


目录
③在application.yml中添加nacos服务的地址
一、nacos环境搭建
我们已经可以实现微服务之间的调用。但是我们把服务提供者的网络地址 (ip,端口)等硬编码到了代码中,这种做法存在许多问题:
一旦服务提供者地址变化,就需要手工修改代码
一旦是多个服务提供者,无法实现负载均衡功能
一旦服务变得越来越多,人工维护调用关系困难
那么应该怎么解决呢, 这时候就需要通过注册中心动态的实现服务治理。
什么是服务治理 服务治理是微服务架构中最核心最基本的模块。用于实现各个微服务的 自动化注册
nacos简介
Nacos 致力于帮助您发现、配置和管理微服务。Nacos 提供了一组简单易用的特性集,帮助您快速 实现动态服务发现、服务配置、服务元数据及流量管理。 从上面的介绍就可以看出,nacos的作用就是一个注册中心,用来管理注册上来的各个微服务。
步骤1:安装nacos
下载地址: https://github.com/alibaba/nacos/releases
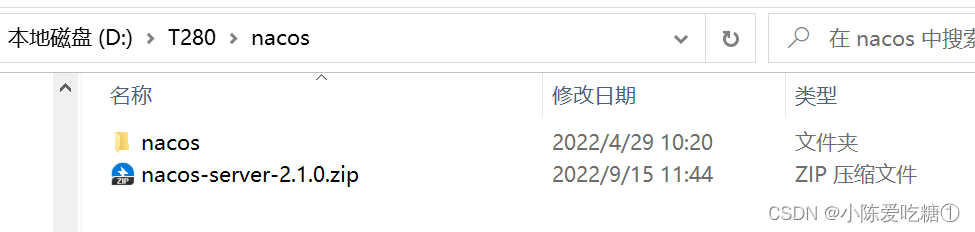
下载zip格式的安装包,然后进行解压缩操作
下载以及解压后
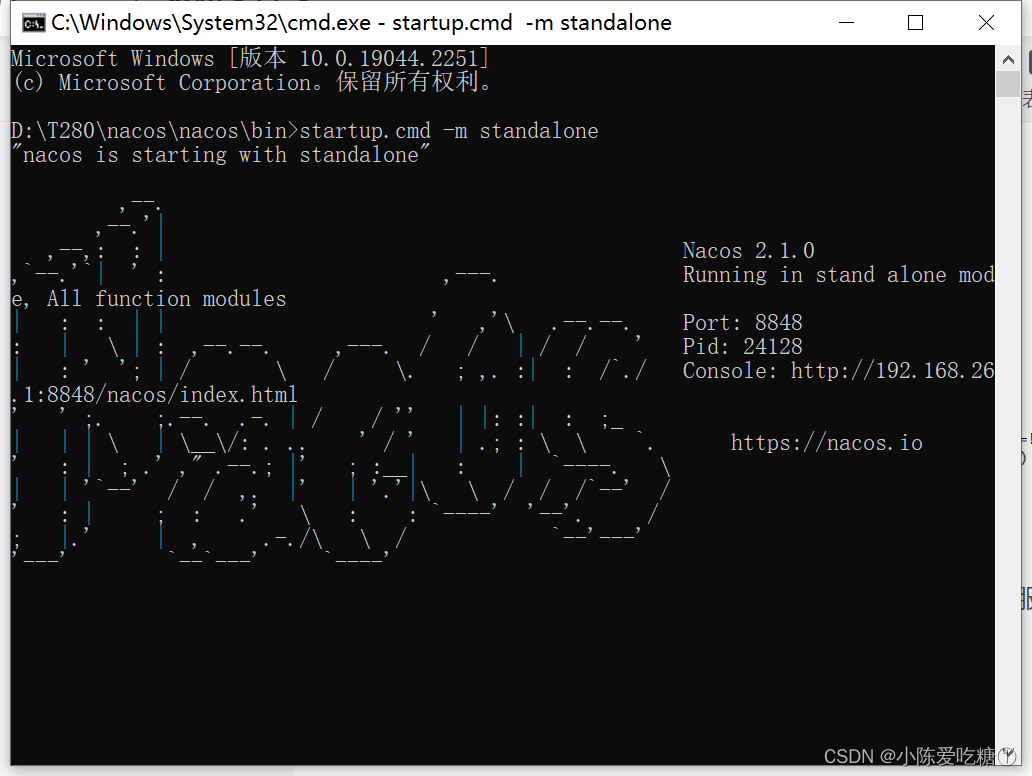
步骤2:启动nacos
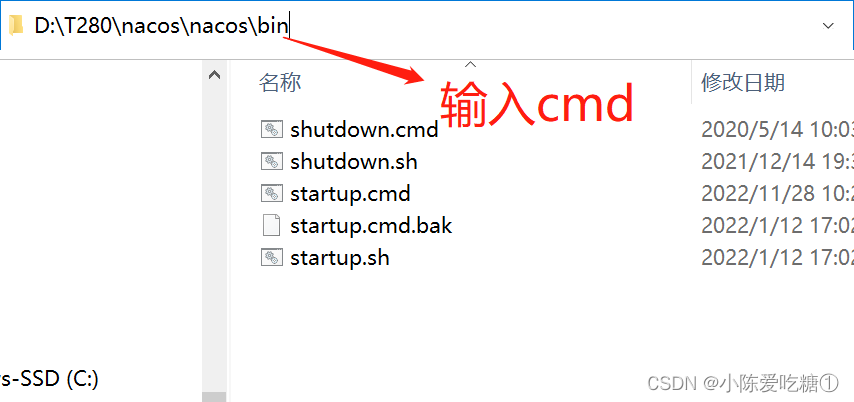
#切换目录
cd nacos/bin
#命令启动
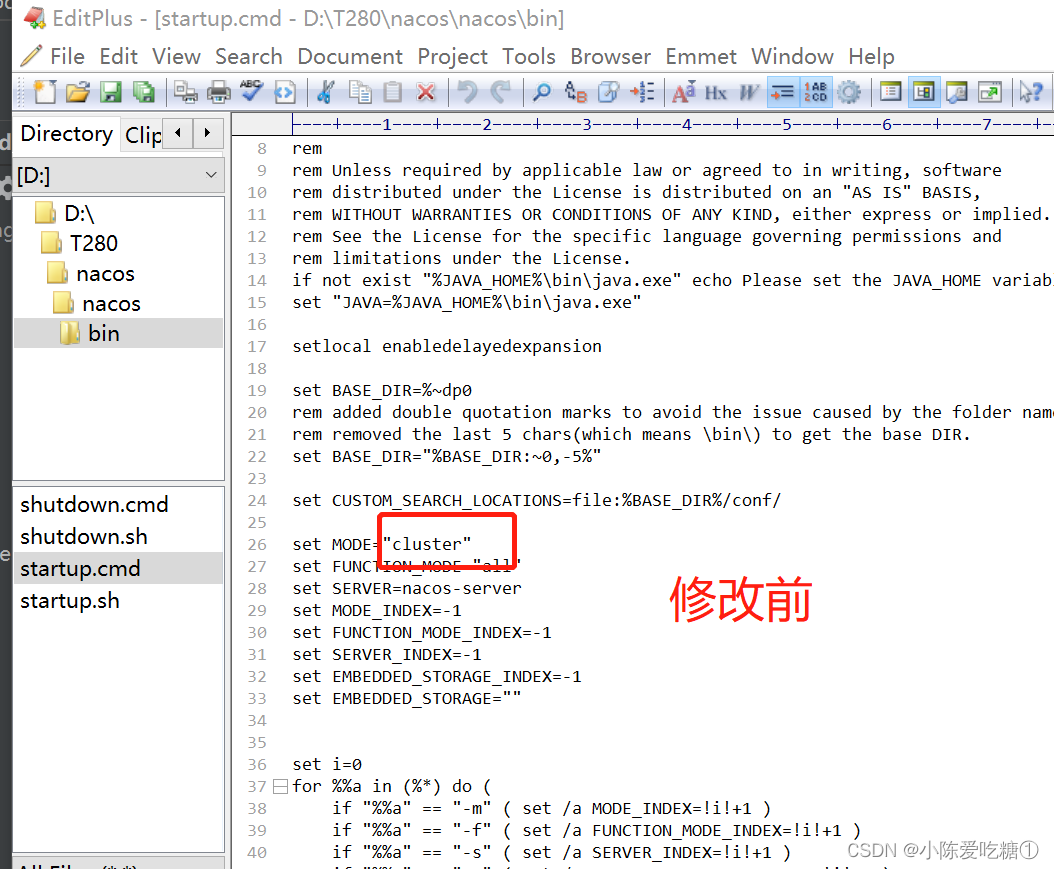
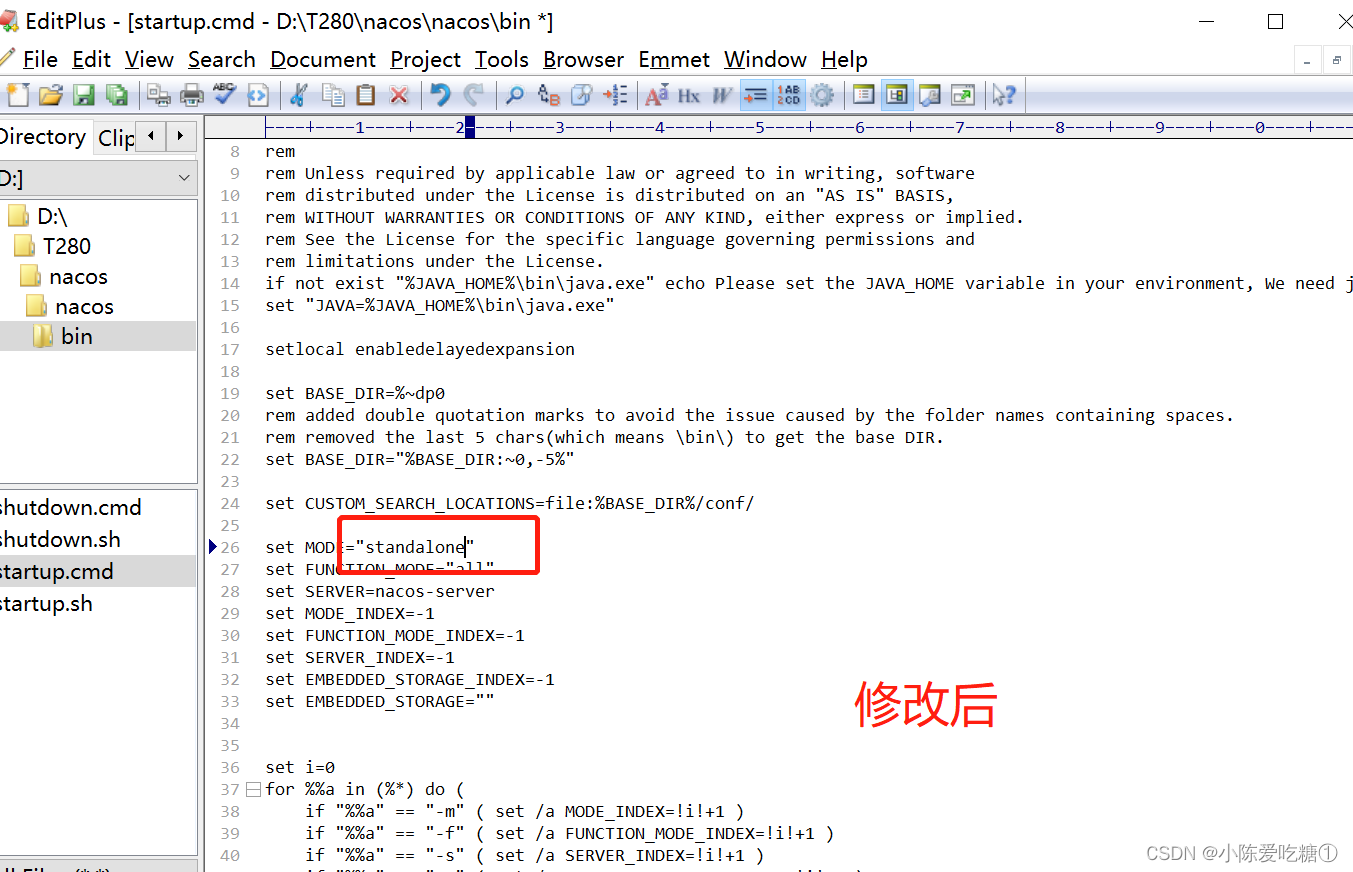
startup.cmd -m standalone或者直接修改startup.cmd文件:
set MODE="standalone
修改前
修改后
启动
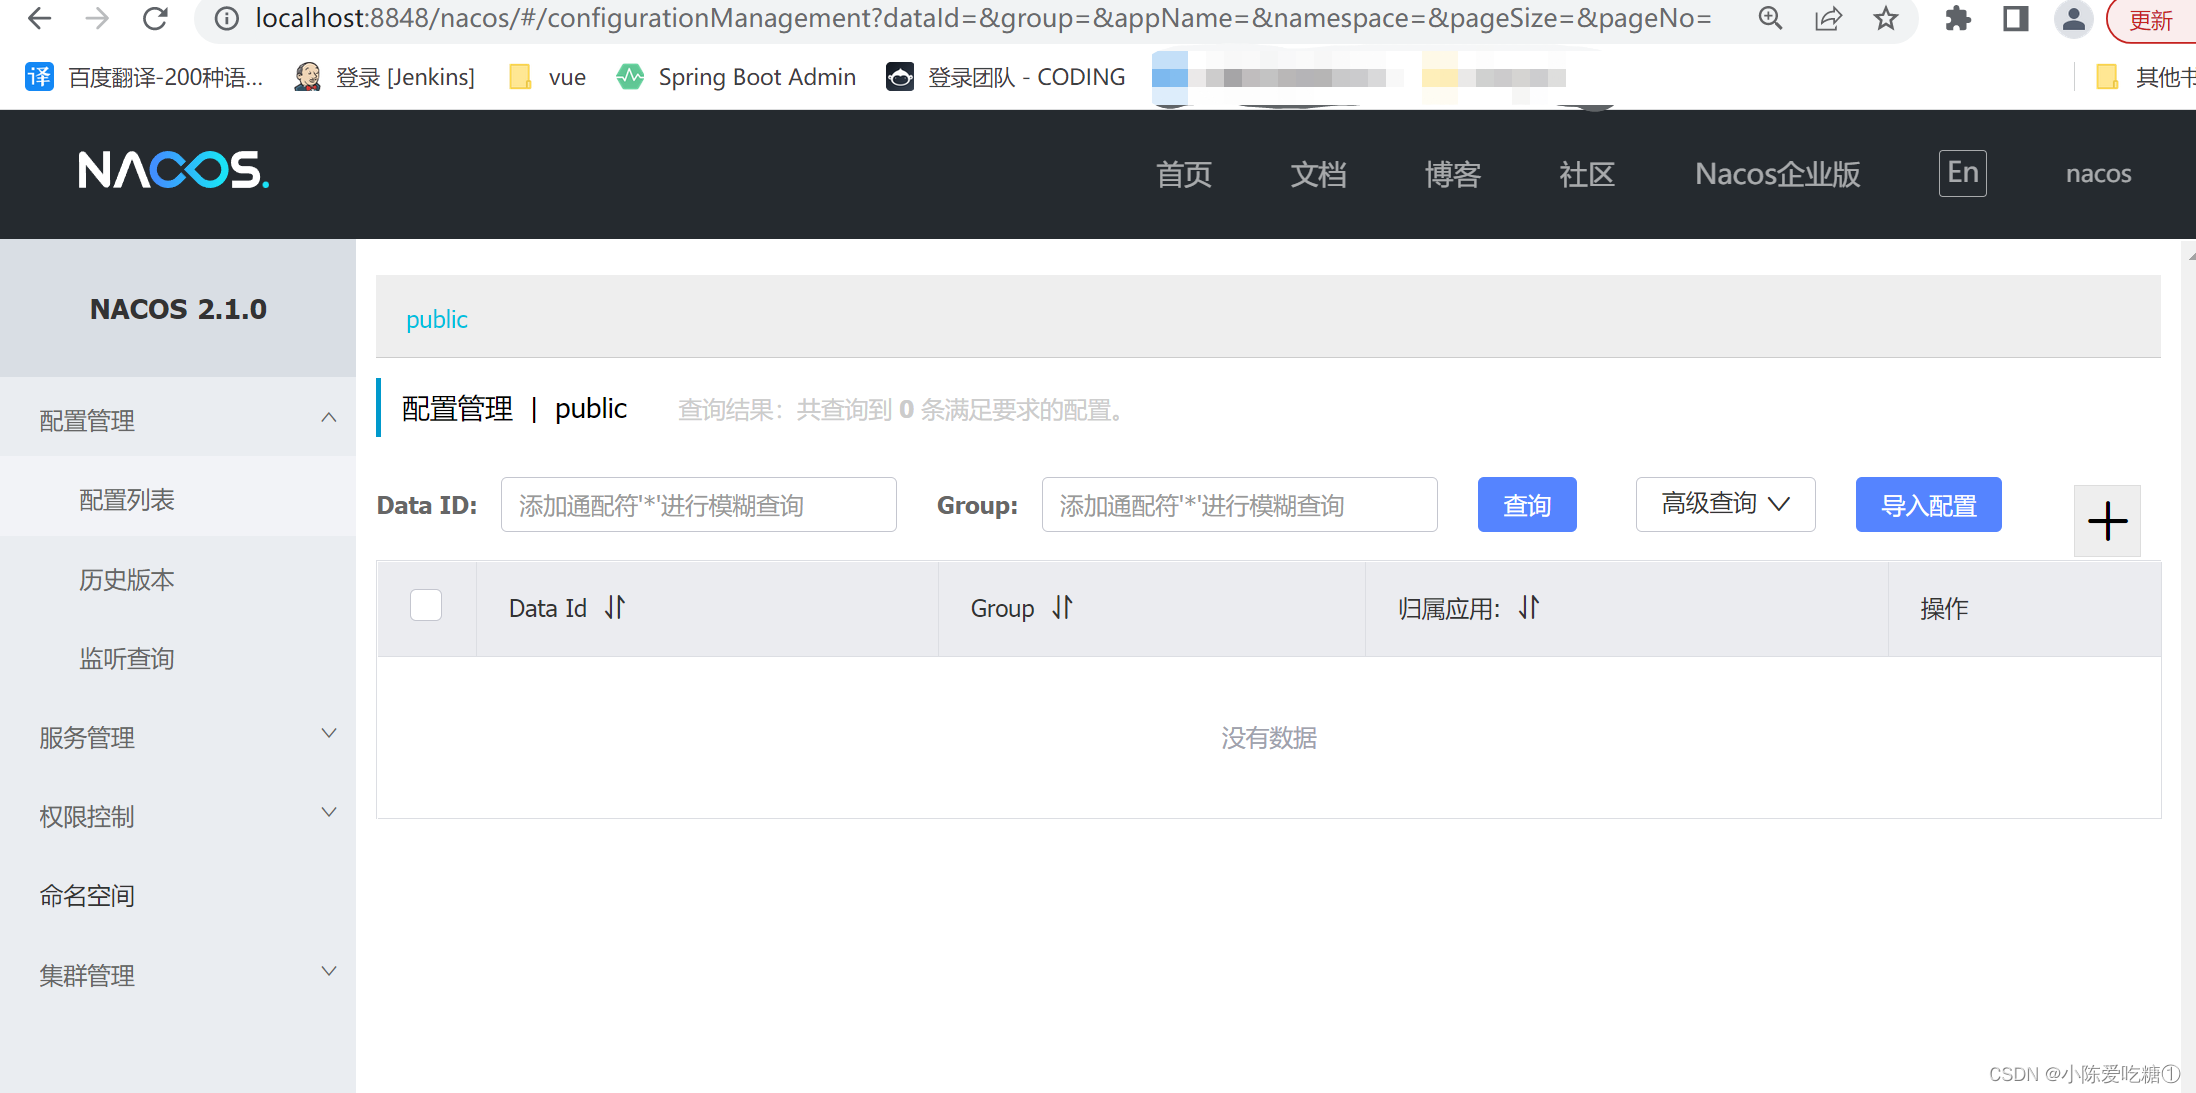
步骤3:访问nacos
打开浏览器输入http://localhost:8848/nacos,即可访问服务, 账户和默认密码是nacos/nacos
二、nacos的微服务注册
将商品微服务注册到nacos
①导入pom依赖
接下来开始修改shop-product 模块的代码, 将其注册到nacos服务上 1 在shop-common模块的pom.xml中添加nacos的依赖
<!--nacos客户端-->
<dependency>
    <groupId>com.alibaba.cloud</groupId>
    <artifactId>spring-cloud-starter-alibaba-nacos-discovery</artifactId>
</dependency>
注意在父模块中是否导入了alibaba
<dependencyManagement>
  <dependencies>
      <dependency>
          <groupId>org.springframework.cloud</groupId>
          <artifactId>spring-cloud-dependencies</artifactId>
          <version>${spring-cloud.version}</version>
          <type>pom</type>
          <scope>import</scope>
      </dependency>
      <dependency>
          <groupId>com.alibaba.cloud</groupId>
          <artifactId>spring-cloud-alibaba-dependencies</artifactId>
          <version>${spring-cloud-alibaba.version}</version>
          <type>pom</type>
          <scope>import</scope>
      </dependency>
  </dependencies>
</dependencyManagement>
shop-common的pom.xml
<?xml version="1.0" encoding="UTF-8"?>
<project xmlns="http://maven.apache.org/POM/4.0.0"
         xmlns:xsi="http://www.w3.org/2001/XMLSchema-instance"
         xsi:schemaLocation="http://maven.apache.org/POM/4.0.0 http://maven.apache.org/xsd/maven-4.0.0.xsd">
    <parent>
        <artifactId>spcloud-shop</artifactId>
        <groupId>com.cdl</groupId>
        <version>1.0-SNAPSHOT</version>
    </parent>
    <modelVersion>4.0.0</modelVersion>

    <artifactId>shop-common</artifactId>

    <!--依赖-->
    <dependencies>
<!--        用于连接数据库-->
<!--        <dependency>-->
<!--            <groupId>org.springframework.boot</groupId>-->
<!--            <artifactId>spring-boot-starter-data-jpa</artifactId>-->
<!--        </dependency>-->
        <dependency>
            <groupId>org.projectlombok</groupId>
            <artifactId>lombok</artifactId>
        </dependency>
        <dependency>
            <groupId>com.alibaba</groupId>
            <artifactId>fastjson</artifactId>
            <version>1.2.56</version>
        </dependency>
        <dependency>
            <groupId>mysql</groupId>
            <artifactId>mysql-connector-java</artifactId>
            <version>5.1.44</version>
        </dependency>
        <!--nacos客户端-->
        <dependency>
            <groupId>com.alibaba.cloud</groupId>
            <artifactId>spring-cloud-starter-alibaba-nacos-discovery</artifactId>
        </dependency>
    </dependencies>


</project>
父工程的pom
<?xml version="1.0" encoding="UTF-8"?>
<project xmlns="http://maven.apache.org/POM/4.0.0"
         xmlns:xsi="http://www.w3.org/2001/XMLSchema-instance"
         xsi:schemaLocation="http://maven.apache.org/POM/4.0.0 http://maven.apache.org/xsd/maven-4.0.0.xsd">
    <modelVersion>4.0.0</modelVersion>

    <groupId>com.cdl</groupId>
    <artifactId>spcloud-shop</artifactId>
    <version>1.0-SNAPSHOT</version>
    <modules>
        <module>shop-common</module>
        <module>shop-order</module>
        <module>shop-product</module>
        <module>shop-user</module>
    </modules>
    <packaging>pom</packaging>

    <!--依赖版本的锁定-->
    <properties>
        <java.version>1.8</java.version>
        <project.build.sourceEncoding>UTF-8</project.build.sourceEncoding>
        <project.reporting.outputEncoding>UTF-8</project.reporting.outputEncoding>
        <spring-boot.version>2.3.2.RELEASE</spring-boot.version>
        <spring-cloud.version>Hoxton.SR9</spring-cloud.version>
        <spring-cloud-alibaba.version>2.2.6.RELEASE</spring-cloud-alibaba.version>
    </properties>

    <dependencyManagement>
        <dependencies>
            <!-- SpringBoot 依赖配置 -->
            <dependency>
                <groupId>org.springframework.boot</groupId>
                <artifactId>spring-boot-dependencies</artifactId>
                <version>${spring-boot.version}</version>
                <type>pom</type>
                <scope>import</scope>
            </dependency>
            <!-- Springcloud 依赖配置 -->
            <dependency>
                <groupId>org.springframework.cloud</groupId>
                <artifactId>spring-cloud-dependencies</artifactId>
                <version>${spring-cloud.version}</version>
                <type>pom</type>
                <scope>import</scope>
            </dependency>
            <!-- Springcloud alibaba 依赖配置 -->
            <dependency>
                <groupId>com.alibaba.cloud</groupId>
                <artifactId>spring-cloud-alibaba-dependencies</artifactId>
                <version>${spring-cloud-alibaba.version}</version>
                <type>pom</type>
                <scope>import</scope>
            </dependency>

        </dependencies>

    </dependencyManagement>


</project>
②加注解
在主类上添加@EnableDiscoveryClient(用于开启远程连接)注解
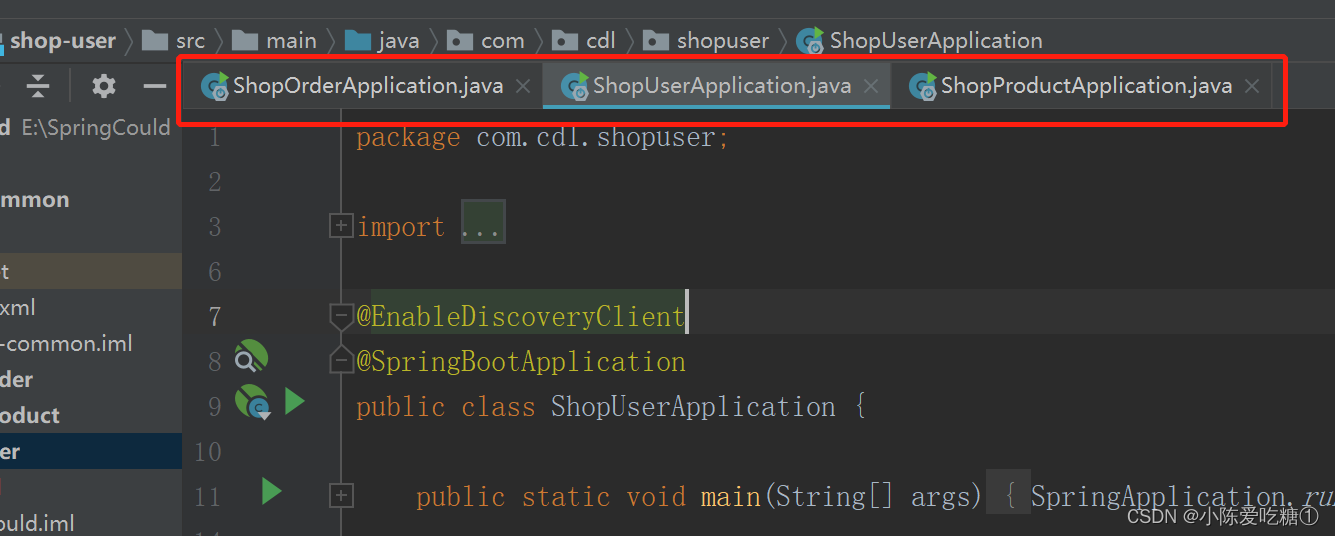
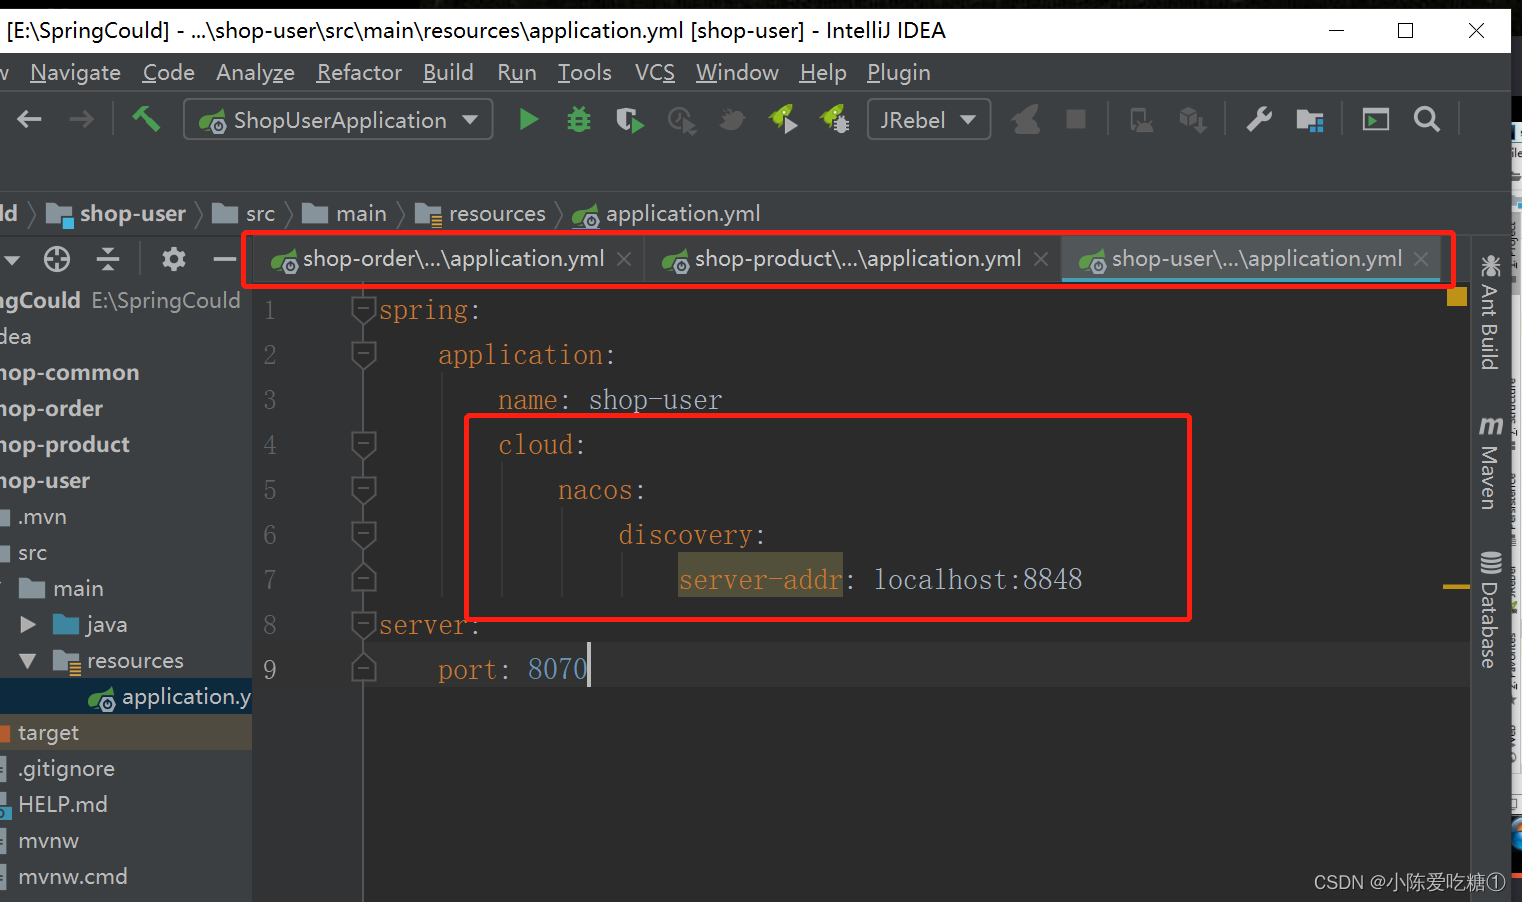
③在application.yml中添加nacos服务的地址
spring:
cloud:
nacos:
discovery:
server-addr: localhost:8848
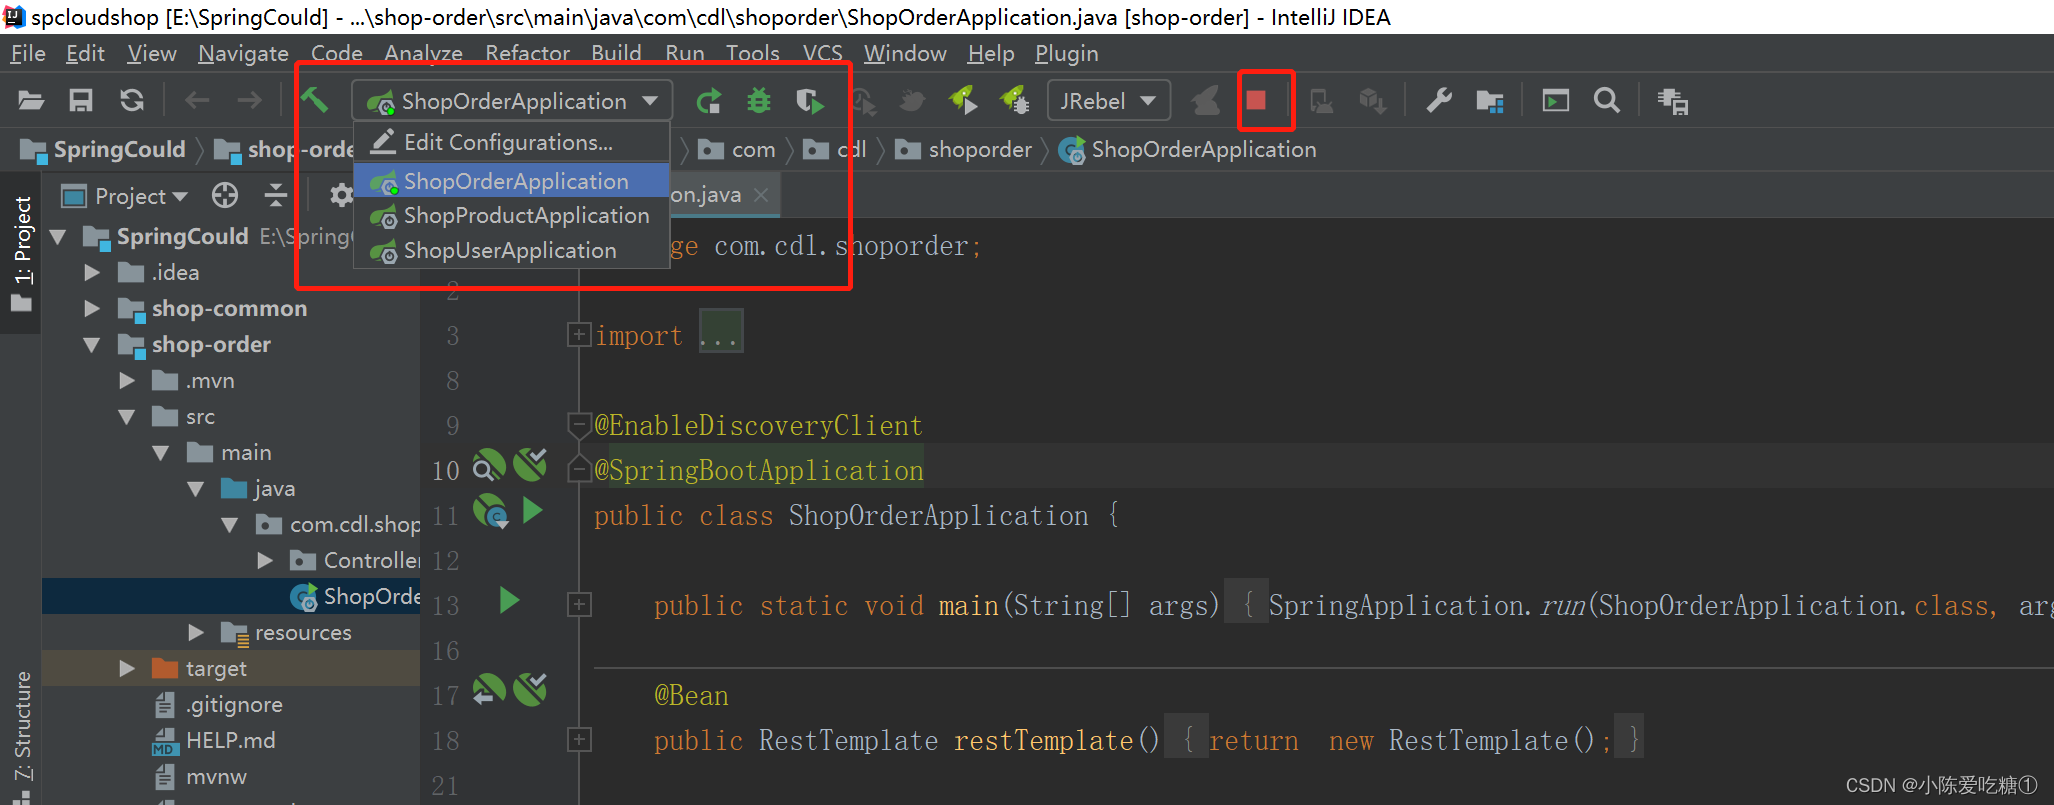
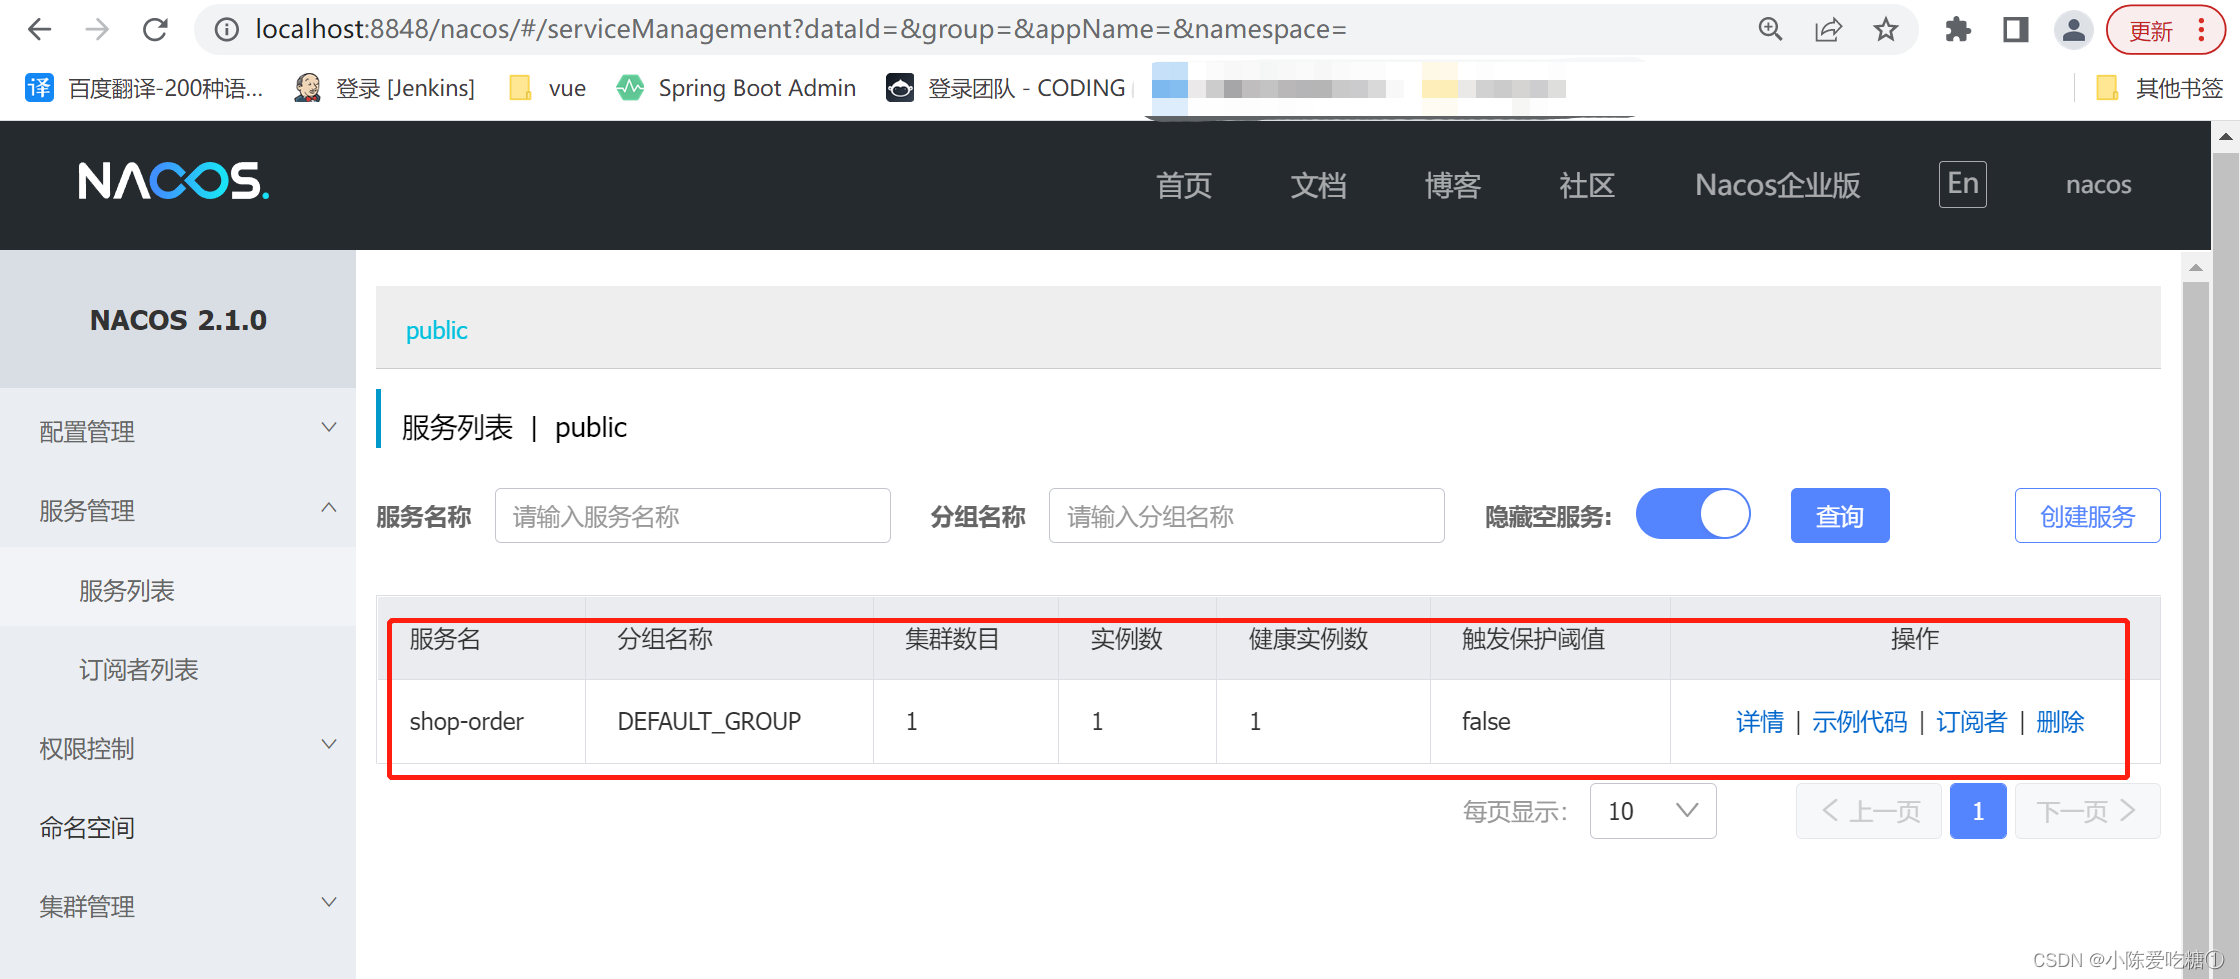
④启动服务
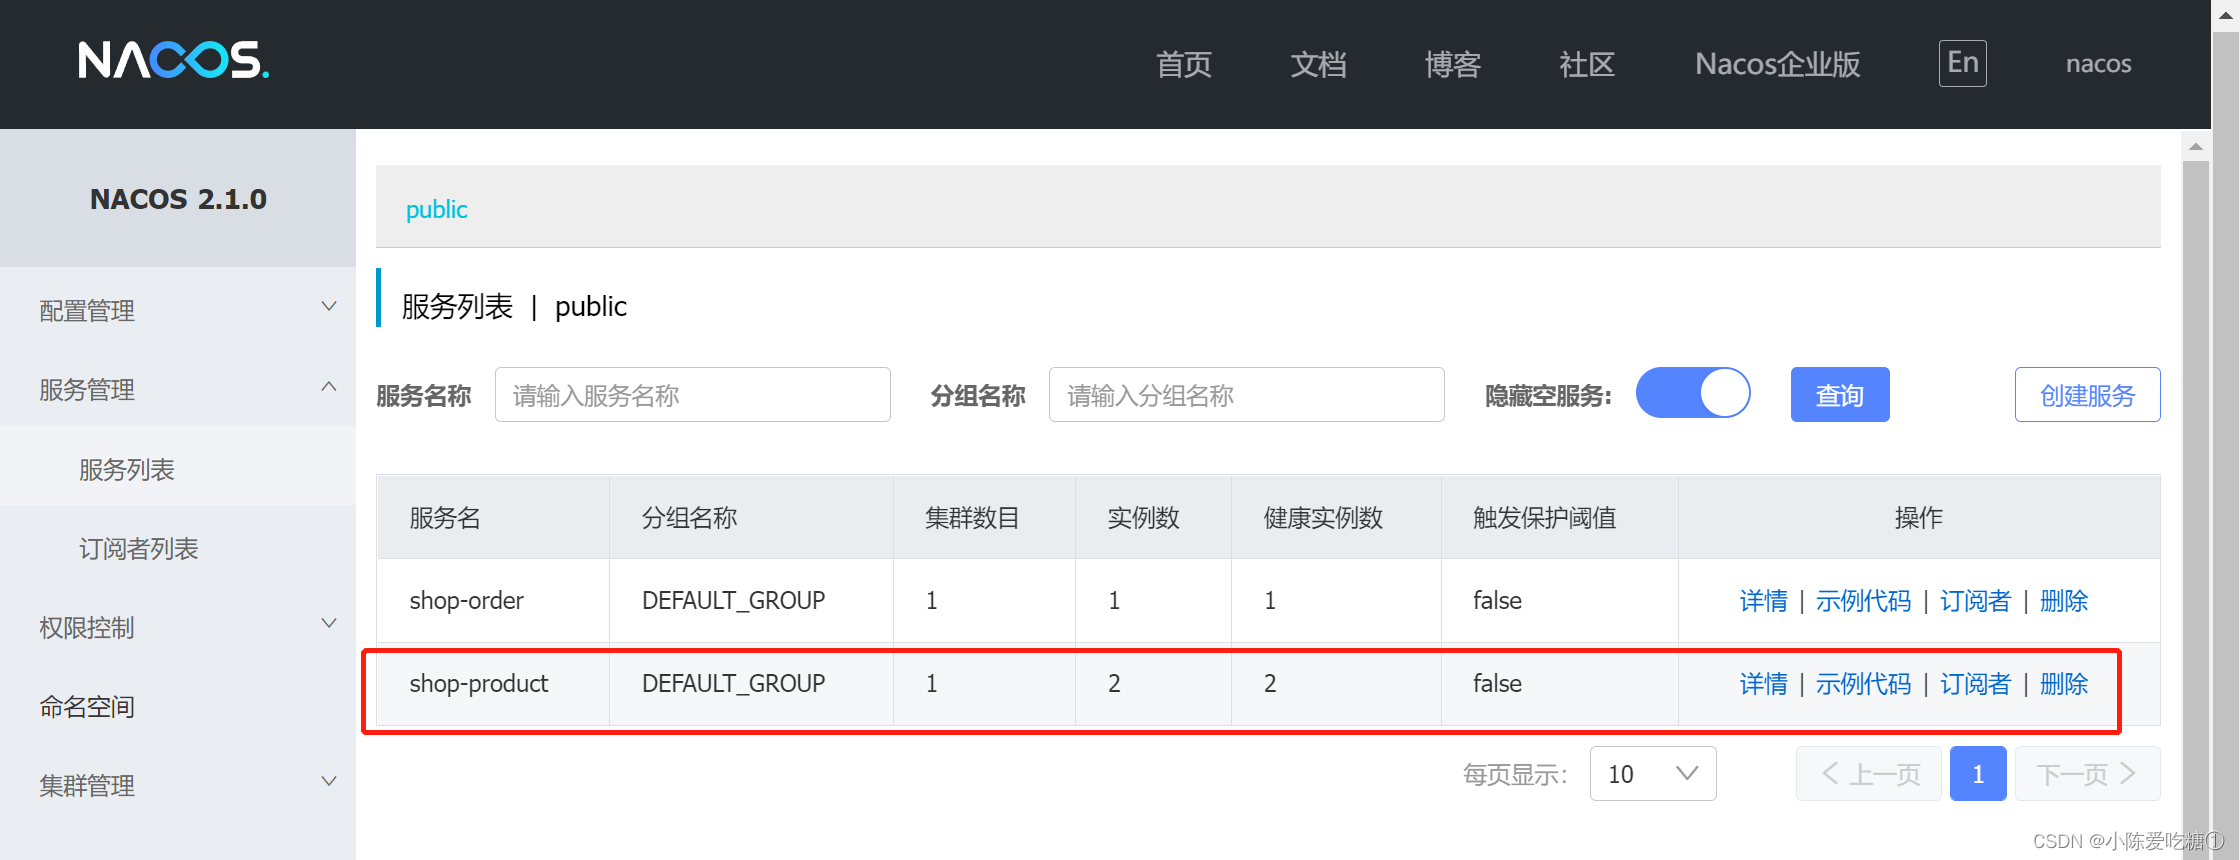
观察nacos的控制面板中是否有注册上来的商品微服务
运行订单
再运行一个商品
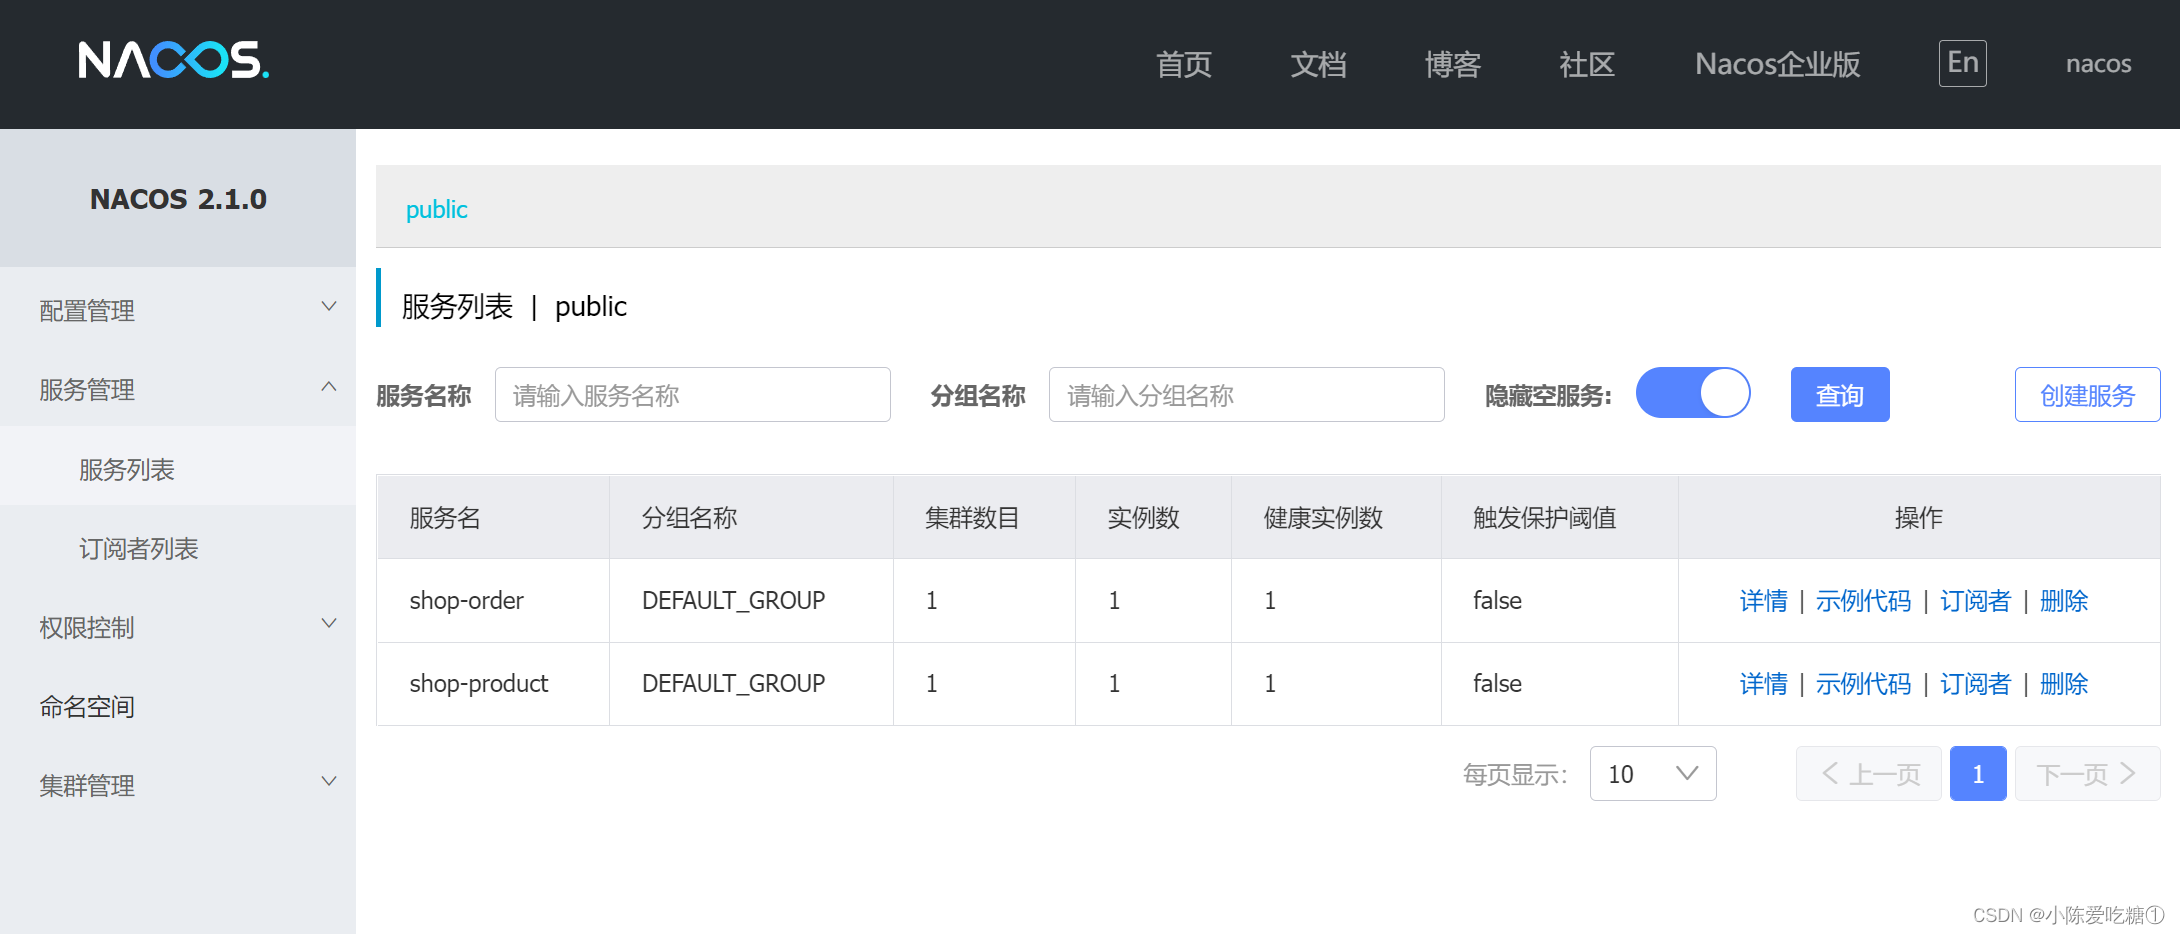
三、负载均衡实现
第一种:DiscoveryClient
创建集群
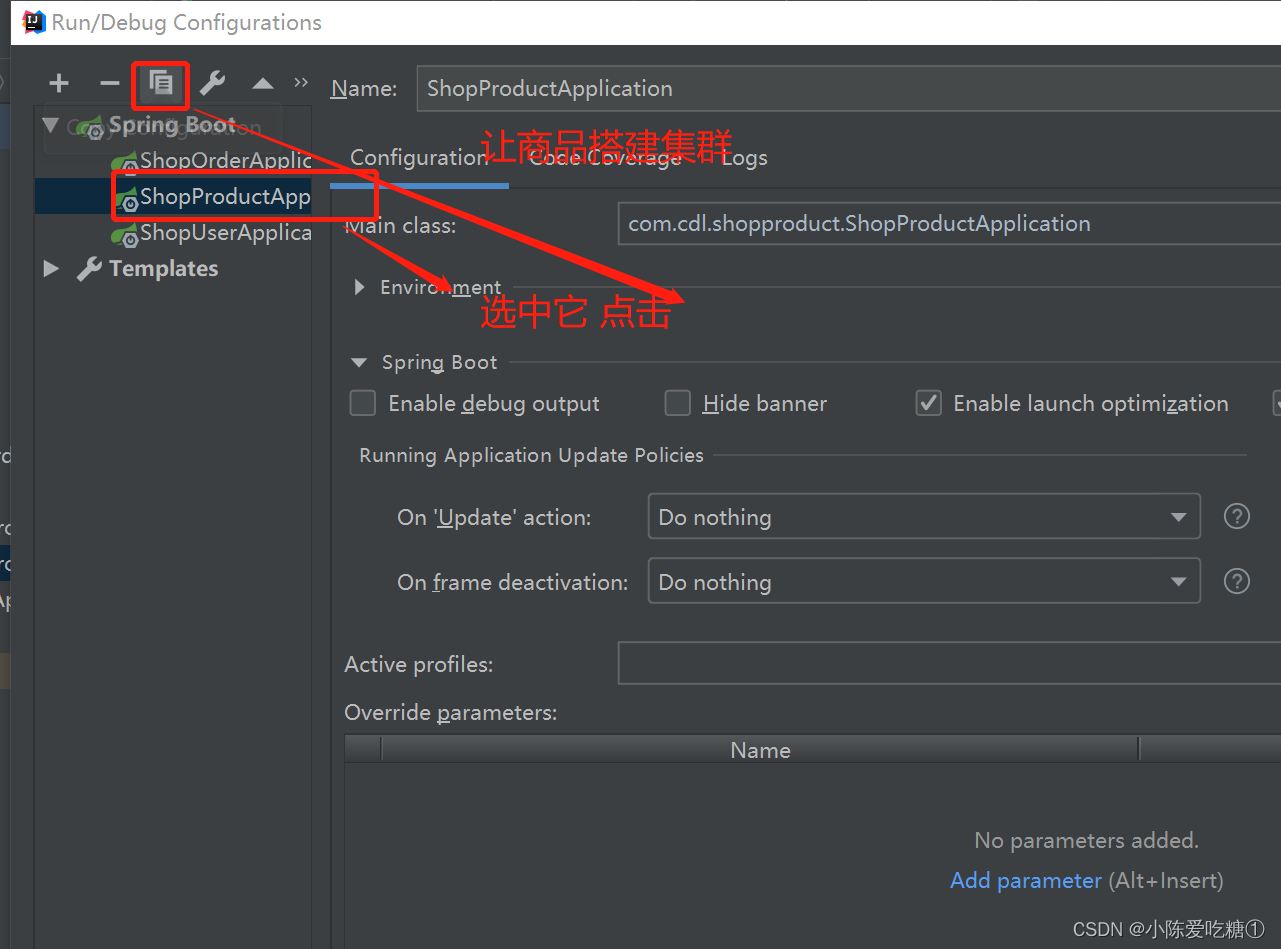
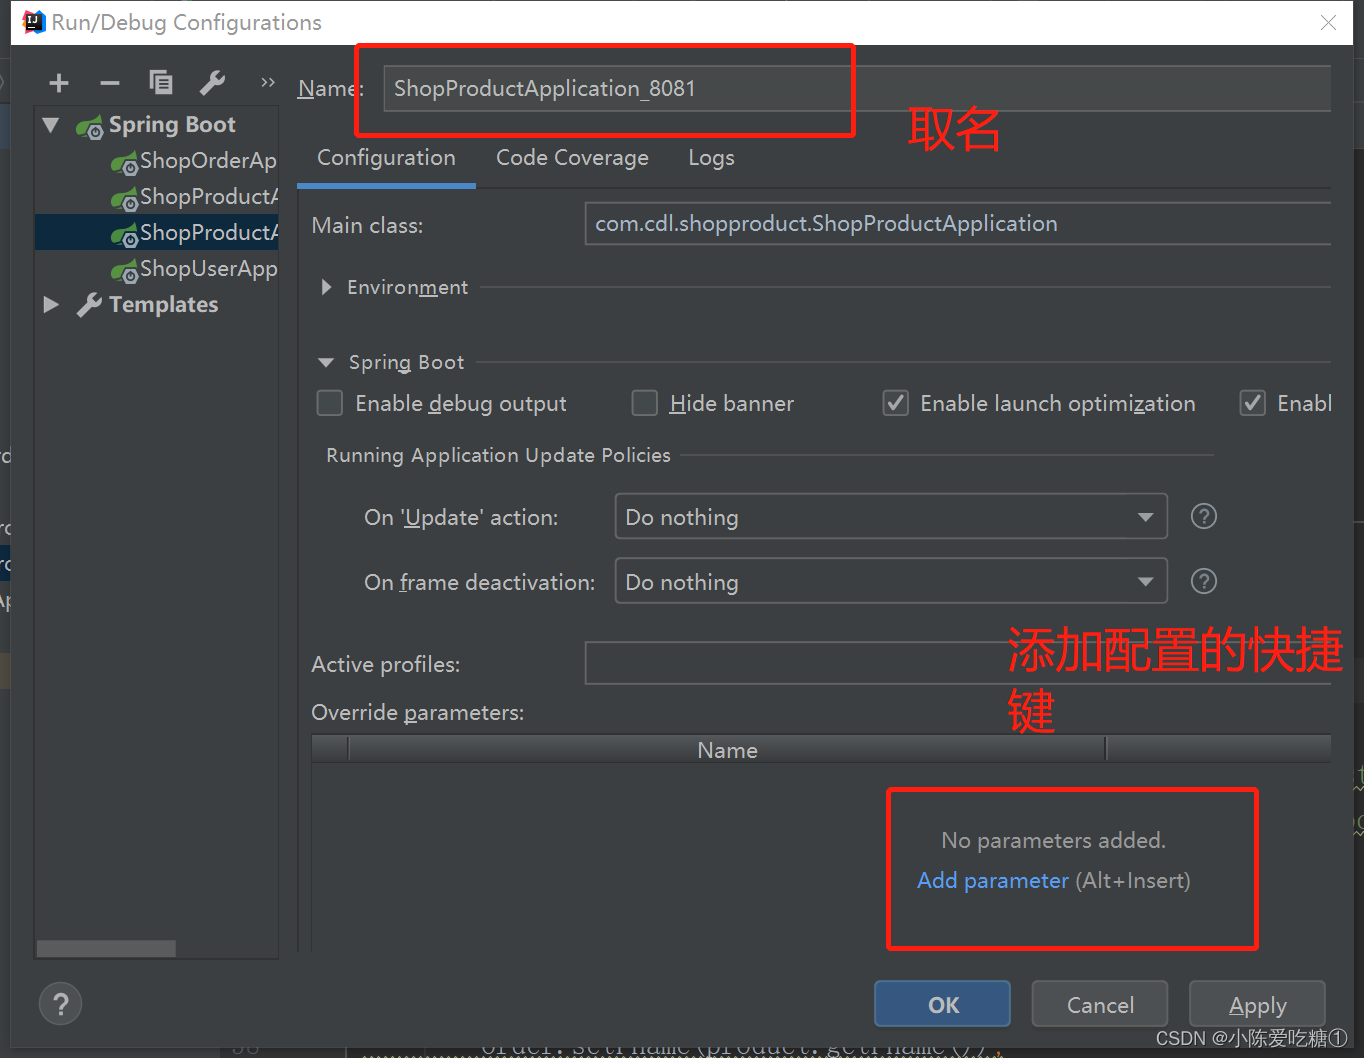
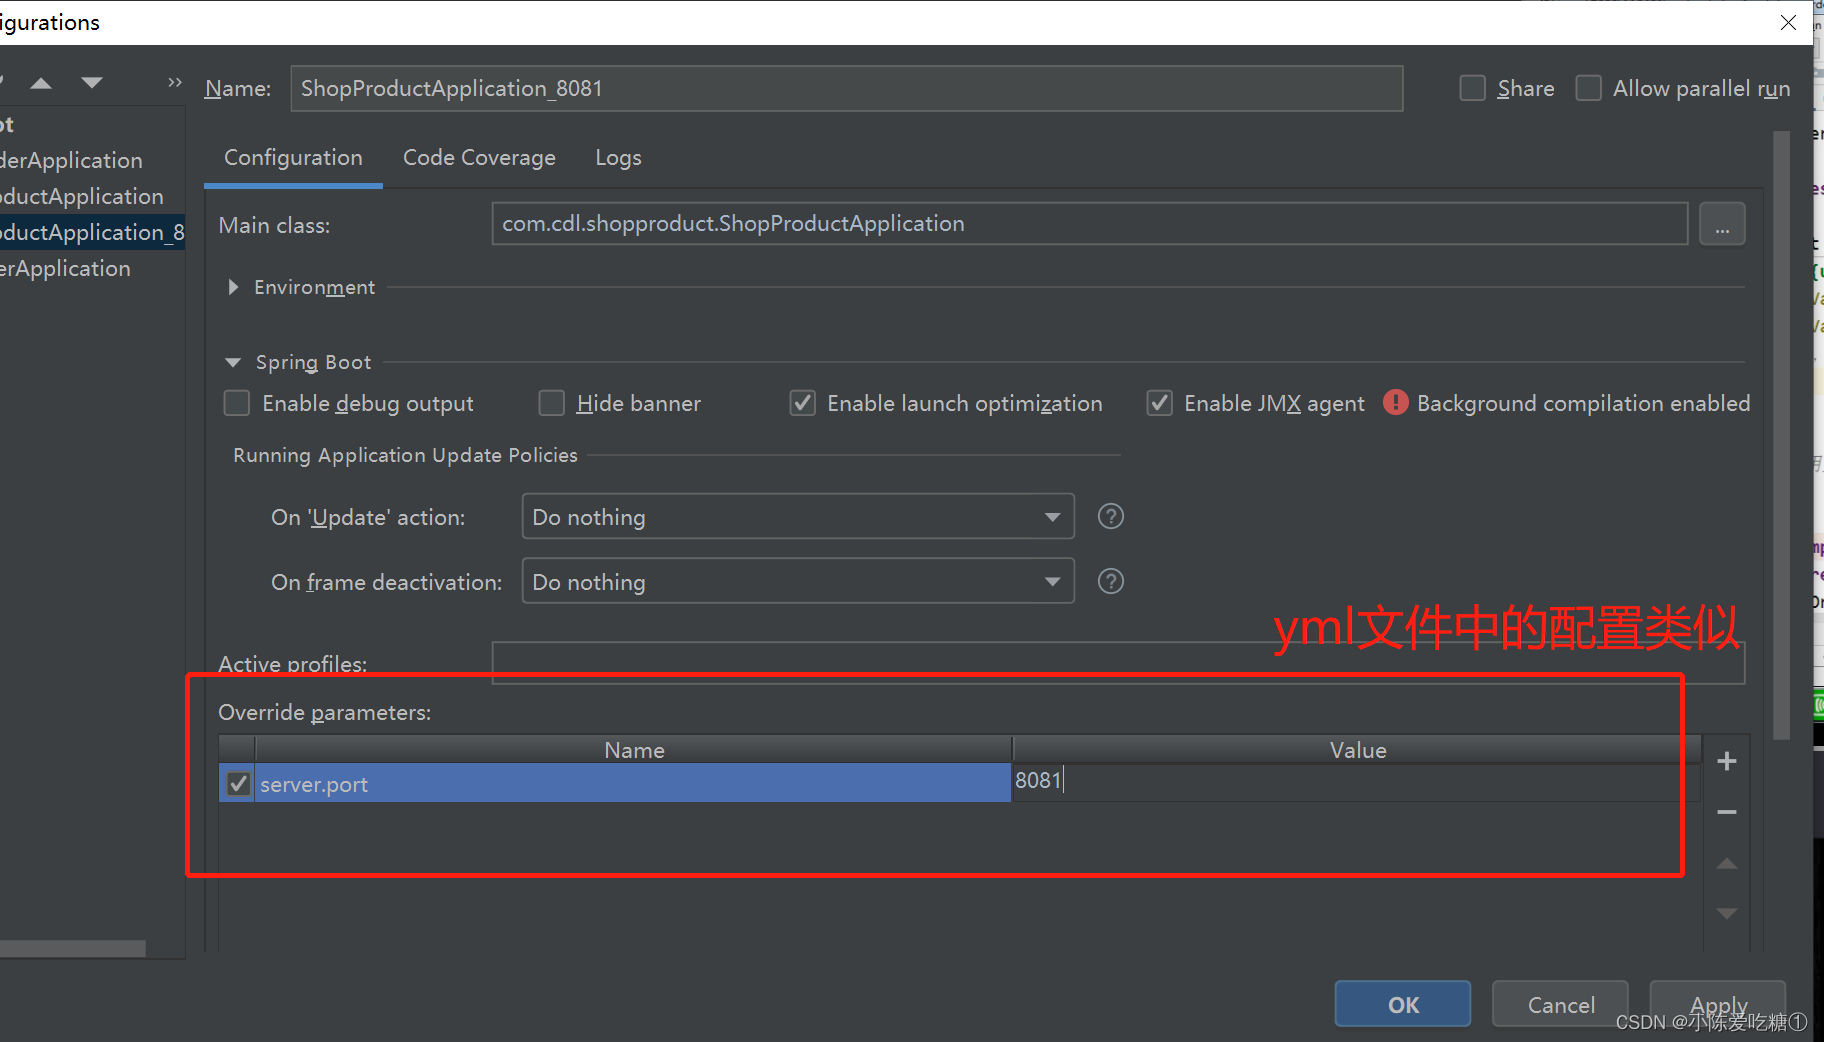
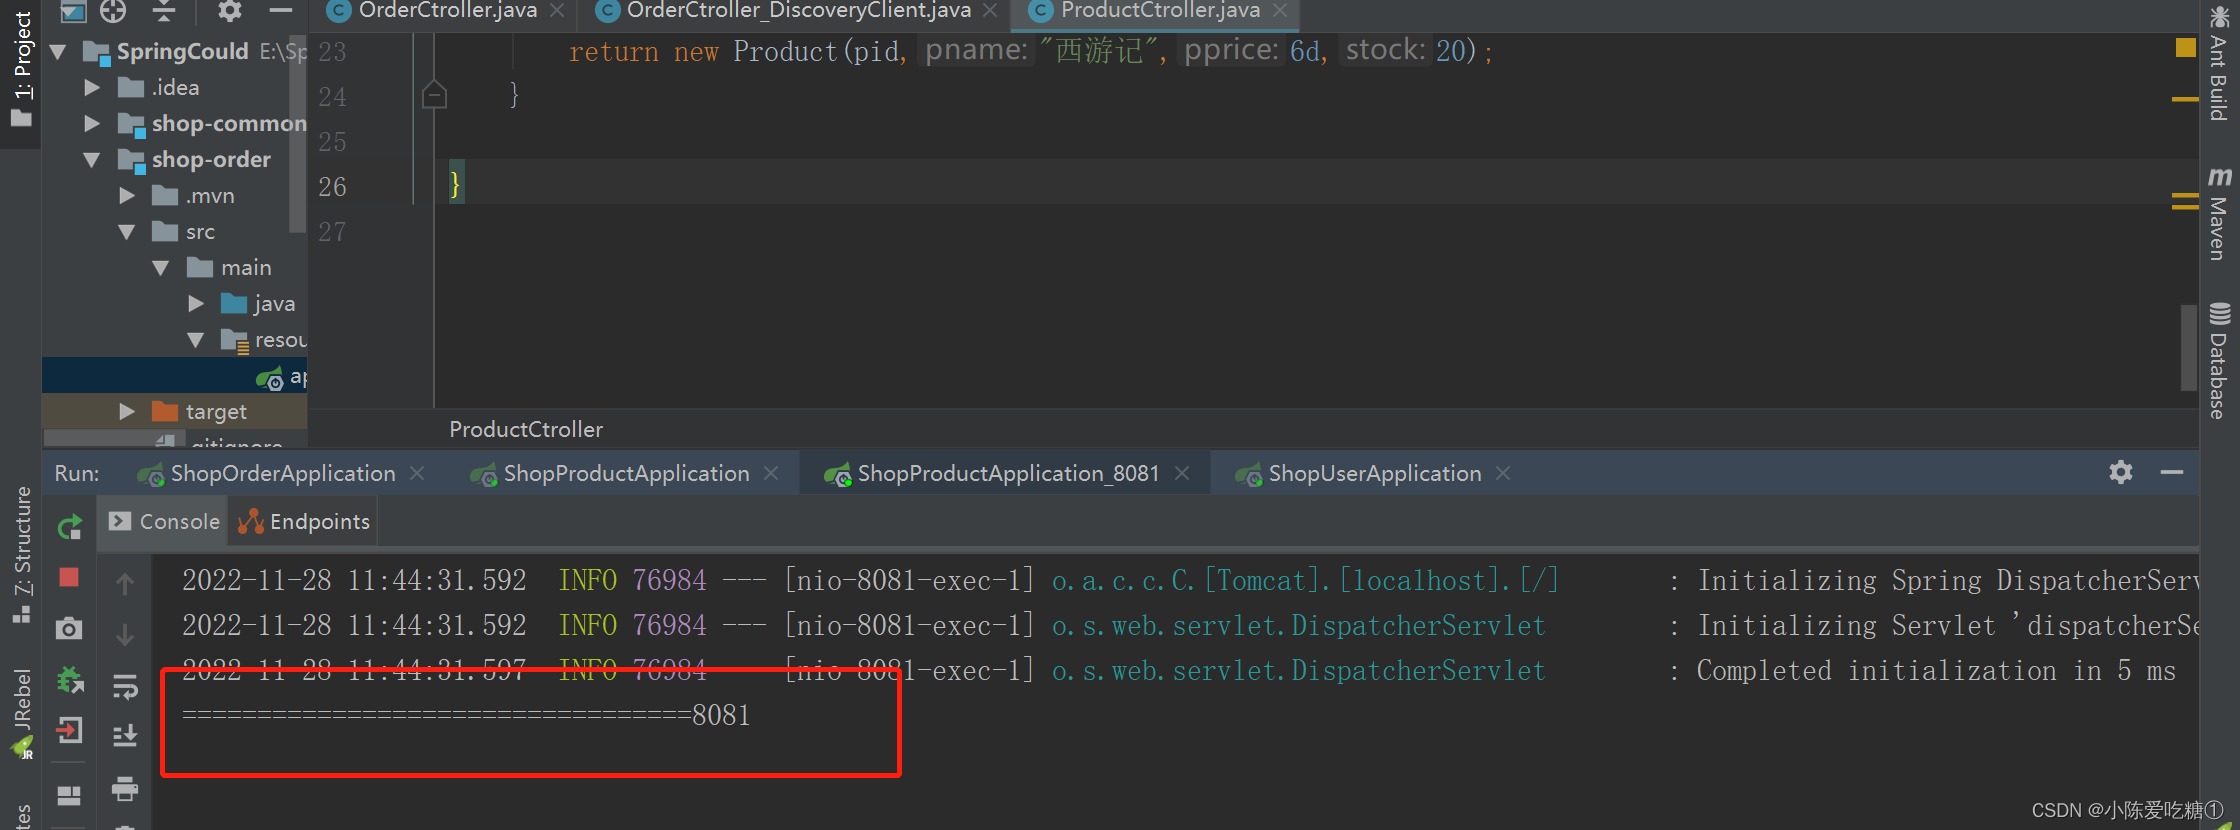
运行8081
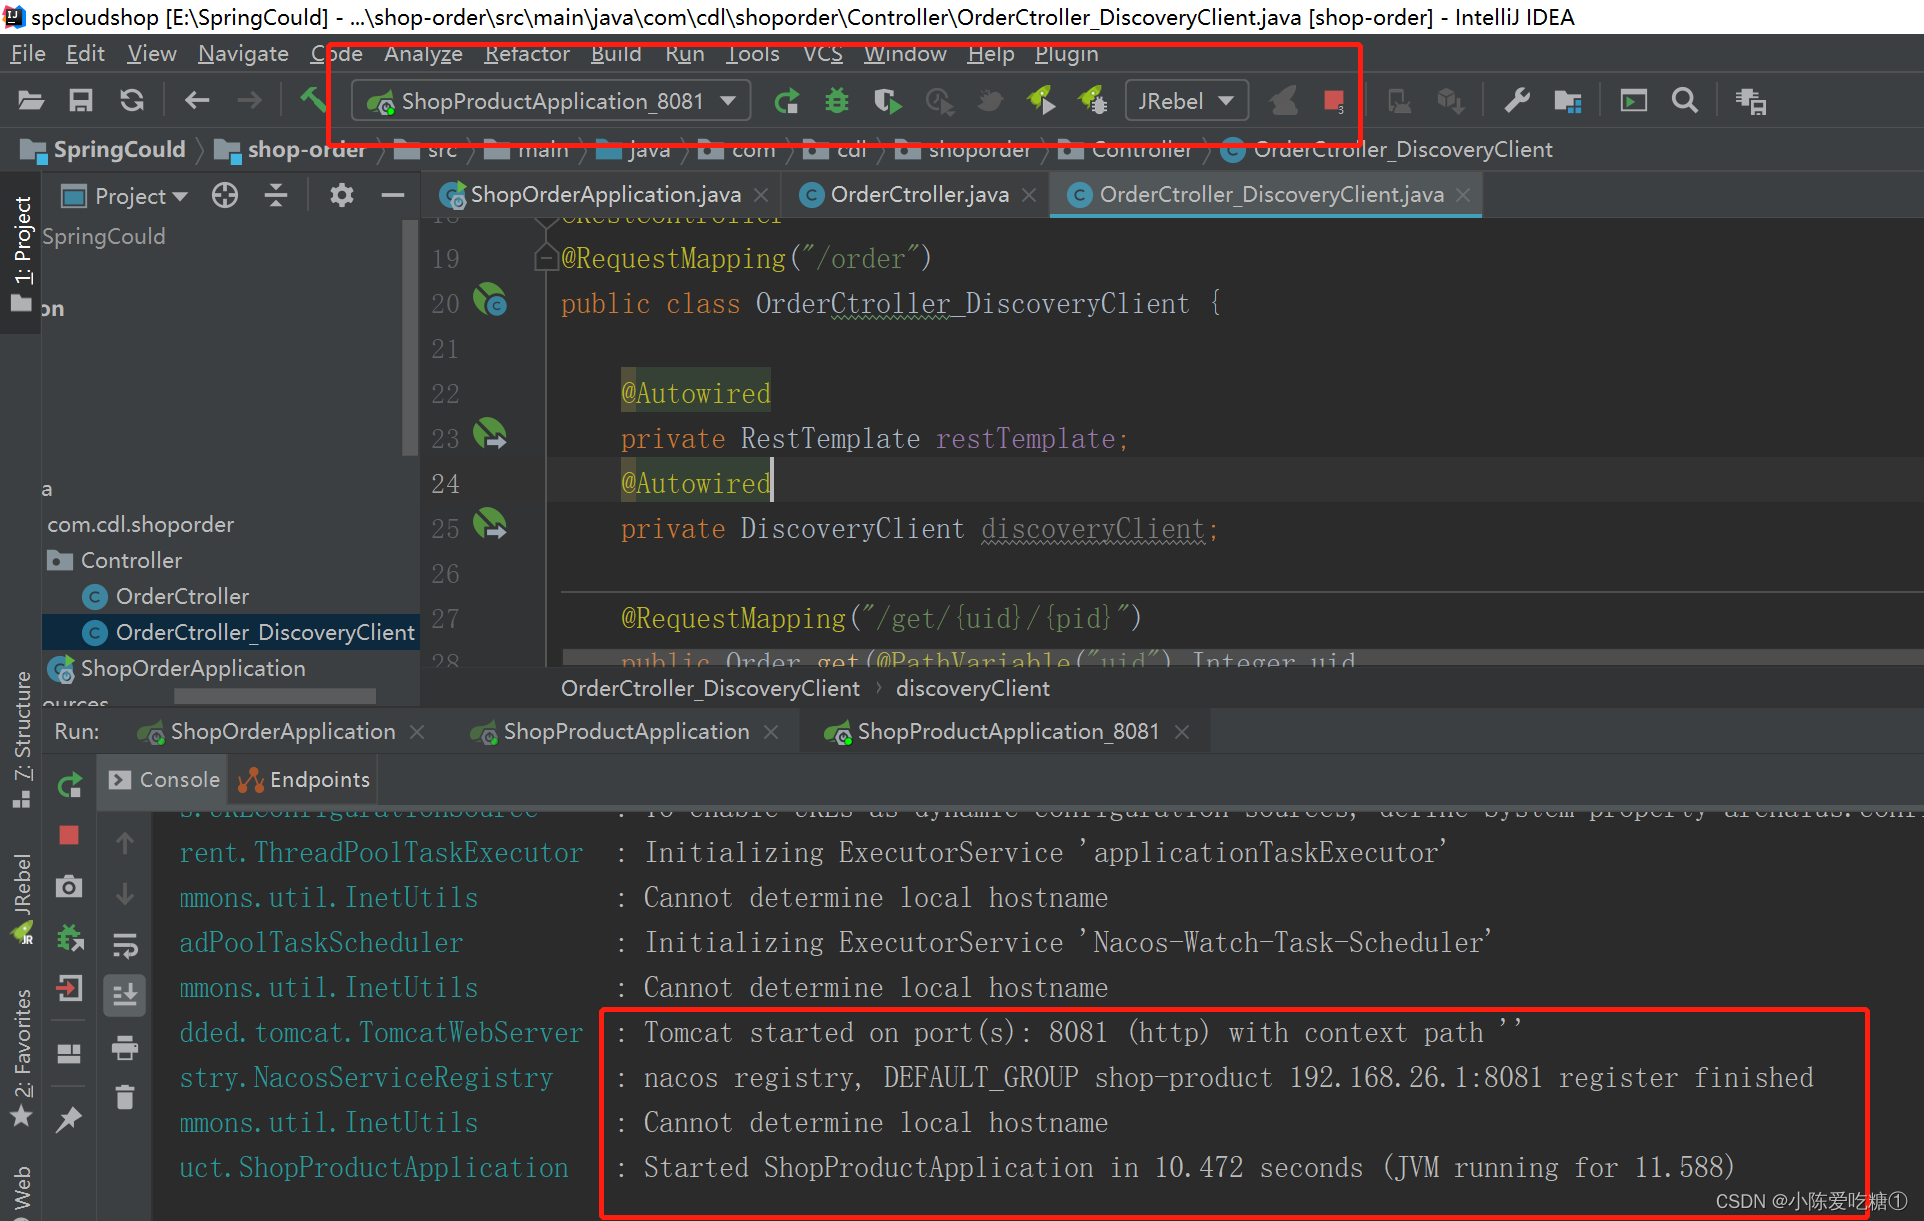


将启动类都运行


对应的端口号:
刷新页面
对应的端口号: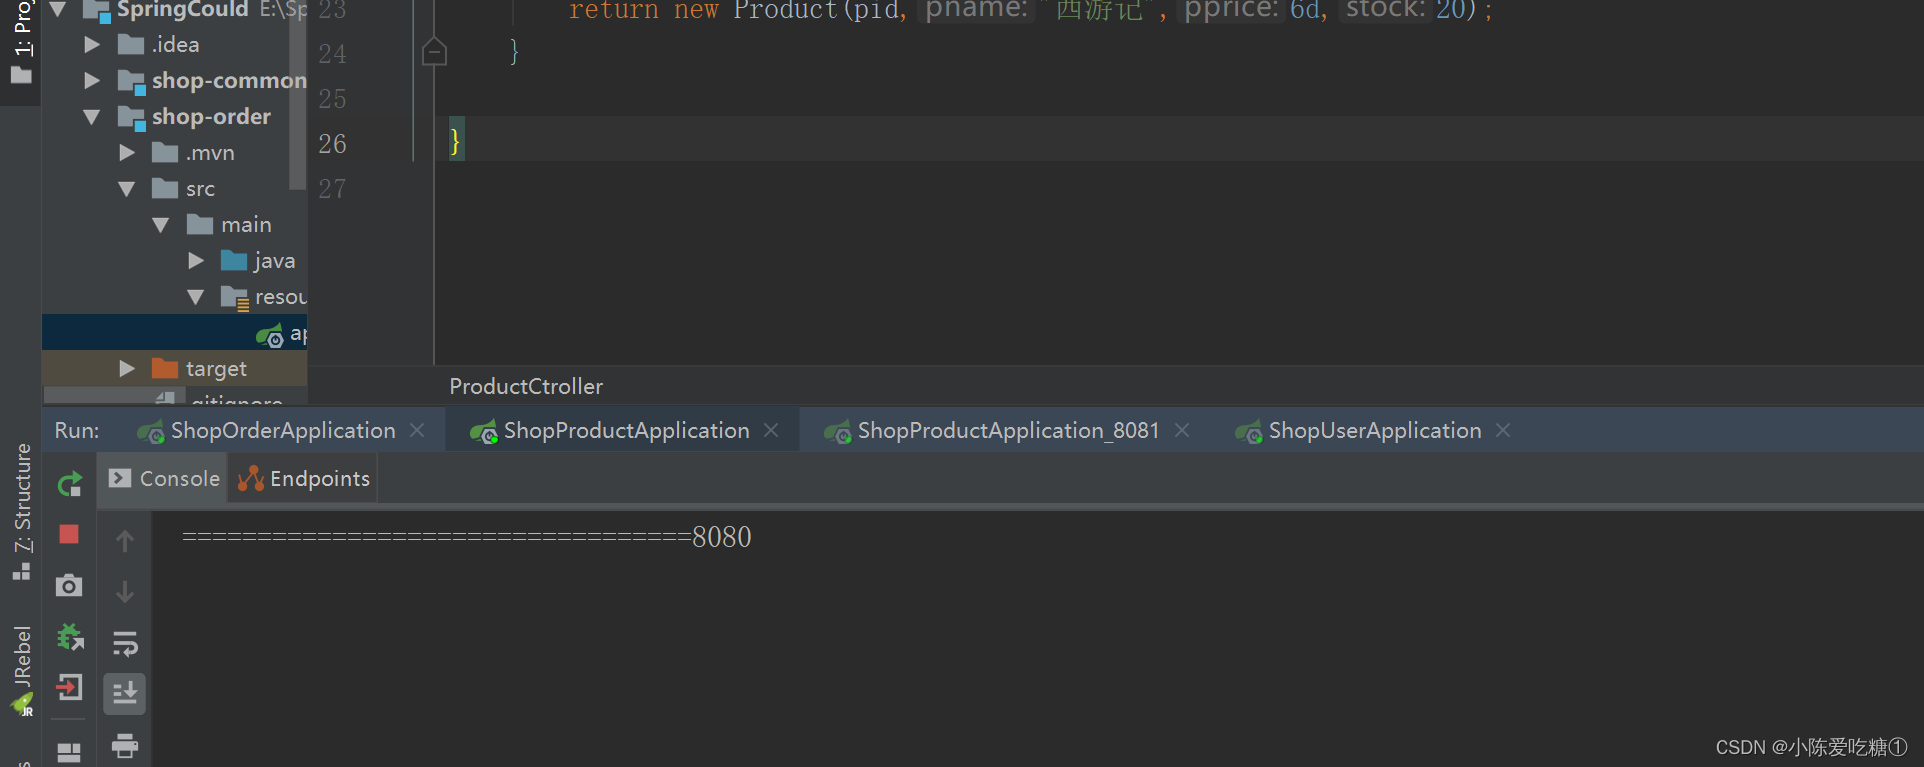
OrderCtroller_DiscoveryClient
package com.cdl.shoporder.Controller;

import com.cdl.model.Order;
import com.cdl.model.Product;
import com.cdl.model.User;
import org.springframework.beans.factory.annotation.Autowired;
import org.springframework.cloud.client.ServiceInstance;
import org.springframework.cloud.client.discovery.DiscoveryClient;
import org.springframework.http.HttpRequest;
import org.springframework.web.bind.annotation.PathVariable;
import org.springframework.web.bind.annotation.RequestMapping;
import org.springframework.web.bind.annotation.RestController;
import org.springframework.web.client.RestTemplate;

import java.util.List;
import java.util.Random;

/**
 * @author cdl
 * @site www.cdl.com
 * @create 2022-11-25 15:43
 */
@RestController
@RequestMapping("/order")
public class OrderCtroller_DiscoveryClient {

    @Autowired
    private RestTemplate restTemplate;
    @Autowired
    private DiscoveryClient discoveryClient;


    @RequestMapping("/get/{uid}/{pid}")
    public Order get(@PathVariable("uid") Integer uid,
                     @PathVariable("pid") Integer pid
                    ){
        //我们可以通过服务名拿到多个节点的信息
        List<ServiceInstance> instances = discoveryClient.getInstances("shop-product");
//      随机产生0或者1的整数
        int index = new Random().nextInt(instances.size());
        ServiceInstance serviceInstance = instances.get(index);
        String url = serviceInstance.getHost() + ":" +
                serviceInstance.getPort();
//通过restTemplate调用商品微服务
        User user = restTemplate.getForObject("http://localhost:8070/user/get/" + uid, User.class);
        Product product = restTemplate.getForObject("http://" + url +
                "/product/get/" + pid, Product.class);
        Order order = new Order();
        order.setUsername(user.getUsername());
        order.setUid(user.getUid());
        order.setPprice(product.getPprice());
        order.setPname(product.getPname());
        order.setPid(product.getPid());
        order.setOid(System.currentTimeMillis());
        order.setNumber(product.getStock());
        return order;
    }

}
第二种:Ribbon
Ribbon是Spring Cloud的一个组件, 它可以让我们使用一个注解就能轻松的搞定负载均衡
在RestTemplate 的生成方法上添加@LoadBalanced注解
ShopOrderApplication
package com.cdl.shoporder;

import org.springframework.boot.SpringApplication;
import org.springframework.boot.autoconfigure.SpringBootApplication;
import org.springframework.cloud.client.discovery.EnableDiscoveryClient;
import org.springframework.cloud.client.loadbalancer.LoadBalanced;
import org.springframework.context.annotation.Bean;
import org.springframework.web.client.RestTemplate;

@EnableDiscoveryClient
@SpringBootApplication
public class ShopOrderApplication {

    public static void main(String[] args) {
        SpringApplication.run(ShopOrderApplication.class, args);
    }

    @LoadBalanced //ribbon负载均衡添加
    @Bean
    public RestTemplate restTemplate(){
        return  new RestTemplate();
    }

}
OrderCtroller_Ribbon
package com.cdl.shoporder.Controller;

import com.cdl.model.Order;
import com.cdl.model.Product;
import com.cdl.model.User;
import org.springframework.beans.factory.annotation.Autowired;
import org.springframework.web.bind.annotation.PathVariable;
import org.springframework.web.bind.annotation.RequestMapping;
import org.springframework.web.bind.annotation.RestController;
import org.springframework.web.client.RestTemplate;

/**
 * @author cdl
 * @site www.cdl.com
 * @create 2022-11-25 15:43
 */
@RestController
@RequestMapping("/order")
public class OrderCtroller_Ribbon {

    @Autowired
    private RestTemplate restTemplate;

    @RequestMapping("/get/{uid}/{pid}")
    public Order get(@PathVariable("uid") Integer uid,
                     @PathVariable("pid") Integer pid){
        //要在订单微服务中调用 用户微服务、商品微服务 跨项目调用
//       当采用http:/shop-user/user/get/访问第三方服务,那么http://localhost:8070/user/get/就用不了了
        User user = restTemplate.getForObject("http://shop-user/user/get/" + uid, User.class);
        Product product = restTemplate.getForObject("http://shop-product/product/get/" + pid, Product.class);
        Order order = new Order();
        order.setUsername(user.getUsername());
        order.setUid(user.getUid());
        order.setPprice(product.getPprice());
        order.setPname(product.getPname());
        order.setPid(product.getPid());
        order.setOid(System.currentTimeMillis());
        order.setNumber(product.getStock());
        return order;
    }

}
启动项目

页面访问 也能访问到
第三种:Feign
什么是Feign
Feign是Spring Cloud提供的一个声明式的伪Http客户端, 它使得调用远程服务就像调用本地服务 一样简单, 只需要创建一个接口并添加一个注解即可。 Nacos很好的兼容了Feign, Feign默认集成了 Ribbon, 所以在Nacos下使用Fegin默认就实现了负 载均衡的效果。
①加入Fegin的依赖
<!--fegin组件-->
<dependency>
<groupId>org.springframework.cloud</groupId>
<artifactId>spring-cloud-starter-openfeign</artifactId>
</dependency>
shop-common的pom
<?xml version="1.0" encoding="UTF-8"?>
<project xmlns="http://maven.apache.org/POM/4.0.0"
         xmlns:xsi="http://www.w3.org/2001/XMLSchema-instance"
         xsi:schemaLocation="http://maven.apache.org/POM/4.0.0 http://maven.apache.org/xsd/maven-4.0.0.xsd">
    <parent>
        <artifactId>spcloud-shop</artifactId>
        <groupId>com.cdl</groupId>
        <version>1.0-SNAPSHOT</version>
    </parent>
    <modelVersion>4.0.0</modelVersion>

    <artifactId>shop-common</artifactId>

    <!--依赖-->
    <dependencies>
<!--        用于连接数据库-->
<!--        <dependency>-->
<!--            <groupId>org.springframework.boot</groupId>-->
<!--            <artifactId>spring-boot-starter-data-jpa</artifactId>-->
<!--        </dependency>-->
        <dependency>
            <groupId>org.projectlombok</groupId>
            <artifactId>lombok</artifactId>
        </dependency>
        <dependency>
            <groupId>com.alibaba</groupId>
            <artifactId>fastjson</artifactId>
            <version>1.2.56</version>
        </dependency>
        <dependency>
            <groupId>mysql</groupId>
            <artifactId>mysql-connector-java</artifactId>
            <version>5.1.44</version>
        </dependency>
        <!--nacos客户端-->
        <dependency>
            <groupId>com.alibaba.cloud</groupId>
            <artifactId>spring-cloud-starter-alibaba-nacos-discovery</artifactId>
        </dependency>
        <!--fegin组件-->
        <dependency>
            <groupId>org.springframework.cloud</groupId>
            <artifactId>spring-cloud-starter-openfeign</artifactId>
        </dependency>

    </dependencies>


</project>
②在主类上添加Fegin的注解
@SpringBootApplication
@EnableDiscoveryClient
@EnableFeignClients//开启Fegin
public class OrderApplication {}
ShopOrderApplication
package com.cdl.shoporder;

import org.springframework.boot.SpringApplication;
import org.springframework.boot.autoconfigure.SpringBootApplication;
import org.springframework.cloud.client.discovery.EnableDiscoveryClient;
import org.springframework.cloud.client.loadbalancer.LoadBalanced;
import org.springframework.cloud.openfeign.EnableFeignClients;
import org.springframework.context.annotation.Bean;
import org.springframework.web.client.RestTemplate;

@EnableFeignClients//开启Fegin
@EnableDiscoveryClient
@SpringBootApplication
public class ShopOrderApplication {

    public static void main(String[] args) {
        SpringApplication.run(ShopOrderApplication.class, args);
    }

    @LoadBalanced //ribbon负载均衡添加
    @Bean
    public RestTemplate restTemplate(){
        return  new RestTemplate();
    }

}
③创建一个service, 并使用Fegin实现微服务调用
ProductService
package com.cdl.shoporder.service;

import com.cdl.model.Product;
import org.springframework.cloud.openfeign.FeignClient;
import org.springframework.web.bind.annotation.GetMapping;
import org.springframework.web.bind.annotation.PathVariable;
import org.springframework.web.bind.annotation.RequestMapping;

import javax.servlet.http.HttpServletRequest;

/**
 * @author cdl
 * @site www.cdl.com
 * @create 2022-11-28 12:14
 *
 * 帮助消费者 shop-order 调用生产者 shop-product
 */
@FeignClient("shop-product")//声明调用的提供者的name
public interface ProductService {
    //接口定义:完全遵守restful接口规范 controller怎么写 这里就怎么写
//    注意:记得加上载化路径
    @RequestMapping("/product/get/{pid}")
    public Product get(@PathVariable("pid") Integer pid);
}
OrderCtroller_Fegin
package com.cdl.shoporder.Controller;

import com.cdl.model.Order;
import com.cdl.model.Product;
import com.cdl.model.User;
import com.cdl.shoporder.service.ProductService;
import org.springframework.beans.factory.annotation.Autowired;
import org.springframework.web.bind.annotation.PathVariable;
import org.springframework.web.bind.annotation.RequestMapping;
import org.springframework.web.bind.annotation.RestController;
import org.springframework.web.client.RestTemplate;

/**
 * @author cdl
 * @site www.cdl.com
 * @create 2022-11-25 15:43
 */
@RestController
@RequestMapping("/order")
public class OrderCtroller_Fegin {

    @Autowired
    private ProductService productService;

    @Autowired
    private RestTemplate restTemplate;

    @RequestMapping("/get/{uid}/{pid}")
    public Order get(@PathVariable("uid") Integer uid,
                     @PathVariable("pid") Integer pid){

        User user = restTemplate.getForObject("http://shop-user/user/get/" + uid, User.class);
        Product product = productService.get(pid);
        Order order = new Order();
        order.setUsername(user.getUsername());
        order.setUid(user.getUid());
        order.setPprice(product.getPprice());
        order.setPname(product.getPname());
        order.setPid(product.getPid());
        order.setOid(System.currentTimeMillis());
        order.setNumber(product.getStock());
        return order;
    }

}
启动项目

四、Feign传参
FeignServerController
package com.cdl.shopproduct.Controller;

import com.cdl.model.Product;
import lombok.extern.slf4j.Slf4j;
import org.springframework.web.bind.annotation.PathVariable;
import org.springframework.web.bind.annotation.RequestBody;
import org.springframework.web.bind.annotation.RequestMapping;
import org.springframework.web.bind.annotation.RequestParam;
import org.springframework.web.bind.annotation.RestController;

@Slf4j
@RestController
@RequestMapping("/feignServer")
public class FeignServerController {
    @RequestMapping("/findByParameter")
    public String findByParameter(String name,Double price){
        log.info("服务提供者日志:{}",name);
        return "hello:"+name;
    }
    @RequestMapping("/findByParameter2")
    public String findByParameter2(
            @RequestParam("name") String name,
            @RequestParam("price") Double price){
        log.info("服务提供者日志:{},{}",name,price);
        return "hello:"+name+price;
    }
    @RequestMapping("/findByPathVariable/{name}")
    public String findByPathVariable(@PathVariable("name") String name){
        log.info("服务提供者日志:{}",name);
        return "hello:"+name;
    }
    @RequestMapping("/findByRequestBody")
    public Product findByRequestBody(@RequestBody Product product){
        log.info("服务提供者日志:{}",product.getPname());
        return product;
    }
}
ProductService
package com.cdl.shoporder.service;

import com.cdl.model.Product;
import org.springframework.cloud.openfeign.FeignClient;
import org.springframework.web.bind.annotation.GetMapping;
import org.springframework.web.bind.annotation.PathVariable;
import org.springframework.web.bind.annotation.RequestBody;
import org.springframework.web.bind.annotation.RequestMapping;
import org.springframework.web.bind.annotation.RequestParam;

import javax.servlet.http.HttpServletRequest;

/**
 * @author cdl
 * @site www.cdl.com
 * @create 2022-11-28 12:14
 *
 * 帮助消费者 shop-order 调用生产者 shop-product
 */
@FeignClient("shop-product")//声明调用的提供者的name
public interface ProductService {
    //接口定义:完全遵守restful接口规范 controller怎么写 这里就怎么写
//    注意:记得加上载化路径
    @RequestMapping("/product/get/{pid}")
    public Product get(@PathVariable("pid") Integer pid);


    @RequestMapping("/feignServer/findByParameter")
    public String findByParameter( @RequestParam("name") String name,@RequestParam("price") Double price);

    @RequestMapping("/feignServer/findByParameter2")
    public String findByParameter2(
            @RequestParam("name") String name,
            @RequestParam("price") Double price);

    @RequestMapping("/feignServer/findByPathVariable/{name}")
    public String findByPathVariable(@PathVariable("name") String name);

    @RequestMapping("/feignServer/findByRequestBody")
    public Product findByRequestBody(@RequestBody Product product);


}
FeignClintController
package com.cdl.shoporder.Controller;

import com.cdl.model.Product;
import com.cdl.shoporder.service.ProductService;
import lombok.extern.slf4j.Slf4j;
import org.checkerframework.checker.units.qual.A;
import org.springframework.beans.factory.annotation.Autowired;
import org.springframework.web.bind.annotation.PathVariable;
import org.springframework.web.bind.annotation.RequestBody;
import org.springframework.web.bind.annotation.RequestMapping;
import org.springframework.web.bind.annotation.RequestParam;
import org.springframework.web.bind.annotation.RestController;

@Slf4j
@RestController
@RequestMapping("/feignClint")
public class FeignClintController {

    @Autowired
    private ProductService productService;


    @RequestMapping("/findByParameter")
    public String findByParameter(@RequestParam("name")String name,@RequestParam("price") Double price){
        log.info("服务消费者日志:{}",name);
        return productService.findByParameter(name,price);
    }
    @RequestMapping("/findByParameter2")
    public String findByParameter2(
            @RequestParam("name") String name,
            @RequestParam("price") Double price){
        log.info("服务消费者日志:{},{}",name,price);
        return productService.findByParameter2(name,price);
    }
    @RequestMapping("/findByPathVariable/{name}")
    public String findByPathVariable(@PathVariable("name") String name){
        log.info("服务消费者日志:{}",name);
        return productService.findByPathVariable(name);
    }
    @RequestMapping("/findByRequestBody")
    public Product findByRequestBody(@RequestBody Product product){
        log.info("服务消费者日志:{}",product.getPname());
        return product;
    }
}


 380
380


 被折叠的 条评论
为什么被折叠?
被折叠的 条评论
为什么被折叠?
 到【灌水乐园】发言


