


下面就以代码来进行说明
1,先导入websocket依赖
        <dependency>
            <groupId>org.springframework.boot</groupId>
            <artifactId>spring-boot-starter-websocket</artifactId>
        </dependency>
2.编写websocket相关bean管理配置
@Configuration
public class config {
    //申明websocket是由bean管理的
    @Bean
    public ServerEndpointExporter serverEndpointExporter() {
        return new ServerEndpointExporter();
    }
}
3.编写业务层代码
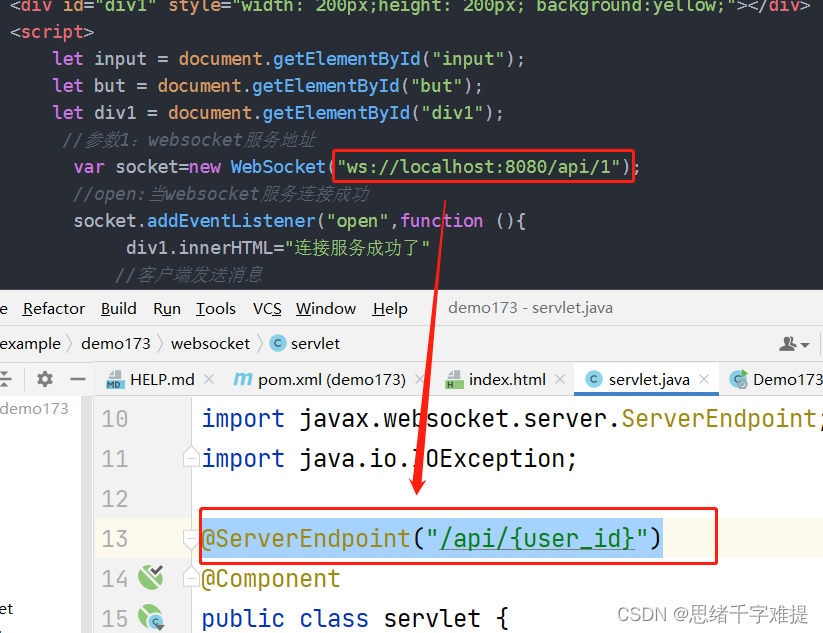
@ServerEndpoint("/api/{user_id}")
@Component
public class servlet {

    private  String id;
    //客户端建立
    @OnOpen
    public  void  onopen(Session  session,  @PathParam("user_id")String id){
        this.id=id;
        try {
            session.getBasicRemote().sendText("连接建立成功");
        } catch (IOException e) {
            throw new RuntimeException(e);
        }
        System.out.println("连接建立");
    }
   //客户端发送消息,服务端接受
    @OnMessage
    public  void  onoMessage(String  message,  Session session){
        System.out.println(message);
        try {
            //向客户端返还信息
            session.getBasicRemote().sendText("消息收到");
        } catch (IOException e) {
            throw new RuntimeException(e);
        }
    }
    //客户端关闭时候
    @OnClose
    public  void  onoClose(Session  session,  @PathParam("user_id")String id){
        this.id=id;
        System.out.println("连接关闭");
    }
}
注意@ServerEndpoint("/api/{user_id}")此注解供websocket提供访问连接url
4.附赠前端代码一份
<!doctype html>
<html lang="en">
<head>
<meta charset="UTF-8">
<meta name="viewport"
content="width=device-width, user-scalable=no, initial-scale=1.0, maximum-scale=1.0, minimum-scale=1.0">
<meta http-equiv="X-UA-Compatible" content="ie=edge">
<title>Document</title>
</head>
<body>
<input id="input" type="text" placeholder="输入你的内容">
<button id="but">发送请求</button>
<div id="div1" style="width: 200px;height: 200px; background:yellow;"></div>
<script>
let input = document.getElementById("input");
let but = document.getElementById("but");
let div1 = document.getElementById("div1");
//参数1:websocket服务地址
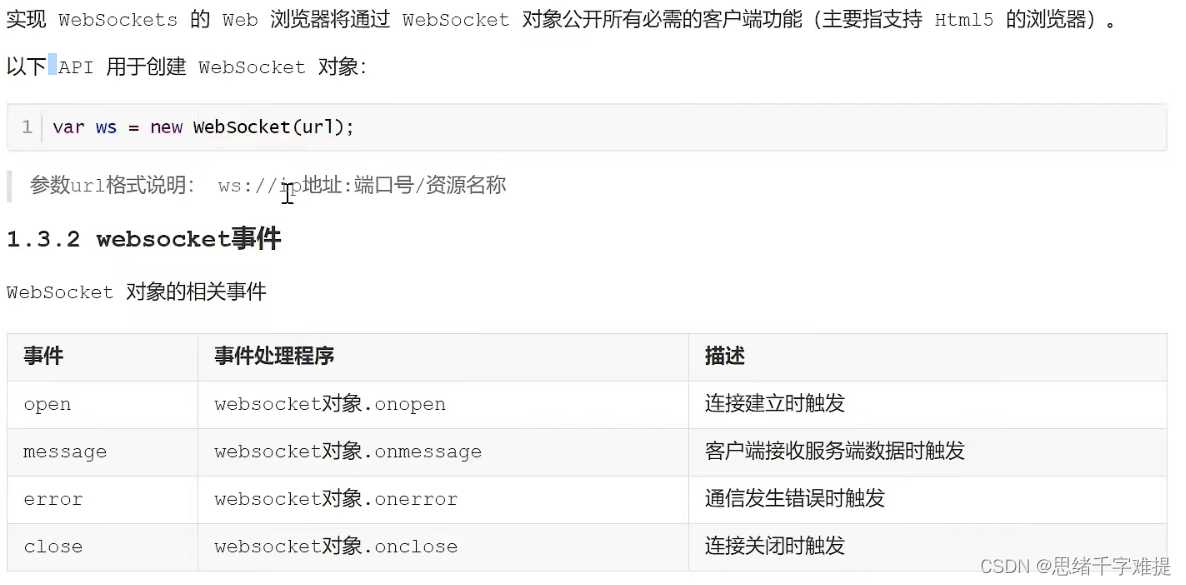
var socket=new WebSocket("ws://localhost:8080/api/1");
//open:当websocket服务连接成功
socket.addEventListener("open",function (){
div1.innerHTML="连接服务成功了"
//客户端发送消息
socket.send("发送成功")
})
//message:接受客户端的信息
socket.addEventListener("message",function (re){
console.log(re.data)
})
//客户端关闭时
socket.addEventListener("close",function (){
div1.innerHTML="我已经离开了"
})
</script>
</body>
</html>5.代码一些关键解析


 1596
1596


 被折叠的 条评论
为什么被折叠?
被折叠的 条评论
为什么被折叠?
 到【灌水乐园】发言


