


 本文讲述了作者在使用docker部署Redis7.2.4的sentinel时遇到的域名解析问题、文件权限及故障迁移失败的解决过程,涉及sentinel配置、DNS支持以及sentinel间的互相发现机制。
部署方案:
redis版本:7.2.4
一主二从(redis1为主机,redis2,redis3为从机),3台sentinel。
问题介绍
在使用docker部署sentinel时,遇到了以下几个问题:
域名解析问题:
sentinel的日志报错:"Can't resolve master instance hostname."
我的哨兵监控配置如下所示:
# sentinel monitor <master-name> <ip> <redis-port> <quorum>
sentinel monitor mymaster redis1 6379 2
我使用的是docker桥接模式自定义网络连接,这种自定义网络内置了DNS解析服务,容器的默认域名有服务名(compose方式下)、容器名、容器id(以容器id的前面一部分作为访问域名)。


在同一个自定义网络下容器,可以通过这些域名来相互访问,不用查询并设置某个docker容器的具体ip,避免了每次重新部署容器时ip发生变动造成的配置麻烦。虽然这种域名访问的方式很方便,但redis内部对域名访问的支持并不稳定。
下面以访问集群信息为例演示:

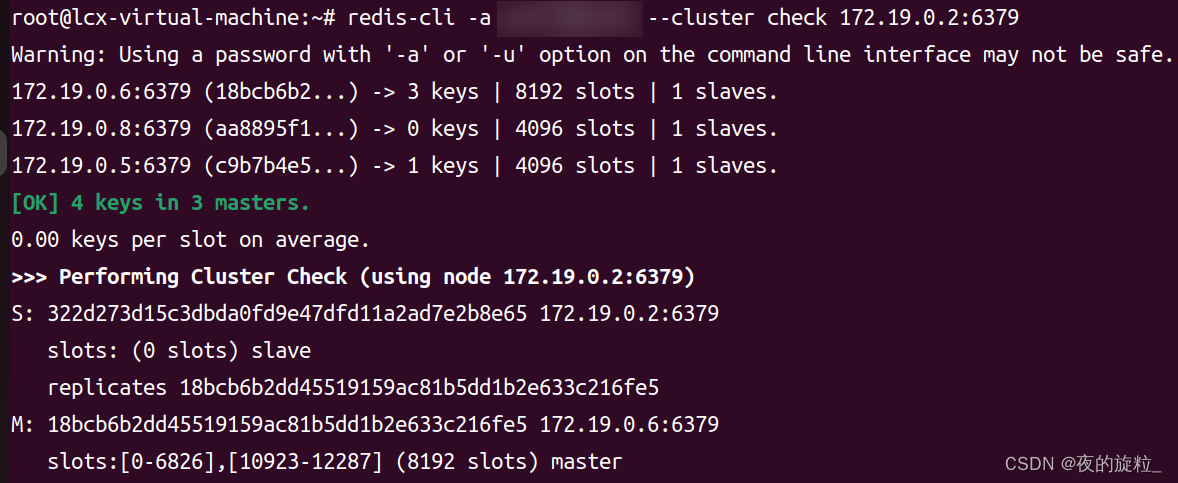
经过测试发现,使用ip可以正常访问集群,而使用域名则出现无法解析的问题
注意:使用桥接模式配置网络,一定要在redis.conf和sentinel.conf中设置bind 0.0.0.0,否则容器间无法连接
在Redis的配置中,
bind 0.0.0.0用于指定服务器应该监听的IP地址。0.0.0.0是一个特殊的IP地址,表示"所有的IPV4地址"。当你设置bind 0.0.0.0时,你的服务器将会监听所有网络接口的网络请求。
回到正题,为什么会发生域名解析问题?
查阅相关资料:
Only sentinel with version above 6.2 can resolve host names, but this is not enabled by default. Adding sentinel resolve-hostnames yes to sentinel.conf will help.
If your sentinel has older versions, the hostname mymaster should be replaced by and ip.
For more details, check out IP Addresses and DNS names in Redis document
原来是这样,我的redis版本是7.2.4,默认不会采用DNS解析主机名,需要在sentinel.conf中找到如下配置项并修改为yes:
sentinel resolve-hostnames yes经过修改,发现确实可以解析主机名了,但新的问题又来了,当我故意让redis1宕机想实现故障迁移时,sentinel日志又报错说不能解析主机名了,看来redis对域名的支持不稳定啊。。。
因此,建议使用ip
文件访问权限问题:
解决了域名解析的问题,sentinel可以正常启动了,但是却报错:“Could not rename tmp config file (Device or resource busy)”
查阅资料:
1. In order for redis to have rights to modify the configurations, you have mount the entire configuration folder, not the file itself (and the folder contents should be writable).
2. Back-up all the original master.conf, slave.conf, sentinel.conf files. Be aware that redis will alter your local configuration files (redis.conf), because eventually you will execute failovers, so the slave config will be turned into a master one and the opposite for the master config. It's up to you how you avoid committing the changes to source control. For example, you can keep the originals in a separate folder, and copy them to the mounted folder by a deploy script, before running "docker-compose up" command.
3. All the changes that redis will apply to these config files will be appended at the end of the config and will be preceded by this comment
简单来说,就是你的sentinel权限不够,不能修改sentinel.conf,因此你需要使用以下命令将宿主机的sentinel配置文件的权限设置为完全开放(-rwxrwxrwx)
chmod -R 0777 你的配置文件名
经过修改,完美解决!

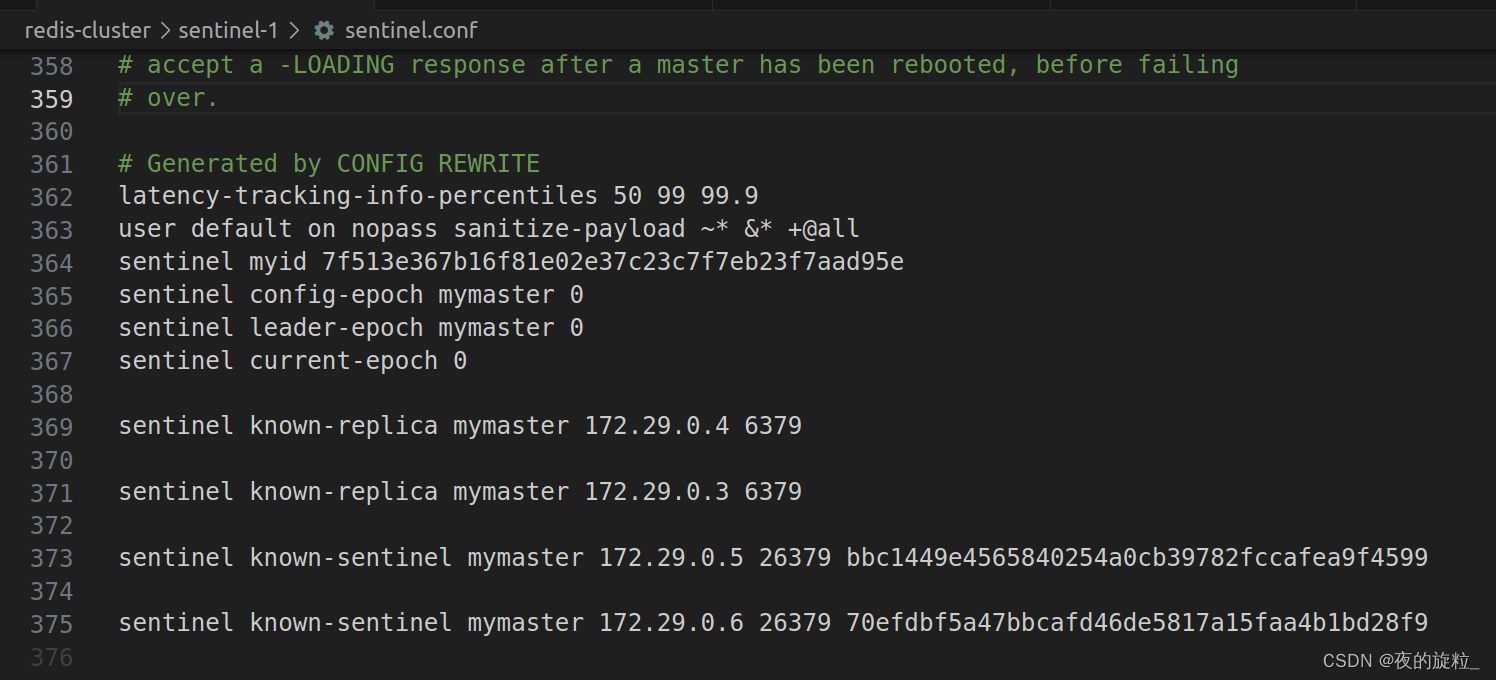
我们发现sentinel.conf文件末尾成功追加了以下内容:
故障迁移失败:
当我故意让redis1宕机时,sentinel的日志一直停在+sdown master......,居然没有odown,太奇怪了,进入redis2和redsi3客户端查看,发现此时它们还是slave,也就是说,failover失败了。
进入sentinel1的客户端输入info sentinel,发现下图最下方位置的sentinels=1,表示当前的sentinel只发现了它自己,也就是说三个sentinel互相没有发现对方。
我们知道,odown是需要哨兵投票决定的,要达到一定的票数才能成功执行,现在三个哨兵无法感知对方,也就无法进行客观下线了,这就是问题所在
 打开sentinel.conf,发现三个sentinel的myid都是一样的,如下:

sentinel的互相发现是通过发布/订阅机制实现的,简单来说就是sentinel会在连接的主机上发布自己的信息,同时也能收到另外几个sentinel发布的信息,这些信息包括自己的myid,ip,端口等。如果myid一致,那么sentinel会认为当前收到的订阅信息是自己发布的,会丢弃该信息,也就无法发现对方了。
myid相同的原因可能是你直接将同一份sentinel.conf复制给三个sentinel使用,这样的话通过底层的sha算法得到的myid就是一样的。
解决方案就是将myid那一行删掉,重启sentinel,之后生成的myid就是不一致的了,问题解决!
故障迁移没有修改配置文件:
在进行故障迁移(failover)时,我的master是redis1,现在我故意让redis1停止运行,发现sentinel可以正常地修改自己配置文件的master ip为redis2的ip,进入redis2, redis3的客户端输入info replication命令查看,发现redis2确实变成了主机,redis3也变成了redis2的从机,也就是说故障迁移成功
了吗?????
先说结论,并没有!
我们发现redis1, redis2, redis3的redis.conf均没有被sentinel修改,也就是说当前故障迁移的结果只是临时的,主从关系并没有在配置文件中修改,这就意味着重启redis后,sentinel会发生混乱,此时sentinel的master ip已经变成redis2了,但是真正的master还是redis1!!!
这个问题很隐蔽,甚至stackoverflow上也没有相关的提问,经过询问ai,发现可能是因为对redis.conf文件没有修改权限的原因,进入redis的客户端,输入以下指令:
config rewrite结果显示Pemission Denied,果然是文件修改权限的问题。
修改文件权限后,一切ok啦!
现在测试一下,使用docker stop redis-1使redis1宕机,开启故障迁移:

查看redis的配置文件,发现redis2的配置文件中的replicaof被sentinel删除了

redis3的主机ip被更换成redis2了

redis1重新上线后,它的redis.conf新增了以下内容:

故障迁移完美成功!
以上就是我在使用docker配置redis哨兵时遇到的问题,实际上遇到的问题远远不止这些,我只是挑了几个网上资料不多的来写,希望对大家有所帮助,欢迎在评论区交流、提问


 4897
4897


 被折叠的 条评论
为什么被折叠?
被折叠的 条评论
为什么被折叠?
 到【灌水乐园】发言


