


目录
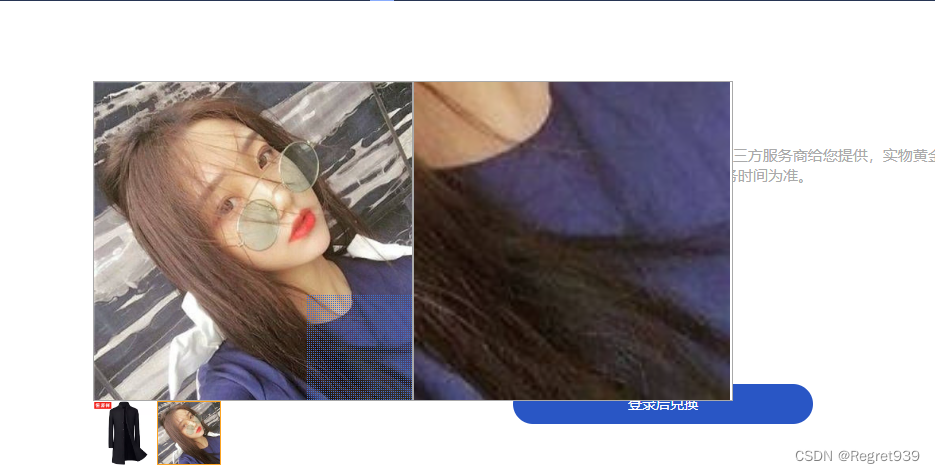
效果展示
1.封装组件 s-imgZoom.vue
<template>
    <div style="display: flex;position: relative">
        <div class="box"
             :style="minImgBoxStyle"
             @mouseleave="mouseLeave"
             @mouseenter="mouseEnter"
             @mousemove="mousemove($event)">
            <!--原始照片-小照片-->
            <img :style="minImgStyle" fit="contain" ref="minImg" :src="finalMinIMGsrc"/>
            <!--探测块-->
            <div v-show="show" class="areaMark" :style="areaMarkStyle"></div>
        </div>
        <div class="box maxImgBox" :style="maxImgBoxStyle" v-show="show">
            <!--放大后的照片-->
            <img :style="maxImgStyle" fit="contain" :src="finalMaxIMGsrc"/>
        </div>
    </div>
</template>
<script>
    export default {
        props: {
            minIMGsrc: String,
            maxIMGsrc: String,
            scale: {
                type: Number,
                default: 2
            },
            width: {
                type: Number,
                default: 420
            },
            height: {
                type: Number,
                default: 420
            },
        },
        data() {
            return {
                show: false,
                finalMinIMGsrc: '',
                finalMaxIMGsrc: '',
                imgBoxWidth: 420,
                imgBoxHeight: 420,
                areaWidth: 210,
                areaHeight: 210,
                areaMarkStyle: {},
                minImgBoxStyle: {
                    cursor: 'move'
                },
                minImgStyle: {},
                maxImgBoxStyle: {


                },
                maxImgStyle: {
                    position: 'absolute',
                },
            }
        },
        watch: {
            'minIMGsrc'() {
                this.init()
            },
            'maxIMGsrc'() {
                this.init()
            },
        },
        mounted() {
            this.init()
        },
        methods: {
            init() {
                this.imgBoxWidth = this.width
                this.imgBoxHeight = this.height
                this.$set(this.minImgStyle, 'width', this.imgBoxWidth + 'px')
                this.$set(this.minImgStyle, 'height', this.imgBoxHeight + 'px')
                this.$set(this.maxImgStyle, 'width', this.imgBoxWidth + 'px')
                this.$set(this.maxImgStyle, 'height', this.imgBoxHeight + 'px')
                this.$set(this.minImgBoxStyle, 'width', this.imgBoxWidth + 'px')
                this.$set(this.minImgBoxStyle, 'height', this.imgBoxHeight + 'px')
                this.$set(this.maxImgBoxStyle, 'width', this.imgBoxWidth + 'px')
                this.$set(this.maxImgBoxStyle, 'height', this.imgBoxHeight + 'px')
                this.$set(this.maxImgBoxStyle, 'left', this.imgBoxWidth + 'px')
                this.areaWidth = this.imgBoxWidth / this.scale
                this.areaHeight = this.imgBoxHeight / this.scale
                this.finalMinIMGsrc = this.minIMGsrc
                if (!this.maxIMGsrc) {
                    this.finalMaxIMGsrc = this.minIMGsrc
                }
                this.$set(this.areaMarkStyle, 'width', this.areaWidth + 'px')
                this.$set(this.areaMarkStyle, 'height', this.areaHeight + 'px')
                this.$set(this.maxImgStyle, 'transform', 'scale(' + this.scale + ')')
            },
            mouseEnter() {
                this.show = true
            },
            mouseLeave() {
                this.show = false
            },
            mousemove(e) {
                // 获取文档顶端与屏幕顶部之间的距离
                // scrollTop指的是“元素中的内容”超出“元素上边界”的那部分的高度
                let documentScrollTop = document.documentElement.scrollTop || document.body.scrollTop;
                // 获取鼠标相对于屏幕的坐标
                let mouseClientX = e.clientX
                let mouseClientY = e.clientY
                // 获取小照片相对于屏幕位置信息
                // getBoundingClientRect()用于获得页面中某个元素的左,上,右和下分别相对浏览器视窗的位置。
                let minImgPosition = this.$refs.minImg.getBoundingClientRect();
                let minImgX = minImgPosition.left;
                let minImgY = minImgPosition.top;
                // 计算出探测块相对于小图片的坐标
                let areaLeft = mouseClientX - minImgX - this.areaWidth / 2
                let areaTop = mouseClientY - minImgY - this.areaHeight / 2
                if (documentScrollTop > 0) {
                    areaTop = documentScrollTop + areaTop
                }
                let minLeft = 0
                let maxLeft = this.imgBoxWidth - this.areaWidth
                let minTop = 0
                let maxTop = this.imgBoxHeight - this.areaHeight
                // 禁止探测块移出小图片
                if (areaLeft < minLeft) {
                    areaLeft = minLeft
                }
                if (areaLeft > maxLeft) {
                    areaLeft = maxLeft
                }
                if (areaTop < minTop) {
                    areaTop = minTop
                }
                if (areaTop > maxTop) {
                    areaTop = maxTop
                }
                // 更新探测块的坐标
                this.$set(this.areaMarkStyle, 'left', areaLeft + 'px')
                this.$set(this.areaMarkStyle, 'top', areaTop + 'px')
                // 更新放大后照片的坐标
                this.$set(this.maxImgStyle, 'left', (this.scale - 1) * this.imgBoxWidth / 2 - areaLeft * this.scale + 'px')
                this.$set(this.maxImgStyle, 'top', (this.scale - 1) * this.imgBoxHeight / 2 - areaTop * this.scale + 'px')
            }
        }
    }
</script>
<style scoped>
    .box {
        border: 1px solid darkgray;
        position: relative;
        overflow: hidden;
        box-sizing: border-box;
    }

    .areaMark {
        position: absolute;
        background: url(//img-tmdetail.alicdn.com/tps/i4/T12pdtXaldXXXXXXXX-2-2.png);
    }
    .maxImgBox{
        position: absolute;
    z-index:999
    }
</style>
2.使用范例
template部分
 <!-- 组件默认是100%的高宽,所以建议将组件包含在一个有固定高宽的容器内 -->
        <s-imgZoom :width="320" :height="320" :minIMGsrc="active_pic" :scale="3" />
  <!-- 缩略图渲染 -->
        <el-row class="smallPic">
          <el-col
            v-for="(item ,i) in img_pic_list"
            :key="i"
            :class="{'active_pic':(active_pic===item.link)}"
          >
            <el-image lazy @click="changeItem(item)" :src="item.link"></el-image>
          </el-col>
        </el-row>
js部分
  data () {
    return {
      // 图片数据数组
      img_pic_list: [
        {
          link: 'https://img.alicdn.com/imgextra/i2/2183295419/O1CN01awKYlS1ptwv0tbmL5_!!0-item_pic.jpg_430x430q90.jpg',
        },
        {
          link: 'https://img2.woyaogexing.com/2023/06/06/9060c27c86d514b6c13868a30e2e14fc.jpg',
        }
      ],
      active_pic: '', // 选中状态
    }
  },
 created () {
    // 初始化选中第一张
    this.active_pic = this.img_pic_list[0].link

  },
 methods: {
// 点击切换事件
    changeItem (item) {
      this.active_pic = item.link
    },
}
css部分
  //  缩略图
  .smallPic{
    width: 320px;
    height: 64px;
    overflow: hidden;
    /deep/.el-col{
      height: 64px;
      width: 20%;
      box-sizing: border-box;
      cursor: pointer;
      .el-image__inner{
        border-radius: 0;
      }
    }
    .active_pic{
      border: 1px solid orange;
    }
  }


 747
747


 被折叠的 条评论
为什么被折叠?
被折叠的 条评论
为什么被折叠?
 到【灌水乐园】发言


