前言:
最近看了很多路由,网关中间件,觉得嵌入比较麻烦,所以想在Admin中对多个系统的配置进行统一管理,不考虑中间件路由分发的情况下,通过restful Api携带系统标识clinetId,注入一个Fun来具体分配。
代码实现:
1.自定义统一接口:供各个子系统各自的具体实现
//定义统一接口
public interface IClientSecurityProxy
{
    //定义方法
    Task<ConfigurationBase> GetConfiguration(string clientId);
}
2.定义ClientSecurityProxyBase:保证各个系统可以只实现自己需要的,解耦
public class ClientSecurityProxyBase : IClientSecurityProxy
{
    //虚方法默认实现,实际供具体子系统具体实现
    public virtual Task<ConfigurationBase> GetConfiguration(string clientId)
    {
        throw new NotImplementedException();
    }
}
3.定义两个子系统,各自实现各自的逻辑
//A系统
public class AClientSecurityProxy : ClientSecurityProxyBase
{
    //A方法实现逻辑
    public override async Task<ConfigurationBase> GetConfiguration(string clientId)
    {
        return new ConfigurationBase()
        {
            configurations =new Dictionary<string, List<Config>>()
            {
                {"A",new List<Config>()}
            }
        };
    }
}


//B系统
public class BClientSecurityProxy: ClientSecurityProxyBase
{
    //B方法实现逻辑
    public override async Task<ConfigurationBase> GetConfiguration(string clientId)
    {
        return new ConfigurationBase()
        {
            configurations =new Dictionary<string, List<Config>>()
            {
                {"B",new List<Config>()}
            }
        };
    }
}
4.Program.cs注入两个单例的子系统实现:注意不要用<接口,实现类>方式注入
//注入各个子系统的具体代理实现
builder.Services.AddSingleton<AClientSecurityProxy>();
builder.Services.AddSingleton<BClientSecurityProxy>();
5.注入一个Func<string, IClientSecurityProxy>(): 供我们获取具体的实现类
//注入一个Fun,来判断属于那个系统
builder.Services.AddSingleton(sp =>new Func<string, IClientSecurityProxy>(c =>
{
    //判断是A系统就返回AClientSecurityProxy
    if (isA(c))
        return sp.GetRequiredService<AClientSecurityProxy>();
    //判断是B系统就返回BClientSecurityProxy
    if (isB(c))
        return sp.GetRequiredService<BClientSecurityProxy>();
    throw new NotSupportedException($"Unsupported clientId:{c}.");
}));
6.定义判断系统Fun<string,bool>(): 区分是哪个系统,可自由添加,复杂的可以定义对象,或者元组来传递判断
//A系统判断依据
Func<string, bool> isA = clientId => clientId.EndsWith(".A", StringComparison.OrdinalIgnoreCase)
                                         || clientId.EndsWith(".axxx", StringComparison.OrdinalIgnoreCase)
                                         || clientId.Equals("A", StringComparison.OrdinalIgnoreCase)
                                         || clientId.Equals("a", StringComparison.OrdinalIgnoreCase);


//B系统判断依据
Func<string, bool> isB = clientId => clientId.EndsWith(".b", StringComparison.OrdinalIgnoreCase)
                                       || clientId.EndsWith(".bxx", StringComparison.OrdinalIgnoreCase)
                                       || clientId.Equals("B", StringComparison.OrdinalIgnoreCase)
                                       || clientId.Equals("b", StringComparison.OrdinalIgnoreCase);
7.Controller 注入Program.cs注入的Func<string, IClientSecurityProxy>()
[ApiController]
[Route("api/[controller]/[action]")]
public class ConfigurationController : ControllerBase
{
    //注入client工厂
    private readonly Func<string, IClientSecurityProxy> _clientProxyFactory;

    public ConfigurationController(Func<string, IClientSecurityProxy> clientProxyFactory)
    {
        _clientProxyFactory = clientProxyFactory;
    }

    //从路由中拿取系统标识,拿到具体系统的实现执行
    [HttpGet("{clientId}/getSetting")]
    public async Task<IActionResult> TestConfigurationAsync([FromRoute] string clientId)
    {
        var resp = await _clientProxyFactory(clientId).GetConfiguration(clientId);
        return Ok(resp);
    }
}
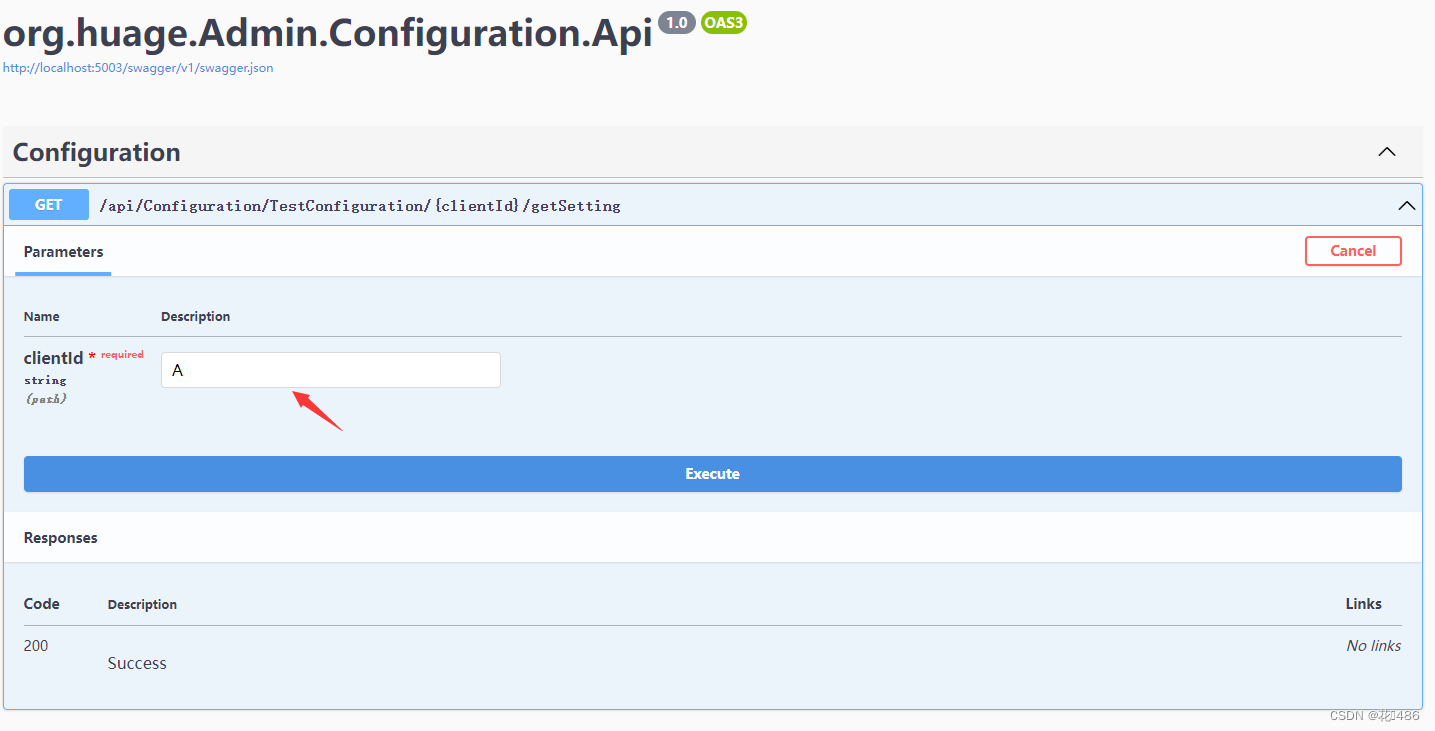
测试:

返回AClientSecurityProxy实例

执行AClientSecurityProxy的GetConfiguration()

以上就是文章的全部了。经测试,这种方式设计简单,方便扩展,prod环境实战表现不错,是一个推荐的实现方案,完整的demo在下文Github链接,如果对你有帮助的话麻烦点一下star !
完整Demo地址:


 772
772


 被折叠的 条评论
为什么被折叠?


