


目录
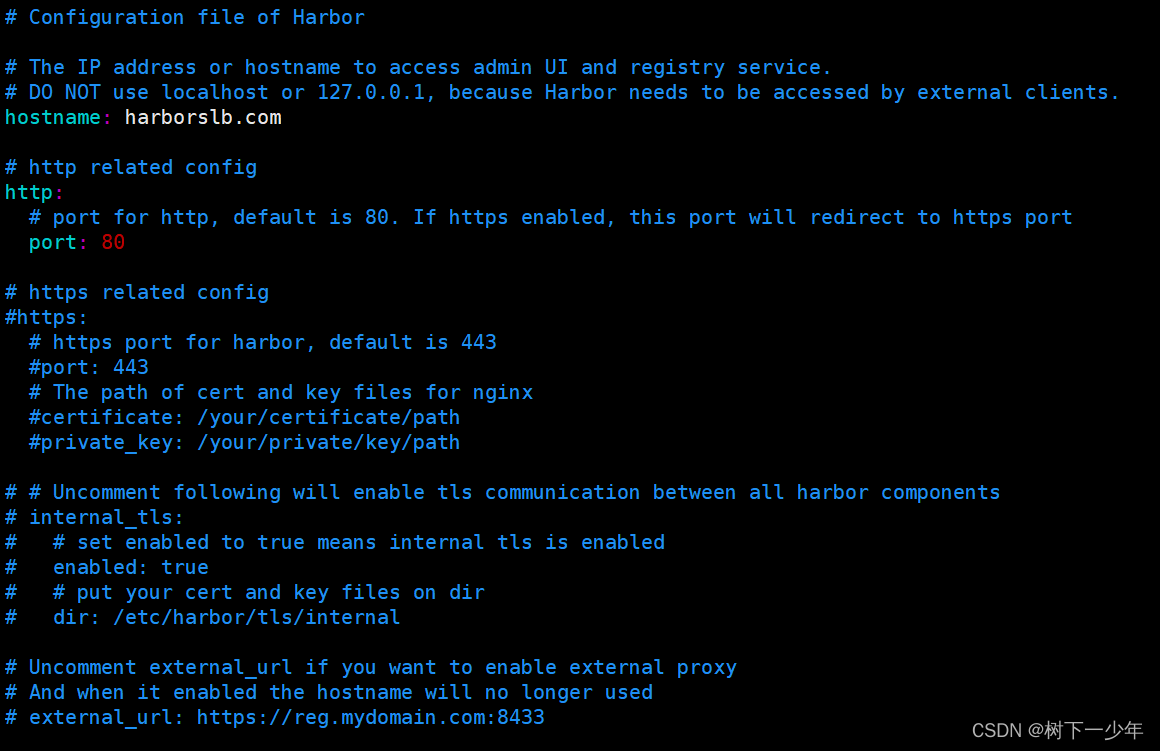
2.将该文件修改为这样,修改好自己的hostname和port,后文的用户和密码可以不改也可以改,用于登录
二.修改daemon.json文件和/etc/hosts文件
1.用户admin,密码没有修改默认是Harbor12345
1.Get "https://harborslb.com/v2/": http: server gave HTTP response to HTTPS client
4.启动docker报docker.service holdoff time over, scheduling restart
2.需要进入harbor运行起来的容器进行修改(主要是harbor-db)
一.安装harbor和docker-compose
1.下载
链接:https://pan.baidu.com/s/1FfDCJPWGcBK0krmiMfdpJQ
提取码:8pu7
[root@localhost ~]# cd /usr/local/
[root@localhost local]# ll
total 651916
drwxr-xr-x. 2 root root         6 Apr 11  2018 bin
-rw-r--r--  1 root root  59383631 Aug 20 15:59 docker-compose-linux-x86_64
drwxr-xr-x. 2 root root         6 Apr 11  2018 etc
drwxr-xr-x. 2 root root         6 Apr 11  2018 games
-rw-r--r--  1 root root 608175520 Aug 20 16:01 harbor-offline-installer-v2.8.4.tgz
drwxr-xr-x. 2 root root         6 Apr 11  2018 include
drwxr-xr-x. 2 root root         6 Apr 11  2018 lib
drwxr-xr-x. 2 root root         6 Apr 11  2018 lib64
drwxr-xr-x. 2 root root         6 Apr 11  2018 libexec
drwxr-xr-x. 2 root root         6 Apr 11  2018 sbin
drwxr-xr-x. 5 root root        49 Jul 23 08:59 share
drwxr-xr-x. 2 root root         6 Apr 11  2018 src
[root@localhost local]# mv docker-compose-linux-x86_64 /usr/local/bin/docker-compose
[root@localhost local]# chmod +x /usr/local/bin/docker-compose

[root@localhost local]# tar -zxvf harbor-offline-installer-v2.8.4.tgz
harbor/harbor.v2.8.4.tar.gz
harbor/prepare
harbor/LICENSE
harbor/install.sh
harbor/common.sh
harbor/harbor.yml.tmpl
[root@localhost local]# cd harbor/
[root@localhost harbor]# ll
total 597536
-rw-r--r-- 1 root root      3639 Aug 15 17:53 common.sh
-rw-r--r-- 1 root root 611834153 Aug 15 17:54 harbor.v2.8.4.tar.gz
-rw-r--r-- 1 root root     12499 Aug 15 17:53 harbor.yml.tmpl
-rwxr-xr-x 1 root root      2725 Aug 15 17:53 install.sh
-rw-r--r-- 1 root root     11347 Aug 15 17:53 LICENSE
-rwxr-xr-x 1 root root      1881 Aug 15 17:53 prepare
[root@localhost harbor]# cp harbor.yml.tmpl harbor.yml
[root@localhost harbor]# hostnamectl set-hostname harborslb.com

[root@localhost harbor]# vim harbor.yml
2.将该文件修改为这样,修改好自己的hostname和port,后文的用户和密码可以不改也可以改,用于登录
3.安装
[root@localhost harbor]# ./install.sh二.修改daemon.json文件和/etc/hosts文件
[root@localhost harbor]# vim /etc/docker/daemon.json
{
"registry-mirrors": ["https://docker.mirrors.ustc.edu.cn"],
"insecure-registries": ["192.168.2.190"],
"insecure-registries": ["harborslb.com"]
}
[root@localhost harbor]# tail -1 /etc/hosts  #按自己的实际名称修改
192.168.2.190 harborslb.com

[root@localhost harbor]# systemctl restart docker


[root@localhost harbor]#  docker-compose up -d
[+] Running 10/10
 ✔ Network harbor_harbor        Created                                                                                                                 0.0s
 ✔ Container harbor-log         Started                                                                                                                 0.0s
 ✔ Container harbor-portal      Started                                                                                                                 0.0s
 ✔ Container registryctl        Started                                                                                                                 0.0s
 ✔ Container registry           Started                                                                                                                 0.0s
 ✔ Container redis              Started                                                                                                                 0.0s
 ✔ Container harbor-db          Started                                                                                                                 0.0s
 ✔ Container harbor-core        Started                                                                                                                 0.0s
 ✔ Container harbor-jobservice  Started                                                                                                                 0.0s
 ✔ Container nginx              Started
三.使用powershell作windows端域名映射
Windows PowerShell
版权所有(C) Microsoft Corporation。保留所有权利。

安装最新的 PowerShell,了解新功能和改进!https://aka.ms/PSWindows

PS C:\WINDOWS\system32> cd .\drivers\etc\
PS C:\WINDOWS\system32\drivers\etc> notepad .\hosts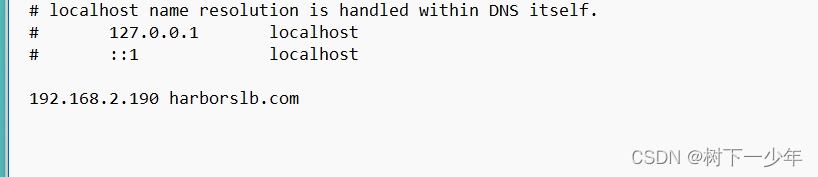
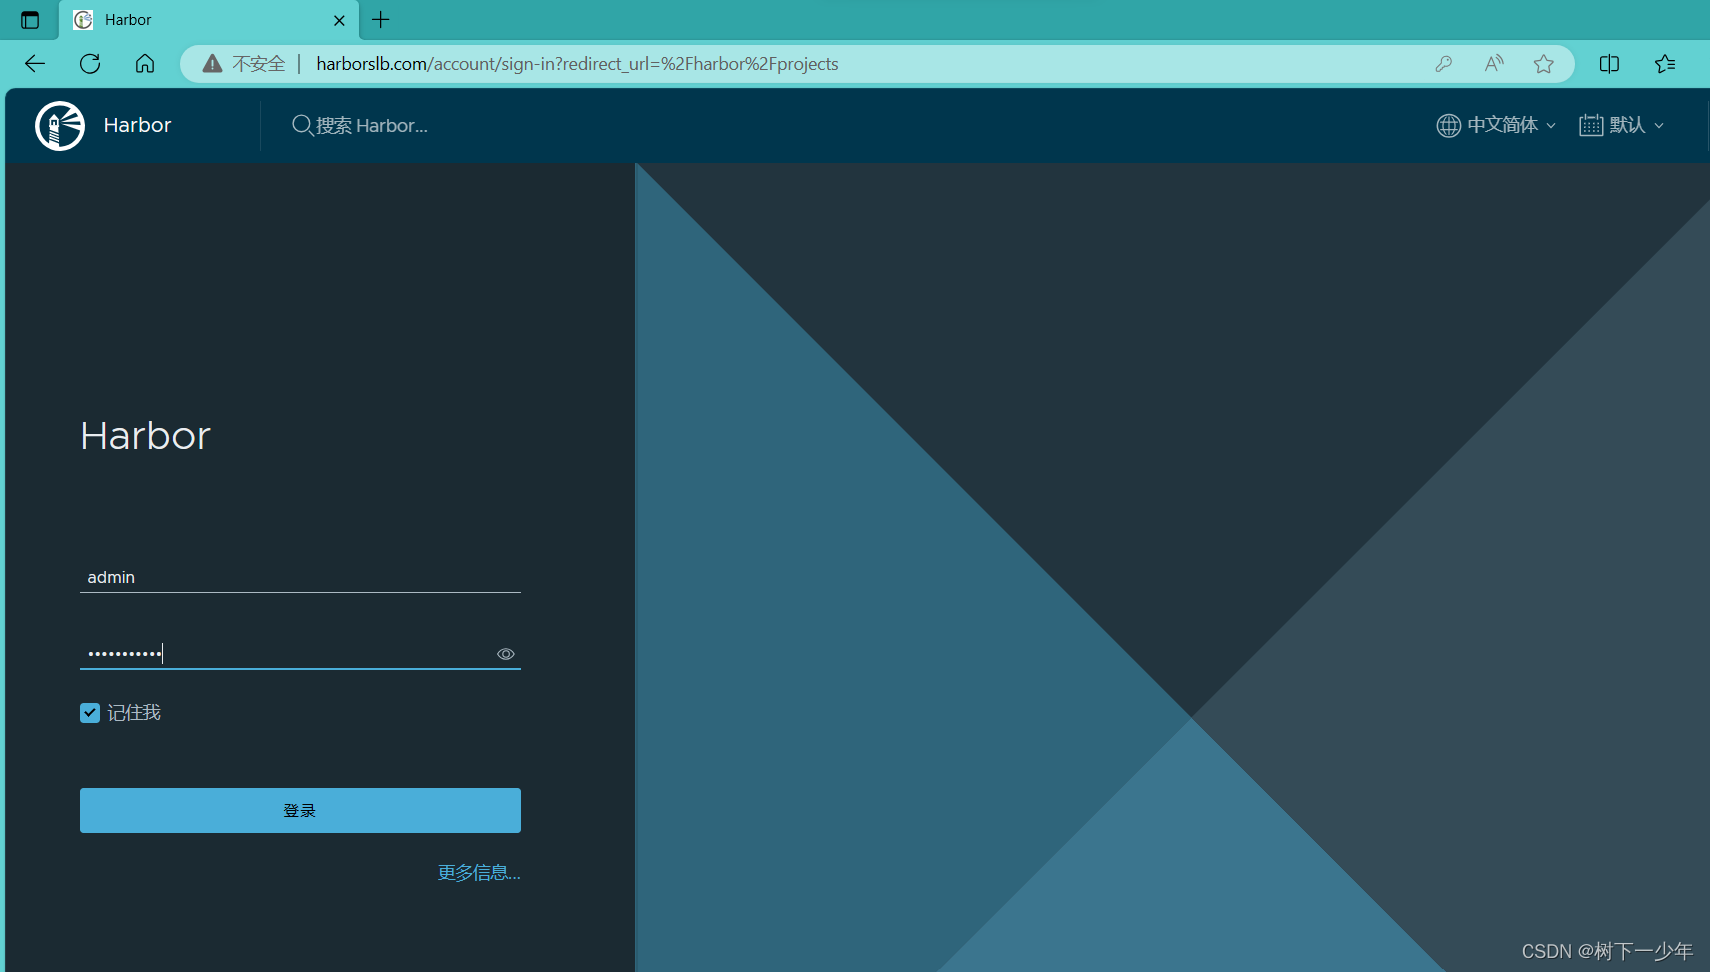
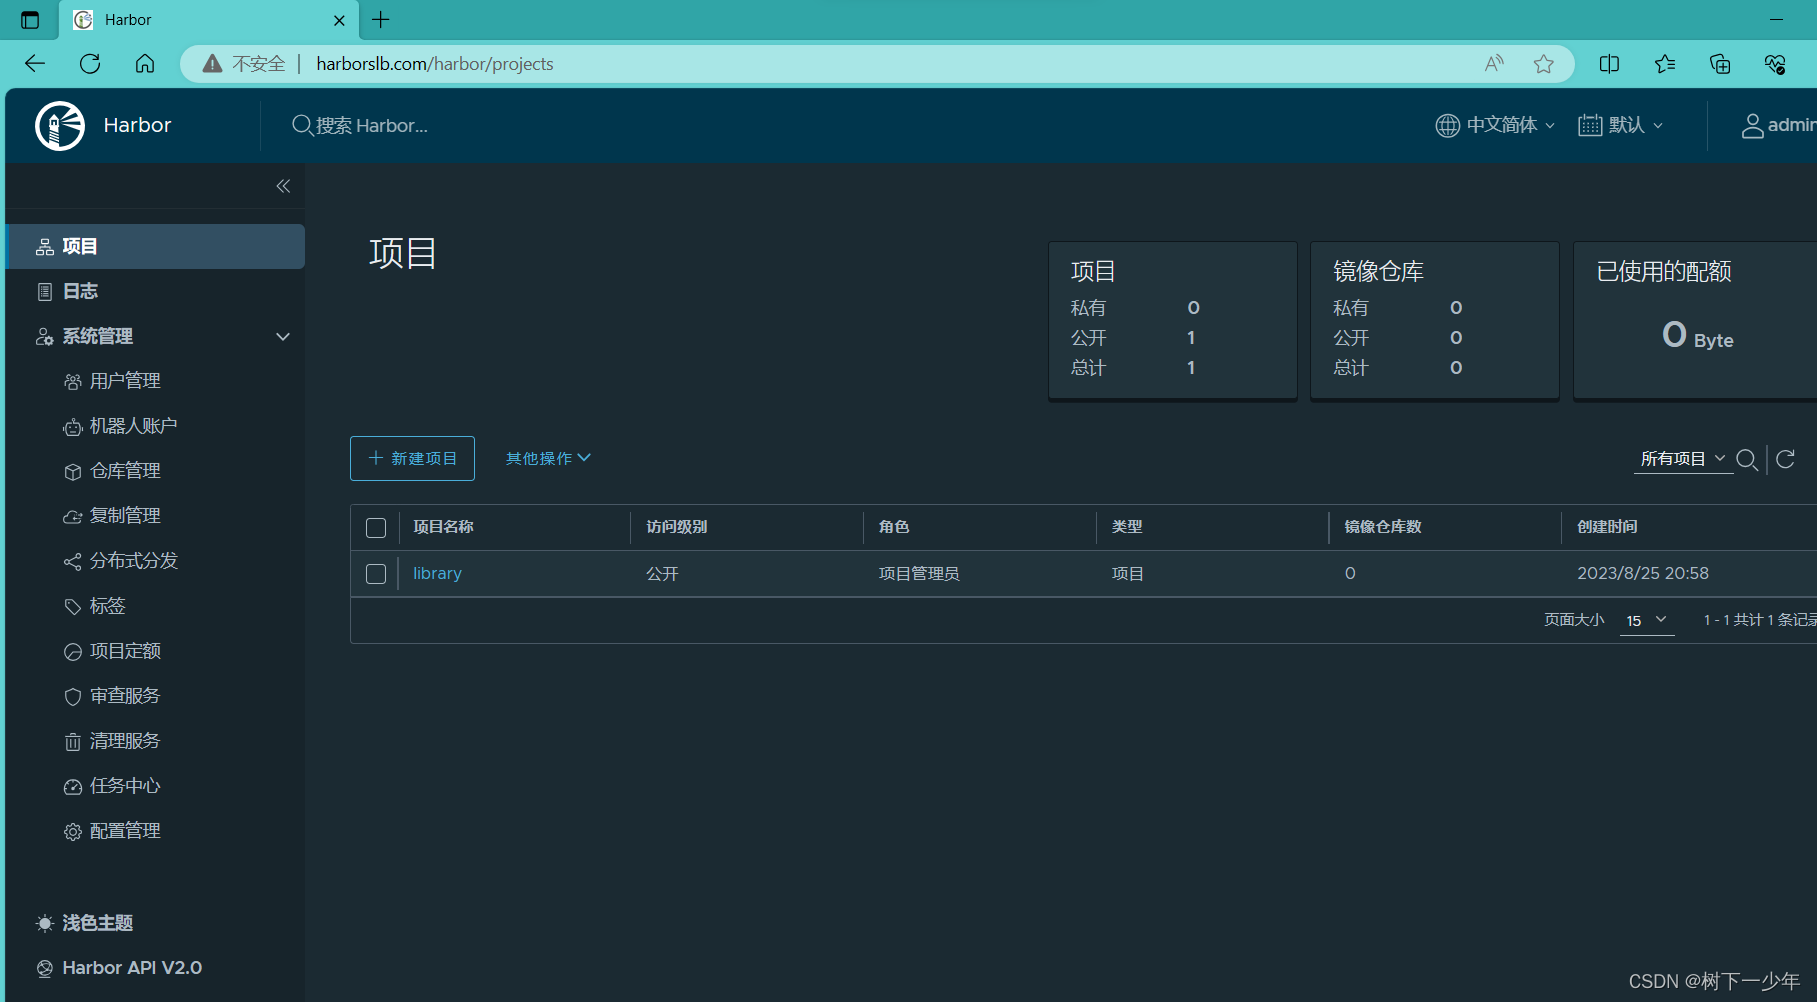
四.浏览器使用域名登录验证
1.用户admin,密码没有修改默认是Harbor12345
2.根据提供的推送指令操作
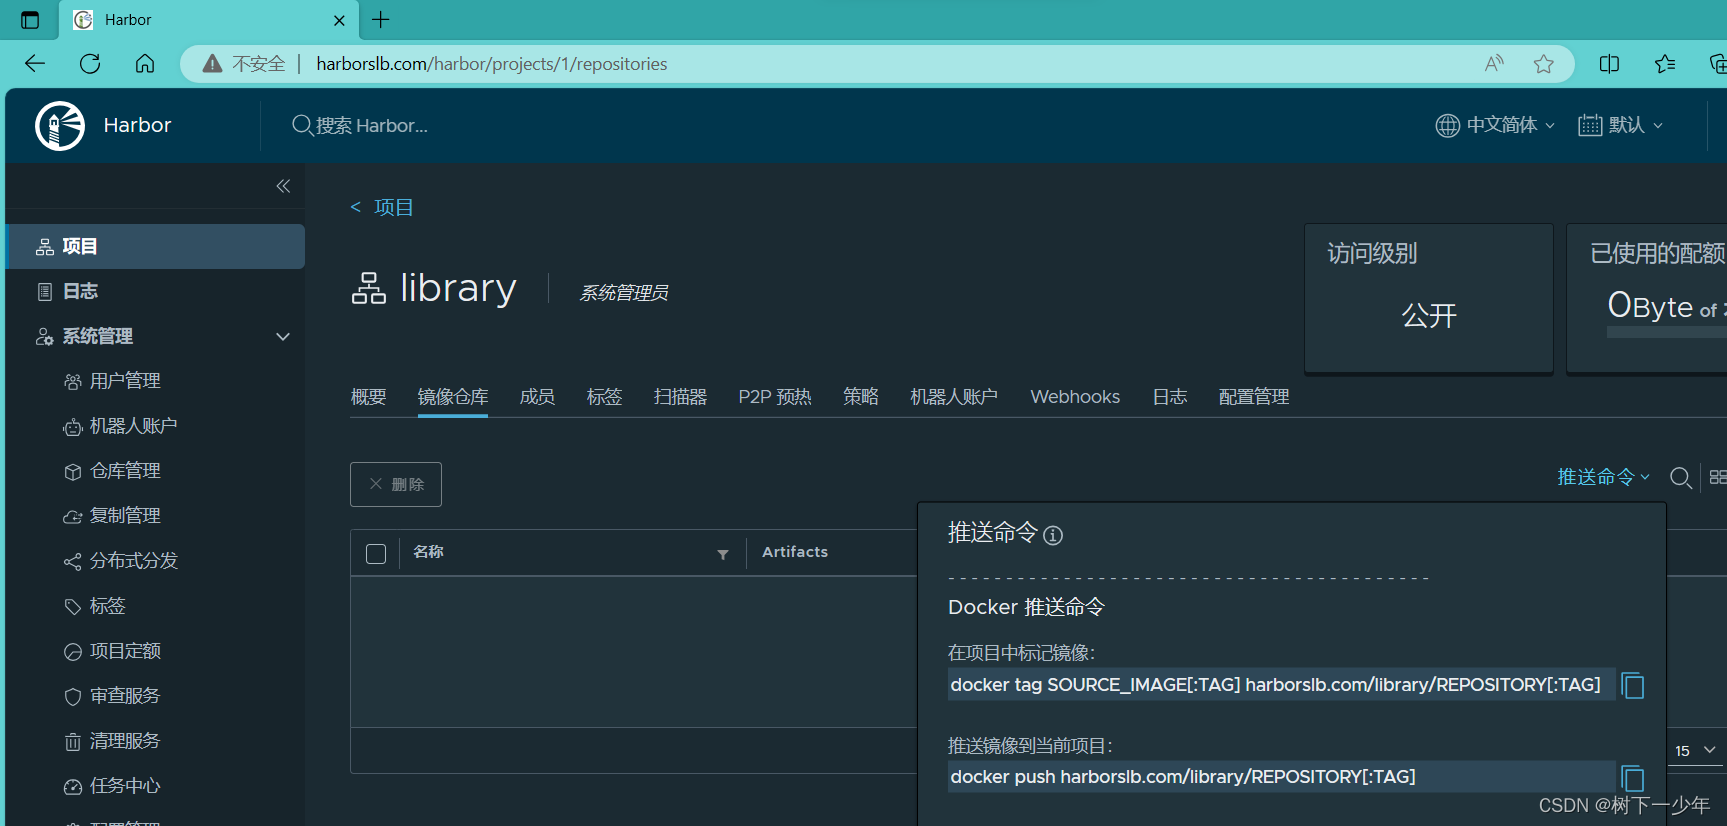
五.镜像打标签和推送
[root@localhost harbor]# docker login http://harborslb.com  #使用刚才的用户和密码登录
Username: admin
Password:
WARNING! Your password will be stored unencrypted in /root/.docker/config.json.
Configure a credential helper to remove this warning. See
https://docs.docker.com/engine/reference/commandline/login/#credentials-store

Login Succeeded

[root@localhost harbor]# docker tag centos:latest harborslb.com/library/centos  #打标签

[root@localhost harbor]# docker push harborslb.com/library/centos  #推送到仓库
Using default tag: latest
The push refers to repository [harborslb.com/library/centos]
74ddd0ec08fa: Pushed
latest: digest: sha256:a1801b843b1bfaf77c501e7a6d3f709401a1e0c83863037fa3aab063a7fdb9dc size: 529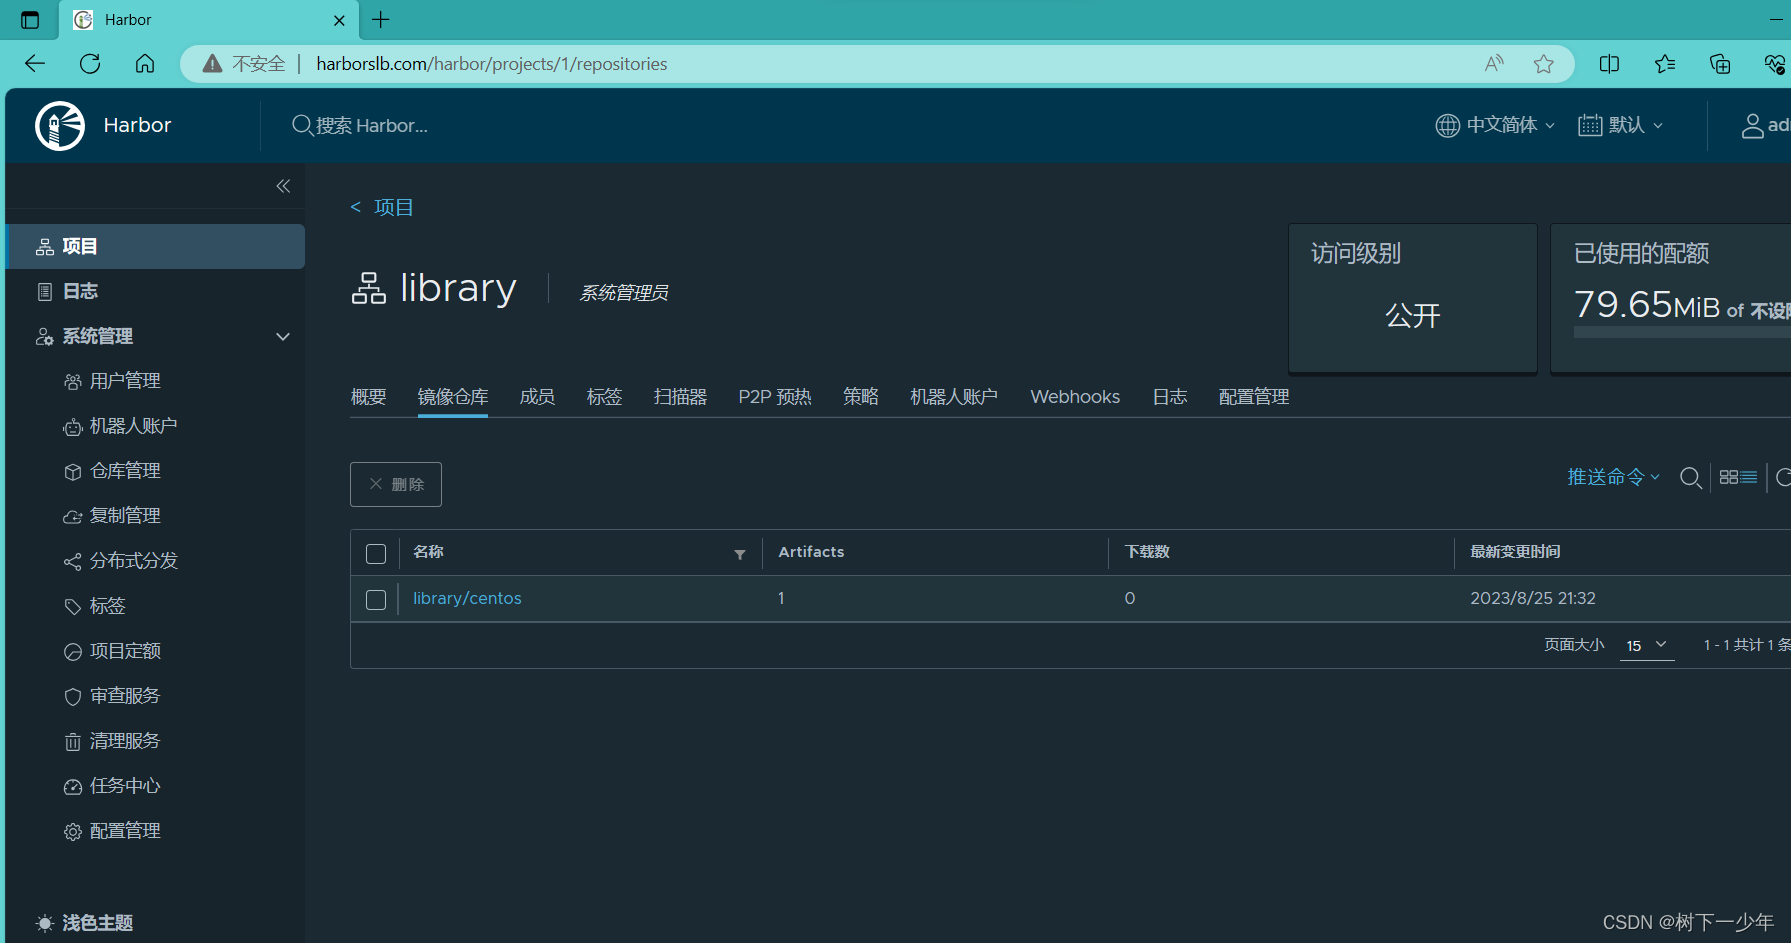
六.拉取验证
[root@localhost harbor]# docker pull harborslb.com/library/centos
Using default tag: latest
latest: Pulling from library/centos
Digest: sha256:a1801b843b1bfaf77c501e7a6d3f709401a1e0c83863037fa3aab063a7fdb9dc
Status: Image is up to date for harborslb.com/library/centos:latest
harborslb.com/library/centos:latest
[root@localhost harbor]# docker images
REPOSITORY                      TAG       IMAGE ID       CREATED         SIZE
nginx                           latest    eea7b3dcba7e   9 days ago      187MB
goharbor/harbor-exporter        v2.8.4    b8d33e28ec68   10 days ago     97.7MB
goharbor/redis-photon           v2.8.4    7b7324d651ca   10 days ago     120MB
goharbor/trivy-adapter-photon   v2.8.4    91d8e9f0b21a   10 days ago     464MB
goharbor/notary-server-photon   v2.8.4    a46f91560454   10 days ago     113MB
goharbor/notary-signer-photon   v2.8.4    da66bd8d944b   10 days ago     110MB
goharbor/harbor-registryctl     v2.8.4    805b38ca6bee   10 days ago     141MB
goharbor/registry-photon        v2.8.4    756769e94123   10 days ago     79MB
goharbor/nginx-photon           v2.8.4    375018db778b   10 days ago     116MB
goharbor/harbor-log             v2.8.4    8a2045fb24d2   10 days ago     124MB
goharbor/harbor-jobservice      v2.8.4    97808fc10f64   10 days ago     141MB
goharbor/harbor-core            v2.8.4    c26fcd0714d8   10 days ago     164MB
goharbor/harbor-portal          v2.8.4    4a8b0205c0f9   10 days ago     124MB
goharbor/harbor-db              v2.8.4    5b8af16d7420   10 days ago     174MB
goharbor/prepare                v2.8.4    bdbf974d86ce   10 days ago     166MB
mysql                           5.6       dd3b2a5dcb48   20 months ago   303MB
centos                          latest    5d0da3dc9764   23 months ago   231MB
harborslb.com/library/centos    latest    5d0da3dc9764   23 months ago   231MB
registry                        2.6.2     10b45af23ff3   3 years ago     28.5MB
owncloud                        latest    327bd201c5fb   4 years ago     618MB
七.过程中遇到的一些问题
1.Get "https://harborslb.com/v2/": http: server gave HTTP response to HTTPS client
检查/etc/docker/daemon.json文件的格式和参数是否正确,尤其是换行后添加“,”容易遗忘就导致安全仓库失败
{
"registry-mirrors": ["https://docker.mirrors.ustc.edu.cn"],
"insecure-registries": ["192.168.2.190"],
"insecure-registries": ["harborslb.com"]
}
2.unauthorized: unauthorized to access repository: library/centos, action: push: unauthorized to access repository: library/centos, action: push
可能是没有登录导致的,我登录了就解决了
[root@localhost harbor]# docker login http://harborslb.com  #使用刚才的用户和密码登录
Username: admin
Password:
WARNING! Your password will be stored unencrypted in /root/.docker/config.json.
Configure a credential helper to remove this warning. See
https://docs.docker.com/engine/reference/commandline/login/#credentials-store

Login Succeeded
3.在浏览器使用账号密码登录时报错核心服务不可用
我是重新运行此命令解决,在第八部分也涉及到了这个问题,我目前遇到的就是一个修改密码后,harbor服务与数据库中的密码不一致导致,敬请查看后文。
[root@localhost harbor]# docker-compose up -d4.启动docker报docker.service holdoff time over, scheduling restart
和第一个问题同样,检查那个文件格式参数
八.更改部署harbor的端口、用户名和密码
本部分为2024年6月补充,都是在我的harbor安装目录/usr/local/harbor下进行的,代码段或者主机名有所不同,原理一样,仅做参考。
[root@sulibao harbor]# ll
total 597568
drwxr-xr-x 3 root root      4096 Jun 16 19:11 common
-rw-r--r-- 1 root root      3639 Aug 15  2023 common.sh
-rw-r--r-- 1 root root         0 Jun 16 19:35 docker
-rw-r--r-- 1 root root      5834 Jun 16 19:54 docker-compose.yml
-rw-r--r-- 1 root root 611834153 Aug 15  2023 harbor.v2.8.4.tar.gz
-rw-r--r-- 1 root root     12500 Jun 16 19:51 harbor.yml
-rw-r--r-- 1 root root     12499 Aug 15  2023 harbor.yml.tmpl
-rwxr-xr-x 1 root root      2725 Aug 15  2023 install.sh
-rw-r--r-- 1 root root     11347 Aug 15  2023 LICENSE
-rwxr-xr-x 1 root root      1881 Aug 15  2023 prepare
1.更改harbor.yml文件
修改为85端口

此处修改主机登录密码和数据库登录密码
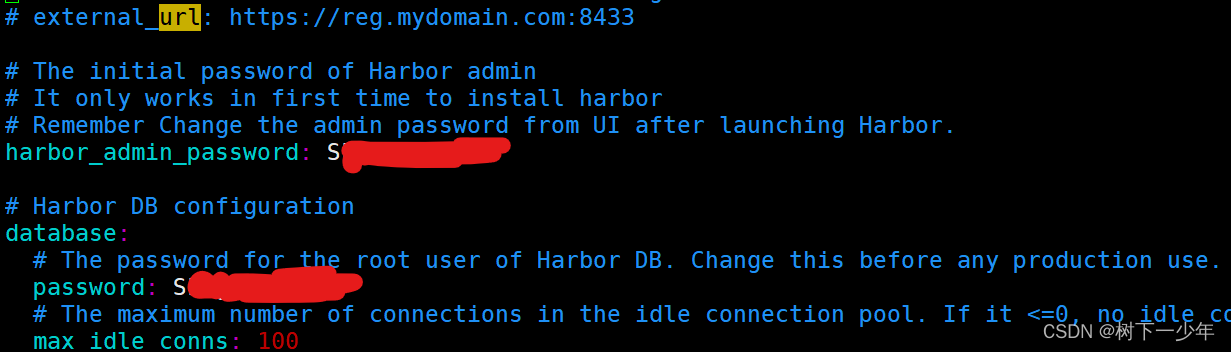
重新install和docker-compose up -d
[root@sulibao harbor]# ./prepare
[root@sulibao harbor]# ./install.sh
[root@sulibao harbor]# docker-compose up -d
2.需要进入harbor运行起来的容器进行修改(主要是harbor-db)
在刚才第一步最后这样改过密码后重新安装会出现harbor的核心服务不可用的情况,也就是他的harbor-core直接是一直restart的状态,此时我们需要进入容器将密码修改一致
[root@sulibao harbor]# docker exec -it harbor-db /bin/bash
postgres [ / ]$
postgres [ / ]$ psql -U postgres -d registry;
psql (13.12)
Type "help" for help.

registry=# alter user postgres with password 'xxxxxx';
#这里是将登录数据库的密码修改一致,和harbor.yml中的database-password的密码一致

registry=# update harbor_user set username='sulibao' where username='admin';
UPDATE 1
#修改登录名,将原来的admin修改为自己的用户名(用户名无法在harbor的浏览器web界面修改,只能在数据库中更改)

registry=# update harbor_user set password=md5('xxxxxx'),salt='' where username='sulibao';
UPDATE 1
#为该用户名修改密码(填写在括号内),该密码和harbor.yaml中的harbor_admin_password一致

[root@sulibao harbor]# docker-compose down
[root@sulibao harbor]# docker-compose up -d   #最后重新启动容器
最后使用你设备的ip:85进行访问,使用修改过后的用户名+密码登录即可。


 1684
1684


 被折叠的 条评论
为什么被折叠?
被折叠的 条评论
为什么被折叠?
 到【灌水乐园】发言


