


第1章 Android简介与环境搭建
1.1Android简介
1.2Android Studio 开发工具安装
- 双击下载好的Android Studio工具;
![]()
- 直接点击“Next”到安装处点击“Install”安装;(中途有:欢迎安装界面-->选择上虚拟设备-->安装路径)
- 等待安装完成后点“Next”如下图所示表示安装完成;
- 运行Android Studio;(由于是第一次安装,没有配置文件,直接点击“OK”)
- 点击“Cancel”;
- 会弹出欢迎界面,提示会提醒是否将使用情况统计信息发送到“Google”;(单纯让谷歌知道多了一位Android开发者)
- 来到欢迎配置Android Studio开发环境,点击”Next“直接到License Agreement[许可协议];(【Install Type:安装类型】[Standard:标准]-->【Select Ul Theme:选择UI主题】-->【Verify Settings:验证配置】)
- 阅读并同意安装组件的许可协议,点击“Finish”;([License Agreement:许可协议]、[Accept:接受])
- 下载完成后,点击“Finish”;
第2章 开发第一个Android程序
创建一个app项目
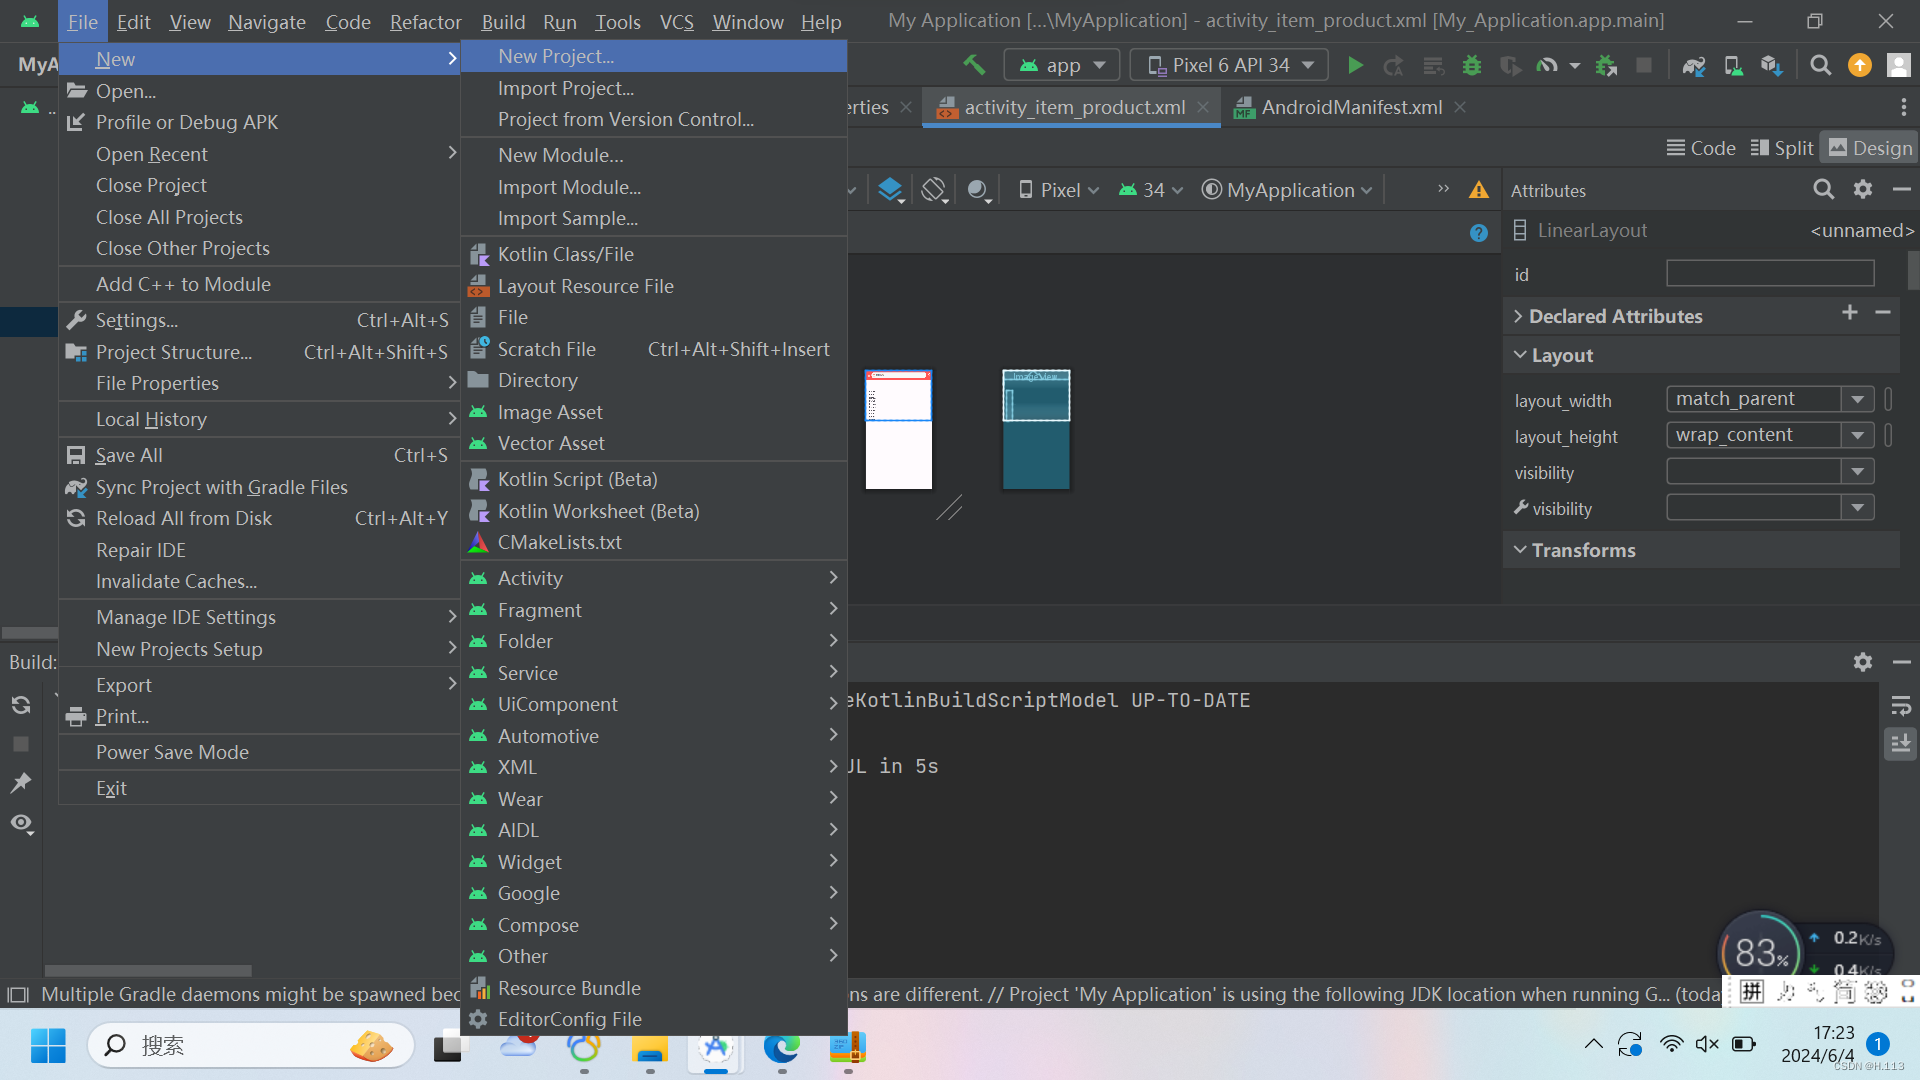
1、选择【File】> 【New】> 【New Project】
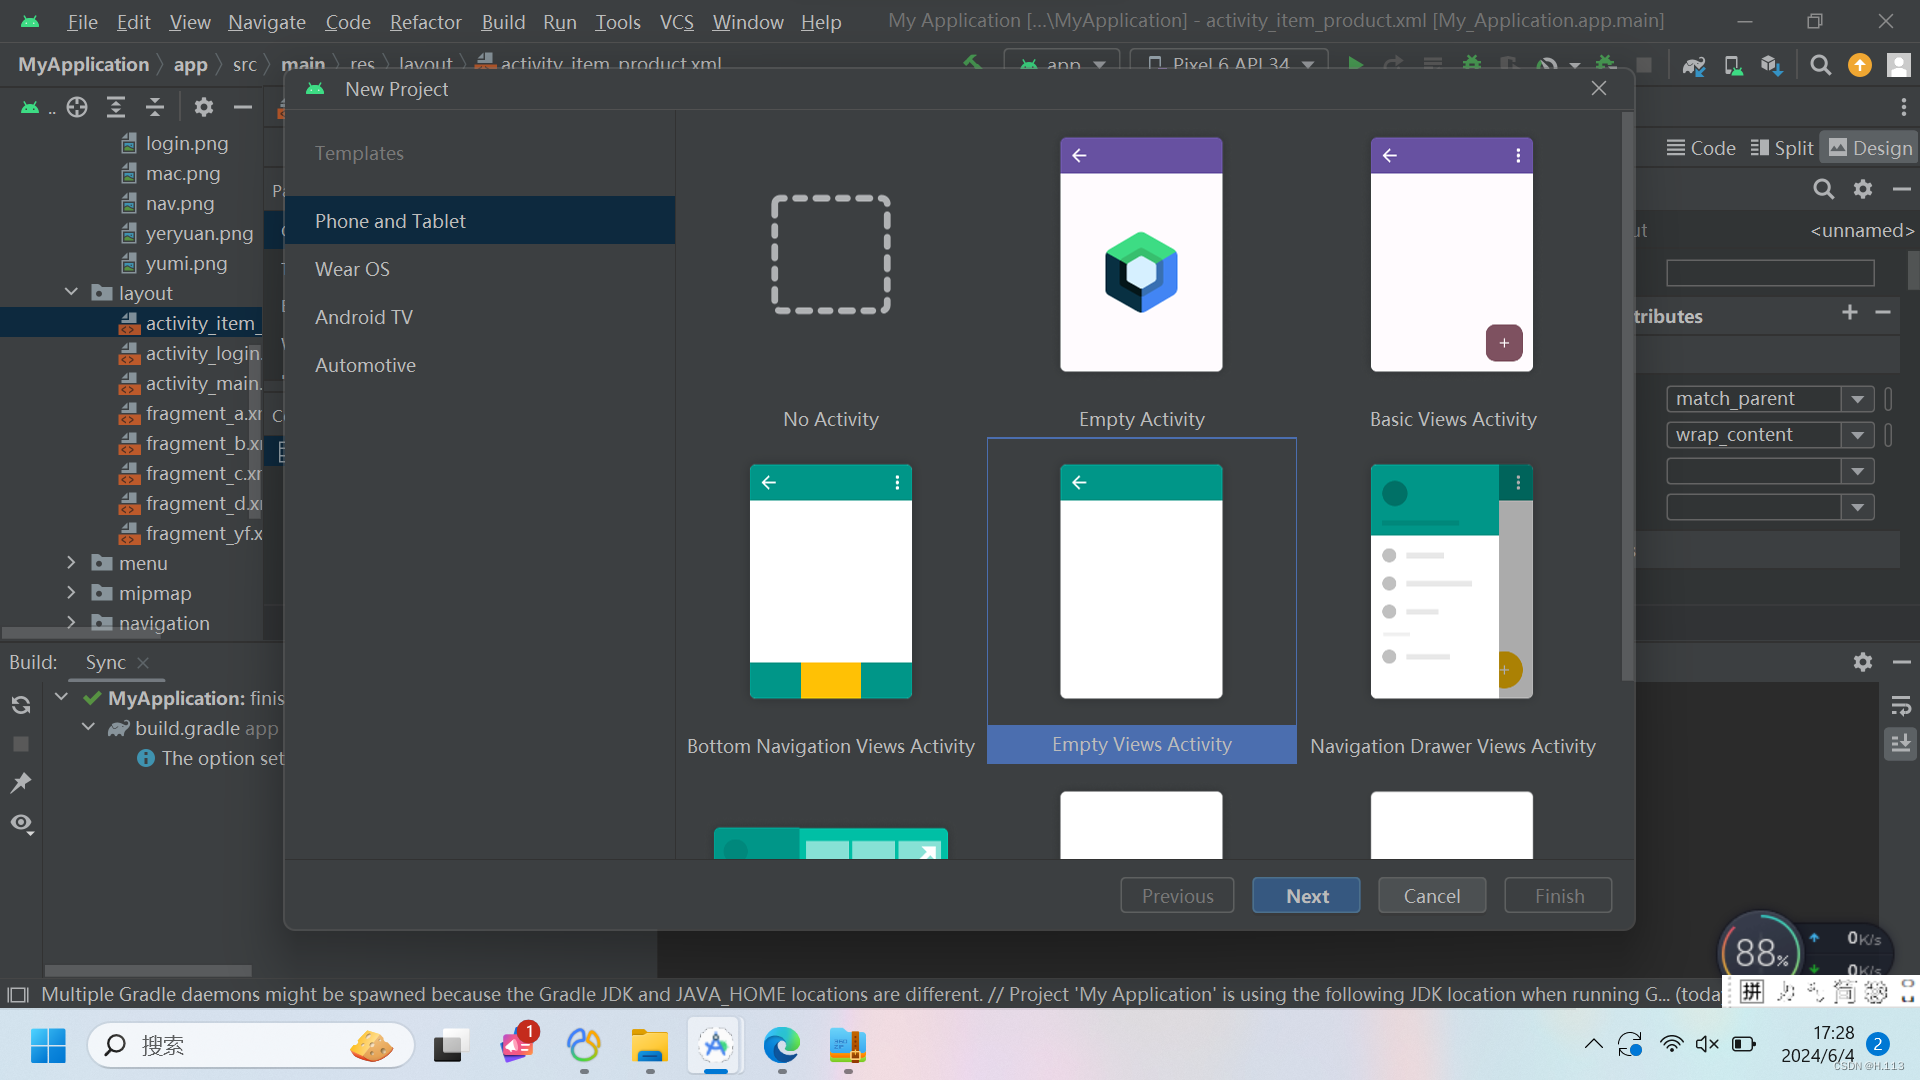
2、选择一个空模板【Empty Views Activity】
3、创建一个名为My App的项目,Language选择Java
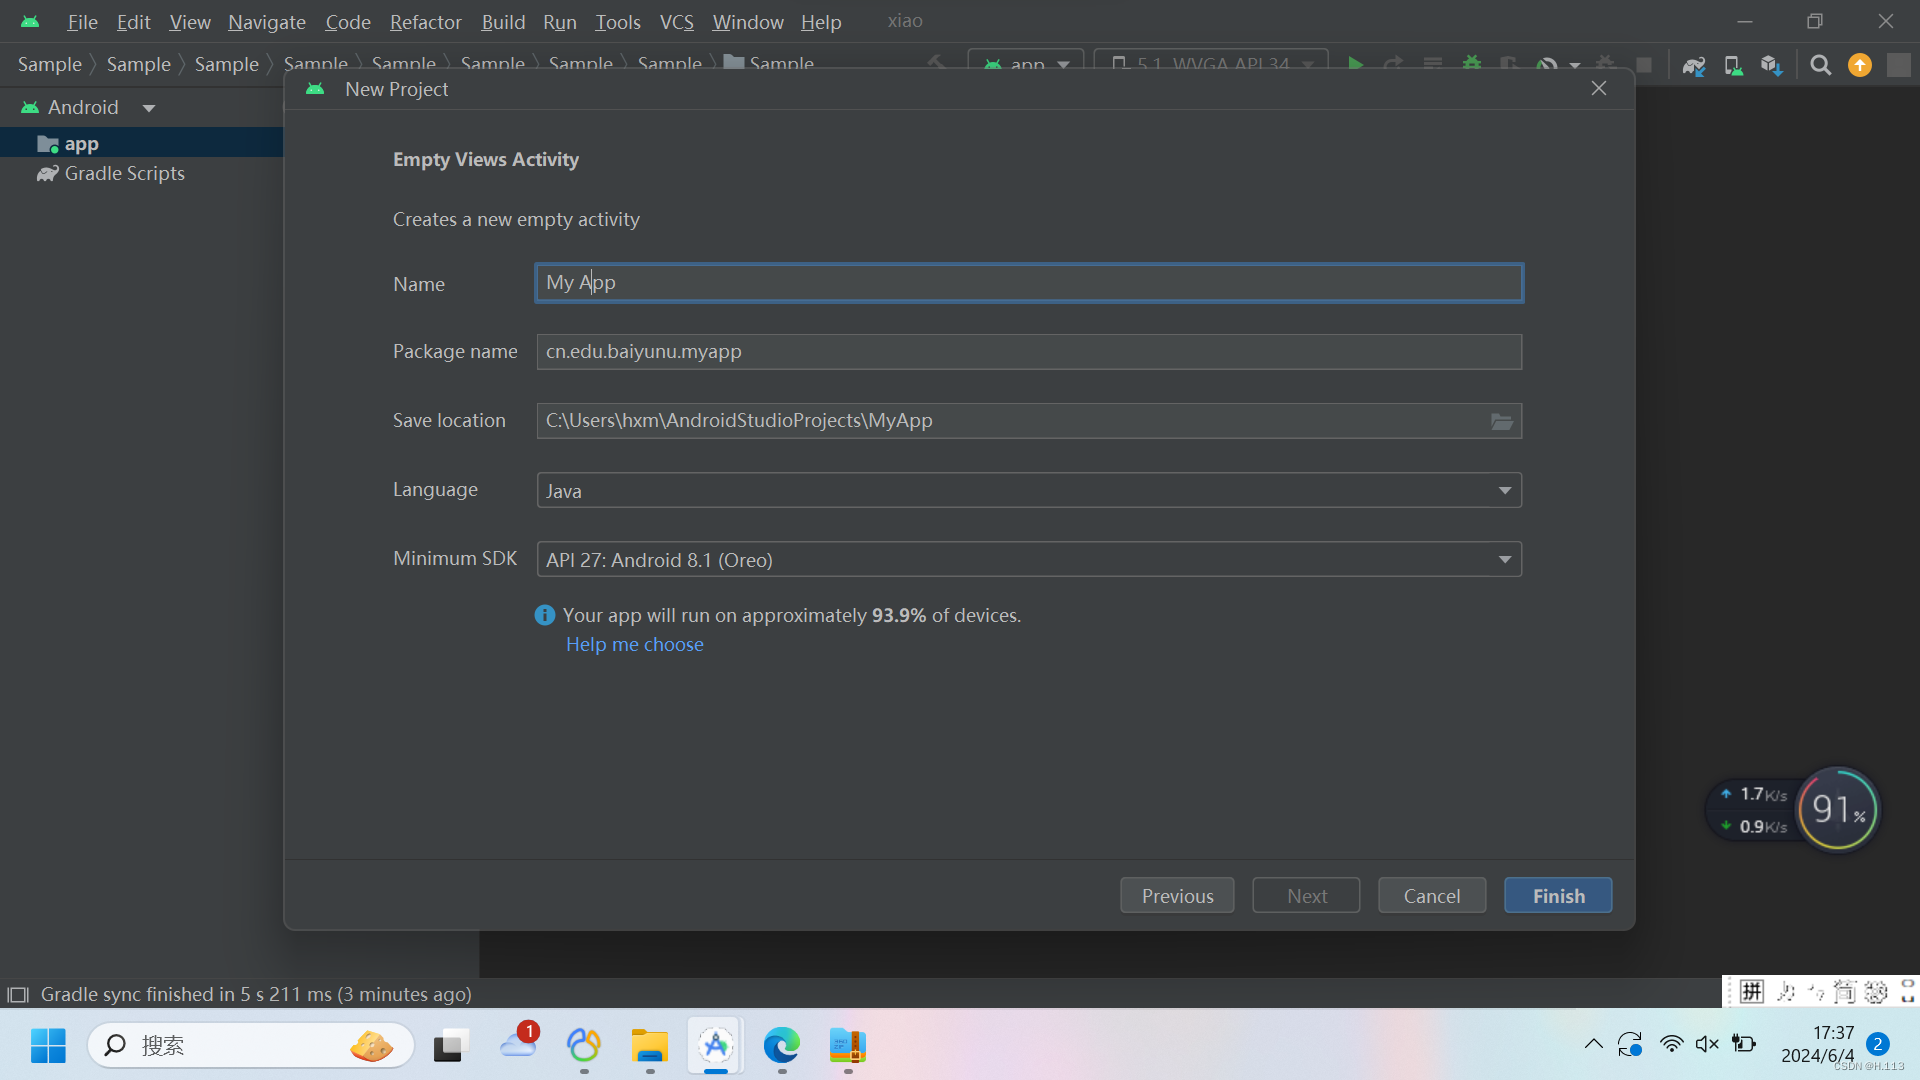
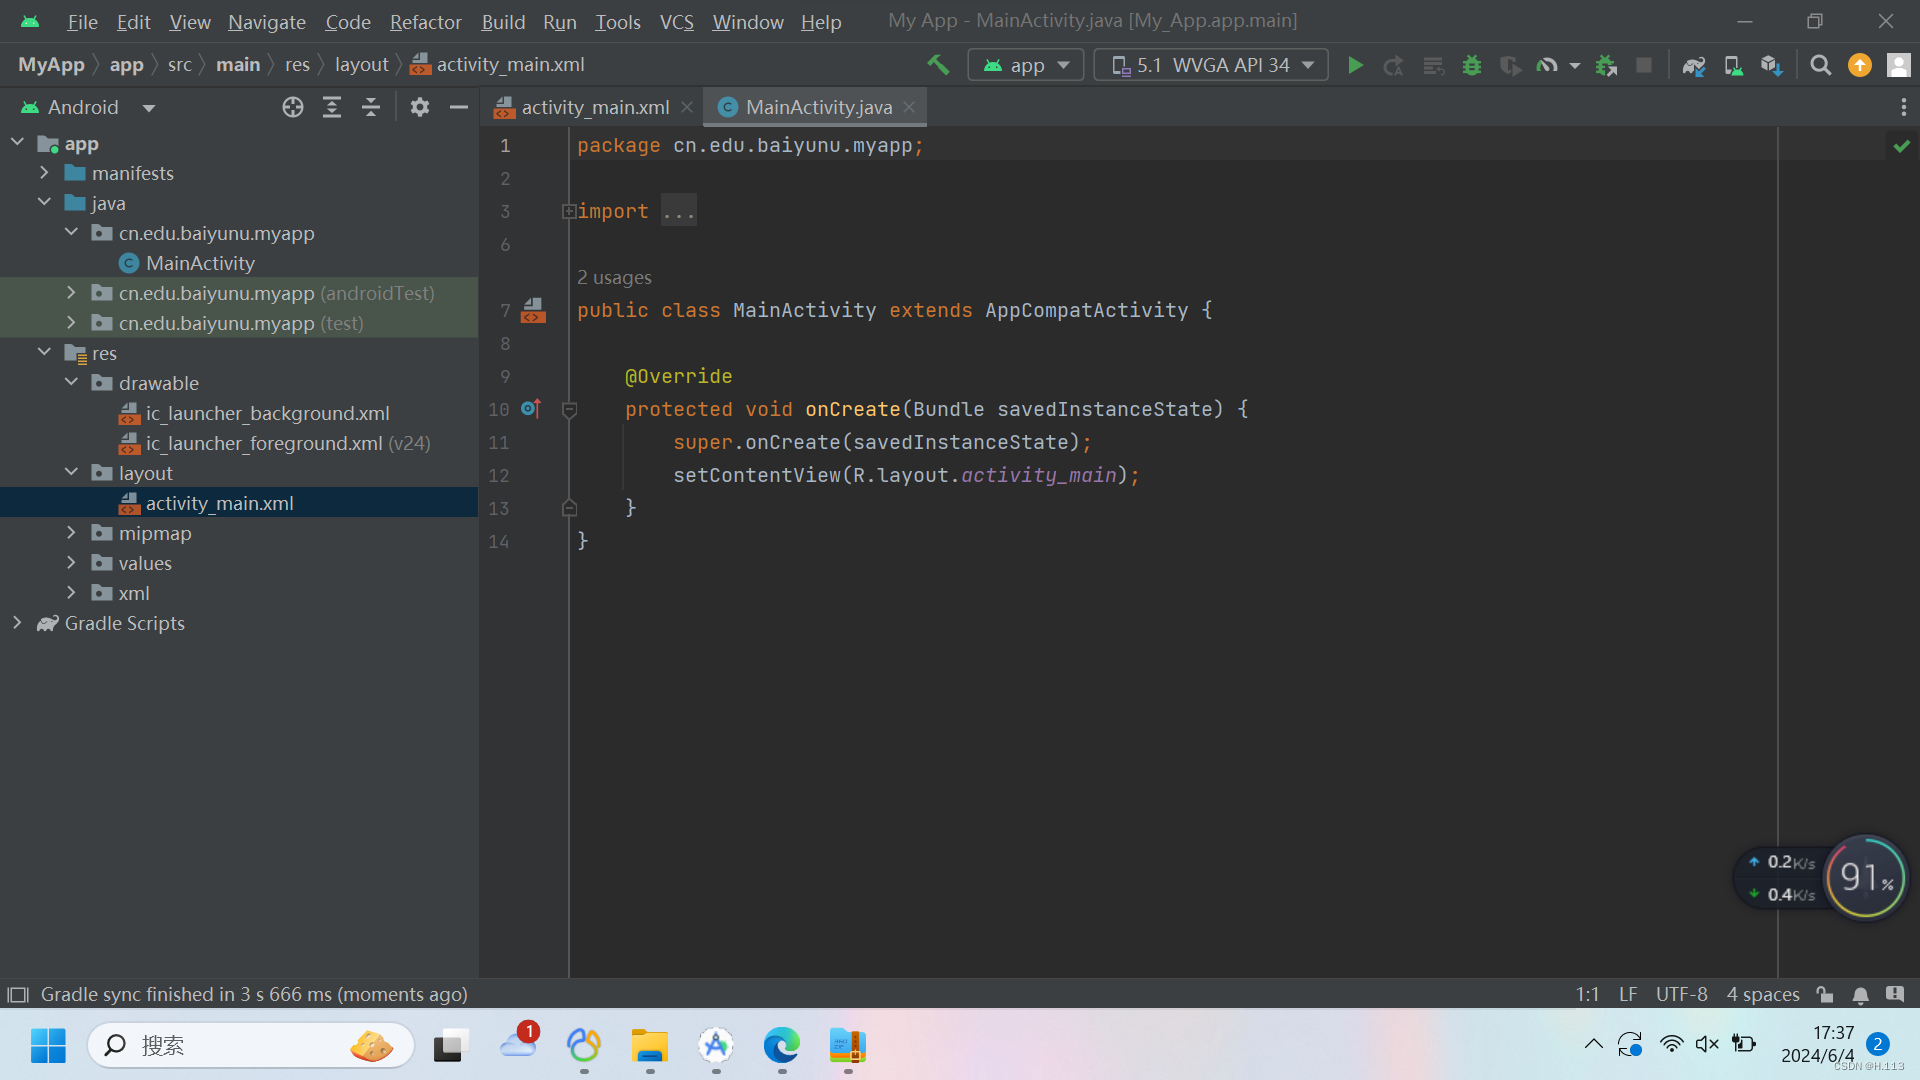
4、点击【Finsh】
第3章 Android的UI控件
3.1 TextView(文本框)
TextView作为Android最基础也是最常用的组件之一,他承担着文本的显示重任。要注意,其显示的文本内容是无法在界面直接被用户修改的。不过作为程序员,可以通过后台代码去修改TextView的内容和各项属性。另外要注意的是,TextView控件是需要放在容器里面的,比如LinearLayout容器(一般控件都要放在容器里面)。
| id | 设置一个组件id(唯一),通过findViewById()的方法获取到该对象,然后进行相关设置 |
| layout_width | 设置组件宽度 |
| layout_height | 设置组件高度 |
| text | 设置显示的文本内容 |
| background | 设置背景颜色(或背景图片) |
| textColor | 设置字体颜色 |
| textStyle | 设置字体样式 ,三个可选值:normal(无效果),bold(加粗),italic(斜体) |
| textSize | 字体大小,单位一般用sp |
| maxHeight | 设置文本框最大高度 |
| gravity | 内容的对齐方向 |
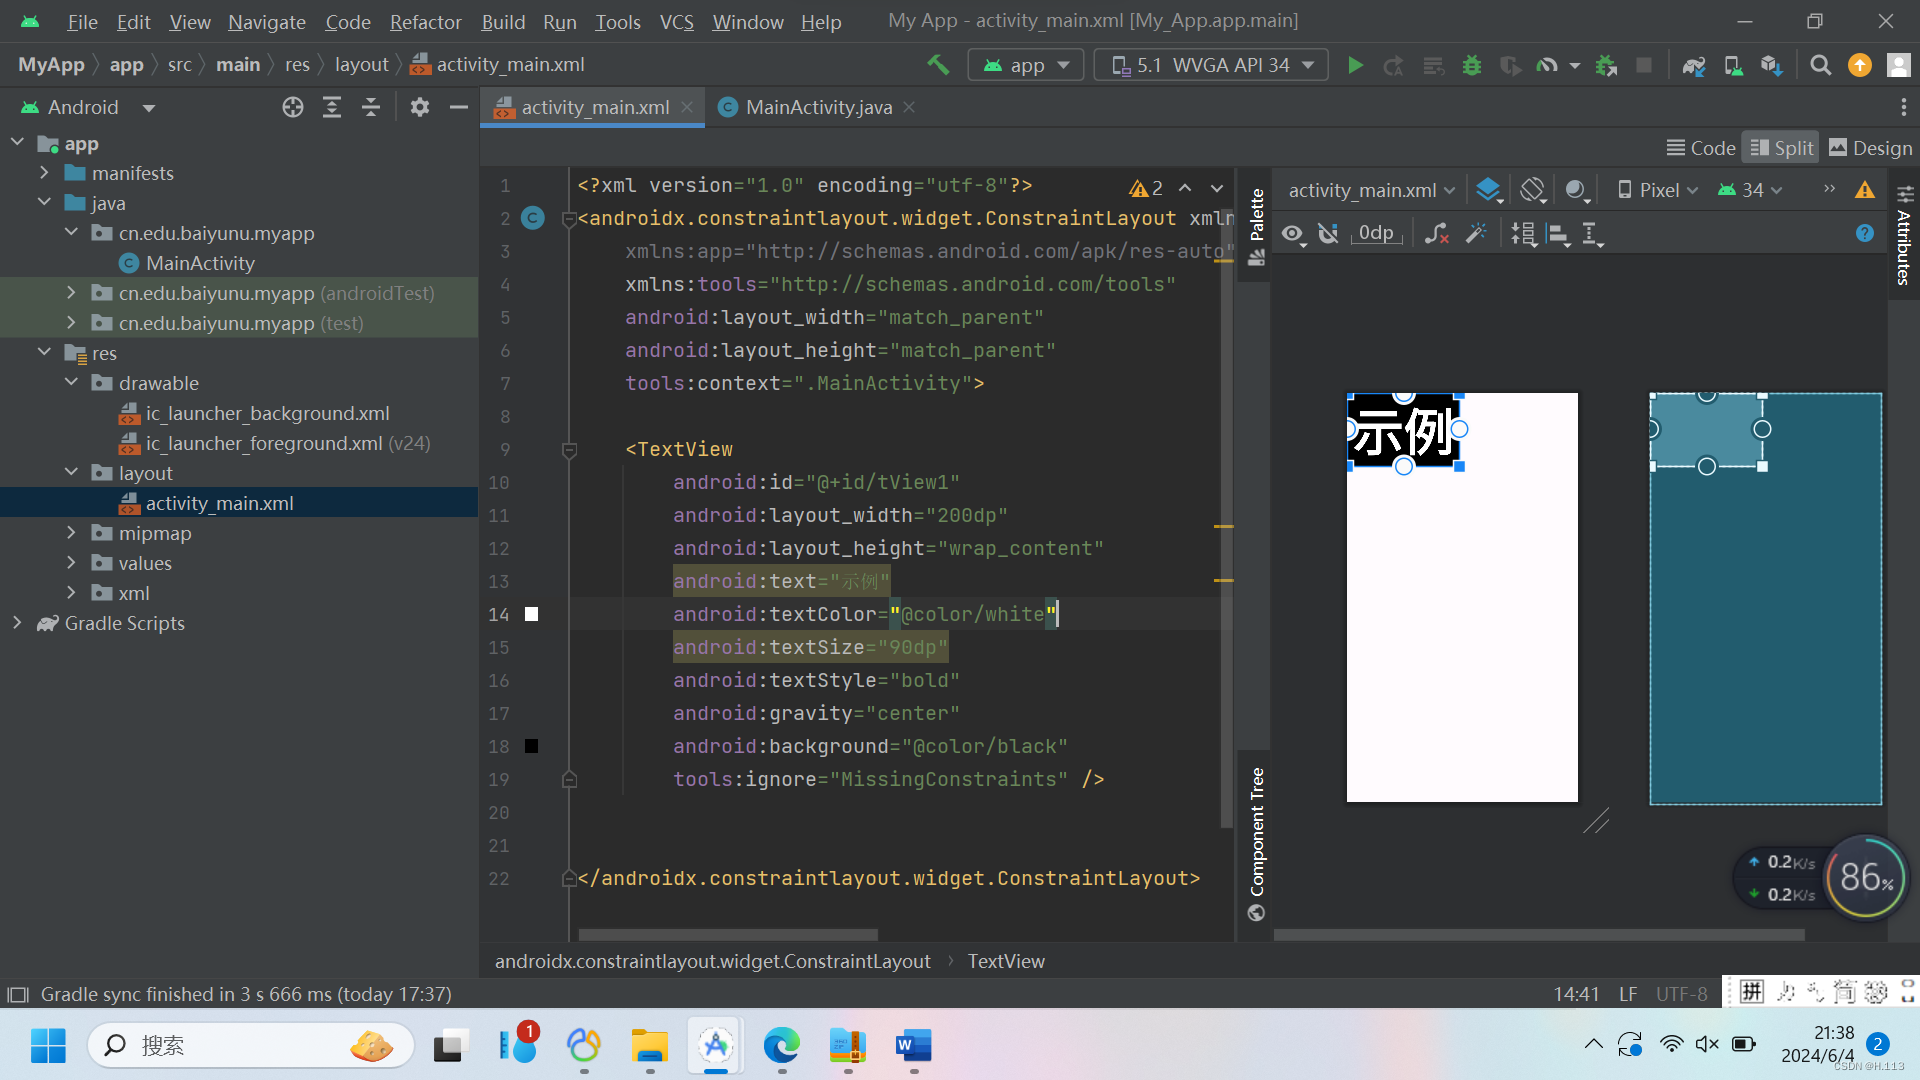
示例:
    <TextView
        android:id="@+id/tView1"
        android:layout_width="200dp"
        android:layout_height="wrap_content"
        android:text="示例"
        android:textColor="@color/white"
        android:textSize="90dp"
        android:textStyle="bold"
        android:gravity="center"
        android:background="@color/black"/>
3.2 Button(按钮)
常见的Button按钮:
- 单击事件:setOnClickListener()
- 长按事件:setOnLongClickListener()
- 触摸/移动事件:setOnTouchListener()
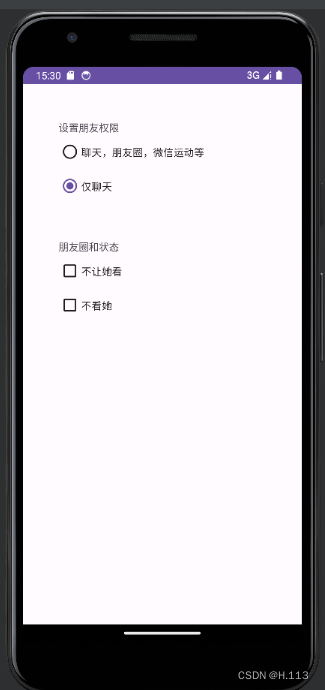
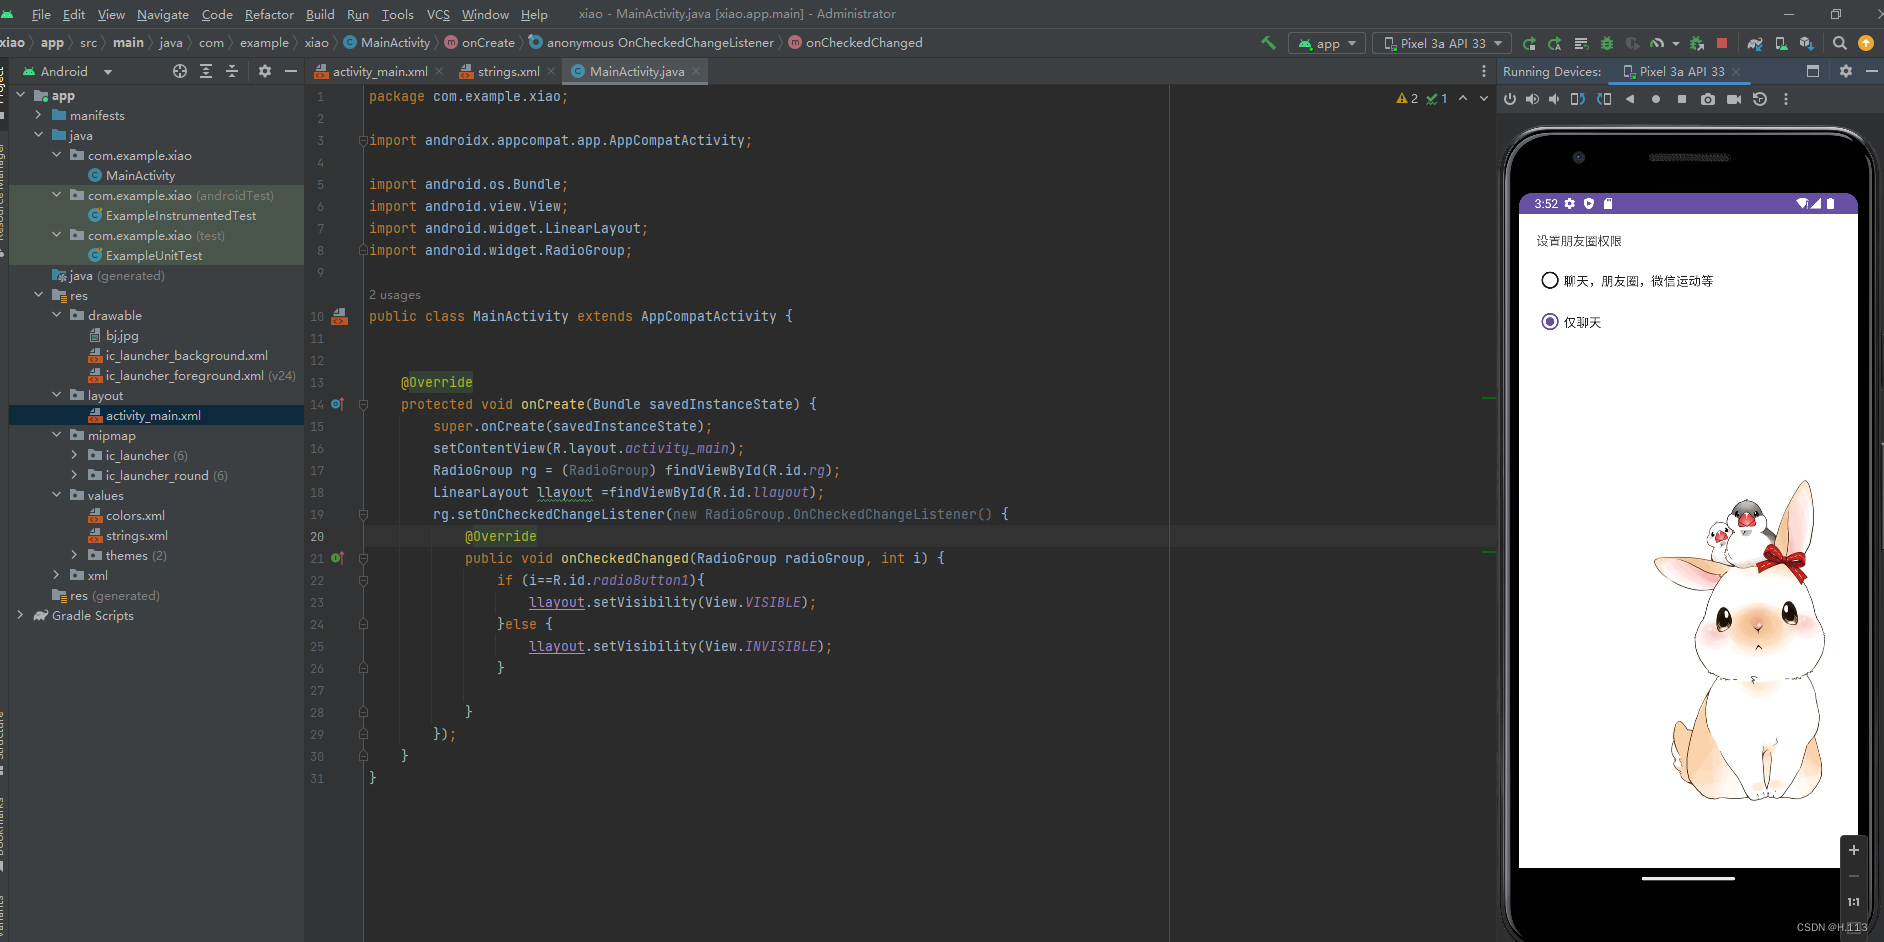
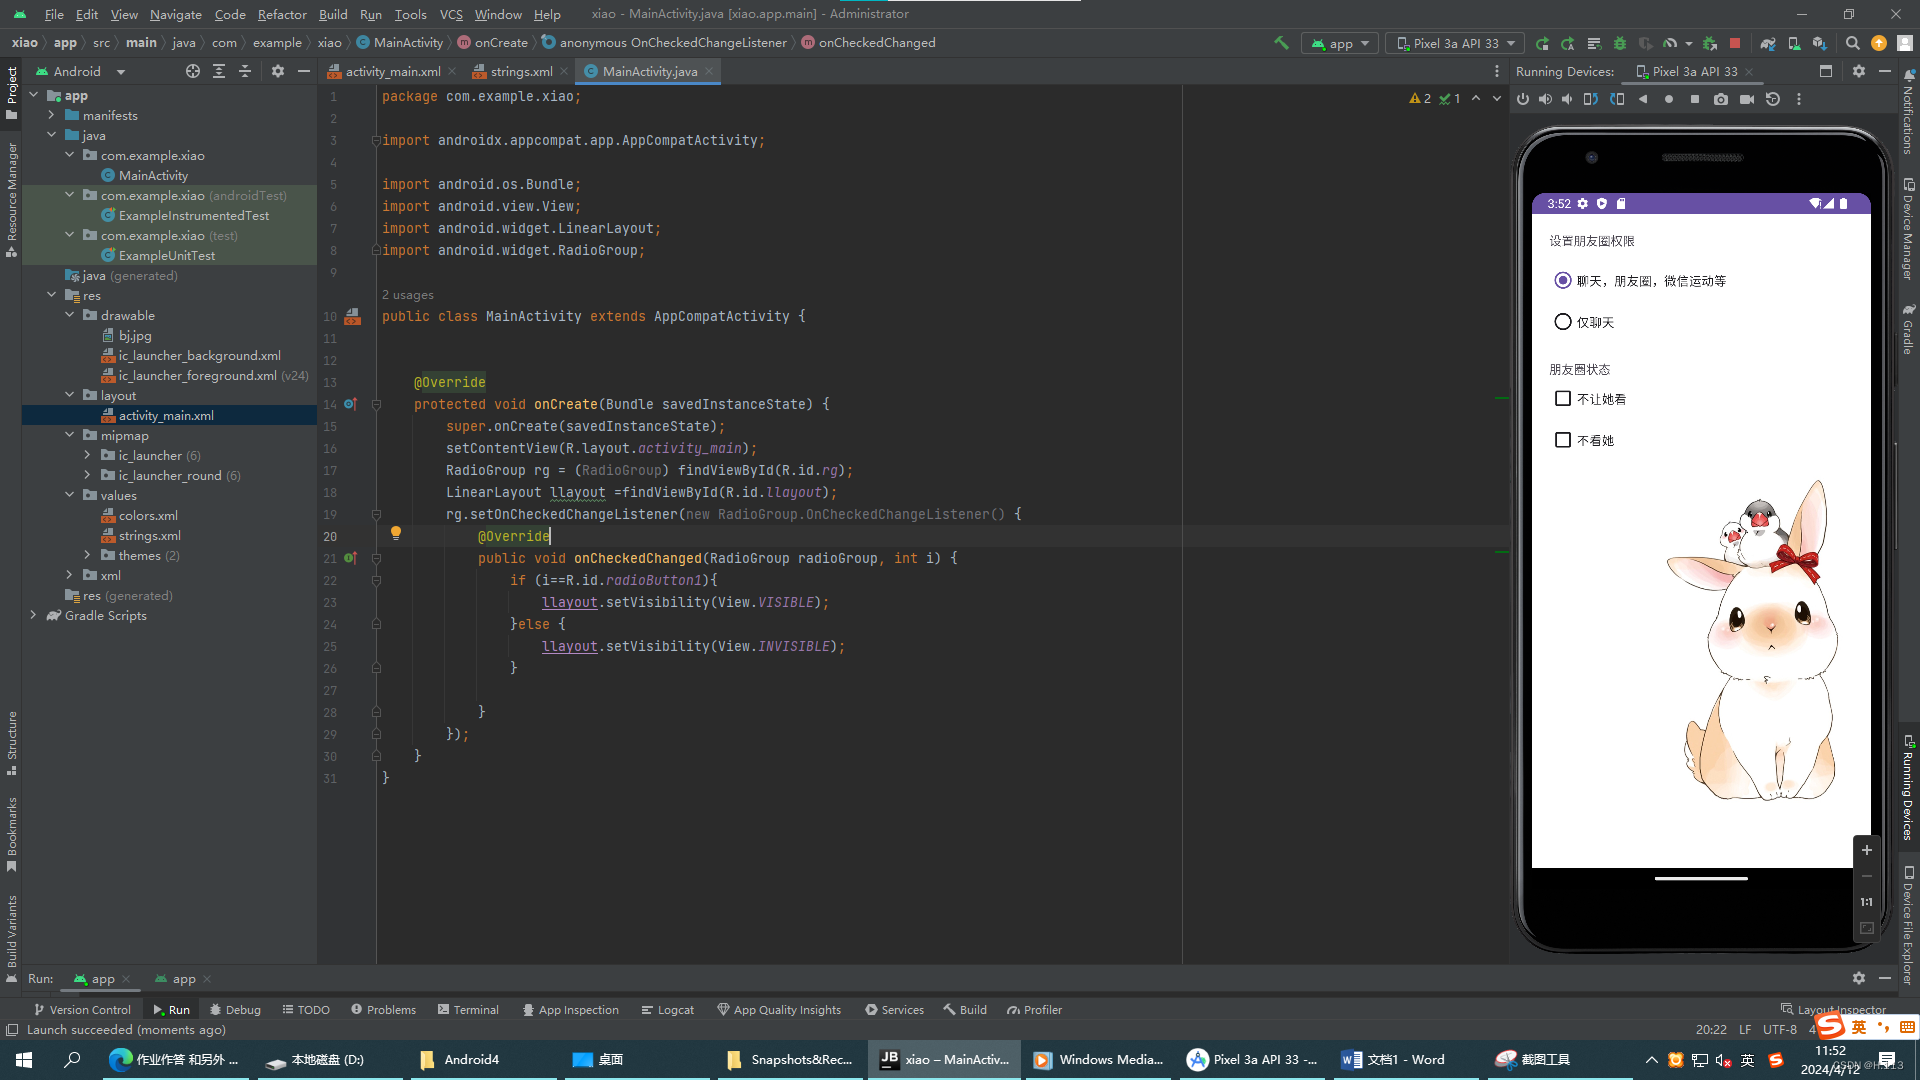
3.3 RadioButton与CheckBox
RadioButton和CheckBox是Android开发中常用的两种基本UI控件,用于实现用户的选择操作。以下是有关这两种控件的具体介绍:
- RadioButton(单选按钮):RadioButton通常用于在一组选项中只允许选择一个的情况。它的主要属性包括
android:id、android:layout_width、android:layout_height、android:text等,用于定义RadioButton的标识、宽高和显示的文字。RadioButton通常需要放在RadioGroup中使用,以确保其单选的特性。通过setOnCheckedChangeListener方法可以为RadioButton设置监听器,以获取选中状态变化的事件。 - CheckBox(复选框):CheckBox允许用户在多个选项中进行选择,每个选择项都是独立的,主要通过
android:checked属性来设置或获取其选中状态。CheckBox的属性与RadioButton类似,也可以通过setOnCheckedChangeListener方法来监听状态变化。
在使用这两个控件时,需要注意以下几点:
- 为每个RadioButton提供一个唯一的
id,这是实现单选功能的前提。 - 可以通过自定义样式来改变RadioButton和CheckBox的外观,比如使用
selector资源来设置不同的状态下的背景或图片。 - 对于CheckBox,可以在点击其他控件(如按钮)时遍历所有CheckBox,判断并处理选中状态。
- 在ListView等滚动视图中使用RadioButton和CheckBox时,可能会遇到错位或状态保存问题,需要特别注意。
应用示例:
代码示例:
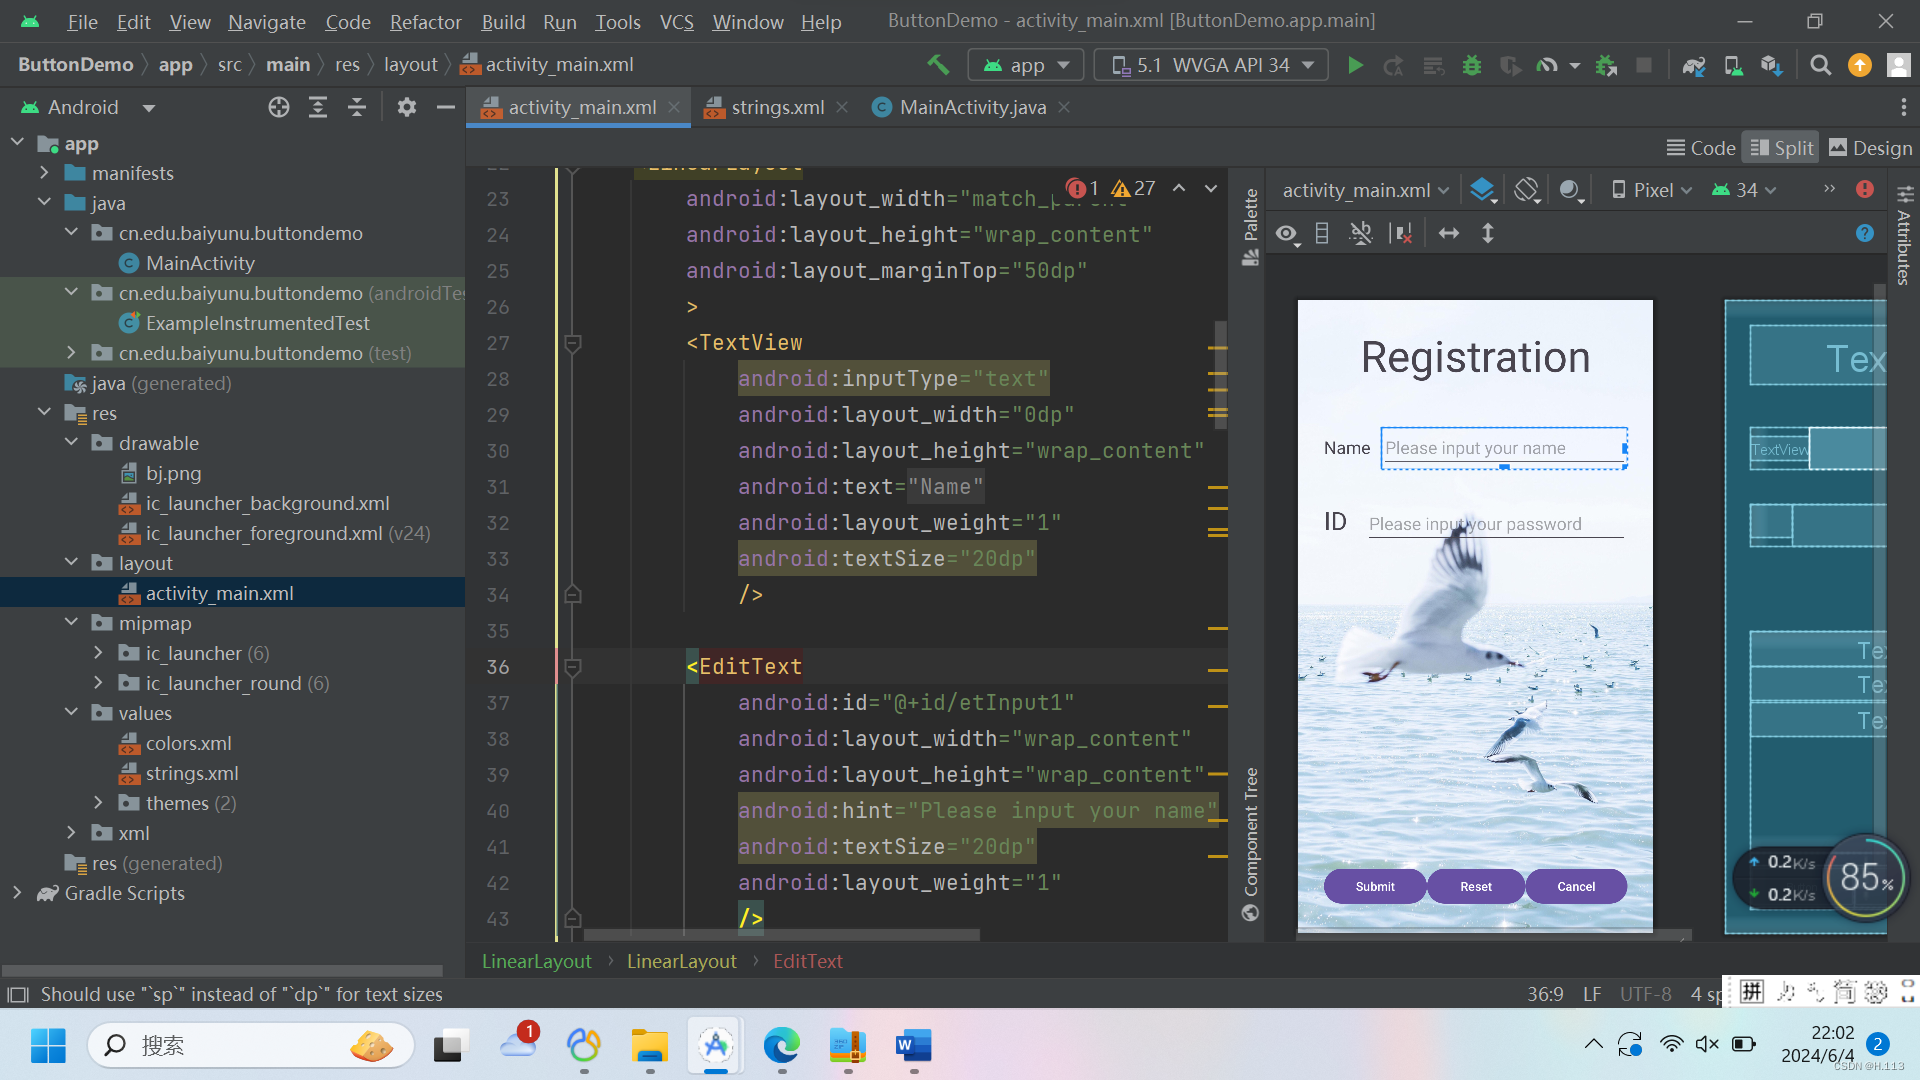
3.4EditText(输入框)
android:hint输入提示
android:textColorHint输入提示文字的颜色
android:inputType输入类型
android:drawableXxoxx在输入框的指定方位添加图片
android:drawablePadding设置图片与输入内容的间距
android:paddingXxxx设置内容与边框的间距
android:background背景色
XML代码:
<EditText
            android:id="@+id/etInput1"
            android:layout_width="wrap_content"
            android:layout_height="wrap_content"
            android:hint="Please input your name"
            android:textSize="20dp"
            android:layout_weight="1"
            />
示例:
3.5 Fragment (碎片)
Fragment是Android开发中用于创建动态、模块化用户界面的重要组成部分。Fragment作为Android 3.0(API级别11)引入的概念,提供了一种更加灵活的方式来构建和管理系统的用户界面。
-
定义与目的
- 定义:Fragment是依赖于Activity的,不能独立存在的组件。它表示Activity界面中的一个模块或“碎片”,拥有自己的生命周期和接收输入事件的能力。
- 目的:Fragment主要用于优化不同屏幕尺寸设备的用户体验。通过使用Fragment,开发者可以更轻松地为手机和平板等设备设计和实现不同的布局,从而提升应用的适应性和灵活性。
-
特点与优势
- 模块化:Fragment允许开发者将Activity分解成多个独立的模块,每个模块负责一部分用户界面和逻辑。这种模块化的设计使得代码更加清晰和可维护。
- 重用性:同一个Fragment可以被多个Activity使用,这有助于减少重复代码,提高开发效率。
- 适配性:Fragment能够根据屏幕尺寸和方向自动调整布局,使应用能够更好地适应不同的设备形态。
-
生命周期
- Fragment的生命周期与Activity相似,但更为复杂。它包括了onAttach()、onCreate()、onCreateView()、onActivityCreated()、onStart()、onResume()、onPause()、onStop()、onDestroyView()、onDestroy()和onDetach()等阶段。理解这些生命周期方法对于正确管理Fragment的状态和资源至关重要。
-
使用方式
- 静态注册:通过在Activity的布局文件中使用
<fragment>标签直接声明Fragment。 - 动态添加:在Activity执行过程中,通过编程方式添加、替换或删除Fragment。这种方式提供了更高的灵活性,允许在运行时根据条件改变界面的结构和内容。
- 静态注册:通过在Activity的布局文件中使用
应用例子:如项目实验4
1、实现一个登录页面,输入账号密码后按下登录按钮可跳转到主页面;
登录页面:activity_login.xml
<LinearLayout
    xmlns:android="http://schemas.android.com/apk/res/android"
    android:layout_width="match_parent"
    android:layout_height="match_parent"
    android:orientation="vertical"
    android:layout_marginTop="200dp"
    android:background="@drawable/login"

    >
    <TextView
        android:layout_width="wrap_content"
        android:layout_height="wrap_content"
        android:text="login"
        android:textSize="40dp"
        android:layout_gravity="center"
        />

    <EditText
        android:id="@+id/et_username"
        android:layout_width="match_parent"
        android:layout_height="wrap_content"
        android:hint="用户名"
        android:layout_marginBottom="40dp"
        />

    <EditText
        android:id="@+id/et_password"
        android:layout_width="match_parent"
        android:layout_height="wrap_content"
        android:hint="密码"
        android:inputType="textPassword"
        android:layout_marginBottom="40dp"/>

    <Button
        android:id="@+id/btn_login"
        android:layout_width="wrap_content"
        android:layout_height="wrap_content"
        android:layout_gravity="center"
        android:text="登录" />


</LinearLayout>
2. 通过setOnClickListener监听
package cn.edu.baiyunu.myapplication;

import androidx.appcompat.app.AppCompatActivity;

import android.content.Intent;
import android.os.Bundle;
import android.text.TextUtils;
import android.view.View;
import android.widget.Button;
import android.widget.EditText;
import android.widget.Toast;

public class LoginActivity extends AppCompatActivity {
    private EditText etUsername;
    private EditText etPassword;
    private Button btnLogin;

    @Override
    protected void onCreate(Bundle savedInstanceState) {
        super.onCreate(savedInstanceState);
        setContentView(R.layout.activity_login);

        etUsername = findViewById(R.id.et_username);
        etPassword = findViewById(R.id.et_password);
        btnLogin = findViewById(R.id.btn_login);

        btnLogin.setOnClickListener(new View.OnClickListener() {
            @Override
            public void onClick(View v) {
                String username = etUsername.getText().toString();
                String password = etPassword.getText().toString();

                if (!TextUtils.isEmpty(username) && !TextUtils.isEmpty(password)) {
                    Intent intent = new Intent(LoginActivity.this, MainActivity.class);
                    intent.putExtra("username", username);
                    intent.putExtra("password", password);
                    startActivity(intent);
                } else {
                    Toast.makeText(LoginActivity.this, "用户名或密码不能为空", Toast.LENGTH_SHORT).show();
                }
            }
        });
    }
}
3.创建fragment文件
【layout】右键 > 【New】 > 【Fragment】 > 【Fragment(Blank)】
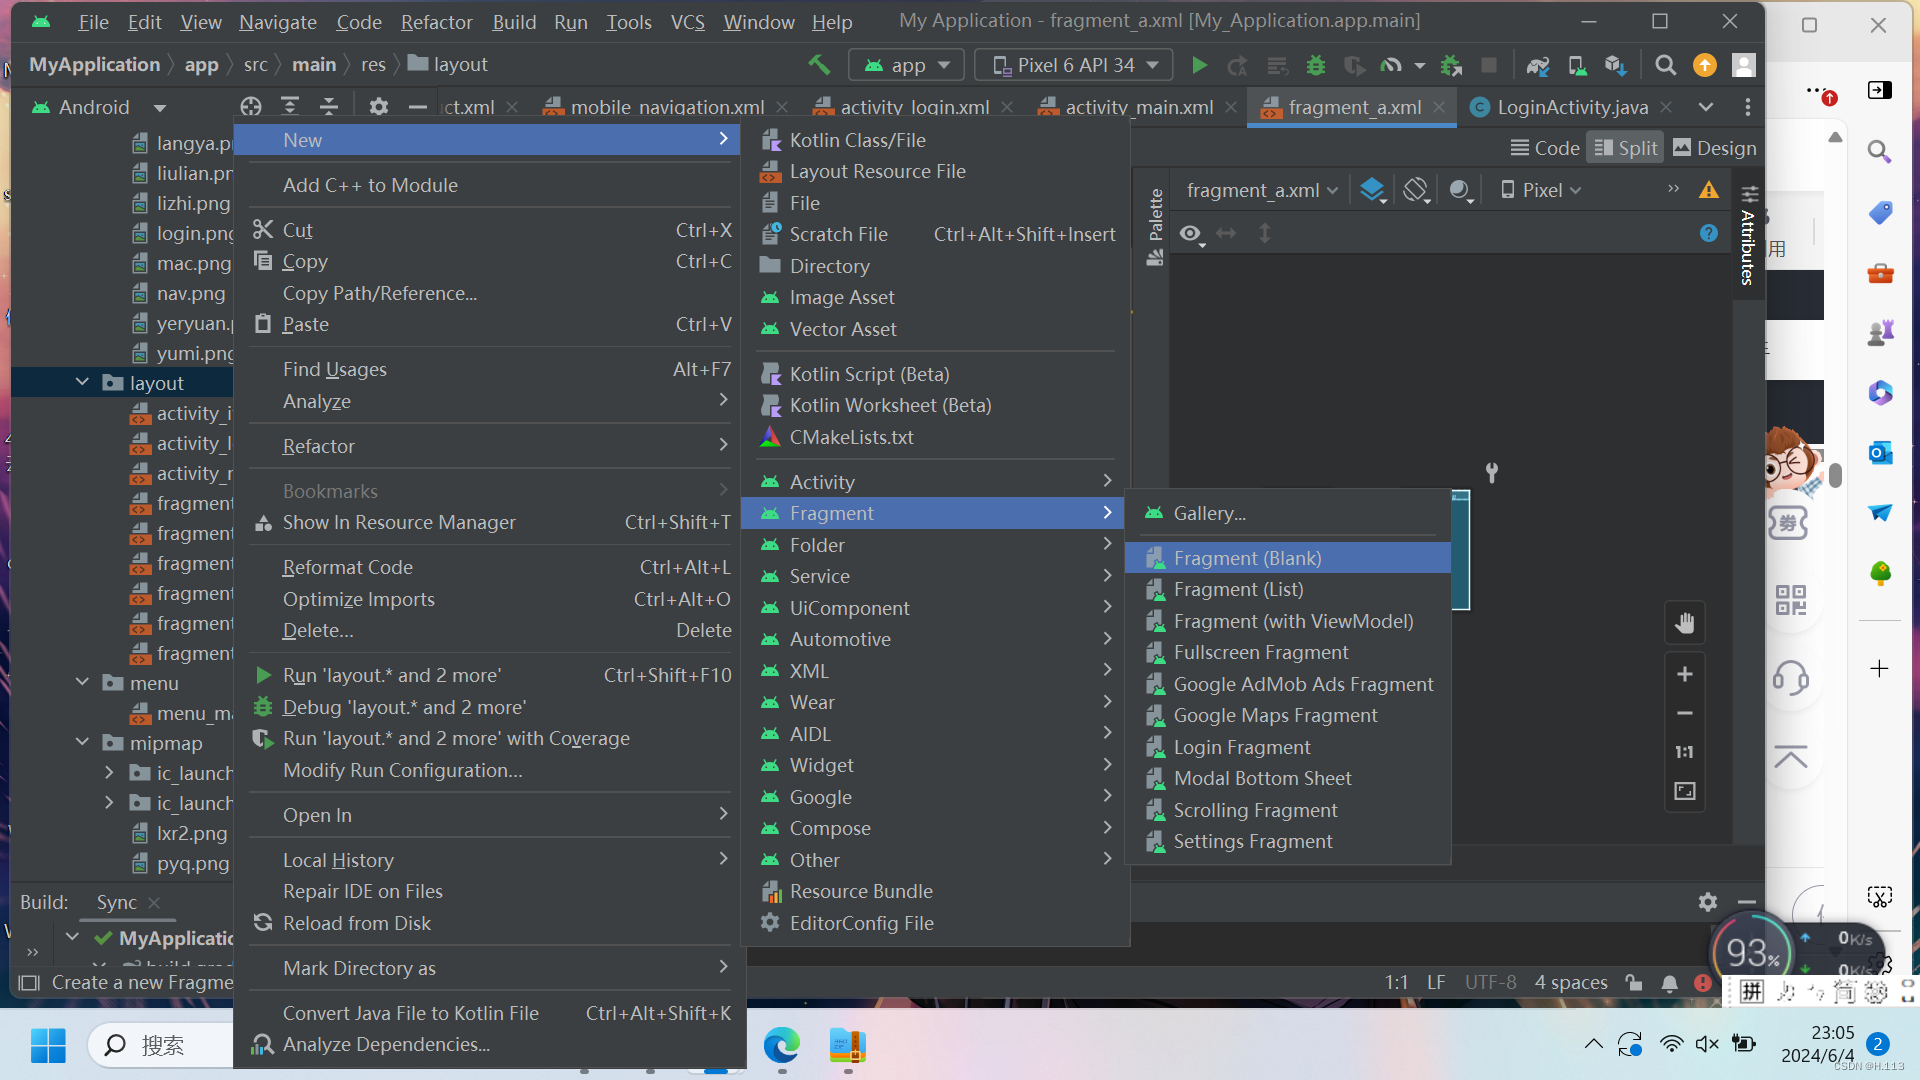
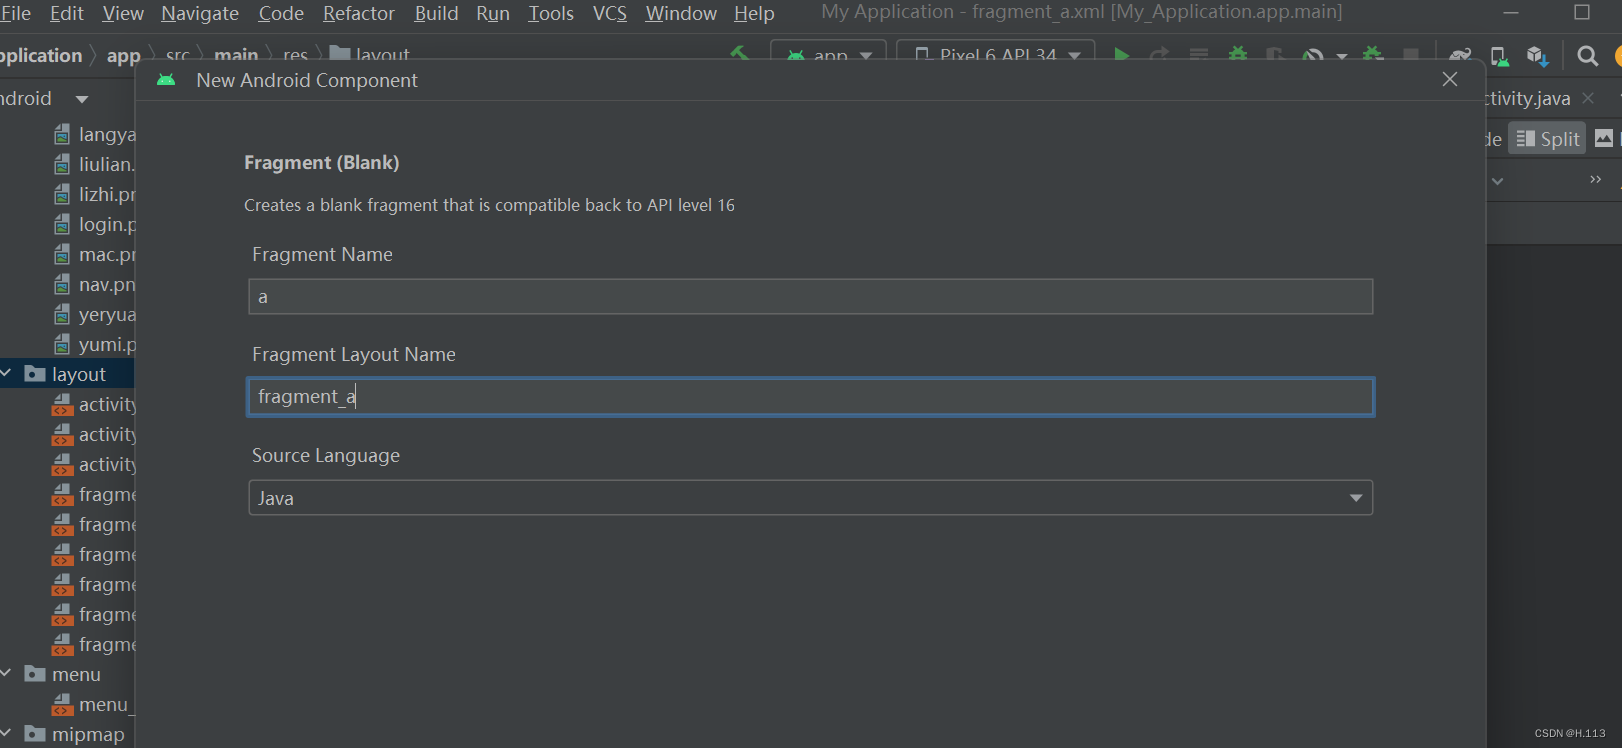
以此类推创建fragment_b、fragment_c、fragment_d
4. 创建导航菜单activity_item_product.xml
<?xml version="1.0" encoding="utf-8"?>
<LinearLayout xmlns:android="http://schemas.android.com/apk/res/android"
    android:layout_width="match_parent"
    android:layout_height="wrap_content"
    android:orientation="vertical"
    android:adjustViewBounds="true"

   >
    <ImageView
        android:id="@+id/product_image"
        android:layout_width="wrap_content"
        android:layout_height="wrap_content"
        android:adjustViewBounds="true"
        android:background="@drawable/nav"

        />
    <TextView
        android:id="@+id/product_name"
        android:layout_width="wrap_content"
        android:layout_height="wrap_content"
        android:textSize="16sp"
        android:textStyle="bold"

        />

    <TextView
        android:id="@+id/product_price"
        android:layout_width="wrap_content"
        android:layout_height="wrap_content"
        android:textColor="@color/my_color"
        android:textSize="30sp"/>

    <androidx.recyclerview.widget.RecyclerView

        android:id="@+id/recycler_view"
        android:layout_width="wrap_content"
        android:layout_height="wrap_content"
        android:layout_marginLeft="20dp"
        android:layout_marginRight="20dp"
        />

</LinearLayout>
5、在项目的res/menu目录下,创建一个名为menu_main.xml的文件,用于定义底部导航栏的菜单项。
<menu xmlns:android="http://schemas.android.com/apk/res/android">
    <item
        android:id="@+id/menu_home"
        android:icon="@mipmap/xx"
        android:title="首页"

        />
    <item
        android:id="@+id/menu_message"
        android:icon="@mipmap/wd"
        android:title="逛一逛" />
    <item
        android:id="@+id/menu_yf"
        android:icon="@mipmap/yf"
        android:title="TODO" />
    <item
        android:id="@+id/menu_contact"
        android:icon="@mipmap/pyq"
        android:title="购物车" />
    <item
        android:id="@+id/menu_my"
        android:icon="@mipmap/lxr2"
        android:title="我的" />
</menu>
6、创建navigation文件夹
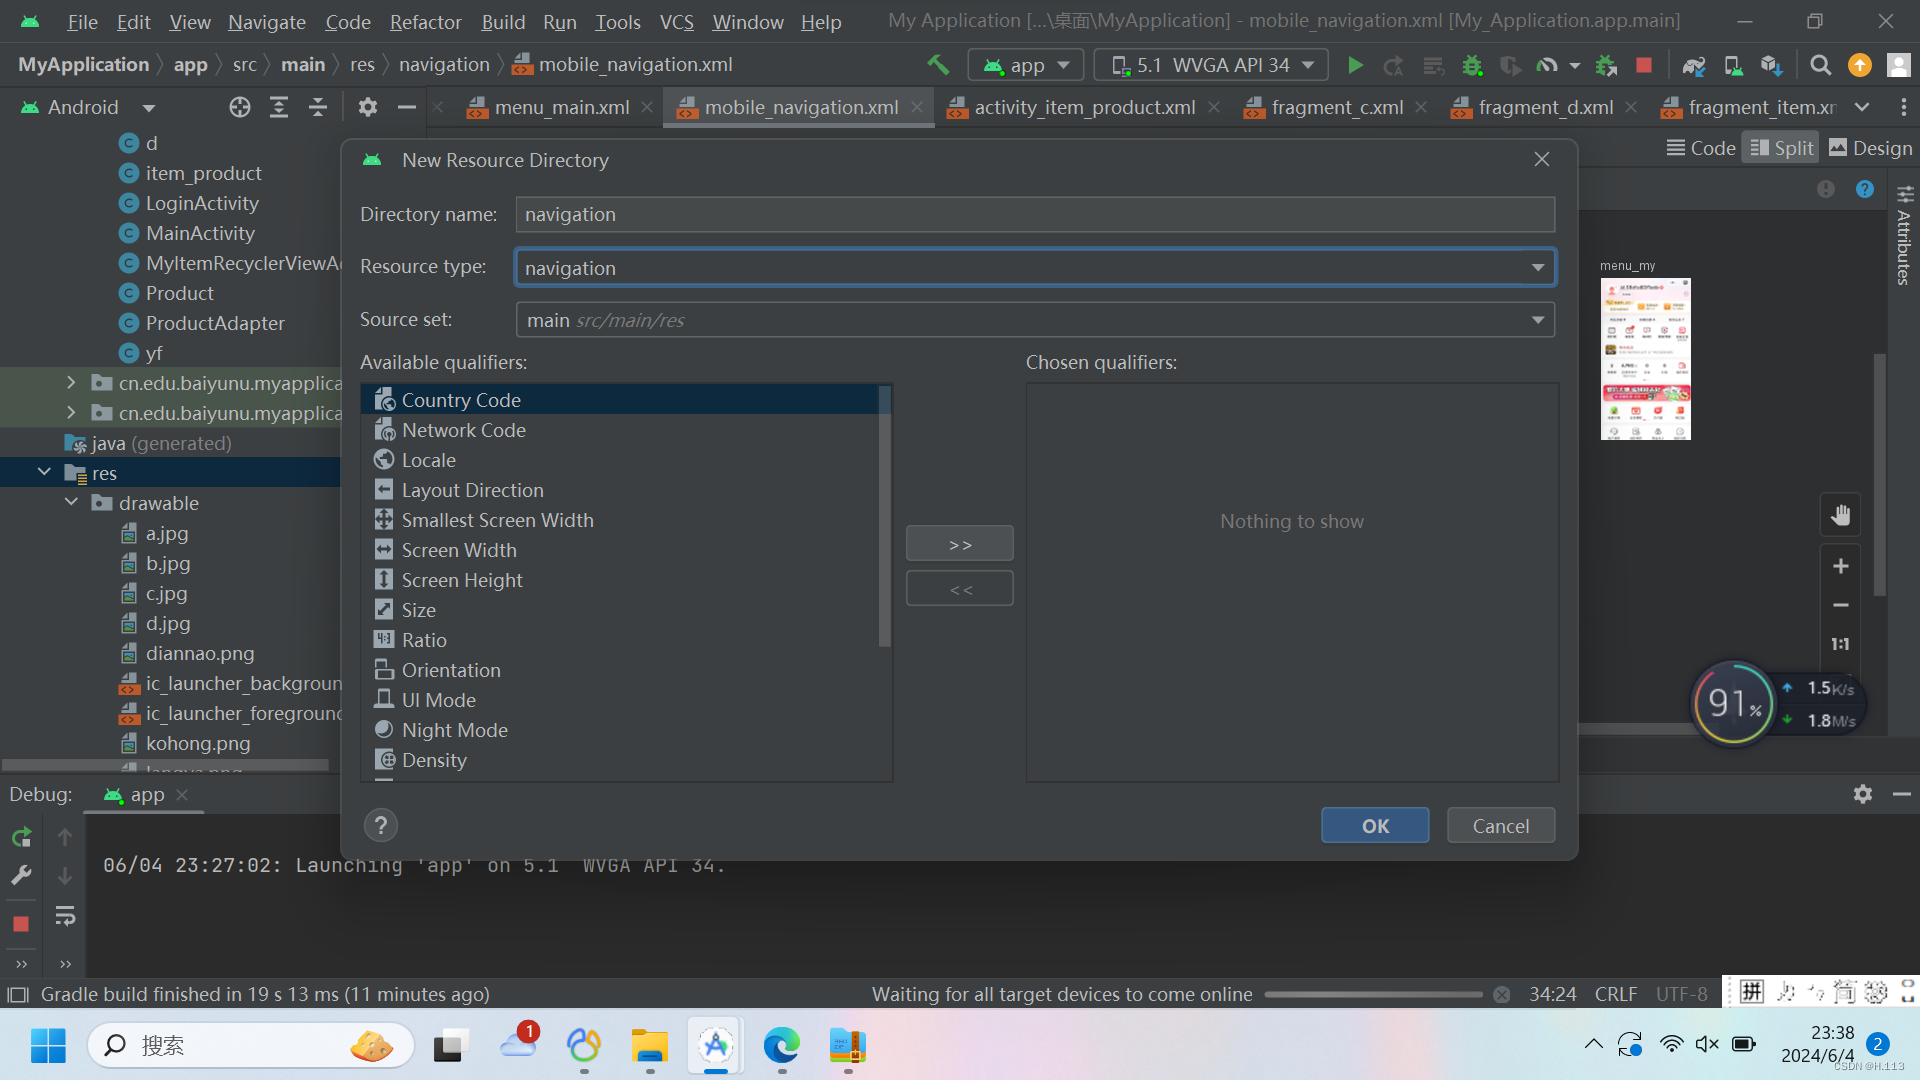
7、创建文件mobile_navigation(用于在应用的底部导航栏中显示这些Fragment)
<?xml version="1.0" encoding="utf-8"?>
<navigation xmlns:android="http://schemas.android.com/apk/res/android"
xmlns:app="http://schemas.android.com/apk/res-auto"
xmlns:tools="http://schemas.android.com/tools"
android:id="@+id/nav_navigation"
app:menu="@menu/menu_main"
tools:ignore="UnusedNavigation"
app:startDestination="@+id/menu_home"
app:navGraph="@navigation/mobile_navigation"
>
<fragment
android:id="@+id/menu_home"
android:name="cn.edu.baiyunu.myapplication.a"
android:label="fragment_a"
tools:layout="@layout/fragment_a" />
<fragment
android:id="@+id/menu_message"
android:name="cn.edu.baiyunu.myapplication.b"
android:label="fragment_b"
tools:layout="@layout/fragment_b" />
<fragment
android:id="@+id/menu_contact"
android:name="cn.edu.baiyunu.myapplication.c"
android:label="fragment_c"
tools:layout="@layout/fragment_c" />
<fragment
android:id="@+id/menu_my"
android:name="cn.edu.baiyunu.myapplication.d"
android:label="fragment_d"
tools:layout="@layout/fragment_d" />
<fragment
android:id="@+id/menu_yf"
android:name="cn.edu.baiyunu.myapplication.yf"
android:label="fragment_yf"
tools:layout="@layout/fragment_yf" />
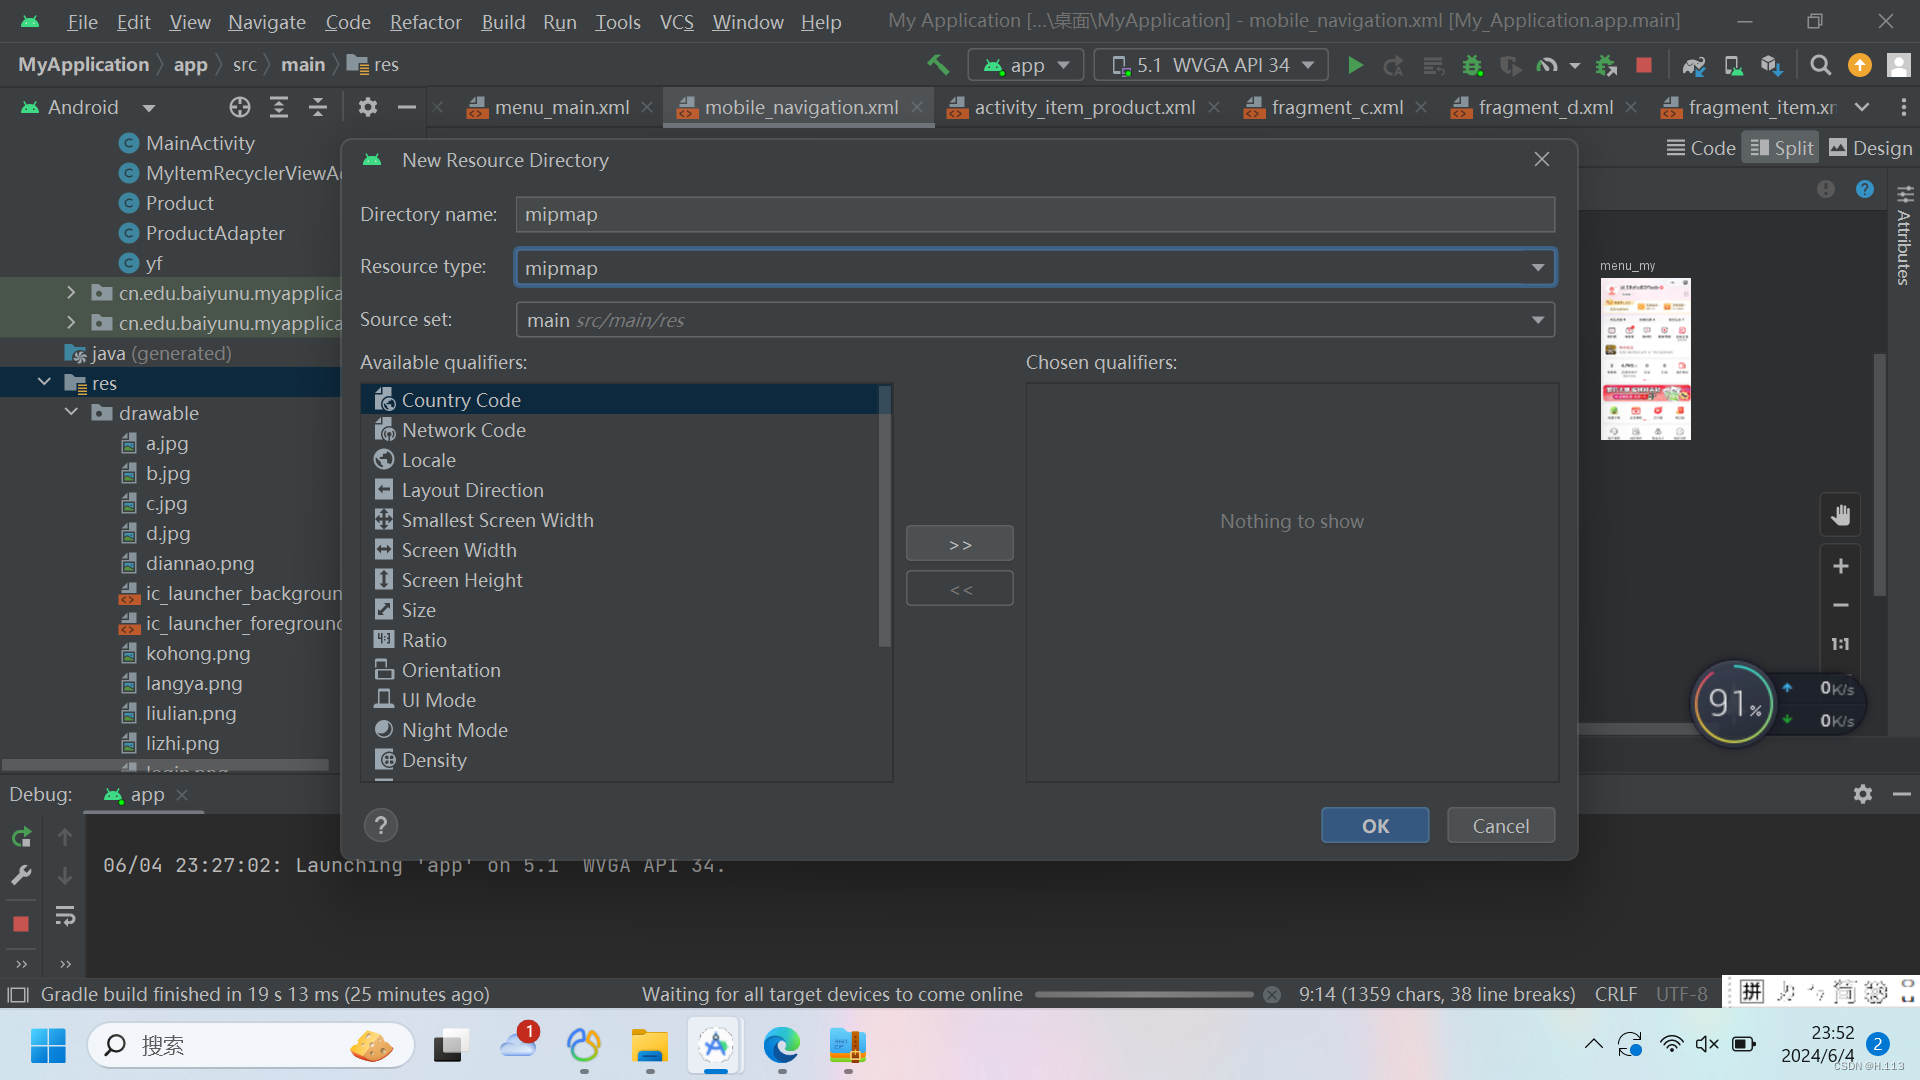
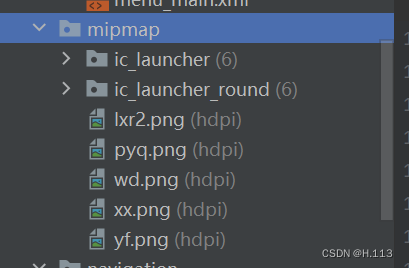
</navigation>8、创建mipmap文件夹
【res】右键 > 【New】 > 【Android Resource Directory】
导入导航图片
9、activity_main.xml(当用户点击底部导航栏上的不同菜单项时,应用程序会切换到相应的Fragment)
<LinearLayout xmlns:android="http://schemas.android.com/apk/res/android"
    android:layout_width="match_parent"
    android:layout_height="match_parent"
    xmlns:app="http://schemas.android.com/apk/res-auto"
    android:orientation="vertical">


    <fragment
        android:id="@+id/nav_host_fragment"
        android:name="androidx.navigation.fragment.NavHostFragment"
        android:layout_width="match_parent"
        android:layout_height="match_parent"
        android:layout_weight="1"
        app:defaultNavHost="true"
        app:layout_constraintBottom_toTopOf="@+id/bottom_navigation"
        app:layout_constraintLeft_toLeftOf="parent"
        app:layout_constraintRight_toRightOf="parent"
        app:layout_constraintTop_toTopOf="parent"
        app:navGraph="@navigation/mobile_navigation" />


    <com.google.android.material.bottomnavigation.BottomNavigationView
        android:id="@+id/bnv_main"
        android:layout_width="match_parent"
        android:layout_height="wrap_content"
        android:layout_marginBottom="0dp"
        android:background="?android:attr/windowBackground"
        app:menu="@menu/menu_main"


        />


</LinearLayout>
java代码
package cn.edu.baiyunu.myapplication;
import android.graphics.Color;
import android.graphics.PorterDuff;
import android.graphics.drawable.Drawable;
import android.view.LayoutInflater;
import android.view.Menu;
import android.view.MenuInflater;
import android.view.MenuItem;


import android.os.Bundle;
import android.view.MenuItem;
import android.view.View;
import android.view.ViewGroup;
import android.widget.ImageView;

import androidx.annotation.NonNull;
import androidx.appcompat.app.AppCompatActivity;
import androidx.navigation.NavController;
import androidx.navigation.Navigation;
import androidx.navigation.fragment.NavHostFragment;
import androidx.navigation.ui.NavigationUI;
import androidx.recyclerview.widget.GridLayoutManager;
import androidx.recyclerview.widget.RecyclerView;

import com.google.android.material.bottomnavigation.BottomNavigationView;

import java.util.ArrayList;
import java.util.List;

import cn.edu.baiyunu.myapplication.R;

public class MainActivity extends AppCompatActivity {


    @Override
    protected void onCreate(Bundle savedInstanceState) {
        super.onCreate(savedInstanceState);
        setContentView(R.layout.activity_main);


        BottomNavigationView bottomNavigationView = findViewById(R.id.bnv_main);

        NavController controller = Navigation.findNavController(this, R.id.nav_host_fragment);
        //在选择菜单时调用,当目的地更改时,BottomNavigationView中的选定项将自动更新
        NavigationUI.setupWithNavController(bottomNavigationView, controller);


    }

}
10、在Android 应用程序的清单文件AndroidManifest.xml里面加上.LoginActivity
<?xml version="1.0" encoding="utf-8"?>
<manifest xmlns:android="http://schemas.android.com/apk/res/android"
    xmlns:tools="http://schemas.android.com/tools">

    <application
        android:allowBackup="true"
        android:dataExtractionRules="@xml/data_extraction_rules"
        android:fullBackupContent="@xml/backup_rules"
        android:icon="@mipmap/ic_launcher"
        android:label="@string/app_name"
        android:roundIcon="@mipmap/ic_launcher_round"
        android:supportsRtl="true"
        android:theme="@style/Theme.MyApplication"
        tools:targetApi="31">

        <!-- 添加的页码要挂载上来 -->
        <activity
            android:name=".LoginActivity"
            android:exported="true">
            <intent-filter>
                <action android:name="android.intent.action.MAIN" />

                <category android:name="android.intent.category.LAUNCHER" />
            </intent-filter>
        </activity>
        <activity
            android:name=".MainActivity"
            android:exported="true">
            <intent-filter>
                <action android:name="android.intent.action.MAIN" />

                <category android:name="android.intent.category.LAUNCHER" />
            </intent-filter>
        </activity>

    </application>

</manifest>
11、运行


3.6 Context Menu (上下文菜单)
在Android中通常指的是当用户在应用界面长按或右键点击某个项目时出现的菜单。然而,在Android开发中,Context是一个核心概念,它提供了访问应用程序环境全局信息的接口,允许开发者访问各种资源和服务。
- 基本概念:Context是一个抽象类,其通用实现在
ContextImpl类中。它是访问application环境全局信息的接口,通过它可以访问application的资源和相关的类。 - 主要功能:Context的主要功能包括启动Activity、启动和停止Service、发送广播消息(Intent)、注册广播接收者、访问APK中的资源(如Resources和AssetManager等)、访问Package的相关信息以及管理APK的各种权限等。
- 相关关系:在Android中,View与Context(或Activity)的关系类似于明星与经纪人的关系。创建View时,必须明确指定其Context,否则View无法正常工作。Context的家族关系还包括ContextWrapper、ContextThemeWrapper等,它们都是基于装饰模式设计的,以提供不同的功能和主题支持。
- 关键函数:Context类定义了许多关键函数,如获取AssetManager实例、获取Resources实例、获取PackageManager实例、获取ContentResolver实例、获取应用程序包名和应用信息等。这些函数对于访问和管理应用程序资源至关重要。
- 关联类:Context的关联类采用了装饰模式,使得使用者(比如Service)能够方便地使用Context。ContextImpl是主要的实现类,而ContextWrapper和ContextThemeWrapper等则是简单的包装类,所有的实现都由其内部的mBase成员完成。
- 创建过程:通过调用
getApplicationContext()可以获取应用程序全局的Application Context。在一个应用程序启动完成后,应用程序就会有一个全局的Application Context,这个过程涉及到ActivityThread和Handler等组件。
- 上下文菜单继承于Menu,但是不同于选项菜单,选项菜单服务于某个Activity,而上下文菜单是需要注册到某个View对象上的。
- 如果在某个View对象上注册了上下文菜单,用户可以通过长按大约2s,将出现一个具有相关功能的上下文菜单。
在使用ContextMenu时,3个关键步骤:
- 首先需要使用RegisterForContextMenu方法为某个控件注册上下文菜单。例如,在Activity中为一个ListView注册上下文菜单:
@Override protected void onCreate(Bundle savedInstanceState) { super.onCreate(savedInstanceState); setContentView(R.layout.activity_main); ListView listView = findViewById(R.id.listView); registerForContextMenu(listView); } - 后重写OnCreateContextMenu方法,在该方法中通过使用getMenuInflater().inflate()方法或Menu类的add方法增加菜单项。例如,添加两个菜单项:
@Override public void onCreateContextMenu(ContextMenu menu, View v, ContextMenu.ContextMenuInfo menuInfo) { super.onCreateContextMenu(menu, v, menuInfo); getMenuInflater().inflate(R.menu.context_menu, menu); // 或者使用Menu类的add方法添加菜单项 // menu.add("Item 1"); // menu.add("Item 2"); } - 最后通过重写OnContextItemSelected方法,为ContextMenu菜单的菜单项增加功能。例如,为第一个菜单项添加点击事件:
@Override
public boolean onContextItemSelected(MenuItem item) {
    switch (item.getItemId()) {
        case R.id.item1:
            Toast.makeText(this, "Item 1 clicked", Toast.LENGTH_SHORT).show();
            return true;
        default:
            return super.onContextItemSelected(item);
    }
}
3.7 对话框
对话框简介:
安卓对话框是一种用户界面元素,可以在屏幕上弹出一个小窗口,显示提示信息、用户选择项或请求用户输入数据。其作用是提供一种简单而直观的用户交互方式,让用户可以快速地做出决定或输入数据,从而方便用户操作应用程序。对话框通常用于警告、确认、输入和选择等场景,可以根据实际需要选择合适的对话框类型来满足不同的交互需求。
| 基本对话框 | AlertDialog |
| 普通列表对话框 | setItems |
| 单选列表对话框 | setSingleChoiceItems |
| 多选列表对话框 | setMultiChoiceItems |
| 进度对话框 | ProgressDialog |
示例:(结合上下文菜单)
activity_main.xml
<?xml version="1.0" encoding="utf-8"?>
<androidx.constraintlayout.widget.ConstraintLayout xmlns:android="http://schemas.android.com/apk/res/android"
    xmlns:app="http://schemas.android.com/apk/res-auto"
    xmlns:tools="http://schemas.android.com/tools"
    android:layout_width="match_parent"
    android:layout_height="match_parent"
    android:background="@drawable/two"
    tools:context=".MainActivity">

    <TextView
        android:id="@+id/tv_helloworld"
        android:layout_width="wrap_content"
        android:layout_height="wrap_content"
        android:text="你的愿望颜色"
        android:textSize="60dp"
        app:layout_constraintBottom_toBottomOf="parent"
        app:layout_constraintEnd_toEndOf="parent"
        app:layout_constraintStart_toStartOf="parent"
        app:layout_constraintTop_toTopOf="parent" />
    <LinearLayout
        android:layout_width="match_parent"
        android:layout_height="match_parent"
        android:orientation="vertical">
        <Button
            android:id="@+id/MultiChoice"
            android:text="许愿"
            android:textSize="40dp"
            android:onClick="MultiChoice"
            android:layout_width="match_parent"
            android:layout_height="wrap_content"
            tools:ignore="MissingConstraints" />

        <Button
            android:id="@+id/MultiChoice2"
            android:layout_width="match_parent"
            android:layout_height="wrap_content"
            android:onClick="MultiChoice2"
            android:text="做梦进度"
            android:textSize="40dp"
            tools:ignore="MissingConstraints"
            android:layout_marginTop="50dp"
            />
    </LinearLayout>


</androidx.constraintlayout.widget.ConstraintLayout>
java代码:
package com.example.contexmwnu;

import androidx.annotation.NonNull;
import androidx.appcompat.app.AppCompatActivity;

import android.annotation.SuppressLint;
import android.app.AlertDialog;
import android.app.ProgressDialog;
import android.content.DialogInterface;
import android.graphics.Color;
import android.os.Bundle;
import android.util.Log;
import android.util.Pair;
import android.view.ContextMenu;
import android.view.MenuInflater;
import android.view.MenuItem;
import android.view.View;
import android.widget.TextView;

public class MainActivity extends AppCompatActivity {

    private TextView tv_helloworld;
    private String[] items={"超级大击毙","睡觉不上班","稍等哈"};
    private boolean[] status ={false,false,false};
    @Override
    protected void onCreate(Bundle savedInstanceState) {
        super.onCreate(savedInstanceState);
        setContentView(R.layout.activity_main);

        tv_helloworld = findViewById(R.id.tv_helloworld);
        registerForContextMenu(tv_helloworld);
    }

    @Override
    public void onCreateContextMenu(ContextMenu menu, View v, ContextMenu.ContextMenuInfo menuInfo) {
        MenuInflater inflater = new MenuInflater(this);
        inflater.inflate(R.menu.cmenu,menu);

        super.onCreateContextMenu(menu, v, menuInfo);
    }

    @Override
    public boolean onContextItemSelected(@NonNull MenuItem item) {
        if (item.getItemId()==R.id.blue){
            tv_helloworld.setTextColor(Color.BLUE);
        }
        if (item.getItemId()==R.id.red){
            tv_helloworld.setTextColor(Color.RED);
        }if (item.getItemId()==R.id.green){
            tv_helloworld.setTextColor(Color.GREEN);
        }if (item.getItemId()==R.id.yellow){
            tv_helloworld.setTextColor(Color.YELLOW);
        }
        return super.onContextItemSelected(item);
    }


   public void MultiChoice(View view){

       AlertDialog.Builder builder = new AlertDialog.Builder(MainActivity.this);
       builder.setIcon(R.drawable.w);
       builder.setTitle("你的愿望是什么??????");
       builder.setItems(items, new DialogInterface.OnClickListener() {
           @Override
           public void onClick(DialogInterface dialog, int which) {
               Log.i("MyTag",items[which]);
           }
       });
       builder.setPositiveButton("1",null);
       builder.setPositiveButton("2",null);
       builder.setPositiveButton("3",null);
       builder.create().show();

   }
    public void MultiChoice2(View view){

        ProgressDialog dialog = new ProgressDialog(MainActivity.this);
        dialog.setIcon(R.drawable.one);
        dialog.setTitle("实现进行中。。。。。。。");
        dialog.setMessage("ing");
        dialog.setProgressStyle(ProgressDialog.STYLE_HORIZONTAL);
        dialog.show();
        new Thread(new Runnable() {
            @Override
            public void run() {
                int progress =0;
                while(progress <100){
                    try {
                        Thread.sleep(100);
                        progress++;
                        dialog.setProgress(progress);
                    } catch (Exception e) {
                        e.printStackTrace();
                    }

                }
                dialog.cancel();
            }
        }).start();

    }


}
menu创建菜单文件cmenu.xml
<?xml version="1.0" encoding="utf-8"?>
<menu xmlns:app="http://schemas.android.com/apk/res-auto"
xmlns:android="http://schemas.android.com/apk/res/android">
<item
android:id="@+id/blue"
android:title="蓝色" />
<item
android:id="@+id/red"
android:title="红色" />
<item
android:id="@+id/green"
android:title="绿色" />
<item
android:id="@+id/yellow"
android:title="黄色" />
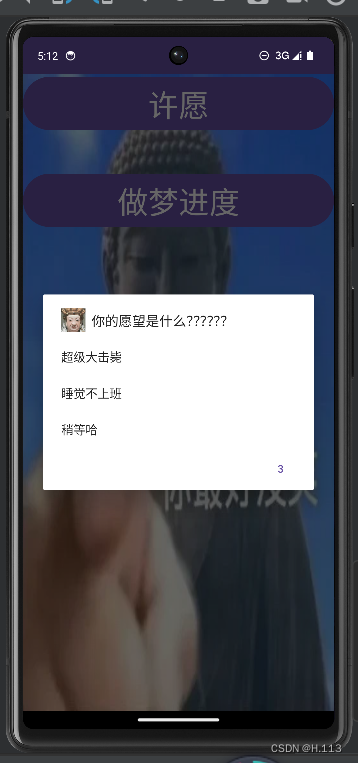
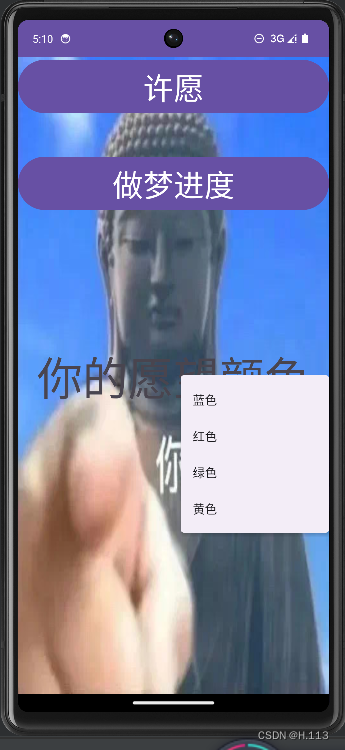
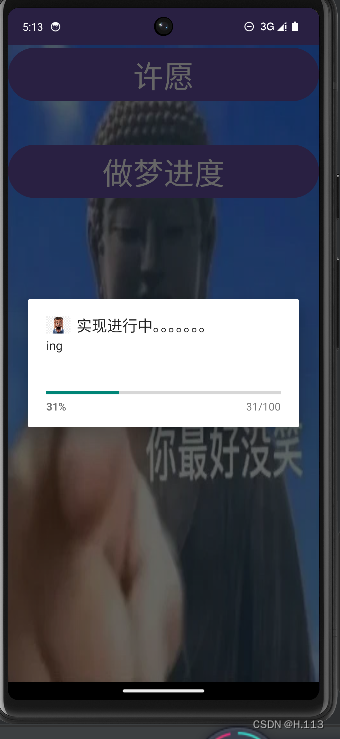
</menu>运行效果:
3.8 RecylerView
RecyclerView 是 Android 开发中用于高效地展示大量数据的一种高级的可滚动组件。以下是 RecyclerView 的具体介绍:
- 基本概念:RecyclerView 是一个用于显示大量数据的列表视图,它通过回收未在屏幕上显示的项的 View 来优化性能。RecyclerView 是 Android 5.0 之后推出的,用以替代 ListView 和 GridView 的标准组件。
- 核心组成:RecyclerView 的核心组成包括 Adapter、LayoutManager 和 ViewHolder。Adapter 负责提供数据;LayoutManager 定义了条目如何在界面上进行排列;ViewHolder 则缓存了子项 View 的引用,避免了频繁的查找和创建过程。
- 配置方法:要使用 RecyclerView,首先需要在布局文件中添加 RecyclerView 控件,并在代码中设置其 LayoutManager(如 LinearLayoutManager)和 Adapter。还可以通过 setItemAnimator 方法设置动画效果,以及使用 addItemDecoration 方法添加装饰元素,比如分隔线。
- 优点:相较于 ListView,RecyclerView 提供了更加灵活的布局控制,支持横向和纵向的滚动,并且可以轻易地实现列表、网格和瀑布流等多种布局效果。同时,RecyclerView 还提供了强大的动画和自定义装饰功能。
- 应用场景:RecyclerView 主要用于需要扩展、支持动画或频繁更新的列表页展示界面。由于其高效的 View 回收机制,它在处理大量数据时表现优异,特别适合于动态数据的展示场景。
- 使用步骤:使用 RecyclerView 包括定义主 xml 布局、根据需要定义 RecyclerView 每行所实现的 xml 布局、定义一个继承自 RecyclerView.Adapter 的适配器类、构造 Adapter 对象并设置适配器等步骤。
- 注意事项:在使用 RecyclerView 时,需要注意正确处理点击事件,因为相比 ListView,RecyclerView 处理点击事件稍微复杂一些。同时,对于不同布局管理器的选择和使用,也需要根据实际需求合理配置。
- 拓展功能:RecyclerView 支持下拉刷新和上拉加载更多的功能,这为开发者提供了更多自定义操作的空间。同时,可以通过设置不同的 LayoutManager、ItemDecoration 和 ItemAnimator 来实现令人瞠目的效果。
应用示例:
具体实现:
要实现一个类似京东APP的商品列表页面,使用Android的RecyclerView和RecyclerView.Adapter,首先需要创建一个商品类(Product),然后创建一个RecyclerView.Adapter的子类来处理数据的显示。
- 创建一个商品类(Product):
package cn.edu.baiyunu.myapplication; public class Product { private String name; private double price; private int imageResource; // 可以是图片资源的ID public Product(String name, double price, int imageResource) { this.name = name; this.price = price; this.imageResource = imageResource; } // Getter methods public String getName() { return name; } public double getPrice() { return price; } public int getImageResource() { return imageResource; } } - 创建一个RecyclerView.Adapter的子类:
package cn.edu.baiyunu.myapplication; import android.view.LayoutInflater; import android.view.View; import android.view.ViewGroup; import android.widget.ImageView; import android.widget.TextView; import androidx.annotation.NonNull; import androidx.recyclerview.widget.RecyclerView; import java.util.List; public class ProductAdapter extends RecyclerView.Adapter<ProductAdapter.ProductViewHolder> { private List<Product> productList; public ProductAdapter(List<Product> productList) { this.productList = productList; } @NonNull @Override public ProductViewHolder onCreateViewHolder(@NonNull ViewGroup parent, int viewType) { View itemView = LayoutInflater.from(parent.getContext()) .inflate(R.layout.activity_item_product, parent, false); return new ProductViewHolder(itemView); } @Override public void onBindViewHolder(@NonNull ProductViewHolder holder, int position) { Product currentProduct = productList.get(position); holder.productImage.setImageResource(currentProduct.getImageResource()); holder.productName.setText(currentProduct.getName()); holder.productPrice.setText("¥" + currentProduct.getPrice()); } @Override public int getItemCount() { return productList.size(); } public static class ProductViewHolder extends RecyclerView.ViewHolder { public ImageView productImage; public TextView productName; public TextView productPrice; public ProductViewHolder(@NonNull View itemView) { super(itemView); productImage = itemView.findViewById(R.id.product_image); productName = itemView.findViewById(R.id.product_name); productPrice = itemView.findViewById(R.id.product_price); } } } - 在布局文件中添加RecyclerView:
<?xml version="1.0" encoding="utf-8"?> <LinearLayout xmlns:android="http://schemas.android.com/apk/res/android" android:layout_width="match_parent" android:layout_height="wrap_content" android:orientation="vertical" android:adjustViewBounds="true" > <ImageView android:id="@+id/product_image" android:layout_width="wrap_content" android:layout_height="wrap_content" android:adjustViewBounds="true" android:background="@drawable/nav" /> <TextView android:id="@+id/product_name" android:layout_width="wrap_content" android:layout_height="wrap_content" android:textSize="16sp" android:textStyle="bold" /> <TextView android:id="@+id/product_price" android:layout_width="wrap_content" android:layout_height="wrap_content" android:textColor="@color/my_color" android:textSize="30sp"/> <androidx.recyclerview.widget.RecyclerView android:id="@+id/recycler_view" android:layout_width="wrap_content" android:layout_height="wrap_content" android:layout_marginLeft="20dp" android:layout_marginRight="20dp" /> </LinearLayout> - 在Activity中设置RecyclerView和Adapter:
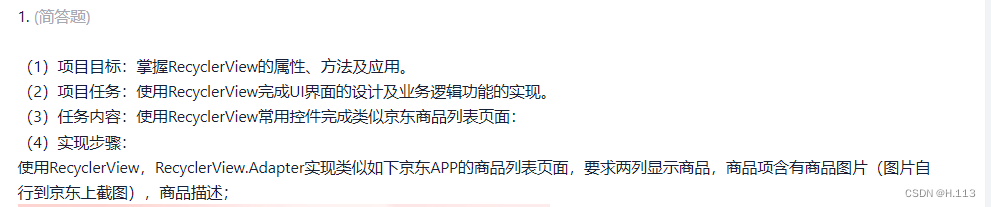
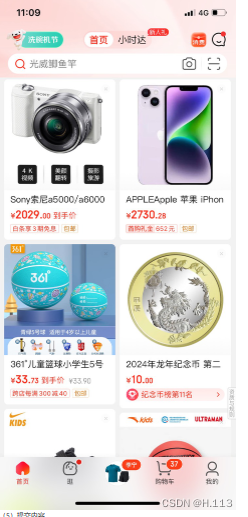
package cn.edu.baiyunu.myapplication;

import static android.view.Gravity.*;

import androidx.appcompat.app.AppCompatActivity;
import androidx.recyclerview.widget.GridLayoutManager;
import androidx.recyclerview.widget.RecyclerView;

import android.os.Bundle;
import android.view.Gravity;
import android.view.View;
import android.widget.LinearLayout;

import java.util.ArrayList;
import java.util.List;

public class item_product extends AppCompatActivity {

    @Override
    protected void onCreate(Bundle savedInstanceState) {
        super.onCreate(savedInstanceState);
        setContentView(R.layout.activity_item_product);

        // 在你的Activity或Fragment中
        RecyclerView  recyclerView = findViewById(R.id.recycler_view);
        recyclerView.setLayoutManager(new GridLayoutManager(this, 2)); // 两列显示商品
        List<Product> productList = new ArrayList<>();
// 添加商品到列表中,例如:
        productList.add(new Product("Technics旗舰款AZ80 真无线蓝牙降噪耳机入耳式 松下HIFI系列支持LDAC/无线充电 适用安卓苹果系统手机 EAH-AZ80黑色【国行】", 1999.00, R.drawable.langya));
        productList.add(new Product("兰蔻313裸唇釉裸郁金 春夏显白柔粉色口红唇膏520礼盒生日礼物", 350.00, R.drawable.kohong));
        productList.add(new Product("泰坦军团 27英寸 2K 原生180Hz FastIPS快速液晶 广色域显示屏 1ms电竞显示器 窄边框电脑办公游戏屏P27H2R", 799.00, R.drawable.diannao));
        productList.add(new Product("M.A.C魅可尤雾弹唇釉口红哑光唇彩#997吃土咖 520情人节礼物生日礼物女", 187.00, R.drawable.mac));
        productList.add(new Product("御京鲜榴莲金枕整箱一整个鲜果泰国进口水果巴掌果金枕头榴莲批发一箱 3-4斤S+级好果型【包3-4房】 泰国进口金枕榴莲", 5999.00, R.drawable.liulian));
        productList.add(new Product("60册绘本幼儿园小中大班儿童绘本3-6岁0到3岁2岁宝宝故事书早教有声情绪管理与性格培养逆商培养教育反霸凌启蒙绘本老师推荐一年级 幼儿交际启蒙绘本【10册】", 6.99, R.drawable.yeryuan));
        productList.add(new Product("守望金谷东北甜糯鲜嫩玉米10支 新鲜蔬菜 真空包装 健康粗粮早餐苞米棒 黄色玉米10支共 2000g (单200g)", 17.90, R.drawable.yumi));
        productList.add(new Product("京鲜生 海南妃子笑荔枝 1kg装 时令尝鲜装 粒果无枝叶 新鲜水果", 89.90, R.drawable.lizhi));

        ProductAdapter adapter = new ProductAdapter(productList);
        recyclerView.setAdapter(adapter);

    }
}
具体项目代码:链接: https://pan.baidu.com/s/1F5eD5BsuEVy3oXT8ZQv3Gw 提取码: 7777
运行效果:
第4章 Android开发中的布局理解
4.1 线性布局(LinearLayout)
特点:线性布局是最基本的布局之一,它允许子视图按照垂直或水平方向排列。通过设置 android:orientation 属性为 vertical或 horizontal来决定子视图的排列方向。
适用场景: 当需要将多个组件按照单一方向(水平或垂直)顺序排列时使用。
4.1.1常用属性
orientation:布局中组件的排列方式
gravity:控制组件所包含的子元素的对齐方式,可多个组合
layout_gravity:控制该组件在父容器里的对其方式
background:为该组件设置一个背景图片,或者是直接用颜色覆盖
divider:分割线(可以使用View来设置分割线的效果)
showDividers:设置分割线所在的位置,none(无),beginning(开始),end(结束),middle(每两个组件间)
dividerPadding:设置分割线的padding
layout_weight(权重):该属性是用来按比例划分剩余的区域,按控件的对齐方式
XML代码:
 <LinearLayout
        android:layout_width="match_parent"
        android:layout_height="wrap_content"
        android:layout_marginTop="50dp"
        >
        <TextView
            android:inputType="text"
            android:layout_width="0dp"
            android:layout_height="wrap_content"
            android:text="@string/prompt_text1"
            android:layout_weight="1"
            android:textSize="20dp"
            />
        <EditText
            android:id="@+id/etInput1"
            android:layout_width="wrap_content"
            android:layout_height="wrap_content"
            android:hint="Please input your name"
            android:textSize="20dp"
            android:layout_weight="1"
            />
    </LinearLayout>
应用例子:如项目实验2——Android 约束布局
1.项目描述
(1)项目目标:掌握约束布局的使用方法及应用。
(2)项目任务:使用约束布局完成UI界面的设计。
(3)任务内容:
l 任务:使用ConstraintLayout完成一个“注册个人信息”的布局。
l 创建项目ConstraintLayoutDemo,包名:cn.edu.baiyunu.constraintlayoutdemo,Language: Java 。
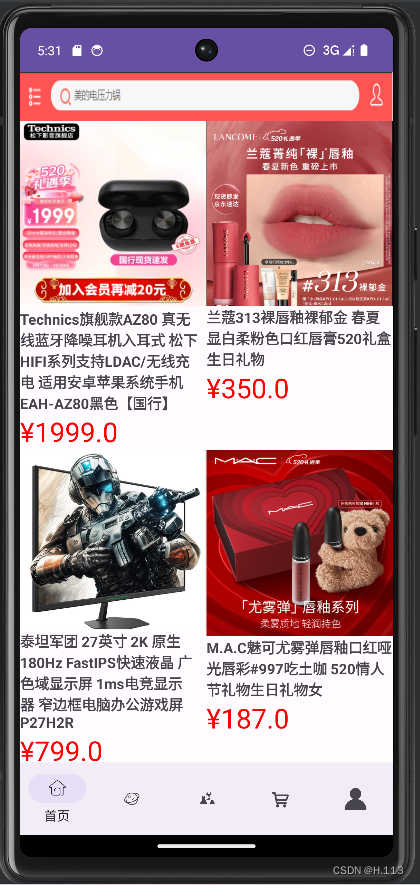
l 组件树如下图所示:
图11-3实验2组件树
l 运行效果图:
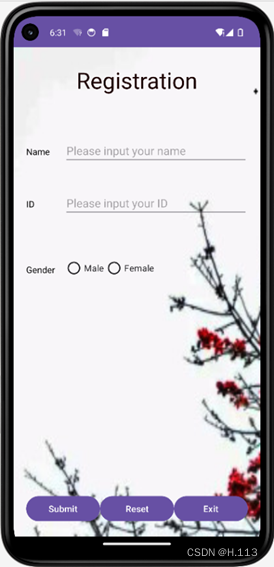
2.项目实施
步骤1:为项目添加图片资源。将背景图片资源复制粘贴到drawable中。
步骤2:在string.xml文件中编写相关文本资源代码。
步骤3:在“activity_main.xml”文件中,完成布局的设计。以约束布局作为根节点,在下方相应位置分别添加四个TextView控件、两个EditText控件、三个Button控件、一个选项按钮组控件(包含两个选项按钮)。
步骤4:运行项目。
3. 项目代码
Activity_main.xml
<?xml version="1.0" encoding="utf-8"?>
<LinearLayout xmlns:android="http://schemas.android.com/apk/res/android"

    xmlns:tools="http://schemas.android.com/tools"
    android:layout_width="match_parent"
    android:layout_height="match_parent"
    android:background="@drawable/bj2"
    android:orientation="vertical"
    android:padding="30dp"
    tools:context=".MainActivity"
    >


    <TextView
        android:layout_width="match_parent"
        android:layout_height="wrap_content"
        android:gravity="center"
        android:text="@string/prompt_text"
        android:textSize="50sp"

        />
    <LinearLayout
        android:layout_width="match_parent"
        android:layout_height="wrap_content"
        android:layout_marginTop="50dp"
        >
        <TextView
            android:inputType="text"
            android:layout_width="0dp"
            android:layout_height="wrap_content"
            android:text="@string/prompt_text1"
            android:layout_weight="1"
            />

        <EditText

            android:layout_width="wrap_content"
            android:layout_height="wrap_content"
            android:hint="Please input your name"
            android:textSize="20dp"
            android:layout_weight="1"
            />

    </LinearLayout>
    <LinearLayout
        android:layout_width="match_parent"
        android:layout_height="wrap_content"
        android:layout_marginTop="40dp">
        <TextView
            android:layout_width="0dp"
            android:layout_height="wrap_content"
            android:text="@string/prompt_text2"
            android:layout_weight="1"

            />
        <EditText

            android:layout_width="wrap_content"
            android:layout_height="wrap_content"
            android:hint="Please input your name"
            android:textSize="20dp"
            android:layout_weight="1"
            />

    </LinearLayout>
    <LinearLayout
        android:layout_width="match_parent"
        android:layout_height="wrap_content"
        android:layout_marginTop="80dp"
        >
        <TextView
            android:layout_width="wrap_content"
            android:layout_height="match_parent"
            android:text="@string/button_text"
            />
        <LinearLayout
            android:layout_width="wrap_content"
            android:layout_height="match_parent"
            android:layout_marginLeft="30dp"
            >
            <EditText
                android:id="@+id/edit_text1"
                android:layout_width="20dp"
                android:layout_height="20dp"
                android:background="@drawable/circle_edittext_bg"
                android:padding="10dp" />
            <EditText
                android:layout_width="wrap_content"
                android:layout_height="match_parent"
                android:text="@string/button_cancel1"
                android:background="#00FFFFFF"
                android:layout_marginLeft="10dp"
                />
            <EditText
                android:id="@+id/edit_text2"
                android:layout_width="20dp"
                android:layout_height="20dp"
                android:background="@drawable/circle_edittext_bg"
                android:padding="10dp"
                android:layout_weight="1"
                android:layout_marginLeft="10dp"
                />
            <EditText
                android:layout_width="wrap_content"
                android:layout_height="match_parent"
                android:text="@string/button_cancel2"
                android:background="#00FFFFFF"
                android:layout_marginLeft="10dp"
                android:layout_weight="1"
                />
        </LinearLayout>

    </LinearLayout>

    <LinearLayout
        android:layout_width="match_parent"
        android:layout_height="match_parent"
        android:orientation="horizontal"
        android:gravity="bottom"
        >

    <Button

        android:layout_width="wrap_content"
        android:layout_height="wrap_content"
        android:layout_weight="1"
        android:text="@string/button1"

        />
    <Button
        android:layout_width="wrap_content"
        android:layout_height="wrap_content"
        android:layout_weight="1"
        android:text="@string/button2"
        />
    <Button
        android:layout_width="wrap_content"
        android:layout_height="wrap_content"
        android:layout_weight="1"
        android:text="@string/button3"
        />
    </LinearLayout>


</LinearLayout>
String.xml
<resources>
    <string name="app_name">xiao</string>
    <string name="prompt_text">Registration</string>
    <string name="prompt_text1">Name</string>
    <string name="prompt_text2">ID</string>
    <string name="button_text">Gender</string>
    <string name="button_cancel1">Male</string>
    <string name="button_cancel2">Female</string>
    <string name="button1">Submit</string>
    <string name="button2">Reset</string>
    <string name="button3">Exit</string>

</resources>
circle_edittext_bg.xml
<shape xmlns:android="http://schemas.android.com/apk/res/android"
    android:shape="oval">
    <solid android:color="#FFFFFFFF" /> <!-- 设置圆圈的填充颜色 -->
    <stroke
        android:width="2dp"
        android:color="#FF000000" /> <!-- 设置圆圈的边框颜色和宽度 -->
    <size
        android:width="5dp"
        android:height="5dp" /> <!-- 设置圆圈的大小 -->
</shape>
运行结果:
4.2 约束布局(ConstraintLayout)
特点:约束布局提供了更灵活的方式来指定子视图的位置和大小,通过定义视图之间的相对位置关系来布局。
适用场景:适用于复杂的界面设计,特别是需要处理不同屏幕尺寸和方向的情况。
应用示例:
<androidx.constraintlayout.widget.ConstraintLayout>
    <Button
        android:id="@+id/button"
        android:layout_width="wrap_content"
        android:layout_height="wrap_content"
        app:layout_constraintTop_toTopOf="parent"
        app:layout_constraintLeft_toLeftOf="parent" />
    <!-- 更多子视图和约束 -->
</androidx.constraintlayout.widget.ConstraintLayout>
4.3 表格布局(TableLayout)
特点:表格布局以行和列的形式管理子视图,类似于HTML的表格结构。
适用场景:当信息需要以表格形式展示时使用。
应用示例:
<TableLayout>
    <TableRow>
        <!-- 单元格内容 -->
    </TableRow>
    <!-- 更多行 -->
</TableLayout>
帧布局(FrameLayout)
特点:帧布局将所有子视图堆叠在同一个位置,后面的子视图会覆盖前面的子视图。
适用场景: 当所有子视图都相同大小时,并且只需要显示最顶层的子视图时使用。
应用示例:
<FrameLayout
    android:layout_width="match_parent"
    android:layout_height="match_parent">
    <!-- 子视图 -->
</FrameLayout>
4.4 相对布局(RelativeLayout)
特点:相对布局允许子视图相对于其父布局或其他子视图进行定位。
适用场景:当需要精细控制子视图位置时使用。
4.4.1 相对父容器定位
layout_alignParentLeft:左对齐
layout_alignParentRight:右对齐
layout_alignParentTop:顶部对齐
layout_alignParentBottom:底部对齐
layout_centerHorizontal:水平居中
layout_centerVertical:垂直居中
layout_centerInParent:中间位置
4.4.2 相对兄弟容器定位
layout_toLeftOf:放置于参考组件的左边
layout_toRightOf:放置于参考组件的右边
layout_above:放置于参考组件的上方
layout_below:放置于参考组件的下方
layout_alignTop:对齐参考组件的上边界
layout_alignBottom:对齐参考组件的下边界
layout_alignLeft:对齐参考组件的左边界
layout_alignRight:对齐参考组件的右边界
4.4.3 通用属性
margin设置组件与父容器的边距
layout_marginLeft:左边距
layout_marginRight:右边距
layout_marginTop:上边距
layout_margiBottom:下边距
padding设置组件与子容器的边距
layout_paddingLeft:左边距
layout_paddingRight:右边距
layout_paddingTop:上边距
layout_paddingBottom:下边距
应用示例:
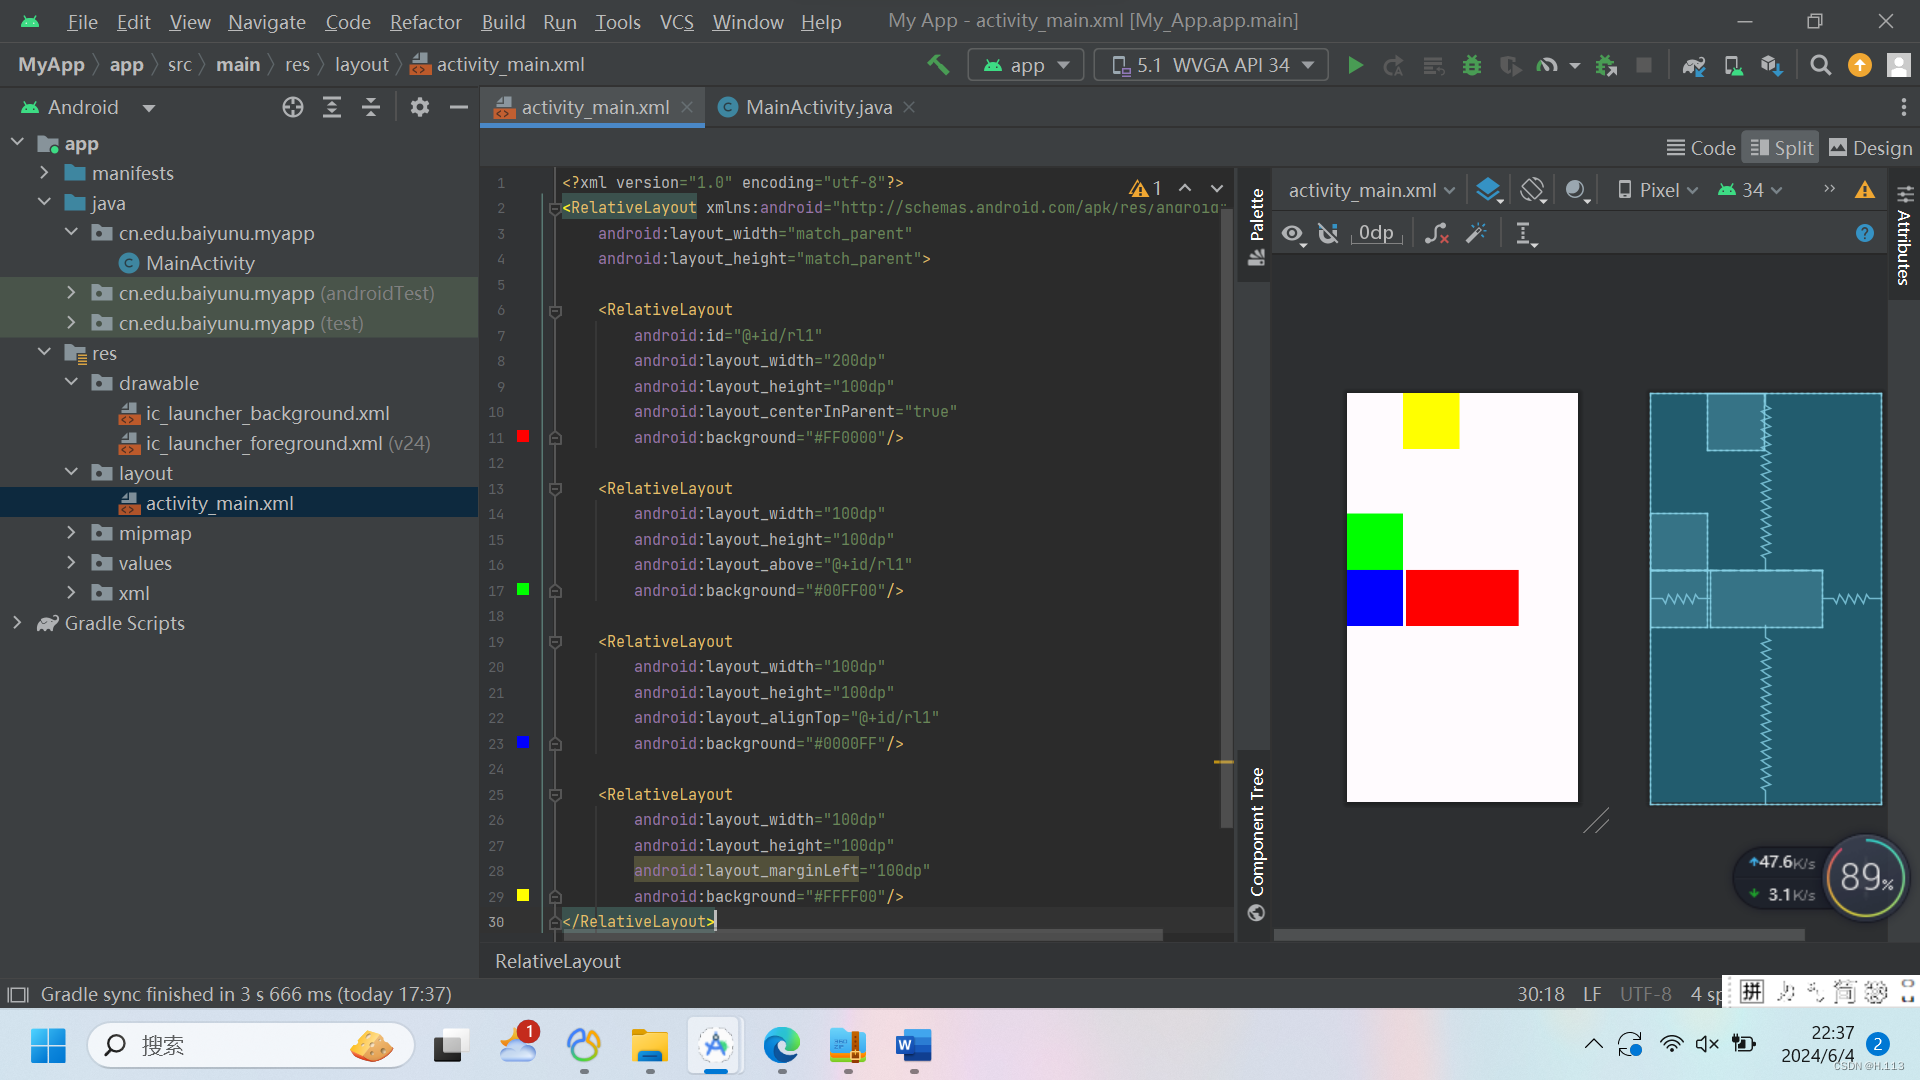
<?xml version="1.0" encoding="utf-8"?>
<RelativeLayout xmlns:android="http://schemas.android.com/apk/res/android"
android:layout_width="match_parent"
android:layout_height="match_parent">
<RelativeLayout
android:id="@+id/rl1"
android:layout_width="200dp"
android:layout_height="100dp"
android:layout_centerInParent="true"
android:background="#FF0000"/>
<RelativeLayout
android:layout_width="100dp"
android:layout_height="100dp"
android:layout_above="@+id/rl1"
android:background="#00FF00"/>
<RelativeLayout
android:layout_width="100dp"
android:layout_height="100dp"
android:layout_alignTop="@+id/rl1"
android:background="#0000FF"/>
<RelativeLayout
android:layout_width="100dp"
android:layout_height="100dp"
android:layout_marginLeft="100dp"
android:background="#FFFF00"/>
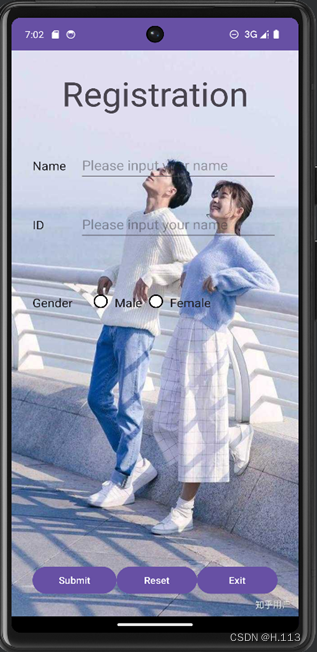
</RelativeLayout>运行效果截图:
第5章 UI界面交互功能的实现方法总结
在安卓开发中,UI界面交互功能主要通过事件监听来实现。例如:
按钮点击事件:使用 setOnClickListener 方法为按钮设置点击事件监听器。
列表项点击事件:对于 ListView或 RecyclerView,可以通过设置适配器来处理列表项的点击事件。
滑动操作:可以使用 ViewPager 或者 HorizontalScrollView来实现滑动效果。
菜单项和对话框: 使用 PopupMenu 和 AlertDialog 类来创建菜单和对话框。
在实际项目中,我通过查阅官方文档、观看教学视频、查看相关文档等方式不断学习和实践这些交互功能的实现方法,并通过编写测试代码来验证功能的正确性。
博客文档规范性和问题分析能力展示
为了确保博客的规范性和标准,我在撰写过程中注重以下几点:
1. 格式美观:使用合适的标题、子标题和列表等元素来组织内容,使文章结构清晰易读。
2. 段落结构清晰:每个段落专注于一个主题,避免过长的句子和段落。
3. 语法和拼写正确:使用文本编辑器的语法检查功能来避免错误。
4. 问题分析透彻全面:在遇到问题时,我会先尝试自己解决,如果无法解决,则会记录下问题的细节,包括错误信息、重现步骤等,然后通过搜索引擎查找相关资料或向同学和老师求助。解决问题后,我会总结解决方案并解释选择这种方法的原因。
学习总结
经过一个学期对Android的学习,对Android有了一定的认知,从最初的Android小白到慢慢能自己编一些简单的程序,虽然有了一定的操作能力,但是不能完全熟练的运用,在代码的编写过程中,还需要去翻看PPT,或者百度去查找一个属性的作用,时间长一点总是很容易遗忘以前学过的知识点,对各个方面里面附带的属性不太清楚,每次使用都需要查阅,导致在写作业,编代码的时候消耗的时间较多,时间越长,越没耐心,写着写着就有一种不想写下去的欲望,就感觉很枯燥,学期Android studio还是大概对Android开发有了一个基本的认识,学会了Android studio的基本操作。
在建立Android studio项目时,或者报错时,经过老师耐心仔细的讲解这些问题还是解决了,我以为会像安装Android studio时那样卡住,每当解决一个问题就会冒出一个新的问题,后来我放平了心态了。
这学期的Android学习之旅告一段落了,bye~~~


 被折叠的 条评论
为什么被折叠?
被折叠的 条评论
为什么被折叠?
 到【灌水乐园】发言


