


前言:wangEditor 官网 。本文档讲解 wangEditor 在 vue3 中的使用。
一:快速开始
1. 安装
需要安装 @wangeditor/editor、@wangeditor/editor-for-vue@next 两个依赖
# 安装 editor
npm install @wangeditor/editor
# or
yarn add @wangeditor/editor
# or
pnpm add @wangeditor/editor

# 安装 Vue3 组件
npm install @wangeditor/editor-for-vue@next
# or
yarn add @wangeditor/editor-for-vue@next
# or
pnpm add @wangeditor/editor-for-vue@next
2. 构建组件 components/Rich.vue
<script setup lang="ts">
  import "@wangeditor/editor/dist/css/style.css"; // 引入 css
  import { onBeforeUnmount, ref, shallowRef, computed } from "vue";
  import { Editor, Toolbar } from "@wangeditor/editor-for-vue";

  const props = defineProps({
    modelValue: {
      type: String,
      required: true,
    },
    toolbarConfig: {
      type: Object,
      default: {},
    },
    editorConfig: {
      type: Object,
      default: {
        placeholder: "请输入内容...",
      },
    },
    height: {
      type: String,
      default: "300px",
    },
  });

  const emits = defineEmits(["update:modelValue"]);
  let valueHtml = computed({
    get() {
      return props.modelValue;
    },
    set(value) {
      emits("update:modelValue", value);
    },
  });

  let style: any = computed(() => {
    return {
      height: props.height,
      "overflow-y": "hidden",
    };
  });

  // 编辑器实例,必须用 shallowRef
  const editorRef = shallowRef();

  // 模式
  let mode = ref("default");

  // 组件销毁时,也及时销毁编辑器
  onBeforeUnmount(() => {
    const editor = editorRef.value;
    if (editor == null) return;
    editor.destroy();
  });

  const handleCreated = (editor: any) => {
    editorRef.value = editor; // 记录 editor 实例,重要!
  };
</script>

<template>
  <div class="editor-content-view">
    <Toolbar
      style="border-bottom: 1px solid #ccc"
      :editor="editorRef"
      :defaultConfig="toolbarConfig"
      :mode="mode"
    />
    <Editor
      :style="style"
      v-model="valueHtml"
      :defaultConfig="editorConfig"
      :mode="mode"
      @onCreated="handleCreated"
    />
  </div>
</template>

<style lang="scss" scoped>
  .editor-content-view {
    border: 1px solid #ccc;
    z-index: 999;
  }
</style>
3. 使用 Rich.vue 组件
<script setup lang="ts">
  import { ref } from "vue";
  import Rich from "@/components/Rich.vue";

  let richHtml = ref("");
</script>

<template>
  <div class="page-rich">
    <Rich v-model="richHtml" />
  </div>
</template>

<style lang="scss" scoped></style>
二:优势
使用 slate.js(但不依赖 React)为内核、强稳定性、高扩展性、有详细中文文档、可直接使用无需二次开发、不依赖框架。
三:基础
1. 定义 CSS
可自定义编辑器、工具栏的尺寸、边框、z-index 等样式。
<template>
  <!-- 边框 -->
  <div class="editor-content-view">
    <!-- 工具栏 -->
    <Toolbar style="border-bottom: 1px solid #ccc" />
    <!-- 编译器 -->
    <Editor style="height: 500px; overflow-y: hidden" />
  </div>
</template>

<style lang="scss" scoped>
  .editor-content-view {
    border: 1px solid #ccc;
    z-index: 999;
  }
</style>
2. 定义 HTML
如果想要“全屏”功能,则要求工具栏、编辑器 DOM 节点必须是同一层级,同时父级盒子设置 z-index: 999。
<template>
  <div class="editor-content-view">
    <!-- 工具栏 -->
    <Toolbar />
    <!-- 编译器 -->
    <Editor />
  </div>
</template>

<style lang="scss" scoped>
  .editor-content-view {
    z-index: 999;
  }
</style>
3. 模式
通过设置 mode 改变富文本模式,'default' 默认模式,基础所有功能。'simple' 简洁模式,仅有常用功能。
<script setup lang="ts">
  // 模式
  let mode = ref("default");
</script>

<template>
  <div class="editor-content-view">
    <Toolbar :mode="mode" />
    <Editor :mode="mode" />
  </div>
</template>
四:在 vue3 中使用
1. 配置
可通过 toolbarConfig 和 editorConfig 来修改菜单栏和编辑器的配置。注意:编辑器配置中 onXxx 格式的生命周期函数,必须通过 Vue 事件来传递,不可以放在 editorConfig 中
<script setup lang="ts">
  const props = defineProps({
    toolbarConfig: {
      type: Object,
      default: {},
    },
    editorConfig: {
      type: Object,
      default: {
        placeholder: "请输入内容...",
      },
    },
  });

  const handleCreated = (editor: any) => {
    editorRef.value = editor; // 记录 editor 实例,重要!
  };
</script>

<template>
  <div class="editor-content-view">
    <Toolbar :defaultConfig="toolbarConfig" />
    <Editor :defaultConfig="editorConfig" @onCreated="handleCreated" />
  </div>
</template>

<style lang="scss" scoped>
  .editor-content-view {
    border: 1px solid #ccc;
    z-index: 999;
  }
</style>
2. 调用 API
当编辑器渲染完成之后,通过 editorRef.value 获取 editor 实例,即可调用它的 API 。
// 组件销毁时,也及时销毁编辑器
onBeforeUnmount(() => {
  const editor = editorRef.value;
  if (editor == null) return;
  editor.destroy();
});
五:配置和 API
下面代码例子,都是以 components/Rich.vue 作为例子的基础上扩展功能。
1. 工具栏配置
1.1 getConfig
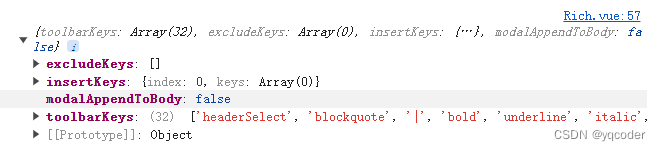
通过 toolbar.getConfig() 查看工具栏的默认配置
import { DomEditor } from "@wangeditor/editor";

const handleCreated = (editor) => {
  const toolbar = DomEditor.getToolbar(editor);
  const result = toolbar.getConfig();
  console.log(result);
};
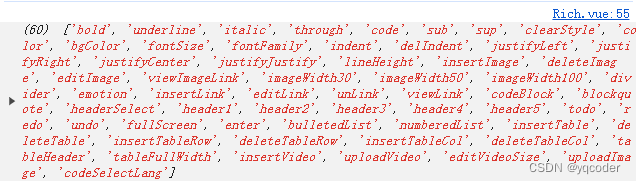
1.2 toolbarKeys
重新配置工具栏,显示哪些菜单,以及菜单的排序、分组。可以通过 toolbar.getConfig().toolbarKeys 查看当前的默认配置。
<script setup lang="ts">
  import { ref } from "vue";
  import Rich from "@/components/Rich.vue";

  let richHtml = ref("asdf");
  let toolbarConfig = {
    toolbarKeys: [
      // 菜单 key
      "headerSelect",

      // 分割线
      "|",

      // 菜单 key
      "bold",
      "italic",
    ],
    insertKeys: {
      index: 1, // 插入的位置,基于当前的 toolbarKeys
      keys: ["color", "bgColor"],
    },
  };
</script>

<template>
  <div class="page-rich">
    <Rich v-model="richHtml" :toolbarConfig="toolbarConfig" />
  </div>
</template>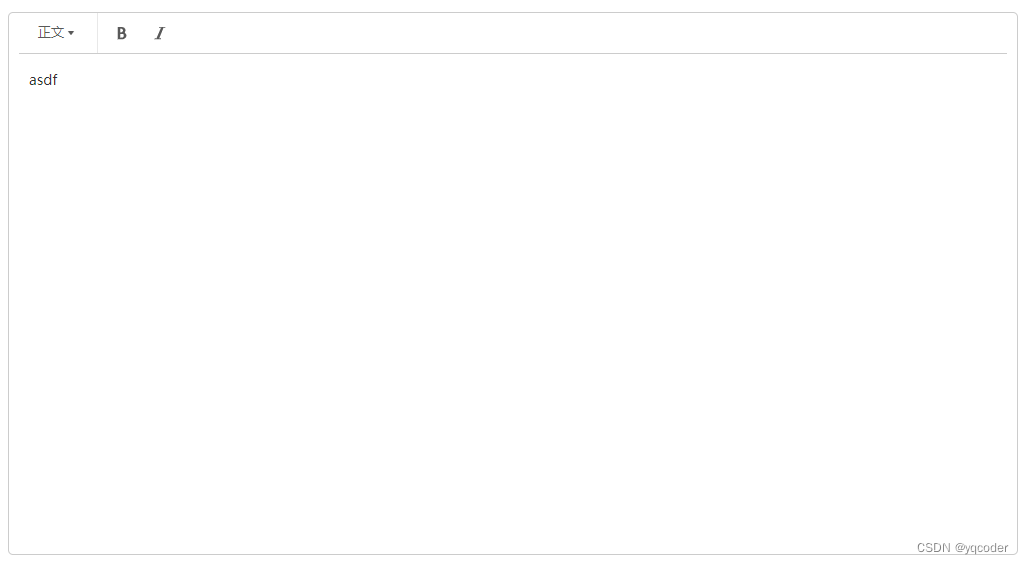
1.3 insertKeys
在当前 toolbarKeys 的基础上继续插入新菜单,如自定义扩展的菜单。
<script setup lang="ts">
  import { ref } from "vue";
  import Rich from "@/components/Rich.vue";

  let richHtml = ref("asdf");
  let toolbarConfig = {
    toolbarKeys: [
      // 菜单 key
      "headerSelect",

      // 分割线
      "|",

      // 菜单 key
      "bold",
      "italic",
    ],
    insertKeys: {
      index: 1, // 插入的位置,基于当前的 toolbarKeys
      keys: ["color", "bgColor"],
    },
  };
</script>

<template>
  <div class="page-rich">
    <Rich v-model="richHtml" :toolbarConfig="toolbarConfig" />
  </div>
</template>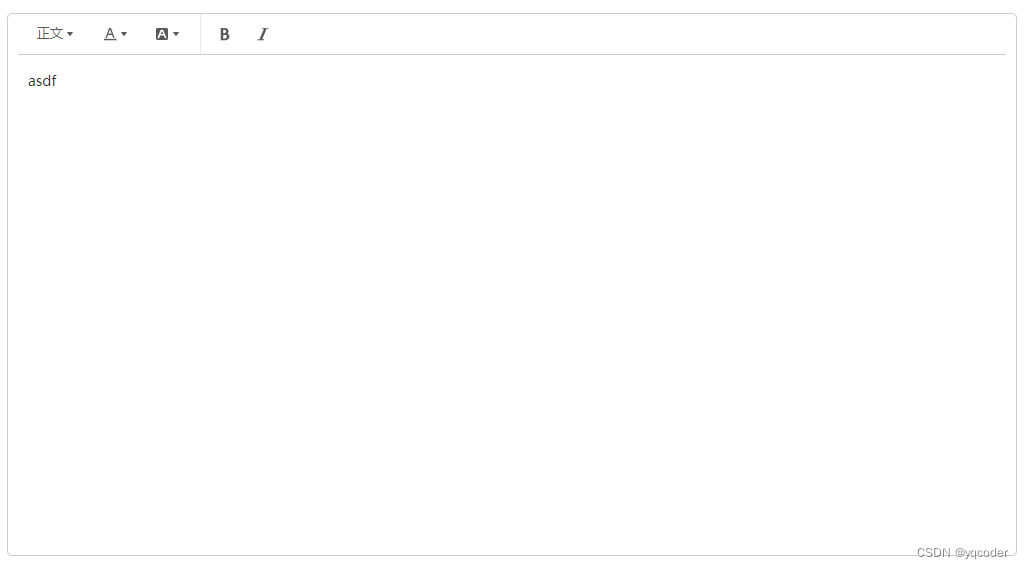
1.4 excludeKeys
排除掉某些菜单
<script setup lang="ts">
  import { ref } from "vue";
  import Rich from "@/components/Rich.vue";

  let richHtml = ref("asdf");
  let toolbarConfig = {
    toolbarKeys: [
      // 菜单 key
      "headerSelect",

      // 分割线
      "|",

      // 菜单 key
      "bold",
      "italic",
    ],
    insertKeys: {
      index: 1, // 插入的位置,基于当前的 toolbarKeys
      keys: ["color", "bgColor"],
    },
    excludeKeys: ["headerSelect"],
  };
</script>

<template>
  <div class="page-rich">
    <Rich v-model="richHtml" :toolbarConfig="toolbarConfig" />
  </div>
</template>
2. 编辑器配置
2.1 getConfig
通过 editor.getConfig() 查看工具栏的默认配置
const handleCreated = (editor) => {
  const result = editor.getConfig();
  console.log(result);
};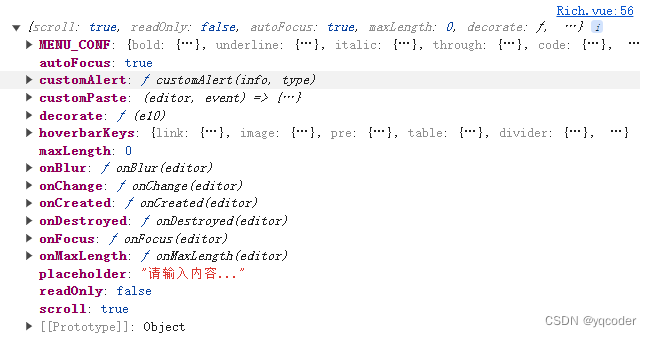
2.2 editorConfig 配置
<script setup lang="ts">
  import { ref } from "vue";
  import Rich from "@/components/Rich.vue";

  let richHtml = ref("");
  let editorConfig = ref({
    placeholder: "请输入",
    readOnly: false, // 是否只读,默认 false
    autoFocus: true, // 是否focus, 默认 true
    scroll: true, // 是否支持滚动,默认true。不要固定 editor-container 的高度,设置一个 min-height 即可。
    maxLength: 20, // 最高内容长度,onMaxLength 当达到限制时,触发函数
  });
</script>

<template>
  <div class="page-rich">
    <Rich v-model="richHtml" :editorConfig="editorConfig" />
  </div>
</template>
2.3 编译器方法
<script setup lang="ts">
  // 编辑器创建完毕时的回调函数。
  const handleCreated = (editor) => {
    editorRef.value = editor;
    console.log("created", editor);
  };
  // 编辑器内容、选区变化时的回调函数。
  const handleChange = (editor) => {
    console.log("change:", editor.children);
  };
  // 编辑器销毁时的回调函数。调用 editor.destroy() 即可销毁编辑器
  const handleDestroyed = (editor) => {
    console.log("destroyed", editor);
  };
  // 编辑器 focus 时的回调函数。
  const handleFocus = (editor) => {
    console.log("focus", editor);
  };
  // 编辑器 blur 时的回调函数。
  const handleBlur = (editor) => {
    console.log("blur", editor);
  };
  // 自定义编辑器 alert 。
  const customAlert = (info, type) => {
    alert(`【自定义提示】${type} - ${info}`);
  };
  // 自定义粘贴。可阻止编辑器的默认粘贴,实现自己的粘贴逻辑。
  const customPaste = (editor, event, callback) => {
    console.log("ClipboardEvent 粘贴事件对象", event);
    // const html = event.clipboardData.getData('text/html') // 获取粘贴的 html
    // const text = event.clipboardData.getData('text/plain') // 获取粘贴的纯文本
    // const rtf = event.clipboardData.getData('text/rtf') // 获取 rtf 数据(如从 word wsp 复制粘贴)

    // 自定义插入内容
    editor.insertText("xxx");

    // 返回 false ,阻止默认粘贴行为
    event.preventDefault();
    callback(false); // 返回值(注意,vue 事件的返回值,不能用 return)

    // 返回 true ,继续默认的粘贴行为
    // callback(true)
  };
</script>

<template>
  <div class="editor-content-view">
    <Toolbar />
    <Editor
      @onCreated="handleCreated"
      @onChange="handleChange"
      @onDestroyed="handleDestroyed"
      @onFocus="handleFocus"
      @onBlur="handleBlur"
      @customAlert="customAlert"
      @customPaste="customPaste"
    />
  </div>
</template>
3. 菜单配置
各个菜单项的详细配置。
3.1 通用方法
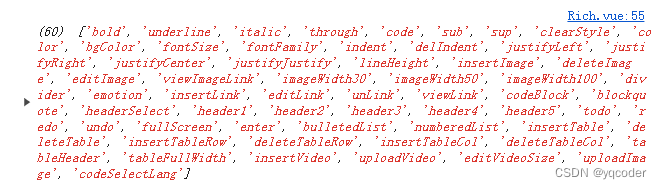
要配置哪个菜单,首先要知道这个菜单的 key 。执行 editor.getAllMenuKeys() 可获取编辑器所有菜单,从中找到自己想要的菜单 key 即可。
const handleCreated = (editor) => {
  const result = editor.getAllMenuKeys();
  console.log(result);
};
找到菜单 key 之后,可以先看看菜单的当前配置,再自行修改。
const handleCreated = (editor) => {
  const result = editor.getMenuConfig("uploadImage"); // 获取 uploadImage 的当前配置
  console.log(result);
};
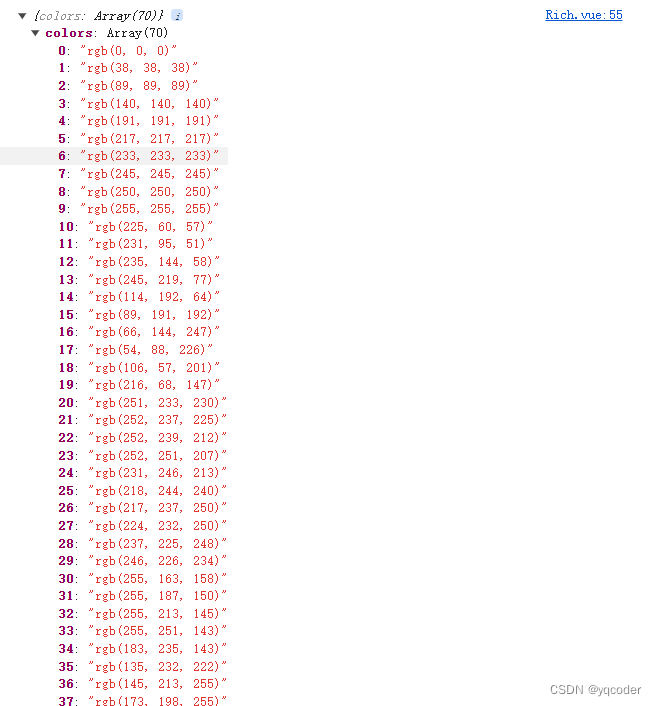
3.2 颜色
<script setup lang="ts">
  import { ref } from "vue";
  import Rich from "@/components/Rich.vue";

  let richHtml = ref("");
  let editorConfig = ref({
    MENU_CONF: {
      color: {
        colors: ["#000", "#333", "#666"],
      },
    },
  });
</script>

<template>
  <div class="page-rich">
    <Rich v-model="richHtml" :editorConfig="editorConfig" />
  </div>
</template>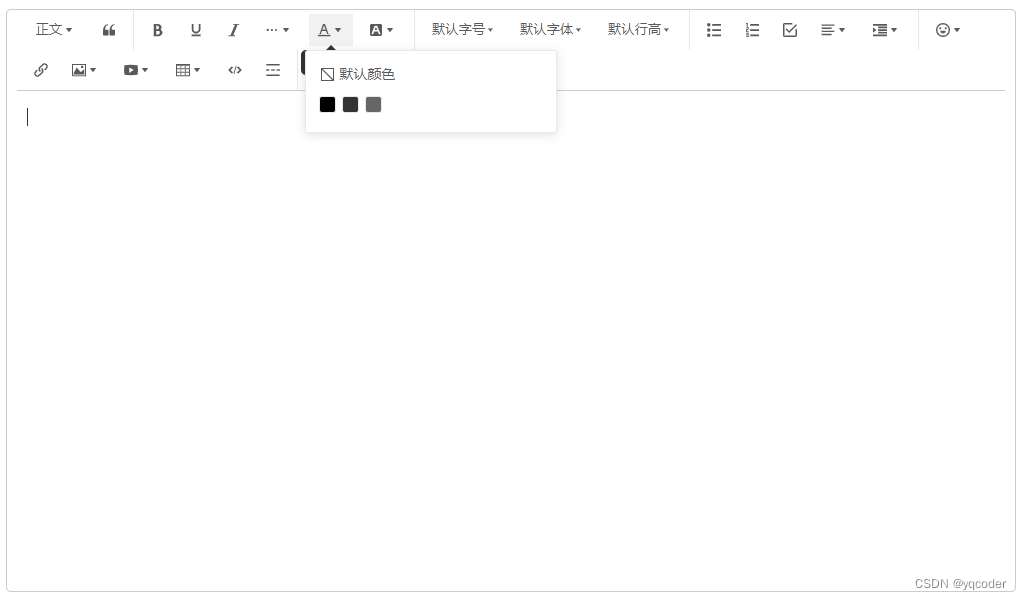
3.3 字号
<script setup lang="ts">
  import { ref } from "vue";
  import Rich from "@/components/Rich.vue";

  let richHtml = ref("");
  let editorConfig = ref({
    MENU_CONF: {
      fontSize: {
        fontSizeList: [
          // 元素支持两种形式
          //   1. 字符串;
          //   2. { name: 'xxx', value: 'xxx' }

          "12px",
          "16px",
          { name: "24px", value: "24px" },
          "40px",
        ],
      },
    },
  });
</script>

<template>
  <div class="page-rich">
    <Rich v-model="richHtml" :editorConfig="editorConfig" />
  </div>
</template>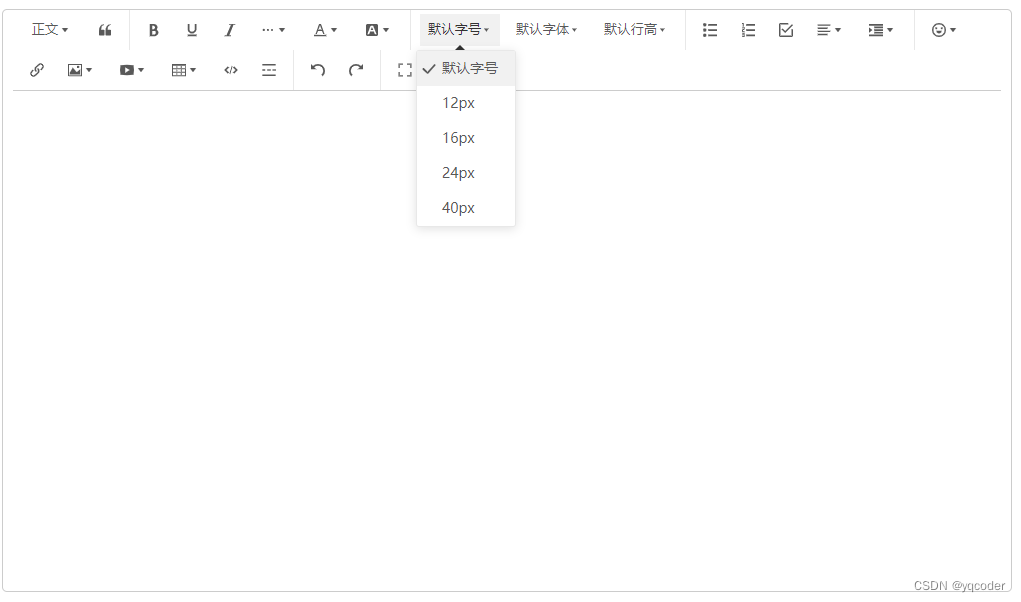
3.4 字体
<script setup lang="ts">
  import { ref } from "vue";
  import Rich from "@/components/Rich.vue";

  let richHtml = ref("");
  let editorConfig = ref({
    MENU_CONF: {
      fontFamily: {
        fontFamilyList: [
          // 元素支持两种形式
          //   1. 字符串;
          //   2. { name: 'xxx', value: 'xxx' }

          "黑体",
          "楷体",
          { name: "仿宋", value: "仿宋" },
          "Arial",
          "Tahoma",
          "Verdana",
        ],
      },
    },
  });
</script>

<template>
  <div class="page-rich">
    <Rich v-model="richHtml" :editorConfig="editorConfig" />
  </div>
</template>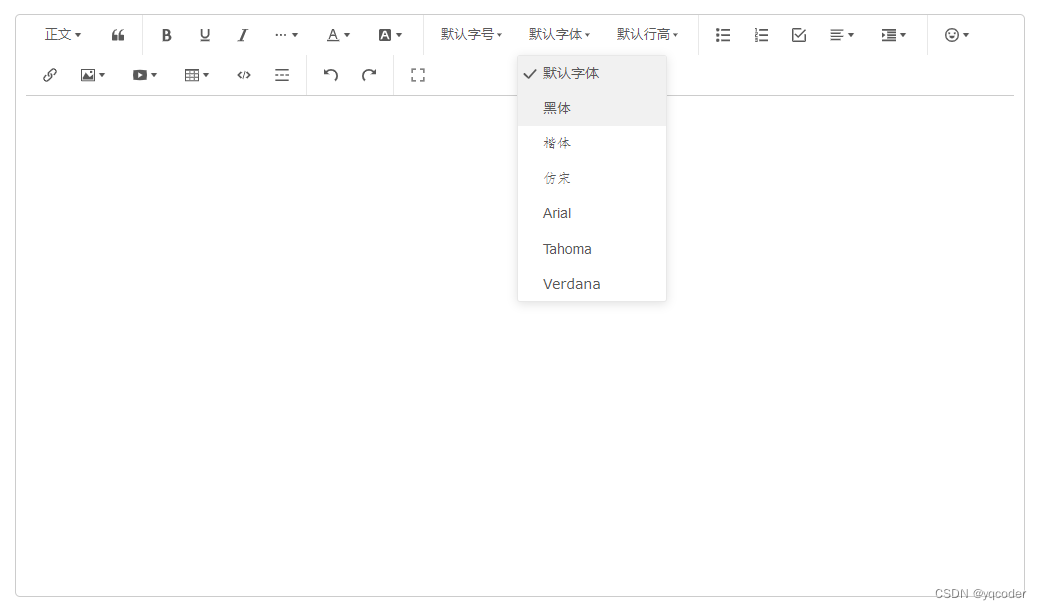
3.5 行高
<script setup lang="ts">
  import { ref } from "vue";
  import Rich from "@/components/Rich.vue";

  let richHtml = ref("");
  let editorConfig = ref({
    MENU_CONF: {
      lineHeight: {
        lineHeightList: ["1", "1.5", "2", "2.5"],
      },
    },
  });
</script>

<template>
  <div class="page-rich">
    <Rich v-model="richHtml" :editorConfig="editorConfig" />
  </div>
</template>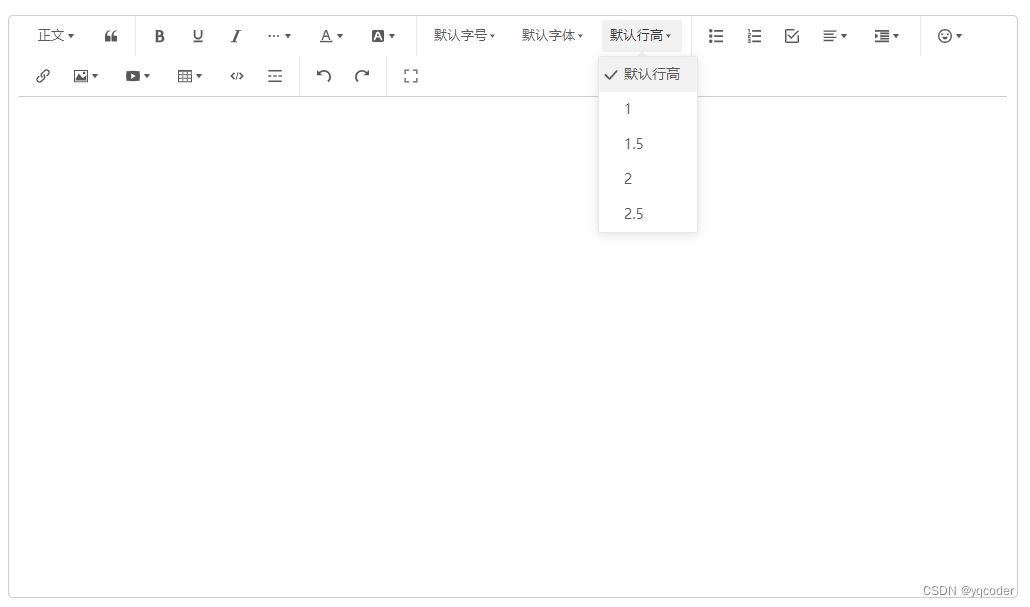
3.6 表情
<script setup lang="ts">
  import { ref } from "vue";
  import Rich from "@/components/Rich.vue";

  let richHtml = ref("");
  let editorConfig = ref({
    MENU_CONF: {
      emotion: {
        emotions: "😀 😃 😄 😁 😆 😅 😂 🤣 😊 😇 🙂 🙃 😉".split(" "),
      },
    },
  });
</script>

<template>
  <div class="page-rich">
    <Rich v-model="richHtml" :editorConfig="editorConfig" />
  </div>
</template>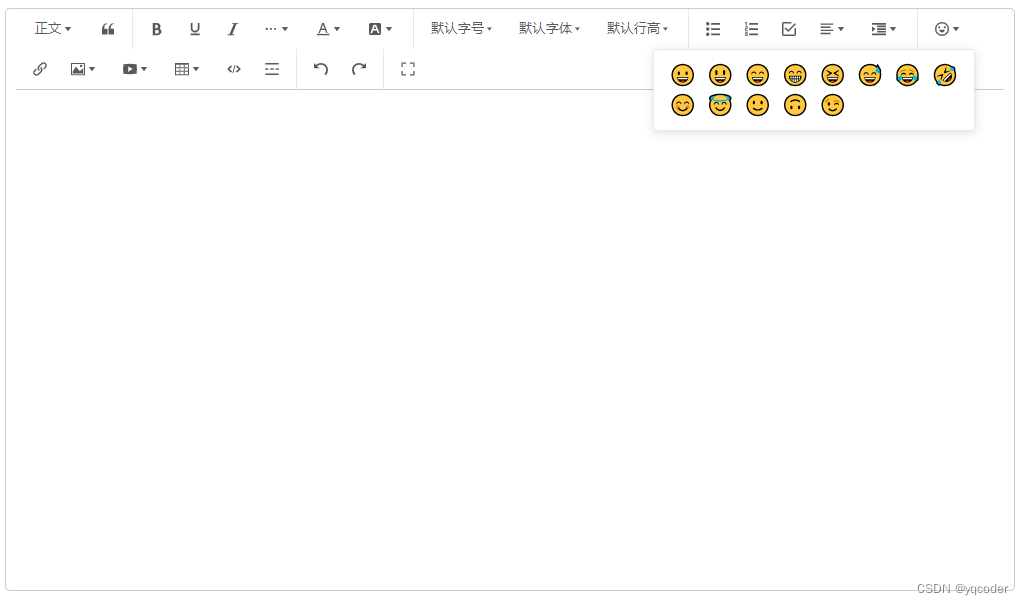
3.7 链接
checkLink 校验链接、parseLinkUrl 转换链接 url
<script setup lang="ts">
  import { ref } from "vue";
  import Rich from "@/components/Rich.vue";

  let richHtml = ref("");

  // 自定义校验链接
  const customCheckLinkFn = (text, url) => {
    if (!url) {
      return;
    }
    if (url.indexOf("http") !== 0) {
      return "链接必须以 http/https 开头";
    }
    return true;

    // 返回值有三种选择:
    // 1. 返回 true ,说明检查通过,编辑器将正常插入链接
    // 2. 返回一个字符串,说明检查未通过,编辑器会阻止插入。会 alert 出错误信息(即返回的字符串)
    // 3. 返回 undefined(即没有任何返回),说明检查未通过,编辑器会阻止插入。但不会提示任何信息
  };

  // 自定义转换链接 url
  const customParseLinkUrl = (url) => {
    if (url.indexOf("http") !== 0) {
      return `http://${url}`;
    }
    return url;
  };

  let editorConfig = ref({
    MENU_CONF: {
      insertLink: {
        checkLink: customCheckLinkFn, // 也支持 async 函数
        parseLinkUrl: customParseLinkUrl, // 也支持 async 函数
      },
    },
  });
</script>

<template>
  <div class="page-rich">
    <Rich v-model="richHtml" :editorConfig="editorConfig" />
  </div>
</template>
3.8 图片
<script setup lang="ts">
  import { ref } from "vue";
  import Rich from "@/components/Rich.vue";

  let richHtml = ref("");

  // 自定义校验图片
  const customCheckImageFn = (src, alt, url) => {
    if (!src) {
      return;
    }
    if (src.indexOf("http") !== 0) {
      return "图片网址必须以 http/https 开头";
    }
    return true;

    // 返回值有三种选择:
    // 1. 返回 true ,说明检查通过,编辑器将正常插入图片
    // 2. 返回一个字符串,说明检查未通过,编辑器会阻止插入。会 alert 出错误信息(即返回的字符串)
    // 3. 返回 undefined(即没有任何返回),说明检查未通过,编辑器会阻止插入。但不会提示任何信息
  };

  // 转换图片链接
  const customParseImageSrc = (src) => {
    if (src.indexOf("http") !== 0) {
      return `http://${src}`;
    }
    return src;
  };

  let editorConfig = ref({
    MENU_CONF: {
      // 插入图片
      insertImage: {
        onInsertedImage(imageNode) {
          if (imageNode == null) return;

          const { src, alt, url, href } = imageNode;
          console.log("inserted image", src, alt, url, href);
        },
        checkImage: customCheckImageFn, // 也支持 async 函数
        parseImageSrc: customParseImageSrc, // 也支持 async 函数
      },
      // 编辑图片
      editImage: {
        onUpdatedImage(imageNode) {
          if (imageNode == null) return;

          const { src, alt, url } = imageNode;
          console.log("updated image", src, alt, url);
        },
        checkImage: customCheckImageFn, // 也支持 async 函数
        parseImageSrc: customParseImageSrc, // 也支持 async 函数
      },
    },
  });
</script>

<template>
  <div class="page-rich">
    <Rich v-model="richHtml" :editorConfig="editorConfig" />
  </div>
</template>
3.9 上传图片
3.9.1 服务端地址
必填,否则上传图片会报错。
let editorConfig = ref({
  MENU_CONF: {
    uploadImage: {
      server: "/api/upload",
    },
  },
});
正常情况要求服务端返回体如下,如果不满足可以查看自定义插入。
// 上传成功返回
{
"errno": 0, // 注意:值是数字,不能是字符串
"data": {
"url": "xxx", // 图片 src ,必须
"alt": "yyy", // 图片描述文字,非必须
"href": "zzz" // 图片的链接,非必须
}
}
// 上传失败返回
{
"errno": 1, // 只要不等于 0 就行
"message": "失败信息"
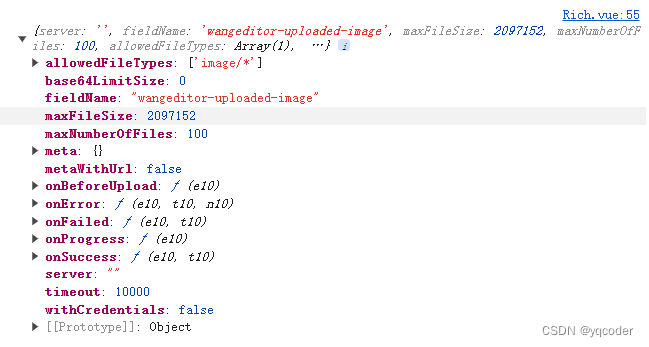
}3.9.2 基本配置
let editorConfig = ref({
  MENU_CONF: {
    uploadImage: {
      // form-data fieldName ,默认值 'wangeditor-uploaded-image'
      fieldName: "your-custom-name",

      // 单个文件的最大体积限制,默认为 2M
      maxFileSize: 1 * 1024 * 1024, // 1M

      // 最多可上传几个文件,默认为 100
      maxNumberOfFiles: 10,

      // 选择文件时的类型限制,默认为 ['image/*'] 。如不想限制,则设置为 []
      allowedFileTypes: ["image/*"],

      // 自定义上传参数,例如传递验证的 token 等。参数会被添加到 formData 中,一起上传到服务端。
      meta: {
        token: "xxx",
        otherKey: "yyy",
      },

      // 将 meta 拼接到 url 参数中,默认 false
      metaWithUrl: false,

      // 自定义增加 http  header
      headers: {
        Accept: "text/x-json",
        otherKey: "xxx",
      },

      // 跨域是否传递 cookie ,默认为 false
      withCredentials: true,

      // 超时时间,默认为 10 秒
      timeout: 5 * 1000, // 5 秒
    },
  },
});
3.9.3 回调函数
let editorConfig = ref({
  MENU_CONF: {
    uploadImage: {
      // 上传之前触发
      onBeforeUpload(file) {
        // file 选中的文件,格式如 { key: file }
        return file;

        // 可以 return
        // 1. return file 或者 new 一个 file ,接下来将上传
        // 2. return false ,不上传这个 file
      },

      // 上传进度的回调函数
      onProgress(progress) {
        // progress 是 0-100 的数字
        console.log("progress", progress);
      },

      // 单个文件上传成功之后
      onSuccess(file, res) {
        console.log(`${file.name} 上传成功`, res);
      },

      // 单个文件上传失败
      onFailed(file, res) {
        console.log(`${file.name} 上传失败`, res);
      },

      // 上传错误,或者触发 timeout 超时
      onError(file, err, res) {
        console.log(`${file.name} 上传出错`, err, res);
      },
    },
  },
});
3.9.4 自定义插入
如果服务端的返回体,不满足所需格式,可以使用 customInsert 自定义插入。
let editorConfig = ref({
  MENU_CONF: {
    uploadImage: {
      customInsert(res, insertFn) {
        // res 即服务端的返回结果

        // 从 res 中找到 url alt href ,然后插入图片
        insertFn(url, alt, href);
      },
    },
  },
});
3.9.5 自定义上传
如果不想使用 wangEditor 自带的上传功能,例如你要上传到阿里云 OSS 。可以通过 customUpload 来自定义上传。
let editorConfig = ref({
  MENU_CONF: {
    uploadImage: {
      async customUpload(file, insertFn) {
        // file 即选中的文件
        // 自己实现上传,并得到图片 url alt href
        // 最后插入图片
        insertFn(url, alt, href);
      },
    },
  },
});
3.9.6 自定义选择图片
如果不想使用 wangEditor 自带的选择文件功能,例如你有自己的图床,或者图片选择器。可以通过 customBrowseAndUpload 来自己实现选择图片、上传图片,并插入图片。
let editorConfig = ref({
  MENU_CONF: {
    uploadImage: {
      customBrowseAndUpload(insertFn) {
        // 自己选择文件
        // 自己上传文件,并得到图片 url alt href
        // 最后插入图片
        insertFn(url, alt, href);
      },
    },
  },
});
3.9.7 base64 插入图片
let editorConfig = ref({
  MENU_CONF: {
    uploadImage: {
      // 小于该值就插入 base64 格式(而不上传),默认为 0
      base64LimitSize: 5 * 1024, // 5kb
    },
  },
});
3.10 视频
onInsertedVideo 插入视频之后的回调、checkVideo 校验视频链接、parseVideoSrc 转换视频链接
<script setup lang="ts">
  import { ref } from "vue";
  import Rich from "@/components/Rich.vue";

  let richHtml = ref("");
  // 自定义校验视频
  const customCheckVideoFn = (src, poster) => {
    if (!src) {
      return;
    }
    if (src.indexOf("http") !== 0) {
      return "视频地址必须以 http/https 开头";
    }
    return true;

    // 返回值有三种选择:
    // 1. 返回 true ,说明检查通过,编辑器将正常插入视频
    // 2. 返回一个字符串,说明检查未通过,编辑器会阻止插入。会 alert 出错误信息(即返回的字符串)
    // 3. 返回 undefined(即没有任何返回),说明检查未通过,编辑器会阻止插入。但不会提示任何信息
  };

  // 自定义转换视频
  const customParseVideoSrc = (src) => {
    if (src.includes(".bilibili.com")) {
      // 转换 bilibili url 为 iframe (仅作为示例,不保证代码正确和完整)
      const arr = location.pathname.split("/");
      const vid = arr[arr.length - 1];
      return `<iframe src="//player.bilibili.com/player.html?bvid=${vid}" scrolling="no" border="0" frameborder="no" framespacing="0" allowfullscreen="true"> </iframe>`;
    }
    return src;
  };
  let editorConfig = ref({
    MENU_CONF: {
      insertVideo: {
        onInsertedVideo(videoNode) {
          if (videoNode == null) return;

          const { src } = videoNode;
          console.log("inserted video", src);
        },
        checkVideo: customCheckVideoFn, // 也支持 async 函数
        parseVideoSrc: customParseVideoSrc, // 也支持 async 函数
      },
    },
  });
</script>

<template>
  <div class="page-rich">
    <Rich v-model="richHtml" :editorConfig="editorConfig" />
  </div>
</template>
3.11 上传视频
3.11.1 服务端地址
必填,否则上传图片会报错。
let editorConfig = ref({
  MENU_CONF: {
    uploadVideo: {
      server: "/api/upload",
    },
  },
});
正常情况要求服务端返回体如下,如果不满足可以查看自定义插入。
// 上传成功返回
{
    "errno": 0, // 注意:值是数字,不能是字符串
    "data": {
        "url": "xxx", // 视频 src ,必须
        "poster": "xxx.png" // 视频封面图片 url ,可选
    }
}

// 上传失败返回
{
    "errno": 1, // 只要不等于 0 就行
    "message": "失败信息"
}
3.11.2 基本配置
let editorConfig = ref({
  MENU_CONF: {
    uploadVideo: {
      // form-data fieldName ,默认值 'wangeditor-uploaded-video'
      fieldName: "your-custom-name",

      // 单个文件的最大体积限制,默认为 10M
      maxFileSize: 5 * 1024 * 1024, // 5M

      // 最多可上传几个文件,默认为 5
      maxNumberOfFiles: 3,

      // 选择文件时的类型限制,默认为 ['video/*'] 。如不想限制,则设置为 []
      allowedFileTypes: ["video/*"],

      // 自定义上传参数,例如传递验证的 token 等。参数会被添加到 formData 中,一起上传到服务端。
      meta: {
        token: "xxx",
        otherKey: "yyy",
      },

      // 将 meta 拼接到 url 参数中,默认 false
      metaWithUrl: false,

      // 自定义增加 http  header
      headers: {
        Accept: "text/x-json",
        otherKey: "xxx",
      },

      // 跨域是否传递 cookie ,默认为 false
      withCredentials: true,

      // 超时时间,默认为 30 秒
      timeout: 15 * 1000, // 15 秒
    },
  },
});
3.11.3 回调函数
let editorConfig = ref({
  MENU_CONF: {
    uploadVideo: {
      // 上传之前触发
      onBeforeUpload(file) {
        // file 选中的文件,格式如 { key: file }
        return file;

        // 可以 return
        // 1. return file 或者 new 一个 file ,接下来将上传
        // 2. return false ,不上传这个 file
      },

      // 上传进度的回调函数
      onProgress(progress) {
        // progress 是 0-100 的数字
        console.log("progress", progress);
      },

      // 单个文件上传成功之后
      onSuccess(file, res) {
        console.log(`${file.name} 上传成功`, res);
      },

      // 单个文件上传失败
      onFailed(file, res) {
        console.log(`${file.name} 上传失败`, res);
      },

      // 上传错误,或者触发 timeout 超时
      onError(file, err, res) {
        console.log(`${file.name} 上传出错`, err, res);
      },
    },
  },
});
3.11.4 自定义插入
如果服务端的返回体,不满足所需格式,可以使用 customInsert 自定义插入。
let editorConfig = ref({
  MENU_CONF: {
    uploadVideo: {
      customInsert(res, insertFn) {
        // res 即服务端的返回结果

        // 从 res 中找到 url poster ,然后插入视频
        insertFn(url, poster);
      },
    },
  },
});
3.11.5 自定义上传
如果不想使用 wangEditor 自带的上传功能,例如你要上传到阿里云 OSS 。可以通过 customUpload 来自定义上传。
let editorConfig = ref({
  MENU_CONF: {
    uploadVideo: {
      async customUpload(file, insertFn) {
        // file 即选中的文件
        // 自己实现上传,并得到视频 url poster
        // 最后插入视频
        insertFn(url, poster);
      },
    },
  },
});
3.11.6 自定义选择视频
如果不想使用 wangEditor 自带的选择文件功能,例如你有自己的图床,或者视频文件选择器。可以通过 customBrowseAndUpload 来自己实现选择视频、上传视频,并插入视频
let editorConfig = ref({
  MENU_CONF: {
    uploadVideo: {
      customBrowseAndUpload(insertFn) {
        // 自己选择文件
        // 自己上传文件,并得到视频 url poster
        // 最后插入视频
        insertFn(url, poster);
      },
    },
  },
});
4. 编辑器 API
4.1 getConfig
获取编辑器所有配置
const handleCreated = (editor) => {
  const result = editor.getConfig();
  console.log(result);
};
4.2 getAllMenuKeys
获取编辑器所有 menu 的 key
const handleCreated = (editor) => {
  const result = editor.getAllMenuKeys();
  console.log(result);
};
4.3 getMenuConfig
获取单个 menu 的配置。
const handleCreated = (editor) => {
  const result = editor.getMenuConfig("color");
  console.log(result);
};
4.4 alert
编辑器 alert ,可通过 customAlert 配置。
editor.alert("错误信息", "error");customAlert 配置
<script setup lang="ts">
  import { message } from "antd";
  const customAlert = (s, t) => {
    switch (t) {
      case "success":
        message.success(s);
        break;
      case "info":
        message.info(s);
        break;
      case "warning":
        message.warning(s);
        break;
      case "error":
        message.error(s);
        break;
      default:
        message.info(s);
        break;
    }
  };
</script>

<template>
  <div class="editor-content-view">
    <Toolbar />
    <Editor @customAlert="customAlert" />
  </div>
</template>
4.5 handleTab
控制编辑器按 tab 键时,输入什么。
<script setup lang="ts">
  const handleCreated = (editor: any) => {
    editor.handleTab = () => editor.insertText("aaaaa");
  };
</script>
<template>
  <div class="editor-content-view">
    <Toolbar />
    <Editor @onCreated="handleCreated" />
  </div>
</template>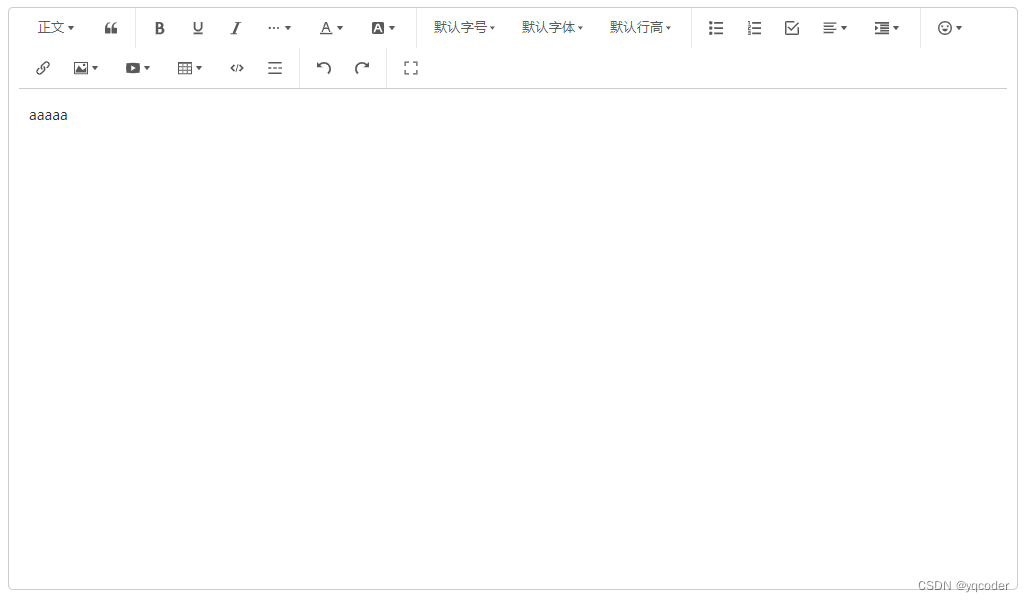
4.6 getHtml
editor.getHtml() 获取非格式化的 html
const result = editor.getHtml();
console.log(result);
4.7 getText
获取当前编辑器的纯文本内容
const handleCreated = (editor) => {
  const result = editor.getText();
  console.log(result);
};
4.8 setHtml
重置编辑器的 HTML 内容。
editor.setHtml("<p>hello</p>");4.9 isEmpty
判断当前编辑器内容是否为空(只有一个空段落)
editor.isEmpty();4.10 getSelectionText
获取选中的文本
const result = editor.getSelectionText();
console.log(result);
4.11 getElemsByType
通过 type 获取编辑器的 element 列表。
editor.getElemsByType("image"); // 所有图片
editor.getElemsByType("link"); // 所有链接
4.12 getElemsByTypePrefix
通过 type 前缀获取编辑器的 element 列表。
editor.getElemsByTypePrefix("header"); // 获取所有标题 header1 header2 header3...4.13 deleteBackward
向前删除,相当于按 backspace 键。
editor.deleteBackward();4.14 deleteForward
向后删除,相当于按 delete 键
editor.deleteForward();4.15 deleteFragment
删除选中的内容
editor.deleteFragment();4.16 getFragment
获取选中的内容,json 格式
editor.getFragment();4.17 insertBreak
在选区回车换行
editor.insertBreak();4.18 insertText
在选区插入文本
editor.insertText("aaaa");4.19 dangerouslyInsertHtml
插入富文本
editor.dangerouslyInsertHtml(`<h1>标题</h1><p>文本 <b>加粗</b></p>`);4.20 clear
清空编辑器内容
editor.clear();4.21 undo
撤销
editor.undo();4.22 redo
重做
editor.redo();4.23 insertNode
在选区插入一个节点
const node = { type: "paragraph", children: [{ text: "simple text" }] };
editor.insertNode(node);
4.24 insertNodes
在选区插入多个节点
import { SlateTransforms } from "@wangeditor/editor";

const node1 = { type: "paragraph", children: [{ text: "aaa" }] };
const node2 = { type: "paragraph", children: [{ text: "bbb" }] };
const nodeList = [node1, node2];

SlateTransforms.insertNodes(editor, nodeList);
4.25 removeNodes
删除选区所在的节点
import { SlateTransforms } from "@wangeditor/editor";

SlateTransforms.removeNodes(editor);
4.26 获取选中节点
可使用 SlateEditor.nodes 获取选中的节点。
import { SlateEditor, SlateElement, SlateNode } from "@wangeditor/editor";

const nodeEntries = SlateEditor.nodes(editor, {
  match: (node) => {
    if (SlateElement.isElement(node)) {
      if (node.type === "paragraph") {
        return true; // 匹配 paragraph
      }
    }
    return false;
  },
  universal: true,
});

if (nodeEntries == null) {
  console.log("当前未选中的 paragraph");
} else {
  for (let nodeEntry of nodeEntries) {
    const [node, path] = nodeEntry;
    console.log("选中了 paragraph 节点", node);
    console.log("节点 path 是", path);
  }
}
4.27 setNodes
设置选中节点的属性
import { SlateTransforms } from "@wangeditor/editor";

SlateTransforms.setNodes(
  editor,
  {
    // @ts-ignore
    textAlign: "right",
  },
  {
    mode: "highest", // 针对最高层级的节点
  }
);
4.28 getParentNode
获取一个节点的父节点
const parentNode = editor.getParentNode(node); // 返回 node 或者 null4.29 toDOMNode
获取一个节点对应的 DOM 节点
const elem = editor.toDOMNode(node); // 返回 HTMLElement4.30 isInline
判断一个节点是否是 inline
const inline = editor.isInline(node);4.31 isVoid
判断一个节点是否是 void
const void = editor.isVoid(node)4.32 isText
判断一个节点是否是 text
import { SlateText } from "@wangeditor/editor";

SlateText.isText(node); // true/false
4.33 isElement
判断一个节点是否是 elem
import { SlateElement } from "@wangeditor/editor";

SlateElement.isElement(node); // true/false
4.34 addMark
为选中的文本添加标记(文本样式)
editor.addMark("bold", true); // 加粗
editor.addMark("color", "#999"); // 文本颜色
4.35 removeMark
对选中的文字,取消标记(文本样式)
editor.removeMark("bold"); // 取消加粗4.36 marks
获取选中文字的标记(文本样式)
import { SlateEditor } from "@wangeditor/editor";

SlateEditor.marks(editor); // 例如 { bold: true, color: "#595959" }
4.37 id
获取编辑器 id
editor.id; // 如 'wangEditor-1'4.38 isFullScreen
编辑器是否全屏
editor.isFullScreen; // true/false4.39 focus
聚焦到编辑器
editor.focus();

// editor.focus(true) // 选区定位到最后
4.40 blur
失焦编辑器
editor.blur();4.41 isFocused
判断当前编辑器是否聚焦?
editor.isFocused(); // true/false4.42 updateView
强制更新视图
editor.updateView();4.43 scrollToElem
滚动到指定元素,类似锚点。
editor.scrollToElem(elemId);4.44 showProgressBar
显示进度条,一般用于上传功能
editor.showProgressBar(progress); // progress 为 0-100 的数字4.45 hidePanelOrModal
隐藏当前的弹框 (如插入链接) 和下拉列表(如设置标题、设置字体)
editor.hidePanelOrModal();4.46 fullScreen
设置为全屏
editor.fullScreen();4.47 unFullScreen
取消全屏
editor.unFullScreen();4.48 disable
禁用编辑器,设置为只读
editor.disable();4.49 isDisabled
判断当前编辑器是否只读?
editor.isDisabled(); // true/false4.50 enable
取消禁用,取消只读
editor.enable();4.51 destroy
销毁编辑器和工具栏
editor.destroy();4.52 getEditableContainer
获取编辑区域容器 DOM 节点
editor.getEditableContainer();4.53 selection
获取编辑器当前的选区。如果未选中,则返回 null 。
editor.selection; // selection 或 nullselection 数据结构如下:
{
  "anchor": { "path": [1, 0], "offset": 8 },
  "focus": { "path": [1, 0], "offset": 10 }
}
4.54 select
选中一个指定的选区。
const newSelection = {
  anchor: { path: [1, 0], offset: 8 },
  focus: { path: [1, 0], offset: 10 },
};
editor.select(newSelection);
4.55 selectAll
选中所有内容
editor.selectAll();4.56 deselect
取消选中
editor.deselect();4.57 move
移动光标
editor.move(3); // 移动 3 个字符4.58 moveReverse
反向移动光标
editor.moveReverse(2); // 反向移动 2 个字符4.59 restoreSelection
恢复最近一次非 null 选区。如编辑器 blur 之后,再重新恢复选区。
editor.restoreSelection();4.60 isSelectedAll
判断编辑器是否全部选中。
editor.isSelectedAll(); // true/false4.61 getSelectionPosition
获取选区的定位,将视情况返回 left right top bottom 的其中几个。
editor.getSelectionPosition(); // 例如 { left: "80.15px", top: "116px" }4.62 getNodePosition
获取某个节点的定位,将视情况返回 left right top bottom 的其中几个。
editor.getNodePosition(node); // 例如 { left: "80.15px", top: "116px" }4.63 on
监听某个事件
editor.on("event-key", fn);4.64 off
取消监听
editor.off("event-key", fn);4.65 once
只监听一次
editor.once("event-key", fn);4.66 emit
触发事件
editor.emit("event-key");4.67 内置的事件
editor.on("fullScreen", () => {
  console.log("fullScreen");
});
editor.on("unFullScreen", () => {
  console.log("unFullScreen");
});
editor.on("scroll", () => {
  console.log("scroll");
});
editor.on("modalOrPanelShow", (modalOrPanel) => {
  console.log(modalOrPanel);
});
editor.on("modalOrPanelHide", () => {
  console.log("modalOrPanelHide");
});


 558
558

 被折叠的 条评论
为什么被折叠?
被折叠的 条评论
为什么被折叠?
 到【灌水乐园】发言


