


由于微信公众号改变了推送规则,为了每次新的推送可以在第一时间出现在您的订阅列表中,记得将本公众号设为星标或置顶喔~
手把手带您安装gamit/globk软件~
🌿前言
受朋友之托,出一期Ubuntu22.04安装GNSS数据处理软件——gamit软件的教程~
🌸安装环境
本教程录制的安装环境为ubuntu22.04双系统物理机,gamit软件版本为10.7。
笔者在虚拟机ubuntu20.04和双系统ubuntu22.04上均尝试安装了gamit软件,相对而言,笔者感觉ubuntu20.04下的安装会更加顺利一些。笔者在介绍过程中也会穿插强调ubuntu22.04安装与20.04安装过程的区别。
🍀安装步骤
1.获取软件安装包
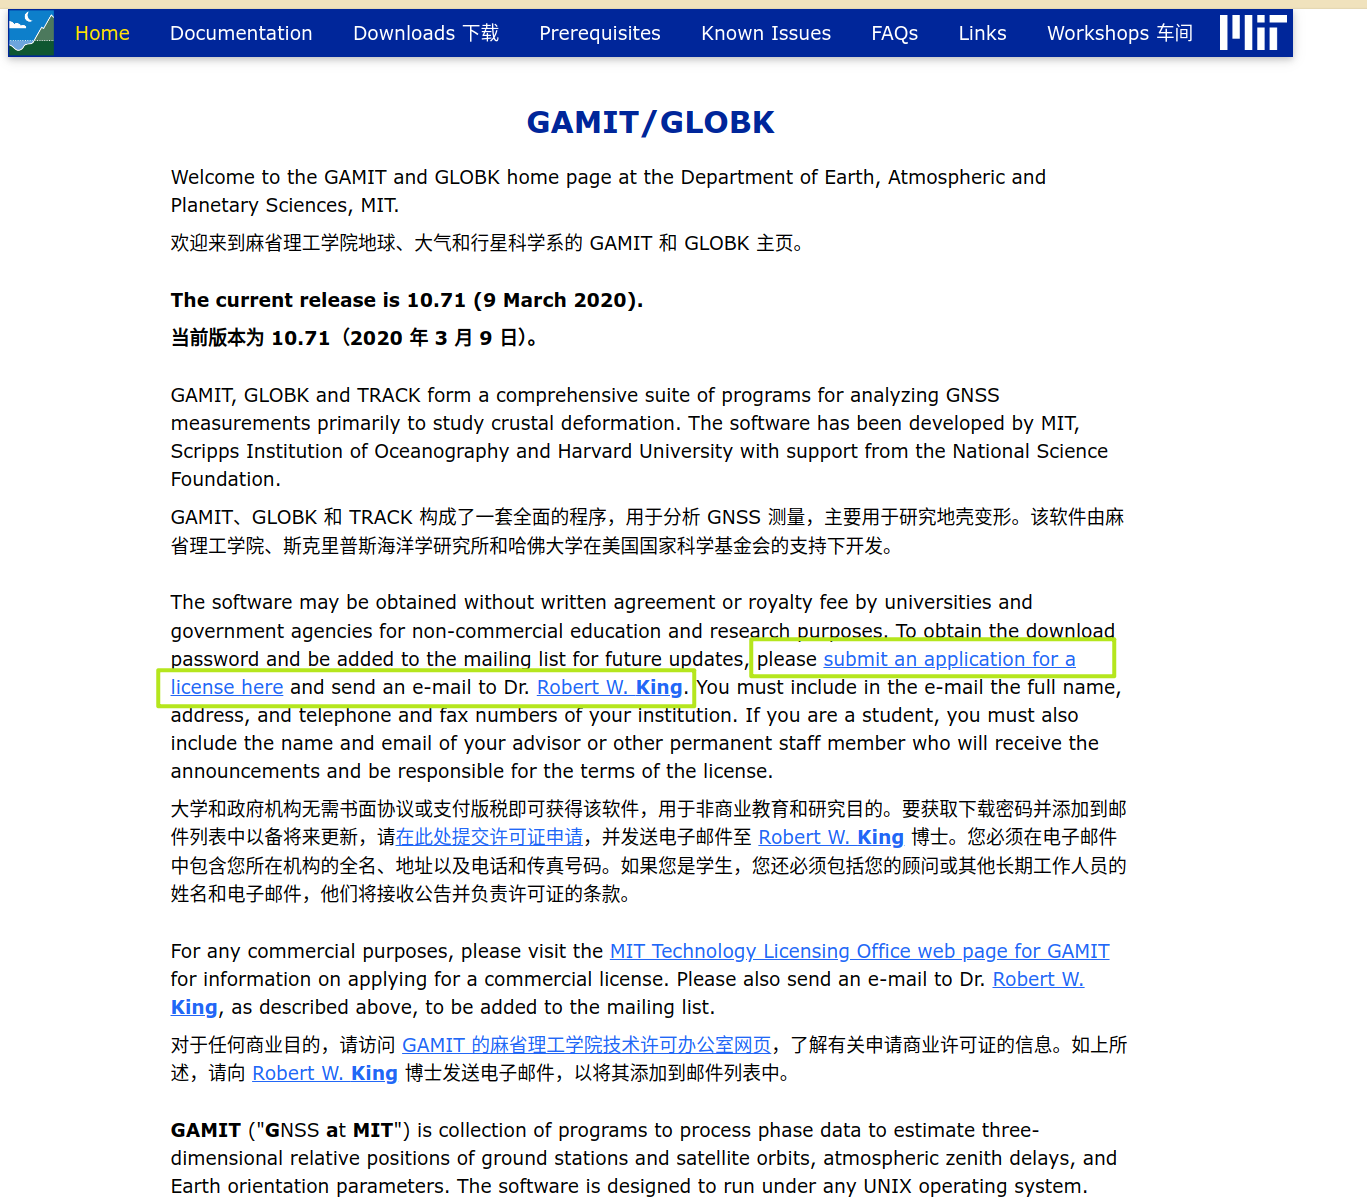
gamit是一款开源软件,但是安装包的获取需要在gamit官网(http://geoweb.mit.edu/gg/)提交申请才可以获得ftp服务器的账号密码,再从ftp服务器上下载源码包。
笔者已将软件包上传至百度网盘,关注公众号回复关键字“240919”即可获取百度网盘链接~
2.安装必要的软件包
使用apt包管理器来安装必要的软件包。
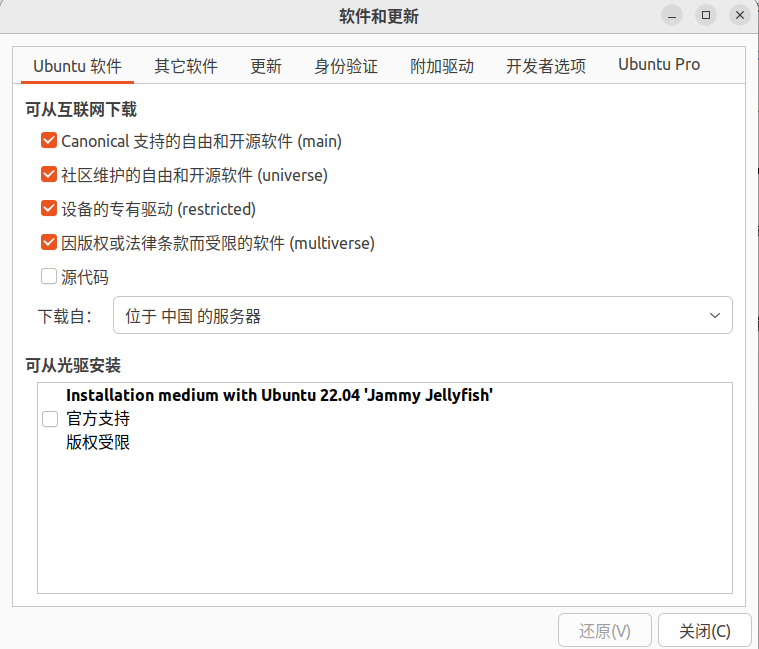
新安装的Ubuntu可能需要换apt源为国内才能正常下载,具体换源方法网上教程很多,笔者这里仅放一张图片以便小白寻路(当你apt安装失败时再检查这一步)。
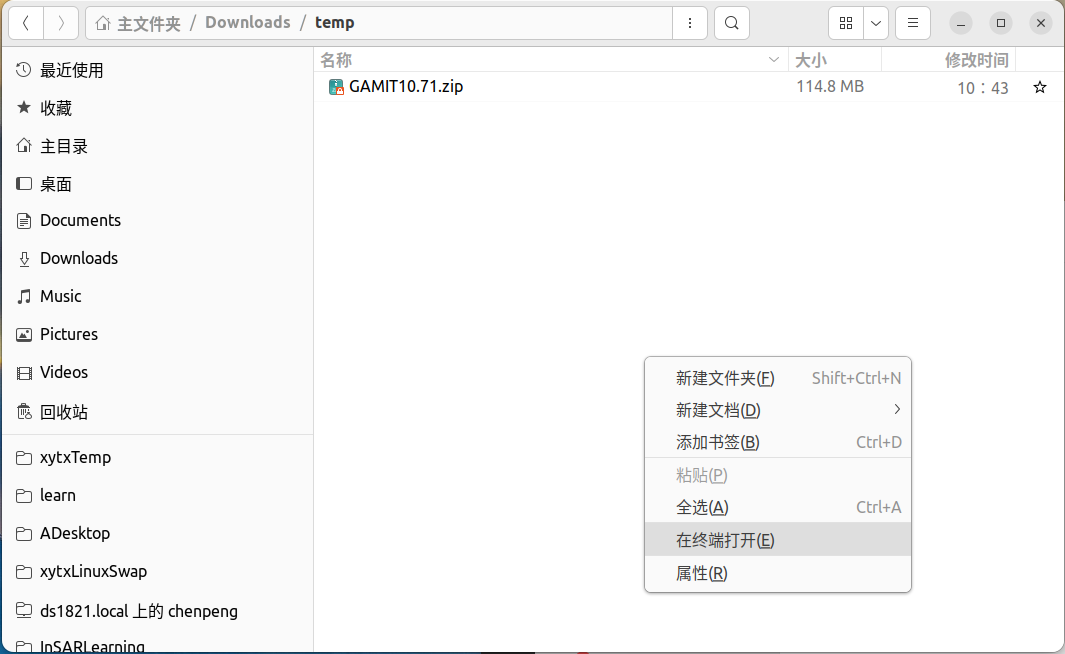
- 在gamit压缩包目录下右键->在终端中打开,如此默认的终端路径会是gamit压缩包路径,以便后续操作。
使用下面命令安装必要的软件包
sudo apt install tcsh csh gcc libx11-dev gfortran make gmt gmt-dcw gmt-gshhg
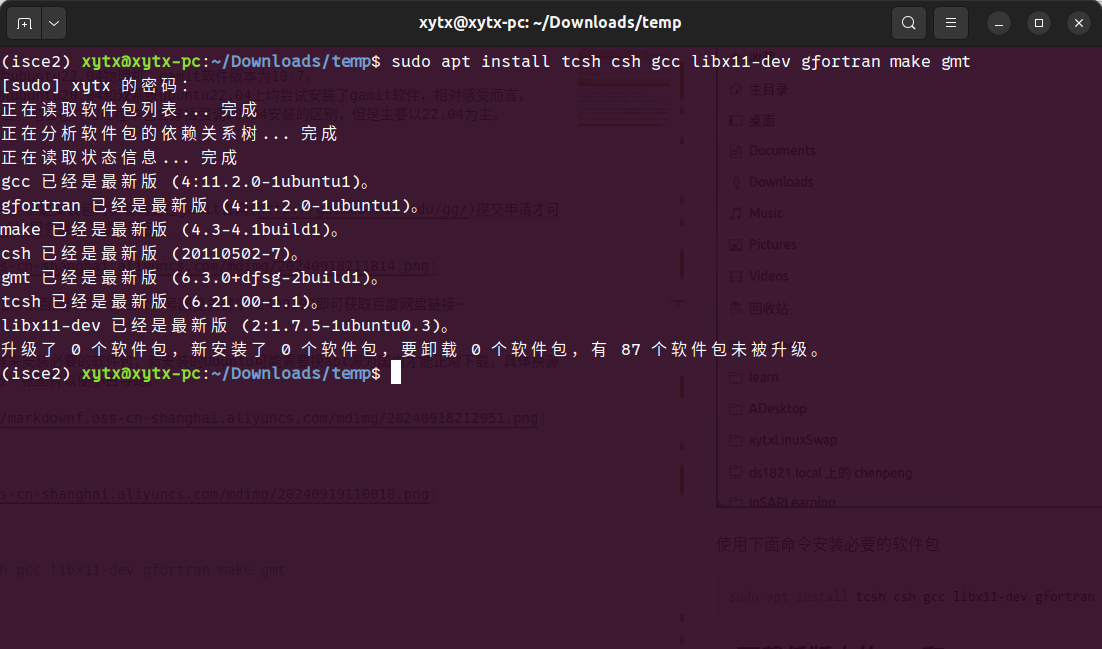
需要注意的是,笔者已经安装过相应的包,所以读者的输出应该与笔者不太一样。
3.下载低版本的gcc和gfortran
这一步是非常重要,如果gcc和gfortran编译器版本过高,就可能会导致编译错误。首先需要下载安装低版本的gcc和gfortran,随后使用alternatives来设置默认的编译器版本。
对于ubuntu20.04的用户而言,可以先转到4.检查调整后的版本,查看gcc和gfortran版本,如果版本都为9.几,则可以跳过此步。
- 安装低版本的gcc和gfortran
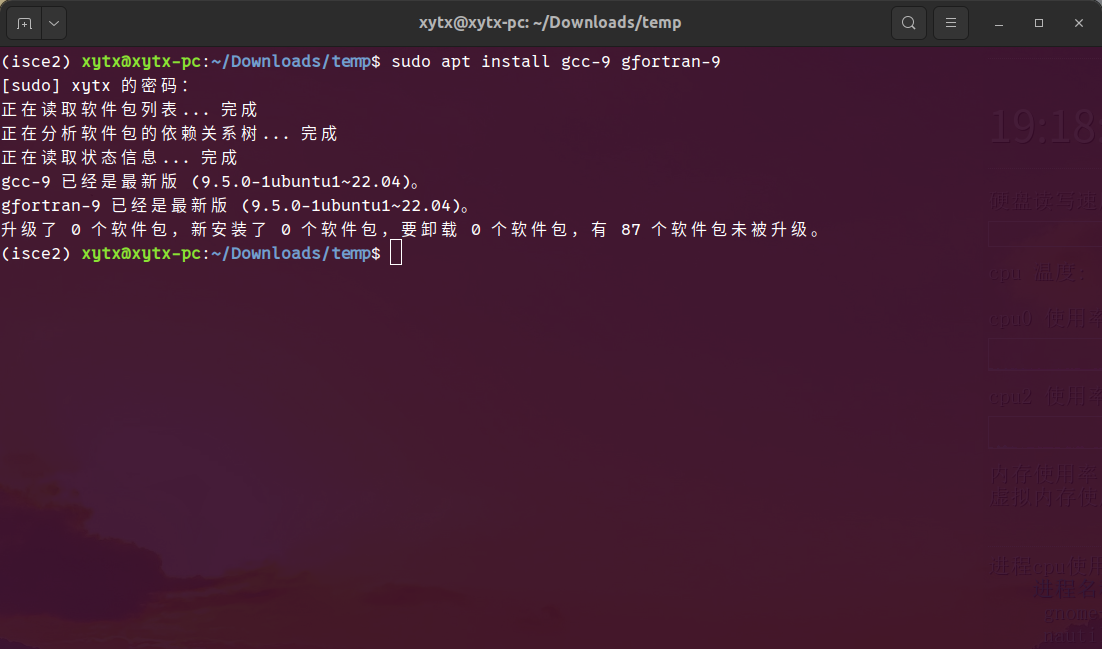
sudo apt install gcc-9 gfortran-9
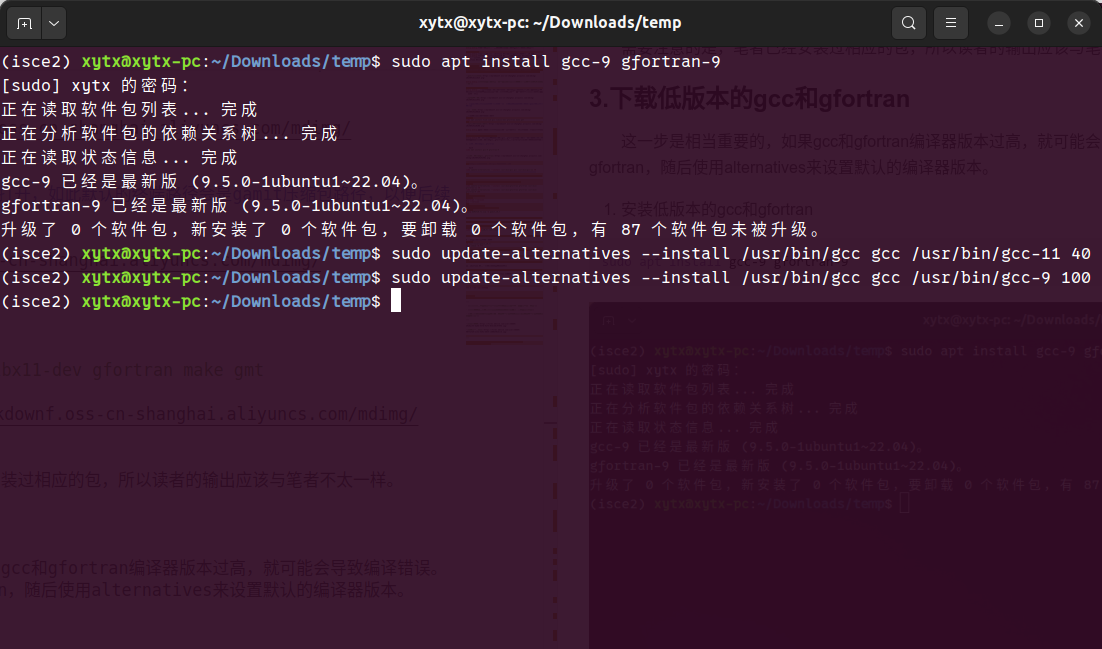
- 调整gcc-11的优先级为40,gcc-9的优先级为100
sudo update-alternatives --install /usr/bin/gcc gcc /usr/bin/gcc-11 40
sudo update-alternatives --install /usr/bin/gcc gcc /usr/bin/gcc-9 100
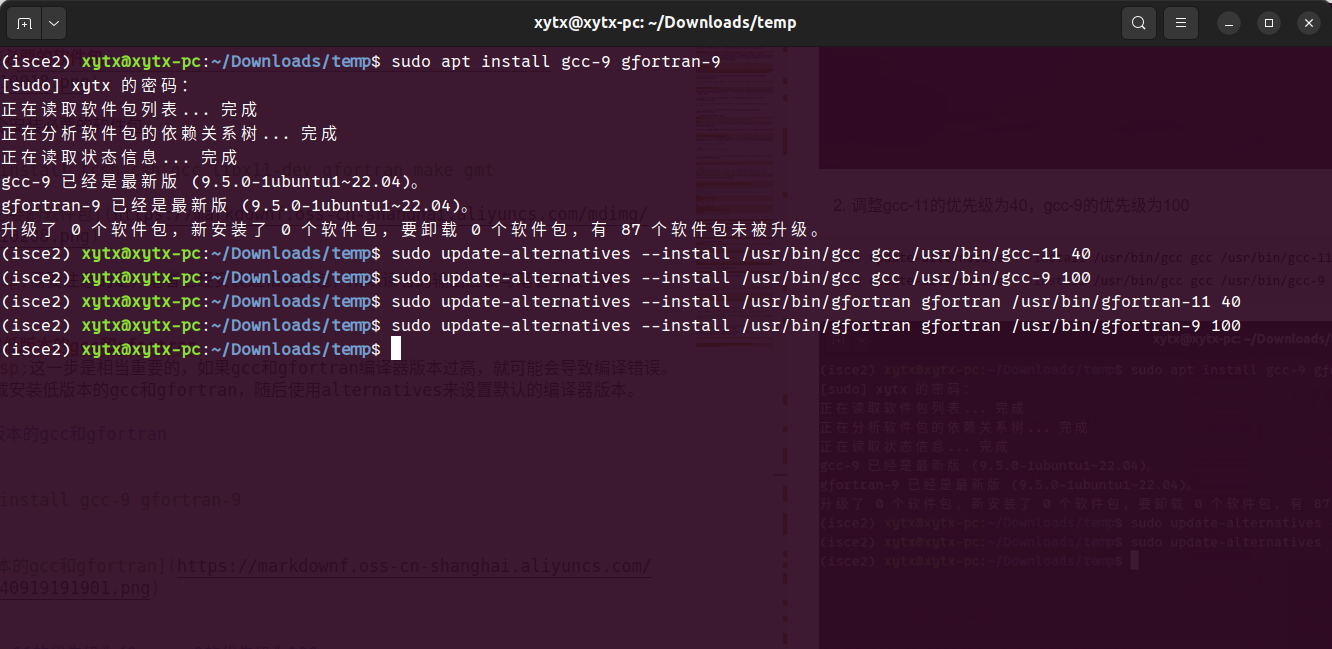
- 调整gfortran-11的优先级为40,gfortran-9的优先级为100
sudo update-alternatives --install /usr/bin/gfortran gfortran /usr/bin/gfortran-11 40
sudo update-alternatives --install /usr/bin/gfortran gfortran /usr/bin/gfortran-9 100
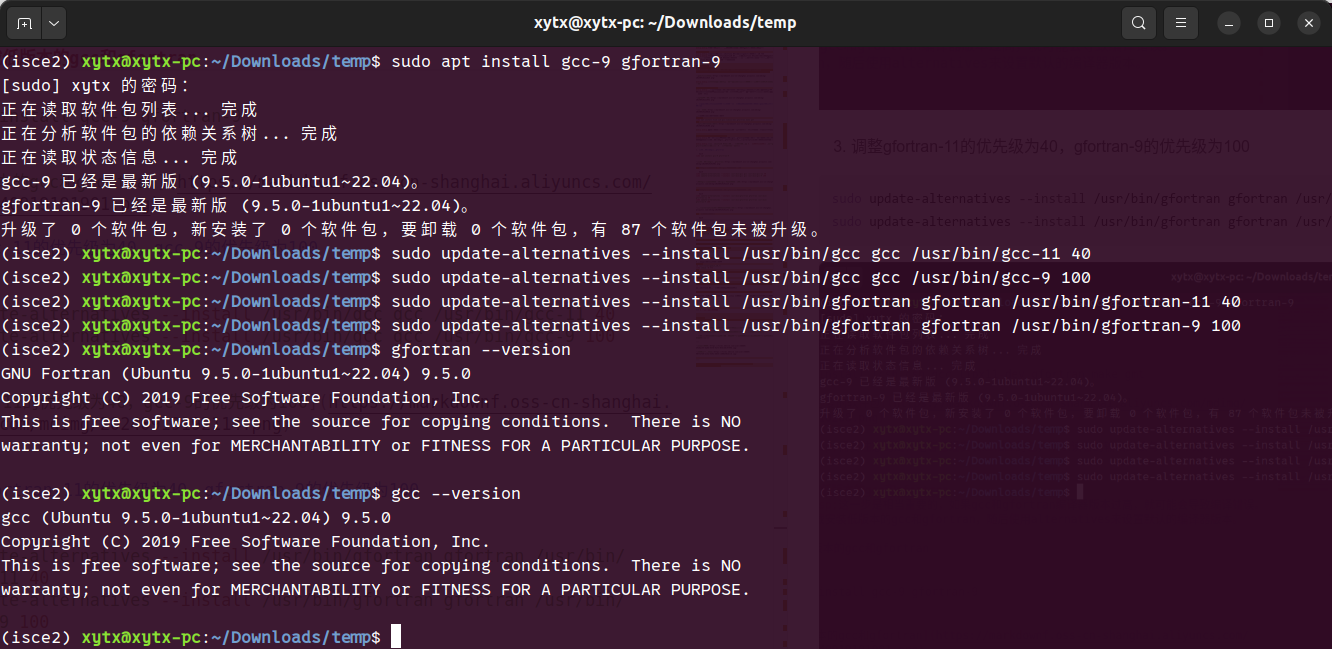
- 检查调整后的版本
检查调整后的gcc和gfortran,如果版本为9.x,则ok。
gfortran --version
gcc --version
4.编译gamit软件
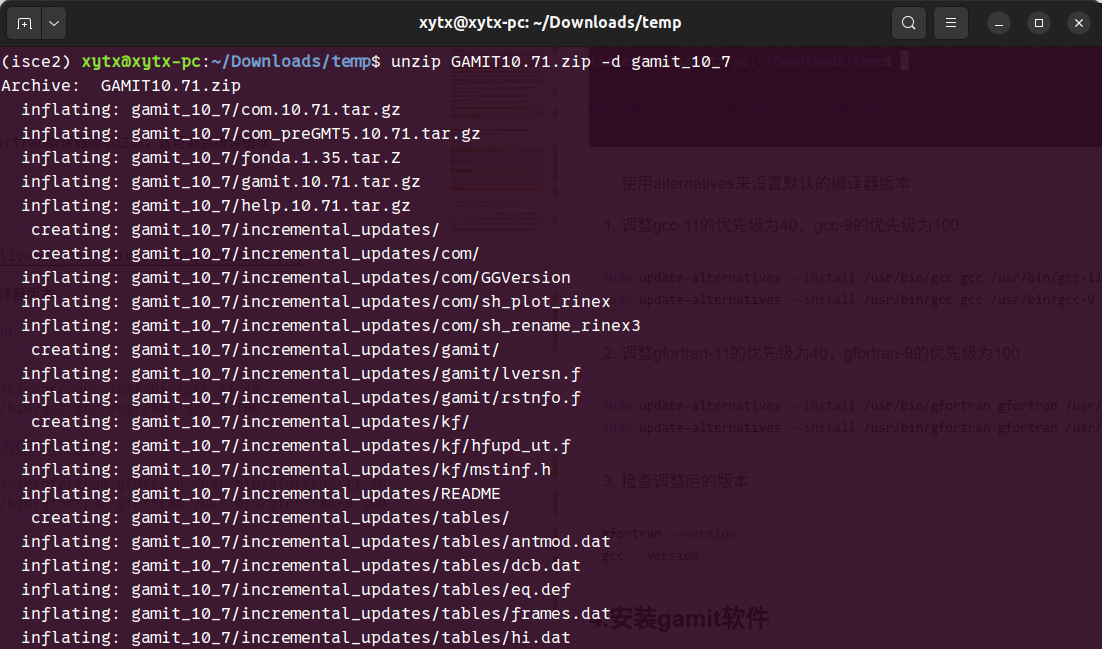
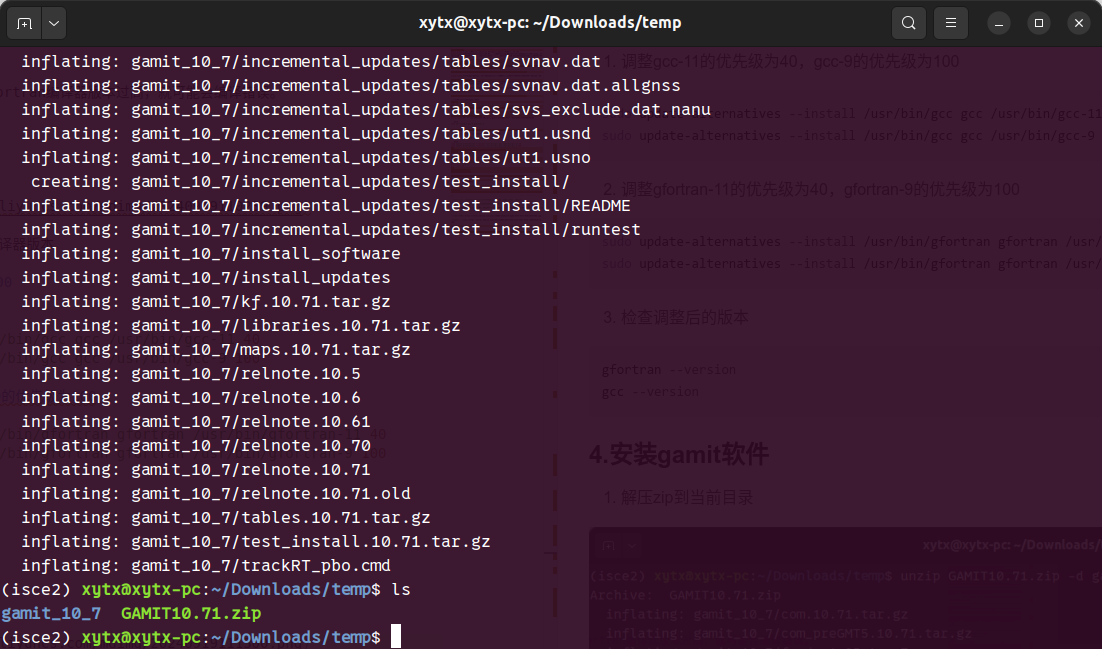
- 使用unzip命令解压zip到当前目录
unzip GAMIT10.71.zip -d gamit_10_7
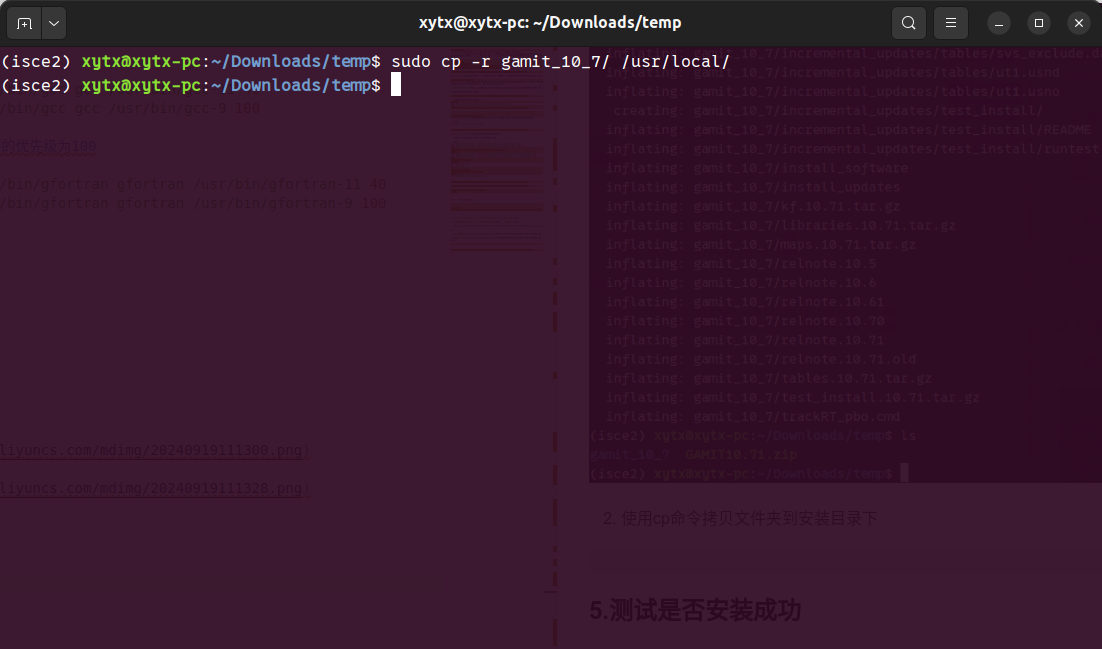
- 使用cp命令拷贝文件夹到安装目录下
使用cp命令将解压后的文件夹拷贝的要安装的目录,笔者习惯于安装在/usl/local/目录下。
sudo cp -r gamit_10_7/ /usr/local/
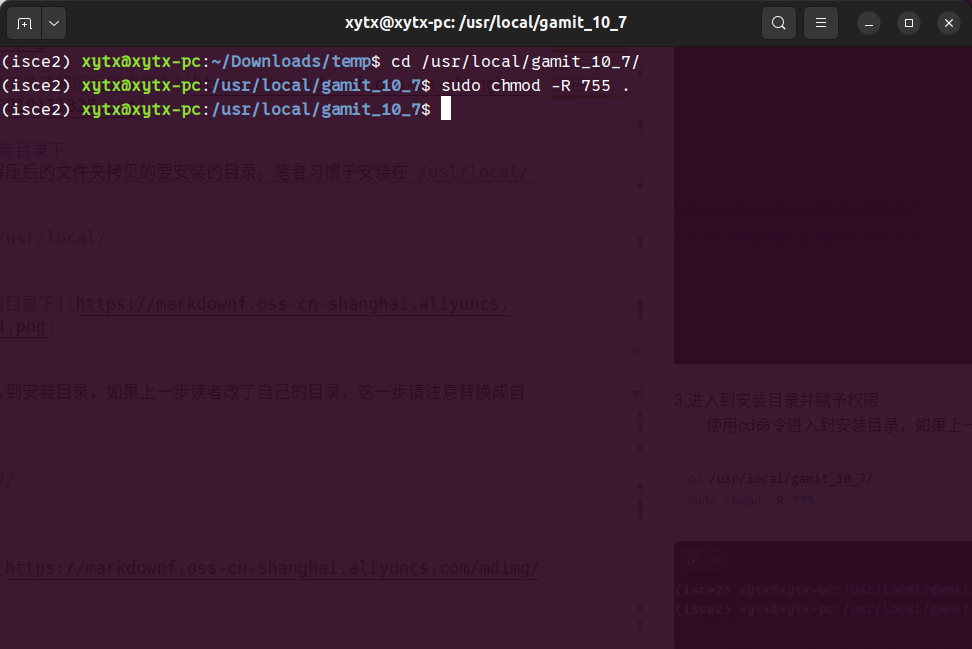
3.进入到安装目录并赋予权限
使用cd命令进入到安装目录,如果上一步读者改了自己的目录,这一步请注意替换成自己的。
cd /usr/local/gamit_10_7/
sudo chmod -R 755 .
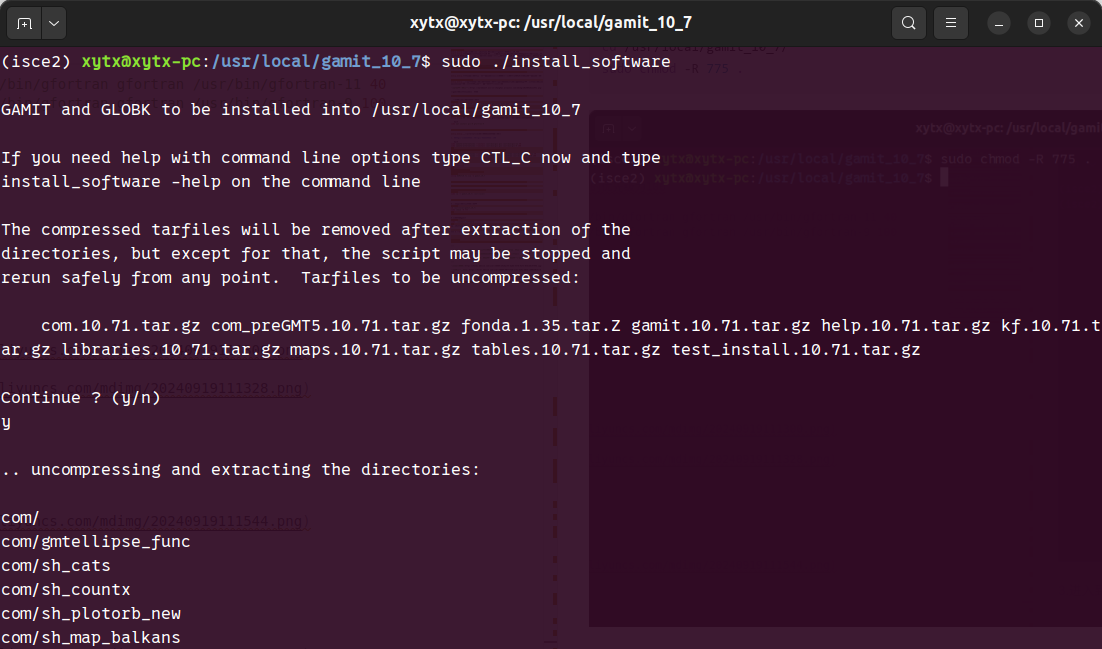
4.安装编译gamit
直接执行文件夹下的install_software文件来编译gamit,一路y即可。编译时间大概需要三四分钟甚至更久?哈哈哈哈。
需要注意的是,如果读者上一步没有更改目录权限,这一步的install_software可能是没有执行权限的。
sudo ./install_software
对于ubuntu22.04而言,可能会遇到如下报错(ubuntu20.04没有该报错):
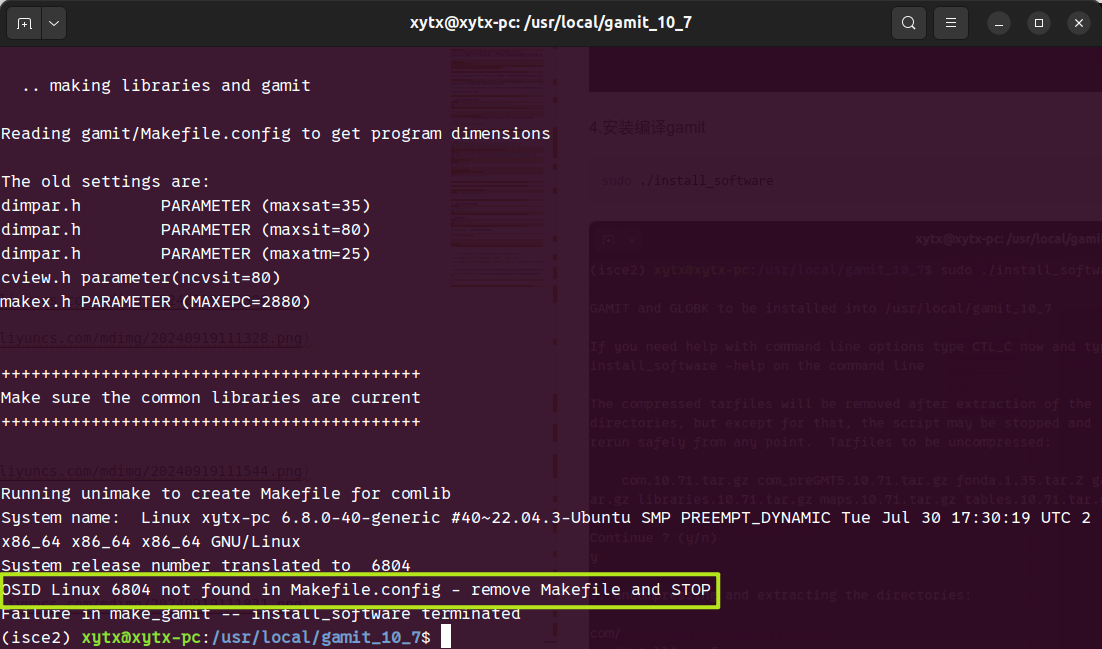
需要修改一下Makefile.config文件中的OS_ID Linux后面的值为给出的报错值,笔者这里是6804。
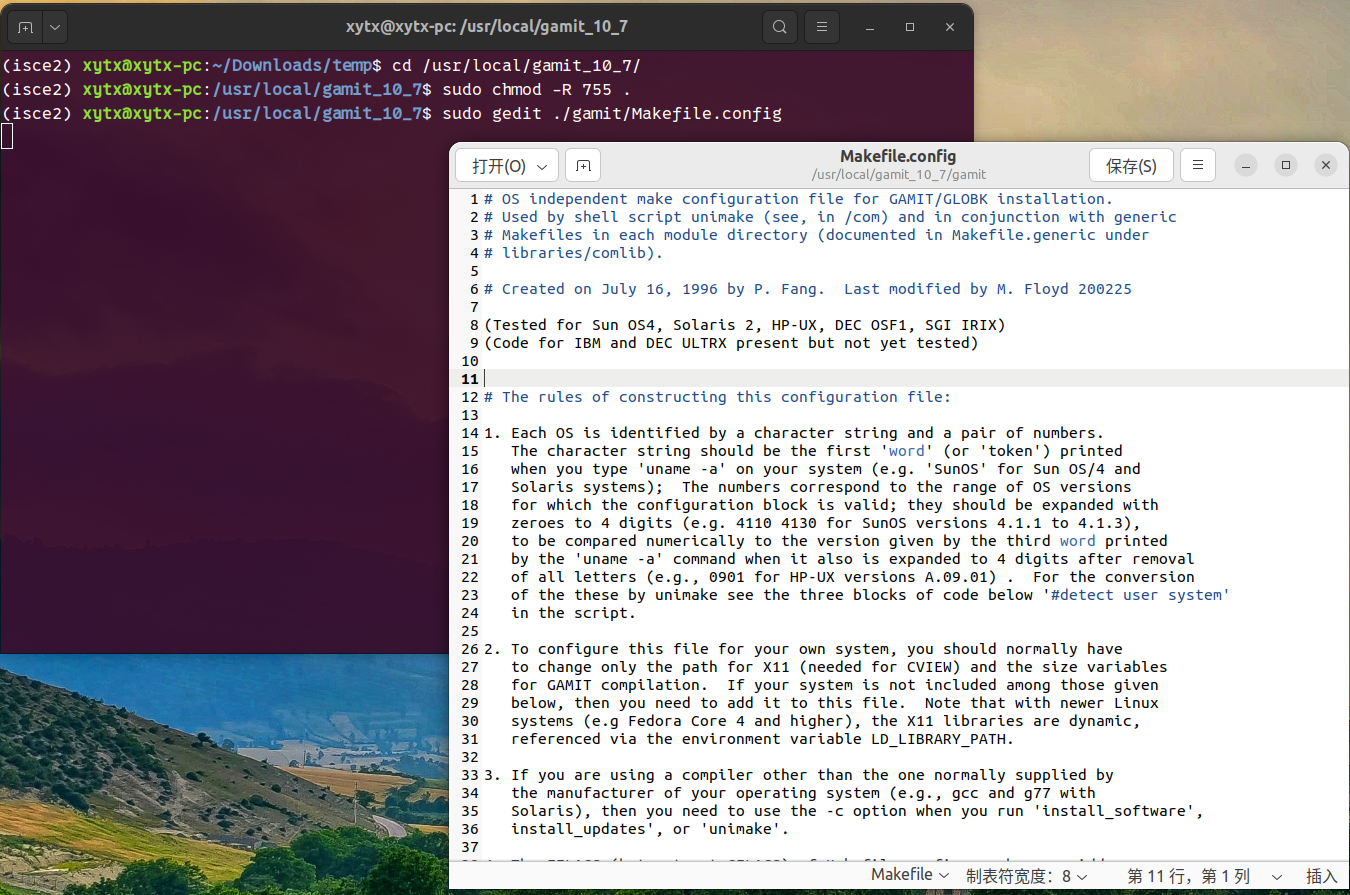
- 使用管理员权限打开./gamit/Makefile.config文件
sudo gedit ./gamit/Makefile.config
- 使用快捷键
Ctrl+F查找OS_ID Linux,修改其值为命令行报错提示的值
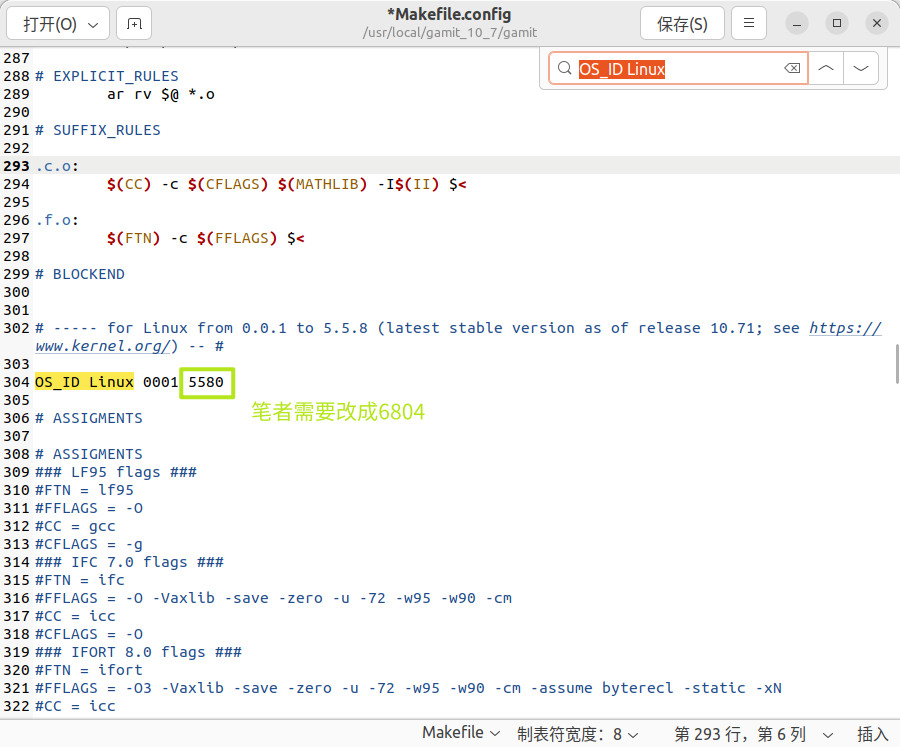
- 更改完之后,使用快捷键
Ctrl+S保存更改,随后可以关闭gedit编辑窗口,重新执行sudo ./install_software
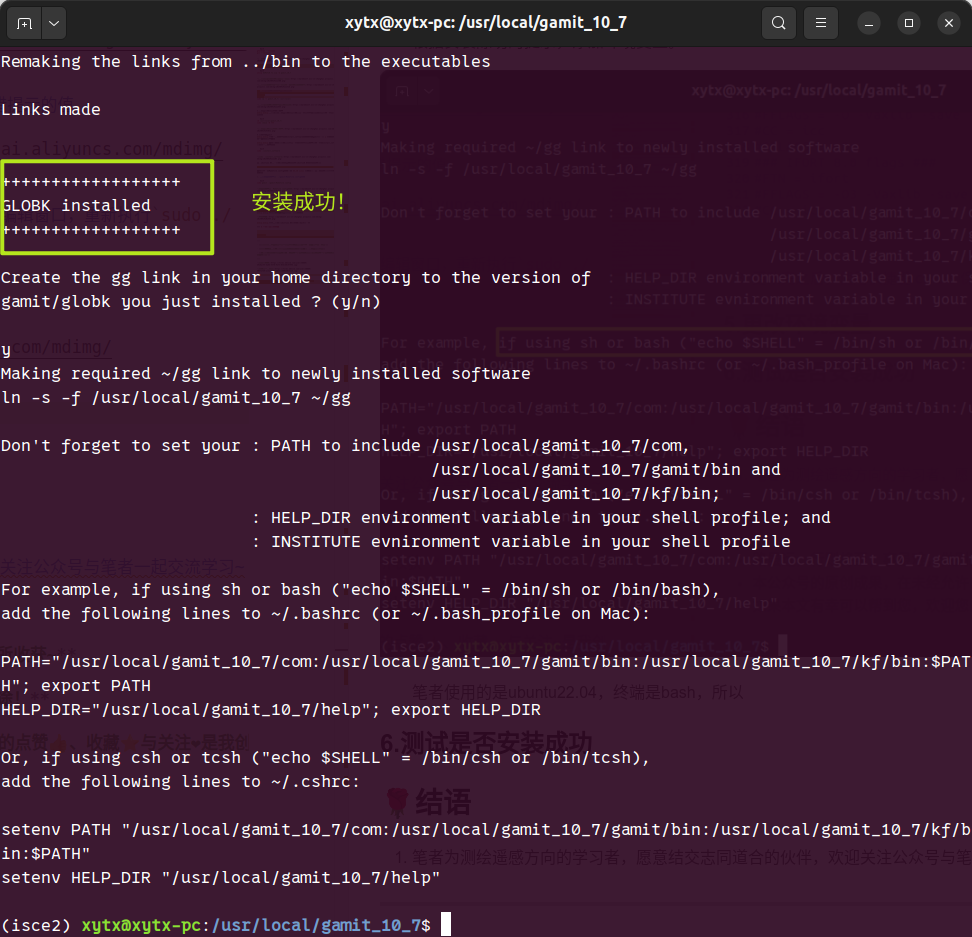
5.添加环境变量
根据安装成功的提示,添加环境变量。
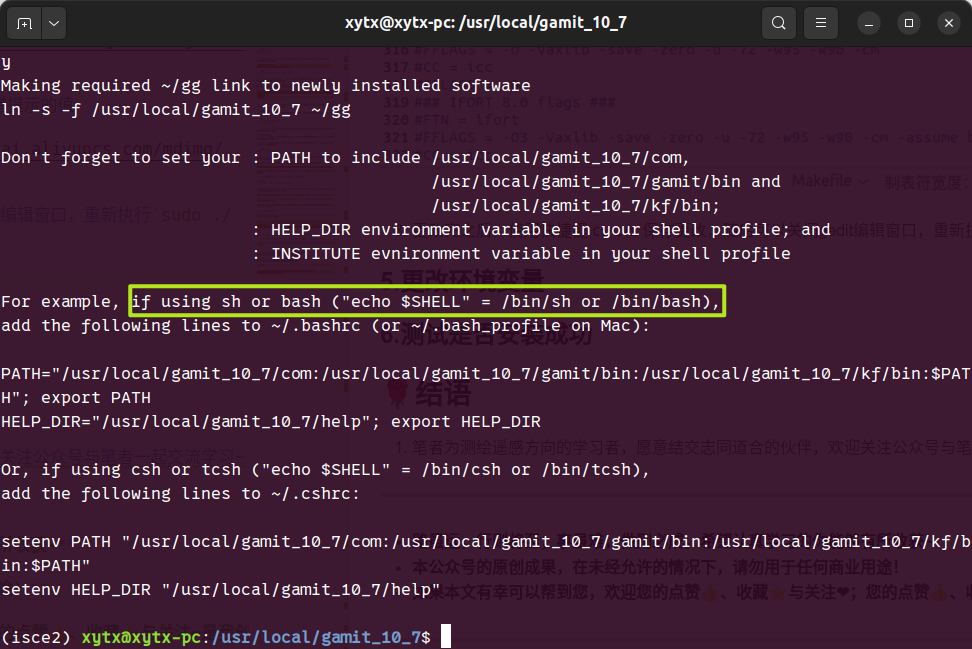
笔者使用的是ubuntu22.04,终端是bash,编辑~/.bashrc文件即可。
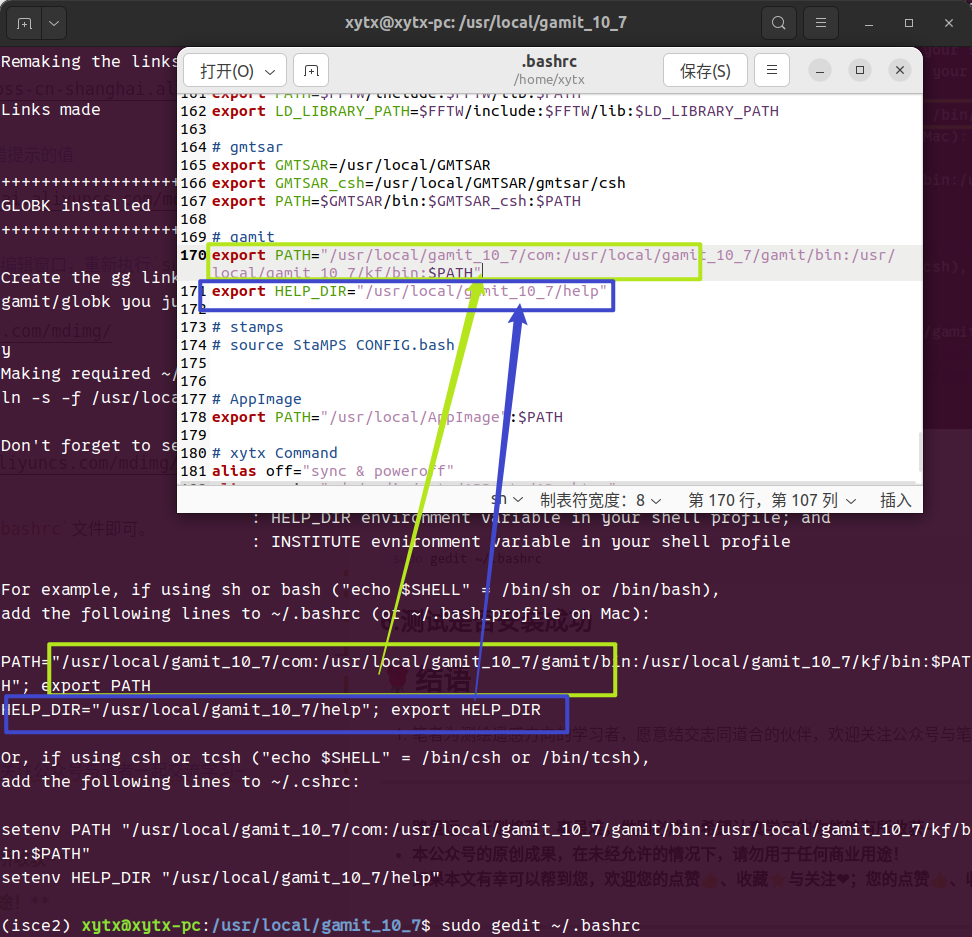
- 打开
~/.bashrc文件
sudo gedit ~/.bashrc
- 按照打印提示添加环境变量
在合适位置添加下面代码:
# gamit
export PATH="/usr/local/gamit_10_7/com:/usr/local/gamit_10_7/gamit/bin:/usr/local/gamit_10_7/kf/bin:$PATH"
export HELP_DIR="/usr/local/gamit_10_7/help"
-
修改完成后记得保存一下再关闭gedit窗口
-
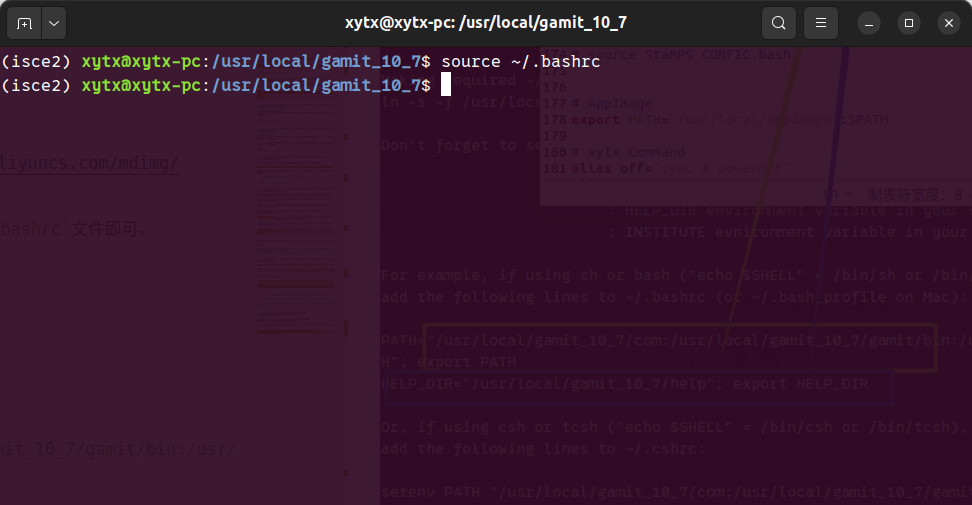
刷新终端配置
对于.bashrc文件的更改,不能及时的更新当前打开的终端配置,使用如下命令更新。
source ~/.bashrc
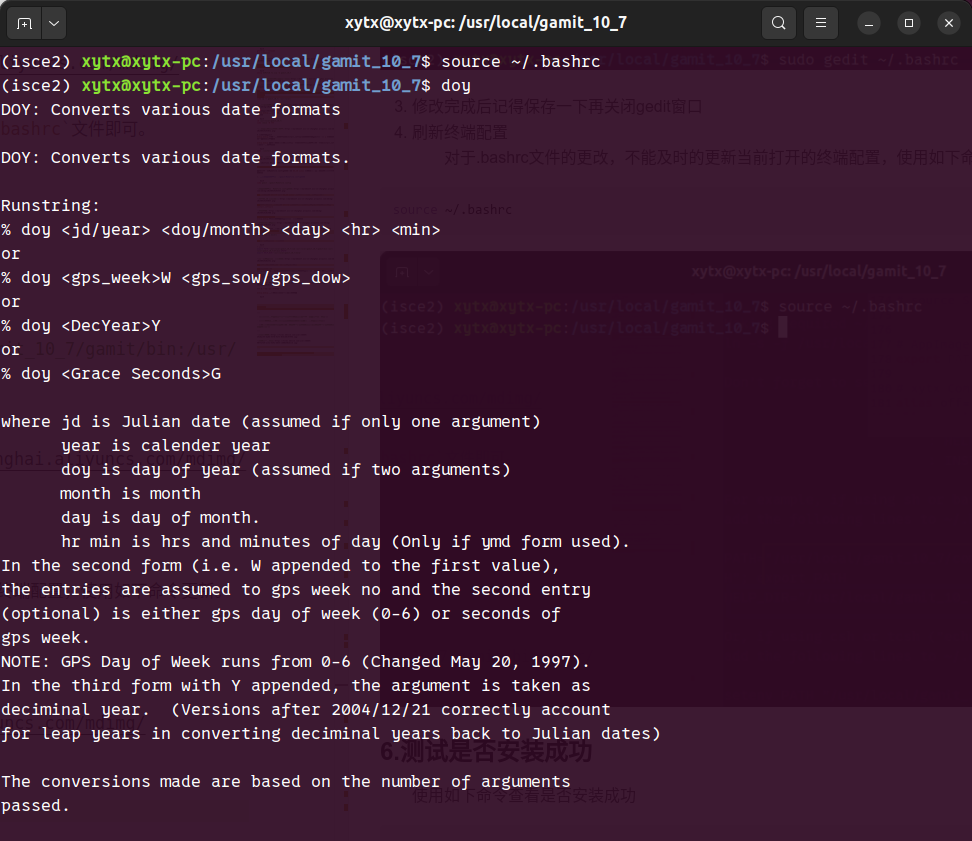
6.测试是否安装成功
使用如下命令测试是否安装成功
doy
sh_gamit

🌹结语
-
笔者已将软件包上传至百度网盘,关注公众号回复关键字“240919”即可获取百度网盘链接~
-
安装遇到任何问题欢迎关注公众号私信与作者交流讨论
-
GAMIT官方的安装教程(http://geoweb.mit.edu/gg/pre.php)
-
笔者为测绘遥感方向的学习者,愿意结交志同道合的伙伴,欢迎关注公众号与笔者一起交流学习~
-
路虽远,行则将至;事虽难,做则必成。希望认真学习的你能够有所收获~
-
本公众号的原创成果,在未经允许的情况下,请勿用于任何商业用途!
-
如果本文有幸可以帮到您,欢迎您的点赞👍、收藏⭐与关注❤;您的点赞👍、收藏⭐与关注❤是我创作的最大动力~


 3197
3197

 被折叠的 条评论
为什么被折叠?
被折叠的 条评论
为什么被折叠?
 到【灌水乐园】发言


