


1.函数this三种指向
环境对象 this : 谁’调用’我,我就指向谁
小技巧: 没点没new是window, 有new是实例,有点是点左边的对象
| 函数 | 表达式 | this的含义 |
|---|---|---|
| 普通函数: | 函数名() | this指向window |
| 对象方法: | 对象名.方法名() | this指向对象 |
| 构造函数: | new 函数名() | this指向new创建实例对象 |
function fn() {
    console.log(this)
}
//普通函数 : window
fn()
//构造函数 : new创建实例对象
new fn()
let obj = {
    name: '张三',
    eat: fn
}
//对象方法 : obj对象
obj.eat()
let person = {
    name: '李四',
    eat: function () {
        console.log(this)
    },
    learn: function () {
        let eat = this.eat //person
        eat()
    }
}
// 打印几次this,分别打印什么
person.eat() //person
person.learn() //window
2.上下文调用
函数上下文:变量当前所在的函数作用域
默认情况下,函数内部的this不能主动修改(只能三选一). 如果需要修改,则需要使用上下文方式
上下文调用 : 修改函数内部的this
(1) 函数名.call(修改后的this,实参1,实参2…………)
function fn(a,b){
    console.log( a + b )
    console.log( this )
}
// 函数名.call(修改后的this)
fn.call({name:'张三'},10,20)
call场景01:伪数组转真数组
如果希望伪数组也可以调用数组的方法(排序、拼接),就需要把伪数组转成真数组
//1. slice可以查询数组,默认情况下不传参这个方法会得到数组本身
//2. 但是伪数组由于原型不是Array,所以无法调用slice
//3. slice方法存储在哪里? : Array.prototype
let weiArr = {
    0:88,
    1:20,
    2:50,
    3:60,
    length:4
}

weiArr = Array.prototype.slice.call(weiArr)  // weiArr.slice()
console.log(weiArr)
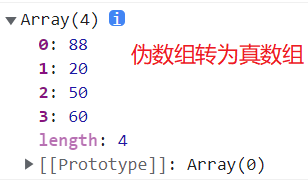
谁调用函数,this就指向谁,所以Array.prototype.slice()里this指向Array.prototype,call(weiArr)将this指向改为了weiArr,所以Array.prototype.slice.call(weiArr)相当于weiArr.slice()
实际开发中,ES6新增语法用于伪数组转真数组 : Array.from(伪数组)
let arr = Array.from(weiArr)
console.log( arr )
call场景02:万能数据类型检测 !!!面试题
1 . typeof 数据 : 有两种数据类型无法检测
null和数组无法检测,结果都是 ‘object’
2 . 解决方案:万能数据类型检测
Object.prototype.toString.call(数据)
原因:在object.prototype中有一个方法叫做toString,返回一个固定格式字符串’[object 数据类型]’
不能直接arr.toString,因为arr的原型对象里的toString是转换成字符串,object的prototype里是toString才是检测数据类型
Object.prototype调用toString()这个函数,this原本指向Object.prototype,检测的是Object.prototype的数据类型,用call将this指向变为arr,检测的就是arr的数据类型了
//值类型
let str = 'abc'
let num = 123
let bol = true
let und = undefined
let nul = null
//引用类型
let arr = [10,20,30]
let fn = function(){}
let obj = {name:'张三'}
console.log( typeof str )//'string'
console.log( typeof num )//'number'
console.log( typeof bol )//'boolean'
console.log( typeof und )//'undefined'
console.log( typeof nul )//'object'
console.log( typeof arr )//'object'
console.log( typeof fn )//'function'
console.log( typeof obj )//'object'
/* Object.prototype.toString() 返回固定格式字符串 '[object 数据类型]' */
//Object.prototype调用toString()这个函数,this原本指向Object.prototype,检测的是Object.prototype的数据类型,用call将this指向变为arr,检测的就是arr的数据类型了
console.log( Object.prototype.toString.call( str ) )//[object String]
console.log( Object.prototype.toString.call( num ) )//[object Number]
console.log( Object.prototype.toString.call( bol ) )//[object Boolean]
console.log( Object.prototype.toString.call( und ) )//[object Undefined]
console.log( Object.prototype.toString.call( nul ) )//[object Null]
console.log( Object.prototype.toString.call( arr ) )//[object Array]
console.log( Object.prototype.toString.call( fn ) )//[object Function]
console.log( Object.prototype.toString.call( obj ) )//[object Object]
(2) 函数名.apply(修改后的this, 数组或伪数组 )
apply会自动帮你遍历数组,然后按照顺序逐一传参
function fn(a,b){
    console.log( a )//30
    console.log( b )//40
    console.log( a + b )//70
    console.log( this )//{name:'李四'}
}
fn.apply({name:'李四'}, [30,40] )
apply场景01:伪数组转数组
这里不需要修改this,只是借助apply传参的特点. this指向原来是谁,还是设置谁
//伪数组 本质是 :  对象
let obj = {
    0:20,
    1:66,
    2:88,
    3:90,
    length:4
}

//伪数组转真数组
let arr = []
// arr.push( obj[0],obj[1],obj[2],obj[3])太麻烦
//借助 apply自动遍历数组/伪数组 逐一传参特点
//这里不需要修改this,只是借助apply传参的特点. this指向原来是谁,还是设置谁
arr.push.apply( arr,obj )
console.log(arr)
//伪数组转真数组 :  Array.from( 伪数组 ) ES6提供的一个更简洁的静态方法
console.log( Array.from(obj) )
apply场景02:求数组最大值
以前:
//求数组最大值


//1.js基础 : 擂台思想
let max = arr[0]
for(let i = 1;i<arr.length;i++){
    if( arr[i] > max ){
        max = arr[i]
    }
}
console.log(max)
现在1:
let arr = [20,50,66,100,30]
//2. Math.max()
// let max1 = Math.max(arr[0],arr[1],arr[2],arr[3],arr[4])
//这里使用apply只是借助传参特点,this指向不用修改。还是原来的this
let max1 = Math.max.apply(Math,arr)
console.log( max1 )
现在2:Math.max(…arr)
ES6求最大值 …作用和apply类似,也会自动遍历数组,然后逐一传参
let arr = [20,50,66,100,30]
let max2 =  Math.max(...arr)
console.log(max2)
(3)函数名.bind(修改后的this)
函数名.bind(修改后的this,形参1,形参2…………) ,一般不会传参,因为会在调用新函数的时候传
如果传参了,则新函数的参数也会绑定不变
bind不会立即执行函数,而是返回一个修改this之后的新函数
function fn(a,b){
    console.log( a + b )
    console.log( this )
}

let newFn = fn.bind({name:'王五'})
newFn(100,200)
newFn(10,20)
bind场景:不会立即执行的函数(修改定时器this)
bind一般用于修改: 定时器函数、事件处理函数
定时器中的this : 默认指向window
定时器中的this其他方法改不了
let fn=function(){
    console.log(this)
}
let newFn=fn.bind({name:'张三'})
//定时器括号里要写newFn,不能写newFn(),因为newFn是变量赋值,newFn()是调用函数,得到的是返回值
setTimeout(newFn,2000)

//简写,减少变量污染
setTimeout(function() {
  console.log(this)
}.bind({ name: "1111" }),2000)
定时器括号里要写newFn,不能写newFn(),因为newFn是变量赋值,newFn()是调用函数,得到的是返回值
定时器里的回调函数加了.bind({ name: “1111” })后,返回了一个新的this为{ name: “1111” }的函数,从而修改了定时器的this
面试必问: call 和 apply 和 bind三者区别 !!!
相同点 : 作用一致,修改函数this指向
不同点 :
传参方式不同 : call是按照顺序传参, apply是自动遍历数组/伪数组传参
执行机制不同 : call和apply会立即执行函数,而bind不会立即执行而是得到修改this的新函数
3.闭包
1.闭包closure是什么 :
a. 闭包 是一个 访问其他函数内部变量 的 函数
b. 闭包 = 函数 + 上下文引用 的组合
闭包是一个组合
2.闭包作用 : 解决变量污染
//局部作用域 :  在函数内部声明
function fn() {
//局部变量:fn上下文
  let num = 10
  // fn1 + 访问num 组合才叫闭包
  function fn1() {
    console.log(num)
  }
  fn1()
}
fn()
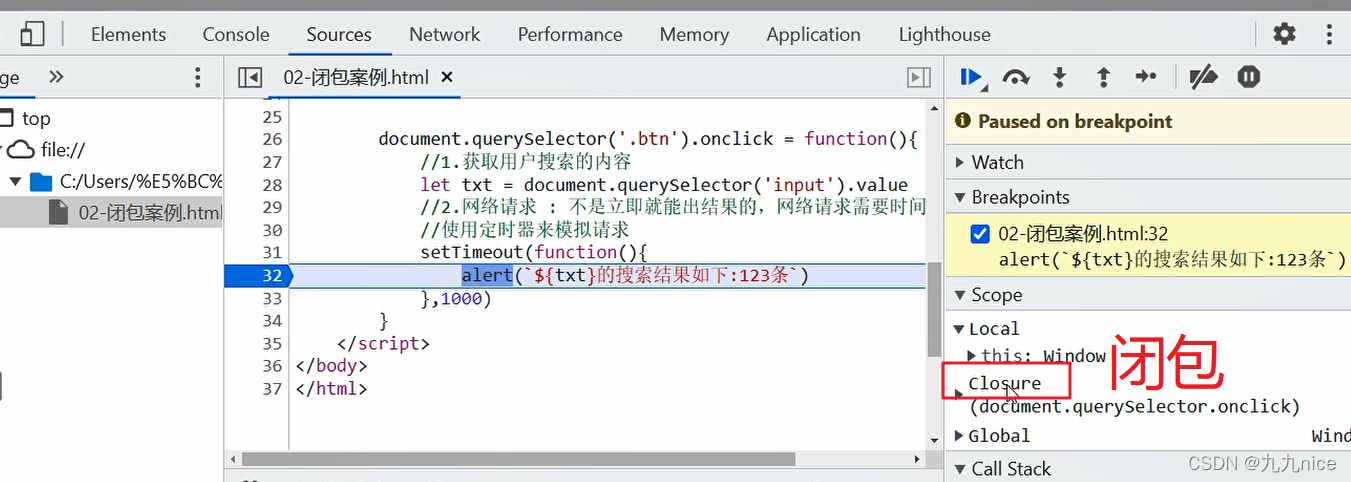
闭包案例:
document.querySelector('.btn').onclick = function(){
    //1.获取用户搜索的内容
    let txt = document.querySelector('input').value
    //2.网络请求 : 不是立即就能出结果的,网络请求需要时间的。
    //使用定时器来模拟请求
    setTimeout(function(){
        alert(`${txt}的搜索结果如下:123条`)
    },1000)
}
4.递归
(1)递归函数: 一个函数 在内部 调用自己
递归作用和循环类似的,也需要有结束条件(优先用循环,递归少用)
递归应用:
function fn(){
    console.log('今天学得很开心')
    fn()
}
fn()
(2)双函数递归 : 两个函数互相调用
function fn1(){
    console.log('哈哈')
    fn2()
}
function fn2(){
    console.log('呵呵')
    fn1()
}
fn1()
(3)递归应用:
浅拷贝与深拷贝 :
方式一(推荐) : JSON方式实现
let newObj = JSON.parse( JSON.stringify( obj ) )
浅拷贝: 拷贝地址
let newObj = obj
修改拷贝后的数据,原数据也会修改
newObj.name = '李四'
console.log( obj,newObj)
深拷贝 : 拷贝数据
(1)先把js对象 -> JSON字符串   (JSON会自动帮你深拷贝)
 let jsonStr = JSON.stringify( obj )
(2)再把 JSON字符串 -> js对象
 let newObj = JSON.parse( jsonStr )
 newObj.name = '李四'
console.log(obj,newObj)

//简写:
let newObj = JSON.parse( JSON.stringify( obj ) )
方式二(递归) : 了解
let obj = {
    name:'张三',
    age:20,
    sex:'男',
    hobby:['吃饭','睡觉','学习'],
    student:{
        name:"班长",
        score:90
    }
}
//使用递归函数
function kaobei(obj,newObj){
    for(let key in obj){
        if( obj[key] instanceof Array ){
            //声明一个空数组,然后继续拷贝数组里面的数据
            newObj[key] = []
            //递归调用继续拷贝 数组
            kaobei(obj[key],newObj[key])
        }else if(  obj[key] instanceof Object ){
             //声明一个空对象
             newObj[key] = {}
            //递归调用继续拷贝 对象
            kaobei(obj[key],newObj[key])
        }else{
            newObj[key] = obj[key]
        }
    }
}
//创建一个空对象,然后深拷贝
let newObj = {}
//一个函数 在内部 调用自己
kaobei(obj,newObj)

newObj.name = '李四'
newObj.hobby[0] = '摸鱼'
newObj.student.name = 'ikun'
console.log( obj,newObj)
遍历dom树
//封装一个遍历dom树函数
function addElement(arr, father) {
  //遍历数组
  for (let i = 0; i < arr.length; i++) {
    //(1)创建空标签
    let div = document.createElement("div")
    //(2)设置内容
    div.innerHTML = `<p>${arr[i].type || arr[i] }</p>`
    //(3)添加到父盒子
    father.appendChild(div)
    //如果元素还有data属性,则需要使用递归继续添加下级菜单
    if( arr[i].data ){
        addElement(arr[i].data , div)
    }
  }
}
addElement(arr, document.querySelector(".menu"))


 2096
2096


 被折叠的 条评论
为什么被折叠?
被折叠的 条评论
为什么被折叠?
 到【灌水乐园】发言


