


目录
一、shiro授权角色、权限
shiro的权限数据表设计

SQL语句
授角色:用户具备哪些角色
select r.roleid from t_shiro_user u,t_shiro_user_role ur,t_shiro_role r
    where u.userid = ur.userid and ur.roleid = r.roleid
    and u.username = #{userName}
授权限:用户具备哪些权限
select p.perid from t_shiro_user u,t_shiro_user_role ur,t_shiro_role_permission rp,t_shiro_permission p
  where u.userid = ur.userid and ur.roleid = rp.roleid and rp.perid = p.perid
  and u.username = #{userName}
1.1 Mapper层,Servlce层
UserMapper.xml
角色
  <select id="selectRoleIdsByUserName" resultType="java.lang.String" parameterType="java.lang.String" >
    select roleid from t_shiro_user u,t_shiro_user_role ur
    where u.userid=ur.userid and u.username=#{userName}
  </select>

权限
  <select id="selectPerIdsByUserName" resultType="java.lang.String" parameterType="java.lang.String" >
   select rp.perid from t_shiro_user u,t_shiro_user_role ur,t_shiro_role_permission rp
    where u.userid=ur.userid and ur.roleid=rp.roleid and u.username=#{userName}
  </select>
UserMapper
    //通过 账户名查询 对应的角色
    Set<String> selectRoleIdsByUserName(@Param("userName") String userName);

    //通过 账户名查询对应的权限
    Set<String> selectPerIdsByUserName(@Param("userName") String userName);
UserBiz
    Set<String> selectRoleIdsByUserName(String userName);

    Set<String> selectPerIdsByUserName(String userName);
UserBizImpl
package com.oyang.ssm.impl;

import com.oyang.ssm.biz.UserBiz;
import com.oyang.ssm.mapper.UserMapper;
import com.oyang.ssm.model.User;
import org.springframework.beans.factory.annotation.Autowired;
import org.springframework.stereotype.Service;

import java.util.Set;

/**
 * @author oyang
 * @site https://blog.csdn.net
 * @qq 1828190940
 * @create  2022-08-25 19:59
 */
@Service("userBiz")
public class UserBizImpl implements UserBiz {

    @Autowired
    private UserMapper userMapper;

    @Override
    public int deleteByPrimaryKey(Integer userid) {
        return userMapper.deleteByPrimaryKey(userid);
    }

    @Override
    public int insert(User record) {
        return userMapper.insert(record);
    }

    @Override
    public int insertSelective(User record) {
        return userMapper.insertSelective(record);
    }

    @Override
    public User selectByPrimaryKey(Integer userid) {
        return userMapper.selectByPrimaryKey(userid);
    }

    @Override
    public Set<String> selectRoleIdsByUserName(String username) {
        return userMapper.selectRoleIdsByUserName(username);
    }

    @Override
    public Set<String> selectPerIdsByUserName(String username) {
        return userMapper.selectPerIdsByUserName(username);
    }

    @Override
    public User queryUserByUserName(String username) {
        return userMapper.queryUserByUserName(username);
    }

    @Override
    public int updateByPrimaryKeySelective(User record) {
        return userMapper.updateByPrimaryKeySelective(record);
    }

    @Override
    public int updateByPrimaryKey(User record) {
        return userMapper.updateByPrimaryKey(record);
    }
}
1.2 授权的方法
MyRealm
package com.oyang.ssm.shiro;

import com.oyang.ssm.biz.UserBiz;
import com.oyang.ssm.model.User;
import org.apache.shiro.authc.AuthenticationException;
import org.apache.shiro.authc.AuthenticationInfo;
import org.apache.shiro.authc.AuthenticationToken;
import org.apache.shiro.authc.SimpleAuthenticationInfo;
import org.apache.shiro.authz.AuthorizationInfo;
import org.apache.shiro.authz.SimpleAuthorizationInfo;
import org.apache.shiro.realm.AuthorizingRealm;
import org.apache.shiro.subject.PrincipalCollection;
import org.apache.shiro.util.ByteSource;

import java.util.Set;

/**
 * @author oyang
 * @site https://blog.csdn.net
 * @qq 1828190940
 * @create  2022-08-25 20:07
 */
public class MyRealm extends AuthorizingRealm {

public UserBiz getUserBiz(){
    return userBiz;
}

public void setUserBiz(UserBiz userBiz){
    this.userBiz=userBiz;
}

    public UserBiz userBiz;

    /**
     * 授权
     * @param principals
     * @return
     * 替代了shiro-web.ini
     */
    @Override
    protected AuthorizationInfo doGetAuthorizationInfo(PrincipalCollection principals) {
        String userName = principals.getPrimaryPrincipal().toString();//获取账户名
        Set<String> roleIds = userBiz.selectRoleIdsByUserName(userName);
        Set<String> perIds = userBiz.selectPerIdsByUserName(userName);
        SimpleAuthorizationInfo info=new SimpleAuthorizationInfo();
        //将当前登录的 权限交给shiro的授权器
        info.setStringPermissions(perIds);
        //将当前登录的 角色交给shiro的授权器
        info.setRoles(roleIds);
        return info;
    }

    /**
     * 认证
     * @param token
     * @return
     * @throws AuthenticationException
     * 替代了
     */
    @Override
    protected AuthenticationInfo doGetAuthenticationInfo(AuthenticationToken token) throws AuthenticationException {
        String userName = token.getPrincipal().toString();
        User user = userBiz.queryUserByUserName(userName);
        AuthenticationInfo info=new SimpleAuthenticationInfo(
                user.getUsername(),
                user.getPassword(),
                ByteSource.Util.bytes(user.getSalt()),
                this.getName()//Realm的名字
        );
        return info;
    }
}
applicationContext-shiro.xml配置文件中,对我们角色进行修改因为我们sql查询出来的是id
只有角色为4的才可访问
只有权限含2的才可访问

使用zs登录

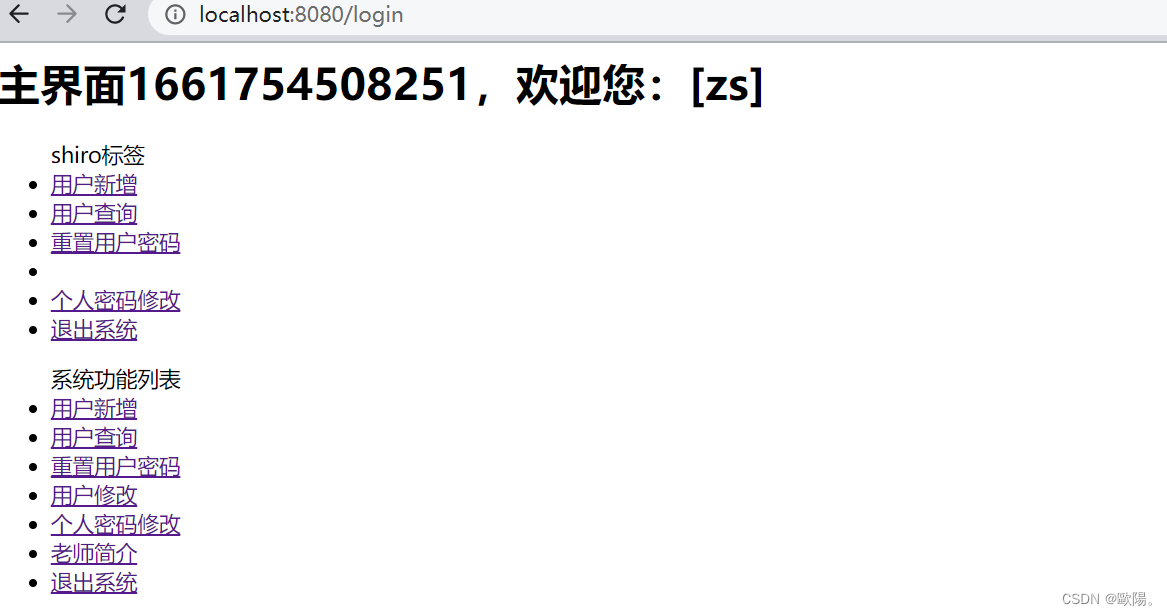
点击用户新增
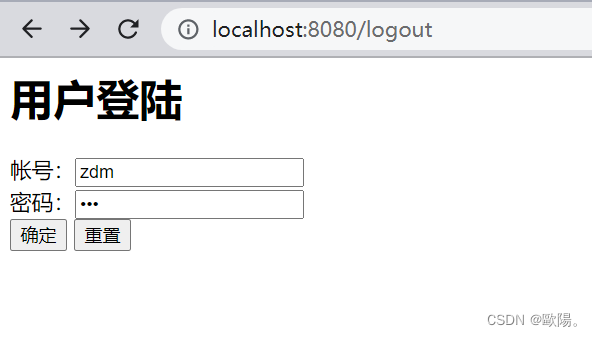
 使用zdm登录
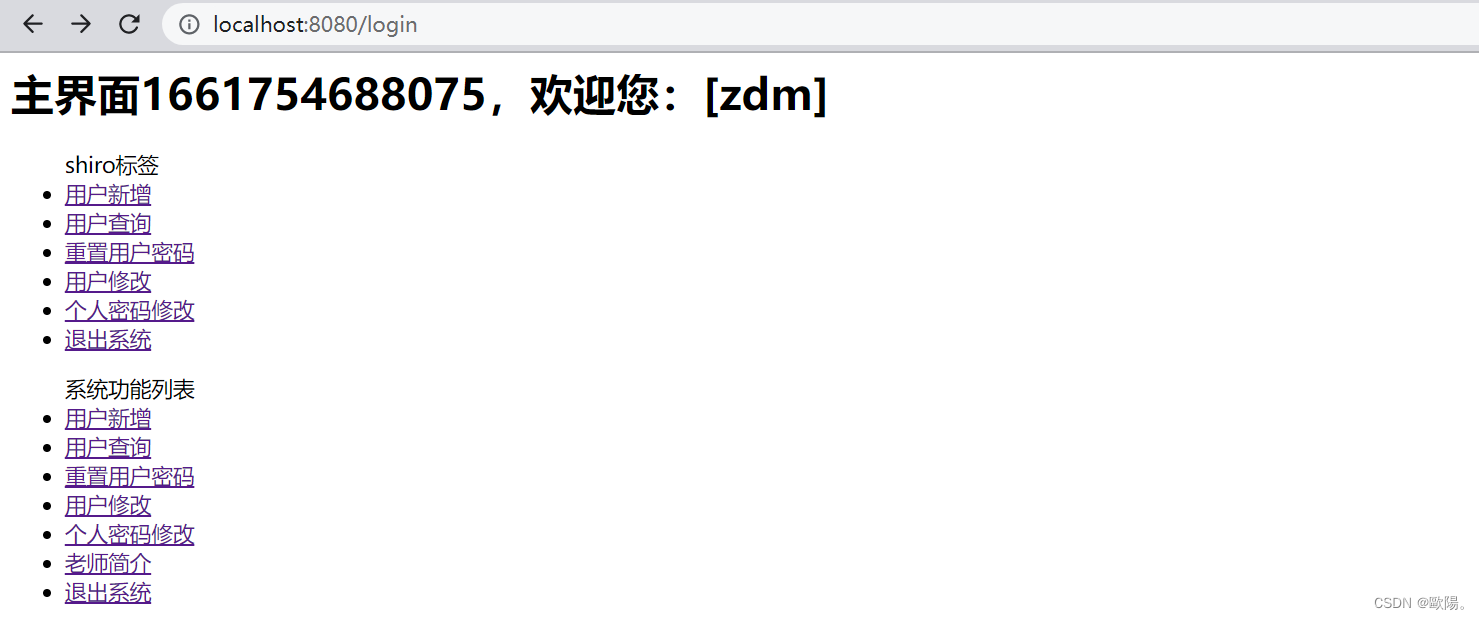
二,Shiro的注解式开发
常用注解介绍:
@RequiresAuthenthentication:表示当前Subject已经通过login进行身份验证;即 Subject.isAuthenticated()返回 true
@RequiresUser:表示当前Subject已经身份验证或者通过记住我登录的
@RequiresGuest:表示当前Subject没有身份验证或者通过记住我登录过,即是游客身份
@RequiresRoles(value = {"admin","user"},logical = Logical.AND):表示当前Subject需要角色admin和user
@RequiresPermissions(value = {"user:delete","user:b"},logical = Logical.OR):表示当前Subject需要权限user:delete或者user:b
注解式开发流程
1)将对应注解添加到指定需要权限控制的方法上
身份认证:requireUser
角色认证:requireRole
权限认证:requirePermission
2)在SpringMVC.xml中添加拦截器相关配置
将对应注解添加到指定需要权限控制的方法上
ShiroController
package com.oyang.ssm.controller;

import org.apache.shiro.authz.annotation.Logical;
import org.apache.shiro.authz.annotation.RequiresPermissions;
import org.apache.shiro.authz.annotation.RequiresRoles;
import org.apache.shiro.authz.annotation.RequiresUser;
import org.springframework.stereotype.Controller;
import org.springframework.web.bind.annotation.RequestMapping;

/**
 * @author oyang
 * @site https://blog.csdn.net
 * @qq 1828190940
 * @create  2022-08-26 20:51
 */
@RequestMapping("/shiro")
@Controller
public class ShiroController {

    //RequiresUser 代表当前方法只有通过登录后才能访问
    //  RequiresUser 等价于 Spring-shiro.xml中的/user/updatePwd.jsp=authc
    @RequiresUser
    @RequestMapping("/passUser")
    public  String passUser(){
        System.out.println("身份认证通过....");
        return "admin/a ddUser";
    }

    //RequiresRoles 代表当前方法只有 具备指定的角色(1,4) 才能访问
    //RequiresRoles 等价于 Spring-shiro.xml中的/admin/*.jsp=roles[4]
    @RequiresRoles(value = {"1","4"},logical = Logical.AND)
    @RequestMapping("/passRole")
    public  String passRole(){
        System.out.println("角色认证通过....");
        return "admin/addUser";
    }

    //RequiresPermissions 代表当前方法只有 具备指定的权限 才能访问
    //RequiresPermissions 等价于 Spring-shiro.xml中的/user/teacher.jsp=perms[2]
    @RequiresPermissions(value = {"2"},logical = Logical.AND)
    @RequestMapping("/passPermissions")
    public  String passPermissions(){
        System.out.println("权限认证通过....");
        return "admin/addUser";
    }

}
在SpringMVC.xml中添加拦截器相关配置
在添加注解之前要在在springmvc.xml中添加拦截器相关配置
<?xml version="1.0" encoding="UTF-8"?>
<beans xmlns="http://www.springframework.org/schema/beans"
xmlns:xsi="http://www.w3.org/2001/XMLSchema-instance"
xmlns:context="http://www.springframework.org/schema/context"
xmlns:mvc="http://www.springframework.org/schema/mvc" xmlns:aop="http://www.springframework.org/schema/aop"
xsi:schemaLocation="http://www.springframework.org/schema/beans http://www.springframework.org/schema/beans/spring-beans.xsd
http://www.springframework.org/schema/context http://www.springframework.org/schema/context/spring-context-4.3.xsd http://www.springframework.org/schema/mvc http://www.springframework.org/schema/mvc/spring-mvc.xsd http://www.springframework.org/schema/aop http://www.springframework.org/schema/aop/spring-aop.xsd">
<!-- 通过context:component-scan元素扫描指定包下的控制器-->
<!--1) 扫描com.javaxl.zf及子子孙孙包下的控制器(扫描范围过大,耗时)-->
<aop:aspectj-autoproxy/>
<context:component-scan base-package="com.oyang.ssm"/>
<!--2) 此标签默认注册DefaultAnnotationHandlerMapping和AnnotationMethodHandlerAdapter -->
<!--两个bean,这两个bean是spring MVC为@Controllers分发请求所必须的。并提供了数据绑定支持,-->
<!--@NumberFormatannotation支持,@DateTimeFormat支持,@Valid支持,读写XML的支持(JAXB),读写JSON的支持(Jackson)-->
<mvc:annotation-driven></mvc:annotation-driven>
<!--3) ViewResolver -->
<bean class="org.springframework.web.servlet.view.InternalResourceViewResolver">
<!-- viewClass需要在pom中引入两个包:standard.jar and jstl.jar -->
<property name="viewClass"
value="org.springframework.web.servlet.view.JstlView"></property>
<property name="prefix" value="/"/>
<property name="suffix" value=".jsp"/>
</bean>
<!--4) 单独处理图片、样式、js等资源 -->
<mvc:resources location="/static/" mapping="/images/**"/>
<!--<mvc:resources location="/css/" mapping="/css/**"/>-->
<!-- <mvc:resources location="/images/" mapping="/images/**"/>-->
<!--<mvc:resources location="/js/" mapping="/js/**"/>-->
<!--文件上传:多功能解析器配置-->
<bean id="multipartResolver" class="org.springframework.web.multipart.commons.CommonsMultipartResolver">
<!-- 必须和用户JSP 的pageEncoding属性一致,以便正确解析表单的内容 -->
<property name="defaultEncoding" value="UTF-8"></property>
<!-- 文件最大大小(字节) 1024*1024*50=50M-->
<property name="maxUploadSize" value="52428800"></property>
<!--resolveLazily属性启用是为了推迟文件解析,以便捕获文件大小异常-->
<property name="resolveLazily" value="true"/>
</bean>
<!--配置拦截器-->
<!--<mvc:interceptors>
<!–针对于所有的请求进行拦截–>
<bean class="com.oyang.ssm.intercept.OneHandlerInterceptor"></bean>
</mvc:interceptors>-->
<!--配置拦截器链-->
<!--<mvc:interceptors>
<mvc:interceptor>
<!–拦截所有–>
<mvc:mapping path="/**/"/>
<bean class="com.oyang.ssm.intercept.OneHandlerInterceptor"> </bean>
</mvc:interceptor>
<!– <mvc:interceptor>
<mvc:mapping path="/clz/**"/>
<bean class="com.oyang.ssm.intercept.TwoHandlerInterceptor"></bean>
</mvc:interceptor>–>
</mvc:interceptors>-->
<!--支持JSON数据返回的适配器-->
<bean class="org.springframework.web.servlet.mvc.method.annotation.RequestMappingHandlerAdapter">
<property name="messageConverters">
<list>
<ref bean="mappingJackson2HttpMessageConverter"/>
</list>
</property>
</bean>
<bean id="mappingJackson2HttpMessageConverter"
class="org.springframework.http.converter.json.MappingJackson2HttpMessageConverter">
<!--处理中文乱码以及避免IE执行AJAX时,返回JSON出现下载文件-->
<property name="supportedMediaTypes">
<list>
<value>text/html;charset=UTF-8</value>
<value>text/json;charset=UTF-8</value>
<value>application/json;charset=UTF-8</value>
</list>
</property>
</bean>
<bean class="org.springframework.aop.framework.autoproxy.DefaultAdvisorAutoProxyCreator"
depends-on="lifecycleBeanPostProcessor">
<property name="proxyTargetClass" value="true"></property>
</bean>
<bean class="org.apache.shiro.spring.security.interceptor.AuthorizationAttributeSourceAdvisor">
<property name="securityManager" ref="securityManager"/>
</bean>
<bean id="exceptionResolver" class="org.springframework.web.servlet.handler.SimpleMappingExceptionResolver">
<property name="exceptionMappings">
<props>
<prop key="org.apache.shiro.authz.UnauthorizedException">
unauthorized
</prop>
</props>
</property>
<property name="defaultErrorView" value="unauthorized"/>
</bean>
</beans>


 710
710


 被折叠的 条评论
为什么被折叠?
被折叠的 条评论
为什么被折叠?
 到【灌水乐园】发言


