1.在assetc里面创建json数据
在res里面右边new找到folder然后创建assets 创建一个.json文件
[
  {
    "id": 1,
    "username": "学生1",
    "phone": "123456",
    "email": "123@163.com"
  },
  {
    "id": 2,
    "username": "学生2",
    "phone": "156984",
    "email": "234@163.com"
  },
  {
    "id": 3,
    "username": "学生3",
    "phone": "21311",
    "email": "345@163.com"
  },
  {
    "id": 4,
    "username": "学生4",
    "phone": "12315",
    "email": "567@163.com"
  },
  {
    "id": 5,
    "username": "学生5",
    "phone": "1233",
    "email": "789@163.com"
  },
  {
    "id": 6,
    "username": "学生6",
    "phone": "77182",
    "email": "890@163.com"
  },
  {
    "id": 7,
    "username": "学生7",
    "phone": "14234",
    "email": "890@163.com"
  },
  {
    "id": 8,
    "username": "学生8",
    "phone": "77182",
    "email": "123@163.com"
  }
]
2.写一个listview准备将json数据放入列表里面
    <ListView
        android:id="@+id/list"
        android:layout_width="match_parent"
        android:layout_height="match_parent"
        />
3.创建一个Bean类
咱们所需三个姓名 电话 邮箱
package com.example.main1;

import java.io.Serializable;

public class ClassBean implements Serializable {
    private String name;
    private String email;
    private int phone;

    public ClassBean(String name, String email, int phone) {
        this.name = name;
        this.email = email;
        this.phone = phone;
    }

    public String getEmail() {
        return email;
    }

    public String getName() {
        return name;
    }

    public int getPhone() {
        return phone;
    }
}
4.创建一个xml子布局(用于显示json数据内容)
<?xml version="1.0" encoding="utf-8"?>
<LinearLayout xmlns:android="http://schemas.android.com/apk/res/android"
    android:layout_width="match_parent"
    android:layout_height="match_parent"
    android:orientation="vertical">


    <LinearLayout
        android:layout_width="match_parent"
        android:layout_height="wrap_content"
        android:layout_marginTop="10dp"
        android:orientation="horizontal">


    <TextView
        android:layout_width="wrap_content"
        android:layout_height="wrap_content"
        android:layout_weight="1"
        android:background="@drawable/cheek"
        android:textSize="15sp"
        android:text="姓名"
        android:gravity="center"
        android:id="@+id/name"/>


    <TextView
        android:layout_width="wrap_content"
        android:layout_height="wrap_content"
        android:layout_weight="1"
        android:background="@drawable/cheek"
        android:textSize="15sp"
        android:text="姓名"
        android:gravity="center"
        android:id="@+id/phone"/>


    <TextView
        android:layout_width="wrap_content"
        android:layout_height="wrap_content"
        android:layout_weight="1"
        android:background="@drawable/cheek"
        android:textSize="15sp"
        android:text="姓名"
        android:gravity="center"
        android:id="@+id/email"/>
</LinearLayout>
</LinearLayout>
5.创建一个BaseAdapter适配器
package com.example.main1;

import android.content.Context;
import android.view.LayoutInflater;
import android.view.View;
import android.view.ViewGroup;
import android.widget.BaseAdapter;
import android.widget.TextView;

import java.util.List;

public class JsonAdapter extends BaseAdapter {
    private List<ClassBean> list;
    private Context context;

    public JsonAdapter(List<ClassBean> list, Context context) {
        this.list = list;
        this.context = context;
    }

    @Override
    public int getCount() {
        return list.size();
    }

    @Override
    public Object getItem(int position) {
        return null;
    }

    @Override
    public long getItemId(int position) {
        return position;
    }

    @Override
    public View getView(int position, View convertView, ViewGroup parent) {
        if (convertView==null){
            convertView=LayoutInflater.from(context).inflate(R.layout.classiteam,parent,false);
        }
        ClassBean bean=list.get(position);
        TextView name=convertView.findViewById(R.id.name);
        TextView phone=convertView.findViewById(R.id.phone);
        TextView email=convertView.findViewById(R.id.email);

        name.setText(bean.getName());
        phone.setText(bean.getPhone()+"");
        email.setText(bean.getEmail());

        return convertView;
    }
}
6. 获取json数据,将数据放入listview列表里面
package com.example.main1;

import androidx.appcompat.app.AppCompatActivity;

import android.annotation.SuppressLint;
import android.os.Bundle;
import android.view.View;
import android.widget.AdapterView;
import android.widget.ListView;
import android.widget.Toast;

import org.json.JSONArray;
import org.json.JSONException;
import org.json.JSONObject;

import java.io.IOException;
import java.io.InputStream;
import java.io.UnsupportedEncodingException;
import java.util.ArrayList;
import java.util.List;

public class JsonActivity3 extends AppCompatActivity {

    private ListView list;
    private List<ClassBean>data=new ArrayList<>();

    protected void onCreate(Bundle savedInstanceState) {
        super.onCreate(savedInstanceState);
        setContentView(R.layout.activity_json3);

        findcheck();
        try {
            // 从 assets 中读取 JSON 数据
            InputStream inputStream = getAssets().open("class.json");
            int size = inputStream.available();
            byte[] buffer = new byte[size];
            inputStream.read(buffer);
            inputStream.close();

            // 将 JSON 数据解析成 JSONArray 对象
            JSONArray jsonArray = new JSONArray(new String(buffer, "UTF-8"));

            // 遍历 JSONArray,获取每个对象的属性值
            for (int i = 0; i < jsonArray.length(); i++) {
                JSONObject jsonObject = jsonArray.getJSONObject(i);
                String name = jsonObject.getString("username");
                int phone = jsonObject.getInt("phone");
                String email=jsonObject.getString("email");

                ClassBean bean=new ClassBean(name,email,phone);
                data.add(bean);
                list.setAdapter(new JsonAdapter(data, JsonActivity3.this));
                list.setOnItemClickListener(new AdapterView.OnItemClickListener() {
                    @Override
                    public void onItemClick(AdapterView<?> parent, View view, int position, long id) {
                        ClassBean bean1=data.get(position);
                        Toast.makeText(JsonActivity3.this, bean1.getName(), Toast.LENGTH_SHORT).show();
                    }
                });

                // ...
            }
        } catch (JSONException e) {
            e.printStackTrace();
        } catch (IOException e) {
            e.printStackTrace();
        }


    }
    private void findcheck(){
        list=findViewById(R.id.list);
        data=new ArrayList<>();
    }
}
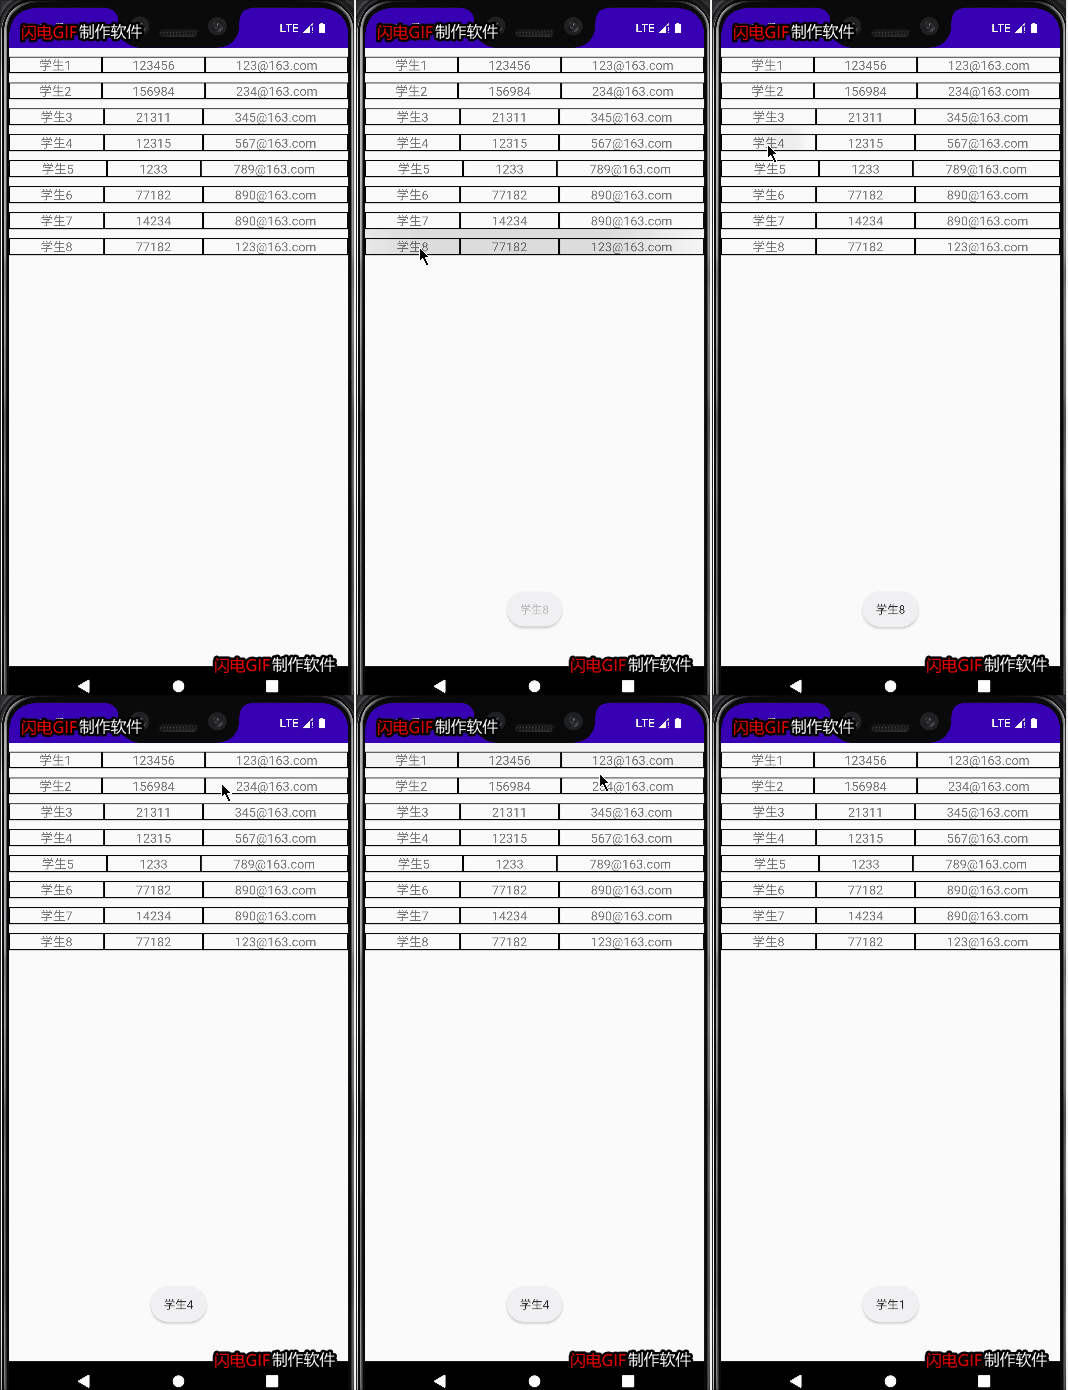
6.效果图展示


 1万+
1万+


 被折叠的 条评论
为什么被折叠?


