


Android开发-类微信界面设计(一)
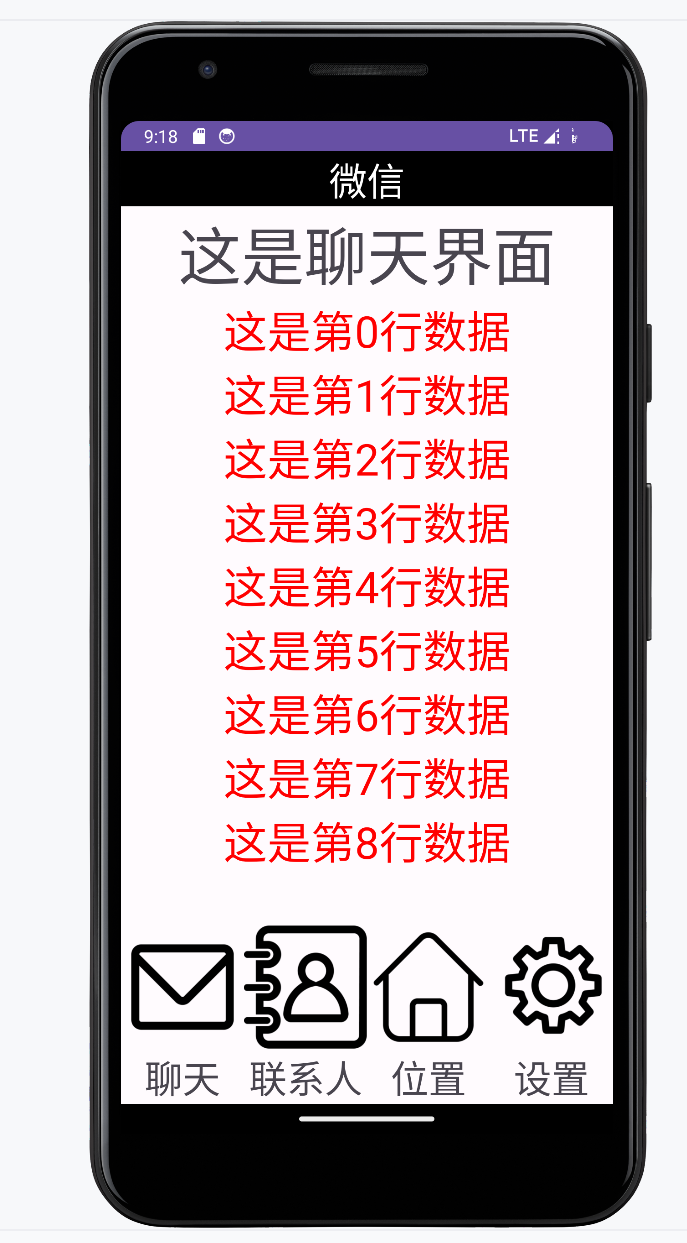
一、实现效果图如下:
二、功能说明:
设计一个类微信的主界面UI,有上中下三个结构,包含四个界面:聊天、联系人、位置、设置,并且实现点击下方进行界面跳转,并且在其中一个tab界面显示列表效果
三、知识点简单介绍
在Android开发中,XML文件和Java文件是两种主要的文件类型,用于定义和控制应用程序的布局、界面和功能。
xml文件
XML文件用于定义应用程序的布局和界面。简单来说就是你能看到的效果图均是由它构成,相当于前端
java文件
Java文件是应用程序的逻辑和功能的实现。就是后端
四、实现说明
上中下三个结构
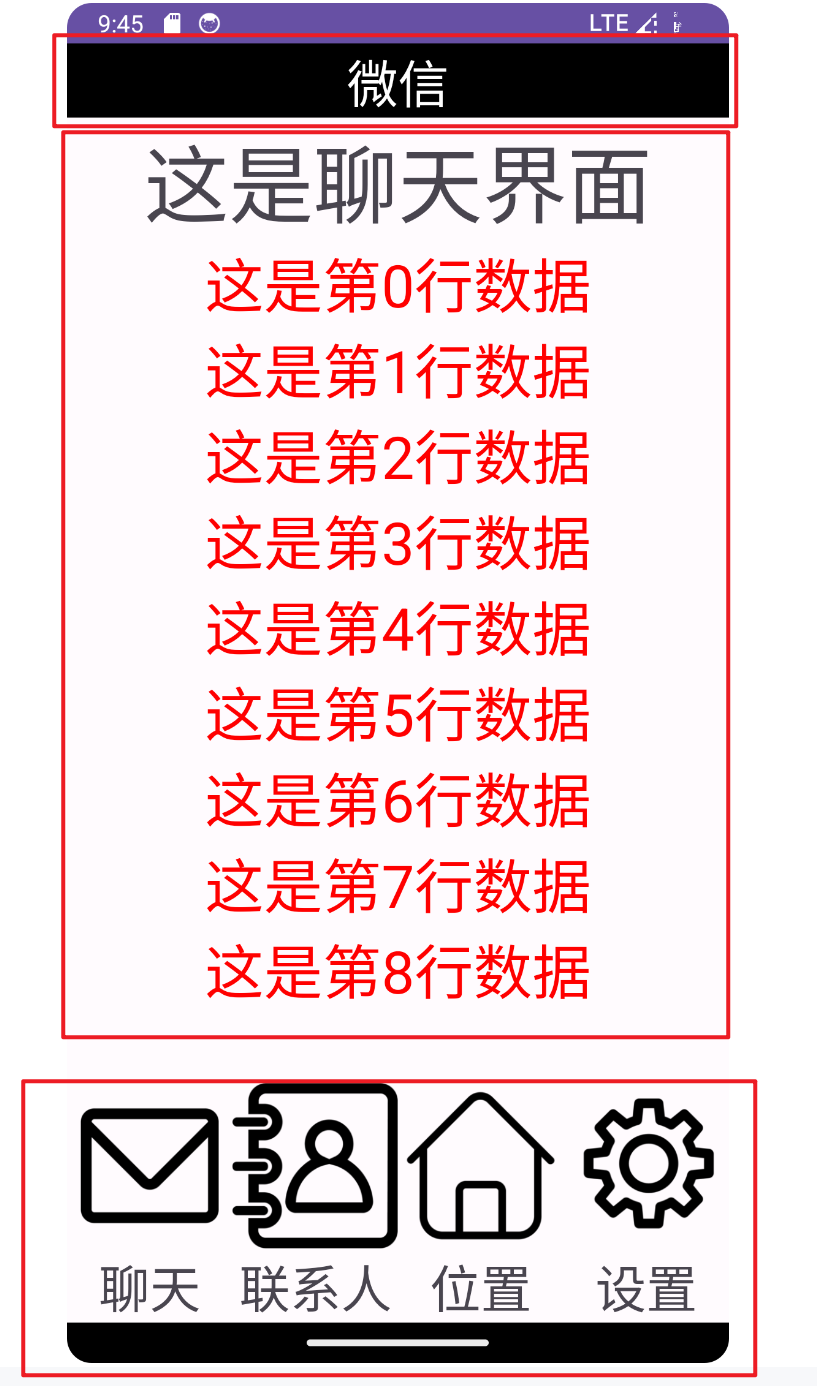
观察可以很明显发现效果图布局为上中下,那么显示就需要在一个主xml(main.xml)上把三个xml显示出来(分别负责上中下)bottom.xml、top.xml、中间显示的xml
由于中间有四个界面需要显示 所以再命名为tab1.xml,tab2.xml,tab3.xml,tab4.xml
main(主界面)
需要把三个部分的xml文件全部压入main.xml中
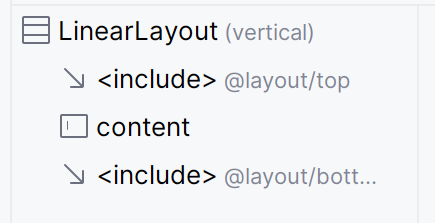
用include包含上中下
<?xml version="1.0" encoding="utf-8"?>
<LinearLayout xmlns:android="http://schemas.android.com/apk/res/android"
    xmlns:tools="http://schemas.android.com/tools"
    xmlns:app="http://schemas.android.com/apk/res-auto"
    android:layout_width="match_parent"
    android:layout_height="match_parent"
    android:orientation="vertical"
    tools:context=".MainActivity">

    <include layout="@layout/top" ></include>

    <FrameLayout
        android:id="@+id/content"
        android:layout_width="match_parent"
        android:layout_height="0dp"
        android:layout_gravity="center"
        android:layout_weight="1">

    </FrameLayout>

    <include layout="@layout/bottom"></include>


</LinearLayout>
top
效果
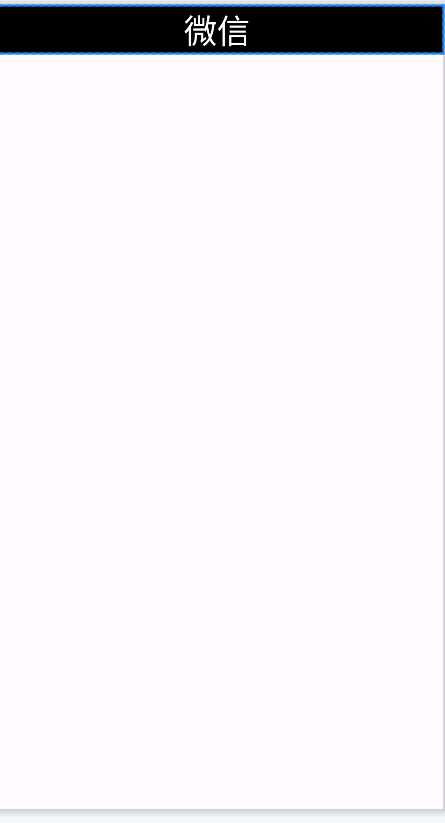
很明显就一个位置在top的文字
故在xml里添加一个textView组件就行
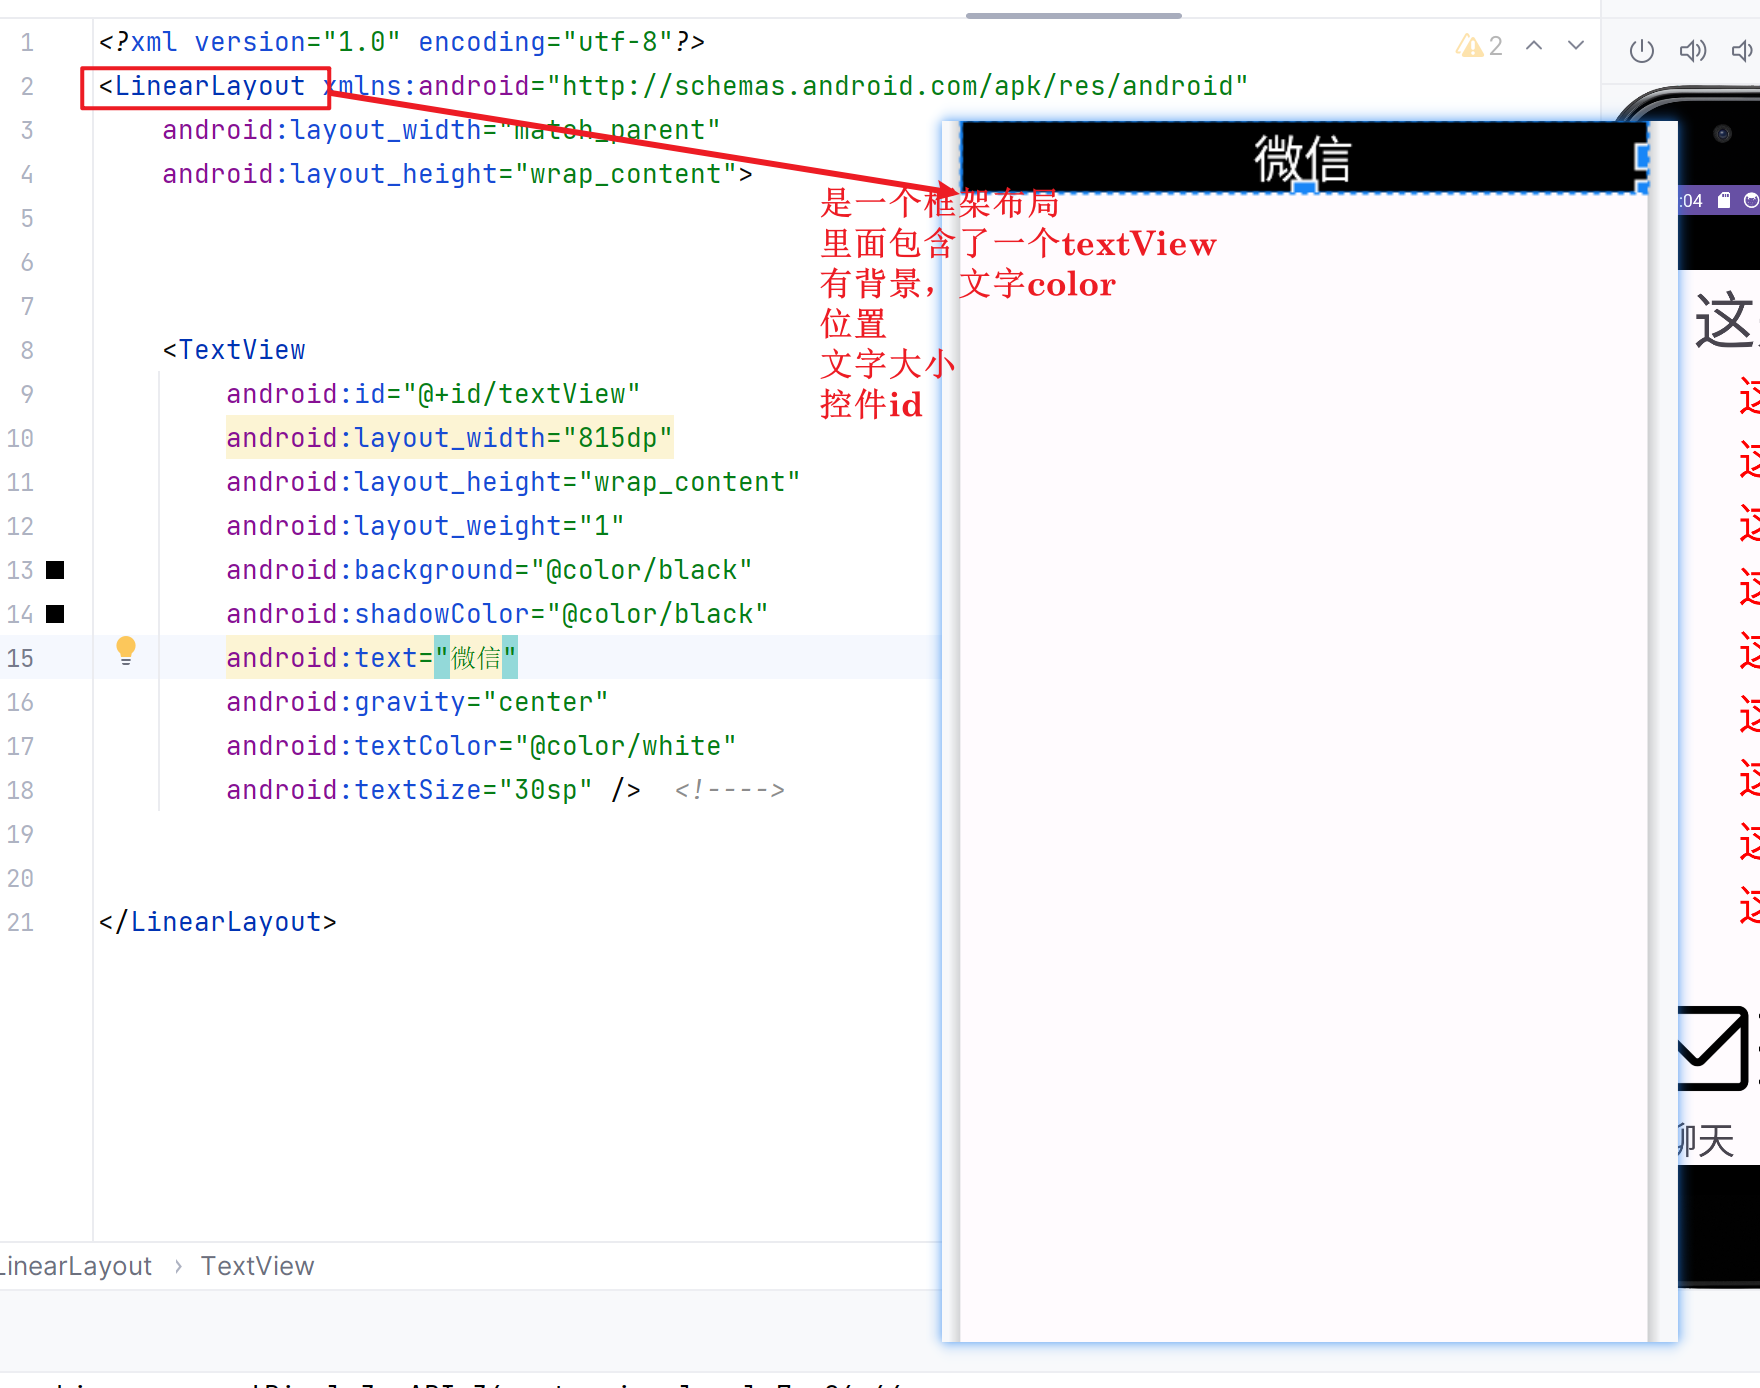
代码:
<?xml version="1.0" encoding="utf-8"?>
<LinearLayout xmlns:android="http://schemas.android.com/apk/res/android"
    android:layout_width="match_parent"
    android:layout_height="wrap_content">


    <TextView
        android:id="@+id/textView"
        android:layout_width="815dp"
        android:layout_height="wrap_content"
        android:layout_weight="1"
        android:background="@color/black"
        android:shadowColor="@color/black"
        android:text="微信"
        android:gravity="center"
        android:textColor="@color/white"
        android:textSize="30sp" />  <!---->


</LinearLayout>
content(四个tab)
效果
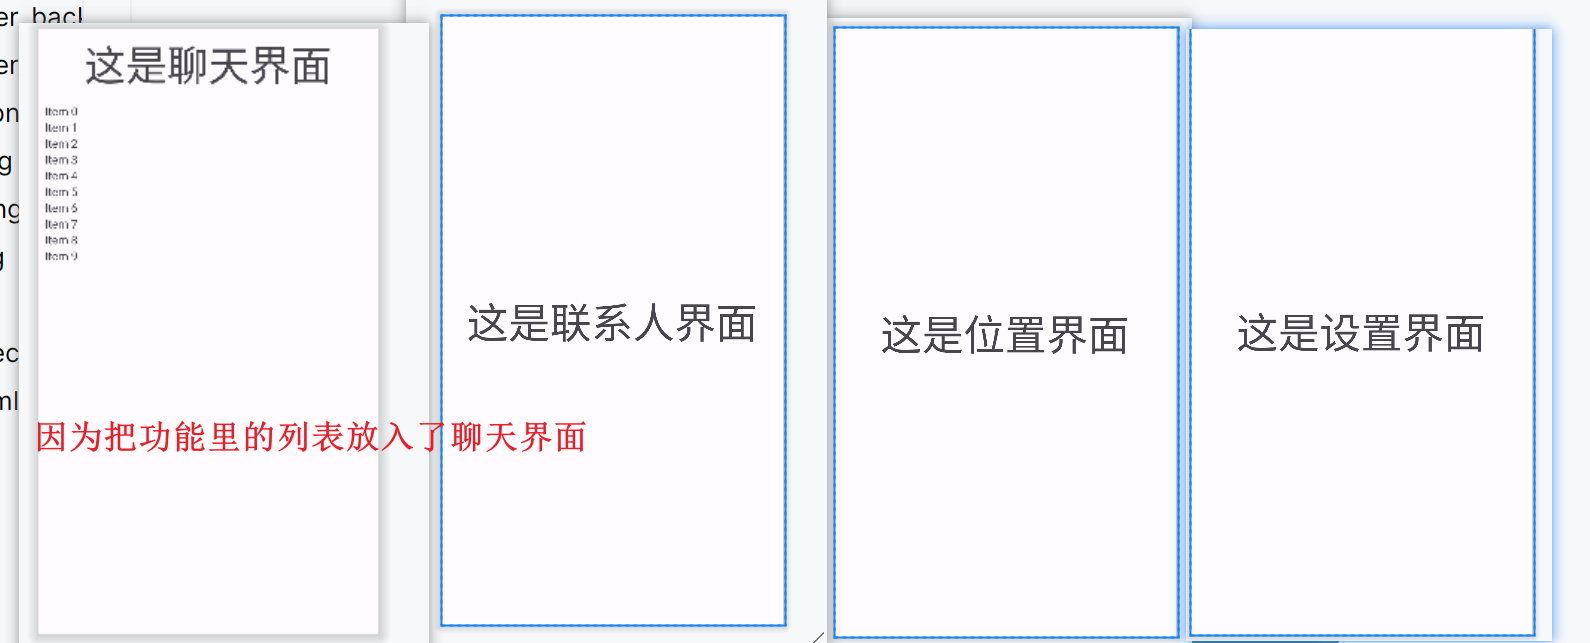
每个都类似,此处说明一个
tab2:
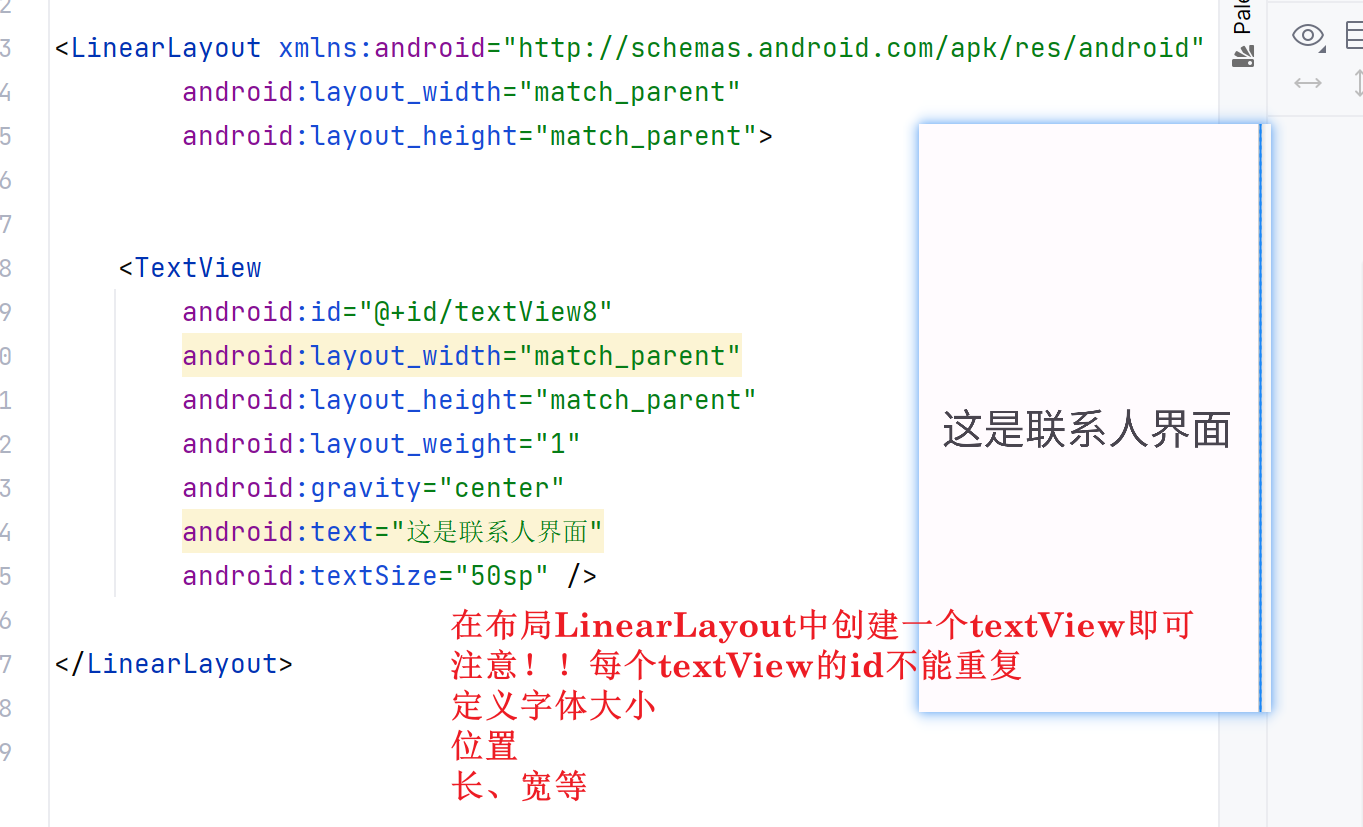
代码
<?xml version="1.0" encoding="utf-8"?>

<LinearLayout xmlns:android="http://schemas.android.com/apk/res/android"
        android:layout_width="match_parent"
        android:layout_height="match_parent">


    <TextView
        android:id="@+id/textView8"
        android:layout_width="match_parent"
        android:layout_height="match_parent"
        android:layout_weight="1"
        android:gravity="center"
        android:text="这是联系人界面"
        android:textSize="50sp" />

</LinearLayout>
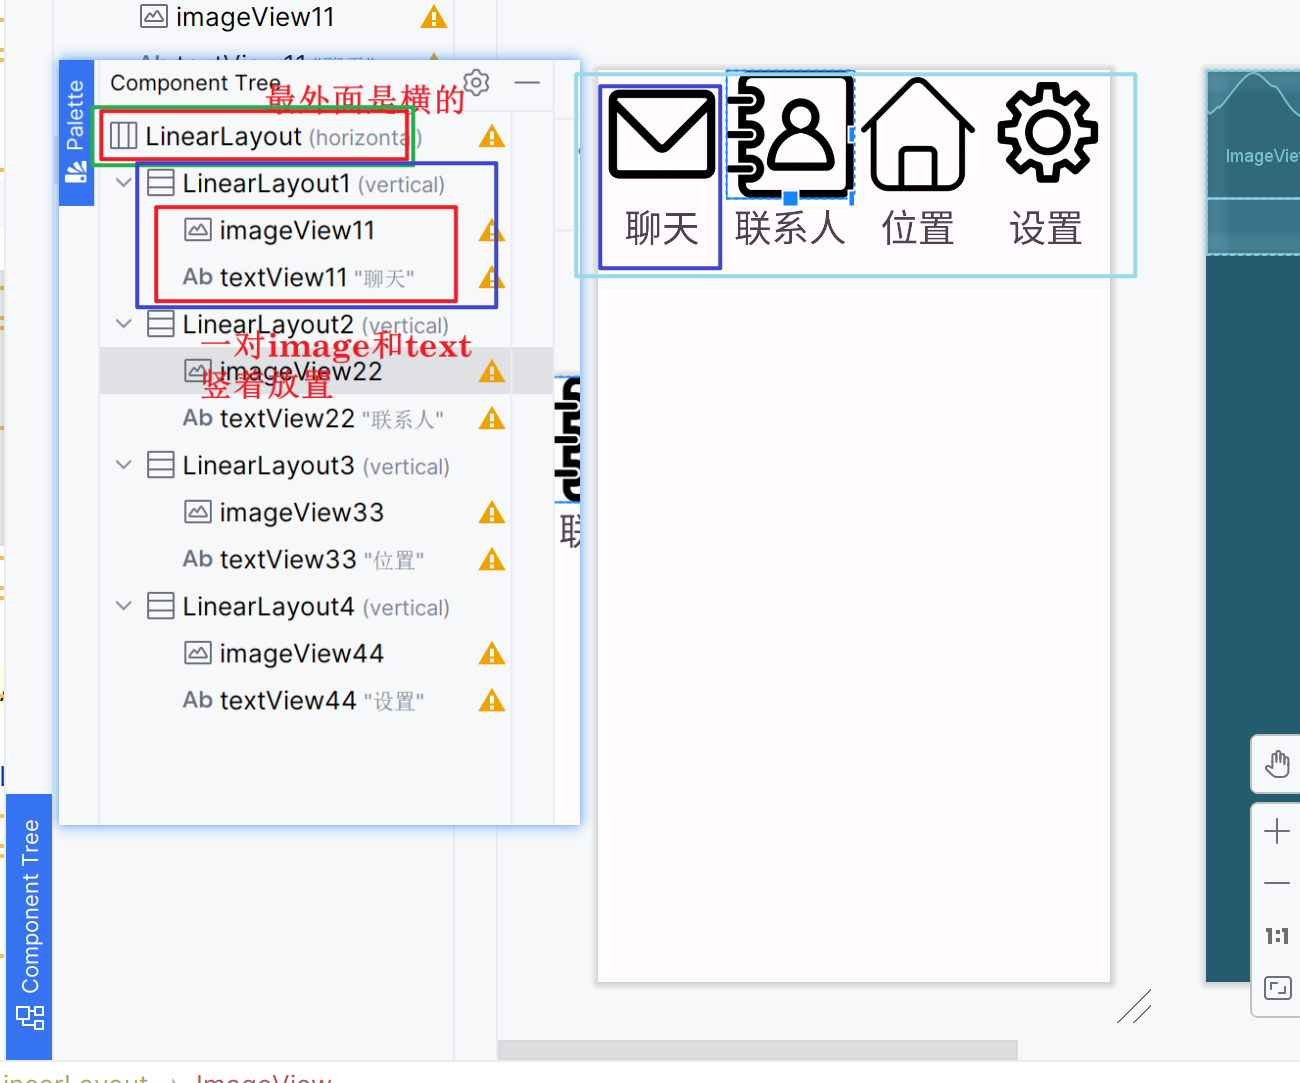
bottom
bottom效果:

看出有4个图像 4个文字,一个图像和一个文字是一对的,4对是横着排列
故布局如下:
代码
<?xml version="1.0" encoding="utf-8"?>
<LinearLayout xmlns:android="http://schemas.android.com/apk/res/android"
    xmlns:app="http://schemas.android.com/apk/res-auto"
    android:layout_width="match_parent"
    android:layout_height="wrap_content">

    <LinearLayout
        android:id="@+id/LinearLayout1"
        android:layout_width="wrap_content"
        android:layout_height="wrap_content"
        android:layout_weight="1"
        android:orientation="vertical">

        <ImageView
            android:id="@+id/imageView11"
            android:layout_width="wrap_content"
            android:layout_height="wrap_content"
            android:layout_weight="1"
            android:adjustViewBounds="true"

            app:srcCompat="@drawable/xiaoxi" />

        <TextView
            android:id="@+id/textView11"
            android:layout_width="match_parent"
            android:layout_height="wrap_content"

            android:gravity="center"
            android:text="聊天"

            android:textSize="30sp" />
    </LinearLayout>

    <LinearLayout
        android:id="@+id/LinearLayout2"
        android:layout_width="wrap_content"
        android:layout_height="wrap_content"
        android:layout_weight="1"
        android:orientation="vertical">

        <ImageView
            android:id="@+id/imageView22"
            android:layout_width="wrap_content"
            android:layout_height="wrap_content"
            android:layout_weight="1"
            android:adjustViewBounds="true"
            app:srcCompat="@drawable/lianxiren" />

        <TextView
            android:id="@+id/textView22"
            android:layout_width="match_parent"
            android:layout_height="match_parent"
            android:gravity="center"
            android:shadowColor="@color/black"
            android:text="联系人"

            android:textSize="30sp" />
    </LinearLayout>

    <LinearLayout
        android:id="@+id/LinearLayout3"
        android:layout_width="wrap_content"
        android:layout_height="wrap_content"
        android:layout_weight="1"

        android:orientation="vertical">

        <ImageView
            android:id="@+id/imageView33"
            android:layout_width="wrap_content"
            android:layout_height="wrap_content"
            android:layout_weight="1"
            android:adjustViewBounds="true"
            app:srcCompat="@drawable/shouye" />

        <TextView
            android:id="@+id/textView33"
            android:layout_width="match_parent"
            android:layout_height="match_parent"
            android:gravity="center"
            android:shadowColor="@color/black"
            android:text="位置"

            android:textSize="30sp" />
    </LinearLayout>

    <LinearLayout
        android:id="@+id/LinearLayout4"
        android:layout_width="wrap_content"
        android:layout_height="wrap_content"
        android:layout_weight="1"
        android:orientation="vertical">

        <ImageView
            android:id="@+id/imageView44"
            android:layout_width="wrap_content"
            android:layout_height="wrap_content"
            android:layout_weight="1"
            android:adjustViewBounds="true"
            app:srcCompat="@drawable/shezhi" />

        <TextView
            android:id="@+id/textView44"
            android:layout_width="match_parent"
            android:layout_height="match_parent"
            android:shadowColor="@color/black"
            android:gravity="center"
            android:text="设置"

            android:textSize="30sp" />
    </LinearLayout>
</LinearLayout>
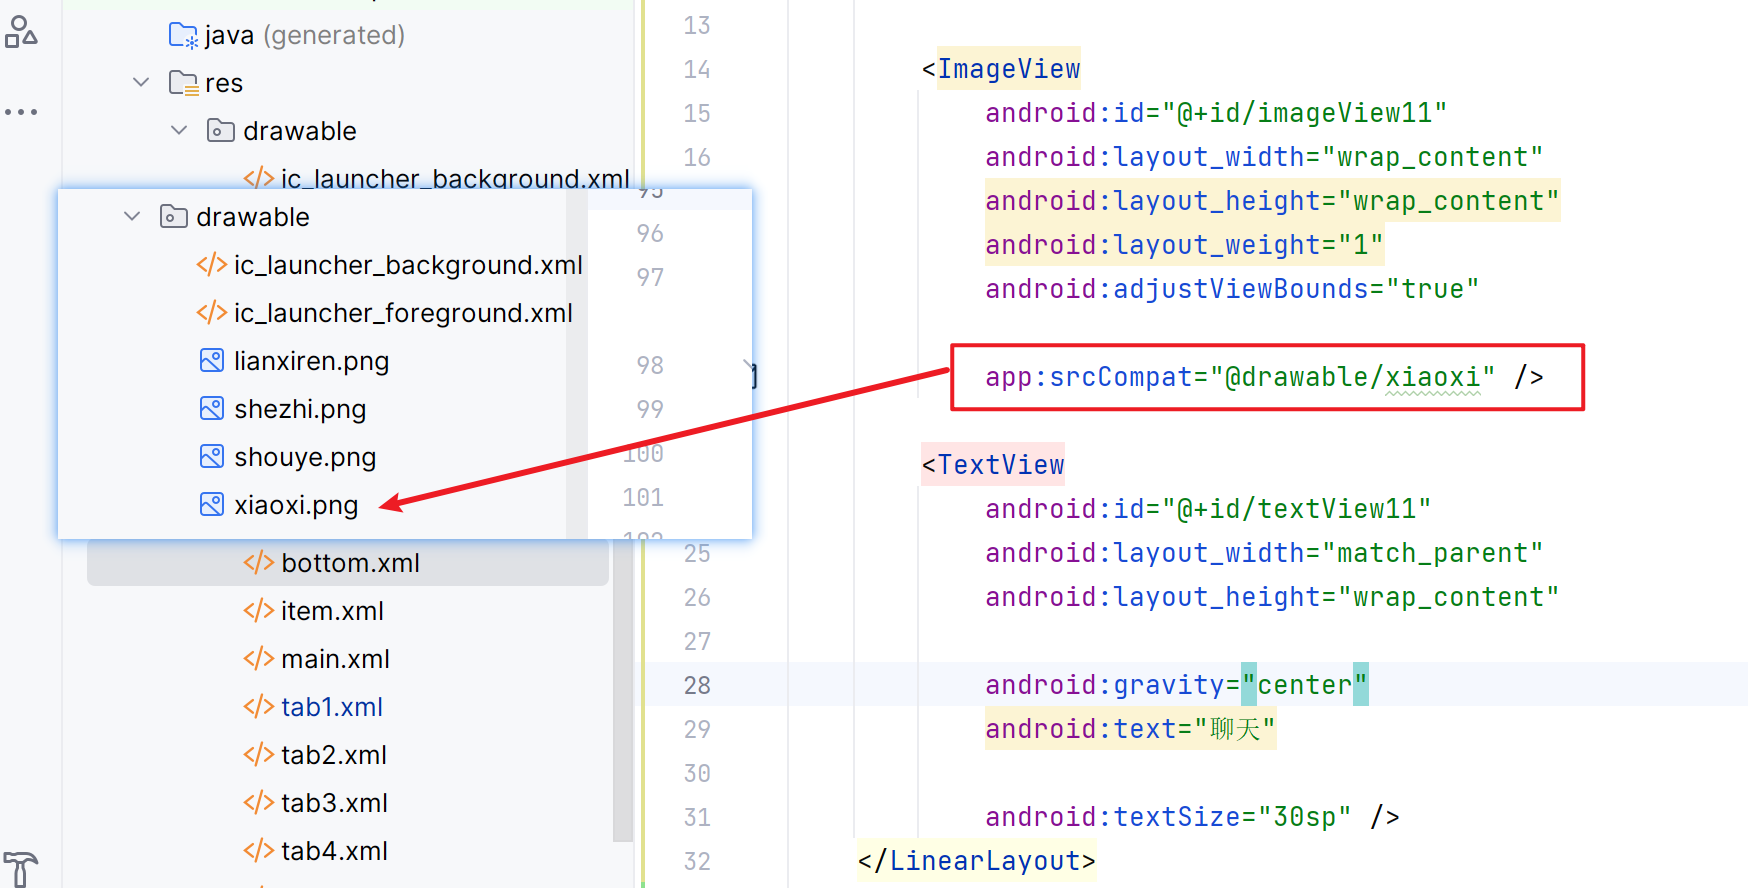
注意!!
自定义的imag要放在drawable目录下并且在LinearLayout进行引用说明
点击4个页面跳转功能
这个涉及到后端接口所以在java中实现
1.首先把java文件frament1.java与tab1.xml进行连接
(fragment作为中间桥梁达到main函数可以调用xml的效果)
故每个fragment都会连接到对应的tab

package com.example.demo;

import android.os.Bundle;
import android.view.LayoutInflater;
import android.view.View;
import android.view.ViewGroup;

import androidx.fragment.app.Fragment;


public class Fragment2 extends Fragment {

    @Override
    public View onCreateView(LayoutInflater inflater, ViewGroup container,
                             Bundle savedInstanceState) {

        return inflater.inflate(R.layout.tab2, container, false);
    }
}
2.桥梁搭好之后在main函数功能实现具体的操作
(1)初始化
把4个fragment(tab页面)压入content里面
    private void initial() {//压入content
        FragmentTransaction ft=fm.beginTransaction()//事物 管理交互动作
                .add(R.id.content,fragment1)
                .add(R.id.content,fragment2)
                .add(R.id.content,fragment3)
                .add(R.id.content,fragment4);
        ft.commit();

    }
(2)显示当前页面
   private void fragmentshow(Fragment fragment) {
        FragmentTransaction ft=fm.beginTransaction()
                .show(fragment);
        ft.commit();
    }
(3)实现点击监听功能
注意!!
switch和if语句都可以实现
如果版本不允许的话(比如我)就可以用if语句实现
 switch(view.getId()){
            case R.id.LinearLayout1:fragmentshow(fragment1);break;
            case R.id.LinearLayout2:fragmentshow(fragment2);break;
            case R.id.LinearLayout3:fragmentshow(fragment3);break;
            case R.id.LinearLayout4:fragmentshow(fragment4);break;
      }
    public void onClick(View view) {
        fragmenthide();
        if (view.getId()==R.id.LinearLayout1){
            fragmentshow(fragment1);
        }else if (view.getId()==R.id.LinearLayout2){
            fragmentshow(fragment2);
        }else if (view.getId()==R.id.LinearLayout3){
            fragmentshow(fragment3);
        }else if(view.getId()==R.id.LinearLayout4){
            fragmentshow(fragment4);
        }
(4)实现页面隐藏功能
private void fragmenthide() {//藏起来
        FragmentTransaction ft=fm.beginTransaction()
                .hide(fragment1)
                .hide(fragment2)
                .hide(fragment3)
                .hide(fragment4);
        ft.commit();
    }
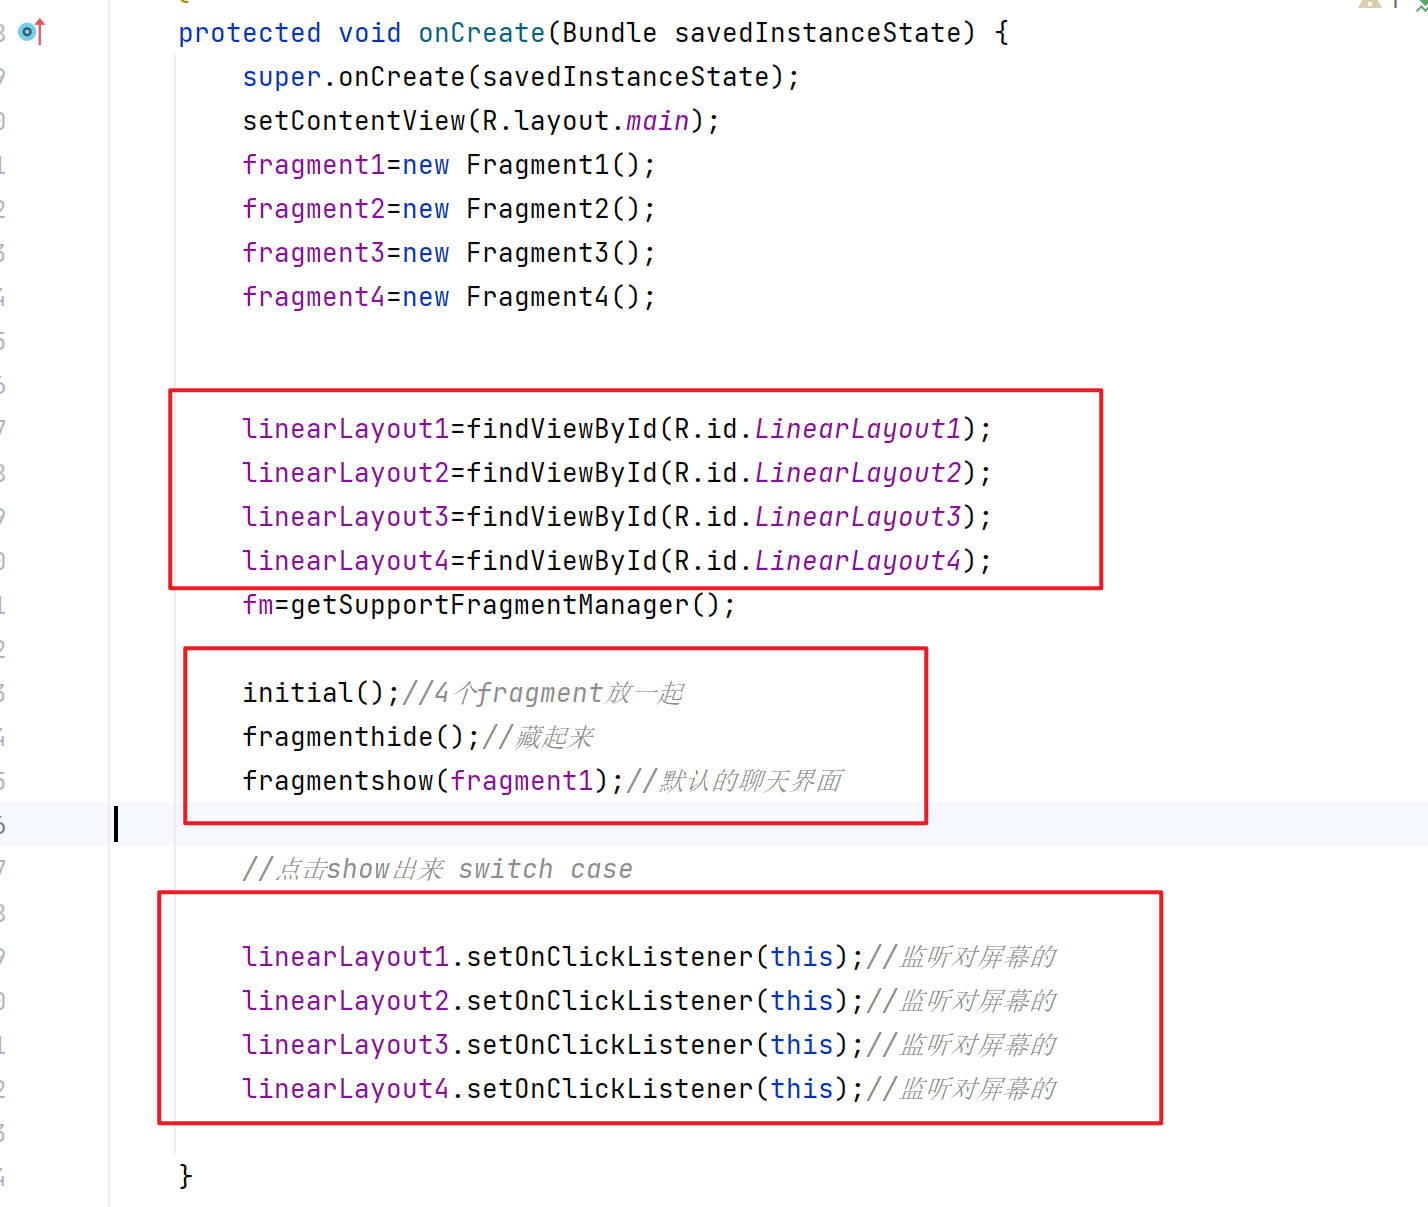
main函数操作
创建4个Fragment变量、1个管理对象FragmentManager变量 、4个LinearLayout变量对象
把LinearLayout实现与tab的图片文件进行初始化连接(get_id)
然后监听(setOnClicklistener)
然后进行全局初始化
把所有tab页面先藏起来
点到谁谁出来
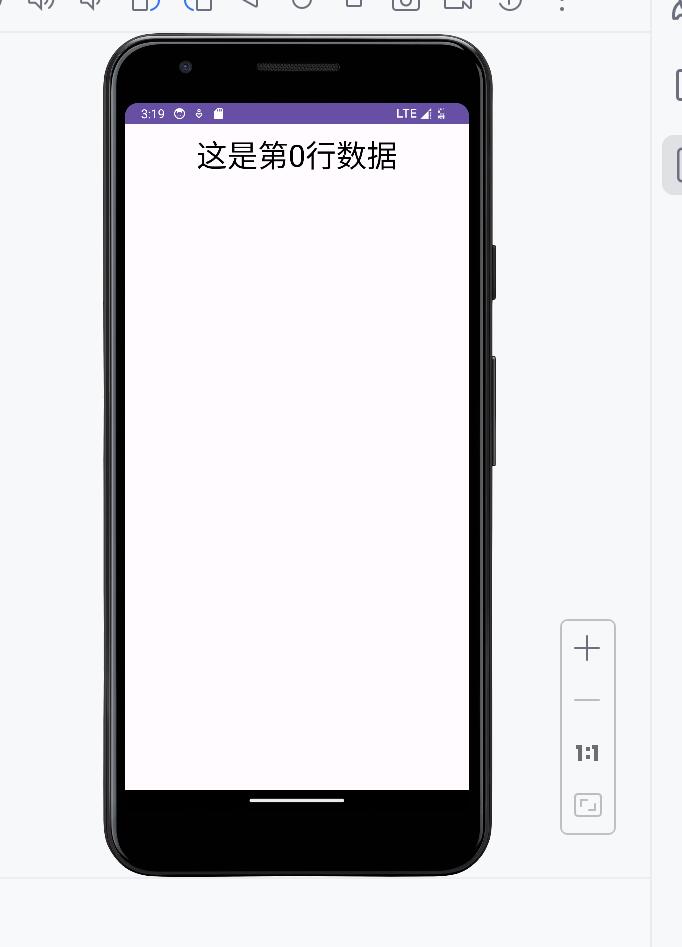
在tab中显示list功能
选择了tab1即聊天界面
需要用到RecycleView这个控件,在tab1.xml中加入,且创建一个item.xml(每一行的列表样式)
也就是说你在tab1中加入的list样式,它的每一行其实是用item进行显示
然后创建Myadapter类连接item(与之前Fragment连接tab一样)
Fragment.java:
view=inflater.inflate(R.layout.tab1,container,false);
recyclerView=view.findViewById(R.id.recyclerview);//连接至tab1的控件
list=new ArrayList();
for(int i=0;i<9;i++){
    list.add("这是第"+i+"行数据");
}

adapter=new Myadapter(view.getContext(),list);//把list导入
LinearLayoutManager manager=new LinearLayoutManager(view.getContext());
manager.setOrientation(LinearLayoutManager.VERTICAL);
recyclerView.setAdapter(adapter);
recyclerView.setLayoutManager(manager);
// Inflate the layout for this fragment
return view;
主要作用是在Fragment的UI界面中展示一个列表视图(RecyclerView),并将数据源(List)提供给适配器(Adapter),以便进行数据的绑定和显示。
LinearLayoutManager manager=new LinearLayoutManager(view.getContext());
- 创建了一个LinearLayoutManager对象,传入了view.getContext()的上下文参数。通过这个参数,LinearLayoutManager可以获取到包含该RecyclerView的Activity或Fragment的Context对象,并在该上下文中设置LinearLayoutManager的属性。
manager.setOrientation(LinearLayoutManager.VERTICAL);
- 对这个布局做界面调整 要垂直的
Myadapter.java说明
RecyclerView中的Myadapter
是一个管理数据和视图之间关系的类
为RecyclerView提供数据并创建对应的视图项
Adapter通常继承自RecyclerView.Adapter类,并通过重写其中的方法来实现自定义逻辑。例如,常见的方法包括:
onCreateViewHolder():用于创建ViewHolder对象,即每个Item对应的视图项。
 public Myholder onCreateViewHolder(@NonNull ViewGroup parent, int viewType) {

        View view=LayoutInflater.from(context1).inflate(R.layout.item,parent,false);
        //布局的压缩
//        Inflater inflater=new Inflater();
//        inflater.inflate(); 真正的压缩
        Myholder myholder=new Myholder(view);

        return myholder;
    }
-
onBindViewHolder():用于将数据绑定到ViewHolder中的视图项上。public void onBindViewHolder(@NonNull Myholder holder, int position) { holder.textView.setText(list1.get(position));//用于设置TextView的文本内容为数据列表list1中指定位置的数据 holder.textView.setTextColor(Color.RED); // 将颜色设置为红色 } -
getItemCount():返回数据集合的大小,即Item的数量。public int getItemCount() { return list1.size(); } -
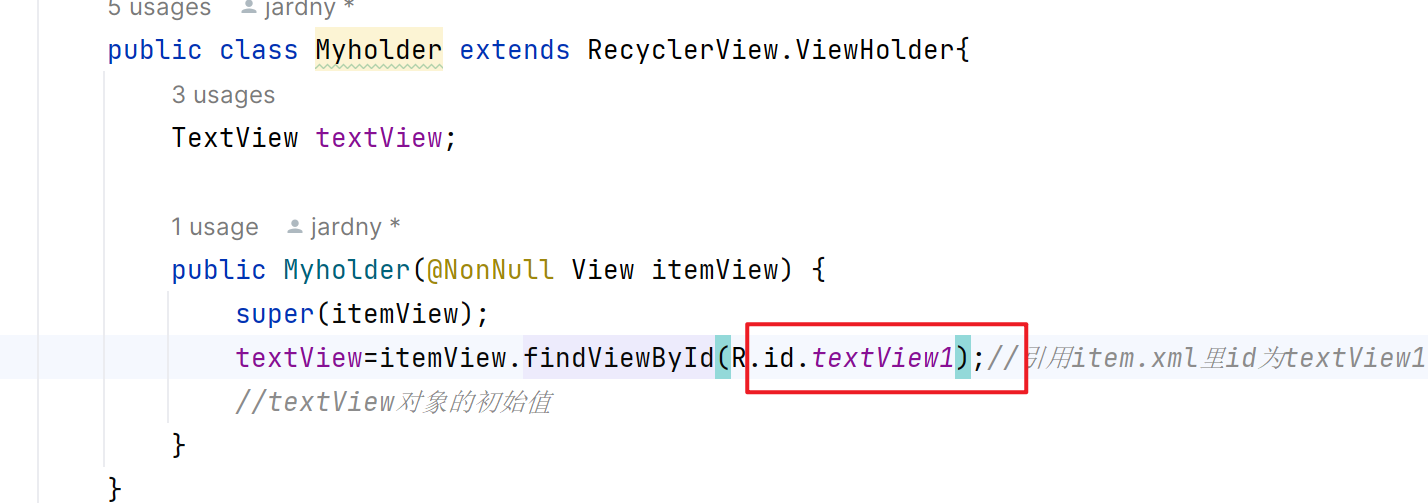
定义一个名为
Myholder的自定义ViewHolder类,它继承自RecyclerView的内部类ViewHolder
是用来表示每个数据项的视图项的,并且可以在需要时对其进行重用。ViewHolder通过保存视图项中的子视图 (例如TextView、ImageView等)的引用,以便在需要时快速地访问和更新视图内容
    public class Myholder extends RecyclerView.ViewHolder{
        TextView textView;

        public Myholder(@NonNull View itemView) {
            super(itemView);
            textView=itemView.findViewById(R.id.textView1);//引用item.xml里id为textView1的textView作为Myholder这个类中
            //textView对象的初始值
        }
    }
五、报错部分
1、error: ‘@tools:sample/avatars’ is incompatible with attribute src (attr) referencelcolor.
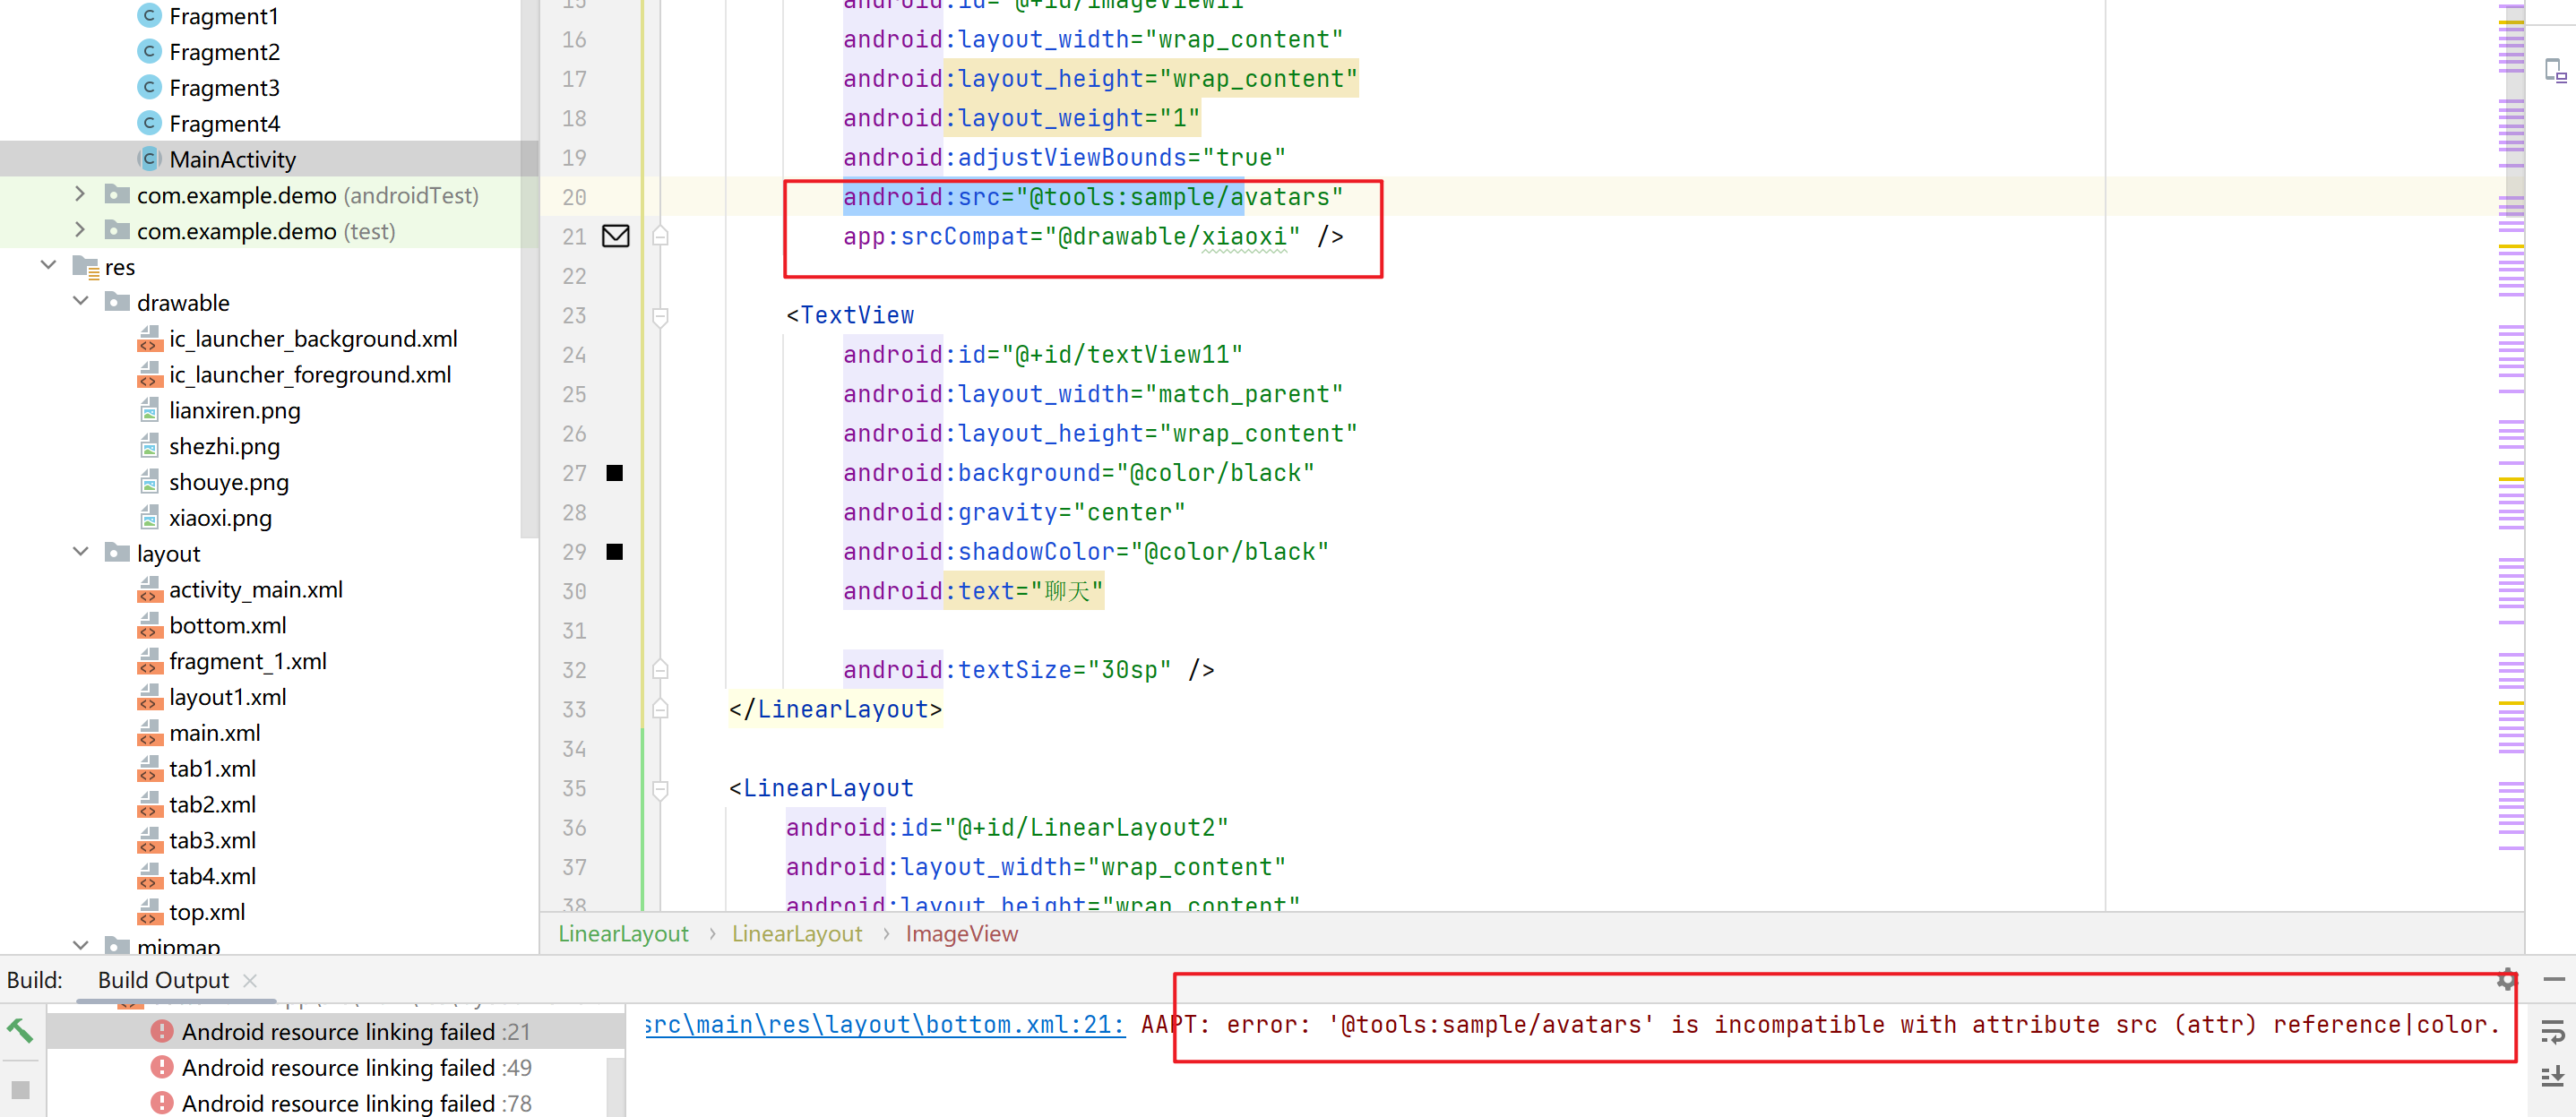
用的是系统自带图片
自定义了2个src
solve:
把tools的那个删除
只留下
srcCompat:="@drawable/xiaoxi"
后面跟的是图片存放路径
2:图片命名飘红
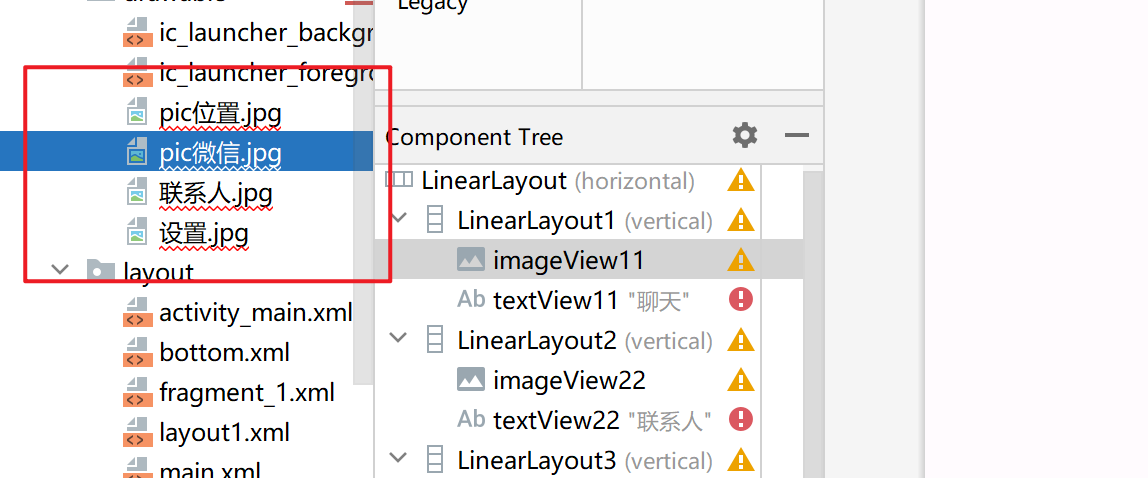
solve:
命名修改为英文的就行
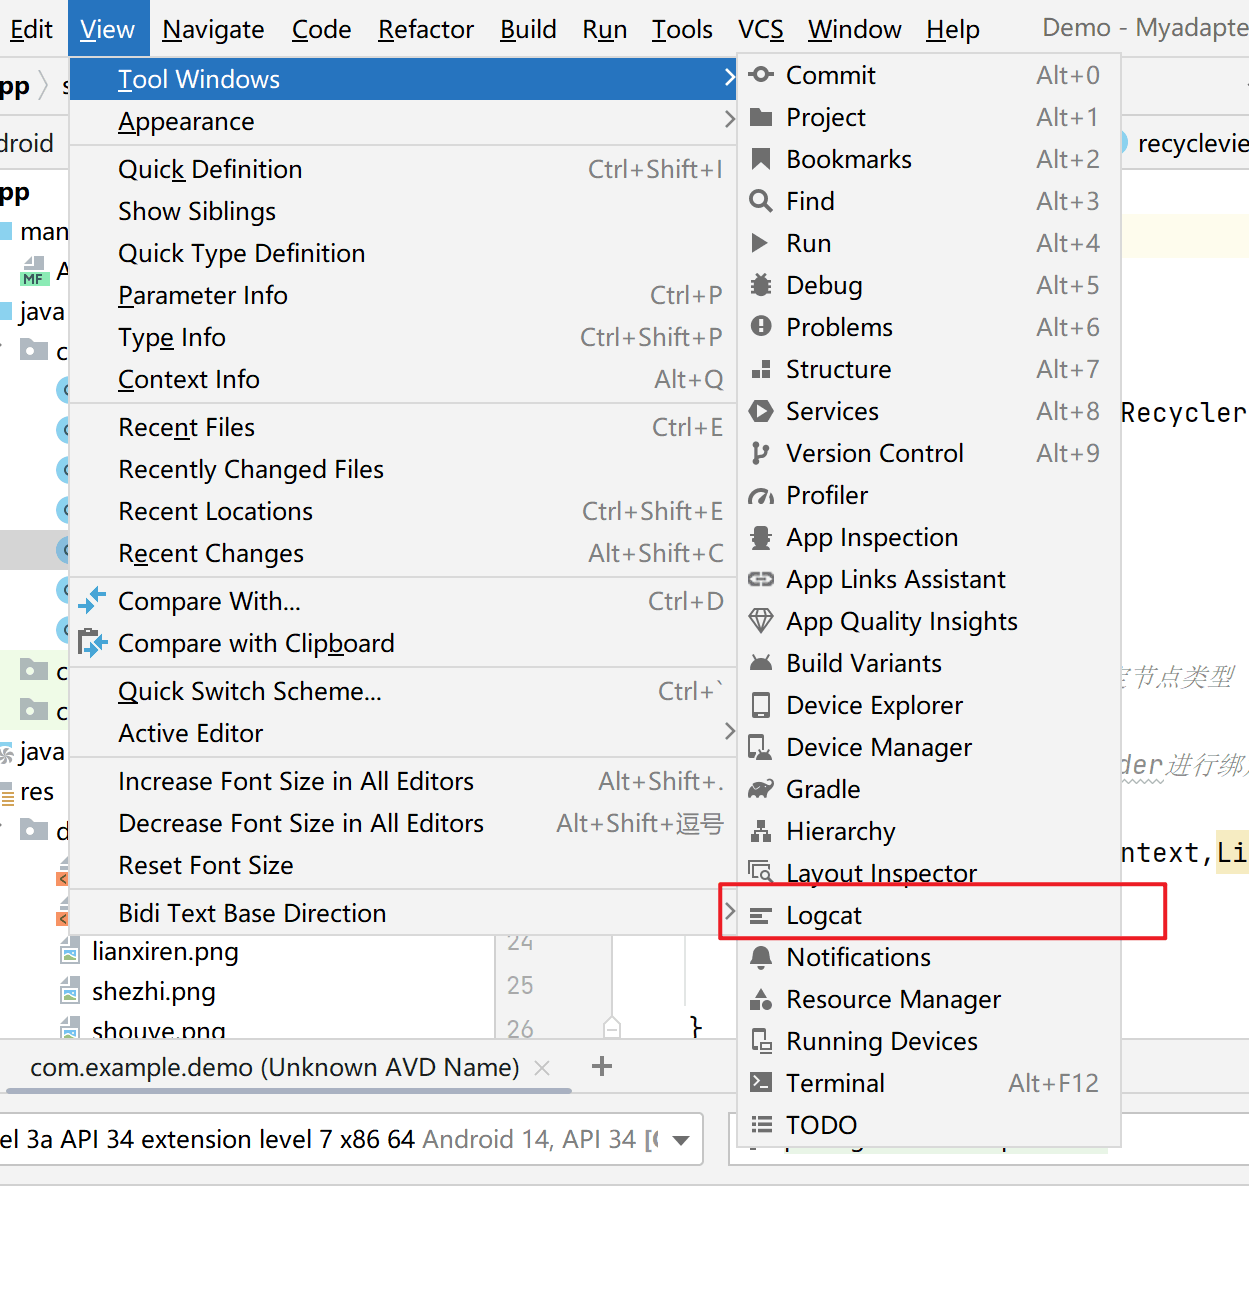
3:没报错但打开程序一直闪退
一开始也不知道怎么办,上网搜索后才发现要查看日志
运行不报错,但是日志会报错(get了)
查找日志方法:
4:Unable to instantiate activity ComponentInfo{com.example.demo/com.example.demo.MainActivity}:
说无法是实例化MainActivity
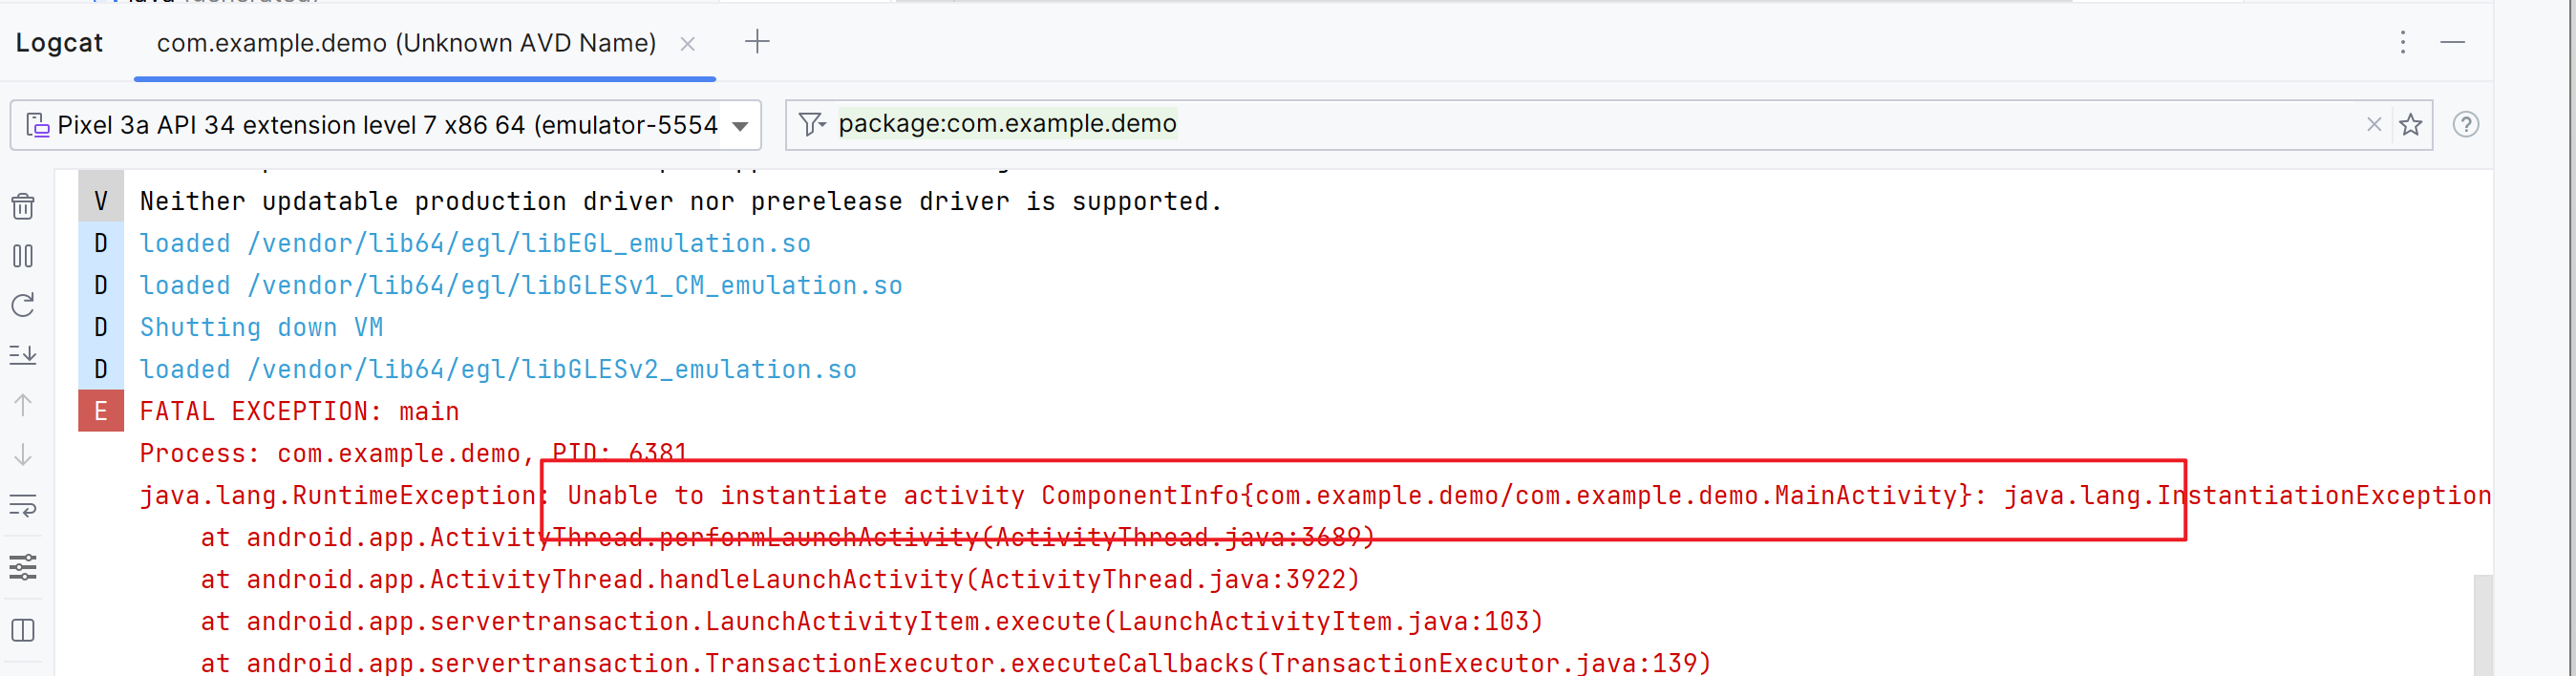
查看后发现我创建的时候不小心加了一个abstract
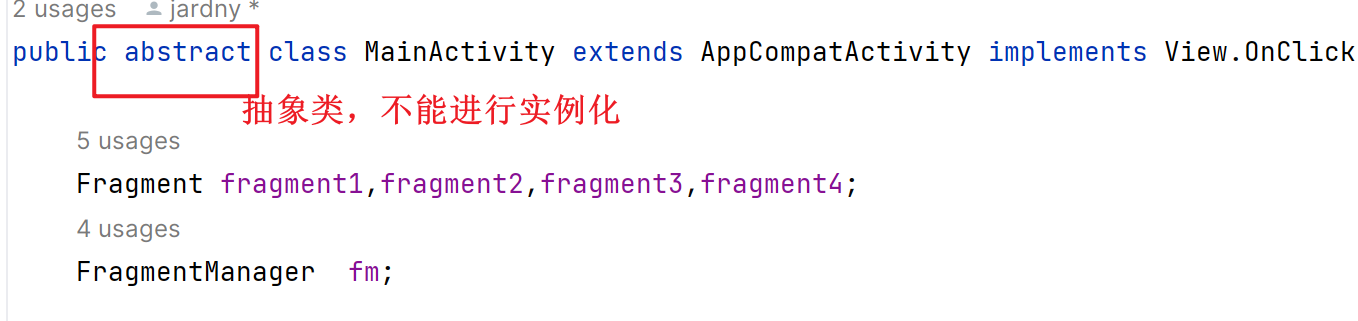
!!!:abstract是抽象类,抽象类是不行进行实例化的
5: Attempt to invoke virtual method ‘void android.widget.TextView.setText(java.lang.CharSequence)’
意思是在代码中尝试对一个空对象进行操作。具体来说,这个错误提示是因为在Myadapter.java文件的43行,尝试对一个TextView对象进行setText()方法的调用,但该TextView对象是null,即没有被正确地初始化或找到。
所以应该是getid的问题 没有正确的get到
果然这里写错了
我的textView的id是textView1,但是我一开始写成立textView
而这个id是个空的
6、要滑动才行,不是老师要求的显示在一个界面
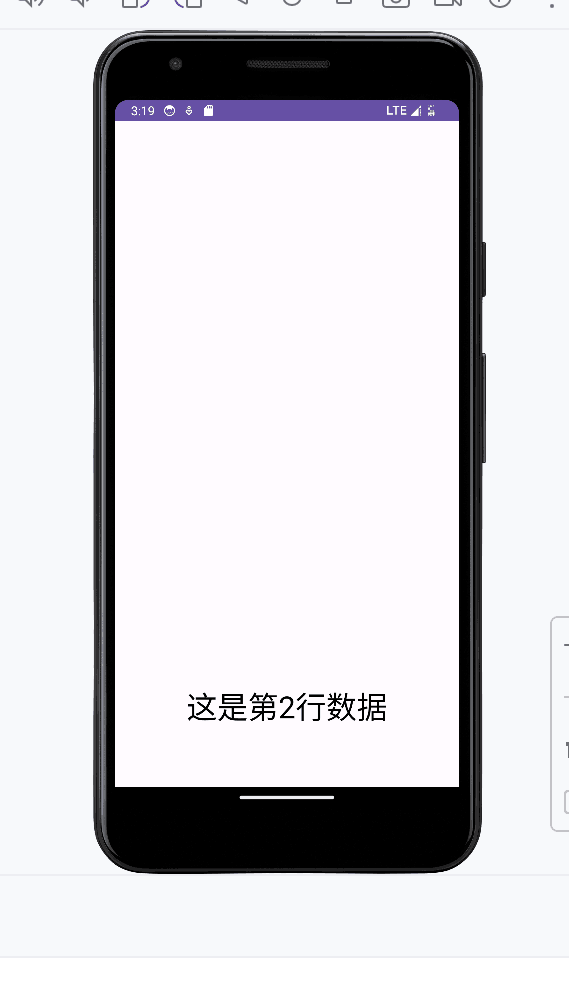
s: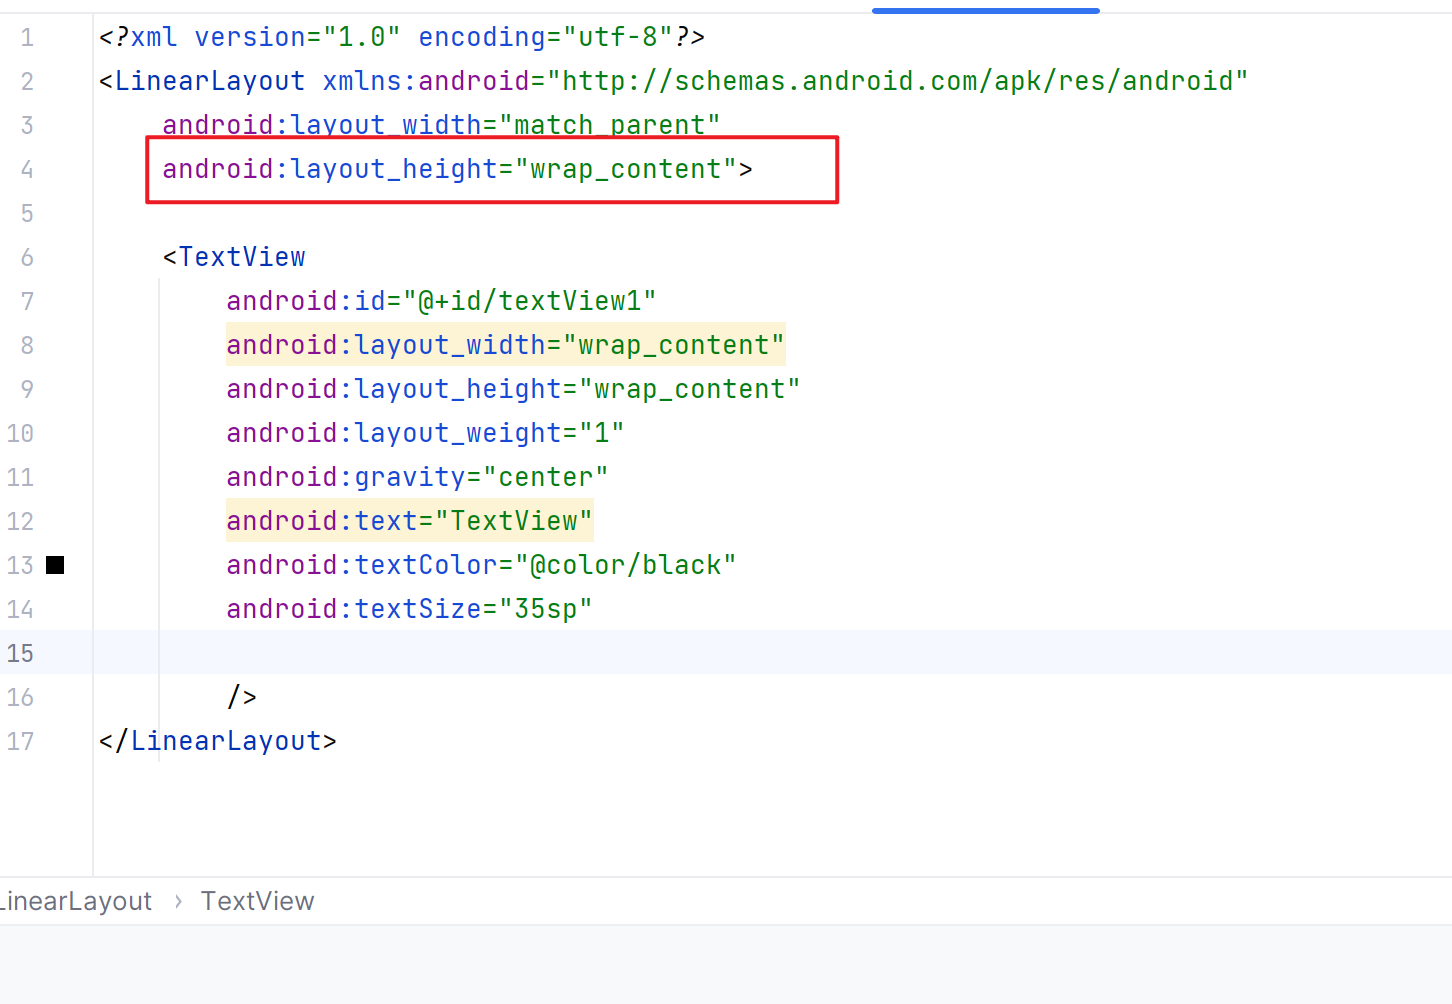
把linearlayout中的height变为wrap_content
因为滑动显示是有关高度的参数
wrap_content 尽量缩小为合适的页面
match_parent 把父页面中找到显示合适的地方
六、Summary
第一次尝试Android开发,挺有趣但是也挺难,还是有很多不懂,希望后面自己能坚持总结写博客,解决完自己的errors之后和同学交流,其实也都是这些问题,解决完自己的问题之后,感觉收获很大,印象很深
希望总结下来,减少大家浪费的时间
源码地址:https://gitee.com/jardny/My_AndroidWork


 652
652


 被折叠的 条评论
为什么被折叠?
被折叠的 条评论
为什么被折叠?
 到【灌水乐园】发言


