


selenium使用
一 bs4搜索文档树
from bs4 import BeautifulSoup

html_doc = """
<html><head><title>The Dormouse's story</title></head>
<body>
<p id="my p" class="title">asdfasdf<b id="bbb" class="boldest">The Dormouse's story</b>
</p>

<p class="story">Once upon a time there were three little sisters; and their names were
<a href="http://example.com/elsie" class="sister" id="link1">Elsie</a>,
<a href="http://example.com/lacie" class="sister" id="link2">Lacie</a> and
<a href="http://example.com/tillie" class="sister" id="link3">Tillie</a>;
and they lived at the bottom of a well.</p>

<p class="story">...</p>
"""

soup = BeautifulSoup(html_doc, 'lxml')

# 1 字符串:可以按照标签名,属性名查找
# res = soup.find(name='a', id='link2')
# <a class="sister" href="http://example.com/lacie" id="link2">Lacie</a>

# res = soup.find(href='http://example.com/tillie')
# <a class="sister" href="http://example.com/tillie" id="link3">Tillie</a>

# res = soup.find(class_='story')
# <a class="sister" href="http://example.com/elsie" id="link1">Elsie</a>,
# <a class="sister" href="http://example.com/lacie" id="link2">Lacie</a> and
# <a class="sister" href="http://example.com/tillie" id="link3">Tillie</a>;

# res = soup.body.find('p')
# <p class="title" id="my p">asdfasdf<b class="boldest" id="bbb">The Dormouse's story</b>
# </p>

# res = soup.body.find(string='Elsie')
# Elsie

res = soup.find(attrs={'class': 'sister'})
# <a class="sister" href="http://example.com/elsie" id="link1">Elsie</a>
print(res)
二 css选择器
from bs4 import BeautifulSoup

html_doc = """
<html><head><title>The Dormouse's story</title></head>
<body>
<p id="my p" class="title">asdfasdf<b id="bbb" class="boldest">The Dormouse's story</b>
</p>

<p class="story">Once upon a time there were three little sisters; and their names were
<a href="http://example.com/elsie" class="sister" id="link1">Elsie</a>,
<a href="http://example.com/lacie" class="sister" id="link2">Lacie</a> and
<a href="http://example.com/tillie" class="sister" id="link3">Tillie</a>;
and they lived at the bottom of a well.</p>

<p class="story">...</p>
"""

soup = BeautifulSoup(html_doc, 'lxml')

# res = soup.select('a')

# res = soup.select('#link1')

# res = soup.select('.sister')

# res = soup.select('body>p>a')

# 只需要会了css选择,几乎所有的解析器[bs4,lxml...],都会支持css和xpath


# res = soup.select('body>p>a:nth-child(2)')

# res = soup.select('body>p>a:nth-last-child(1)')

# [attribute=value]
res = soup.select('a[href="http://example.com/tillie"]')
print(res)
三 selenium基本使用
selenium,可以操作浏览器,控制浏览器,模拟人的行为。
selenium最初是一个自动化测试工具,而爬虫中使用它主要是为了解决requests无法直接执行JavaScript代码的问题。
selenium本质是通过驱动浏览器,完全模拟浏览器的操作,比如跳转、输入、点击、下拉等,来拿到网页渲染之后的结果,可支持多种浏览器。
使用:
1.安装模块
pip3 install selenium
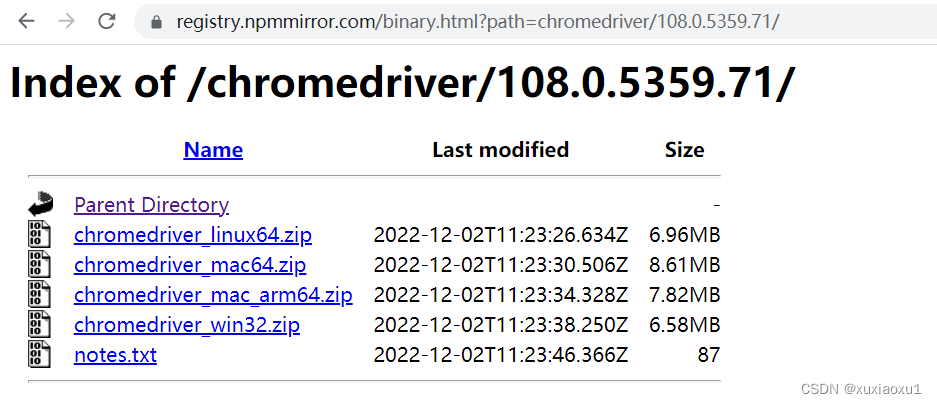
2.下载浏览器驱动:selenium操作浏览器,需要有浏览器(谷歌浏览器)。
谷歌浏览器驱动 https://registry.npmmirror.com/binary.html?path=chromedriver/
3.浏览器版本对应的驱动,找到相应的驱动。
4.简单使用
from selenium import webdriver
import time

# 驱动放到环境变量中,就不用传executable_path参数

# 打开一个浏览器
driver = webdriver.Chrome(executable_path='./chromedriver.exe')

# 在地址栏输入网站
driver.get('https://www.baidu.com')

time.sleep(3)

# 关闭浏览器
driver.close()
四 无界面浏览器
做爬虫,不希望有一个浏览器打开,谷歌支持无头浏览器,后台运行,没有浏览器的图形化(GUI)界面。
from selenium.webdriver import Chrome
from selenium.webdriver.chrome.options import Options
import time

chrome_options = Options()

chrome_options.add_argument('window-size=1920x3000')  # 指定浏览器分辨率
chrome_options.add_argument('--disable-gpu')  # 谷歌文档提到需要加上这个属性来规避bug
chrome_options.add_argument('--hide-scrollbars')  # 隐藏滚动条, 应对一些特殊页面
chrome_options.add_argument('blink-settings=imagesEnabled=false')  # 不加载图片, 提升速度
chrome_options.add_argument('--headless')  # 浏览器不提供可视化页面. linux下如果系统不支持可视化不加这条会启动失败
# chrome_options.binary_location = r"C:\Program Files (x86)\Google\Chrome\Application\chrome.exe"  # 手动指定使用的浏览器位置


driver = Chrome(executable_path='./chromedriver.exe', options=chrome_options)

driver.get('https://www.jd.com')

print(driver.page_source)  # 浏览器中看到的页面的内容

time.sleep(3)

# 关闭tab页
driver.close()

# 关闭浏览器
driver.quit()
五 selenium其它用法
5.1 登录百度
from selenium.webdriver import Chrome
from selenium.webdriver.common.by import By
from selenium.webdriver.chrome.options import Options
import time

chrome_options = Options()
chrome_options.add_argument('--disable-gpu')

drive = Chrome('./chromedriver.exe', options=chrome_options)
drive.implicitly_wait(10)
drive.get('https://www.baidu.com')

drive.implicitly_wait(10)  # 隐式等待10s

drive.maximize_window()  # 全屏

# 通过a标签文字内容查找标签的方式 找到登录按钮
a = drive.find_element(by=By.LINK_TEXT, value='登录')

# 点击标签
a.click()

# 找到用户名的输入框 并输入用户名
username_input = drive.find_element(by=By.ID, value='TANGRAM__PSP_11__userName')
username_input.send_keys('百度手机号')

# 找到密码的输入框 并输入密码
password_input = drive.find_element(by=By.ID, value='TANGRAM__PSP_11__password')
password_input.send_keys('百度密码')

# 找到登陆按钮 并点击
logon_btn = drive.find_element(by=By.ID, value='TANGRAM__PSP_11__submit')
logon_btn.click()

time.sleep(3)

drive.close()

drive.quit()
5.2 获取位置属性大小,文本
# 查找标签
drive.find_element(by=By.ID,value='id号')
drive.find_element(by=By.LINK_TEXT,value='a标签文本内容')
drive.find_element(by=By.PARTIAL_LINK_TEXT,value='a标签文本内容模糊匹配')
drive.find_element(by=By.CLASS_NAME,value='类名')
drive.find_element(by=By.TAG_NAME,value='标签名')
drive.find_element(by=By.NAME,value='属性name')
# 通用的
bro.find_element(by=By.CSS_SELECTOR,value='css选择器')
bro.find_element(by=By.XPATH,value='xpath选择器')
获取12306网站的扫码登陆二维码信息
from selenium.webdriver import Chrome
from selenium.webdriver.common.by import By
import time

driver = Chrome(executable_path='./chromedriver.exe')

driver.get('https://kyfw.12306.cn/otn/resources/login.html')
driver.implicitly_wait(10)

# 找到扫码登陆按钮并点击
sm_btn = driver.find_element(by=By.LINK_TEXT, value='扫码登录')
sm_btn.click()

# 找到登录二维码
code = driver.find_element(by=By.ID, value='J-qrImg')
code.screenshot('a.png')


# 获取标签位置,大小
print(code.location)  # {'x': 836, 'y': 254}
print(code.size)  # {'height': 158, 'width': 158}
print(code.tag_name)  # img
print(code.id)  # 96e7c537-3301-4e5b-a3db-208401f68dfe

time.sleep(60)
driver.close()
5.3 元素操作
# 点击
标签.click()
# input写文字
标签.send_keys('文字')
#input清空文字
标签.clear()

# 模拟键盘操作
from selenium.webdriver.common.keys import Keys
input_search.send_keys(Keys.ENTER)
5.4 执行js代码
from selenium.webdriver import Chrome

import time

driver = Chrome(executable_path='./chromedriver.exe')

driver.get('https://www.jd.com')

# driver.execute_script('alert(123)')

# 滚动页面,到最底部
for i in range(10):
    y = 400 * (i + 1)
    driver.execute_script(f'scrollTo(0,{y})')
    time.sleep(1)

driver.close()
5.5 切换选项卡
import time
from selenium import webdriver

driver = webdriver.Chrome(executable_path='./chromedriver.exe')
driver.get('https://www.jd.com/')

# 使用js打开新的选项卡
driver.execute_script('window.open()')

# 切换到这个选项卡上,刚刚打开的是第一个
driver.switch_to.window(driver.window_handles[1])
driver.get('https://www.taobao.com')
time.sleep(2)
driver.switch_to.window(driver.window_handles[0])

time.sleep(3)
driver.close()
driver.quit()
5.6 浏览器前进后退
import time
from selenium import webdriver

driver = webdriver.Chrome(executable_path='./chromedriver.exe')
driver.get('https://www.jd.com/')

time.sleep(2)
driver.get('https://www.taobao.com/')

time.sleep(2)
driver.get('https://www.baidu.com/')

# 后退一下
driver.back()
time.sleep(1)

# 前进一下
driver.forward()

time.sleep(3)
driver.close()
5.7 异常处理
from selenium.common.exceptions import TimeoutException,NoSuchElementException,NoSuchFrameException
try:
	pass
except Exception as e:
    print(e)
finally:
    bro.close()
六 selenium登录cnblogs获取cookie
import time

from selenium import webdriver
from selenium.webdriver.common.by import By
from selenium.webdriver.common.keys import Keys
import json


# 登录过程
# bro = webdriver.Chrome(executable_path='./chromedriver.exe')
# bro.get('https://www.cnblogs.com/')
# bro.implicitly_wait(10)
# try:
#     # 找到登录按钮
#     submit_btn = bro.find_element(By.LINK_TEXT, value='登录')
#     submit_btn.click()
#     time.sleep(1)
#     username = bro.find_element(By.ID, value='mat-input-0')
#     password = bro.find_element(By.ID, value='mat-input-1')
#     username.send_keys("616564099@qq.com")
#     password.send_keys('sadfasdfads')
#
#     submit = bro.find_element(By.CSS_SELECTOR,
#                               value='body > app-root > app-sign-in-layout > div > div > app-sign-in > app-content-container > div > div > div > form > div > button')
#
#     time.sleep(20)
#     submit.click()
#     # 会有验证码,滑动,手动操作完了,敲回车,程序继续往下走
#     input()
#     # 已经登录成功了
#
#     cookie = bro.get_cookies()
#     print(cookie)
#     with open('cnblogs.json', 'w', encoding='utf-8') as f:
#         json.dump(cookie, f)
#
#     time.sleep(5)
# except Exception as e:
#     print(e)
# finally:
#     bro.close()


#  打开cnblose,自动写入cookie,就是登录状态了
bro = webdriver.Chrome(executable_path='./chromedriver.exe')
bro.get('https://www.cnblogs.com/')
bro.implicitly_wait(10)
time.sleep(3)
# 把本地的cookie写入,就登录了
with open('cnblogs.json','r',encoding='utf-8') as f:
    cookie=json.load(f)

for item in cookie:
    bro.add_cookie(item)


# 刷新一下页面
bro.refresh()
time.sleep(10)
bro.close()
七 抽屉半自动点赞
from selenium import webdriver
from selenium.webdriver.common.by import By
import time
import json
import requests

bro = webdriver.Chrome(executable_path='./chromedriver.exe')

bro.get('https://dig.chouti.com/')
bro.implicitly_wait(10)
try:
    submit = bro.find_element(by=By.ID, value='login_btn')
    bro.execute_script("arguments[0].click()", submit)
    # submit.click() # 有的页面button能找到,但是点击不了,报错,可以使用js点击它
    time.sleep(2)
    username = bro.find_element(by=By.NAME, value='phone')
    username.send_keys('18953675221')
    password = bro.find_element(by=By.NAME, value='password')
    password.send_keys('lqz123')
    time.sleep(3)
    submit_button = bro.find_element(By.CSS_SELECTOR,
                                     'body > div.login-dialog.dialog.animated2.scaleIn > div > div.login-footer > div:nth-child(4) > button')
    submit_button.click()

    # 验证码
    input()
    cookie = bro.get_cookies()
    print(cookie)
    with open('chouti.json', 'w', encoding='utf-8') as f:
        json.dump(cookie, f)

    # 找出所有文章的id号
    div_list = bro.find_elements(By.CLASS_NAME, 'link-item')
    l = []
    for div in div_list:
        article_id = div.get_attribute('data-id')
        l.append(article_id)


except Exception as e:
    print(e)

finally:
    bro.close()

#  继续往下写,selenium完成它的任务了,登录---》拿到cookie,使用requests发送[点赞]

print(l)

with open('chouti.json', 'r', encoding='utf-8')as f:
    cookie = json.load(f)
# 小细节,selenium的cookie不能直接给request用,需要有些处理
request_cookies = {}
for item in cookie:
    request_cookies[item['name']] = item['value']
print(request_cookies)
header = {
    'User-Agent': 'Mozilla/5.0 (Windows NT 10.0; Win64; x64) AppleWebKit/537.36 (KHTML, like Gecko) Chrome/106.0.0.0 Safari/537.36'
}
for i in l:
    data = {
        'linkId': i
    }
    res = requests.post('https://dig.chouti.com/link/vote', data=data, headers=header, cookies=request_cookies)
    print(res.text)
八 xpath的使用
XPath即为XML路径语言(XML Path Language),它是一种用来确定XML文档中某部分位置的语言。
from lxml import etree

doc = '''
<html>
 <head>
  <base href='https://example.com/' />
  <title>Example website</title>
 </head>
 <body>
  <div id='images'>
   <a href='image1.html' id='id_a'>Name: My image 1 <br/><img src='image1_thumb.jpg' /></a>
   <a href='image2.html'>Name: My image 2 <br /><img src='image2_thumb.jpg' /></a>
   <a href='image3.html'>Name: My image 3 <br /><img src='image3_thumb.jpg' /></a>
   <a href='image4.html'>Name: My image 4 <br /><img src='image4_thumb.jpg' /></a>
   <a href='image5.html' class='li li-item' name='items'>Name: My image 5 <br /><img src='image5_thumb.jpg' /></a>
   <a href='image6.html' name='items'><span><h5>test</h5></span>Name: My image 6 <br /><img src='image6_thumb.jpg' /></a>
  </div>
 </body>
</html>
'''

html = etree.HTML(doc)

# html = etree.parse('search.html', etree.HTMLParser())
# 1 所有节点
a = html.xpath('//*')
# 2 指定节点(结果为列表)
a = html.xpath('//head')

# 3 子节点,子孙节点
a = html.xpath('//div/a')
a = html.xpath('//body/a')  # 无数据
a = html.xpath('//body//a')
# 4 父节点
a = html.xpath('//body//a[@href="image1.html"]/..')
a = html.xpath('//body//a[1]/..')
# 也可以这样
a = html.xpath('//body//a[1]/parent::*')
a = html.xpath('//body//a[1]/parent::div')
# 5 属性匹配
a = html.xpath('//body//a[@href="image1.html"]')

# 6 文本获取  text()    ********
a = html.xpath('//body//a[@href="image1.html"]/text()')

# 7 属性获取            ******
a = html.xpath('//body//a/@href')
a = html.xpath('//body//a/@id')
# 注意从1 开始取(不是从0)
a = html.xpath('//body//a[1]/@id')
# 8 属性多值匹配
#  a 标签有多个class类,直接匹配就不可以了,需要用contains
a = html.xpath('//body//a[@class="li"]')
a = html.xpath('//body//a[@name="items"]')
a = html.xpath('//body//a[contains(@class,"li")]')
a = html.xpath('//body//a[contains(@class,"li")]/text()')
# 9 多属性匹配
a = html.xpath('//body//a[contains(@class,"li") or @name="items"]')
a = html.xpath('//body//a[contains(@class,"li") and @name="items"]/text()')

# 10 按序选择
a = html.xpath('//a[2]/text()')
a = html.xpath('//a[3]/@href')
# 取最后一个
a = html.xpath('//a[last()]/@href')
# 位置小于3的
a = html.xpath('//a[position()<3]/@href')
# 倒数第二个
a = html.xpath('//a[last()-2]/@href')
# 11 节点轴选择
# ancestor:祖先节点
# 使用了* 获取所有祖先节点
a = html.xpath('//a/ancestor::*')
# # 获取祖先节点中的div
a = html.xpath('//a/ancestor::div')
# attribute:属性值
a = html.xpath('//a[1]/attribute::*')
a = html.xpath('//a[1]/attribute::href')
# child:直接子节点
a = html.xpath('//a[1]/child::*')
# descendant:所有子孙节点
a = html.xpath('//a[6]/descendant::*')

# following:当前节点之后所有节点
a = html.xpath('//a[1]/following::*')
a = html.xpath('//a[1]/following::*[1]/@href')
# following-sibling:当前节点之后同级节点
a = html.xpath('//a[1]/following-sibling::*')
a = html.xpath('//a[1]/following-sibling::a')
# a=html.xpath('//a[1]/following-sibling::*[2]')
a = html.xpath('//a[1]/following-sibling::*[2]/@href')

print(a)
九 selenium动作链
自动登录12306(滑动验证码)
from selenium.webdriver import Chrome
from selenium.webdriver.chrome.options import Options
from selenium.webdriver.common.by import By
from selenium.webdriver import ActionChains
import time

options = Options()
options.add_argument("--disable-blink-features=AutomationControlled")  # 去掉自动化控制的提示

driver = Chrome(executable_path='./chromedriver.exe', options=options)

driver.get('https://kyfw.12306.cn/otn/resources/login.html')

driver.maximize_window()

driver.implicitly_wait(10)

try:
    username = driver.find_element(by=By.ID, value='J-userName')
    username.send_keys('12306用户名')
    password = driver.find_element(by=By.ID, value='J-password')
    password.send_keys('12306密码')
    time.sleep(3)
    btn = driver.find_element(by=By.ID, value='J-login')
    btn.click()
    span = driver.find_element(by=By.ID, value='nc_1_n1z')

    ActionChains(driver).click_and_hold(span).perform()  # 鼠标点主
    ActionChains(driver).move_by_offset(xoffset=300, yoffset=0).perform() #滑动

    time.sleep(10)

except Exception as e:
    print(e)

finally:
    driver.close()
十 打码平台使用
验证码图片发给第三方,第三方返回结果。
云码注册,关注公众号领取免费积分。http://zhuce.jfbym.com/register/
云码sdk
import json
import time
import requests
import base64


class YdmVerify(object):
    _custom_url = "https://www.jfbym.com/api/YmServer/customApi"
    _token = "9HDypjqfEEprg3JLRoBIC_4ePJvR2aX_+jQE_mc+iF4"
    _headers = {
        'Content-Type': 'application/json'
    }

    def common_verify(self, image, verify_type="10110"):
        # 数英汉字类型
        # 通用数英1-4位 10110
        # 通用数英5-8位 10111
        # 通用数英9~11位 10112
        # 通用数英12位及以上 10113
        # 通用数英1~6位plus 10103
        # 定制-数英5位~qcs 9001
        # 定制-纯数字4位 193
        # 中文类型
        # 通用中文字符1~2位 10114
        # 通用中文字符 3~5位 10115
        # 通用中文字符6~8位 10116
        # 通用中文字符9位及以上 10117
        # 中文字符 1~4位 plus 10118
        # 定制-XX西游苦行中文字符 10107
        # 计算类型
        # 通用数字计算题 50100
        # 通用中文计算题 50101
        # 定制-计算题 cni 452
        payload = {
            "image": base64.b64encode(image).decode(),
            "token": self._token,
            "type": verify_type
        }
        resp = requests.post(self._custom_url, headers=self._headers, data=json.dumps(payload))
        print(resp.text)
        return resp.json()['data']['data']

    def slide_verify(self, slide_image, background_image, verify_type="20101"):
        # 滑块类型
        # 通用双图滑块  20111
        payload = {
            "slide_image": base64.b64encode(slide_image).decode(),
            "background_image": base64.b64encode(background_image).decode(),
            "token": self._token,
            "type": verify_type
        }
        resp = requests.post(self._custom_url, headers=self._headers, data=json.dumps(payload))
        print(resp.text)
        return resp.json()['data']['data']

    def sin_slide_verify(self, image, verify_type="20110"):
        # 通用单图滑块(截图)  20110
        payload = {
            "image": base64.b64encode(image).decode(),
            "token": self._token,
            "type": verify_type
        }
        resp = requests.post(self._custom_url, headers=self._headers, data=json.dumps(payload))
        print(resp.text)
        return resp.json()['data']['data']

    def traffic_slide_verify(self, seed, data, href, verify_type="900010"):
        # 定制-滑块协议slide_traffic  900010
        payload = {
            "seed": seed,
            "data": data,
            "href": href,
            "token": self._token,
            "type": verify_type
        }
        resp = requests.post(self._custom_url, headers=self._headers, data=json.dumps(payload))
        print(resp.text)
        return resp.json()['data']['data']

    def click_verify(self, image, extra=None, verify_type="30100"):
        # 通用任意点选1~4个坐标 30009
        # 通用文字点选1(通用,xd;extra,点选文字逗号隔开,原图) 30100
        # 定制-文字点选2(xy3,extra="click",原图) 30103
        # 定制-单图文字点选(xd) 30102
        # 定制-图标点选1(xd,原图) 30104
        # 定制-图标点选2(xy3,原图,extra="icon") 30105
        # 定制-语序点选1(xy3,原图,extra="phrase") 30106
        # 定制-语序点选2(xd,原图) 30107
        # 定制-空间推理点选1(xd,原图,extra="请点击xxx") 30109
        # 定制-空间推理点选1(xy3,原图,extra="请_点击_小尺寸绿色物体。") 30110
        # 定制-tx空间点选(extra="请点击侧对着你的字母") 50009
        # 定制-tt_空间点选 30101
        # 定制-推理拼图1(xd,原图,extra="交换2个图块") 30108
        # 定制-xy4九宫格点选(label_image,image) 30008
        # 点选二字TX  30111
        # 定制-文字点选3(extra="je4_click") 30112
        # 定制-图标点选3(extra="je4_icon") 30113
        # 定制-语序点选3(extra="je4_phrase") 30114
        payload = {
            "image": base64.b64encode(image).decode(),
            "token": self._token,
            "type": verify_type
        }
        if extra:
            payload['extra'] = extra
        resp = requests.post(self._custom_url, headers=self._headers, data=json.dumps(payload))
        print(resp.text)
        return resp.json()['data']['data']

    def rotate(self, image):
        # 定制-X度单图旋转  90007
        payload = {
            "image": base64.b64encode(image).decode(),
            "token": self._token,
            "type": "90007"
        }
        # 定制-Tt双图旋转,2张图,内圈图,外圈图  90004
        # payload = {
        #     "out_ring_image": base64.b64encode(image).decode(),
        #     "inner_circle_image": base64.b64encode(image).decode(),
        #     "token": self._token,
        #     "type": "90004"
        # }
        resp = requests.post(self._custom_url, headers=self._headers, data=json.dumps(payload))
        print(resp.text)
        return resp.json()['data']['data']

    def google_verify(self, googlekey, pageurl, invisible=1, data_s=""):
        _headers = {
            'Content-Type': 'application/json'
        }
        """
        第一步,创建验证码任务
        :param
        :return taskId : string 创建成功的任务ID
        """
        url = "https://www.jfbym.com/api/YmServer/funnelApi"
        payload = json.dumps({
            "token": self._token,
            "type": "40010",  ## v2
            # "type": "40011", ## v3
            "googlekey": googlekey,
            "enterprise": 0,  ## 是否为企业版
            "pageurl": pageurl,
            "invisible": invisible,
            "data-s": data_s,  ## V2+企业如果能找到,找不到传空字符串
            # 'action':"" #V3必传
            # 'min_score':"" #V3才支持的可选参数
        })
        # 发送JSON格式的数据
        result = requests.request("POST", url, headers=_headers, data=payload).json()
        print(result)
        # {'msg': '识别成功', 'code': 10000, 'data': {'code': 0, 'captchaId': '51436618130', 'recordId': '74892'}}
        captcha_id = result.get('data').get("captchaId")
        record_id = result.get('data').get("recordId")
        times = 0
        is_solved = 0
        while times < 150:
            try:
                url = f"https://www.jfbym.com/api/YmServer/funnelApiResult"
                data = {
                    "token": self._token,
                    "captchaId": captcha_id,
                    "recordId": record_id
                }
                result = requests.post(url, headers=_headers, json=data).json()
                print(result)
                # {'msg': '结果准备中,请稍后再试', 'code': 10009, 'data': []}
                if result['msg'] == "结果准备中,请稍后再试":
                    continue
                if result['msg'] == '请求成功' and result['code'] == 10001:
                    is_solved = 1
                    return result['data']['data']
                    # {'msg': '请求成功', 'code': 10001, 'data': {'data': '03AGdBq2611GTOgA2v9HUpMMEUE70p6dwOtYyHJQK4xhdKF0Y8ouSGsFZt647SpJvZ22qinYrm6MYBJGFQxMUIApFfSBN6WTGspk6DmFdQAoWxynObRGV7qNMQOjZ_m4w3_6iRu8SJ3vSUXH_HHuA7wXARJbKEpU4J4R921NfpKdahgeFD8rK1CFYAqLd5fz4l-8_VRmRE83dRSfkgyTN338evQ1doWKJRipZbk4ie-89Ud0KGdOsP4QzG3stRZgj2oaEoMDSAP62vxKGYqtDEqTcwtlgo-ot3rF5SmntaoKGwcKPo0NrekWA5gtj0vqKLU6lY2GcnSci_tgBzBwuH40uvyR1PFu02VK_E44mopJ7FOO4cUukNaLGqypU2YCA8QuaaebOIoCMU7RGqGs_41RYNCG1GSdthiwcwk2hHFbi-TXuICXSwh4Er5mgVW9A3t_9Ndp0eJcyr3HtuJrcA7BtlcgruuQxK5h4Ew4ert4KPH_aQGN9ww5VsUtbSManzUDnUOs7aEdvFk1DOOPmLys-aX20ZFN2CcQcZZSO-7HZpZZt3EDeWWE5S02HFDY8gl3_0xqIts8774Tr4GMVJaddG0NR6pcBFC11FqNcK2a18gM3gaKDy3_2ZMeSU4nj4NWwoAhPjQN2BS8JxX4kKVpX4rD959kc93vczVD3TYD6_4GJahGSpBvM7Y5_GGIdLL8imXde1R35mZnEcFYXQ40zcy3DdJFkk_gzGTVOEb1Q1IZpjMxzCxyGgwjgL9dtDIgst5H5CSZoerX_Lz-DmsBvYIYZdpbPLEMROx9MODImaEw8Cp6M8Xj7_foijiGE9hh-pzJSTlKl3HytiSUyJJ7r1BssrX5C_TFWxl0IXNg8azP8H-ZIOWwnYlMWCS1w9piHdoLg5zACiYIN3Txdlsvi61MuPmzJggJd1_dlyMdAlzb5_zdfweqj0_Ko1ODP378YT7sV7LECgRj5QJU6sF5nlf4m2g5sFypBw9GFAkEE-OaWGYxRJOy2ioU41ggAJIkcza2B_N5AL2KLROtm0-c2MxplM4ZzHxrUv9A24zlgzo3Pz4NONwU_gaOcDB7j1dZKXD8UaoIrZv0BTd8JeojYowm9Usdg7Rt4Fpo_vDLJdrEUfbxVlXieDD9Fr1fu72-d4AduT_J3n-rIhyX4gFav-KfP-qOxqOZsmjXZirsBxZs7042NYeirRYnLv35cxIAJARz03FJmeKViUivwC5mCWw64hjRad9XyyBOP2n8KFOrTXhPskC-WwEfksGtfLxi6VW76FHGvRdwHXzMwVfNqe3P5H_WZUc-vxeTAsTnqZz3WA97lM4MLrX0nTZYgXxCEiS6raSOiEMqcx_Nv7Zxre-abj4LZRbFpH8nx1SEiaOV2Dm-a1iPFEmCs0L4kDtt6VImSVIQaTOAd3KFSo7W_XTvRPsQJOtblrcKyuagztX_Yr0lT0YqN9I9MZAARo7M5OfwSLJW16rdmp4NuRefEvNPNHO2cVh1Xha1qNGuF_QDvWFFmWG0Y6IbRqLmF-Dv8BY4TWyOeVnADJftGQw2QSr8RmbCHryA'}}
            except Exception as e:
                print(e)
            finally:
                if is_solved:
                    break
                print("sleep 5s...")
                time.sleep(5)
                times += 5

    def hcaptcha_verify(self, site_key, site_url, verify_type="50001"):
        # 定制类接口-Hcaptcha
        payload = {
            "site_key": site_key,
            "site_url": site_url,
            "token": self._token,
            "type": verify_type
        }
        resp = requests.post(self._custom_url, headers=self._headers, data=json.dumps(payload))
        print(resp.text)
        return resp.json()['data']['data']

    def fun_captcha_verify(self, publickey, pageurl, verify_type="40007"):
        # 定制类接口-Hcaptcha
        payload = {
            "publickey": publickey,
            "pageurl": pageurl,
            "token": self._token,
            "type": verify_type
        }
        resp = requests.post(self._custom_url, headers=self._headers, data=json.dumps(payload))
        print(resp.text)
        return resp.json()['data']['data']


if __name__ == '__main__':
    Y = YdmVerify()
    with open('2.png', 'rb') as f:
        s = f.read()
    Y.click_verify(image=s, extra="家,炉,私")
京东验证码登录
import time

from selenium import webdriver
from selenium.webdriver.common.by import By
from yunma import YdmVerify
from selenium.webdriver import ActionChains

bro = webdriver.Chrome(executable_path='./chromedriver.exe')
bro.get('https://passport.jd.com/new/login.aspx?ReturnUrl=https%3A%2F%2Fwww.jd.com%2F')
bro.implicitly_wait(10)
bro.maximize_window()
try:
    login = bro.find_element(by=By.LINK_TEXT, value='账户登录')
    login.click()

    loginname = bro.find_element(by=By.ID, value='loginname')
    loginname.send_keys('')
    nloginpwd = bro.find_element(by=By.ID, value='nloginpwd')
    nloginpwd.send_keys('')

    login = bro.find_element(by=By.ID, value='loginsubmit')
    login.click()

    hk_img = bro.find_element(by=By.CSS_SELECTOR,
                              value='#JDJRV-wrap-loginsubmit > div > div > div > div.JDJRV-img-panel.JDJRV-click-bind-suspend > div.JDJRV-img-wrap > div.JDJRV-smallimg > img')
    time.sleep(1)
    img = bro.find_element(by=By.XPATH, value='//*[@id="JDJRV-wrap-loginsubmit"]/div/div/div/div[1]/div[2]/div[1]/img')
    hk_img.screenshot('hk.png')
    img.screenshot('bj.png')

    Y = YdmVerify()
    with open('bj.png', 'rb') as f:
        s = f.read()
    with open('hk.png', 'rb') as f:
        s2 = f.read()
    res = Y.slide_verify(slide_image=s, background_image=s2)
    print(res)

    btn = bro.find_element(by=By.XPATH, value='//*[@id="JDJRV-wrap-loginsubmit"]/div/div/div/div[2]/div[3]')
    ActionChains(bro).drag_and_drop_by_offset(btn, xoffset=res, yoffset=0).perform()
    time.sleep(5)

except Exception as e:
    print(e)
finally:
    bro.close()


 696
696


 被折叠的 条评论
为什么被折叠?
被折叠的 条评论
为什么被折叠?
 到【灌水乐园】发言


