


scrapy爬虫框架
一 scrapy架构介绍
Scrapy一个开源和协作的框架,其最初是为了页面抓取 (更确切来说, 网络抓取 )所设计的,使用它可以以快速、简单、可扩展的方式从网站中提取所需的数据。但目前Scrapy的用途十分广泛,可用于如数据挖掘、监测和自动化测试等领域,也可以应用在获取API所返回的数据(例如 Amazon Associates Web Services ) 或者通用的网络爬虫。
Scrapy 是基于twisted框架开发而来,twisted是一个流行的事件驱动的python网络框架。因此Scrapy使用了一种非阻塞(又名异步)的代码来实现并发。整体架构大致如下。
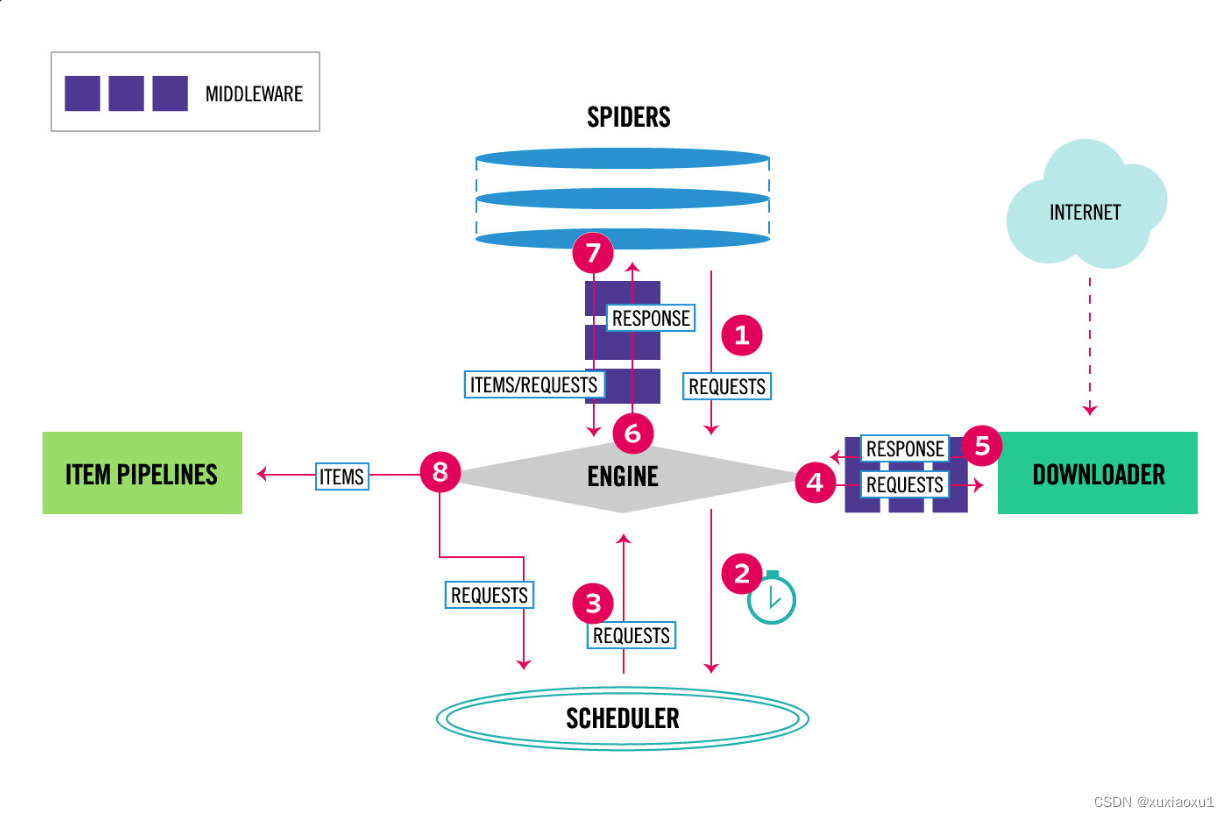
The data flow in Scrapy is controlled by the execution engine, and goes like this:
数据流:
-
The Engine gets the initial Requests to crawl from the Spider.
引擎从爬行器获取要爬取的初始请求。 -
The Engine schedules the Requests in the Scheduler and asks for the next Requests to crawl.
引擎在调度器中调度请求,并请求抓取下一个请求。 -
The Scheduler returns the next Requests to the Engine.
调度器将下一个请求返回给引擎。 -
The Engine sends the Requests to the Downloader, passing through the Downloader Middlewares (see process_request()).
引擎将请求发送给下载程序,通过下载程序中间件(参见process_request())。 -
Once the page finishes downloading the Downloader generates a Response (with that page) and sends it to the Engine, passing through the Downloader Middlewares (see process_response()).
一旦页面完成下载,下载器将生成一个响应(使用该页面)并将其发送给引擎,通过下载器中间件(参见process_response())。 -
The Engine receives the Response from the Downloader and sends it to the Spider for processing, passing through the Spider Middleware (see process_spider_input()).
引擎接收来自下载程序的响应,并通过Spider中间件将其发送给Spider进行处理(请参见process_spider_input())。 -
The Spider processes the Response and returns scraped items and new Requests (to follow) to the Engine, passing through the Spider Middleware (see process_spider_output()).
爬行器处理响应,并通过爬行器中间件(参见process_spider_output())将抓取的项目和新请求返回给引擎。 -
The Engine sends processed items to Item Pipelines, then send processed Requests to the Scheduler and asks for possible next Requests to crawl.
引擎将处理过的项目发送到项目管道,然后将处理过的请求发送给调度器,并请求可能的下一个请求进行抓取。 -
The process repeats (from step 1) until there are no more requests from the Scheduler.
该过程重复(从步骤1开始),直到没有来自调度器的请求为止。
组件:
引擎(EGINE)
引擎负责控制系统所有组件之间的数据流,并在某些动作发生时触发事件。有关详细信息,请参见上面的数据流部分。
调度器(SCHEDULER)
用来接受引擎发过来的请求, 压入队列中, 并在引擎再次请求的时候返回. 可以想像成一个URL的优先级队列, 由它来决定下一个要抓取的网址是什么, 同时去除重复的网址。
下载器(DOWLOADER)
用于下载网页内容, 并将网页内容返回给EGINE,下载器是建立在twisted这个高效的异步模型上的。
爬虫(SPIDERS)
SPIDERS是开发人员自定义的类,用来解析responses,并且提取items,或者发送新的请求。
项目管道(ITEM PIPLINES)
在items被提取后负责处理它们,主要包括清理、验证、持久化(比如存到数据库)等操作。
下载器中间件(Downloader Middlewares)
位于Scrapy引擎和下载器之间,主要用来处理从EGINE传到DOWLOADER的请求request,已经从DOWNLOADER传到EGINE的响应response,你可用该中间件做以下几件事。
- process a request just before it is sent to the Downloader (i.e. right before Scrapy sends the request to the website);
在请求发送给下载程序之前处理请求(即在Scrapy将请求发送给网站之前); - change received response before passing it to a spider;
在传递给爬行器之前更改接收到的响应; - send a new Request instead of passing received response to a spider;
发送新请求,而不是将接收到的响应传递给爬行器; - pass response to a spider without fetching a web page;
将响应传递给爬行器,而不获取网页; - silently drop some requests.
悄悄删除一些请求。
爬虫中间件(Spider Middlewares)
位于EGINE和SPIDERS之间,主要工作是处理SPIDERS的输入(即responses)和输出(即requests)。
中文文档:https://www.w3cschool.cn/scrapy2_3/scrapy2_3-31uw3fn1.html
官网:https://docs.scrapy.org/en/latest/topics/architecture.html
二 安装指南
安装 Scrapy
pip install scrapy
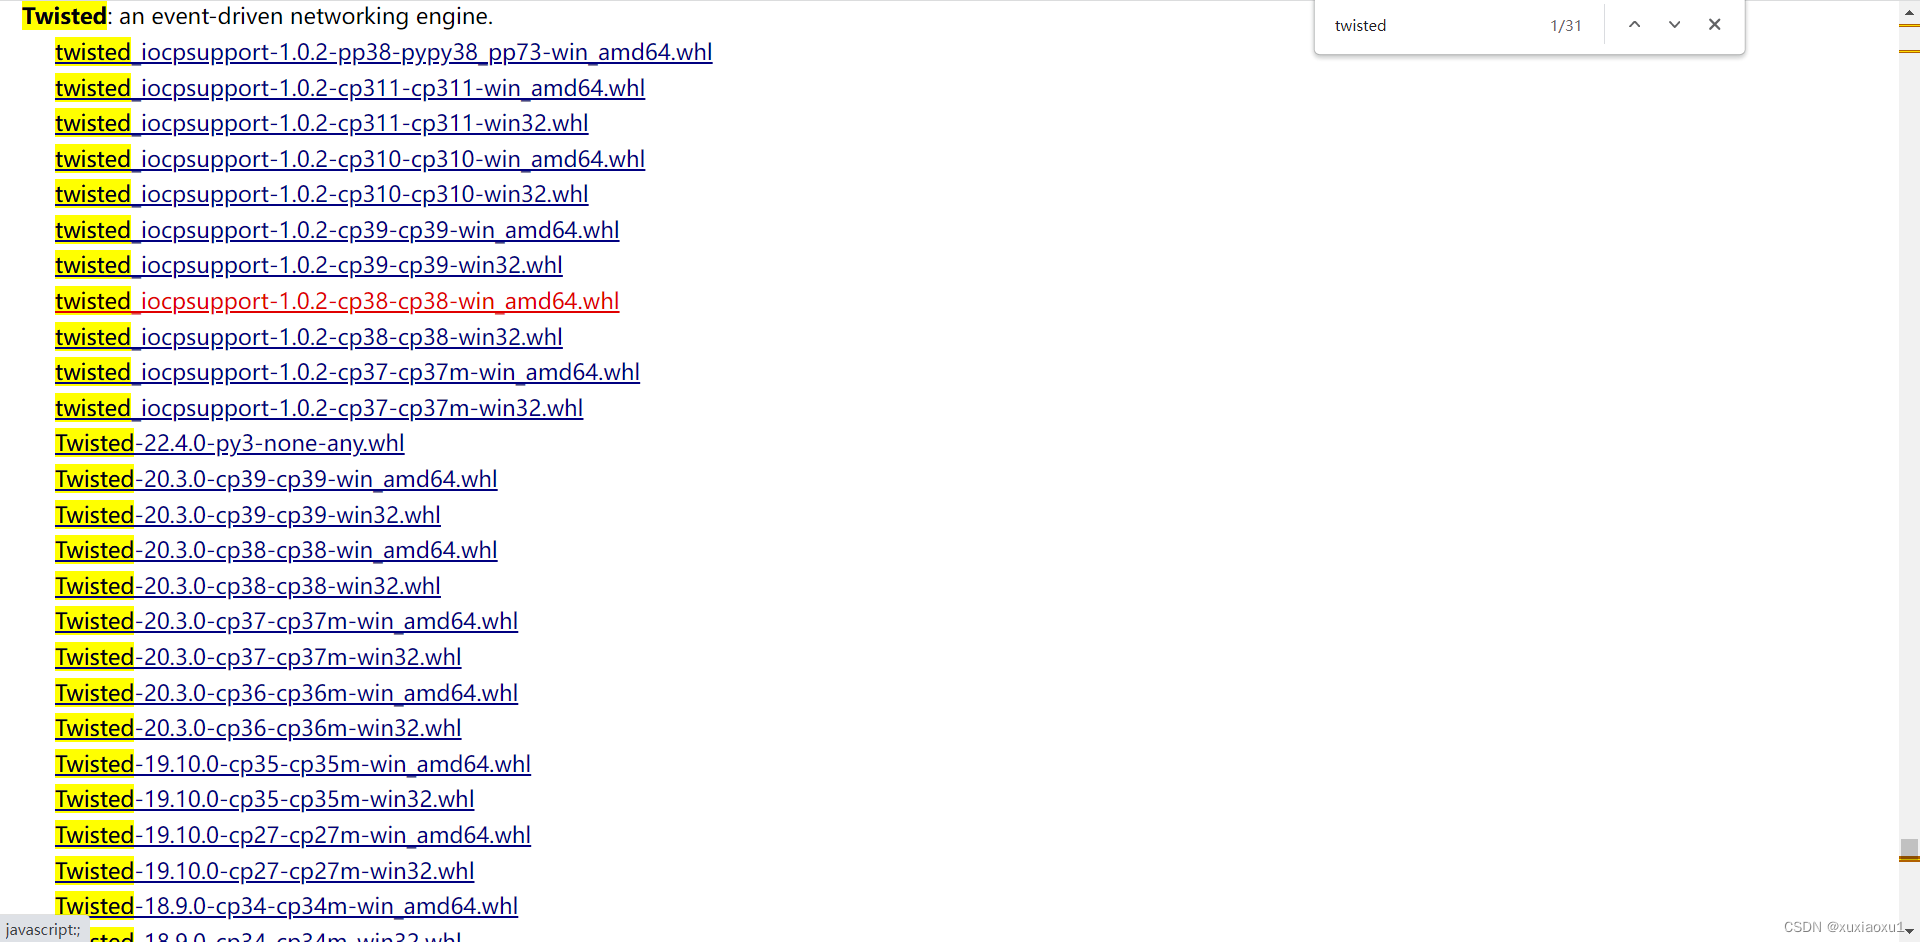
在Windows下安装可能会安装失败,也可以使用wheel文件安装。
wheel文件的安装及使用
-
使用pip安装wheel这个库。
pip install whell -
打开网址 https://www.lfd.uci.edu/~gohlke/pythonlibs/
选择要下载的whl文件。
-
使用whl文件安装。
pip install whl文件路径
已经安装了twisted模块,下变安装一个pygame,先下载whl文件。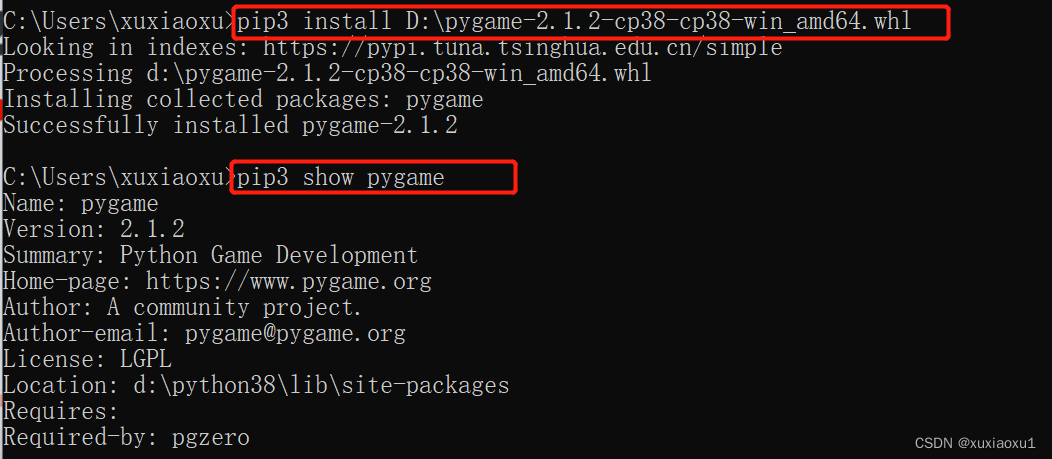
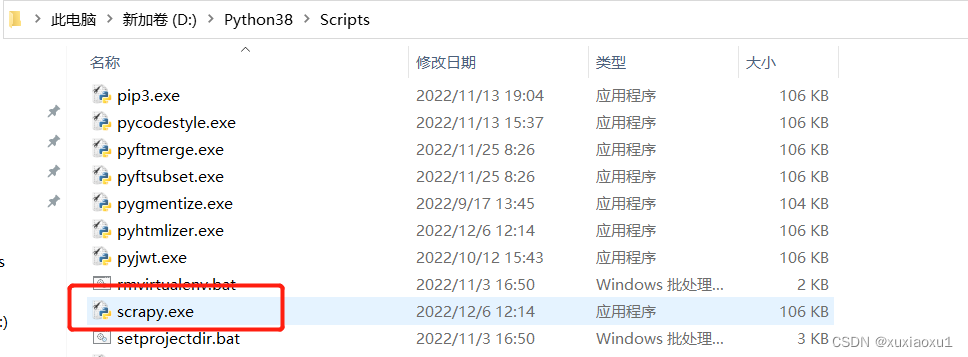
三 创建项目
在安装了scrapy框架后,会在python解释器路径下的Script文件夹下产生一个scrapy.exe可执行文件。(相当于django框架的django-admin.exe)
3.1 创建爬虫项目
# cd到要创建的目录下
# scrapy startproject 项目名

scrapy startproject tutorial

目录包含以下内容
tutorial/
    scrapy.cfg            # deploy configuration file

    tutorial/             # project's Python module, you'll import your code from here
        __init__.py

        items.py          # project items definition file

        middlewares.py    # project middlewares file

        pipelines.py      # project pipelines file

        settings.py       # project settings file

        spiders/          # a directory where you'll later put your spiders
            __init__.py
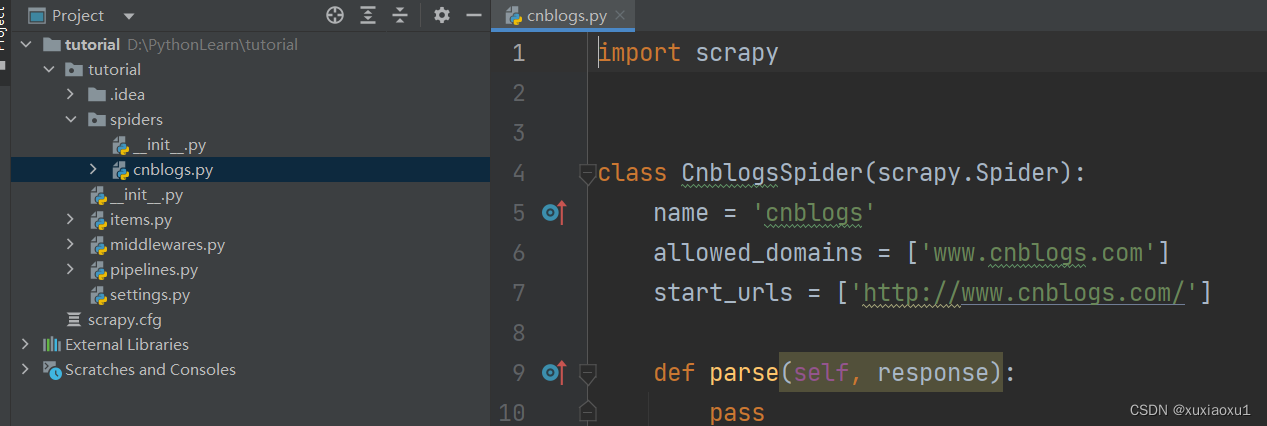
3.2 创建爬虫
# cd到爬虫项目里
# scrapy genspider 爬虫名 url

scrapy genspider cnblogs www.cnblogs.com

3.3 启动爬虫
# scrapy crawl 爬虫名--nolog(不输出日志)

scrapy crawl cnblogs --nolog

3.4 pycharm中运行
新建run.py
from scrapy.cmdline import execute

execute(['scrapy', 'crawl', 'cnblogs', '--nolog'])
# execute(['scrapy', 'crawl', 'cnblogs'])
四 scrapy解析数据
当你抓取网页时,你需要执行的最常见的任务是从HTML源代码中提取数据。有几个库可以实现这一点,例如:
BeautifulSoup 在Python程序员中是一个非常流行的Web抓取库,它基于HTML代码的结构构造了一个Python对象,并且能够很好地处理错误的标记,但是它有一个缺点:速度慢。lxml 是一个XML解析库(它也解析HTML),使用基于 ElementTree . (LXML不是Python标准库的一部分。)
Scrapy有自己的数据提取机制。它们被称为选择器,因为它们“选择”HTML文档的某些部分 XPath 或 CSS 表达。
XPath 是一种在XML文档中选择节点的语言,也可以与HTML一起使用。 CSS 是用于将样式应用于HTML文档的语言。它定义选择器,将这些样式与特定的HTML元素相关联。
response对象有css方法和xpath方法
重点1:
	-xpath取文本内容
	'.//a[contains(@class,"link-title")]/text()'
	-xpath取属性
	'.//a[contains(@class,"link-title")]/@href'

	-css取文本
	'a.link-title::text'
    -css取属性
    'img.image-scale::attr(src)'

重点2:
	.extract_first()  取一个
    .extract()        取所有
import scrapy


class CnblogsSpider(scrapy.Spider):
    name = 'cnblogs'
    allowed_domains = ['www.cnblogs.com']
    start_urls = ['http://www.cnblogs.com/']

    def parse(self, response):
        # article_list = response.css('article.post-item')
        # for article in article_list:
            # # css选择器
            # article_title = article.css('section>div>a::text').extract_first()
            # author_icon = article.css('section>div>p>a>img::attr(src)').extract_first()
            # article_desc_list = article.css('section>div>p::text').extract()
            # author_name = article.css('section>footer>a>span::text').extract_first()
            # date = article.css('section>footer>span>span::text').extract_first()
            # article_desc = article_desc_list[0].replace('\n', '').replace(' ', '')
            # if not article_desc:
            #     article_desc = article_desc_list[1].replace('\n', '').replace(' ', '')
            # print(f"""
            # 作者名:{author_name}
            # 作者头像:{author_icon}
            # 文章标题:{article_title}
            # 文章描述:{article_desc}
            # 发布时间:{date}
            # """)
        article_list = response.xpath('//article[contains(@class,"post-item")]')
        for article in article_list:
            # xpath选择器
            article_title = article.xpath('./section/div/a/text()').extract_first()
            author_icon = article.xpath('./section/div/p/a/img/@src').extract_first()
            article_desc_list = article.xpath('./section/div/p/text()').extract()
            author_name = article.xpath('./section/footer/a/span/text()').extract_first()
            date = article.xpath('./section/footer/span/span/text()').extract_first()
            article_desc = article_desc_list[0].replace('\n', '').replace(' ', '')
            if not article_desc:
                article_desc = article_desc_list[1].replace('\n', '').replace(' ', '')
            print(f"""
                        作者名:{author_name}
                        作者头像:{author_icon}
                        文章标题:{article_title}
                        文章描述:{article_desc}
                        发布时间:{date}
                        """)
五 settings相关配置
基础:
ROBOTSTXT_OBEY = False 是否遵循爬虫协议
LOG_LEVEL = 'ERROR' 日志级别(报错如果不打印日志,在控制台看不到错误)
USER_AGENT 用户代理
USER_AGENT = 'Mozilla/5.0 (Windows NT 10.0; Win64; x64) AppleWebKit/537.36 (KHTML, like Gecko) Chrome/103.0.0.0 Safari/537.36'
DEFAULT_REQUEST_HEADERS 默认请求头
DEFAULT_REQUEST_HEADERS = {
  'Accept': 'text/html,application/xhtml+xml,application/xml;q=0.9,*/*;q=0.8',
  'Accept-Language': 'en',
}
SPIDER_MIDDLEWARES 爬虫中间件
# 爬虫中间件
SPIDER_MIDDLEWARES = {
   'tutorial.middlewares.TutorialSpiderMiddleware': 543,
}

# 下载器中间件
DOWNLOADER_MIDDLEWARES = {
   'tutorial.middlewares.TutorialDownloaderMiddleware': 543,
}
ITEM_PIPELINES 持久化配置
ITEM_PIPELINES = {
   'tutorial.pipelines.TutorialPipeline': 300,
}
BOT_NAME = 'tutorial' 项目名
SPIDER_MODULES = ['myfirstscrapy.spiders']
NEWSPIDER_MODULE = 'myfirstscrapy.spiders' 指定爬虫类的py文件的位置
增加爬虫的爬取效率
-
增加并发:
CONCURRENT_REQUESTS = 32
增加并发,默认16。scrapy开启的并发线程为32个,可以适当进行增加。在settings配置文件中修改CONCURRENT_REQUESTS参数。 -
降低日志级别:
LOG_LEVEL = 'INFO'
在运行scrapy时,会有大量日志信息的输出,为了减少CPU的使用率。可以设置log输出信息为INFO或者ERROR即可。 -
禁止cookie:
COOKIES_ENABLED = False
如果不是真的需要cookie,则在scrapy爬取数据时可以禁止cookie从而减少CPU的使用率,提升爬取效率。 -
禁止重试:
RETRY_ENABLED = False
对失败的HTTP进行重新请求(重试)会减慢爬取速度,因此可以禁止重试。 -
减少下载超时:
DOWNLOAD_TIMEOUT = 10超时时间为10s
如果对一个非常慢的链接进行爬取,减少下载超时可以能让卡住的链接快速被放弃,从而提升效率。
六 持久化方案
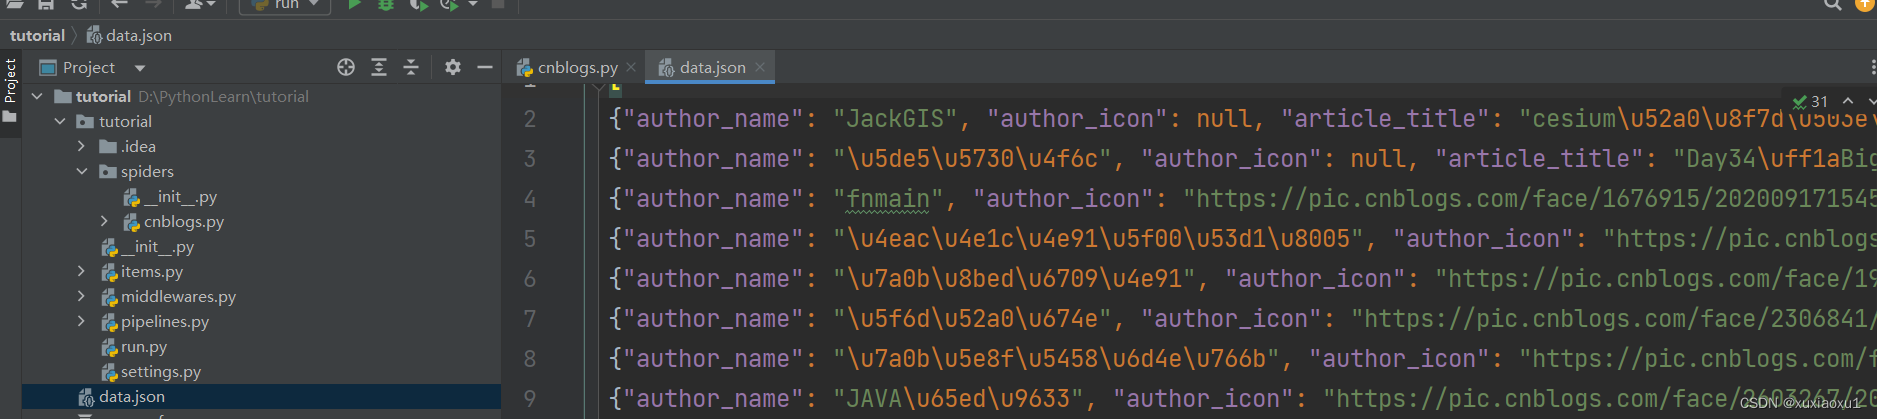
方案一:
import scrapy


class CnblogsSpider(scrapy.Spider):
    name = 'cnblogs'
    allowed_domains = ['www.cnblogs.com']
    start_urls = ['http://www.cnblogs.com/']

    def parse(self, response):
        data_list = []
        article_list = response.xpath('//article[contains(@class,"post-item")]')
        for article in article_list:
            # xpath选择器
            article_title = article.xpath('./section/div/a/text()').extract_first()
            author_icon = article.xpath('./section/div/p/a/img/@src').extract_first()
            article_desc_list = article.xpath('./section/div/p/text()').extract()
            author_name = article.xpath('./section/footer/a/span/text()').extract_first()
            date = article.xpath('./section/footer/span/span/text()').extract_first()
            article_desc = article_desc_list[0].replace('\n', '').replace(' ', '')
            if not article_desc:
                article_desc = article_desc_list[1].replace('\n', '').replace(' ', '')
            data_list.append({
                'author_name': author_name,
                'author_icon': author_icon,
                'article_title': article_title,
                'article_desc': article_desc,
                'date': date,

            })
        return data_list

方案二:使用pipline,管道形式,可以同时存到多个位置。
1.在items.py中写一个类[相当于写django的表模型],继承scrapy.Item。
2.在类中写属性,写字段,所有字段都是scrapy.Field类型.
name = scrapy.Field()
3.在爬虫中导入类,实例化得到对象,把要保存的数据放到对象中。
# 使用[]给对象添加属性,不能使用.
item['name'] = name
4.修改配置文件,指定pipline,数字表示优先级,越小越大。
ITEM_PIPELINES = {
   'tutorial.pipelines.TutorialPipeline': 300,
}
5.写一个pipline:TutorialPipeline。
- open_spider:数据初始化,打开文件,打开数据库链接
- process_item:真正存储的地方
- 一定不要忘了return item,交给后续的pipline继续使用
- close_spider:销毁资源,关闭文件,关闭数据库链接
七 全站爬取cnblogs文章
spiders/cnblogs.py
import scrapy
from tutorial.items import TutorialItem
from scrapy import Request


class CnblogsSpider(scrapy.Spider):
    name = 'cnblogs'
    allowed_domains = ['www.cnblogs.com']
    start_urls = ['http://www.cnblogs.com/']

    def detail_parse(self, response):
        item = response.meta.get('item')
        # 解析出文章详情
        article_content = response.css('div.post').extract_first()
        item['article_content'] = str(article_content)
        yield item

    def parse(self, response):
        article_list = response.xpath('//article[contains(@class,"post-item")]')
        for article in article_list:
            item = TutorialItem()
            # xpath选择器
            article_title = article.xpath('./section/div/a/text()').extract_first()
            author_icon = article.xpath('./section/div/p/a/img/@src').extract_first()
            article_desc_list = article.xpath('./section/div/p/text()').extract()
            author_name = article.xpath('./section/footer/a/span/text()').extract_first()
            date = article.xpath('./section/footer/span/span/text()').extract_first()
            article_desc = article_desc_list[0].replace('\n', '').replace(' ', '')
            # 文章详情
            url = article.xpath('./section/div/a/@href').extract_first()
            if not article_desc:
                article_desc = article_desc_list[1].replace('\n', '').replace(' ', '')
            item['article_title'] = article_title
            item['author_icon'] = author_icon
            item['author_name'] = author_name
            item['date'] = date
            item['article_desc'] = article_desc
            item['url'] = url
            yield Request(url=url, callback=self.detail_parse, meta={'item': item})

        # 获取下一页
        next_url = 'https://www.cnblogs.com/' + response.css('div.pager>a:last-child::attr(href)').extract_first()
        yield Request(url=next_url)
tutorial/items.py
# Define here the models for your scraped items
#
# See documentation in:
# https://docs.scrapy.org/en/latest/topics/items.html

import scrapy


class TutorialItem(scrapy.Item):
    # define the fields for your item here like:
    # name = scrapy.Field()
    article_title = scrapy.Field()
    author_icon = scrapy.Field()
    author_name = scrapy.Field()
    date = scrapy.Field()
    article_desc = scrapy.Field()
    url = scrapy.Field()
    article_content = scrapy.Field()
tutorial/pipelines.py
import pymysql


class TutorialPipeline:
    def open_spider(self, spider):
        self.conn = pymysql.connect(
            user='root',
            password='',
            host='127.0.0.1',
            database='tutorial',
            port=3306,
            autocommit=True,
        )
        self.course = self.conn.cursor()

    def process_item(self, item, spider):
        self.course.execute(
            "insert into article (`article_title`,`author_icon`,`author_name`,`date`,`article_desc`,`url`, `article_content`) values(%s,%s,%s,%s,%s,%s,%s)",
            args=[
                item['article_title'],
                item['author_icon'],
                item['author_name'],
                item['date'],
                item['article_desc'],
                item['url'],
                item['article_content'],
            ])
        return item

    def close_spider(self, spider):
        self.course.close()
        self.conn.close()
八 中间件
SpiderMiddleware
def process_spider_input(self, response, spider):  # 进入爬虫会执行它

def process_spider_output(self, response, result, spider):  # 从爬虫出来会执行它

def process_spider_exception(self, response, exception, spider):  # 出了异常会执行

def process_start_requests(self, start_requests, spider):  # 第一次爬取执行

def spider_opened(self, spider):  # 爬虫开启执行
# 下载中间件
DownloaderMiddleware
def process_request(self, request, spider):  # request对象从引擎进入到下载器会执行

def process_response(self, request, response, spider):  # response对象从下载器进入到引擎会执行

def process_exception(self, request, exception, spider):  # 出异常执行它

def spider_opened(self, spider):  # 爬虫开启执行它
class TutorialDownloaderMiddleware:
    # Not all methods need to be defined. If a method is not defined,
    # scrapy acts as if the downloader middleware does not modify the
    # passed objects.

    @classmethod
    def from_crawler(cls, crawler):
        # This method is used by Scrapy to create your spiders.
        s = cls()
        crawler.signals.connect(s.spider_opened, signal=signals.spider_opened)
        return s

    def process_request(self, request, spider):
        # Called for each request that goes through the downloader
        # middleware.

        # Must either:
        # - return None: continue processing this request
        # - or return a Response object
        # - or return a Request object
        # - or raise IgnoreRequest: process_exception() methods of
        #   installed downloader middleware will be called
        return None

    def process_response(self, request, response, spider):
        # Called with the response returned from the downloader.

        # Must either;
        # - return a Response object
        # - return a Request object
        # - or raise IgnoreRequest
        return response

    def process_exception(self, request, exception, spider):
        # Called when a download handler or a process_request()
        # (from other downloader middleware) raises an exception.

        # Must either:
        # - return None: continue processing this exception
        # - return a Response object: stops process_exception() chain
        # - return a Request object: stops process_exception() chain
        pass

    def spider_opened(self, spider):
        spider.logger.info('Spider opened: %s' % spider.name)
DownloaderMiddleware的process_request
返回值:
	- return None: 继续执行下面的中间件的process_request
	- return a Response object: 不进入下载中间件了,直接返回给引擎,引擎在返回给爬虫
	- return a Request object:不进入中间件了,直接返回给引擎,引擎把它放到调度器中
DownloaderMiddleware的process_response
返回值:
	- return a Response object:正常,会进入到引擎,引擎把它给爬虫
	- return a Request object: 会进入到引擎,引擎把它放到调度器中,等待下次爬取
	- raise IgnoreRequest :    会执行process_exception
九 加代理,cookie,header,selenium
9.1 加入代理ip
middlewares.py/DownloaderMiddleware/
在下载中间件的process_request中加上代理ip
def _get_proxy_ip(self):
    dic = requests.get('http://127.0.0.1:5010/get/').json()
    proxy = dic.get('proxy')
    prefix = 'https://' if dic.get('https') else 'http://'
    return prefix + proxy

def process_request(self, request, spider):
    # 从代理ip池中获取ip代理
    proxy = self._get_proxy_ip()
    # print(proxy)
    # request就是在爬虫中yield返回的Request的对象
    request.meta['proxy'] = proxy
    # print(request.meta)
    return None
如果中间件中出了异常,会调用中间件的process_exception。
把当前爬取的request对象,return出去,会被引擎重新放回调度器,等待下次执行。
9.2 加入cookie
def process_request(self, request, spider):
      print(request.cookies)  # {}
      request.cookies['xxx'] = 'yyy'
      print(request.cookies)  # {'xxx': 'yyy'}
      return None

# request.cookies=从cookie池中取出来的cookie
9.3 修改请求头
fake-useragent模块
from fake_useragent import UserAgent

ua = UserAgent()
print(ua.ie)  # 随机打印ie浏览器任意版本
print(ua.firefox)  # 随机打印firefox浏览器任意版本
print(ua.chrome)  # 随机打印chrome浏览器任意版本
print(ua.random)  # 随机打印任意厂家的浏览器
def process_request(self, request, spider):
    ua = UserAgent()
    request.headers['User-Agent'] = ua.random
    print(request.headers)
    # # {b'Referer': [b'https://www.cnblogs.com/sitehome/p/2'], b'Accept': [b'text/html,application/xhtml+xml,application/xml;q=0.9,*/*;q=0.8'], b'Accept-Language': [b'en'], b'User-Agent': [b'Scrapy/2.7.1 (+https://scrapy.org)']}
    return None
9.4 集成selenium
使用scrapy,爬取网页,本质跟使用requests模块是一样的,模拟发送http请求,有的网站,页面可能不是一次http请求返回的所有数据,会执行js,再发ajax,得到的所有数据,所以有的数据不全的网页,可以使用selenium去爬取。
第一步:在爬虫类的类属性中生成浏览器对象
class CnblogsSpider(scrapy.Spider):
    name = 'cnblogs'
    allowed_domains = ['www.cnblogs.com']
    start_urls = ['http://www.cnblogs.com/']
    # 第一步:在爬虫类的类属性中生成浏览器对象
    driver = Chrome(executable_path='tutorial/chromedriver.exe')
第二步:在中间件中使用selenium爬取
def process_request(self, request, spider):
    is_selenium = request.meta.get('is_selenium')
    if is_selenium:
        spider.driver.get(request.url)
        from scrapy.http import HtmlResponse
        response = HtmlResponse(spider.driver.page_source.encode(encoding='utf-8'))
        return response
第三步:在爬虫类中关闭
def close(self, spider, reason):
     self.driver.close()
十 去重规则源码分析(布隆过滤器)
调度器的类:from scrapy.core.scheduler import Scheduler
# 这个方法如果return True表示这个request要爬取,如果return表示这个网址就不爬了(已经爬过了)
def enqueue_request(self, request: Request) -> bool:
    """
    Unless the received request is filtered out by the Dupefilter, attempt to push
    it into the disk queue, falling back to pushing it into the memory queue.

    Increment the appropriate stats, such as: ``scheduler/enqueued``,
    ``scheduler/enqueued/disk``, ``scheduler/enqueued/memory``.

    Return ``True`` if the request was stored successfully, ``False`` otherwise.
    """
    # request.dont_filter是在Ruquest实例化时传入,如果不传,默认为dont_filter: bool = False,
    # self.df.request_seen(request)返回True就记录日志并返回False,表示已经爬过
    if not request.dont_filter and self.df.request_seen(request):
        self.df.log(request, self.spider)
        return False
    dqok = self._dqpush(request)
    if dqok:
        self.stats.inc_value('scheduler/enqueued/disk', spider=self.spider)
    else:
        self._mqpush(request)
        self.stats.inc_value('scheduler/enqueued/memory', spider=self.spider)
    self.stats.inc_value('scheduler/enqueued', spider=self.spider)
    # 表示没有爬过
    return True
self.df 默认是配置文件中的 setting:DUPEFILTER_CLASS
from scrapy.settings import default_settings

DUPEFILTER_CLASS = 'scrapy.dupefilters.RFPDupeFilter'
找RFPDupeFilter类里的request_seen方法。
def request_seen(self, request: Request) -> bool:
	# 指纹
    fp = self.request_fingerprint(request)
    # self.fingerprints: Set[str] = set()
    # 是一个集合
    # 判断当前指纹在集合中就返回True
    if fp in self.fingerprints:
        return True
    # 不在就将指纹添加到集合中并返回False
    self.fingerprints.add(fp)
    if self.file:
        self.file.write(fp + '\n')
    return False
更小内存实现去重:
如果是集合:存的数据库越多,占内存空间越大,如果数据量特别大,可以使用布隆过滤器实现去重。
https://zhuanlan.zhihu.com/p/94668361
Python中使用布隆过滤器
安装pybloom_live:
pip3 install pybloom_live
示例一(ScalableBloomFilter 可以自动扩容):
from pybloom_live import ScalableBloomFilter

# ScalableBloomFilter 可以自动扩容
bloom = ScalableBloomFilter(initial_capacity=100, error_rate=0.001, mode=ScalableBloomFilter.LARGE_SET_GROWTH)

bloom.add(1)
bloom.add(2)
bloom.add(3)

print(1 in bloom)  # True
print(4 in bloom)  # False
示例二(BloomFilter 是定长的):
from pybloom_live import BloomFilter

bloom = BloomFilter(capacity=3)

bloom.add(1)
bloom.add(2)
bloom.add(3)
bloom.add(4)
# bloom.add(5)  # 超出会抛出 BloomFilter is at capacity错误

print(1 in bloom)  # True
print(6 in bloom)  # False
可以使用布隆过滤器重写scrapy的过滤类。
十一 scrapy-redis实现分布式爬虫
当使用多台机器,需要使用同一个调度队列和同一个去重集合。使用scrapy-redis模块实现。
安装
pip install scrapy-redis
重写爬虫类
from scrapy_redis.spiders import RedisSpider


class CnblogsSpider(RedisSpider):
    name = 'cnblogs_redis'
    allowed_domains = ['www.cnblogs.com']
    redis_key = 'myspider:start_urls'  # 爬虫起始网址获取的key
配置文件配置
REDIS_HOST = 'localhost'  # 主机名
REDIS_PORT = 6379  # 端口
DUPEFILTER_CLASS = "scrapy_redis.dupefilter.RFPDupeFilter"
SCHEDULER = "scrapy_redis.scheduler.Scheduler"
SCHEDULER_PERSIST = True  # 持久化
在多台机器上启动scrapy项目
scrapy crawl cnblogs_redis
把起始爬取的地址放到redis的列表中
lpush myspider:start_urls http://www.cnblogs.com/


 1万+
1万+


 被折叠的 条评论
为什么被折叠?
被折叠的 条评论
为什么被折叠?
 到【灌水乐园】发言


