❣博主主页: 33的博客❣
▶️文章专栏分类:项目日记◀️
🚚我的代码仓库: 33的代码仓库🚚
🫵🫵🫵关注我带你了解更多项目内容

1.前言
当我第一次使用csdn的时候,我完全被它的功能吸引,可以通过别人的文章来解答我们的疑惑,自己也可以记录学习心得等,当时我就想要是我也能实现一个这样的网站就好了,现在,当我的知识储备量达到一定的程度,我也可以简单实现像csdn的网站了,接下来,我们就一起完成吧!
2.后端模块
相信大家对csdn的核心功能都是非常熟悉的,那么我们就模拟csdn来实现自己的博客系统,那么一个博客系统的核心功能主要包含前端模块和后端模块,而后端需要提供以下功能
- 1.用户注册:当用户第一次登录该页面需要注册用户名和密码。
- 2.用户登录:根据用户名和密码,判断用户的信息是否正确。
- 3.博客列表展示:查询博客列表。
- 4.作者个人页:根据用户id,返回博客信息。
- 5.博客详情信息:根据博客ID返回博客信息。
- 6.博客编辑:根据ID,返回博客,根据用户输入信息,更新博客。
- 7.博客删除,根据ID,进行博客删除。
- 8.写博客:根据输入信息进行博客添加。
再进行分析实体类主要由:用户实体,博客实体。
3数据库设计
我们先设计用户表用于存储用户信息和博客信息。
用户表:
DROP TABLE IF EXISTS java_blog_spring.user;
 CREATE TABLE java_blog_spring.user(
 `id` INT NOT NULL AUTO_INCREMENT,
 `user_name` VARCHAR ( 128 ) NOT NULL,
 `password` VARCHAR ( 128 ) NOT NULL,
 `github_url` VARCHAR ( 128 ) NULL,
 `delete_flag` TINYINT ( 4 ) NULL DEFAULT 0,
 `create_time` DATETIME DEFAULT now(),
 `update_time` DATETIME DEFAULT now(),
 PRIMARY KEY ( id ),
 UNIQUE INDEX user_name_UNIQUE ( user_name ASC )) ENGINE = INNODB DEFAULT
CHARACTER
SET = utf8mb4 COMMENT = '⽤⼾表';
博客表:
drop table if exists java_blog_spring.blog;
 CREATE TABLE java_blog_spring.blog (
 `id` INT NOT NULL AUTO_INCREMENT,
  `title` VARCHAR(200) NULL,
 `content` TEXT NULL,
 `user_id` INT(11) NULL,
 `delete_flag` TINYINT(4) NULL DEFAULT 0,
 `create_time` DATETIME DEFAULT now(),
 `update_time` DATETIME DEFAULT now(),
 PRIMARY KEY (id))
 ENGINE = InnoDB DEFAULT CHARSET = utf8mb4 COMMENT = '博客表';
添加信息:
新增⽤⼾信息
insert into java_blog_spring.user (user_name,
password,github_url)values("波妞","123456","https://gitee.com/thirtythree-code");
 insert into java_blog_spring.user (user_name,
password,github_url)values("龙猫","123456","https://gitee.com/thirtythree-code");
 insert into java_blog_spring.blog (title,content,user_id) values("第⼀篇博客
","111我是博客正⽂我是博客正⽂我是博客正⽂",1);
 insert into java_blog_spring.blog (title,content,user_id) values("第⼆篇博客","222我是博客正⽂我是博客正⽂我是博客正⽂",2);
根据数据库属性实现实体类:
@Data
public class UserInfo {
    private Integer id;
    private String UserName;
    private String password;
    private String githubUrl;
    private Integer deleteFlag;
    private Date createTime;
    private Date updateTime;
}
@Data
public class BlogInfo {
    private  Integer id;
    private  String title;
    private String content;
    private Integer userId;
    private boolean isLoginUser;
    private Integer deleteFlag;
    private Date createTime;
    private Date updateTime;
}
4.mapper实现
我们先根据上诉信息进行数据层的实现。数据层主要从MySQL中获取数据用户信息和博客信息。
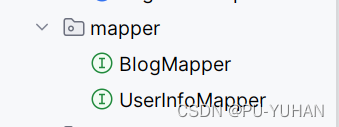
我们先创建一个mapper的包,然后在包中创建两个mapper类:

我们使用Mybaitis框架,完成数据库操作,那么就需要先进行数据库的配置:
spring:
  datasource:
    url: jdbc:mysql://127.0.0.1:3306/java_blog_spring?characterEncoding=utf8&useSSL=false
    username: root
    password: 123456
    driver-class-name: com.mysql.cj.jdbc.Driver
mybatis:
  configuration:
    map-underscore-to-camel-case: true #配置驼峰自动转换
    log-impl: org.apache.ibatis.logging.stdout.StdOutImpl #打印sql语句
4.1UserInfoMapper
在UserInfoMapper中主要根据用户输入姓名或者id查询用户信息:
  @Select("select * from user where delete_flag=0 and user_name=#{userName}")
    public UserInfo selectByName(String userName);
    /*
    * 根据用户ID查询用户信息
    * */
    @Select("select * from user where delete_flag=0 and id=#{id}")
    public UserInfo selectById(Integer id);
4.2BlogMapper
只要完成博客系统的核心内容:查询所有博客,更新博客,发布博客
 /*
    * 查询博客列表
    * */
    @Select("select * from blog where delete_flag=0 order by create_time desc")
    public List<BlogList> selectAll();
    @Select("select * from blog where delete_flag=0 and id=#{id}")
    public BlogInfo selectById(Integer id);
    /**
     * 更新博客
     */
    Integer updateBlog(BlogInfo blogInfo);
    /**
     * 发布博客
     */
    @Insert("insert into blog (title, content, user_id) values (#{title}, #{content}, #{userId})")
    Integer insertBlog(BlogInfo blogInfo);
在更新的时候我们采用xml实现,而不采用注解来实现,使用xml的时候我们需要在配置文件中进行路径的配置。
mybatis:
  mapper-locations:classpath:mapper/**Mapper.xml
再进行更新操作:
<?xml version="1.0" encoding="UTF-8"?>
<!DOCTYPE mapper PUBLIC "-//mybatis.org//DTD Mapper 3.0//EN" "http://mybatis.org/dtd/mybatis-3-mapper.dtd">
<mapper namespace="com.example.springblog.mapper.BlogMapper">//实现对应的类
    <update id="updateBlog">//实现对应的方法
        update blog
       <set>
           <if test="title!=null">
               title = #{title},
           </if>
           <if test="content!=null">
               content = #{content},
           </if>
           <if test="userId!=null">
               user_id = #{userId},
           </if>
           <if test="deleteFlag!=null">
               delete_flag = #{deleteFlag},
           </if>
       </set>
        where id=#{id}
    </update>
</mapper>
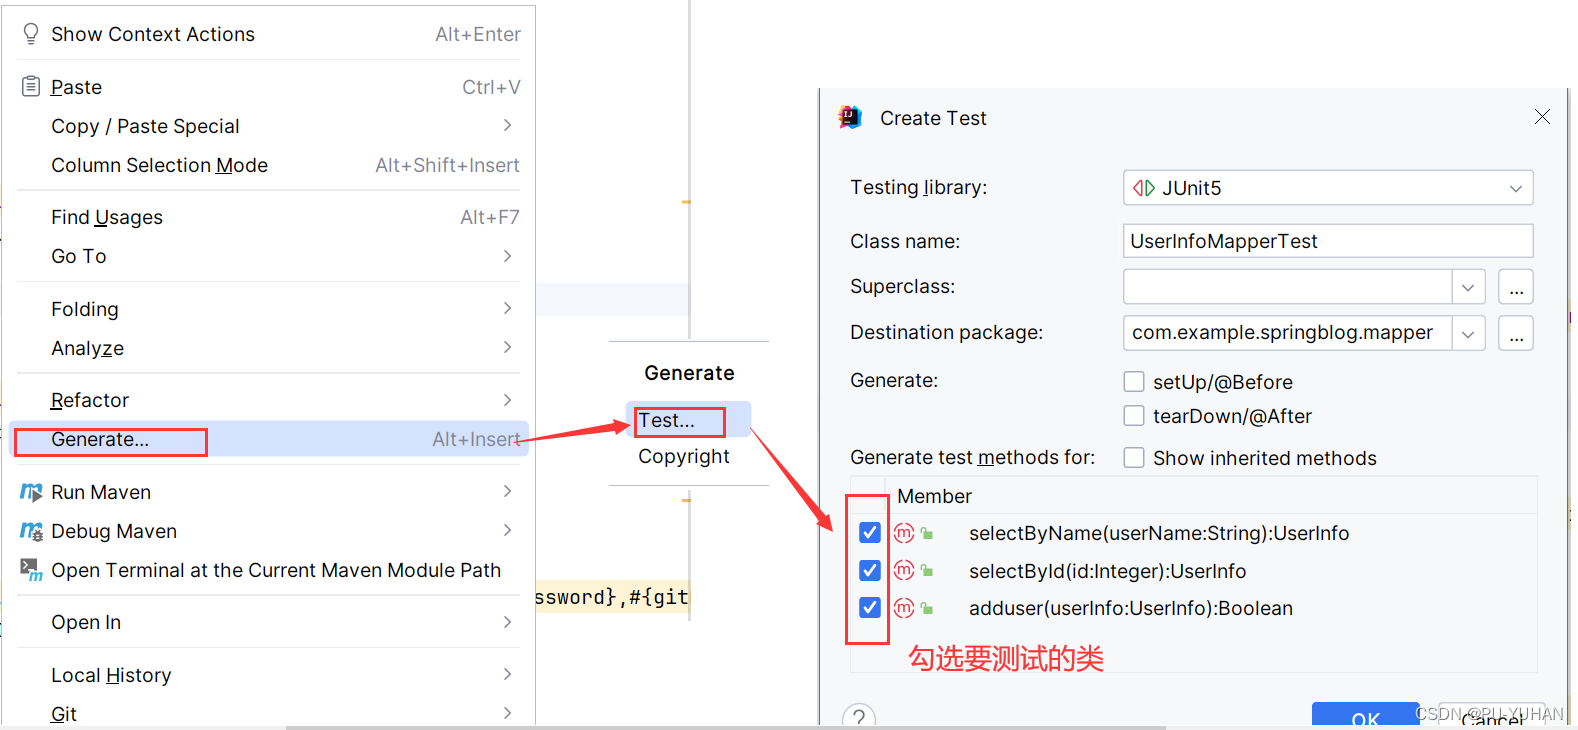
到这里我们已经完成了数据层的数据库实现。我i吗可以自动生成测试类进行测试:


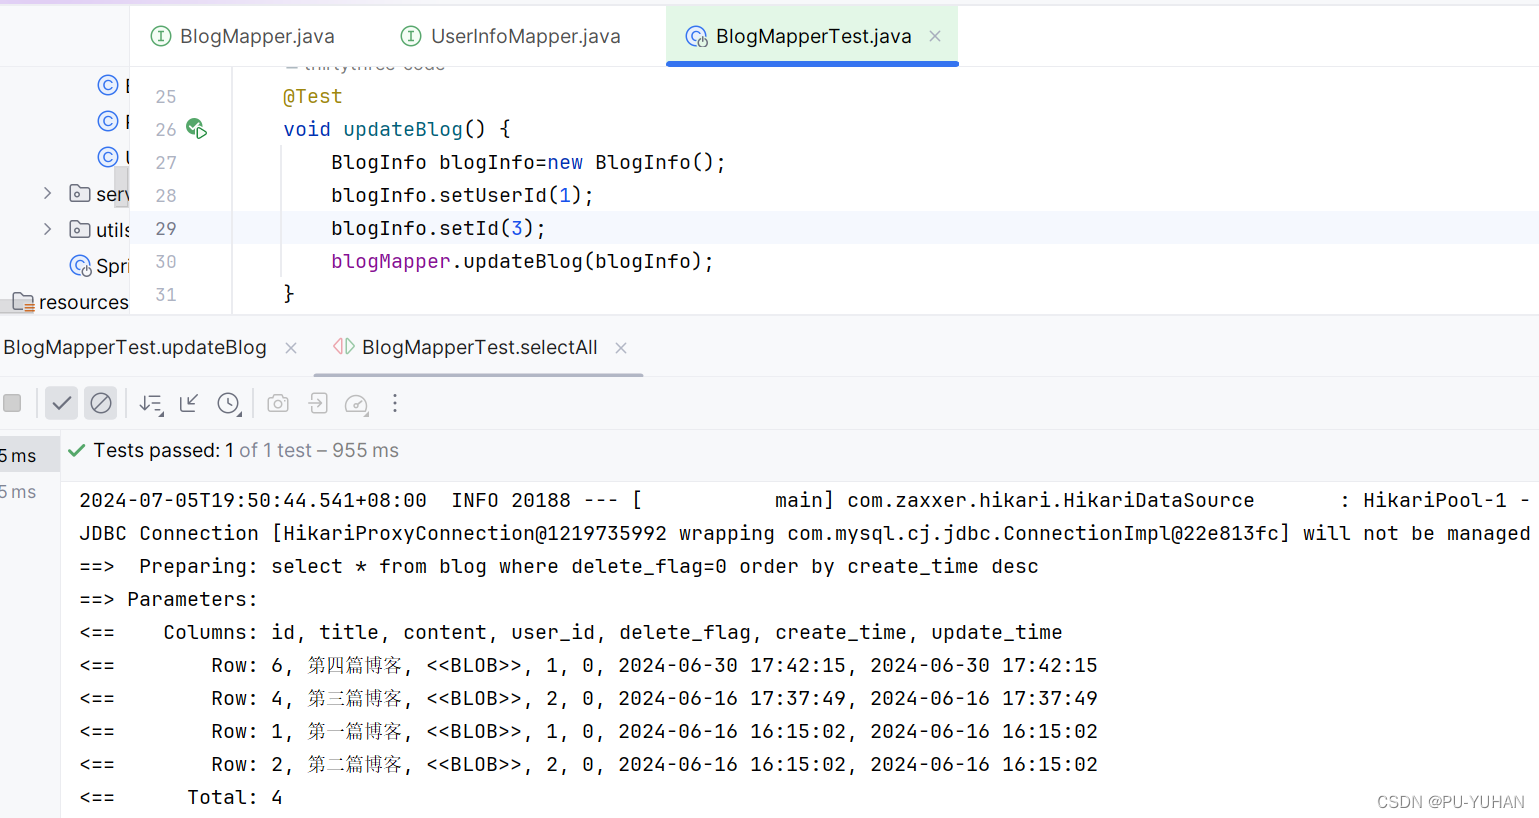
我以selectAll方法测试为例子,可以通过结果了解到它已经查找到数据库所有内容,同学们可以对其他方法进行测试。
5.总结
这一部分我们主要数数据库进行了设计,并对数据层进行了实现和测试,在下一篇文章中,我们就对用户登录和博客进行实现。
下期预告:项目日记(二)


 6万+
6万+

 被折叠的 条评论
为什么被折叠?


