


一.thymeleaf介绍及常用标签
Thymeleaf 是一款用于渲染 XML/XHTML/HTML5 内容的模板引擎。它与 JSP,Velocity,FreeMaker 等模板引擎类似,也可以轻易地与 Spring MVC 等 Web 框架集成。与其它模板引擎相比,Thymeleaf 最大的特点是,即使不启动 Web 应用,也可以直接在浏览器中打开并正确显示模板页面 。
Thymeleaf 简介
Thymeleaf 是新一代 Java 模板引擎,支持 HTML 原型,以直接被浏览器打开,此时浏览器会忽略未定义的 Thymeleaf 标签属性,展示 thymeleaf 模板的静态页面效果。当在应用程序中会动态地替换掉页面设置的标签属性。
Thymeleaf 的特点
-
动静结合:Thymeleaf 既可以直接使用浏览器打开,查看页面的静态效果,也可以通过 Web 应用程序进行访问,查看动态页面效果。
-
开箱即用:Thymeleaf 提供了 Spring 标准方言以及一个与 SpringMVC 完美集成的可选模块,可以快速地实现表单绑定、属性编辑器、国际化等功能。
-
多方言支持:它提供了 Thymeleaf 标准和 Spring 标准两种方言,可以直接套用模板实现 JSTL、 OGNL 表达式;必要时,开发人员也可以扩展和创建自定义的方言。
-
与 SpringBoot 完美整合:SpringBoot 为 Thymeleaf 提供了的默认配置,并且还为 Thymeleaf 设置了视图解析器,因此 Thymeleaf 可以与 Spring Boot 完美整合。
Thymeleaf 通过在 html 标签中,增加额外属性来达到“模板+数据”的展示方式
常用标签介绍:
(11条消息) Thymeleaf常用th标签_我爱圆溜溜的博客-CSDN博客_thymeleaf th
二.代码实现
注:此处使用的分页工具类只需提供页码及每页条数
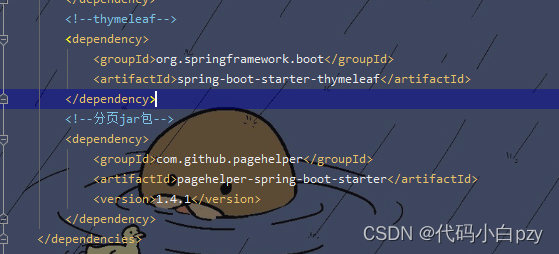
1.导入两个jar包
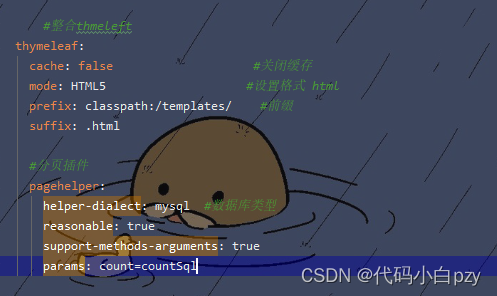
2.配置文件添加如下代码
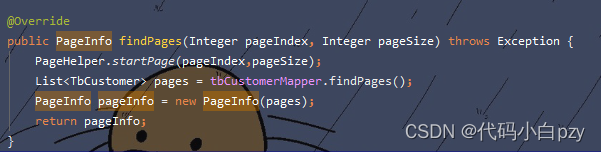
3.service实现类
1)无条件分页
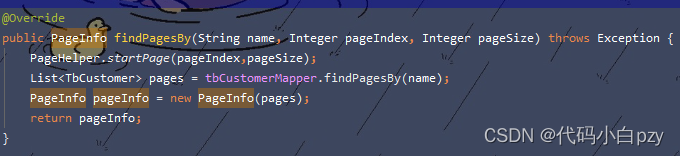
2) 根据名称查询
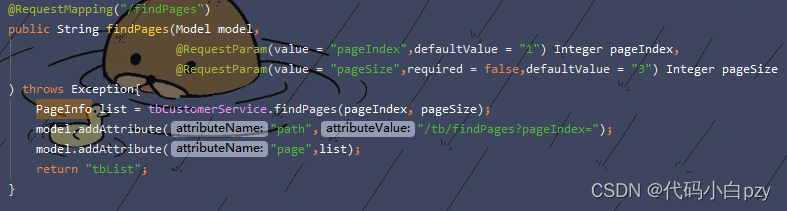
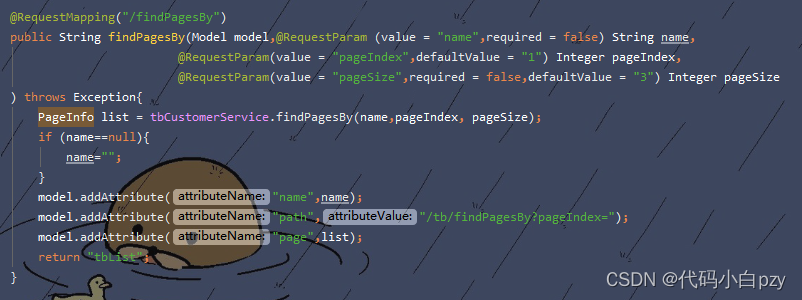
4.Controller层
1)无条件分页
2) 根据名称查询
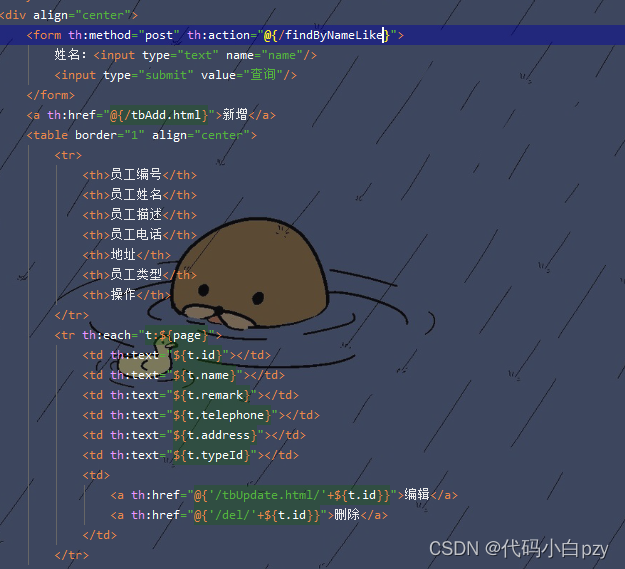
5.前端展示


 554
554


 被折叠的 条评论
为什么被折叠?
被折叠的 条评论
为什么被折叠?
 到【灌水乐园】发言


