


前言:
首先,数据结构这个东西并不针对某一种编程语言,但是很多初学者在学习过c语言后先接触的是有关c语言实现的基础数据结构(例如链表,栈,队列等),后面学会了C++之后反而有些束手束脚,用C++的类去实现链栈时反而造成了内存泄漏。
这是因为,我们知道,如果在类内创建对象,那么他在主函数结束后就会自动调用类的析构函数(没写的话会调用默认析构函数),所以有同学就会以为在类中写链式结构时不需要delete或者free,这是错误的想法,因为类的析构只是释放类的内部空间,对于new和malloc所建立的堆区空间仍旧需要调用delete或free。
好的那么废话就不再多说了,我这篇文章已经把源码放到文章末尾了,有需要的直接拿走不谢!当然作者很希望各位看官能给本人点个小赞,谢谢!
axis:坐标节点类
那么首先是坐标节点类,我设计的只有横坐标和纵坐标这两个属性,然后不允许使用拷贝构造函数和移动构造函数以及赋值函数。
class axis {
public:
	int first;
	int second;
	axis* next;
	axis(int f, int s, axis* n = nullptr) :first(f), second(s), next(n) { cout << "Creat a axis" << endl; }
	~axis() { cout << "Delete a axis" << endl; }
	axis(axis& x) = delete;
	axis(axis&& x) = delete;
	axis operator=(axis& x) = delete;
	axis operator=(axis&& x) = delete;
	void printaxis() const { cout << "(" << first << "," << second << ")" << endl; }
};
这里的printaxis呢就是打印函数,打印坐标信息。
Road:路线类
链栈的结构就是在栈的规则下使用链式储存结构。
那么可以看到呢,每一段路程肯定有栈顶,坐标路径个数这些。然后和坐标节点类一样,不允许使用拷贝构造函数和移动构造函数以及赋值函数,在对链栈进行入栈操作和出栈操作我也写在了下面的代码中了。
class Road {
private:
	axis* top;
	int num;
public:
	Road() :top(nullptr), num(0) { cout << "Creat a Road" << endl; }
	~Road() { cout << "Delete a Road" << endl; }
	Road(Road& x) = delete;
	Road(Road&& x) = delete;
	Road operator=(Road& x) = delete;
	Road operator=(Road&& x) = delete;
	void printaxis() const {
		axis* p = top;
		while (p != nullptr) {
			p->printaxis();
			p = p->next;
		}
	}
	bool push(int f, int s) {
		axis* newaxis = new axis(f, s, top);
		top = newaxis;
		num++;
		return true;
	}
	bool pop() {
		if (top->next != nullptr && num > 1) {
			axis* p = top;
			top = top->next;
			p->printaxis();
			delete p;
			num--;
		}
		else {
			top->printaxis();
			delete top;
			top = nullptr;
			num = 0;
		}
		return true;
	}
	bool Delete_Road() {
		while (top != nullptr) {
			pop();
		}
		return true;
	}
};
总结
那么用类写链栈呢,要注意的就是我在开篇时提到的那些,下面是我用于测试的部分(主函数)
main
int main() {
Road taken_road;
for (int i = 0; i < 10; i++) {
taken_road.push(i, i);
}
taken_road.Delete_Road();
return 0;
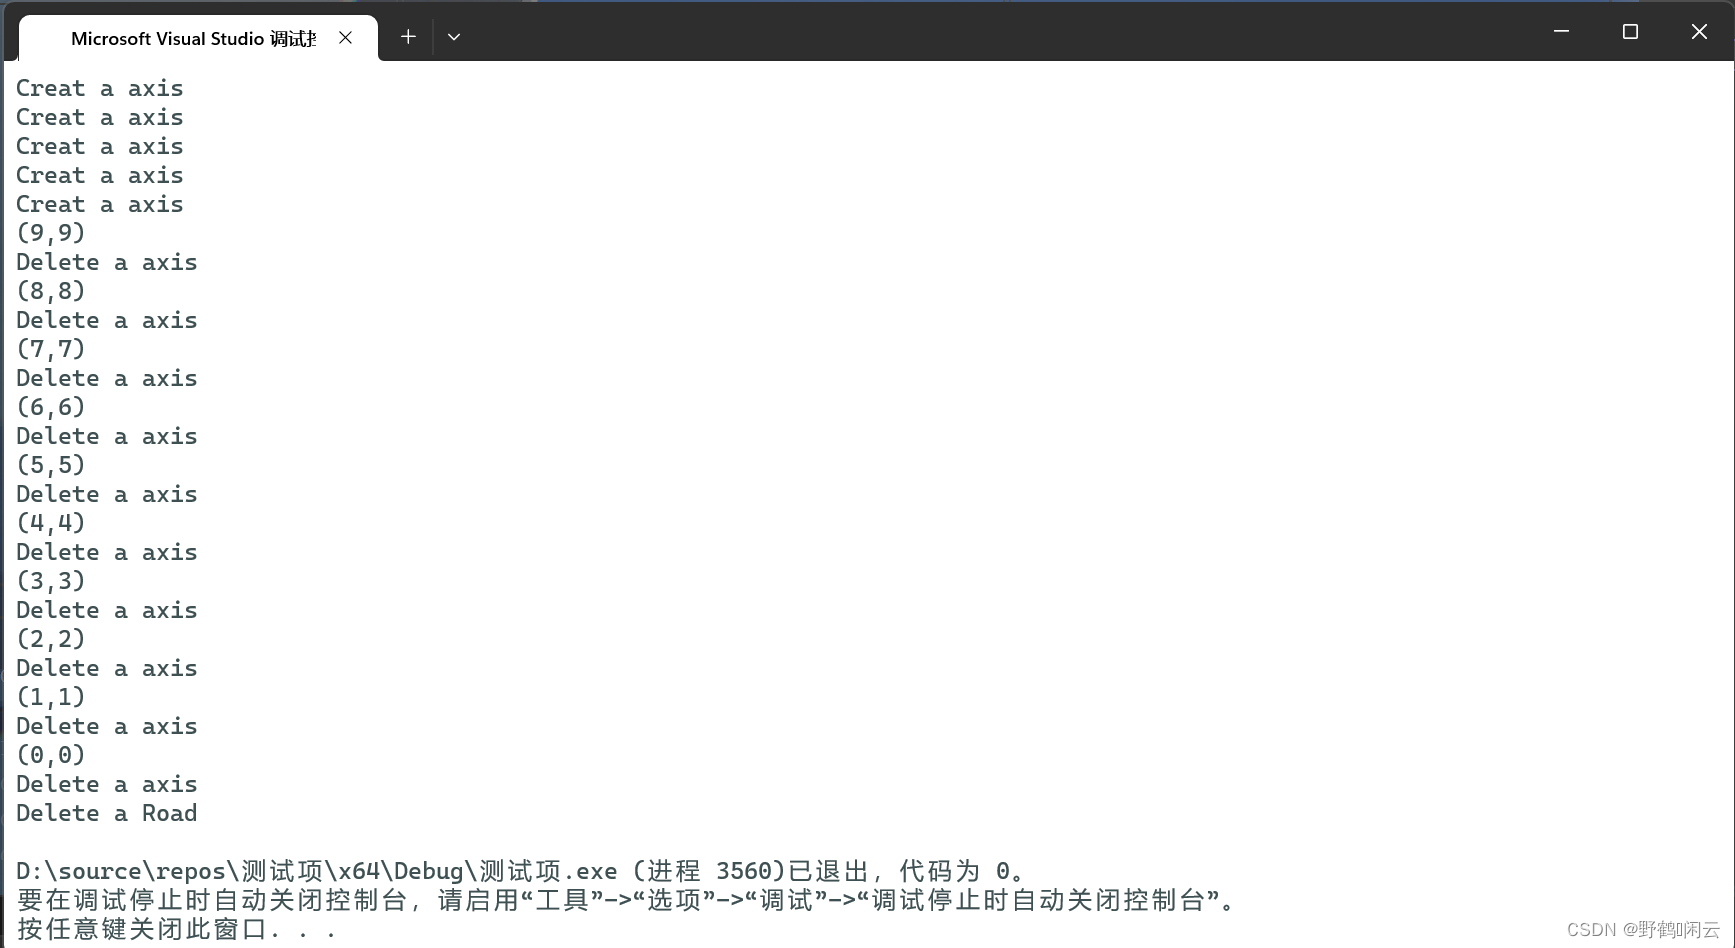
}运行结果
源代码
#include<iostream>
#include<string>
using namespace std;
class axis {
public:
	int first;
	int second;
	axis* next;
	axis(int f, int s, axis* n = nullptr) :first(f), second(s), next(n) { cout << "Creat a axis" << endl; }
	~axis() { cout << "Delete a axis" << endl; }
	axis(axis& x) = delete;
	axis(axis&& x) = delete;
	axis operator=(axis& x) = delete;
	axis operator=(axis&& x) = delete;
	void printaxis() const { cout << "(" << first << "," << second << ")" << endl; }
};
class Road {
private:
	axis* top;
	int num;
public:
	Road() :top(nullptr), num(0) { cout << "Creat a Road" << endl; }
	~Road() { cout << "Delete a Road" << endl; }
	Road(Road& x) = delete;
	Road(Road&& x) = delete;
	Road operator=(Road& x) = delete;
	Road operator=(Road&& x) = delete;
	void printaxis() const {
		axis* p = top;
		while (p != nullptr) {
			p->printaxis();
			p = p->next;
		}
	}
	bool push(int f, int s) {
		axis* newaxis = new axis(f, s, top);
		top = newaxis;
		num++;
		return true;
	}
	bool pop() {
		if (top->next != nullptr && num > 1) {
			axis* p = top;
			top = top->next;
			p->printaxis();
			delete p;
			num--;
		}
		else {
			top->printaxis();
			delete top;
			top = nullptr;
			num = 0;
		}
		return true;
	}
	bool Delete_Road() {
		while (top != nullptr) {
			pop();
		}
		return true;
	}
};
int main() {
	Road taken_road;
	for (int i = 0; i < 10; i++) {
		taken_road.push(i, i);
	}
	taken_road.Delete_Road();
	return 0;
}
最后,写文不易,不收藏也请给个赞,谢谢亲~!
(本文仅供学习时参考,如有错误,纯属作者技术不到位,不足之处请多指教,谢谢)


 被折叠的 条评论
为什么被折叠?
被折叠的 条评论
为什么被折叠?
 到【灌水乐园】发言


