


 本文介绍了如何使用VMwareWorkstation创建虚拟机并安装爱快软路由系统,包括选择LinuxUbuntu版本,设置网络适配器为自动桥连,以及后续的软路由配置,如修改登录IP地址和绑定网卡等步骤。
1.前言
手头有多余的电脑,或者自己手头的电脑性能过剩的时候不妨考虑一下用这些剩余的性能提升一下周边设备的使用体验于此同时剩下不少原本需要花费到周边设备的开销,岂不快哉!
2.环境准备
VMware Workstation虚拟机,版本12,14,15,16都可,这四个版本我都尝试过都可以的,软路由系统不挑版本,此次过程分享使用16版本。
3.爱快软路由下载
官网地址:爱快官网
4.安装VMware Workstation(如果已有VMware请跳过此步骤)
正式安装
爱快软路由系统上面我们已经下载完毕,下面我们就开始在VM上安装爱快吧
新建虚拟机
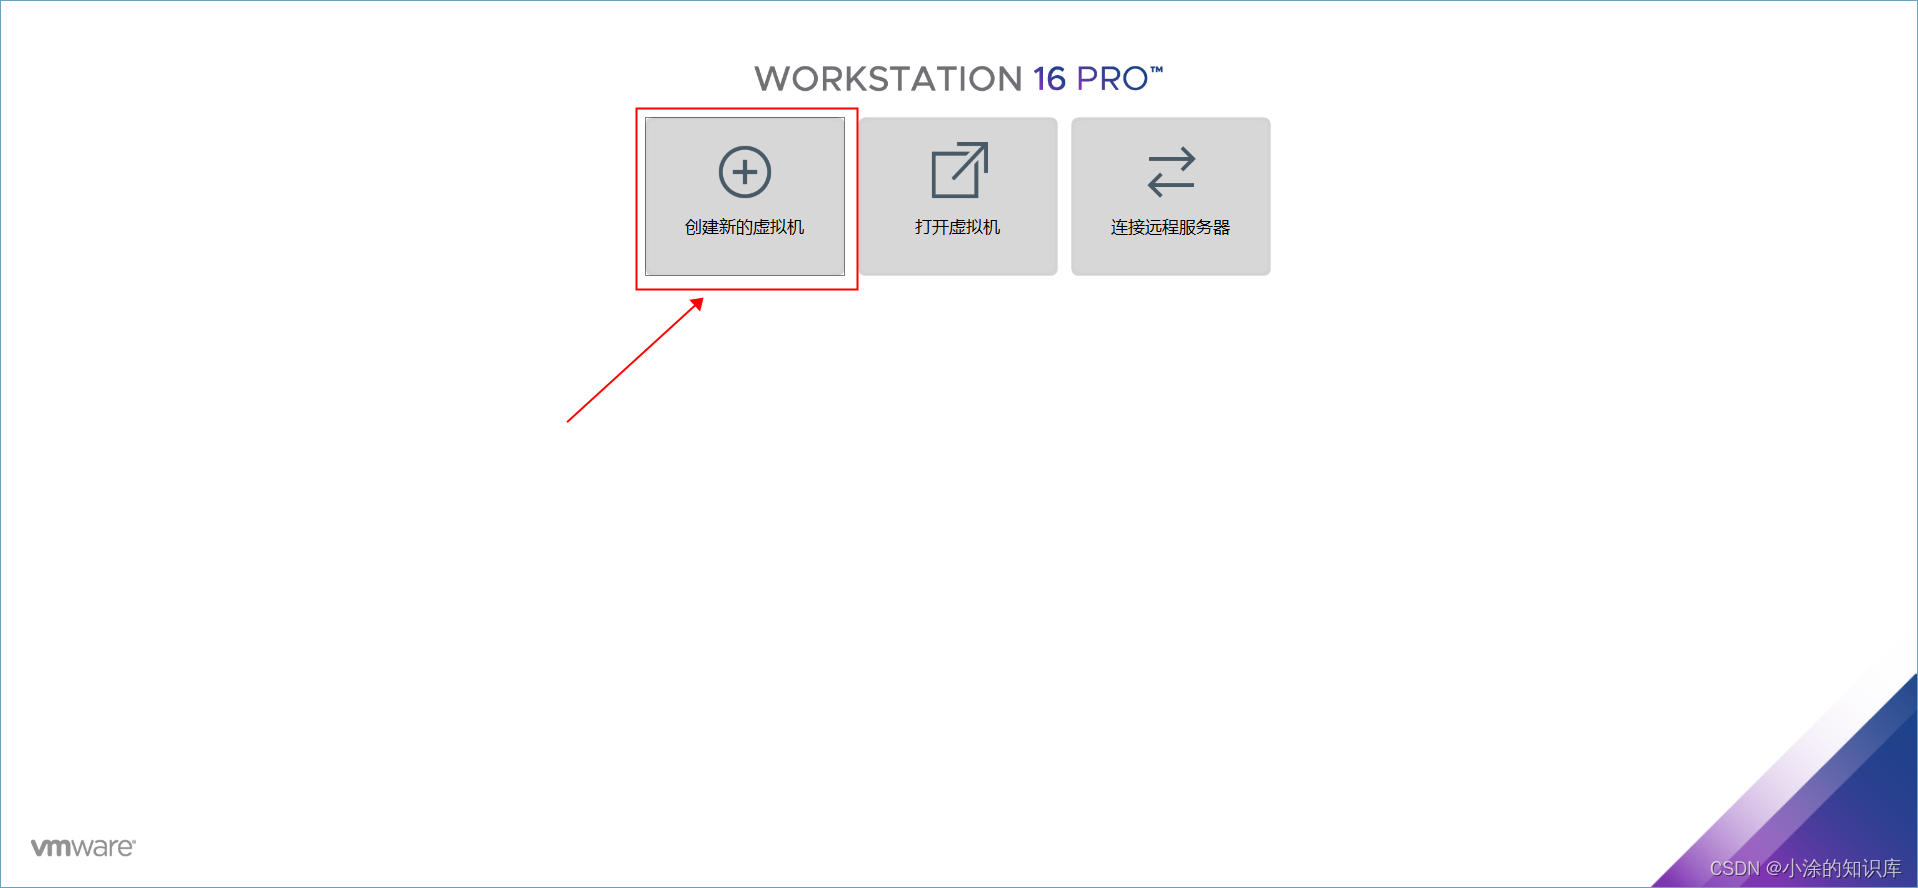
1.单击创建新的虚拟机
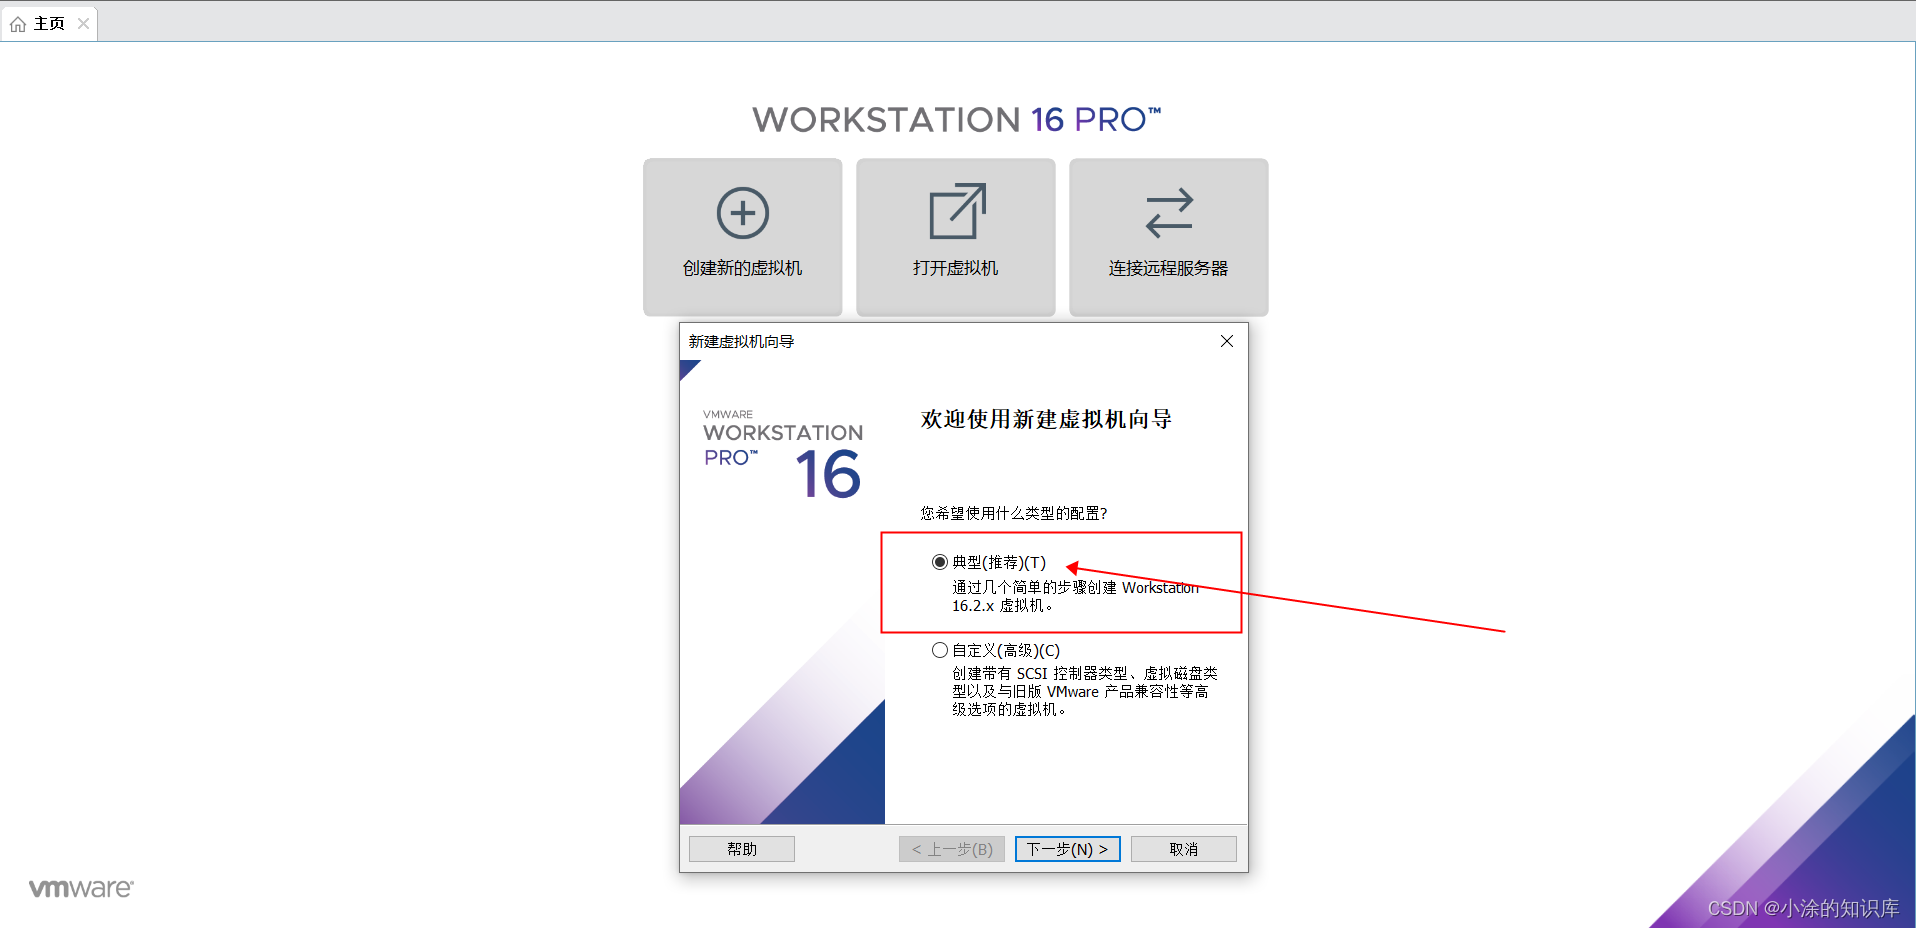
2.直接选择典型安装就可以了,不必那么复杂去选自定义
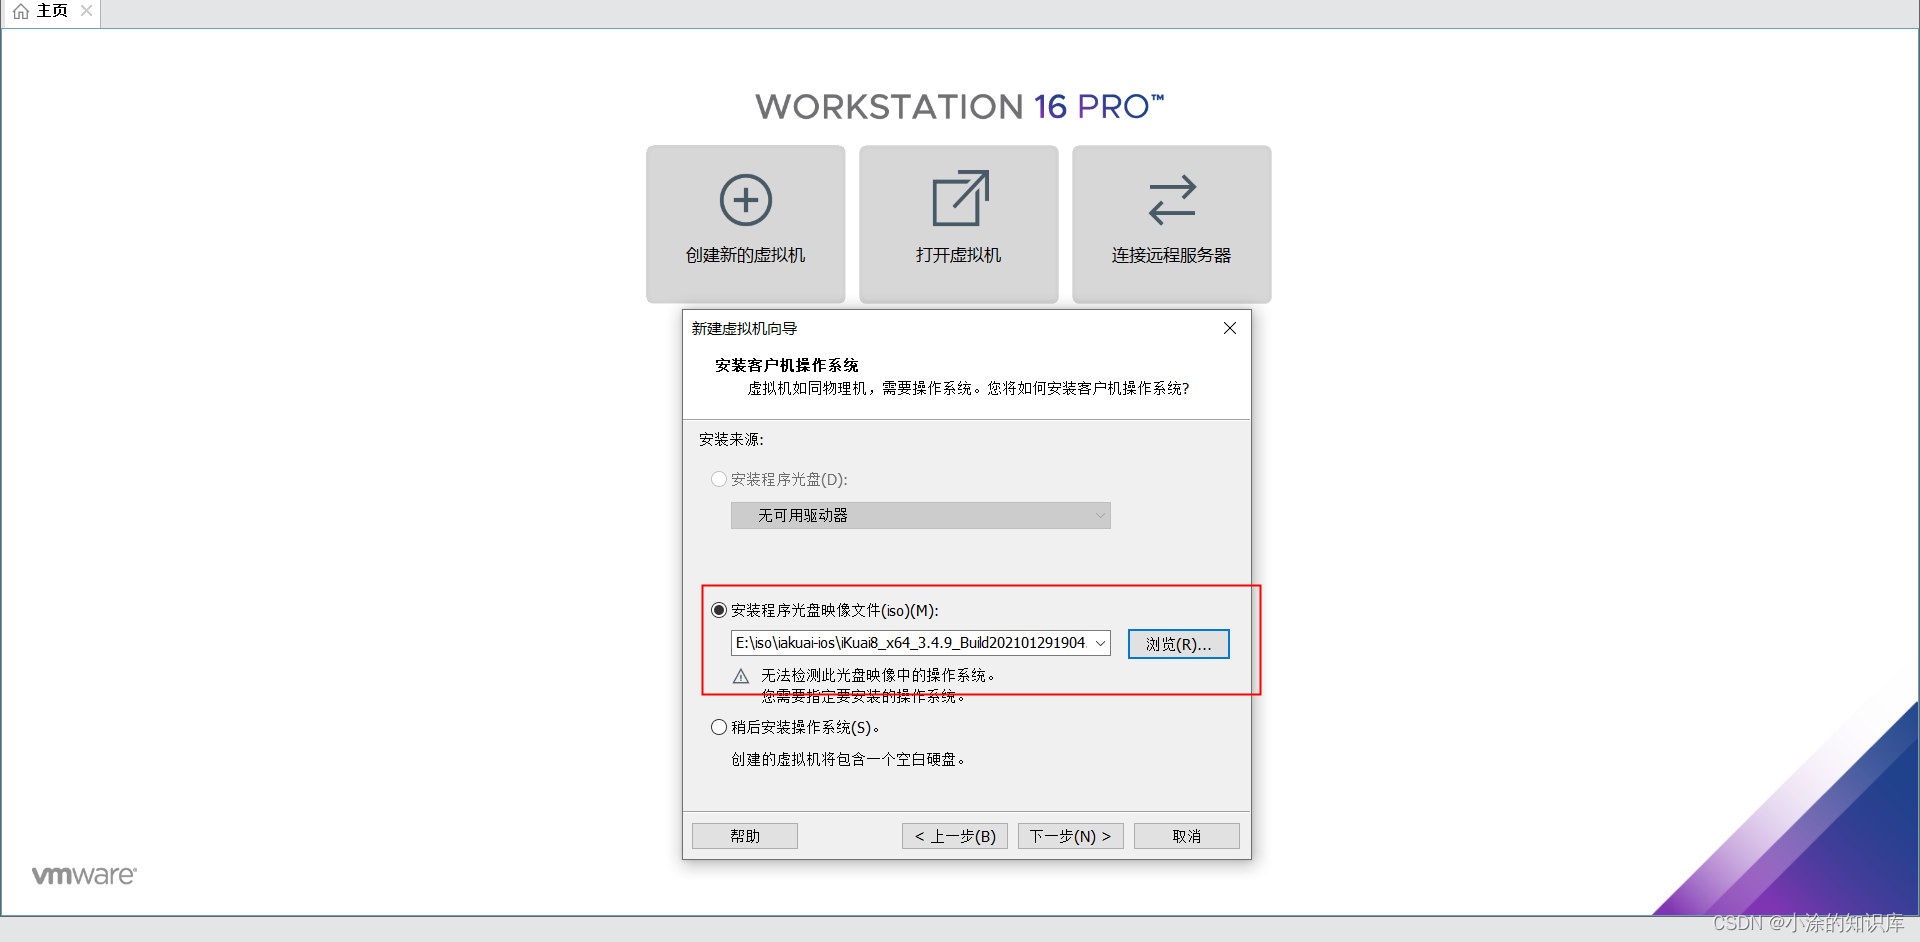
3.按照下图直接选择下载的镜像地址,然后单击下一步
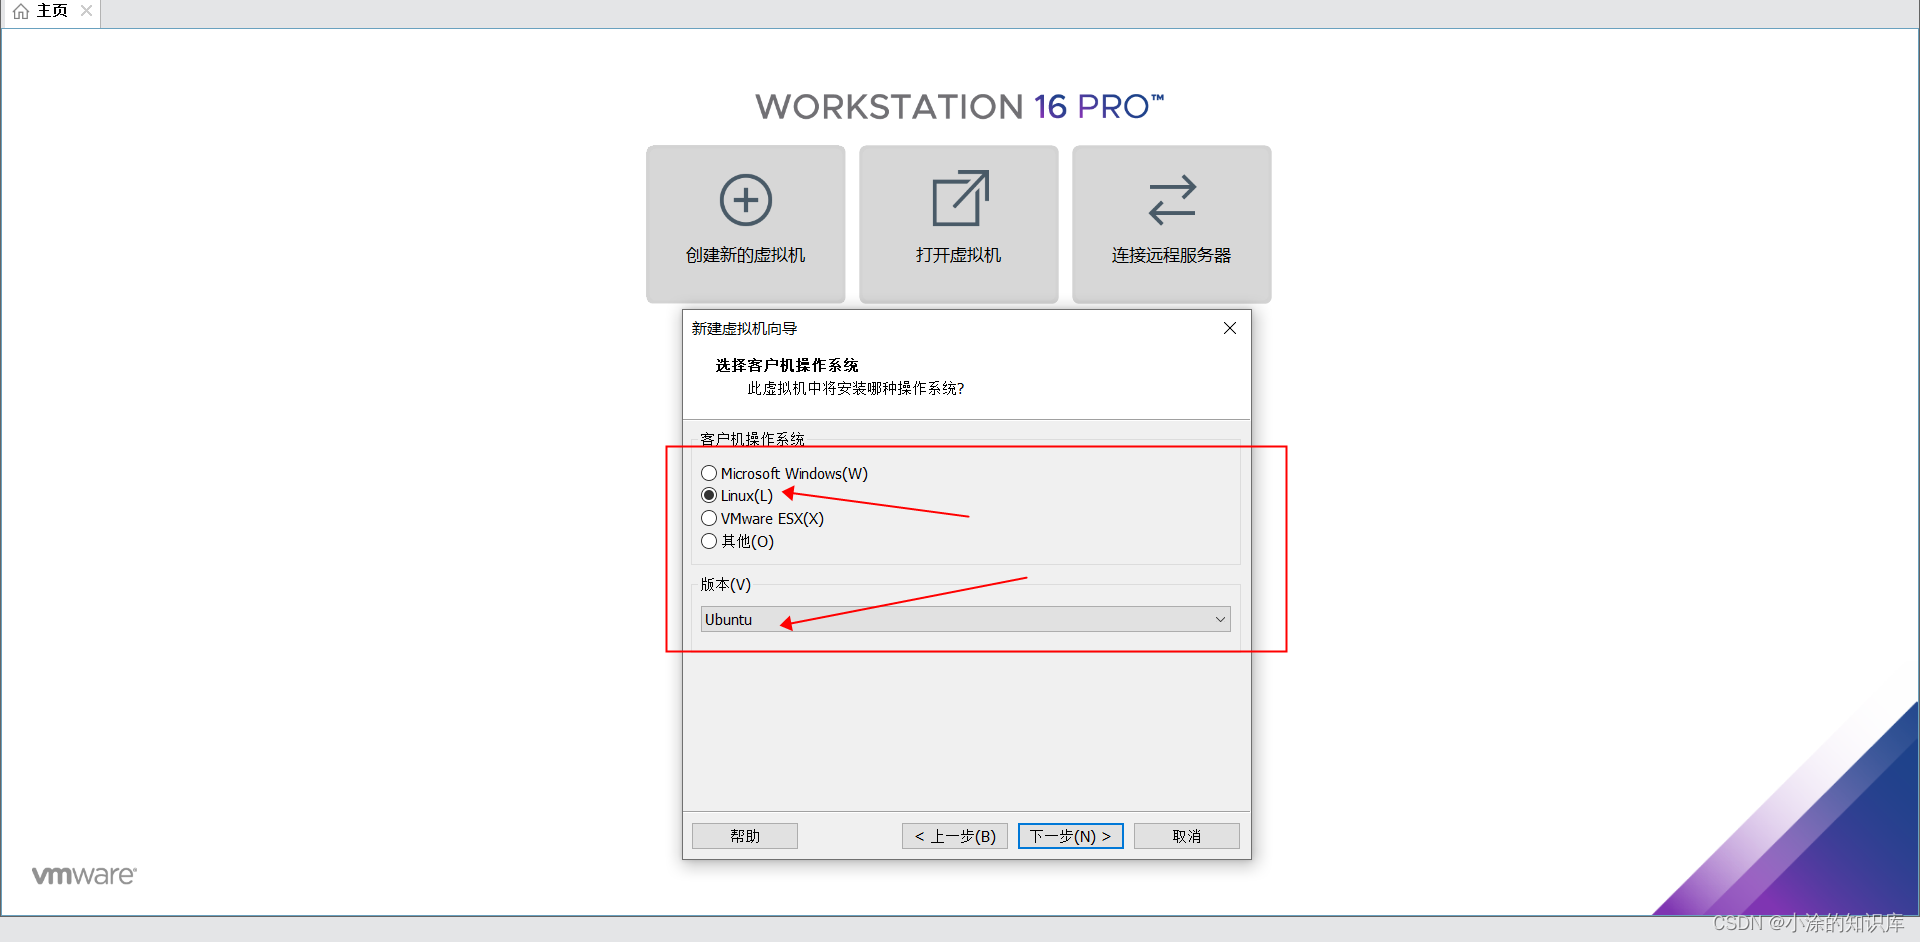
4.客户机操作系统选择linux,版本选择ubuntu,直接下一步
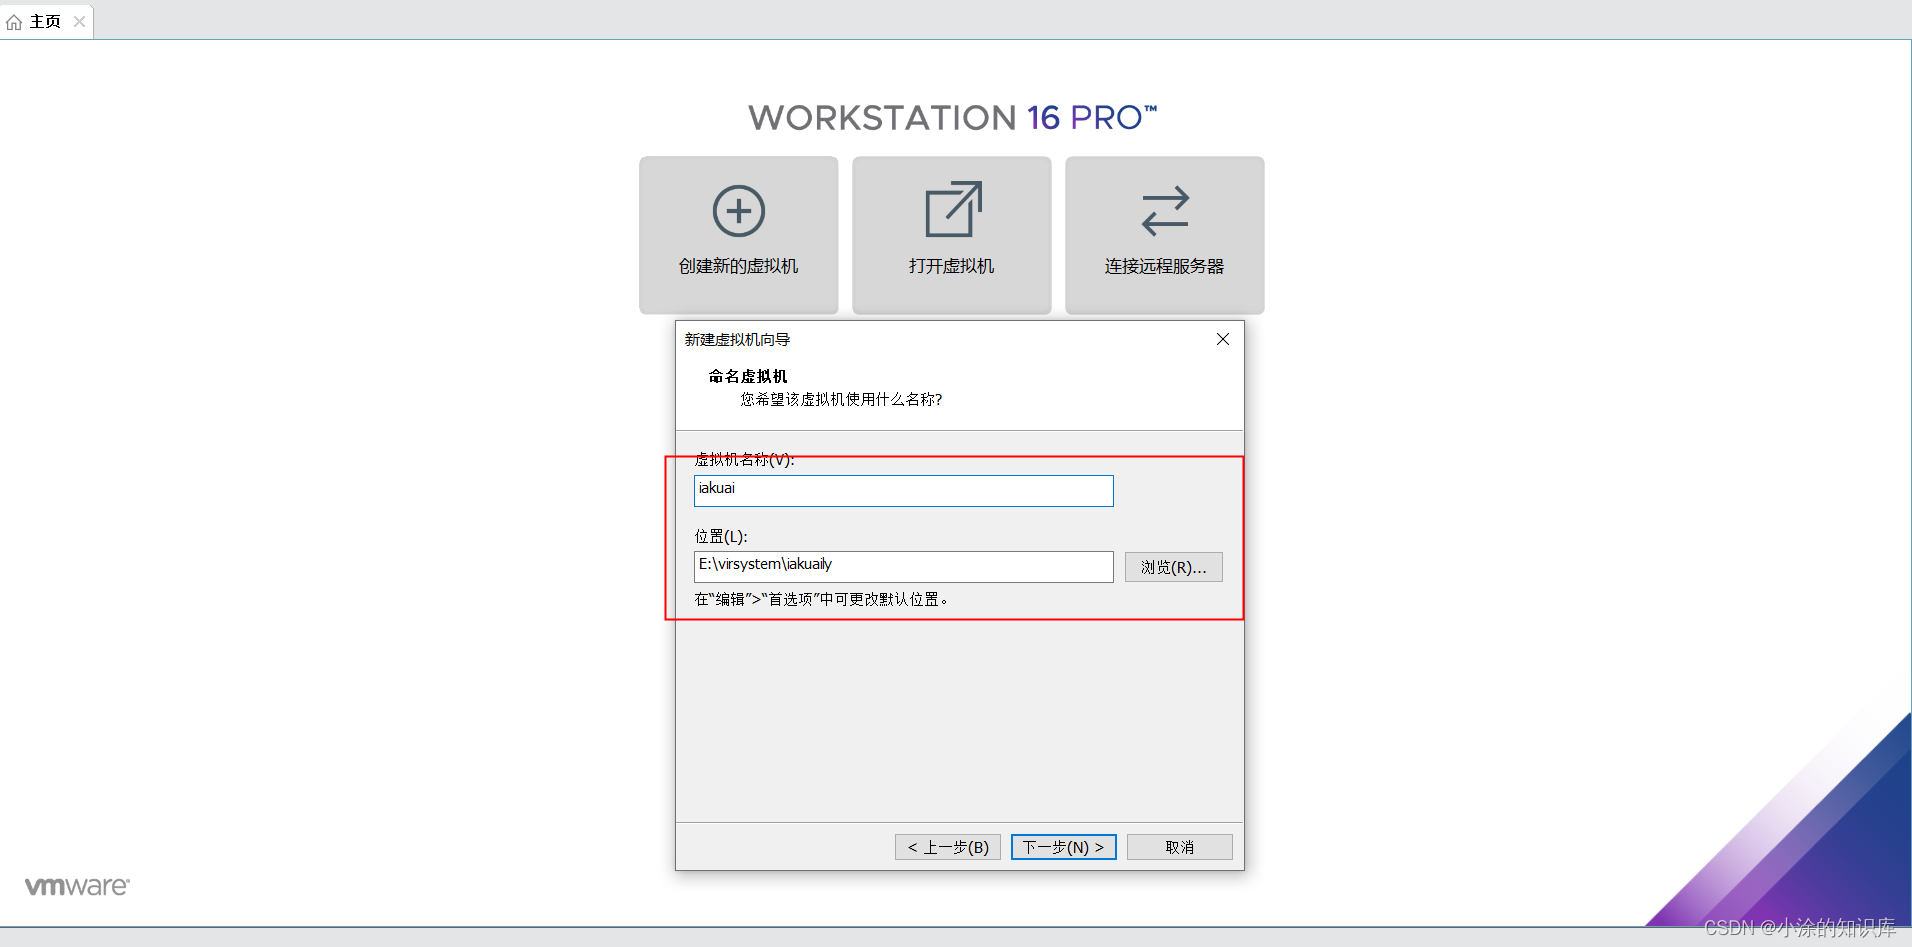
5.下面填写虚拟机名称(可以随意填),选择合适的磁盘位置用于存放iKuai系统
6.下面选择磁盘容量大小,这边按照默认就可以了,一般20G完全够用了。

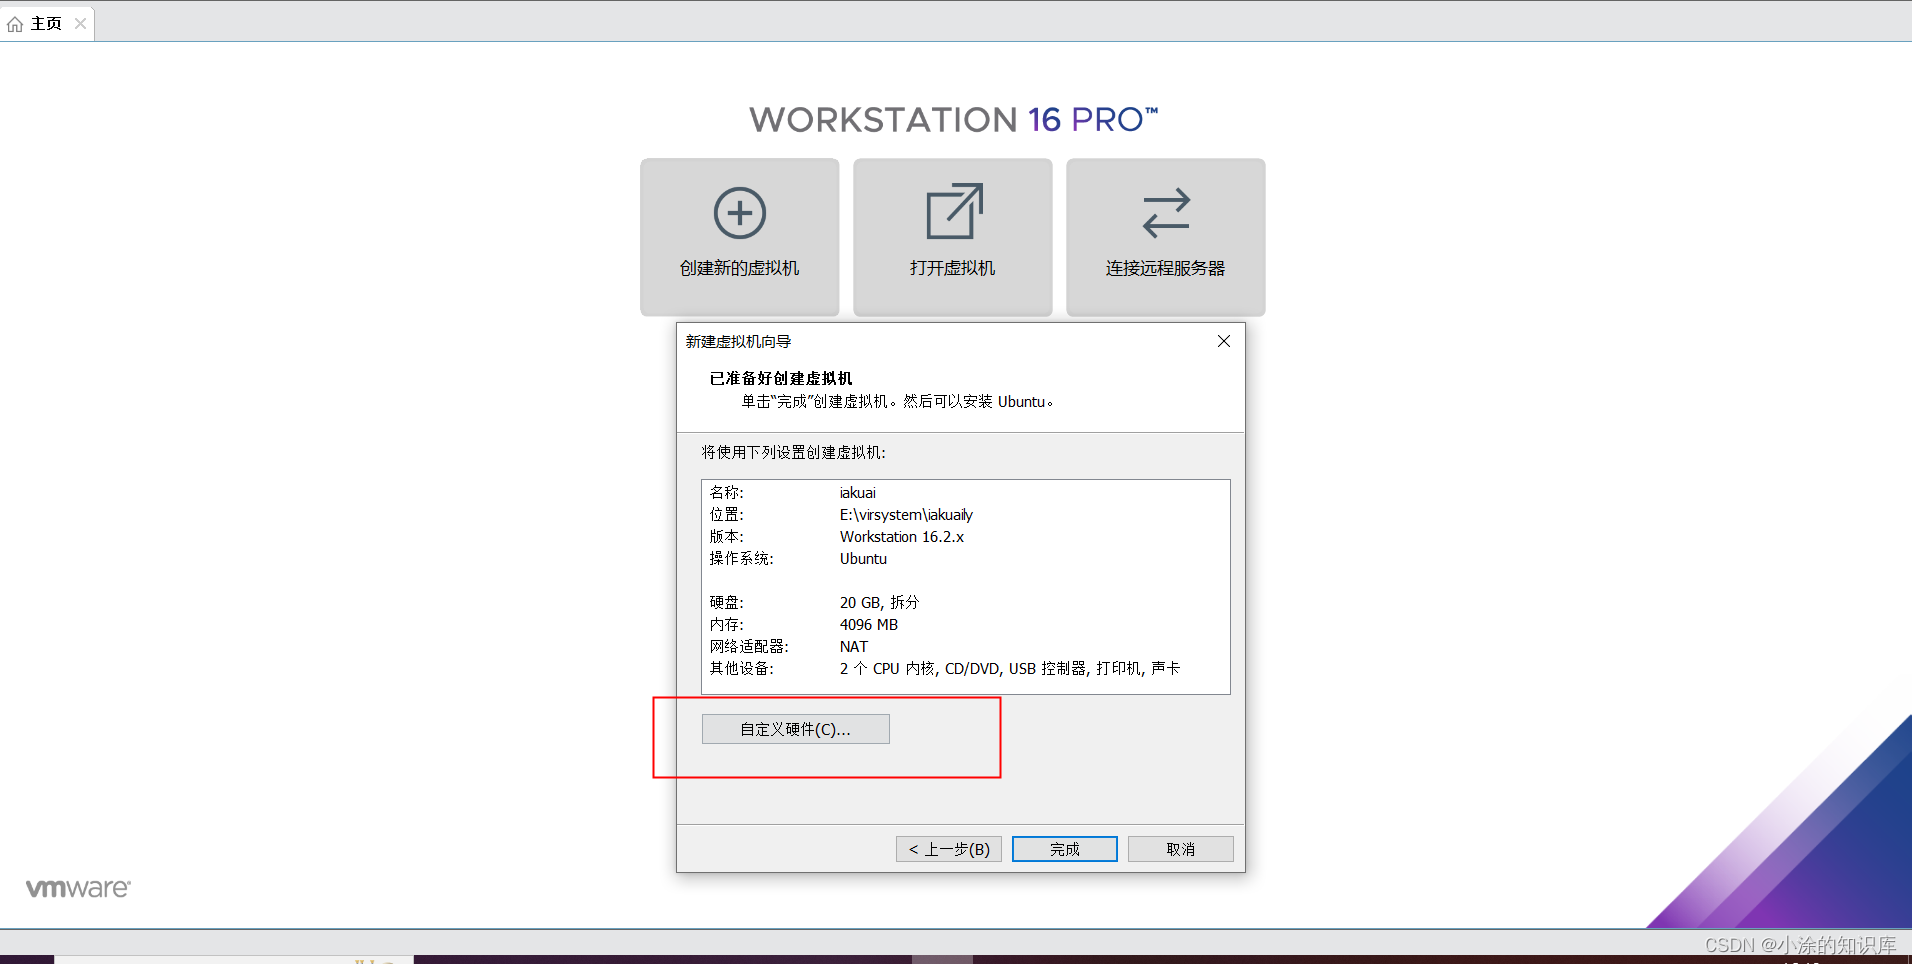
7.下面单击自定义硬件
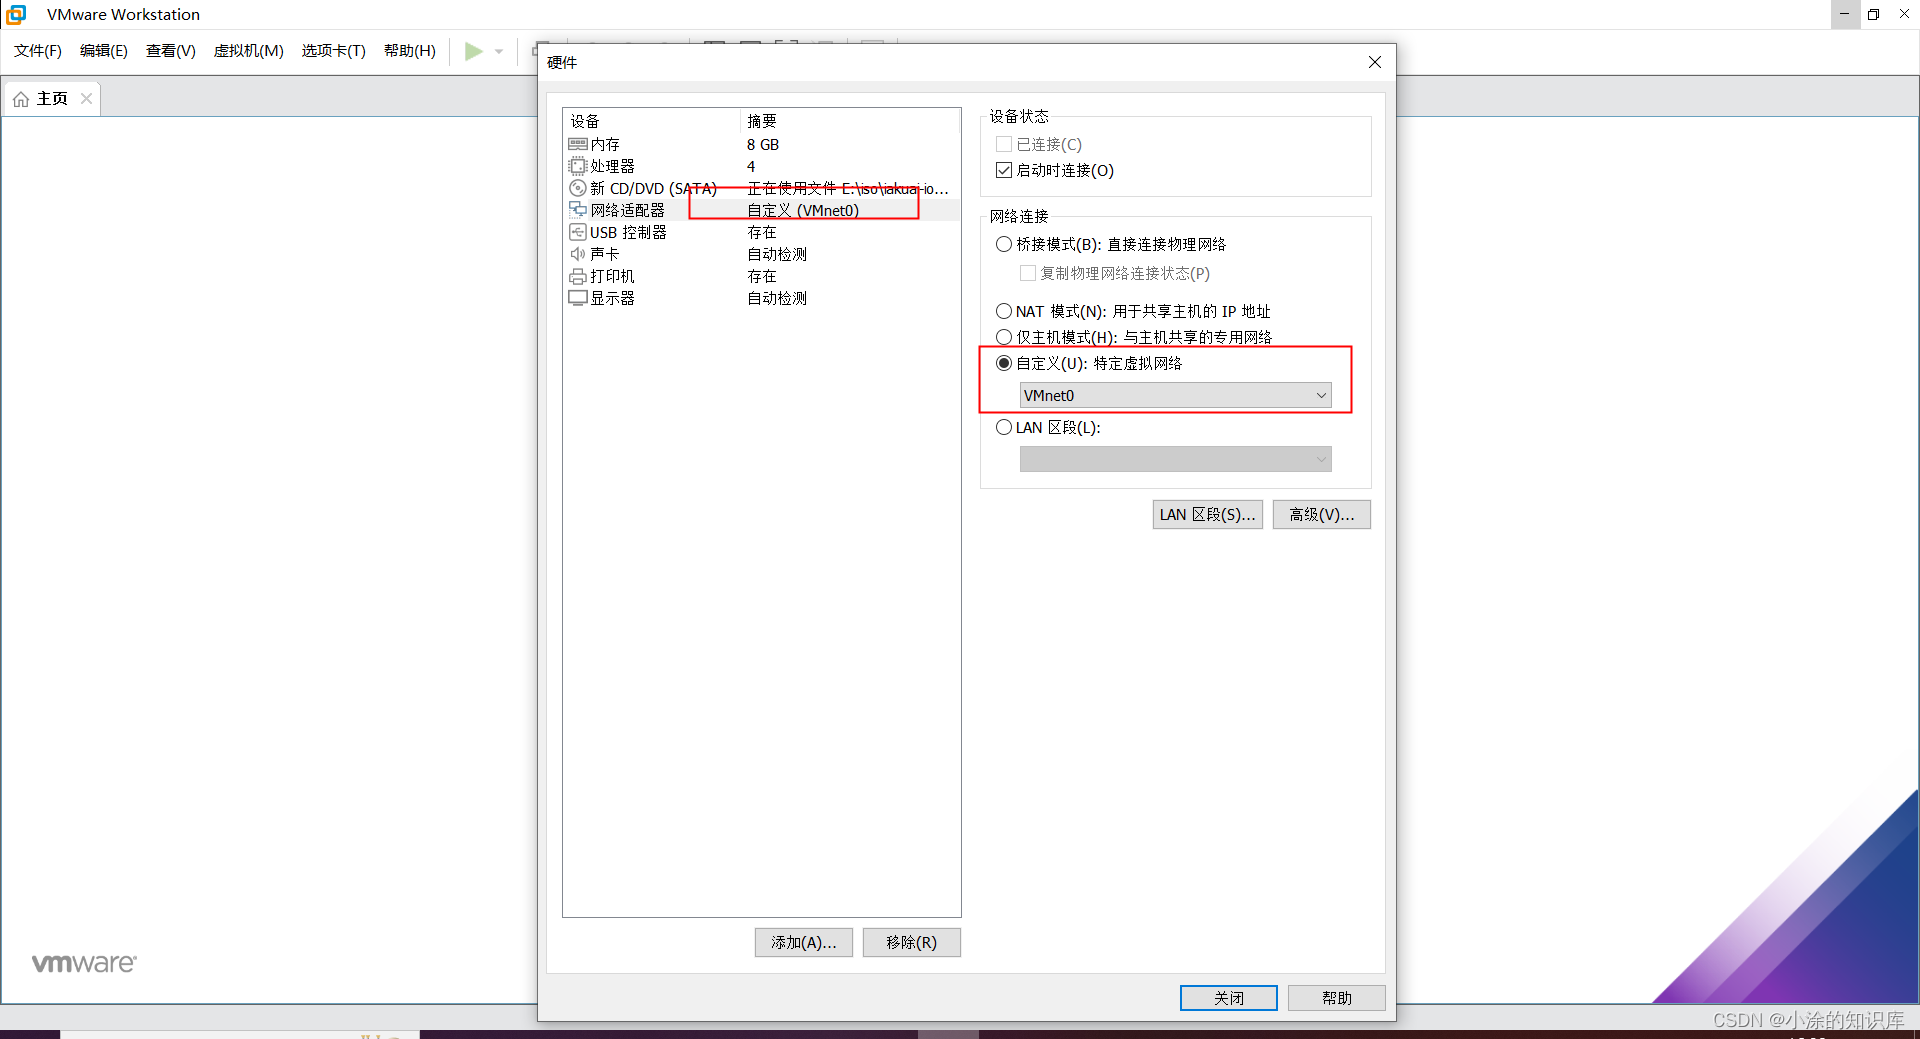
8.虚拟机内存选择8G就可以了,一般来说4G就够了,我这边给它多加一点。处理器数量的话,可以按照自已的情况去选择。
下面到了最重要的地方了,这一步如果错了,后续就会产生很多问题的。网络适配器选择自定义,选择自动桥连,以下图为例。
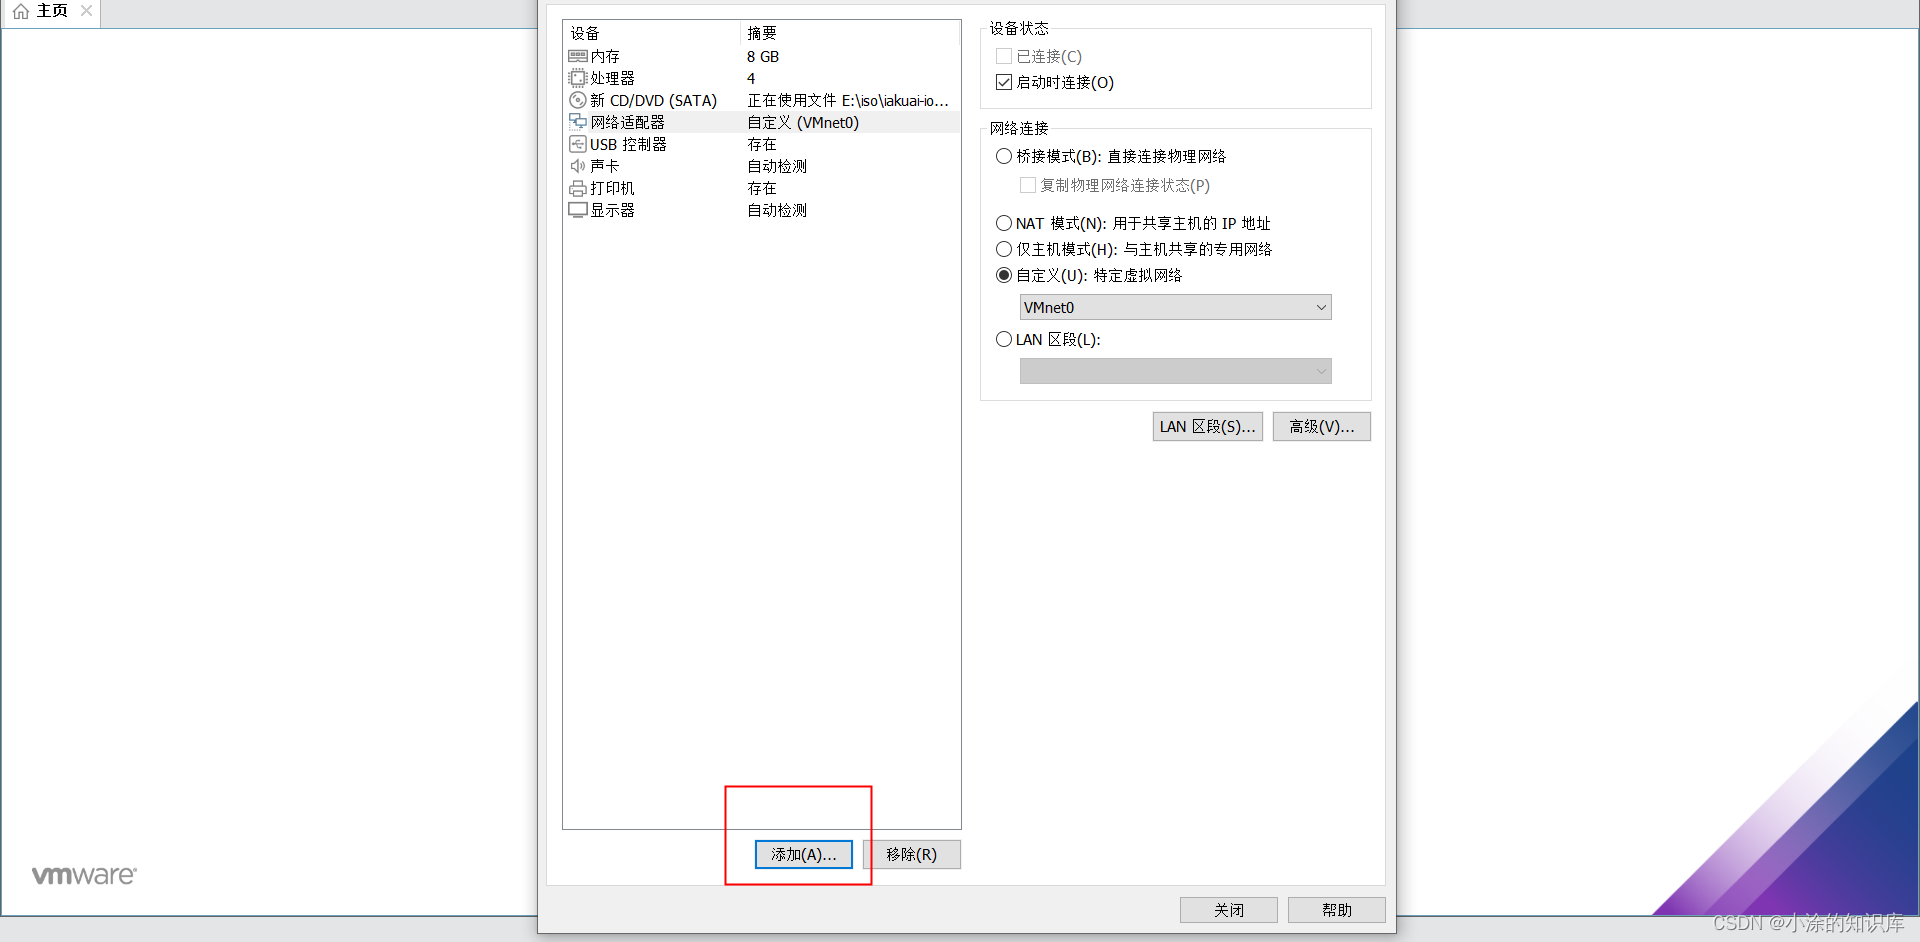
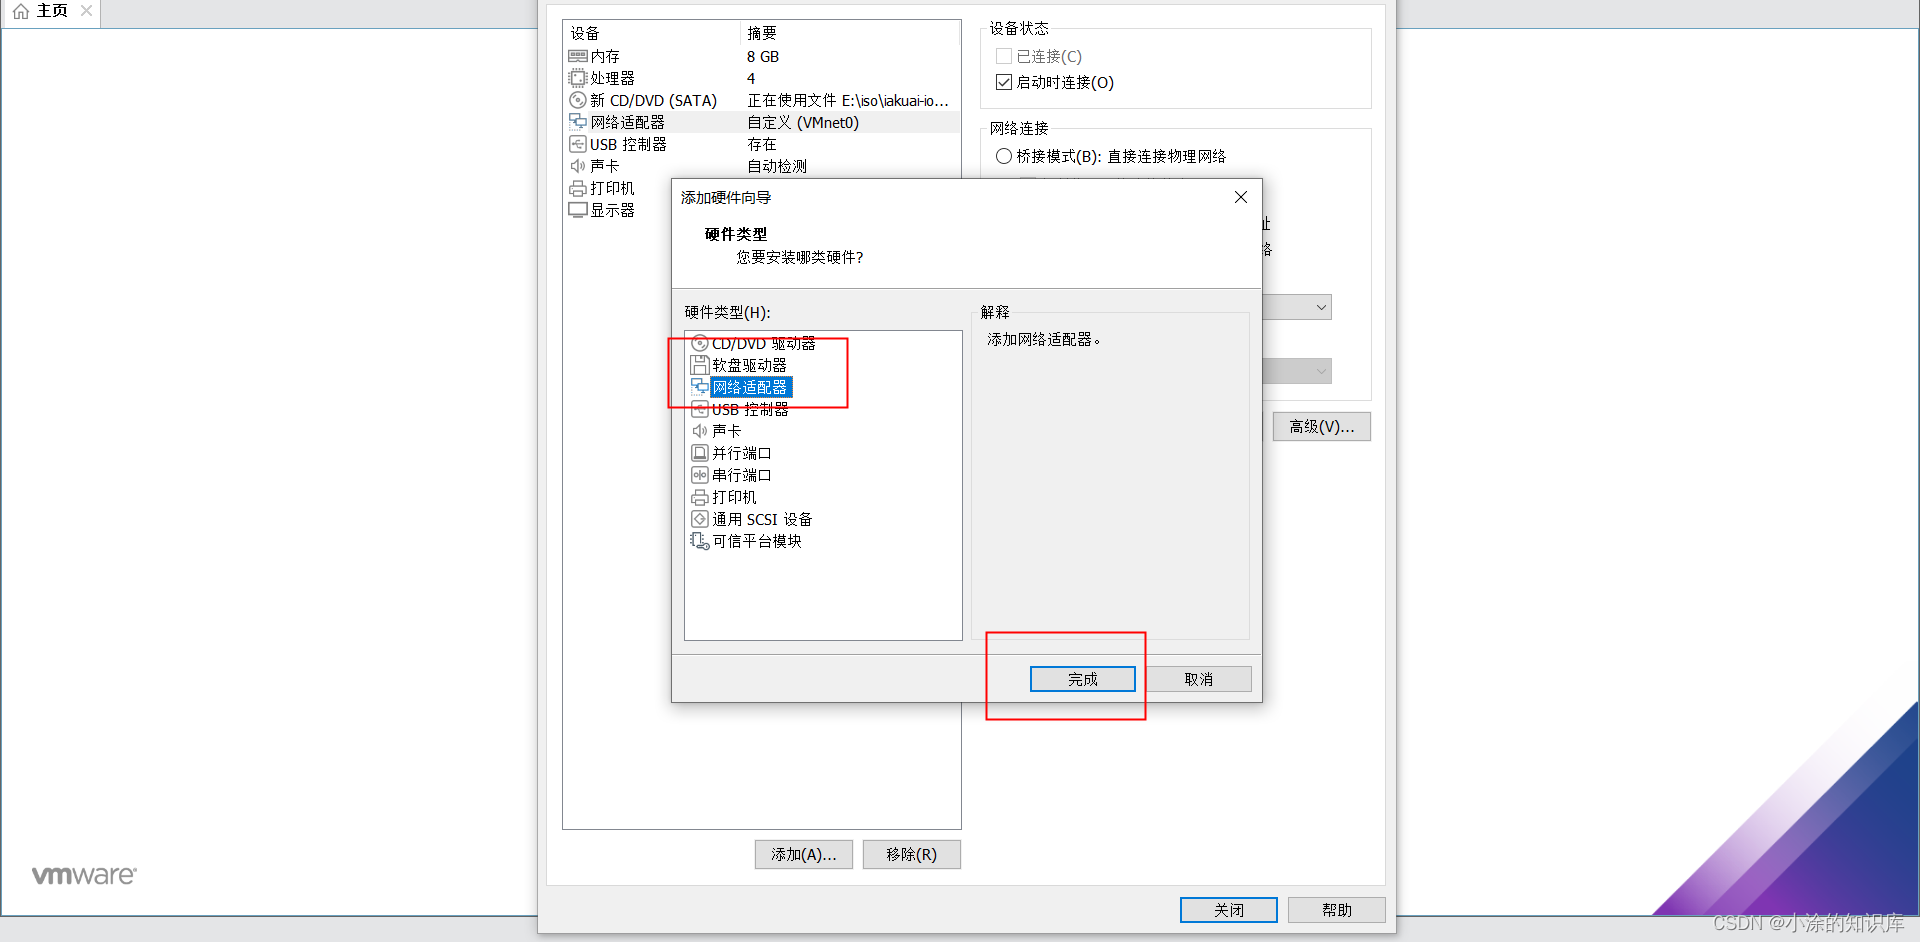
9.选择左下角的添加,来添加虚拟设备
10.选择网络适配器,单击完成,例下图
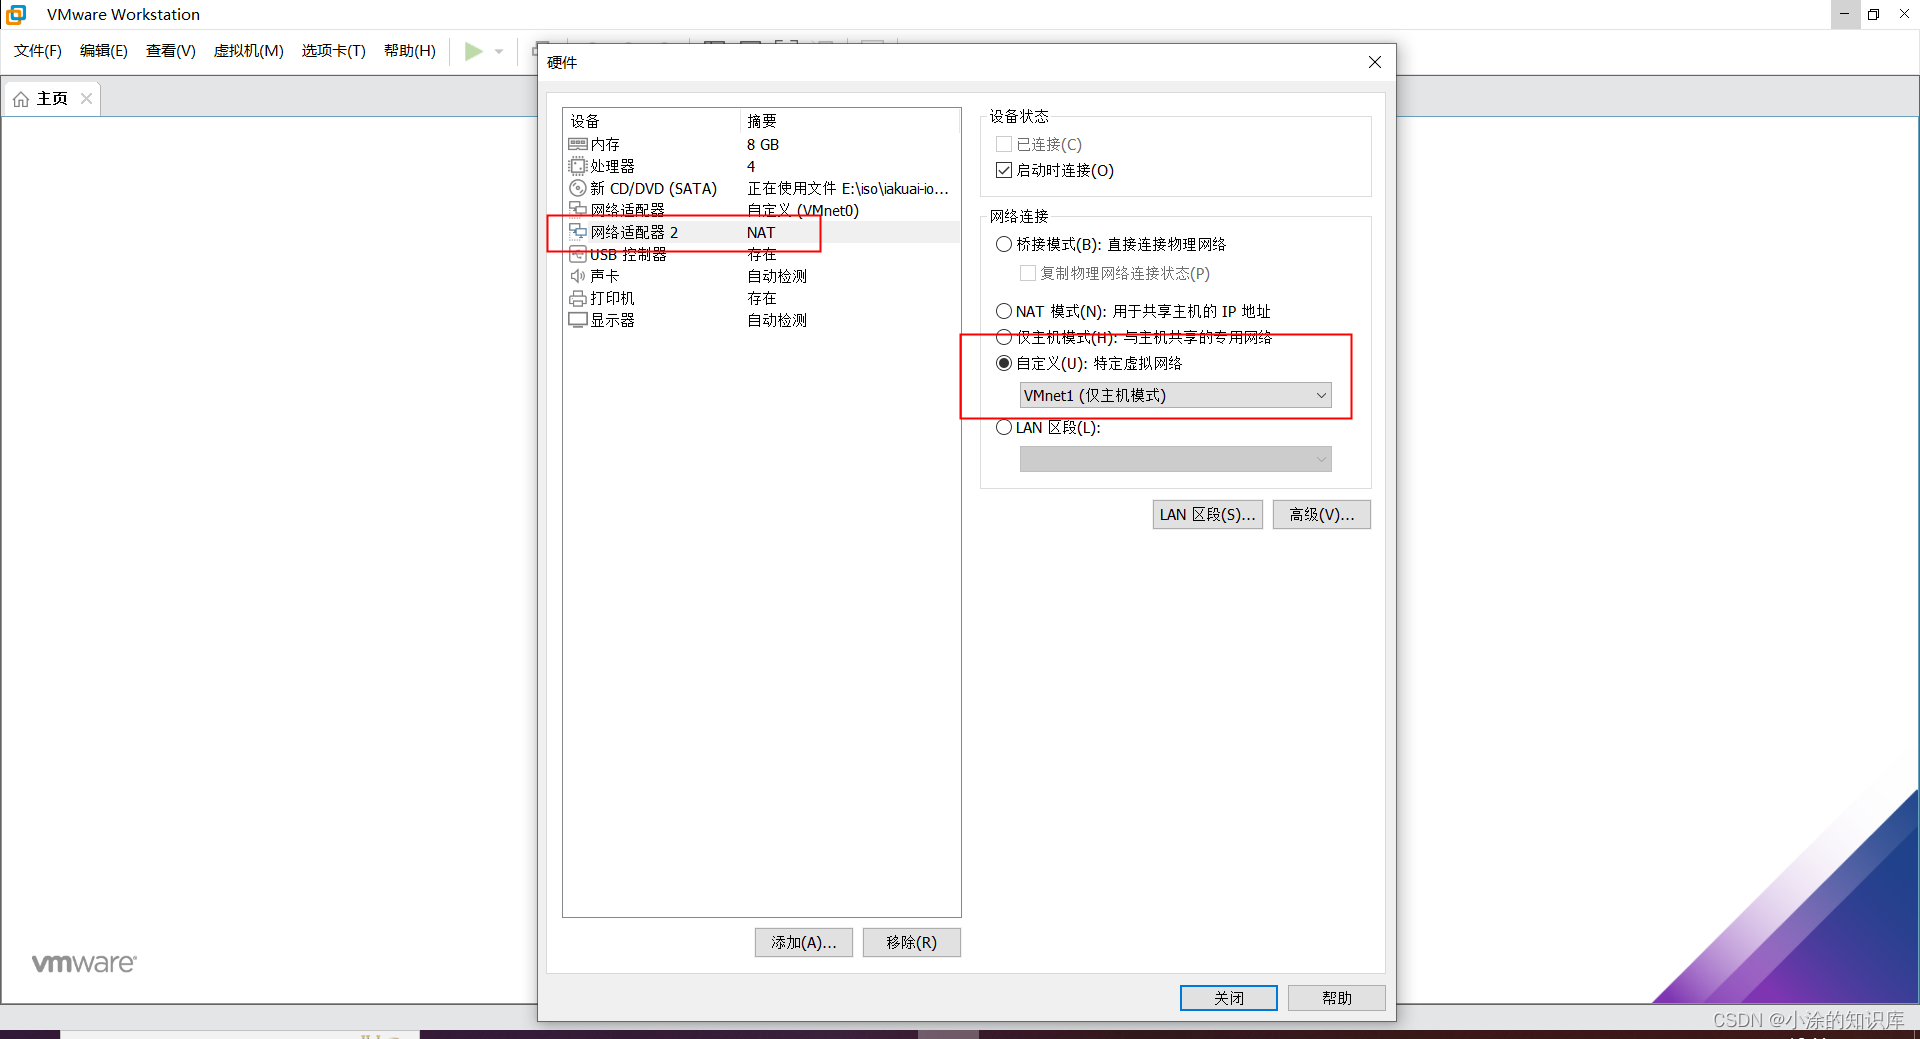
11.新添加的网络适配器,选择自定义,仅主机模式,例下图
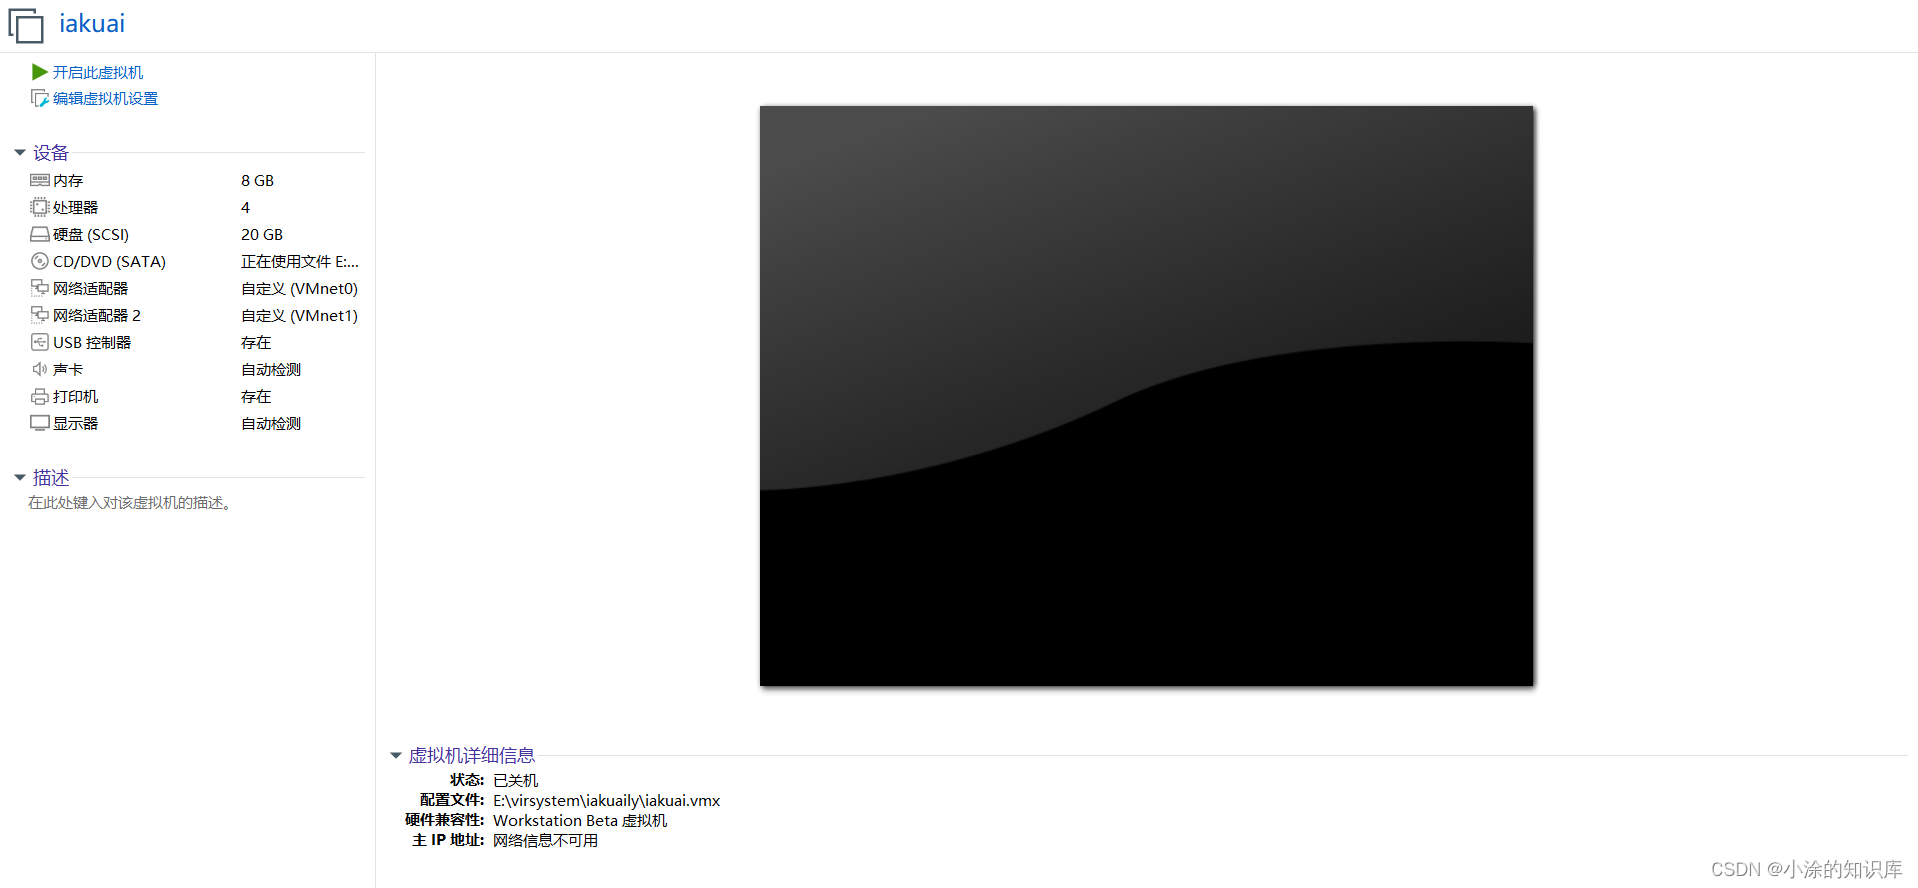
12.下面单击关闭,再单击完成,虚拟机就已经布置好了
iKuai的安装
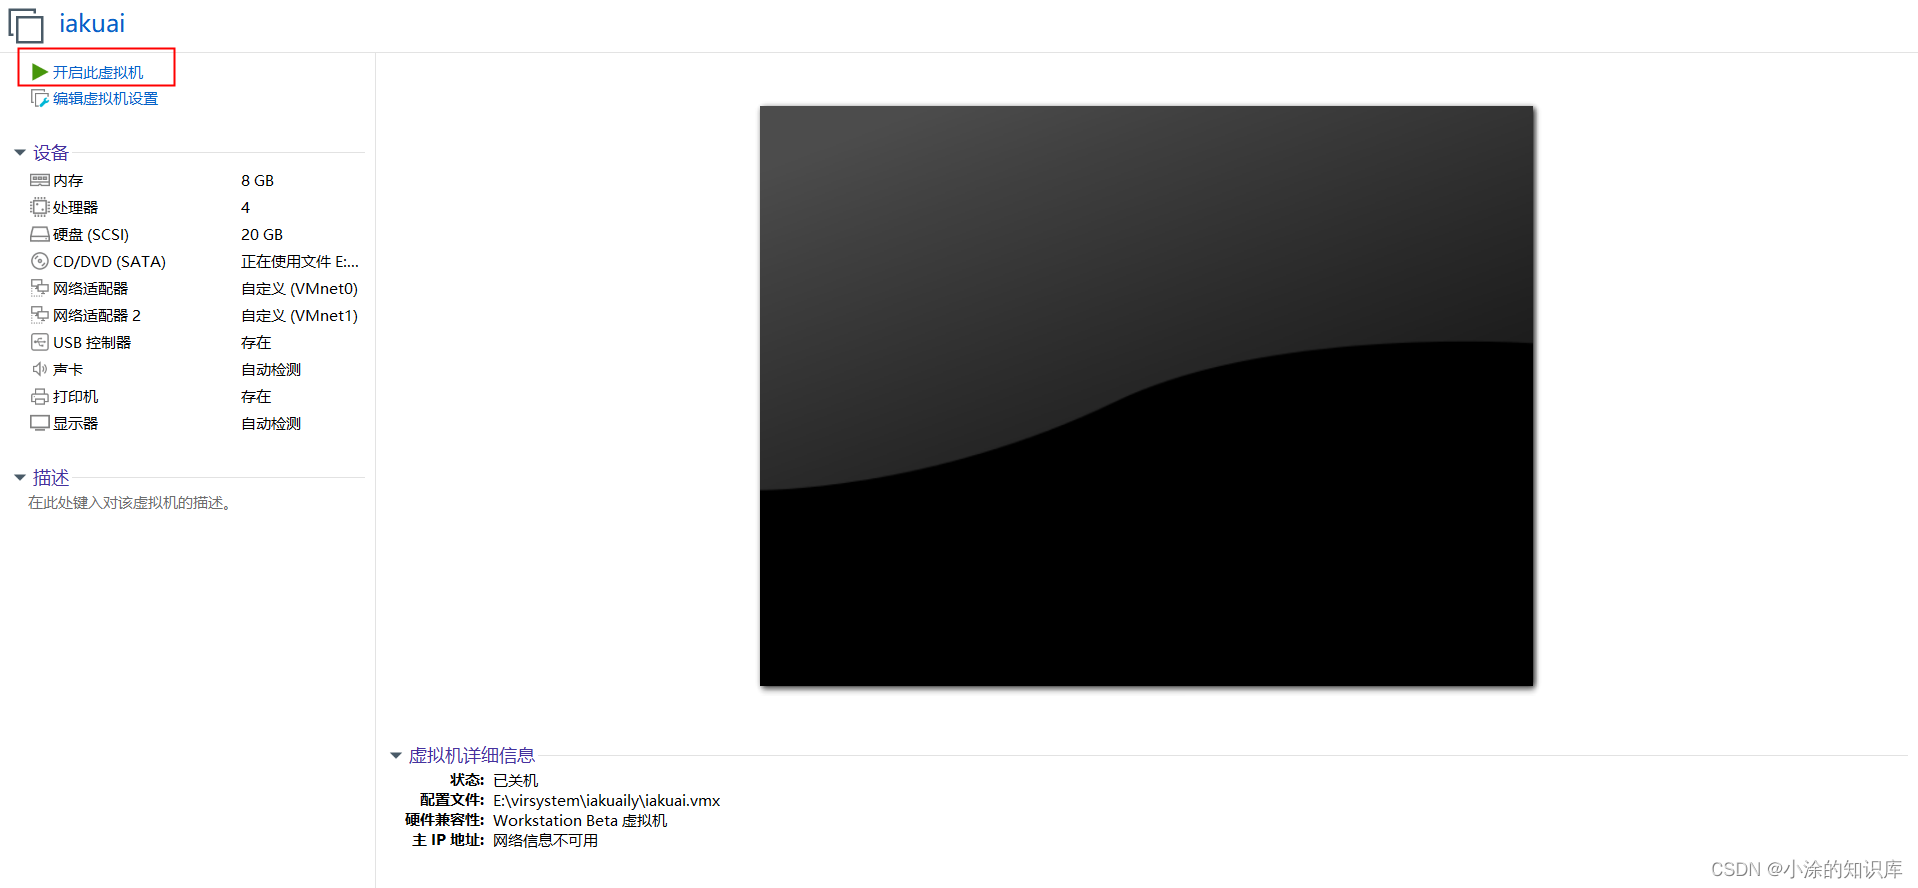
1.开启此虚拟机
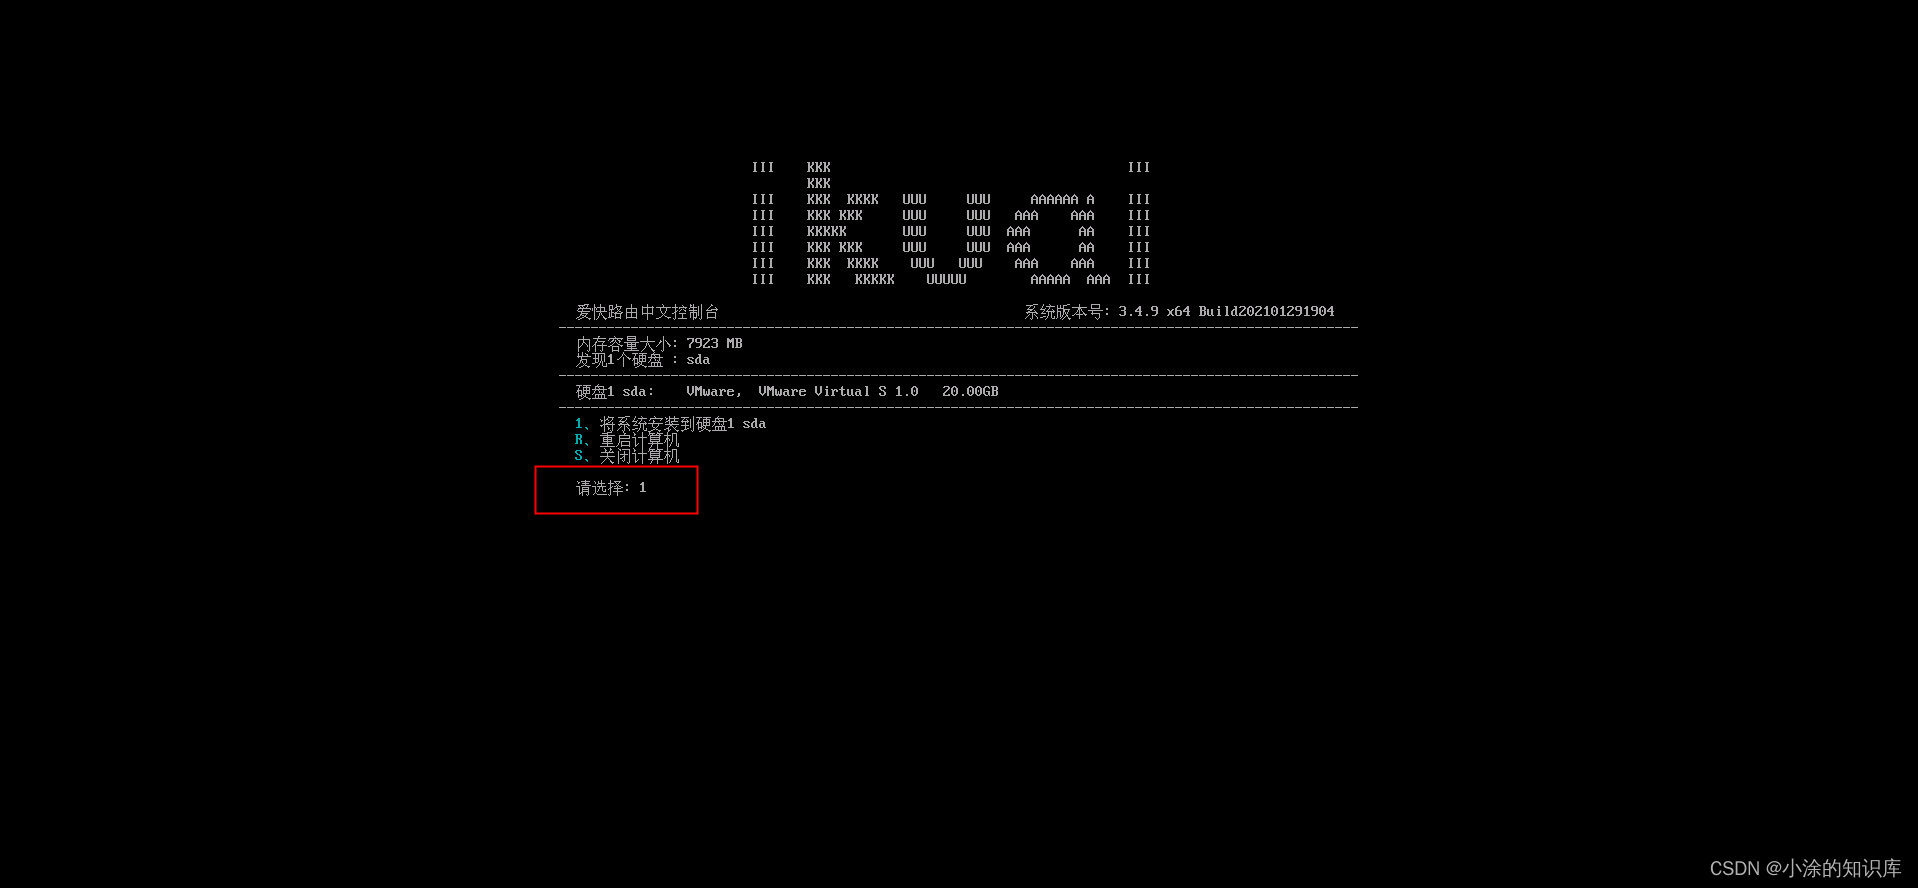
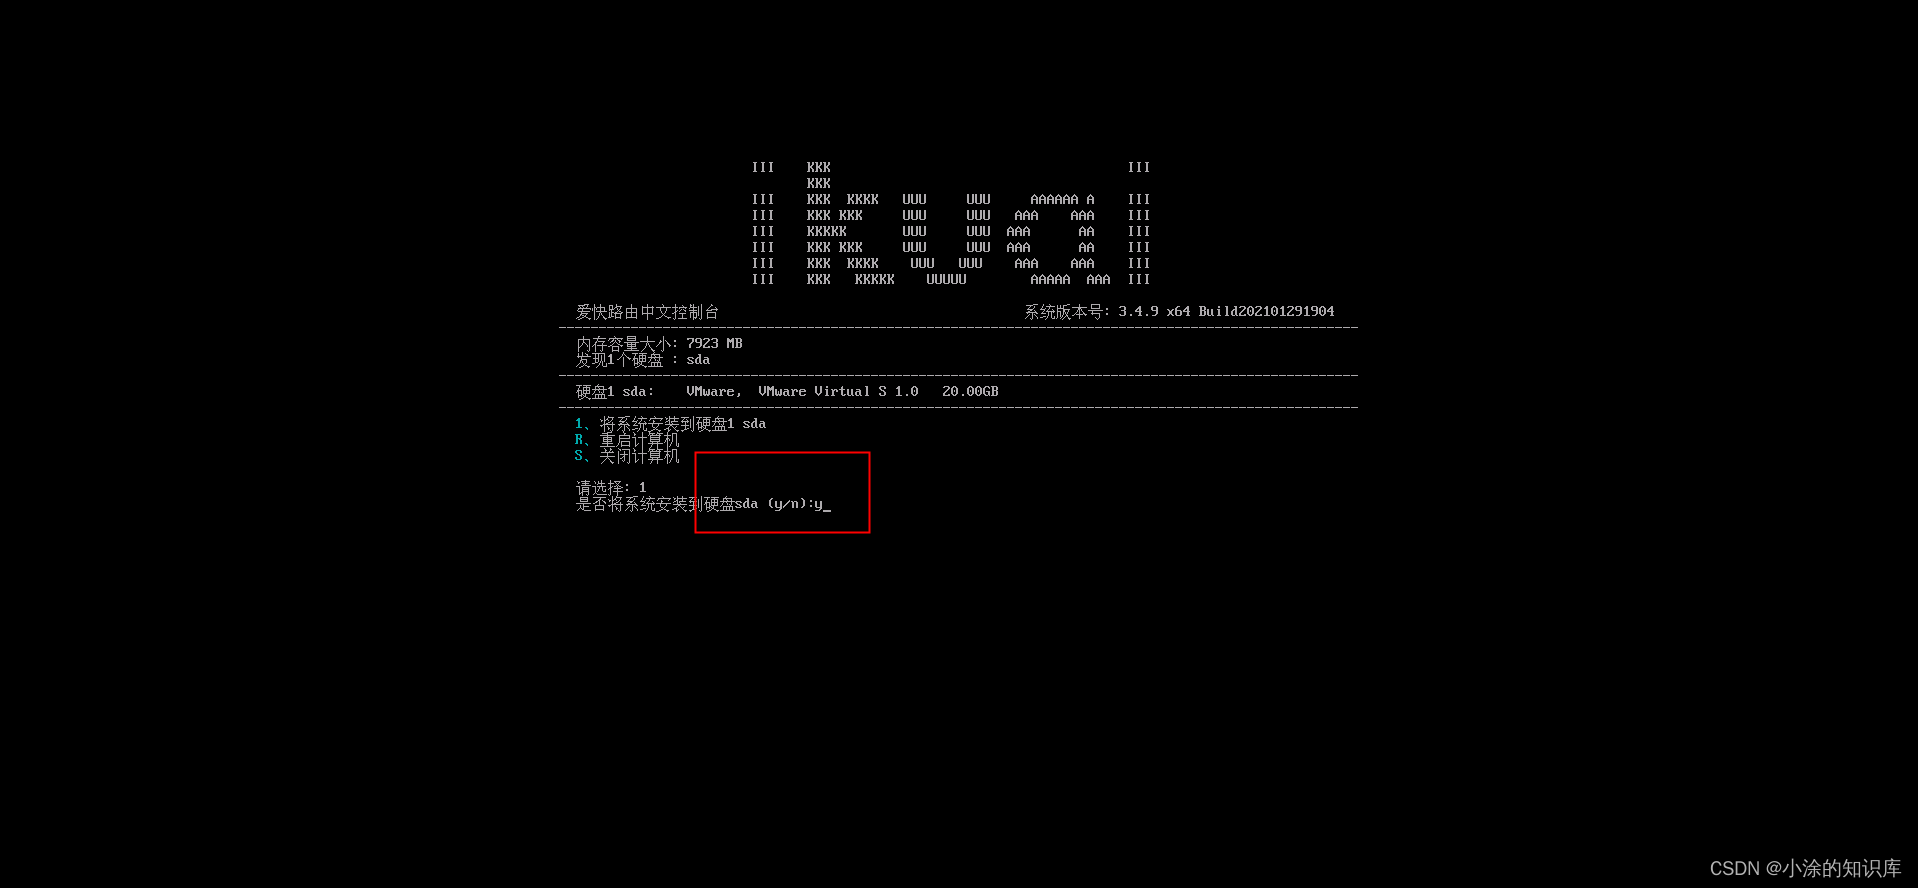
2.开机后,按enter,稍等片刻,就会进入安装界面,如下所示。下面就需要选择安装了,直接输入1,按下enter,之后会跳转到是否确认安装,直接输入y,回车就可以了。马上就会开始安装
3.出现这张图说明你已经安装成功了,那么恭喜你,你已经完成了一大步了。
 iKuai的配置
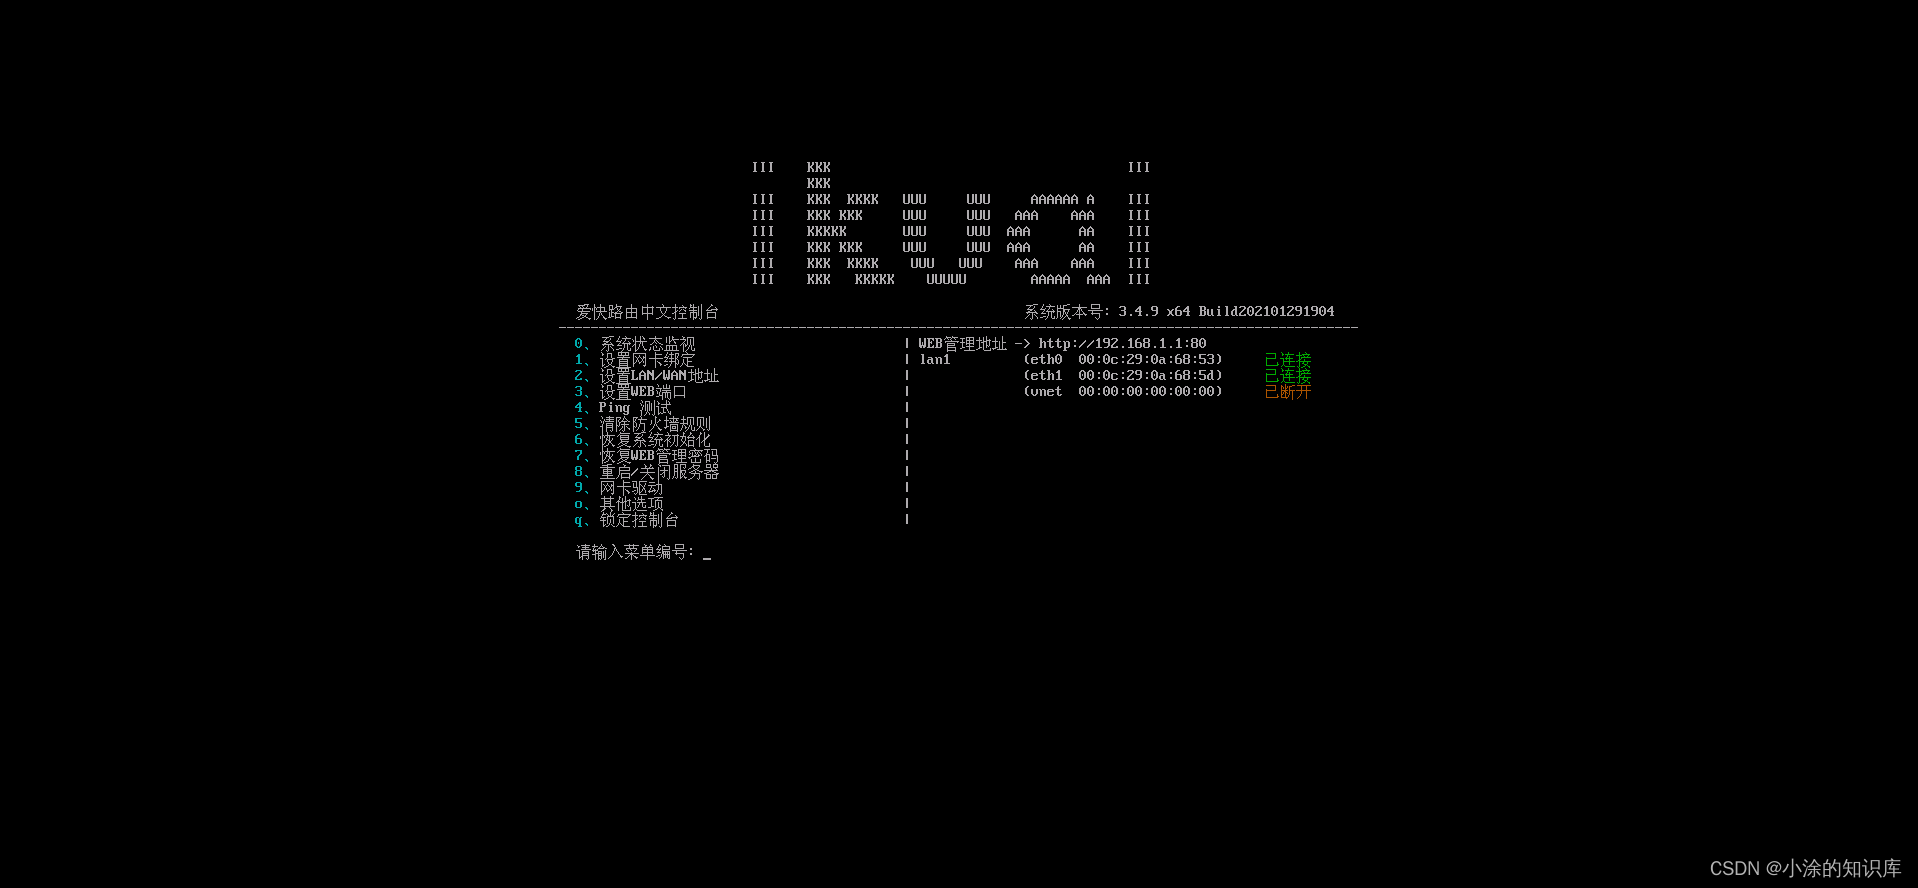
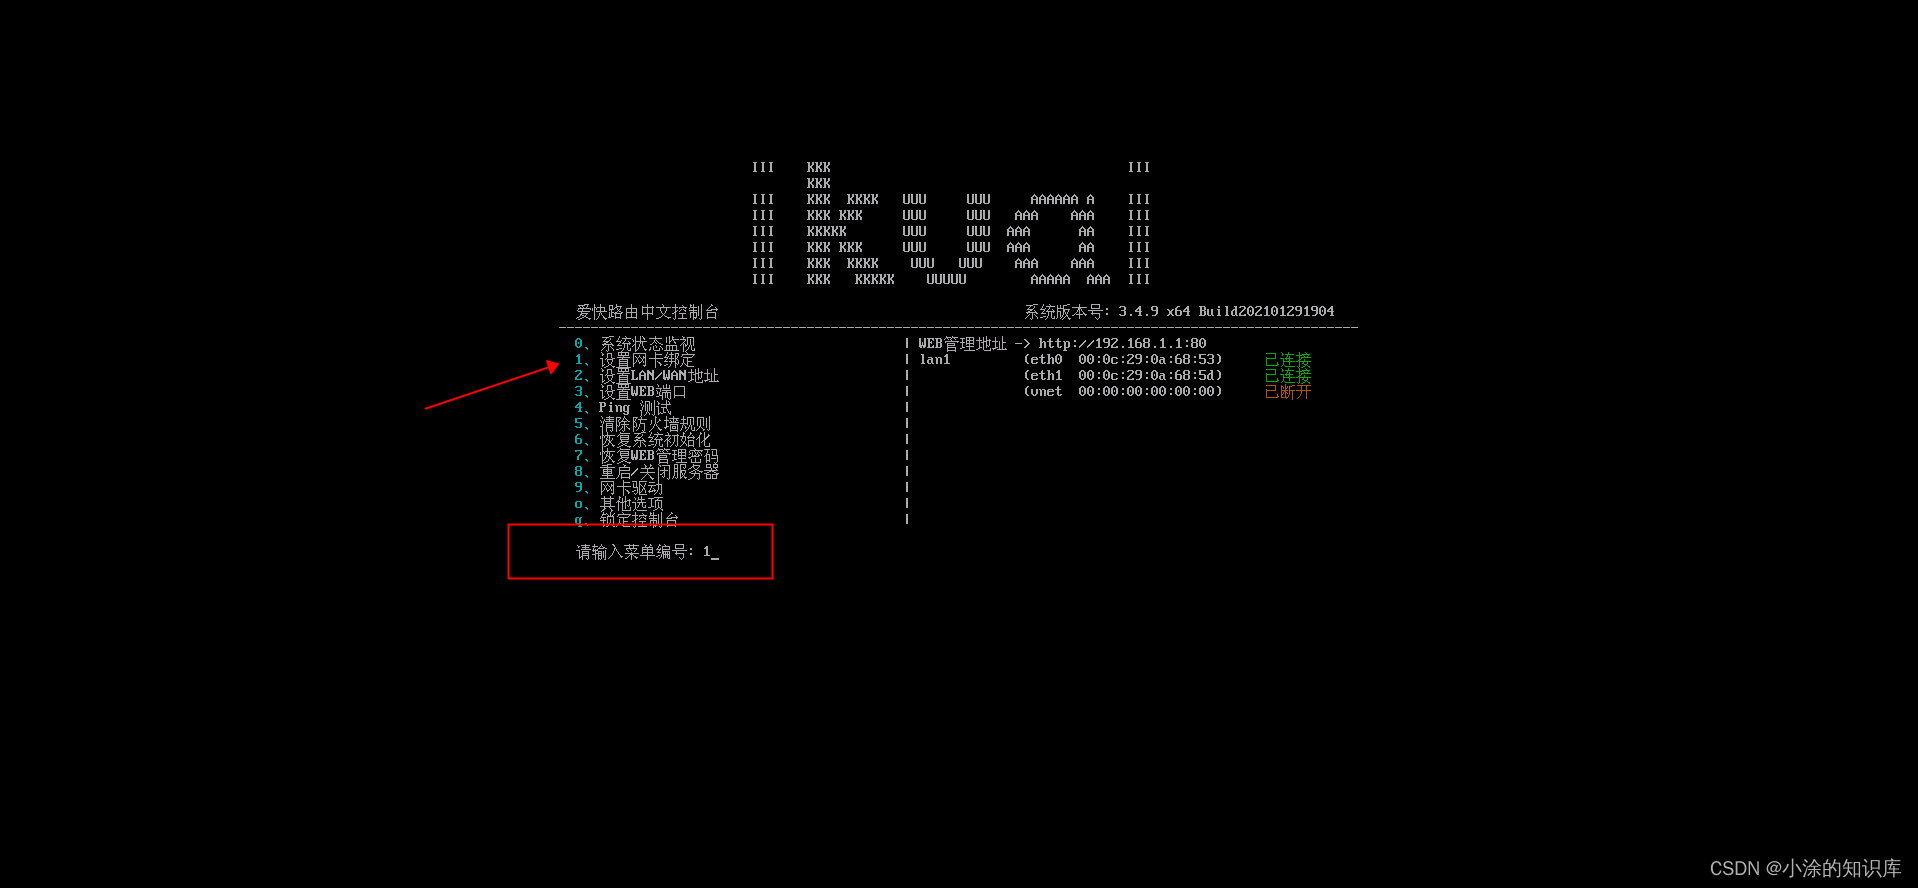
1.下面开始设置网卡,我们需要将系统默认的网卡(eth0)解绑,然后再绑定我们需要使用的网卡。
在菜单栏输入1,然后回车,进入网卡绑定菜单
下面输入del lan1,回车,解绑网卡

下面继续输入set lan1 eth1,然后回车,绑定我们需要的网卡
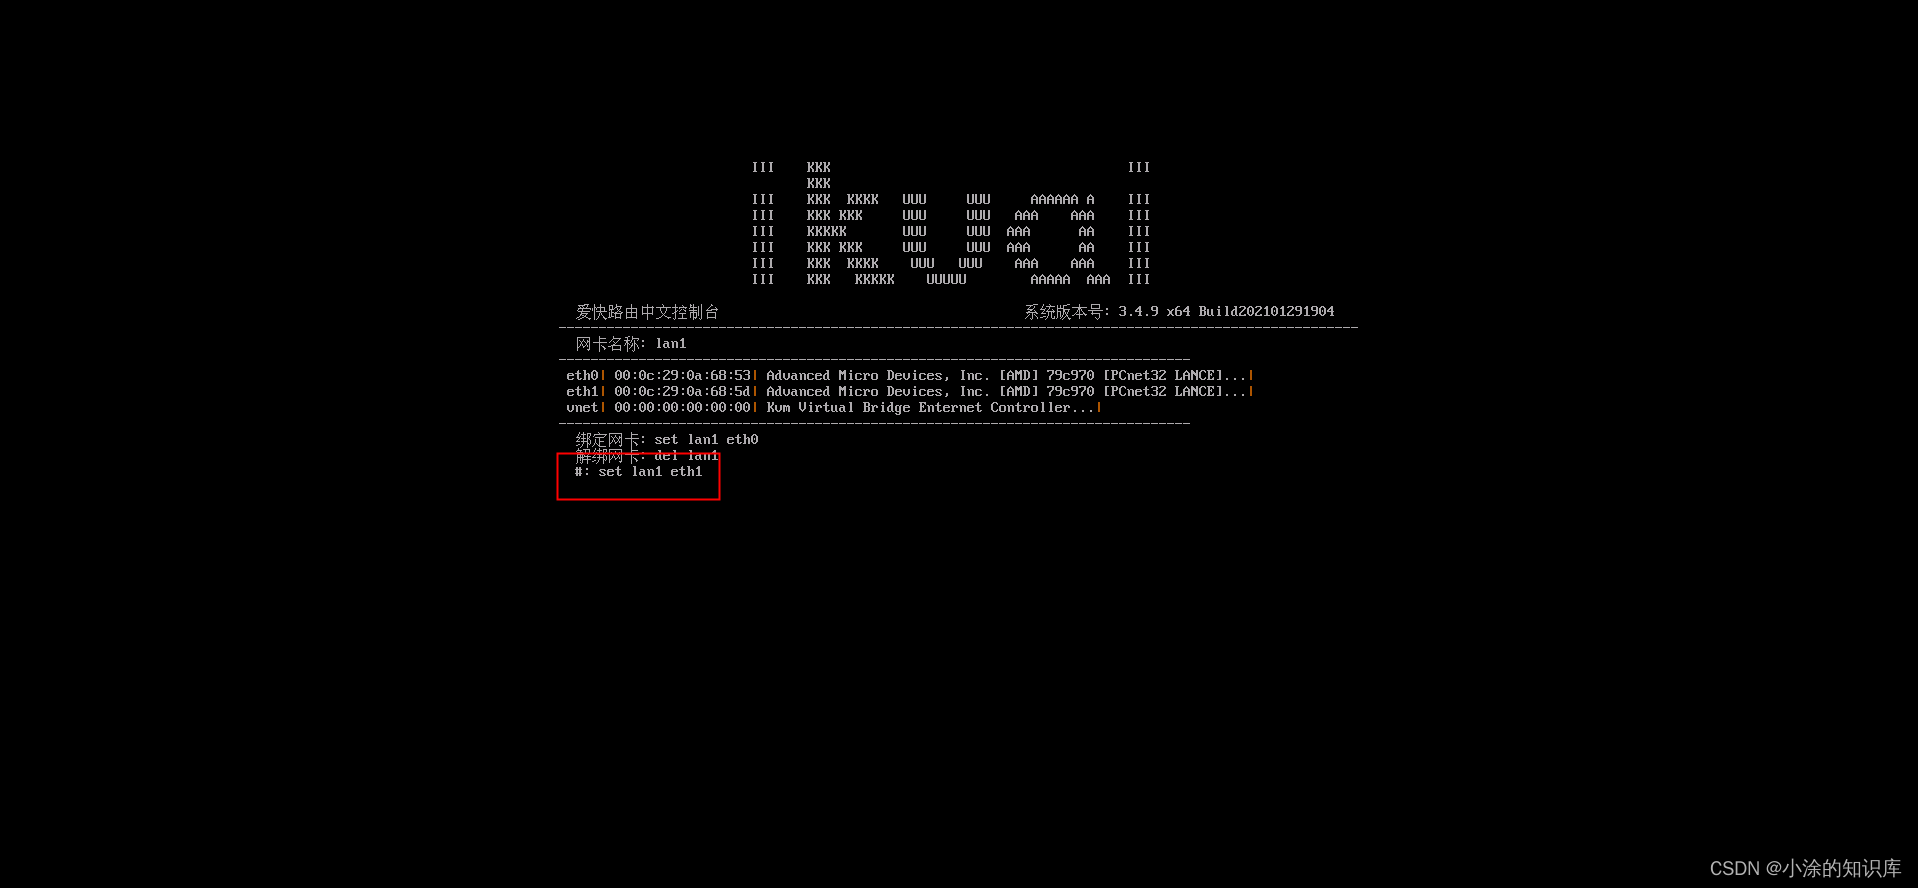
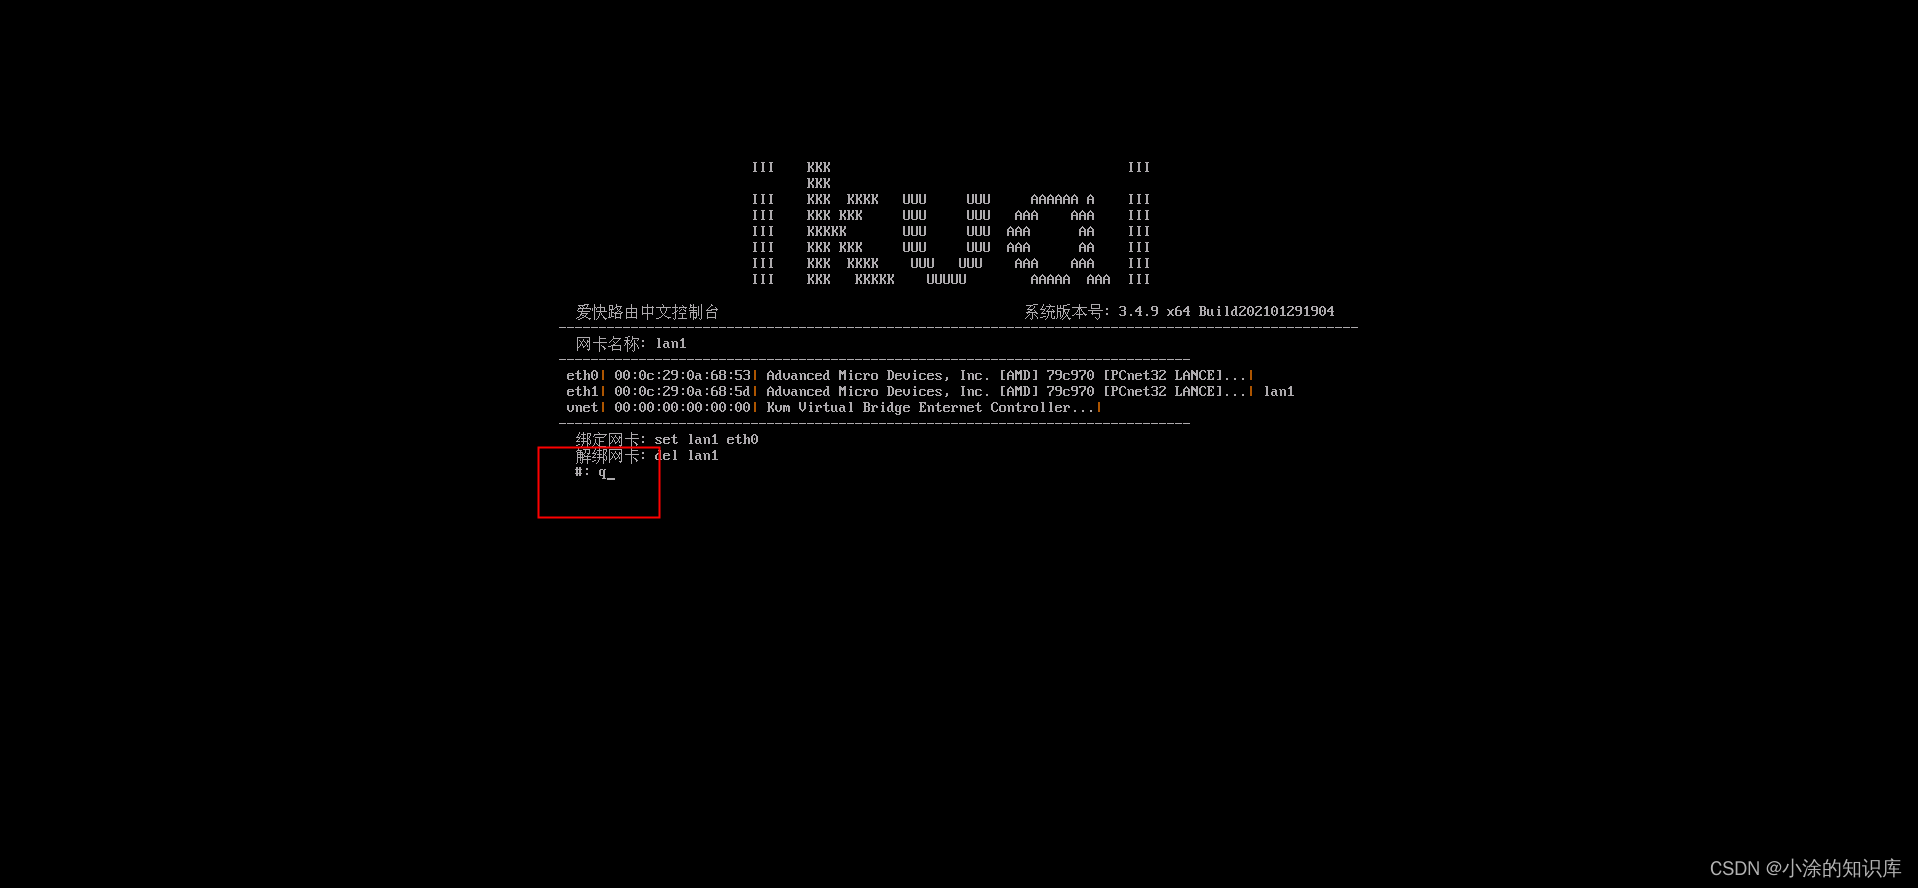
输入q,回车,返回原本菜单
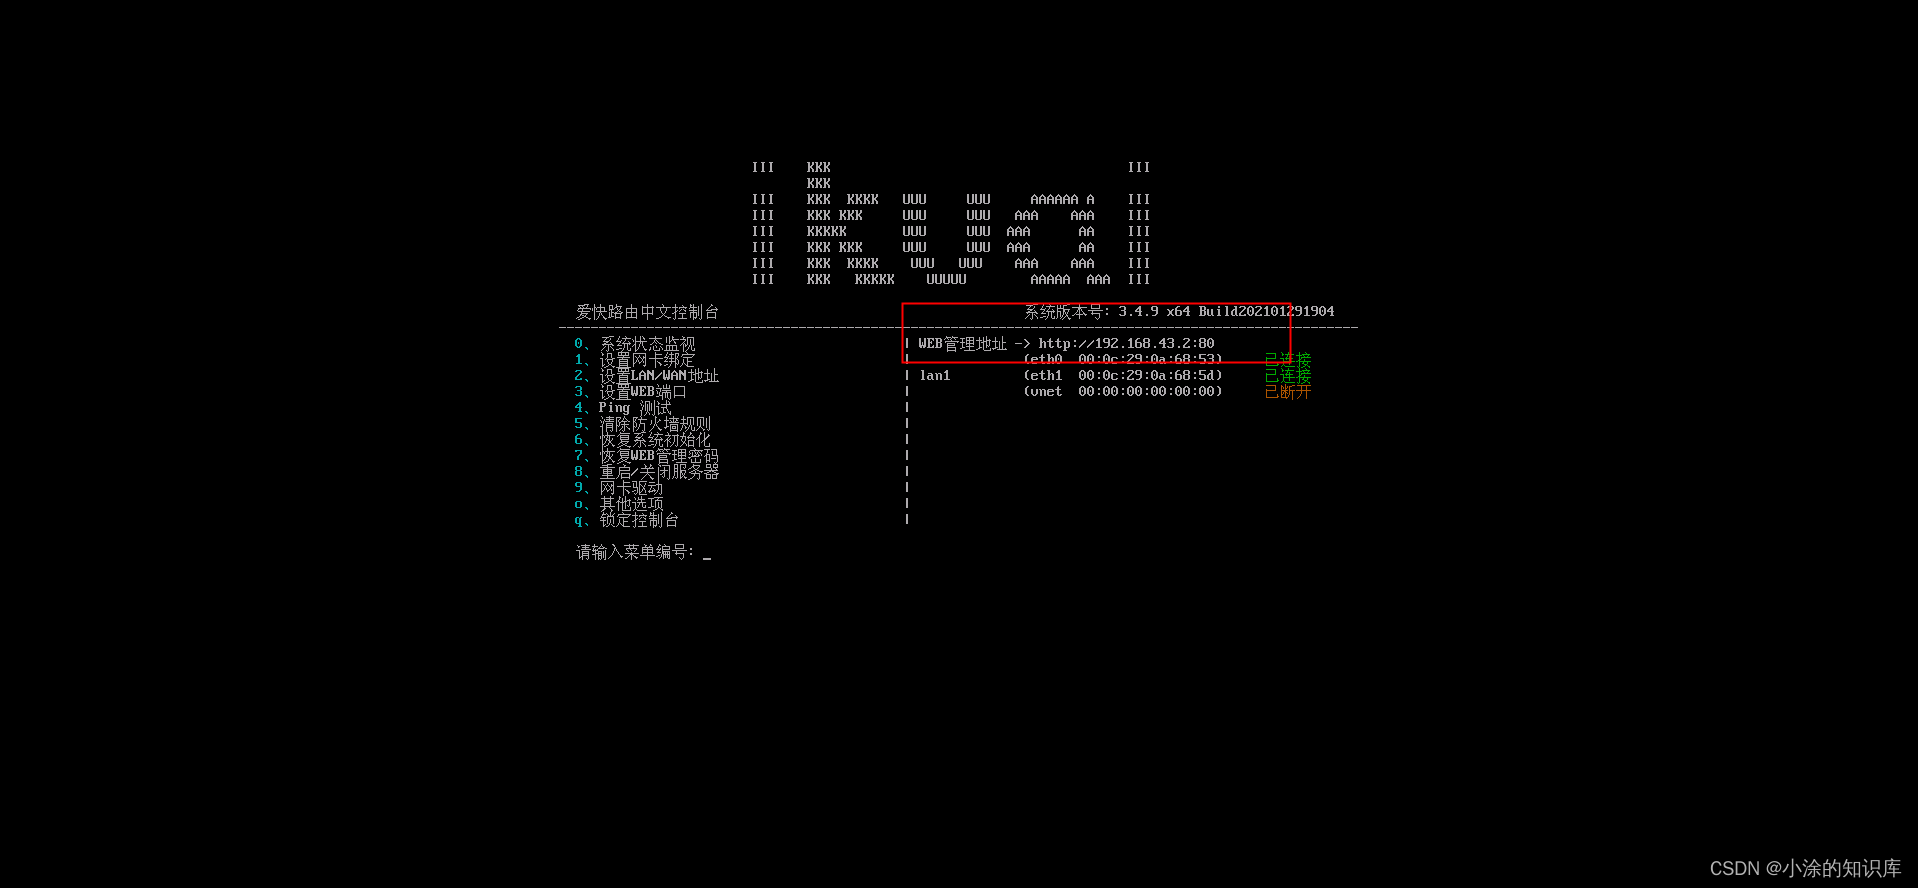
 2.下面我们需要设置软路由登录ip地址,原来的地址也是可以使用的,但我们为了防止和路由器的登录地址重合,我们选择改掉爱快的默认登录地址。
在菜单中输入2(回车)
 下面输入菜单编号0并回车,接下来输入我们需要变更为的ip地址,我这边输入是192.168.43.2,然后回车,下面就会显示设置成功的提示,下面继续输入q,并且回车,就会回到初始菜单

在初始界面我们就已经可以看出,登录地址已经改成我们设置的地址了
iKuai的登录
1.打开浏览器,在浏览器中输入之前设置的登录ip,我这边是192.168.43.2,打开web登录后台
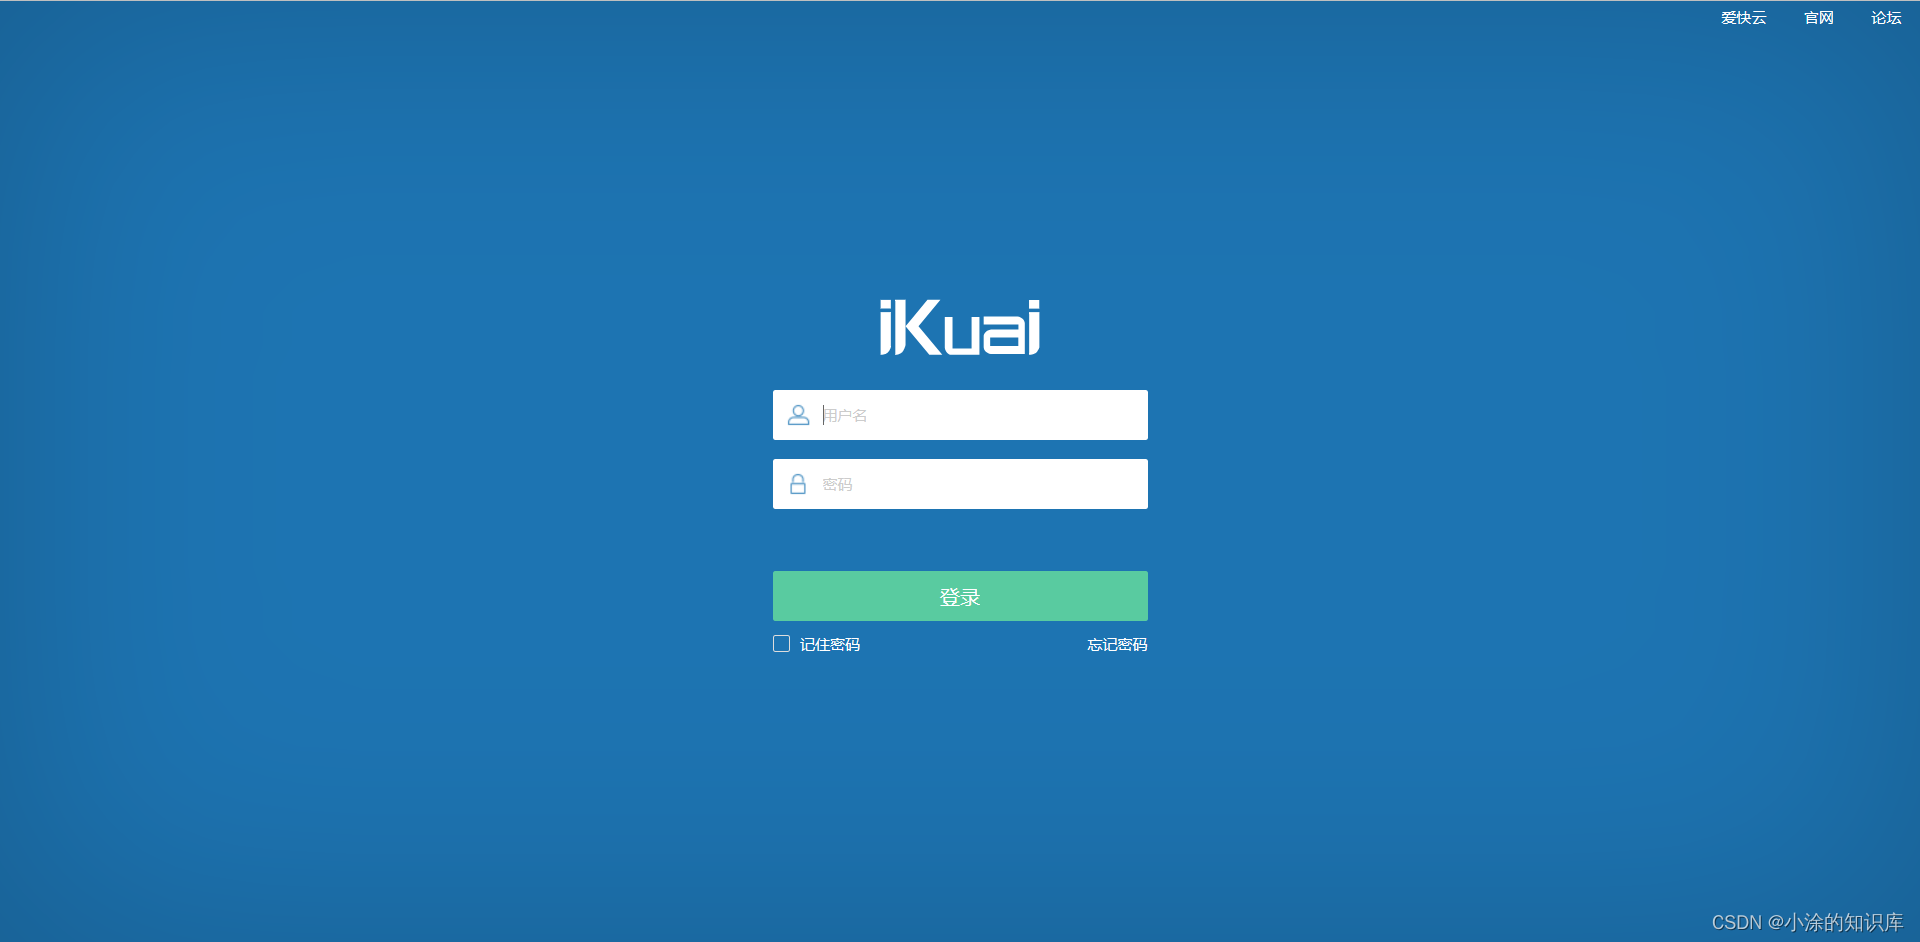
下面输入用户名和密码,iKuai刚刚安装成功,用户名和密码都是默认的admin。输入用户名和密码,点击登录。这个时候回提示你需要更改原始密码
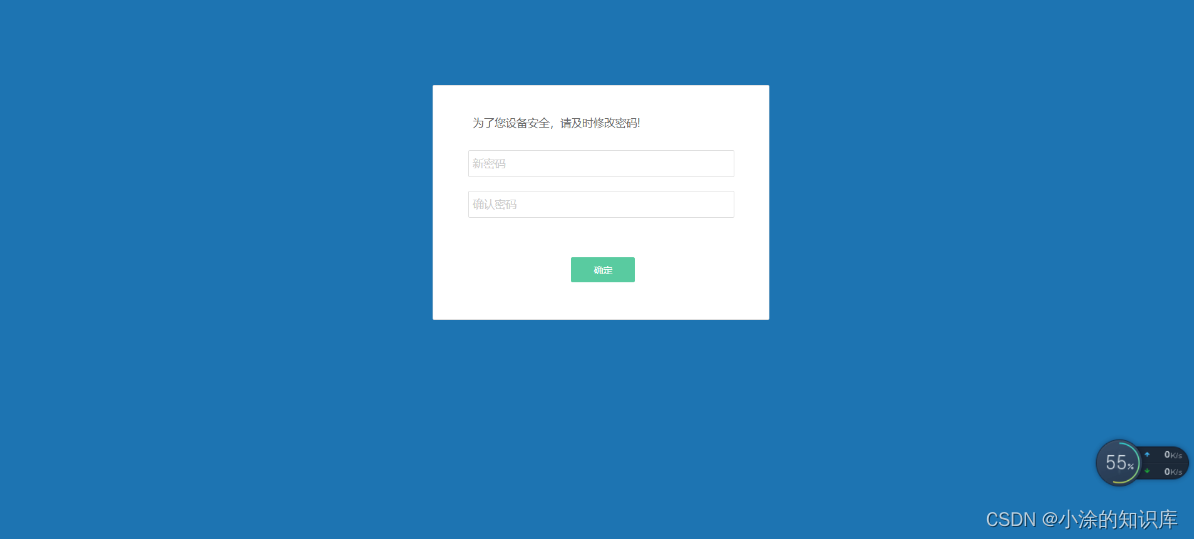 改好密码后,就可以直接进去后台了。这个时候我们基本已经成功了。但我们的外网还是没有连接,下一步就需要我们配置外网了
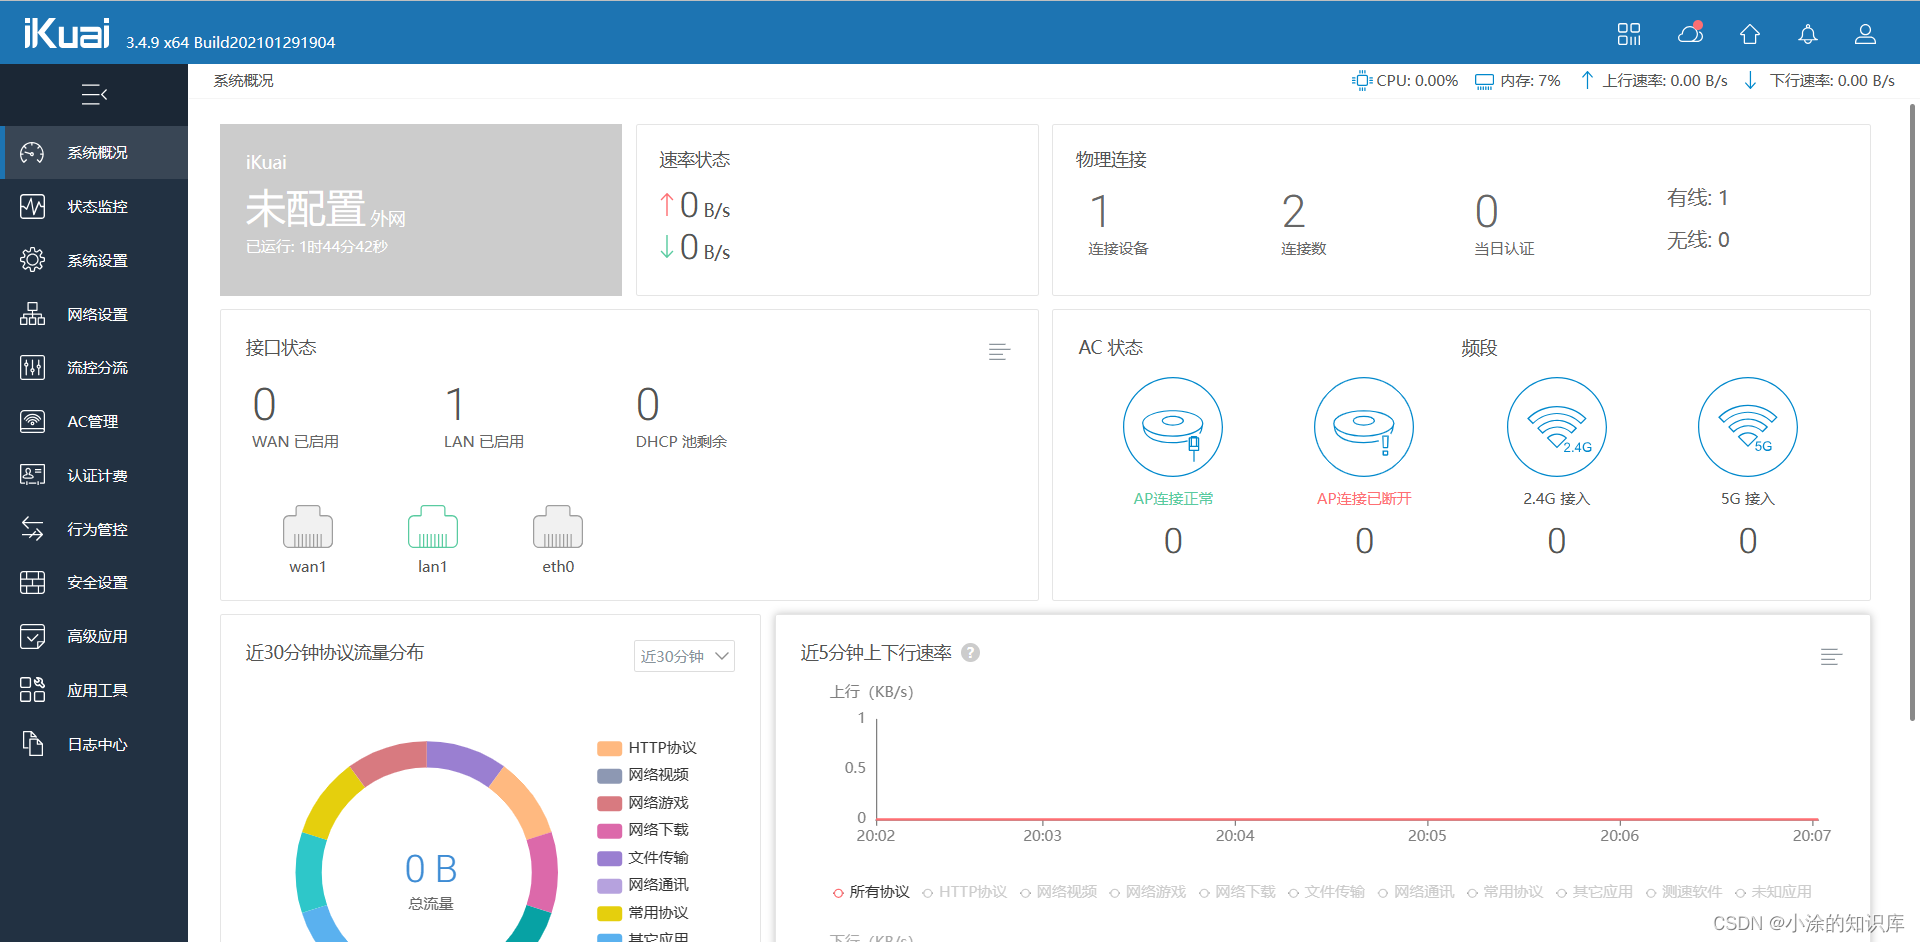
iKaui的外网配置
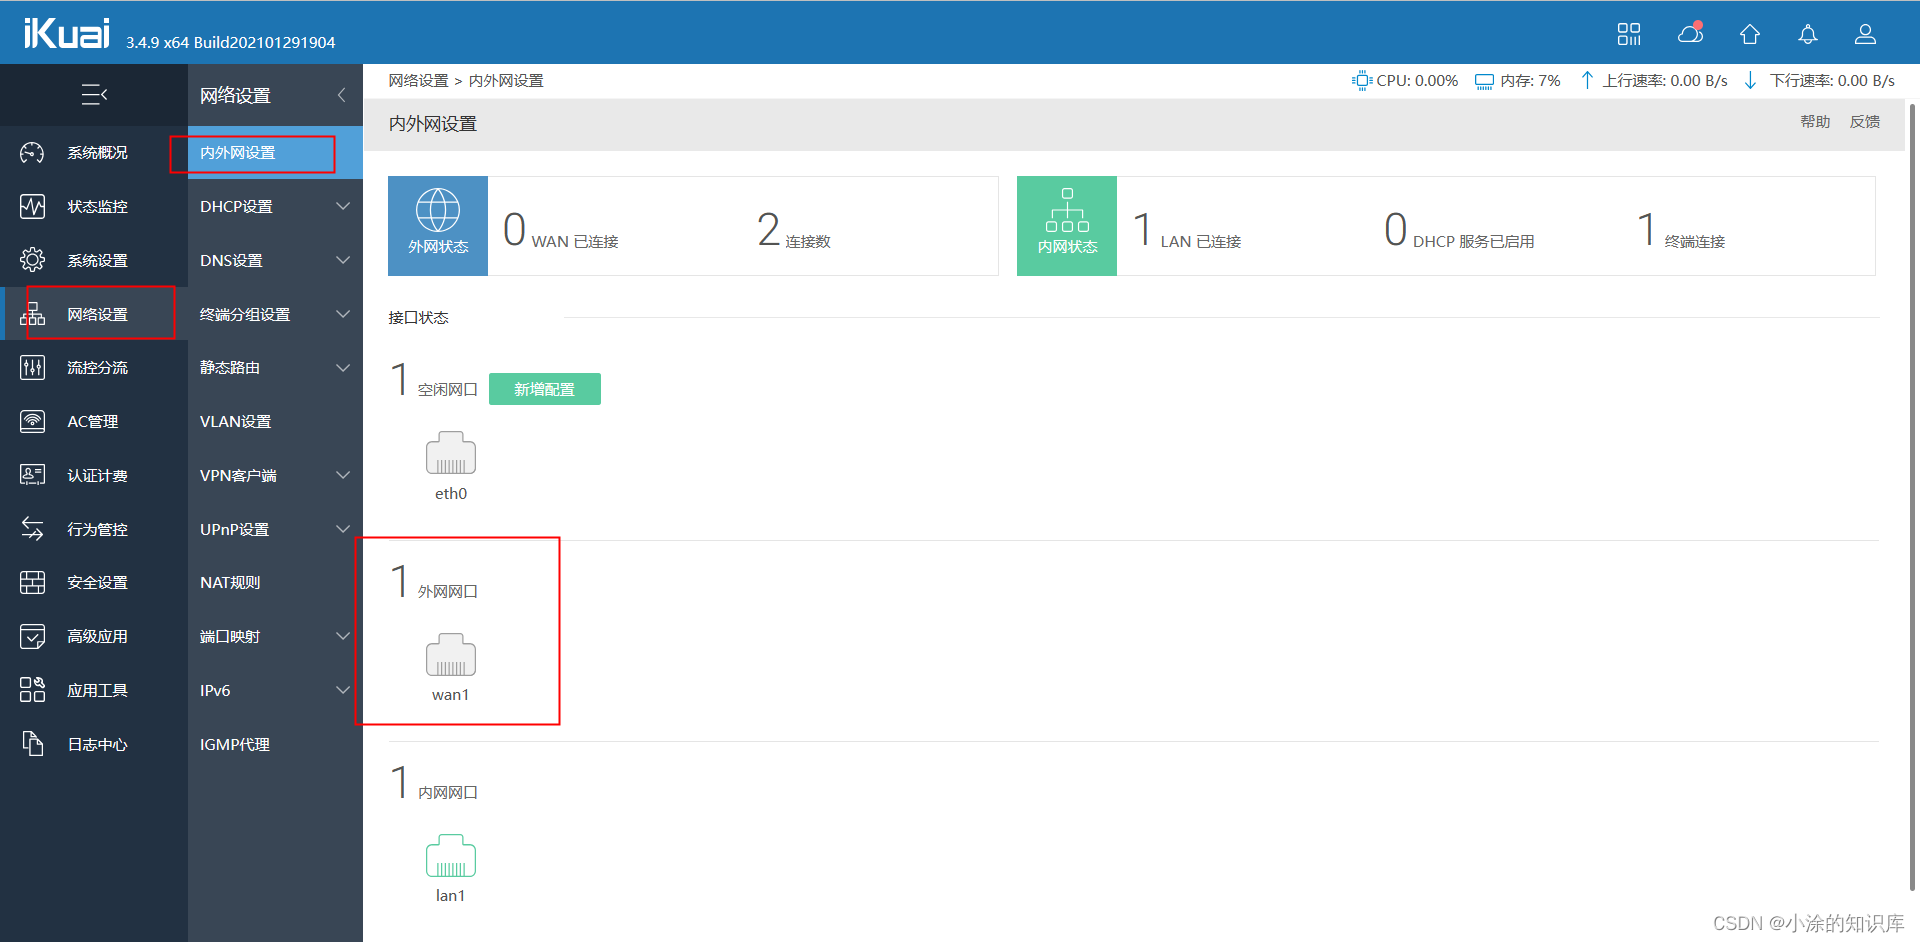
1.选择网络设置>内外网设置>外网网卡口,如下图所示
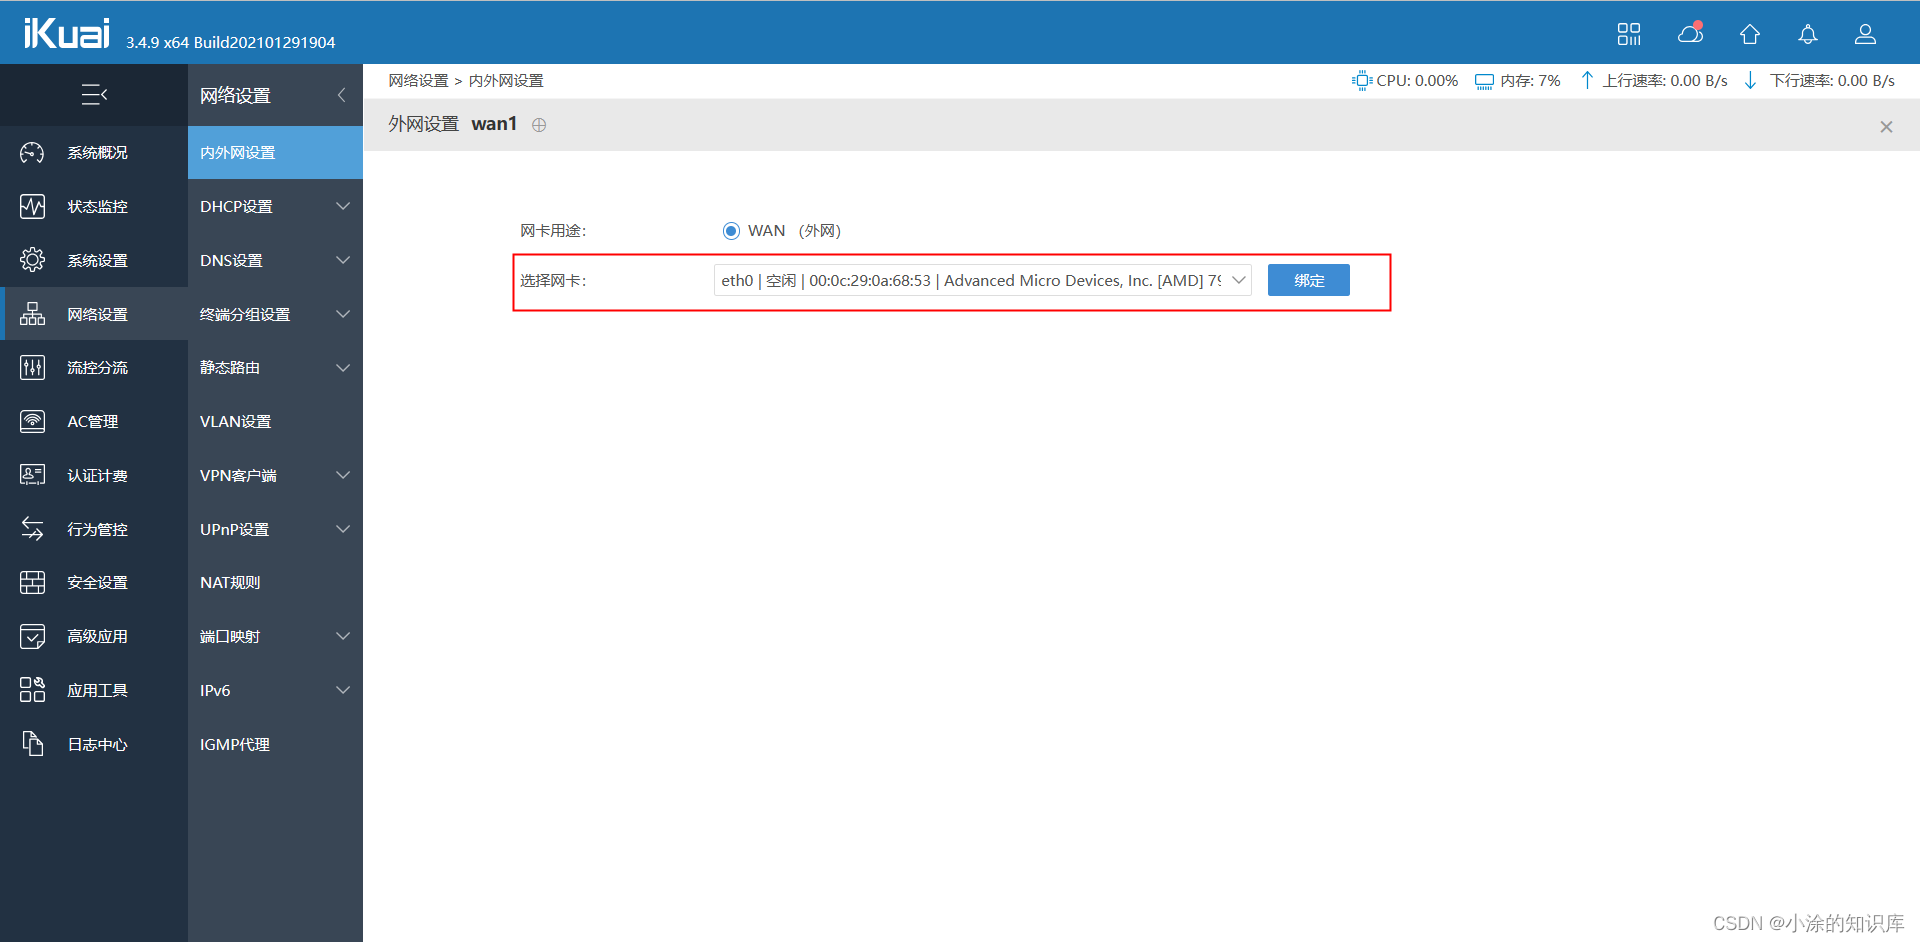
2.选择网卡eth0,点击绑定
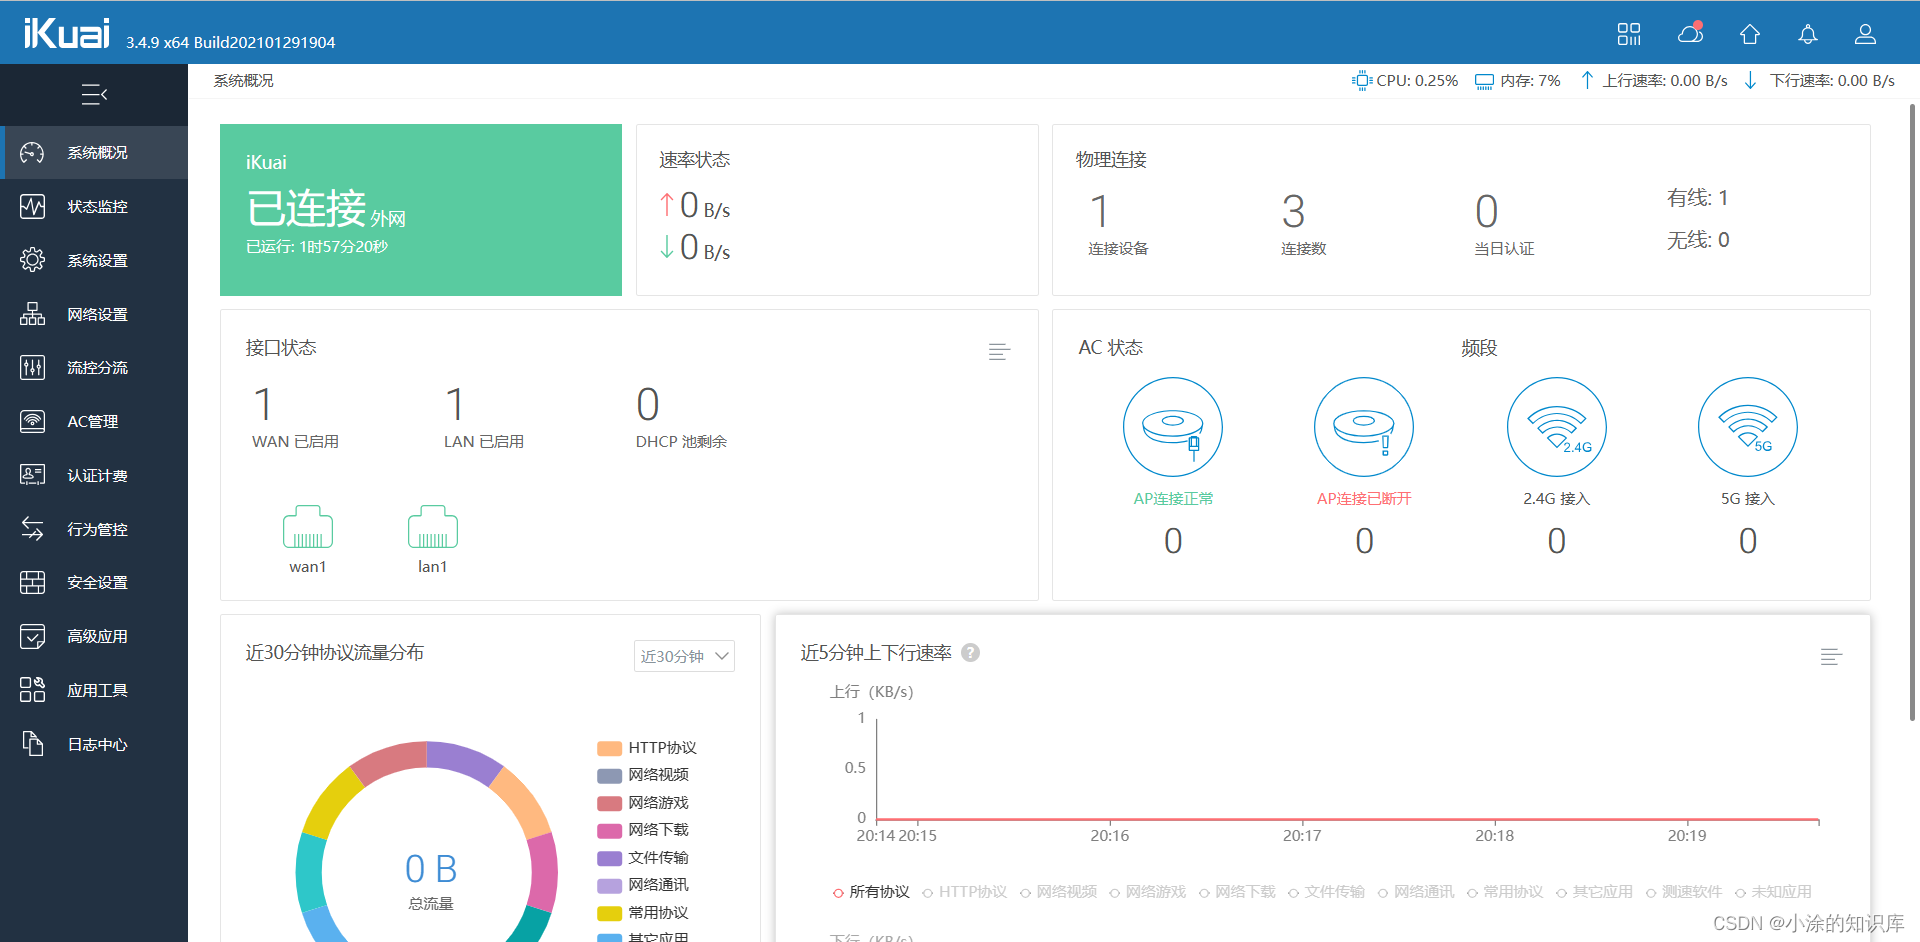
3.回到系统概述,我们可以看见,外网以连接
本教程到此结束。


 7926
7926

 被折叠的 条评论
为什么被折叠?
被折叠的 条评论
为什么被折叠?
 到【灌水乐园】发言


