


#yum工具的使用和源码安装
###7.2 yum网络仓库
官方网络yum仓库(国外)
阿里云yum仓库
163yum仓库
xx大学yum仓库
epel源
// Base/Extras/Updates: 默认国外官方源
[root@localhost ~]# curl -o /etc/yum.repos.d/CentOS-Base.repo
//国外epel源
[root@localhost ~]# yum -y install epel-release
//阿里云epel源
[root@localhost ~]# curl -o /etc/yum.repos.d/epel.repo
###7.3 软件官方仓库
// 源查找方式基本一致,zabbix,mysql,saltstack,openstack等等,上官网找
[root@localhost ~]# vim /etc/yum.repos.d/nginx.repo
[nginx]
name=nginx repo
baseurl=http://nginx.org/packages/centos/7/$basearch/
gpgcheck=0
enabled=1
###7.4 redhat7使用centos7的yum源
//下载base和epel仓库
[root@localhost ~]# wget -O /etc/yum.repos.d/CentOS-Base.repo http://mirrors.aliyun.com/repo/Centos-7.repo
[root@localhost ~]# sed -i 's#\$releasever#7#g' /etc/yum.repos.d/CentOS-Base.repo

[root@localhost ~]# wget -O /etc/yum.repos.d/epel.repo http://mirrors.aliyun.com/repo/epel-7.repo
###8. yum管理软件
###8.1 yum命令语法:
yum [options] [command] [package …]
###8.2 常用的options:
–nogpgcheck //如果从网上下载包有时会检查gpgkey,此时可以使用此命令跳过gpgkey的检查
-y //自动回答为"yes"
-q //静默模式,安装时不输出信息至标准输出
–disablerepo=repoidglob //临时禁用此处指定的repo
–enablerepo=repoidglob //临时启用此处指定的repo
–noplugins //禁用所有插件
###8.3 常用的command:
list //列表
all //默认项
[root@localhost ~]# yum list all
available //列出仓库中有的,但尚未安装的所有可用的包
[root@localhost ~]# yum list available
installed //列出已经安装的包
[root@localhost ~]# yum list installed
updates //可用的升级
[root@localhost ~]# yum list updates
clean //清理缓存
packages
headers
metadata
dbcache
all
repolist //显示repo列表及其简要信息
all
enabled //默认项
disabled
install //安装
yum install packages […]
update //升级
yum update packages […]
update_to //升级为指定版本
downgrade package1 [package2 …] //降级
remove|erase //卸载
info //显示rpm -qi package的结果
yum info packages
provides|whatprovides //查看指定的文件或特性是由哪个包安装生成的
search string1 [string2 …] //以指定的关键字搜索程序包名及summary信息
deplist package [package2 …] //显示指定包的依赖关系
history //查看yum的历史事务信息
localinstall //安装本地rpm包,自动解决依赖关系
grouplist //列出可用的组
groupinstall “group name” //安装一组软件
createrepo命令 //创建yum仓库的元数据信息
[root@localhost ~]# yum install createrepo -y
[root@localhost ~]# createrepo [options] <directory>
###8.4 具体实例
###8.4.1 搜索软件包
//列出软件仓库中可用的软件
[root@localhost ~]# yum list all
//进行模糊查找
//列出软件包详情
###8.4.2 安装软件包
//安装软件只需要给出软件名称
[root@localhost ~]# yum install traceroute
//安装过程中分析依赖关系后, 直接安装, 无需交互
[root@localhost ~]# yum -y install php
//安装本地的rpm包, 如果有依赖关系, 会自动从软件仓库中下载所需依赖(非来自.repo定义的软件仓库)
[root@localhost ~]# yum localinstall /mnt/Packages/bind-9.9.4-50.el7.x86_64.rpm
//安装网络上rpm包
[root@localhost ~]# yum install http://repo.zabbix.com/zabbix/3.4/rhel/7/x86_64/zabbix-release-3.4-2.el7.noarch.rpm
###8.4.3 重装软件包
//检查软件是否存在
[root@localhost ~]# rpm -q vsftpd
vsftpd-2.2.2-24.el6.x86_64
//检查vsftpd软件配置文件
[root@localhost ~]# rpm -qc vsftpd
/etc/logrotate.d/vsftpd
/etc/pam.d/vsftpd
/etc/vsftpd/ftpusers
/etc/vsftpd/user_list
/etc/vsftpd/vsftpd.conf
//不小心删除vsftpd配置文件
[root@localhost ~]# rm -f /etc/vsftpd/vsftpd.conf
//重新安装软件
[root@localhost ~]# yum reinstall vsftpd
//再次检查
[root@localhost ~]# rpm -qc vsftpd
/etc/logrotate.d/vsftpd
/etc/pam.d/vsftpd
/etc/vsftpd/ftpusers
/etc/vsftpd/user_list
/etc/vsftpd/vsftpd.conf
###8.4.4 更新软件包
//对比Linux已安装的软件和yum仓库中的软件, 有哪些需要升级
[root@localhost ~]# yum check-update
//更新软件
[root@localhost ~]# yum update acl -y
###8.4.5 删除软件包
//先安装一个samba软件
[root@localhost ~]# yum -y install samba
//删除该软件包,不会删除依赖, 但是我们尽可能不要使用删除软件操作
[root@localhost ~]# yum -y erase samba
[root@localhost ~]# yum -y remove samba
###8.4.6 与仓库相关的命令
//列出yum源可用的软件仓库
[root@localhost ~]# yum repolist
//列出全部yum源可用和禁用的仓库
[root@localhost ~]# yum repolist all
//查看这个文件或命令属于哪个包
[root@localhost ~]# yum provides /etc/my.cnf
[root@localhost ~]# yum provides cd
[root@localhost ~]# yum provides *bin/pstree
###8.4.7 与缓存相关的命令
//缓存yum源软件仓库, xml元数据文件
[root@localhost ~]# yum makecache
//缓存软件包, 修改yum全局配置文件
[root@localhost ~]# vim /etc/yum.conf
[main]
cachedir=/var/cache/yum/$basearch/$releasever
keepcache=1 //启动缓存
//查看缓存的xml文件
[root@localhost ~]# ls /var/cache/yum/x86_64/7/base/
//查看缓存软件包路径
[root@localhost ~]# ls /var/cache/yum/x86_64/7/
#另一种缓存rpm包方式
//1.安装插件支持只下载软件包不安装
[root@localhost ~]# yum -y install yum-plugin-downloadonly
//2.将软件下载至指定目录
[root@localhost ~]# yum -y install --downloadonly --downloaddir=/tmp httpd
//清除所有yum缓存
[root@localhost ~]# yum clean all
//只清除缓存的软件包
[root@localhost ~]# yum clean packages
###8.4.8 与包组相关的命令
//列出已经安装和所有可使用的软件组
[root@localhost ~]# yum groups list
//安装一整个组的软件
[root@localhost ~]# yum groups install Development tools \
Compatibility libraries \
Base Debugging Tools
//yum删除包组
[root@localhost ~]# yum groups remove -y Base
###8.4.9 与历史记录相关的命令
//查看历史执行yum命令
[root@localhost ~]# yum history
//查询历史执行yum命令ID详细信息
[root@localhost ~]# yum history info N
//撤销历史执行过的yum命令
[root@localhost ~]# yum history undo N
###8.4.10 YUM签名检查机制
rpm软件提供组织redhat在构建rpm包时, 使用其私钥private key对 rpm进行签名
客户端在使用rpm为了验证其合法性, 可以使用redhat提供的公钥public key进行签名检查
方式1:指定公钥位置
[root@localhost ~]# vim /etc/yum.repos.d/CentOS-Base.repo
[base]
name=CentOS-$releasever - Base mirrorlist=http://mirrorlist.centos.org/?release=$releasever&arch=$basearch&repo=os&infra=$infra #baseurl=http://mirror.centos.org/centos/$releasever/os/$basearch/
gpgcheck=1
gpgkey=file:///etc/pki/rpm-gpg/RPM-GPG-KEY-CentOS-7
方式2:提前导入公钥
[root@localhost ~]# rpm --import /etc/pki/rpm-gpg/RPM-GPG-KEY-CentOS-7
[root@localhost ~]# vim /etc/yum.repos.d/CentOS-Base.repo
[base]
name=CentOS-$releasever - Base
mirrorlist=http://mirrorlist.centos.org/?release=$releasever&arch=$basearch&repo=os&infra=$infra
baseurl=http://mirror.centos.org/centos/$releasever/os/$basearch/
gpgcheck=1
方式3:不进行签名验证
//不检查软件包的签名
[root@localhost ~]# yum install httpd --nogpgcheck
#源码安装包管理
###1. 源码包基本概述
在linux环境下面安装源码包是比较常见的, 早期运维管理工作中,大部分软件都是通过源码安装的。那么安装一个源码包,是需要我们自己把源代码编译成二进制的可执行文件。
源码包的编译用到了linux系统里的编译器,通常源码包都是用C语言开发的,这也是因为C语言为linux上最标准的程序语言。Linux上的C语言编译器叫做gcc,利用它就可以把C语言变成可执行的二进制文件。所以如果你的机器上没有安装gcc就没有办法去编译源码。可以使用yum -y install gcc来完成安装。
###2. 源码包的好处
自定义修改源代码
定制需要的相关功能
新版软件优先更新源码
3. 源码包的获取
官方网站, 可以获得最新的软件包
Apache官方网站
Nginx官方网站
Mysql官方网站
###4. 源码包分类
源码格式(需要编译安装)
二进制格式(解压后可以直接使用)
###5. 源码包的安装
编译需要编译环境,开发环境,开发库,开发工具。
常用的编译环境有c、c++、perl、java、python5种
c环境的编译器:gcc(GNU C Complier)
c++环境的编译器:g++
make:c、c++的统一项目管理工具,编译时有可能调用gcc也有可能调用g++。使用makefile文件定义make按何种次序去编译源程序文件中的源程序
源码安装三部曲(常见):
第一步: ./configure(定制组件)
1.指定安装路径,例如 --prefix=/opt/nginx-1.12
2.启用或禁用某项功能, 例如 --enable-ssl
3.和其它软件关联,例如–with-pcre
4.检查安装环境,例如是否有编译器 gcc,是否满足软件的依赖需求
5.检测通过后生成Makefile文件
第二步: make
1.执行make命令进行编译, 可以使用-j指定CPU核心数进行编译
2.按Makefile文件进行编译, 编译成可执行二进制文件
3.生成各类模块和主程序
第三步: make install
1.按Makefile定义好的路径拷贝至安装目录中
上面介绍的源码三部曲不能百分百通用于所有源码包, 也就是说源码包的安装并非存在标准安装步骤,但是大部分源码安装都是类似的步骤
建议:
拿到源码包解压后,然后进入到目录找相关的帮助文档,通常会以INSTALL或者README为文件名
###5.1 configure脚本的功能
让用户选定编译特性
检查编译环境是否符合程序编译的基本需要
###5.2 编译安装注意事项
- 如果安装时不是使用的默认路径,则必须要修改PATH环境变量,以能够识别此程序的二进制文件路径;
修改/etc/profile文件或在/etc/profile.d/目录建立一个以.sh为后缀的文件,在里面定义export PATH=$PATH:/path/to/somewhere
默认情况下,系统搜索库文件的路径只有/lib,/usr/lib
增添额外库文件搜索路径方法: - 在/etc/ld.so.conf.d/中创建以.conf为后缀名的文件,而后把要增添的路径直接写至此文件中。此时库文件增添的搜索路径重启后有效,若要使用增添的路径立即生效则要使用ldconfig命令
- ldconfig:通知系统重新搜索库文件
/etc/ld.so.conf和/etc/ls.so.conf.d/*.conf //配置文件
/etc/ld.so.cache //缓存文件
-v //显示重新搜索库的过程
-p //打印出系统启动时自动加载并缓存到内存中的可用库文件名及文件路径映射关系 - 头文件:输出给系统
默认:系统在/usr/include中找头文件,若要增添头文件搜索路径,使用链接进行 - man文件路径:安装在–prefix指定的目录下的man目录
默认:系统在/usr/share/man中找man文件。此时因为编译安装的时候不是安装到默认路径下,如果要查找man文件则可以使用以下两种方法:
man -M /path/to/man_dir command
在/etc/man_db.conf文件中添加一条MANPATH
###5.3 源码包编译实例
下面通过编译安装nginx来深入理解源码包安装
[root@localhost usr]# ls
bin  config  games  include  lib  lib64  libexec  local  nginx-1.22.0.tar.gz  sbin  share  src  tmp
[root@localhost usr]# wget https://nginx.org/download/nginx-1.22.0.tar.gz
--2022-07-14 15:19:35--  https://nginx.org/download/nginx-1.22.0.tar.gz
Resolving nginx.org (nginx.org)... 3.125.197.172, 52.58.199.22, 2a05:d014:edb:5704::6, ...
Connecting to nginx.org (nginx.org)|3.125.197.172|:443... connected.
HTTP request sent, awaiting response... 200 OK
Length: 1073322 (1.0M) [application/octet-stream]
Saving to: 'nginx-1.22.0.tar.gz.1'

nginx-1.22.0.tar.gz.1        100%[===========================================>]   1.02M  15.8KB/s    in 62s

2022-07-14 15:20:44 (17.0 KB/s) - 'nginx-1.22.0.tar.gz.1' saved [1073322/1073322]

[root@localhost usr]# ls
bin     games    lib    libexec  nginx-1.22.0.tar.gz    sbin   src
config  include  lib64  local    nginx-1.22.0.tar.gz.1  share  tmp
[root@localhost usr]# dnf groups mark install -y "Development Tools"
Failed to set locale, defaulting to C.UTF-8
Last metadata expiration check: 0:08:06 ago on Thu Jul 14 15:15:42 2022.
Dependencies resolved.
=================================================================================================================
 Package                   Architecture             Version                      Repository                 Size
=================================================================================================================
Installing Groups:
 Development Tools

Transaction Summary
=================================================================================================================

Complete!

[root@localhost usr]# tar xf nginx-1.22.0.tar.gz
[root@localhost usr]# ls
bin     games    lib    libexec  nginx-1.22.0         nginx-1.22.0.tar.gz.1  share  tmp
config  include  lib64  local    nginx-1.22.0.tar.gz  sbin                   src
下载c++ 使二进制拥有预编译能力
[root@localhost usr]# yum -y install gcc gcc-c++
Failed to set locale, defaulting to C.UTF-8
Last metadata expiration check: 0:10:17 ago on Thu Jul 14 15:15:42 2022.
Dependencies resolved.
=================================================================================================================
 Package                       Architecture         Version                        Repository               Size
=================================================================================================================
Installing:
 gcc                           x86_64               8.5.0-13.el8                   appstream                23 M
 gcc-c++                       x86_64               8.5.0-13.el8                   appstream                12 M
Upgrading:
 libgcc                        x86_64               8.5.0-13.el8                   baseos                   80 k
 libgomp                       x86_64               8.5.0-13.el8                   baseos                  207 k
 libstdc++                     x86_64               8.5.0-13.el8                   baseos                  454 k
Installing dependencies:
 cpp                           x86_64               8.5.0-13.el8                   appstream                10 M
环境
[root@localhost nginx-1.22.0]# yum -y install pcre-devel
Failed to set locale, defaulting to C.UTF-8
Last metadata expiration check: 0:16:25 ago on Thu Jul 14 15:15:42 2022.
Dependencies resolved.
=================================================================================================================
 Package                     Architecture            Version                       Repository               Size
=================================================================================================================
Installing:
 pcre-devel                  x86_64                  8.42-6.el8                    baseos                  551 k
Installing dependencies:
 pcre-cpp                    x86_64                  8.42-6.el8                    baseos                   47 k
 pcre-utf16                  x86_64                  8.42-6.el8                    baseos                  195 k
 pcre-utf32                  x86_64                  8.42-6.el8                    baseos                  186 k

Transaction Summary
=================================================================================================================
指定目录程序
Configuration summary
  + using system PCRE library
  + OpenSSL library is not used
  + using system zlib library

  nginx path prefix: "/usr/local/nginx"
  nginx binary file: "/usr/local/nginx/sbin/nginx"
  nginx modules path: "/usr/local/nginx/modules"
  nginx configuration prefix: "/usr/local/nginx/conf"
  nginx configuration file: "/usr/local/nginx/conf/nginx.conf"
  nginx pid file: "/usr/local/nginx/logs/nginx.pid"
  nginx error log file: "/usr/local/nginx/logs/error.log"
  nginx http access log file: "/usr/local/nginx/logs/access.log"
  nginx http client request body temporary files: "client_body_temp"
  nginx http proxy temporary files: "proxy_temp"
  nginx http fastcgi temporary files: "fastcgi_temp"
  nginx http uwsgi temporary files: "uwsgi_temp"
  nginx http scgi temporary files: "scgi_temp"
解决错误
- OpenSSL library is not used
添加模块
[root@localhost nginx-1.22.0]# ./configure --help | grep ssl
  --with-http_ssl_module             enable ngx_http_ssl_module
  --with-mail_ssl_module             enable ngx_mail_ssl_module
  --with-stream_ssl_module           enable ngx_stream_ssl_module
  --with-stream_ssl_preread_module   enable ngx_stream_ssl_preread_module
  --with-openssl=DIR                 set path to OpenSSL library sources
  --with-openssl-opt=OPTIONS         set additional build options for OpenSSL
继续加载
./configure: error: SSL modules require the OpenSSL library.
You can either do not enable the modules, or install the OpenSSL library
into the system, or build the OpenSSL library statically from the source
with nginx by using --with-openssl=<path> option.

[root@localhost nginx-1.22.0]#
./configure --prefix=/usr/local/nginx --withhttp_ssl_module
存在openSSL错误
Upgraded:
  openssl-1:1.1.1k-6.el8.x86_64                        openssl-libs-1:1.1.1k-6.el8.x86_64
Installed:
  keyutils-libs-devel-1.5.10-9.el8.x86_64                   krb5-devel-1.18.2-14.el8.x86_64
  libcom_err-devel-1.45.6-3.el8.x86_64                      libkadm5-1.18.2-14.el8.x86_64
  libselinux-devel-2.9-5.el8.x86_64                         libsepol-devel-2.9-3.el8.x86_64
  libverto-devel-0.3.0-5.el8.x86_64                         openssl-devel-1:1.1.1k-6.el8.x86_64
  pcre2-devel-10.32-2.el8.x86_64                            pcre2-utf16-10.32-2.el8.x86_64
  pcre2-utf32-10.32-2.el8.x86_64

Complete!
[root@localhost nginx-1.22.0]# dnf -y install openssl openssl-devel
检查
第一部完成,无错误
Configuration summary
  + using system PCRE2 library
  + using system OpenSSL library
  + using system zlib library

  nginx path prefix: "/usr/local/nginx"
  nginx binary file: "/usr/local/nginx/sbin/nginx"
  nginx modules path: "/usr/local/nginx/modules"
  nginx configuration prefix: "/usr/local/nginx/conf"
  nginx configuration file: "/usr/local/nginx/conf/nginx.conf"
  nginx pid file: "/usr/local/nginx/logs/nginx.pid"
  nginx error log file: "/usr/local/nginx/logs/error.log"
  nginx http access log file: "/usr/local/nginx/logs/access.log"
  nginx http client request body temporary files: "client_body_temp"
  nginx http proxy temporary files: "proxy_temp"
  nginx http fastcgi temporary files: "fastcgi_temp"
  nginx http uwsgi temporary files: "uwsgi_temp"
  nginx http scgi temporary files: "scgi_temp"
然后成功生成file文件
[root@localhost nginx-1.22.0]# ls
CHANGES  CHANGES.ru  LICENSE  Makefile  README  auto  conf  configure  contrib  html  man  objs  src
[root@localhost nginx-1.22.0]#
第二部分
-Wl,-E
sed -e "s|%%PREFIX%%|/usr/local/nginx|" \
        -e "s|%%PID_PATH%%|/usr/local/nginx/logs/nginx.pid|" \
        -e "s|%%CONF_PATH%%|/usr/local/nginx/conf/nginx.conf|" \
        -e "s|%%ERROR_LOG_PATH%%|/usr/local/nginx/logs/error.log|" \
        < man/nginx.8 > objs/nginx.8
make[1]: Leaving directory '/usr/nginx-1.22.0'
[root@localhost nginx-1.22.0]# make
对makefile文件 下载安装
test -f '/usr/local/nginx/conf/nginx.conf' \
        || cp conf/nginx.conf '/usr/local/nginx/conf/nginx.conf'
cp conf/nginx.conf '/usr/local/nginx/conf/nginx.conf.default'
test -d '/usr/local/nginx/logs' \
        || mkdir -p '/usr/local/nginx/logs'
test -d '/usr/local/nginx/logs' \
        || mkdir -p '/usr/local/nginx/logs'
test -d '/usr/local/nginx/html' \
        || cp -R html '/usr/local/nginx'
test -d '/usr/local/nginx/logs' \
        || mkdir -p '/usr/local/nginx/logs'
make[1]: Leaving directory '/usr/nginx-1.22.0'
[root@localhost nginx-1.22.0]# make install
查看
[root@localhost ~]# cd /usr/local/nginx/
[root@localhost nginx]# ls
conf  html  logs  sbin
[root@localhost nginx]#
启动nginx
[root@localhost nginx]# /usr/local/nginx/sbin/nginx
[root@localhost nginx]# ss -antl
State        Recv-Q       Send-Q             Local Address:Port             Peer Address:Port      Process
LISTEN       0            128                      0.0.0.0:111                   0.0.0.0:*
LISTEN       0            128                      0.0.0.0:80                    0.0.0.0:*
LISTEN       0            32                 192.168.122.1:53                    0.0.0.0:*
LISTEN       0            128                      0.0.0.0:22                    0.0.0.0:*
LISTEN       0            5                      127.0.0.1:631                   0.0.0.0:*
LISTEN       0            128                         [::]:111                      [::]:*
LISTEN       0            128                         [::]:22                       [::]:*
LISTEN       0            5                          [::1]:631
关闭防火墙
[root@localhost nginx]# systemctl stop firewalld
[root@localhost nginx]# systemctl disable firewalld
Removed /etc/systemd/system/multi-user.target.wants/firewalld.service.
Removed /etc/systemd/system/dbus-org.fedoraproject.FirewallD1.service.
[root@localhost nginx]# setenforce 0
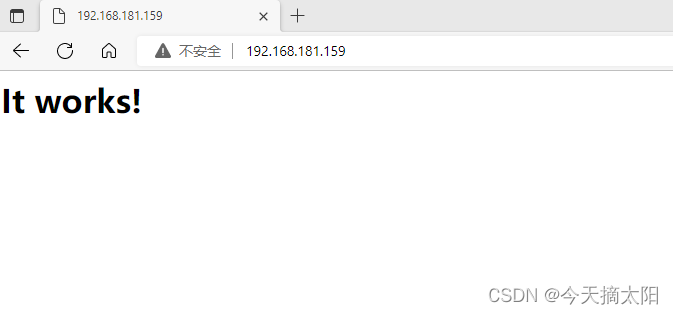
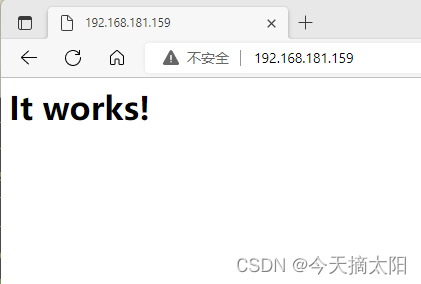
访问网页
Welcome to nginx!
If you see this page, the nginx web server is successfully installed and working. Further configuration is required.

For online documentation and support please refer to nginx.org.
Commercial support is available at nginx.com.

Thank you for using nginx.
停止
[root@localhost nginx]# /usr/local/nginx/sbin/nginx -s stop
[root@localhost nginx]# ss -antl
State        Recv-Q       Send-Q             Local Address:Port             Peer Address:Port      Process
LISTEN       0            128                      0.0.0.0:111                   0.0.0.0:*
LISTEN       0            32                 192.168.122.1:53                    0.0.0.0:*
LISTEN       0            128                      0.0.0.0:22                    0.0.0.0:*
LISTEN       0            5                      127.0.0.1:631                   0.0.0.0:*
LISTEN       0            128                         [::]:111                      [::]:*
LISTEN       0            128                         [::]:22                       [::]:*
LISTEN       0            5                          [::1]:631                      [::]:*
[root@localhost nginx]#
编译环境变量
为保证能够快速启动nginx
root@localhost nginx]# vi /etc/profile.d/nginx
export PATH=/usr/local/nginx/sbin:$PATH

[root@localhost nginx]# . /etc/profile.d/nginx
[root@localhost nginx]# ss -antl
State        Recv-Q       Send-Q             Local Address:Port             Peer Address:Port      Process
LISTEN       0            128                      0.0.0.0:111                   0.0.0.0:*
LISTEN       0            32                 192.168.122.1:53                    0.0.0.0:*
LISTEN       0            128                      0.0.0.0:22                    0.0.0.0:*
LISTEN       0            5                      127.0.0.1:631                   0.0.0.0:*
LISTEN       0            128                         [::]:111                      [::]:*
LISTEN       0            128                         [::]:22                       [::]:*
LISTEN       0            5                          [::1]:631                      [::]:*
再次启动
[root@localhost nginx]# nginx
[root@localhost nginx]# ss -antl
State        Recv-Q       Send-Q             Local Address:Port             Peer Address:Port      Process
LISTEN       0            128                      0.0.0.0:111                   0.0.0.0:*
LISTEN       0            128                      0.0.0.0:80                    0.0.0.0:*
LISTEN       0            32                 192.168.122.1:53                    0.0.0.0:*
LISTEN       0            128                      0.0.0.0:22                    0.0.0.0:*
LISTEN       0            5                      127.0.0.1:631                   0.0.0.0:*
LISTEN       0            128                         [::]:111                      [::]:*
LISTEN       0            128                         [::]:22                       [::]:*
LISTEN       0            5                          [::1]:631                      [::]:*
服务控制方式,使用nginx命令
-t //检查配置文件语法
-v //输出nginx的版本
-c //指定配置文件的路径
-s //发送服务控制信号,可选值有{stop|quit|reopen|reload}
继续配置html的内容
进入html的index。html进行网页文件配置
[root@localhost nginx]# cd /usr/local/nginx/html/
[root@localhost html]# ls
50x.html  index.html
[root@localhost html]# echo WeLcome to WUHAN!!!! > index.html
echo WeLcome to WUHANlsls > index.html
[root@localhost html]# cat index.html
WeLcome to WUHANlsls
[root@localhost html]#
下面通过编译安装nginx来深入理解源码包安装
//1.基础环境准备
[root@localhost ~]# yum -y install gcc gcc-c++ make wget
//2.下载源码包(源码包一定要上官方站点下载,其他站点不安全)
[root@localhost ~]# cd /usr/src
[root@localhost src]# wget http://nginx.org/download/nginx-1.12.2.tar.gz
//3.解压源码包,并进入相应目录
[root@localhost src]# tar xf nginx-1.12.2.tar.gz
[root@localhost src]# cd nginx-1.12.2
//4.配置相关的选项,并生成Makefile
[root@localhost nginx-1.12.2]# ./configure --help|head

  --help                             print this message
  --prefix=PATH                      set installation prefix
  --sbin-path=PATH                   set nginx binary pathname
  --modules-path=PATH                set modules path
  --conf-path=PATH                   set nginx.conf pathname
  --error-log-path=PATH              set error log pathname
  --pid-path=PATH                    set nginx.pid pathname
  --lock-path=PATH                   set nginx.lock pathname
//后面的内容省略了,使用 ./configure --help 命令查看可以使用的选项
//一般常用的有 --prefix=PREFIX 这个选项的意思是定义软件包安装到哪里
//建议,源码包都是安装在/opt/目录下
//5.指定编译参数
[root@localhost nginx-1.12.2]# ./configure --prefix=/opt/nginx-1.12.2
//6.验证这一步命令是否成功, 非0的都不算成功
[root@localhost nginx-1.12.2]# echo $?
0
//7.编译并安装
[root@localhost nginx-1.12.2]# make
[root@localhost nginx-1.12.2]# make install
[root@localhost nginx-1.12.2]# echo $?
//8.建立软链接
[root@localhost nginx-1.12.2]# ln -s /opt/nginx-1.12.2 /opt/nginx
源码编译报错信息处理
checking for C compiler ... not found ./configure: error: C compiler cc is not found
//解决方案
[root@localhost ~]# yum -y install gcc gcc-c++ make

./configure: error: the HTTP rewrite module requires the PCRE library.
You can either disable the module by using --without-http_rewrite_module
option, or install the PCRE library into the system, or build the PCRE library
statically from the source with nginx by using --with-pcre=<path> option.
//解决方案
[root@localhost ~]# yum install -y pcre-devel


./configure: error: the HTTP gzip module requires the zlib library.
You can either disable the module by using --without-
http_gzip_module option, or install the zlib library into the
system, or build the zlib library statically from the source with
nginx by using --with-zlib=<path> option.
//解决方案:
[root@localhost ~]# yum -y install zlib-devel


./configure: error: SSL modules require the OpenSSL library.
You can either do not enable the modules, or install the OpenSSL
library into the system, or build the OpenSSL library statically
from the source with nginx by using --with-openssl=<path> option.
//解决方案
[root@localhost ~]# yum -y install openssl-devel
#APACHE
1.下载源码包
[root@localhost usr]# wget https://downloads.apache.org/apr/apr-1.6.5.tar.bz2
--2022-07-14 16:15:28--  https://downloads.apache.org/apr/apr-1.6.5.tar.bz2
Resolving downloads.apache.org (downloads.apache.org)... 135.181.214.104, 88.99.95.219, 2a01:4f9:3a:2c57::2, ...
Connecting to downloads.apache.org (downloads.apache.org)|135.181.214.104|:443... connected.
HTTP request sent, awaiting response... 200 OK
Length: 855393 (835K) [application/x-bzip2]
Saving to: 'apr-1.6.5.tar.bz2.1'

apr-1.6.5.tar.bz2.1         100%[===========================================>] 835.34K  12.3KB/s    in 72s

2022-07-14 16:16:49 (11.7 KB/s) - 'apr-1.6.5.tar.bz2.1' saved [855393/855393]
[root@localhost usr]# wget https://downloads.apache.org/httpd/httpd-2.4.54.tar.bz2
--2022-07-14 16:18:12--  https://downloads.apache.org/httpd/httpd-2.4.54.tar.bz2
Resolving downloads.apache.org (downloads.apache.org)... 88.99.95.219, 135.181.214.104, 2a01:4f8:10a:201a::2, ...
Connecting to downloads.apache.org (downloads.apache.org)|88.99.95.219|:443... connected.
HTTP request sent, awaiting response... 200 OK
Length: 7434530 (7.1M) [application/x-bzip2]
Saving to: 'httpd-2.4.54.tar.bz2.1'

httpd-2.4.54.tar.bz2.1      100%[===========================================>]   7.09M  16.2KB/s    in 6m 17s

2022-07-14 16:24:30 (19.3 KB/s) - 'httpd-2.4.54.tar.bz2.1' saved [7434530/7434530]
[root@localhost usr]# wget https://downloads.apache.org/apr/apr-util-1.6.1.tar.bz2
--2022-07-14 16:24:54--  https://downloads.apache.org/apr/apr-util-1.6.1.tar.bz2
Resolving downloads.apache.org (downloads.apache.org)... 135.181.214.104, 88.99.95.219, 2a01:4f9:3a:2c57::2, ...
Connecting to downloads.apache.org (downloads.apache.org)|135.181.214.104|:443... connected.
HTTP request sent, awaiting response... 200 OK
Length: 428595 (419K) [application/x-bzip2]
Saving to: 'apr-util-1.6.1.tar.bz2.1'

apr-util-1.6.1.tar.bz2.1    100%[===========================================>] 418.55K  17.8KB/s    in 26s

2022-07-14 16:25:24 (15.9 KB/s) - 'apr-util-1.6.1.tar.bz2.1' saved [428595/428595]
基础环境准备
[root@localhost usr]# wget https://downloads.apache.org/apr/apr-1.6.5.tar.bz2
--2022-07-14 16:15:28--  https://downloads.apache.org/apr/apr-1.6.5.tar.bz2
Resolving downloads.apache.org (downloads.apache.org)... 135.181.214.104, 88.99.95.219, 2a01:4f9:3a:2c57::2, ...
Connecting to downloads.apache.org (downloads.apache.org)|135.181.214.104|:443... connected.
[root@localhost usr]# yum -y install expat-devel libtool
Failed to set locale, defaulting to C.UTF-8
Last metadata expiration check: 0:17:57 ago on Thu Jul 14 16:13:49 2022.
Dependencies resolved.
解压,先解压依赖包在解压主包
[root@localhost usr]# tar xf apr-1.6.5.tar.bz2
[root@localhost usr]# cd apr-1.6.5/
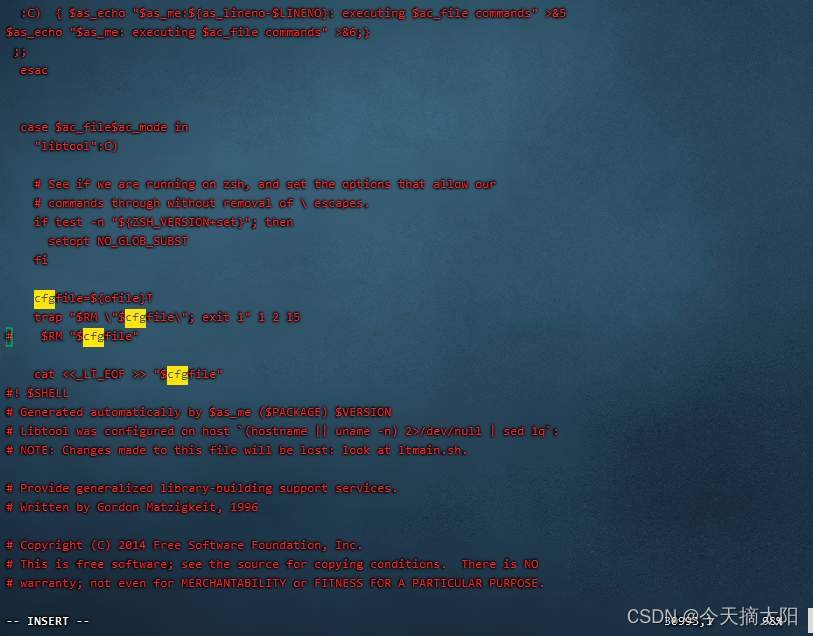
[root@localhost apr-1.6.5]# vim configure
将此行注释或删除
解压apr-util包
configure: creating ./config.status
config.status: creating Makefile
config.status: WARNING:  'Makefile.in' seems to ignore the --datarootdir setting
config.status: creating include/apr.h
config.status: creating build/apr_rules.mk
config.status: creating build/pkg/pkginfo
config.status: creating apr-1-config
config.status: creating apr.pc
config.status: creating test/Makefile
config.status: creating test/internal/Makefile
config.status: creating include/arch/unix/apr_private.h
config.status: executing libtool commands
config.status: executing default commands

[root@localhost apr-1.6.5]# ./configure --prefix=/usr/local/apr
done
/usr/bin/install -c -m 644 build/apr_rules.out /usr/local/apr/build-1/apr_rules.mk
/usr/bin/install -c -m 644 /usr/apr-1.6.5/build/apr_common.m4 /usr/local/apr/build-1
/usr/bin/install -c -m 644 /usr/apr-1.6.5/build/find_apr.m4 /usr/local/apr/build-1
/usr/bin/install -c -m 755 apr-config.out /usr/local/apr/bin/apr-1-config

[root@localhost apr-1.6.5]# make && make install
解压apr-util包
[root@localhost usr]# tar xf apr-util-1.6.1.tar.bz2
[root@localhost usr]# cd apr-util-1.6.1/
[root@localhost apr-util-1.6.1]#
configure: creating ./config.status
config.status: creating Makefile
config.status: creating export_vars.sh
config.status: creating build/pkg/pkginfo
config.status: creating apr-util.pc
config.status: creating apu-1-config
config.status: creating include/private/apu_select_dbm.h
config.status: creating include/apr_ldap.h
config.status: creating include/apu.h
config.status: creating include/apu_want.h
config.status: creating test/Makefile
config.status: creating include/private/apu_config.h
config.status: executing default commands

[root@localhost apr-util-1.6.1]# ./configure --prefix=/usr/local/apr-util --with-apr=/usr/local/apr
See any operating system documentation about shared libraries for
more information, such as the ld(1) and ld.so(8) manual pages.
----------------------------------------------------------------------
/usr/bin/install -c -m 644 aprutil.exp /usr/local/apr-util/lib
/usr/bin/install -c -m 755 apu-config.out /usr/local/apr-util/bin/apu-1-config

[root@localhost apr-util-1.6.1]# make && make install
解压主包
[root@localhost usr]# tar xf httpd-2.4.54.tar.bz2
[root@localhost usr]# cd httpd-2.4.54/
[root@localhost httpd-2.4.54]#
  Server Version: 2.4.54
    Install prefix: /usr/local/apache
    C compiler:     gcc
    CFLAGS:          -g -O2 -pthread
    CPPFLAGS:        -DLINUX -D_REENTRANT -D_GNU_SOURCE
    LDFLAGS:
    LIBS:
    C preprocessor: gcc -E

[root@localhost httpd-2.4.54]# ./configure --prefix=/usr/local/apache --with-apr=/usr/local/apr --with-apr-util=/usr/local/apr-util
mkdir /usr/local/apache/cgi-bin
Installing header files
mkdir /usr/local/apache/include
Installing build system files
mkdir /usr/local/apache/build
Installing man pages and online manual
mkdir /usr/local/apache/man
mkdir /usr/local/apache/man/man1
mkdir /usr/local/apache/man/man8
mkdir /usr/local/apache/manual
make[1]: Leaving directory '/usr/httpd-2.4.54'

[root@localhost httpd-2.4.54]# make && make install
启动apache服务
[root@localhost httpd-2.4.54]# /usr/local/apache/bin/apachectl
AH00558: httpd: Could not reliably determine the server's fully qualified domain name, using localhost.localdomain. Set the 'ServerName' directive globally to suppress this message
[root@localhost httpd-2.4.54]#
浏览器访问
配置环境变量
[root@localhost httpd-2.4.54]# /usr/local/apache/bin/apachectl stop
AH00558: httpd: Could not reliably determine the server's fully qualified domain name, using localhost.localdomain. Set the 'ServerName' directive globally to suppress this message
[root@localhost httpd-2.4.54]# vim /etc/profile.d/apache.sh
export PATH=$PATH:/usr/local/apache/bin/

[root@localhost httpd-2.4.54]# source /etc/profile.d/apache.sh
[root@localhost httpd-2.4.54]# apachectl start
AH00558: httpd: Could not reliably determine the server's fully qualified domain name, using localhost.localdomain. Set the 'ServerName' directive globally to suppress this message
[root@localhost httpd-2.4.54]# ss -antl
State        Recv-Q       Send-Q             Local Address:Port             Peer Address:Port      Process
LISTEN       0            128                      0.0.0.0:111                   0.0.0.0:*
LISTEN       0            32                 192.168.122.1:53                    0.0.0.0:*
LISTEN       0            128                      0.0.0.0:22                    0.0.0.0:*
LISTEN       0            5                      127.0.0.1:631                   0.0.0.0:*
LISTEN       0            128                         [::]:111                      [::]:*
LISTEN       0            128                            *:80                          *:*
LISTEN       0            128                         [::]:22                       [::]:*
LISTEN       0            5                          [::1]:631                      [::]:*
[root@localhost httpd-2.4.54]#
创建软链接
[root@localhost httpd-2.4.54]# ln -s /usr/local/apache /usr/local/hello
[root@localhost httpd-2.4.54]# ll /usr/local/
total 0
drwxr-xr-x. 14 root root 164 Jul 14 16:51 apache
drwxr-xr-x.  6 root root  58 Jul 14 16:39 apr
drwxr-xr-x.  5 root root  43 Jul 14 16:45 apr-util
drwxr-xr-x.  2 root root   6 Jun 22  2021 bin
drwxr-xr-x.  2 root root   6 Jun 22  2021 etc
drwxr-xr-x.  2 root root   6 Jun 22  2021 games
lrwxrwxrwx.  1 root root  17 Jul 14 16:59 hello -> /usr/local/apache
drwxr-xr-x.  2 root root   6 Jun 22  2021 include
drwxr-xr-x.  2 root root   6 Jun 22  2021 lib
drwxr-xr-x.  3 root root  17 Jun 30 14:35 lib64
drwxr-xr-x.  2 root root   6 Jun 22  2021 libexec
drwxr-xr-x. 11 root root 151 Jul 14 15:52 nginx
drwxr-xr-x.  2 root root   6 Jun 22  2021 sbin
drwxr-xr-x.  5 root root  49 Jun 30 14:35 share
drwxr-xr-x.  2 root root   6 Jun 22  2021 src
[root@localhost httpd-2.4.54]#


 106
106


 被折叠的 条评论
为什么被折叠?
被折叠的 条评论
为什么被折叠?
 到【灌水乐园】发言


