


Postfix+Dovecot
文章目录
资源列表
| 操作系统 | 配置 | 主机名 | IP | 所需软件 |
|---|---|---|---|---|
| CentOS 7.9 | 2C4G | ns.bdqn.com | 192.168.93.101 | bind postfix dovecot ssl证书 |
| Windows 10 | 2C4G | client | IP:192.168.93.100 网关:192.168.93.101 | FoxmailSetup_7.2.23.121 |
基础环境
- 关闭防火墙
systemctl stop firewalld
systemctl disable firewalld
- 关闭内核安全机制
setenforce 0
sed -i "s/^SELINUX=.*/SELINUX=disabled/g" /etc/selinux/config
- 修改主机名
hostnamectl set-hostname ns.bdqn.com
一、部署DNS
- 邮件服务器做下面操作 (ns.bdqn.com)
[root@ns ~]# yum -y install bind*
# 备份主配置文件
[root@ns ~]# cp /etc/named.conf /tmp/named.conf.bak

[root@ns ~]# vim /etc/named.conf
# 原有的基础上修改
options {
        listen-on port 53 { 192.168.93.101; };
		allow-query     { any; };

# 末尾添加即可
zone "bdqn.com" IN {
        type master;
        file "bdqn.com.zone";
        allow-transfer {192.168.93.100;};
};


# 拷贝一个正向解析区域文件进行修改
[root@ns ~]# cp -p /var/named/named.localhost /var/named/bdqn.com.zone
[root@ns ~]# vim /var/named/bdqn.com.zone
$TTL 1D
@       IN SOA  bdqn.com. admin.bdqn.com. (
                                        0       ; serial
                                        1D      ; refresh
                                        1H      ; retry
                                        1W      ; expire
                                        3H )    ; minimum
@       NS      ns.bdqn.com.
        MX      10      mail.bdqn.com.
ns      A       192.168.93.101
mail    A       192.168.93.101
*       A       192.168.93.101


# 重新设置权限
[root@ns ~]# chown named:named /etc/named.conf
[root@ns ~]# chown named:named /var/named/bdqn.com.zone


[root@ns ~]# systemctl start named
[root@ns ~]# systemctl enable named
-
Windows 10 修改DNS
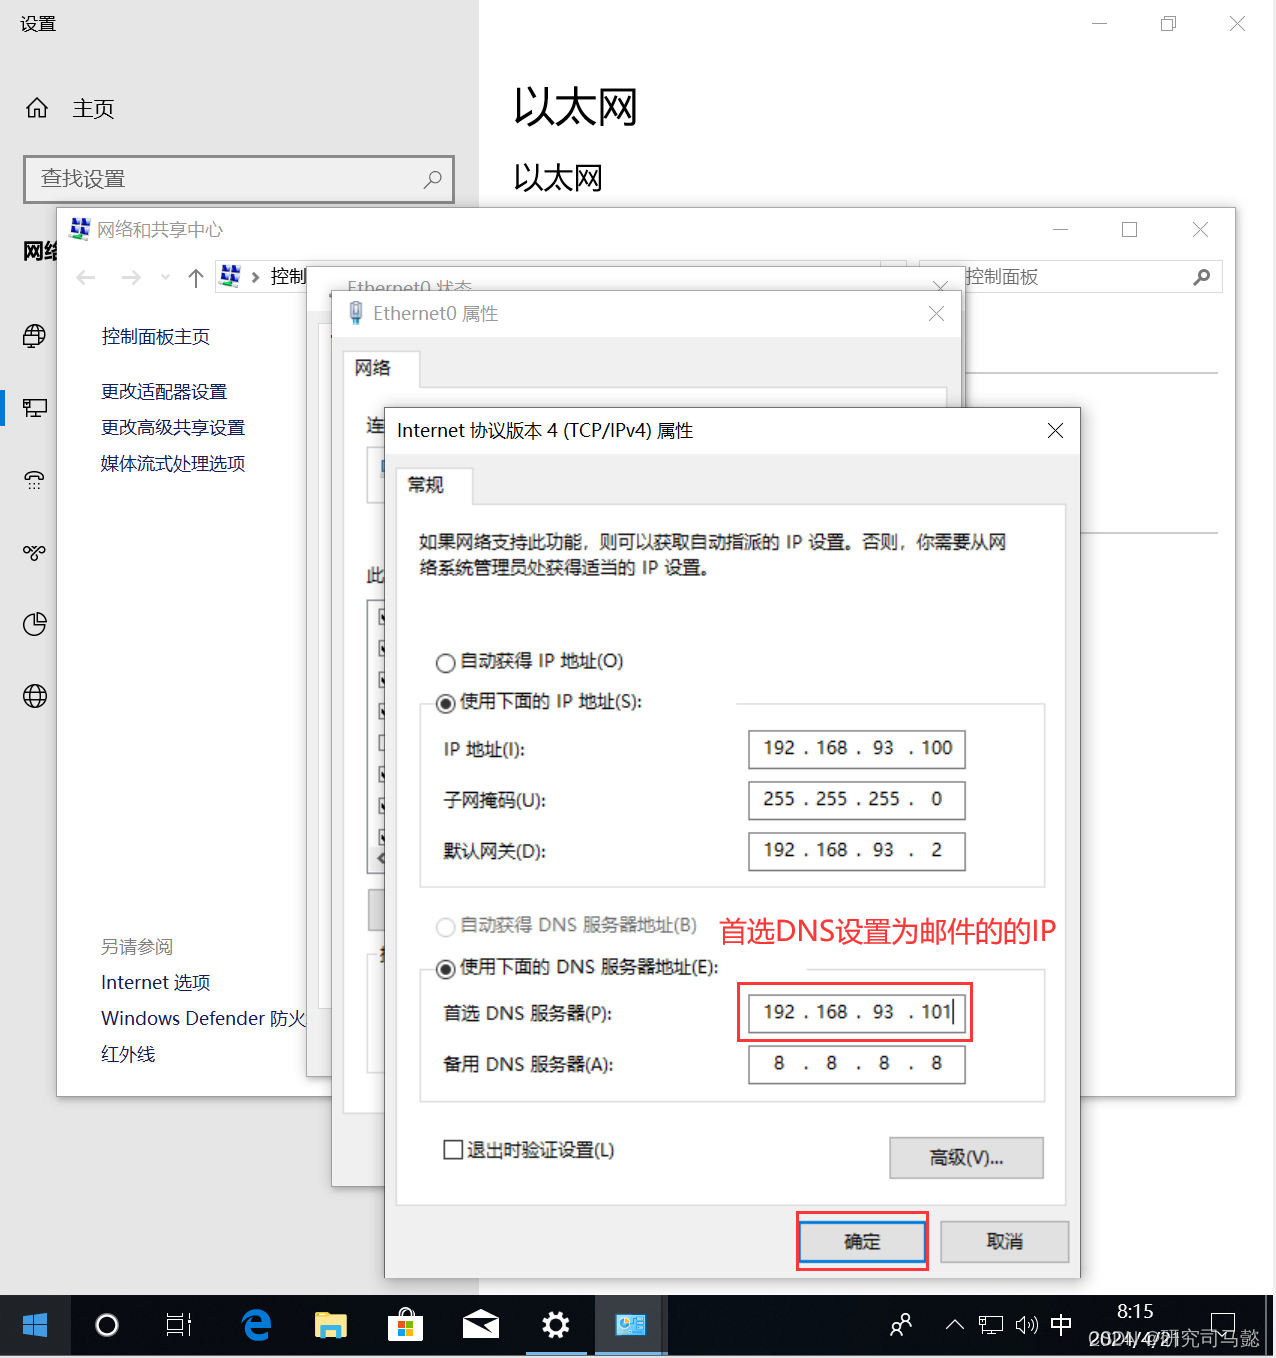
-
测试DNS
# Winsows 10 打开CMD进行ping测试
ping mail.bdqn.com
ping ns.bdqn.com
ping web.bdqn.com
二、部署postfix和dovecot
- ns.bdqn.com节点操作
2.1、配置postfix
- postfix:提供发邮件功能
[root@ns ~]# yum -y install postfix		# 默认已经安装


以下操作均默认存在,只需要在原有的配置上进行修改即可
[root@ns ~]# vim /etc/postfix/main.cf
myhostname = ns.bdqn.com   # 填写服务器主机名
mydomain = bdqn.com		# 设置服务器域名
inet_interfaces = 192.168.93.101	# 修改监听地址,也可以写成all
mydestination = $mydomain,$myhostname	# 定义可接受的主机或域名列表
home_mailbox = Maildir/		# 邮箱保存路径
[root@ns ~]# systemctl restart postfix.service

# 监听postfix端口,25
[root@ns ~]# netstat -anpt | grep 25
tcp        0      0 192.168.93.101:25       0.0.0.0:*               LISTEN      14995/master
2.2、配置dovecot
- dovecot:提供发邮件功能
[root@ns ~]# yum -y install dovecot*   # 安装发邮件服务

先进行全局搜索配置项,有的话就修改,没有就添加
[root@ns ~]# vim /etc/dovecot/dovecot.conf
!include conf.d/10-auth.conf
ssl=no
disable_plaintext_auth = no
mail_location=maildir:~/Maildir

[root@ns ~]# systemctl start dovecot
[root@ns ~]# systemctl enable dovecot

# 监听dovecot端口、110
[root@ns ~]# netstat -anpt | grep 110
tcp        0      0 0.0.0.0:110             0.0.0.0:*               LISTEN      15233/dovecot
tcp6       0      0 :::110                  :::*                    LISTEN      15233/dovecot
2.3、创建邮件用户
[root@ns ~]# groupadd mailusers
[root@ns ~]# useradd -g mailusers -s /sbin/nologin test01
[root@ns ~]# useradd -g mailusers -s /sbin/nologin test02
[root@ns ~]# echo "123" | passwd --stdin test01
[root@ns ~]# echo "123" | passwd --stdin test02
[root@ns ~]# chmod 600 /var/mail/*
三、发送邮件测试
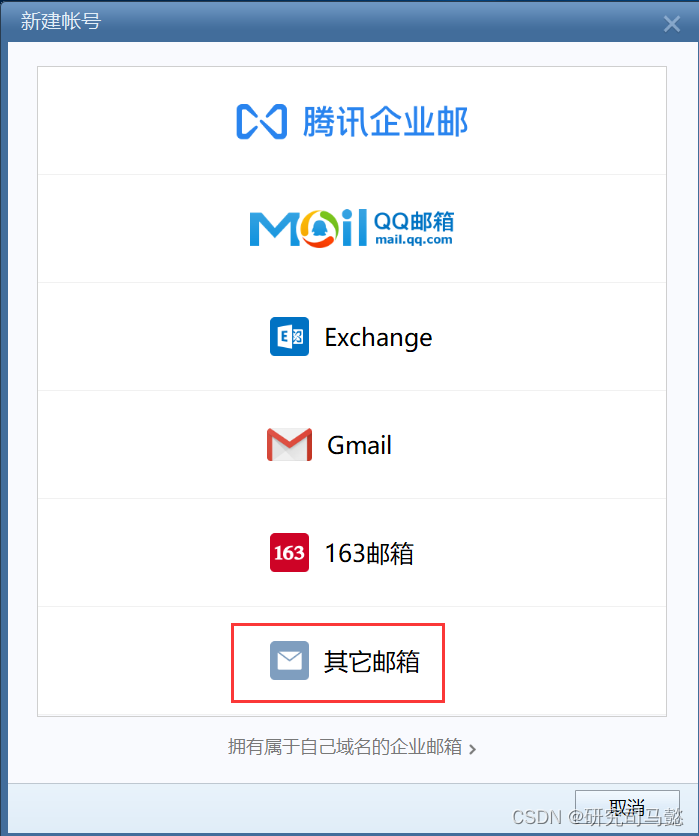
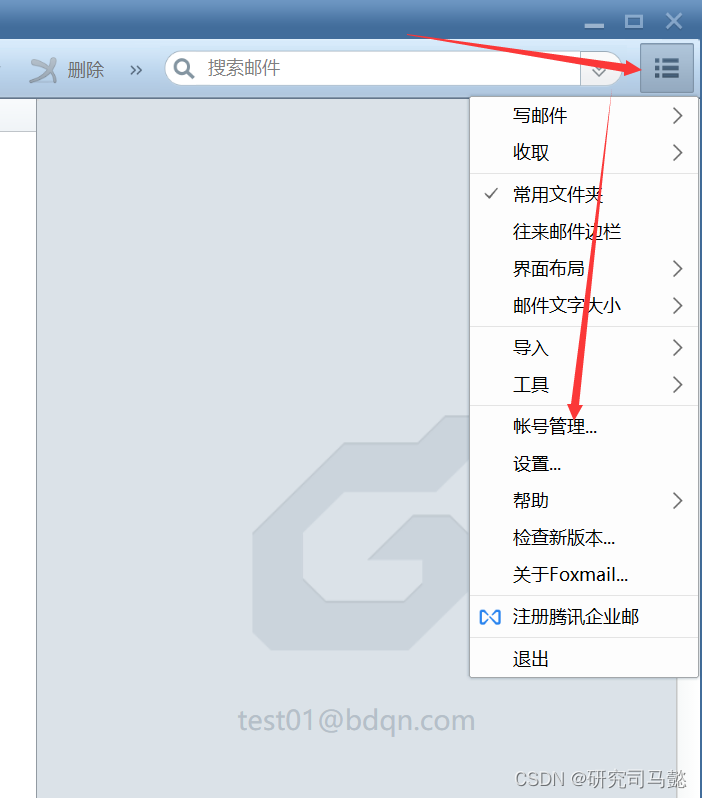
3.1、windows安装poxmail
- 下面是下载软件地址
https://dldir1.qq.com/foxmail/windows/FoxmailSetup_7.2.23.121.exe
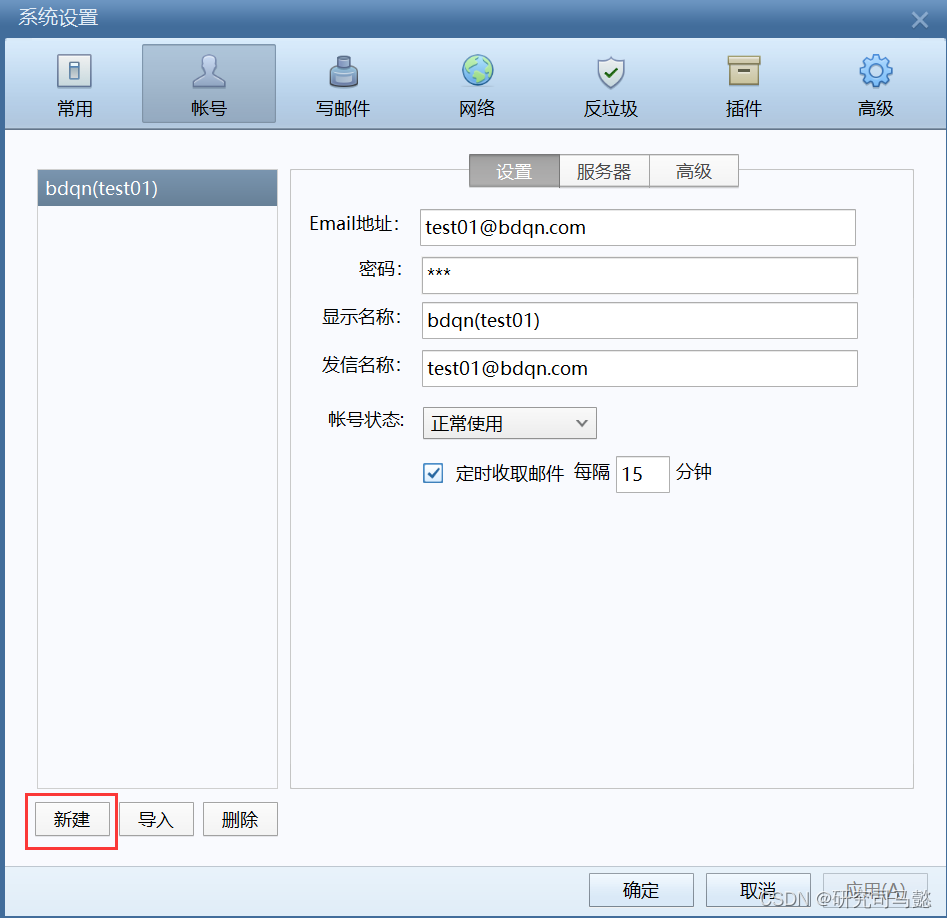
3.2、登录邮箱
- 登录test01用户账号
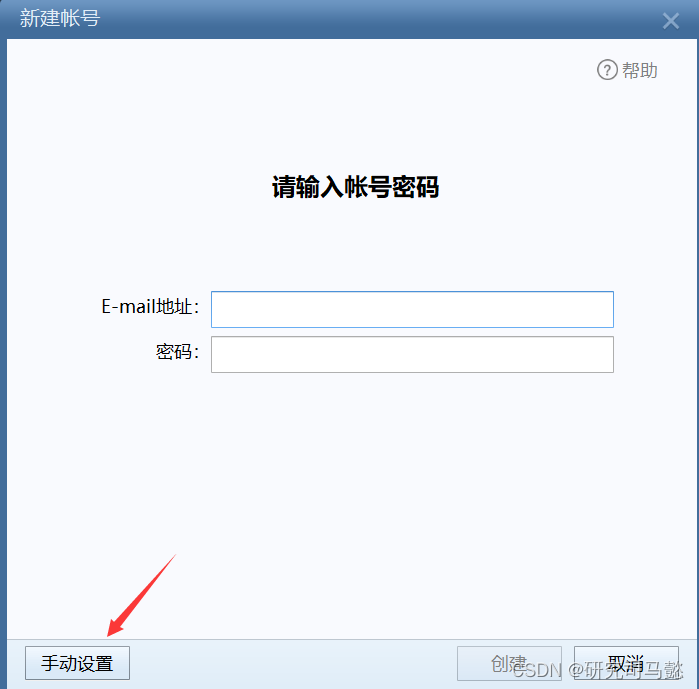
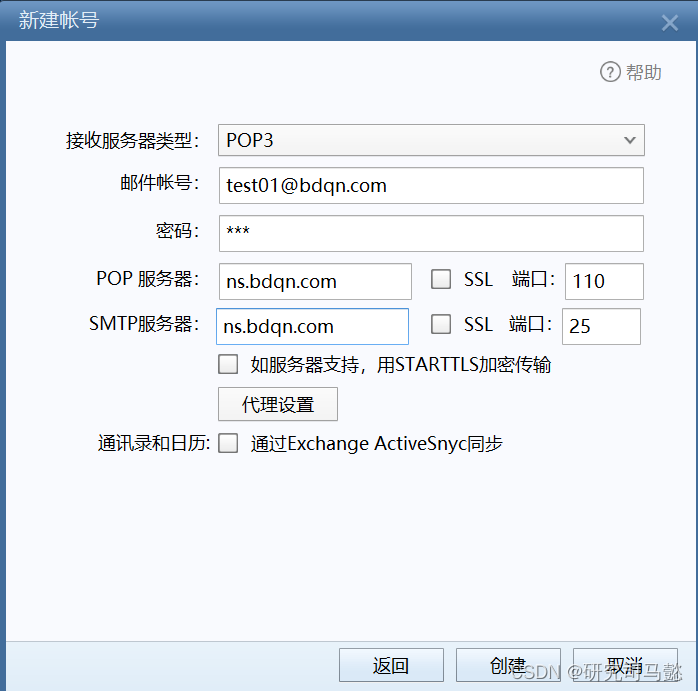
- 登录test02邮箱账号
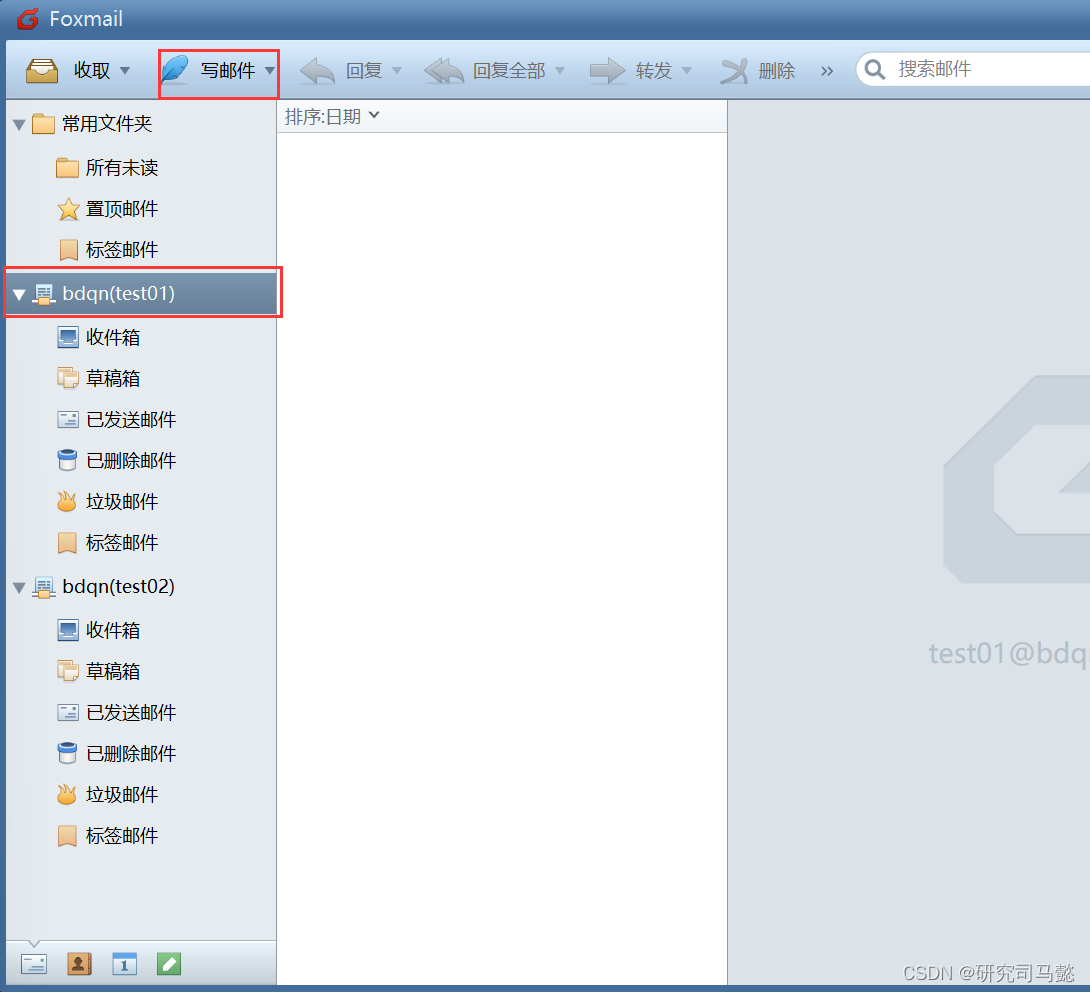
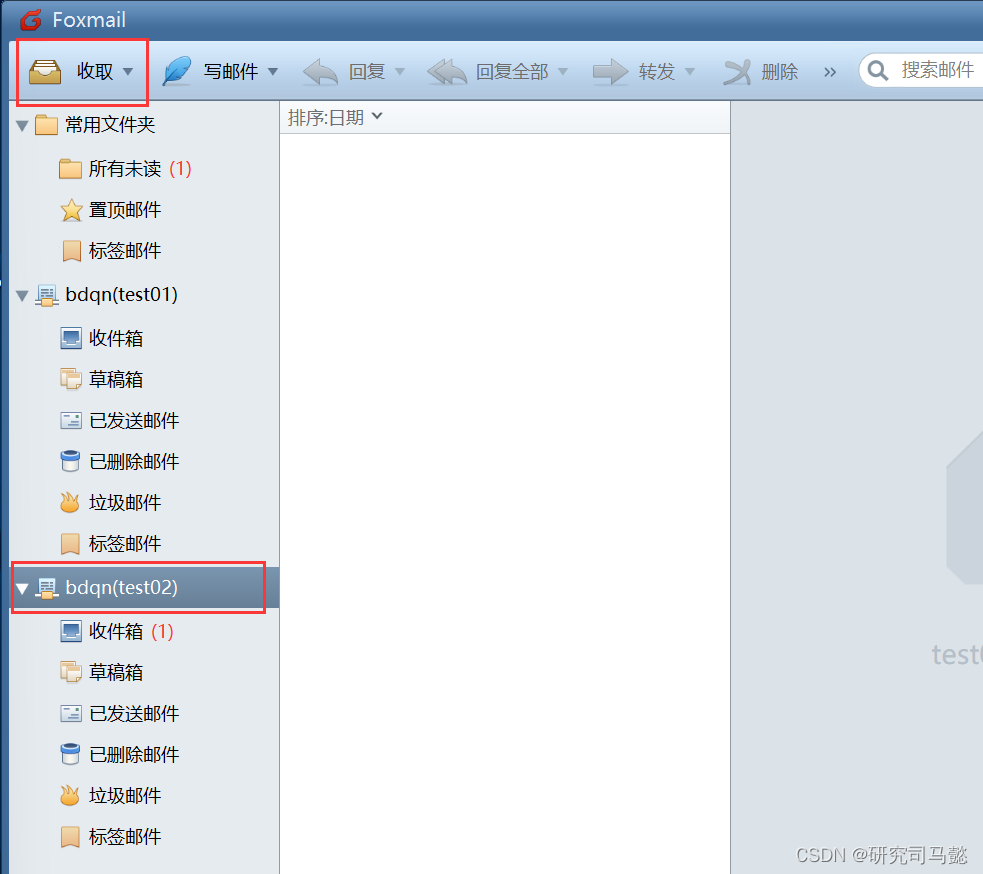
3.3、发送接收邮件

四、搭建SSL认证加密
- 安装搭建SSL认证加密,防止有人窃取文件
[root@ns ~]# yum -y install openssl # 默认已经安装
4.1、生成私钥
# 生成私钥
[root@ns ~]# cd /etc/pki/tls/certs/
[root@ns certs]# make server.key
umask 77 ; \
/usr/bin/openssl genrsa -aes128 2048 > server.key
Generating RSA private key, 2048 bit long modulus
.....................................+++
.........................................................................................+++
e is 65537 (0x10001)
Enter pass phrase:		# 密码123456
Verifying - Enter pass phrase:		# 确认密码

[root@ns certs]# openssl rsa -in server.key -out server.key
Enter pass phrase for server.key:		# 输入刚刚的密码123456
writing RSA key
4.2、生成公钥
# 生成公钥
[root@ns certs]# make server.csr
umask 77 ; \
/usr/bin/openssl req -utf8 -new -key server.key -out server.csr
You are about to be asked to enter information that will be incorporated
into your certificate request.
What you are about to enter is what is called a Distinguished Name or a DN.
There are quite a few fields but you can leave some blank
For some fields there will be a default value,
If you enter '.', the field will be left blank.
-----
Country Name (2 letter code) [XX]:CN	#中国
State or Province Name (full name) []:HeNan		#河南
Locality Name (eg, city) [Default City]:ZhengZhou	#郑州
Organization Name (eg, company) [Default Company Ltd]:kgc #单位
Organizational Unit Name (eg, section) []:jisuanji	#组织单位
Common Name (eg, your name or your server's hostname) []:bdqn.com
Email Address []:	#回车

Please enter the following 'extra' attributes
to be sent with your certificate request
A challenge password []:	#回车
An optional company name []:	#回车
4.3、生成自签证书
[root@ns certs]# openssl x509 -in server.csr -out server.crt -req -signkey server.key -days 3650
Signature ok
subject=/C=CN/ST=HeNan/L=ZhengZhou/O=kgc/OU=jisuanji/CN=bdqn.com
Getting Private key
4.4、更改证书权限
[root@ns certs]# chmod 400 server.*
[root@ns certs]# ls server.*
server.crt  server.csr  server.key
4.5、配置发件SSL
[root@ns certs]# vim /etc/postfix/main.cf
# 末尾添加即可
smtpd_use_tls = yes
smtpd_tls_cert_file = /etc/pki/tls/certs/server.crt
smtpd_tls_key_file = /etc/pki/tls/certs/server.key

[root@ns certs]# vim /etc/postfix/master.cf
# 26、28行取消注释
smtps     inet  n       -       n       -       -       smtpd
  -o smtpd_tls_wrappermode=yes

# 监听端口、465
[root@ns certs]# systemctl restart postfix.service
[root@ns certs]# netstat -anpt | grep 465
tcp        0      0 192.168.93.101:465      0.0.0.0:*               LISTEN      15621/master
4.6、配置收件SSL
[root@ns certs]# vim /etc/dovecot/dovecot.conf
# 将下面一行配置端更改为*
!include conf.d/*.conf
# 删除下面两行配置项
ssl=no
disable_plaintext_auth = no

[root@ns certs]# vim /etc/dovecot/conf.d/10-ssl.conf
ssl = yes	# 更改为yes
# 修改下面两行配置项
ssl_cert = </etc/pki/tls/certs/server.crt
ssl_key = </etc/pki/tls/certs/server.key
[root@ns certs]# systemctl restart dovecot

# 监听端口、995
[root@ns certs]# netstat -anpt | grep 995
tcp        0      0 0.0.0.0:995             0.0.0.0:*               LISTEN      15752/dovecot
tcp6       0      0 :::995                  :::*                    LISTEN      15752/dovecot
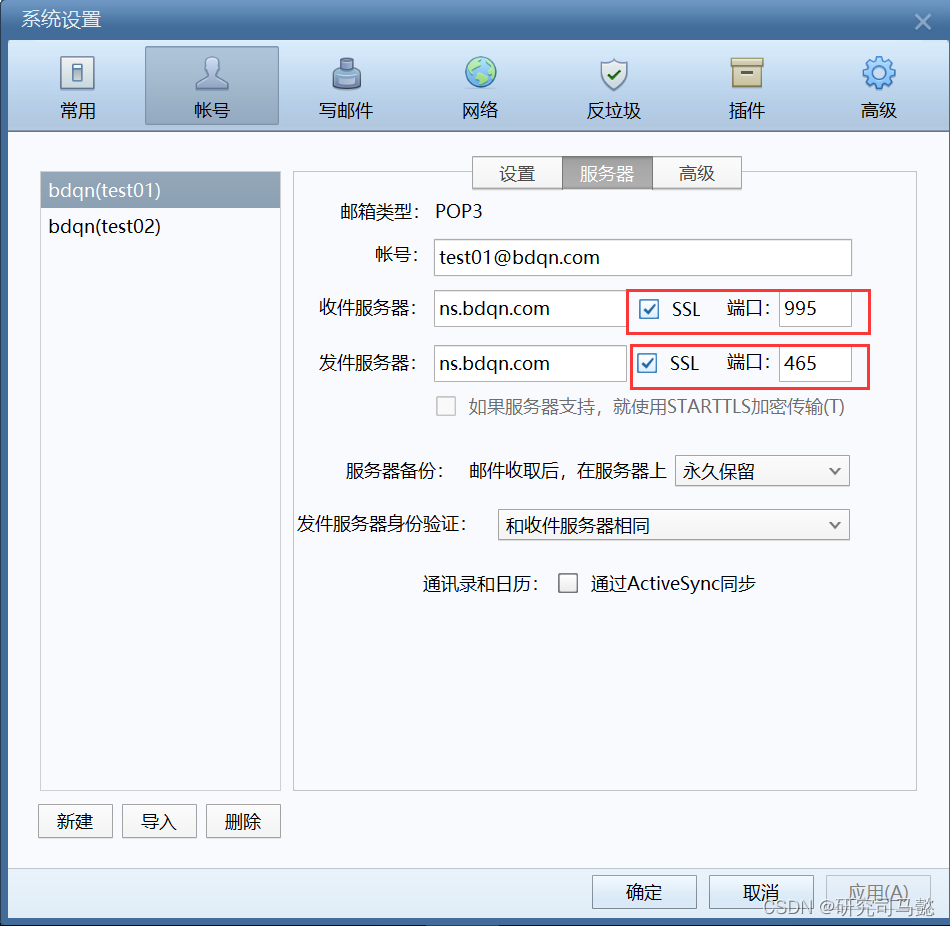
五、验证SSL
-
test01、test02都开启SSL端口分别为995、465
-
进行发送跟接收文件步骤和第三步骤一样,重复一遍即可


 1612
1612


 被折叠的 条评论
为什么被折叠?
被折叠的 条评论
为什么被折叠?
 到【灌水乐园】发言


