


探究repaint函数的作用
前言
我在编写java手写识别项目(一):初识KNN算法和GUI框架搭建的时候学到的新的函数——repaint函数,觉得这个函数在编写与绘图有关的项目中有着重要的作用,在这篇文章中,我将详细的分析这个函数,并探究这个函数的应用,希望对大家的java的学习有一定帮助。
一、repaint函数是什么?
1. 回到项目中的应用
在编写java手写识别项目(一):初识KNN算法和GUI框架搭建时,我接触到的用处就是清空画布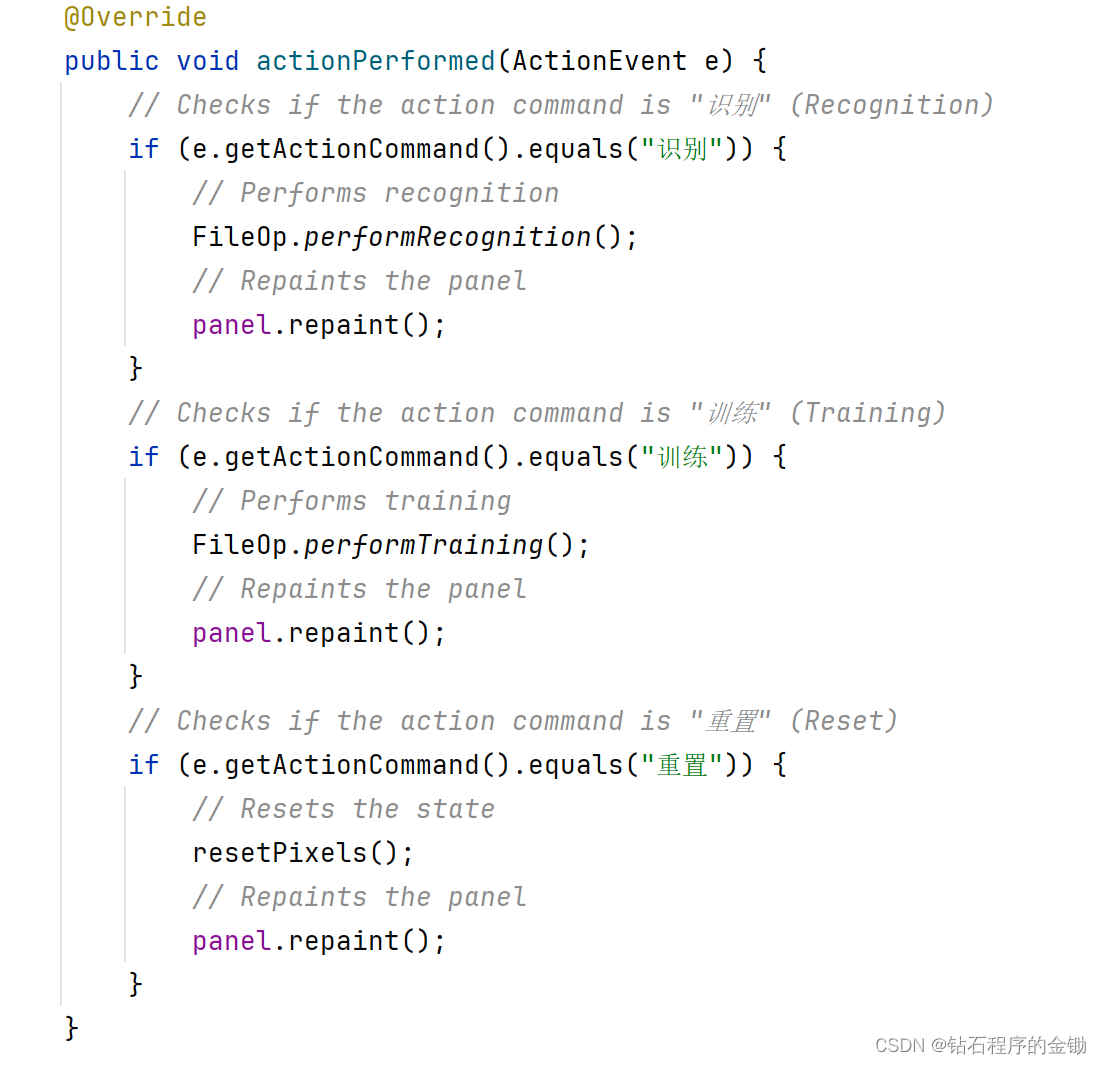
每当执行完一个动作或Button后我都会调用一次repaint函数进行清空画布,这样再进行其他操作就比较方便。
那么repaint函数到底是什么?
我们先看看GPT4.0怎么说:
在Java Swing框架中,
repaint()是一个方法,用于请求异步更新组件的显示。它标记一个组件为“需要重绘”,通知Swing的绘图系统在未来的某个时刻重新绘制该组件。这个过程涉及调用组件的paint()方法,通常是由事件调度线程(Event Dispatch Thread,EDT)处理。通过这种方式,repaint()实现了Swing组件视觉外观的动态更新。
😂🤔😓额…非常好,除了汉字之外我就看明白汉字了(啥也看不懂🥹)
2. 深入源码
既然专业的描述看不懂,那就需要深入分析,一个容易想到的方法就是直接查看它的源码。在 Windows/Linux 上,使用 Ctrl + B 或 Ctrl + Click。在 macOS 上,使用 Cmd + B 或 Cmd + Click,进入到Component类中。我们会看到以下代码:
    /**
     * Repaints this component.
     * <p>
     * If this component is a lightweight component, this method
     * causes a call to this component's {@code paint}
     * method as soon as possible.  Otherwise, this method causes
     * a call to this component's {@code update} method as soon
     * as possible.
     * <p>
     * <b>Note</b>: For more information on the paint mechanisms utilitized
     * by AWT and Swing, including information on how to write the most
     * efficient painting code, see
     * <a href="http://www.oracle.com/technetwork/java/painting-140037.html">Painting in AWT and Swing</a>.

     *
     * @see       #update(Graphics)
     * @since     1.0
     */
    public void repaint() {
        repaint(0, 0, 0, width, height);
    }

    /**
     * Repaints the component.  If this component is a lightweight
     * component, this results in a call to {@code paint}
     * within {@code tm} milliseconds.
     * <p>
     * <b>Note</b>: For more information on the paint mechanisms utilitized
     * by AWT and Swing, including information on how to write the most
     * efficient painting code, see
     * <a href="http://www.oracle.com/technetwork/java/painting-140037.html">Painting in AWT and Swing</a>.
     *
     * @param tm maximum time in milliseconds before update
     * @see #paint
     * @see #update(Graphics)
     * @since 1.0
     */
    public void repaint(long tm) {
        repaint(tm, 0, 0, width, height);
    }

    /**
     * Repaints the specified rectangle of this component.
     * <p>
     * If this component is a lightweight component, this method
     * causes a call to this component's {@code paint} method
     * as soon as possible.  Otherwise, this method causes a call to
     * this component's {@code update} method as soon as possible.
     * <p>
     * <b>Note</b>: For more information on the paint mechanisms utilitized
     * by AWT and Swing, including information on how to write the most
     * efficient painting code, see
     * <a href="http://www.oracle.com/technetwork/java/painting-140037.html">Painting in AWT and Swing</a>.
     *
     * @param     x   the <i>x</i> coordinate
     * @param     y   the <i>y</i> coordinate
     * @param     width   the width
     * @param     height  the height
     * @see       #update(Graphics)
     * @since     1.0
     */
    public void repaint(int x, int y, int width, int height) {
        repaint(0, x, y, width, height);
    }

    /**
     * Repaints the specified rectangle of this component within
     * {@code tm} milliseconds.
     * <p>
     * If this component is a lightweight component, this method causes
     * a call to this component's {@code paint} method.
     * Otherwise, this method causes a call to this component's
     * {@code update} method.
     * <p>
     * <b>Note</b>: For more information on the paint mechanisms utilitized
     * by AWT and Swing, including information on how to write the most
     * efficient painting code, see
     * <a href="http://www.oracle.com/technetwork/java/painting-140037.html">Painting in AWT and Swing</a>.
     *
     * @param     tm   maximum time in milliseconds before update
     * @param     x    the <i>x</i> coordinate
     * @param     y    the <i>y</i> coordinate
     * @param     width    the width
     * @param     height   the height
     * @see       #update(Graphics)
     * @since     1.0
     */
    public void repaint(long tm, int x, int y, int width, int height) {
        if (this.peer instanceof LightweightPeer) {
            // Needs to be translated to parent coordinates since
            // a parent native container provides the actual repaint
            // services.  Additionally, the request is restricted to
            // the bounds of the component.
            if (parent != null) {
                if (x < 0) {
                    width += x;
                    x = 0;
                }
                if (y < 0) {
                    height += y;
                    y = 0;
                }

                int pwidth = (width > this.width) ? this.width : width;
                int pheight = (height > this.height) ? this.height : height;

                if (pwidth <= 0 || pheight <= 0) {
                    return;
                }

                int px = this.x + x;
                int py = this.y + y;
                parent.repaint(tm, px, py, pwidth, pheight);
            }
        } else {
            if (isVisible() && (this.peer != null) &&
                (width > 0) && (height > 0)) {
                PaintEvent e = new PaintEvent(this, PaintEvent.UPDATE,
                                              new Rectangle(x, y, width, height));
                SunToolkit.postEvent(SunToolkit.targetToAppContext(this), e);
            }
        }
    }
这就是源代码的特点,我第一次看,简单说就是一堆奇怪的注释和一些看不懂的代码。在C/C++中,源代码理解起来还是相当于难度的,但是在java IDEA中,理解成本降低了不少,对于初学者来说查看源代码对于理解一个类或函数的作用有很大的作用。
3. 详细分析
整体概括
进入源码后,我们会看到repaint函数的4的重载函数,它们分别是:
public void repaint() {
    repaint(0, 0, 0, width, height);
}
public void repaint(long tm) {
    repaint(tm, 0, 0, width, height);
}
public void repaint(int x, int y, int width, int height) {
    repaint(0, x, y, width, height);
}
public void repaint(long tm, int x, int y, int width, int height) {
    // ... (具体实现略)
}
这4个。我们不难看出,核心的代码就是第4个函数,其余3个都是对第4个进行调用,下面,我们将注意力集中到第4个函数上。对函数进行简单的处理:我们使用GPT为其添加中文的注释
public void repaint(long tm, int x, int y, int width, int height) {
    // 检查组件是否为轻量级组件(不是直接由本地系统窗口管理)
    if (this.peer instanceof LightweightPeer) {
        // 对于轻量级组件,重绘请求需要转发给父组件处理

        // 检查是否有父组件存在
        if (parent != null) {
            // 确保请求的重绘区域在组件的范围内
            if (x < 0) {
                width += x; // 调整宽度
                x = 0;      // 重置x坐标
            }
            if (y < 0) {
                height += y; // 调整高度
                y = 0;       // 重置y坐标
            }

            // 确保请求的重绘区域不大于组件自身的尺寸
            int pwidth = (width > this.width) ? this.width : width;
            int pheight = (height > this.height) ? this.height : height;

            // 如果计算后的重绘区域有效(即宽度和高度大于0)
            if (pwidth > 0 && pheight > 0) {
                // 将重绘区域的坐标转换为父组件的坐标系
                int px = this.x + x;
                int py = this.y + y;

                // 调用父组件的repaint方法,传递转换后的参数
                parent.repaint(tm, px, py, pwidth, pheight);
            }
        }
    } else {
        // 对于量级重组件(由本地系统窗口管理)

        // 检查组件是否可见并且有有效的peer(窗口句柄)
        if (isVisible() && (this.peer != null) && (width > 0) && (height > 0)) {
            // 创建一个绘图事件,指定需要更新的区域
            PaintEvent e = new PaintEvent(this, PaintEvent.UPDATE, new Rectangle(x, y, width, height));

            // 将绘图事件发布到Swing事件队列中,待后续处理
            SunToolkit.postEvent(SunToolkit.targetToAppContext(this), e);
        }
    }
}
这里我们看到了repaint函数对于轻量级和重量级组件分别进行了处理,为什么需要这样的区分:在 Swing 中,轻量级和重量级组件的绘制机制有显著差异。轻量级组件完全由 Java 自身处理绘制,而重量级组件的绘制则涉及到与本地操作系统的交互。这种区分对于优化绘制性能和处理组件间的交互(如重叠和布局)非常重要。
if (this.peer instanceof LightweightPeer)这一条语句,就是用于判断是否为轻量级组件,这个语句的具体含义发,我们这篇文章不做具体分析,相关文档我放到文章开头的资源绑定中了。
轻量级组件处理
这个过程有点像递归调用
if (parent != null) {
	// 确保请求的重绘区域在组件的范围内
	if (x < 0) {
		width += x; // 调整宽度
		x = 0;      // 重置x坐标
	}
	if (y < 0) {
		height += y; // 调整高度
		y = 0;       // 重置y坐标
	}

	// 确保请求的重绘区域不大于组件自身的尺寸
  	int pwidth = (width > this.width) ? this.width : width;
	int pheight = (height > this.height) ? this.height : height;

	if (pwidth <= 0 || pheight <= 0) {
		return;
	}

	// 将重绘区域的坐标转换为父组件的坐标系
	int px = this.x + x;
	int py = this.y + y;

	// 调用父组件的repaint方法,传递转换后的参数
	parent.repaint(tm, px, py, pwidth, pheight);
}
当这个轻量级组件的父组件不为空时,这个轻量级组件的重绘请求在组件树中向上传递,因为对于轻量级组件,重绘操作通常需要父组件来协助处理,轻量级组件本身不拥有与底层平台的直接交互能力。这个过程中不断调整坐标让它适应父组件,直至找到一个合适的处理者。
最终,重绘请求会传递到一个可以直接处理绘制请求的组件。在 Swing 中,这通常是一个能够与底层窗口系统交互的重量级组件,或者是顶级容器(如 JFrame、JDialog)。这个组件或容器负责管理其所有子组件的绘制。
接下来就进入到了else下面的语句:
重量级组件处理
else {
    // 检查组件是否可见、是否有对应的peer对象(即与本地窗口系统的连接),
    // 以及请求重绘的区域宽度和高度是否有效(大于0)
    if (isVisible() && (this.peer != null) && (width > 0) && (height > 0)) {
        // 创建一个绘制事件(PaintEvent),指定需要更新的区域
        PaintEvent e = new PaintEvent(this, PaintEvent.UPDATE, new Rectangle(x, y, width, height));

        // 将这个绘制事件发布到事件队列中,等待事件调度线程(Event Dispatch Thread, EDT)处理
        SunToolkit.postEvent(SunToolkit.targetToAppContext(this), e);
    }
}
对这些底层组件进行处理,这是repaint函数的核心所在。它通过创建一个绘制事件并将其传递给事件队列中等待EDT处理。这部分需要与底层建立链接,下面时详细的执行过程:
检查组件状态
-
可见性与存在性检查:
isVisible(): 确保组件当前是可见的。如果组件不可见,那么没有必要进行重绘操作。this.peer != null: 确保组件具有有效的“peer”,即它已经与底层窗口系统建立了连接。对于重量级组件,peer 是其在本地窗口系统中的表示。
-
重绘区域的有效性检查:
width > 0 && height > 0: 确保请求重绘的区域具有有效的尺寸。如果宽度或高度为零或负数,则没有实际的绘制工作需要执行。
创建并发布绘制事件
-
创建绘制事件(
PaintEvent):new PaintEvent(this, PaintEvent.UPDATE, new Rectangle(x, y, width, height)): 创建一个新的PaintEvent对象,表示一个绘制请求。这个事件包含了组件自身的引用和需要更新的区域。PaintEvent.UPDATE: 这是事件的类型,表示这是一个更新事件。在 Swing 中,UPDATE类型的事件通常会触发组件的update方法,该方法再调用paint方法来执行实际的绘制操作。
-
发布事件到事件队列:
SunToolkit.postEvent(SunToolkit.targetToAppContext(this), e): 这一步骤将创建的PaintEvent发布到 Swing 的事件队列中。SunToolkit.targetToAppContext(this)确定了事件应该被发布到哪个应用程序上下文中。- 事件队列由事件调度线程(Event Dispatch Thread, EDT)处理。EDT 负责处理所有的 GUI 事件,包括绘制事件。这样做确保了 GUI 操作的线程安全和一致性。
事件处理和绘制执行
-
事件调度线程处理事件:
- 当
PaintEvent到达事件队列后,EDT 将提取并处理这个事件。处理通常涉及调用组件的update方法,后者通常再调用paint方法来进行实际的绘制。 - 绘制操作会根据
PaintEvent指定的区域更新组件的视觉表示。
- 当
-
完成重绘流程:
- 一旦
paint方法执行完成,组件的相关部分就被更新了。如果有必要,操作系统会将这些更改反映到屏幕上。 - 这样,重量级组件的更新请求就在 Swing 的架构中得到了正确的处理。
- 一旦
二、一个简短的总结
repaint实现重绘操作最终还是由paint函数实现的,哈哈哈哈哈说了一堆repaint就是用paint画😂
那么问题来了,为什么repaint函数回经过如此复杂的过程来连接底层,连接操作系统,而不是直接通过paint函数覆盖实现重绘?
通过查阅资料,总结出一下5点:
涉及到Java Swing 的设计哲学和多线程环境中的绘制机制。
1. 线程安全和事件调度
- 事件调度线程(EDT):Swing 是一个基于事件驱动的框架,所有的 GUI 操作,包括绘制,都必须在事件调度线程(EDT)上执行。这是为了确保线程安全,因为 GUI 组件不是线程安全的。如果直接在非EDT线程上调用
paint方法,可能会导致线程冲突和界面更新的不一致性。
2. 优化绘制过程
- 避免不必要的绘制:
repaint方法允许 Swing 延迟绘制操作,合并多个绘制请求,从而减少不必要的屏幕刷新和重新绘制。这种优化对于提高应用程序的性能和响应速度非常重要。
3. 管理绘制的复杂性
- 复杂的组件层次结构:Swing 应用通常包含复杂的组件层次结构。
repaint方法通过委托给父组件或 Swing 的绘制系统,可以更有效地管理这种复杂性,例如处理重叠的组件或部分重绘。
4. 提供灵活的绘制机制
- 自定义绘制的控制:
repaint方法为开发者提供了控制何时以及如何更新组件的灵活性。而直接调用paint方法则缺乏这样的控制,可能导致无效的绘制和性能问题。
5. 遵守 MVC 设计模式
- 分离表示和逻辑:Swing 遵循模型-视图-控制器(MVC)设计模式。在这种模式中,
repaint方法属于控制器的一部分,负责处理绘制逻辑,而paint方法属于视图,负责表示。这种分离确保了代码的模块化和可维护性。
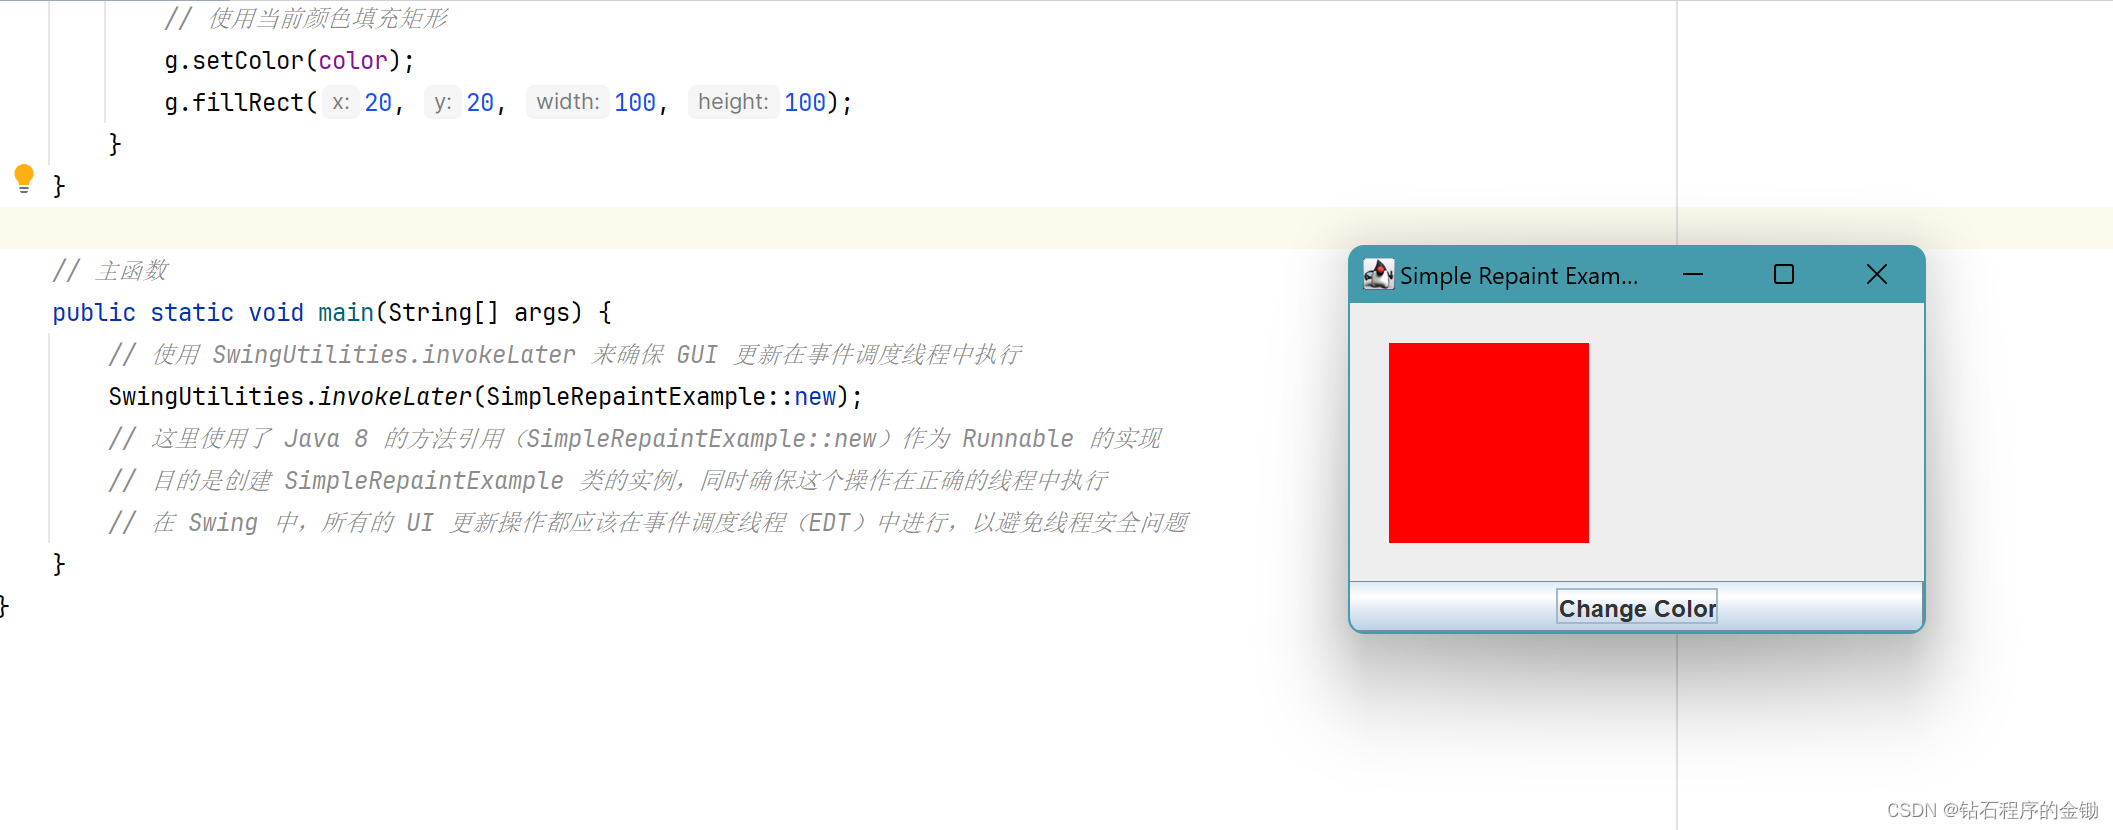
三、一个应用案例
import javax.swing.*;
import java.awt.*;
import java.util.Random;

// 定义 SimpleRepaintExample 类,继承自 JFrame,用于创建主窗口
public class SimpleRepaintExample extends JFrame {

    // 定义 ColorPanel 实例变量
    private final ColorPanel colorPanel;

    // 构造函数
    public SimpleRepaintExample() {
        // 设置窗口标题
        setTitle("Simple Repaint Example");
        // 设置默认关闭操作,关闭窗口时退出应用程序
        setDefaultCloseOperation(JFrame.EXIT_ON_CLOSE);

        // 创建 ColorPanel 实例,并添加到窗口的中央
        colorPanel = new ColorPanel();
        add(colorPanel, BorderLayout.CENTER);

        // 创建按钮,用于触发颜色变化和重绘
        JButton changeColorButton = new JButton("Change Color");
        changeColorButton.addActionListener(e -> {
            colorPanel.changeColor(); // 改变颜色
            colorPanel.repaint();     // 请求重绘 ColorPanel
        });
        add(changeColorButton, BorderLayout.SOUTH); // 将按钮添加到窗口的南部

        // 设置窗口的大小
        setSize(300, 200);
        // 使窗口可见
        setVisible(true);
    }

    // 定义 ColorPanel 类,继承自 JPanel
    private static class ColorPanel extends JPanel {
        // 初始颜色设置为红色
        private Color color = Color.RED;

        // 用于改变颜色的方法
        public void changeColor() {
            // 随机生成新的颜色
            Random rand = new Random();
            float r = rand.nextFloat();
            float g = rand.nextFloat();
            float b = rand.nextFloat();
            color = new Color(r, g, b); // 设置新颜色
        }

        // 重写 paintComponent 方法,用于绘制组件
        @Override
        protected void paintComponent(Graphics g) {
            super.paintComponent(g);  // 调用父类的 paintComponent 方法
            // 使用当前颜色填充矩形
            g.setColor(color);
            g.fillRect(20, 20, 100, 100);
        }
    }

    // 主函数
    public static void main(String[] args) {
        // 使用 SwingUtilities.invokeLater 来确保 GUI 更新在事件调度线程中执行
        SwingUtilities.invokeLater(SimpleRepaintExample::new);
        // 这里使用了 Java 8 的方法引用(SimpleRepaintExample::new)作为 Runnable 的实现
        // 目的是创建 SimpleRepaintExample 类的实例,同时确保这个操作在正确的线程中执行
        // 在 Swing 中,所有的 UI 更新操作都应该在事件调度线程(EDT)中进行,以避免线程安全问题
    }
}
一个以变色的小方块😊
总结
在本篇博客中,我们深入探讨了 Java Swing 中 repaint 方法的工作原理及其在组件绘制中的关键作用。通过分析 repaint 方法的源码,我们理解了 Swing 如何处理轻量级和重量级组件的绘制请求,并确保了在多线程环境中的线程安全和高效绘制。我们还探讨了 repaint 与 paint 方法之间的区别以及 Swing 的事件驱动架构。此外,通过具体的代码示例,我们展示了如何在实际应用中使用这些知识。这些理解对于开发高效、稳定的 Swing 应用至关重要。


 2869
2869


 被折叠的 条评论
为什么被折叠?
被折叠的 条评论
为什么被折叠?
 到【灌水乐园】发言


