文章目录
一、前言
官方网站:https://jquery.com/
参考资料:https://learn.jquery.com/about-jquery/、https://www.runoob.com/jquery/jquery-tutorial.html
二、概述
2.1 介绍
jQuery 是一个快速、小型且功能丰富的 JavaScript 库。它可以在多个浏览器上通过使用API来遍历HTML 文档、事件处理、动画和 Ajax 等
2.2 安装
下载链接:https://jquery.com/download/,选择适宜的版本进入页面后,右键保存为文件,然后将下载好的文件放在网页的同一目录下,就可以开始使用JQuery了

除此之外,也可以使用CDN来使用JQuery,例如使用百度的CDN:
<head>
  <script src="https://apps.bdimg.com/libs/jquery/2.1.4/jquery.min.js">
  </script>
</head>
三、语法
3.1 文档就绪
在DOM加载完成后才开始对DOM进行操作,基本格式为:
$(document).ready(function(){
        // JQuery代码
});

// 也可以这么写
$(function(){
        // JQuery代码
});
举个栗子:当刷新网页时,会触发警告框
<html>
  <head>
    <script src="https://apps.bdimg.com/libs/jquery/2.1.4/jquery.min.js"></script>
    <script>
      $( document ).ready(function() {
        alert( "document loaded" );
      });
    </script>
  </head>
  <body>
    <p>Hello world!</p>
  </body>
</html>

也可以写成下面形式,效果都是一样的
<html>
  <head>
    <script src="https://apps.bdimg.com/libs/jquery/2.1.4/jquery.min.js"></script>
    <script>
      $( window ).on( "load", function() {
        alert( "window loaded" );
      });
    </script>
  </head>
  <body>
    <p>Hello world!</p>
  </body>
</html>

3.2 选择器
JQuery通过选取HTML元素来对其进行操作;语法:$(selector).action()
|
四、事件
4.1 概述
常见DOM事件:
| 鼠标事件 | 键盘事件 | 表单事件 | 文档/窗口事件 |
|---|---|---|---|
| click | keypress | submit | load |
| dblclick | keydown | change | resize |
| mouseenter | keyup | focus | scroll |
| mouseleave | blur | unload | |
| hover |
事件对象的关键属性和方法:

4.2 事件绑定/解绑
▰▰▰▰▰▰▰▰▰▰▰▰▰▰▰▰绑定事件▰▰▰▰▰▰▰▰▰▰▰▰▰▰▰
on方法用来绑定一个或多个事件处理函数,格式为on(events[,selector][,data],handler)
events:事件
selector:选择器,用于筛选触发事件的选定元素后代
data:数据,触发事件时用来传递给处理程序
handler:处理器,触发事件时要执行的函数
// 单个事件
$("button").on("click", function() {
  console.log("按钮被点击");
});

// 多个事件(共用处理函数)
$("input").on("focus blur", function(e) {
  console.log(e.type); // 输出 'focus' 或 'blur'
});

// 多个事件和多个处理
$( "div" ).on({
    mouseenter: function() {
        console.log( "hovered over a div" );
    },
    mouseleave: function() {
        console.log( "mouse left a div" );
    },
    click: function() {
        console.log( "clicked on a div" );
    }
});

// 将数据传递给处理程序
$( "button" ).on( "click", {
  name: "Karl"
}, function greet( event ) {
  alert( "Hello " + event.data.name );
} );
除此之外,也可以使用快捷方法:
| 方法 | 描述 |
|---|---|
click() | 按钮点击时触发事件 |
dblclick() | 双击元素时触发事件 |
mouseenter() | 鼠标穿过元素时触发事件 |
mouseleave() | 鼠标离开元素时触发事件 |
mousedown() | 鼠标移动到元素上方,并按下按键时触发事件 |
mouseup() | 在元素上方松开鼠标按钮时触发事件 |
hover() | 悬停在元素上方时触发事件 |
focus() | 元素获得焦点触发事件 |
blur() | 元素失去焦点触发事件 |
click方法:按钮点击时会触发事件
<html>
  <head>
    <script src="https://apps.bdimg.com/libs/jquery/2.1.4/jquery.min.js"></script>
    <script>
      $( window ).on( "load", function() {
        $( "#btn" ).click(function() {
            alert( "按钮被点击了!" );
        })
      });
    </script>
  </head>
  <body>
    <p>Hello world!</p>
    <button class="btn" id="btn">Click me!</button>
  </body>
</html>
dblclick方法:双击元素时,会触发事件
<html>
  <head>
    <script src="https://apps.bdimg.com/libs/jquery/2.1.4/jquery.min.js"></script>
    <script>
      $( window ).on( "load", function() {
        $( "p" ).dblclick(function() {
            alert( "文本被双击了!" );
        })
        $( "#btn" ).click(function() {
            alert( "按钮被单击了!" );
        })
      });
    </script>
  </head>
  <body>
    <p>Hello world!</p>
    <button class="btn" id="btn">Click me!</button>
  </body>
</html>
mouseenter方法:鼠标穿过元素时,会触发事件
<html>
  <head>
    <script src="https://apps.bdimg.com/libs/jquery/2.1.4/jquery.min.js"></script>
    <script>
      $( window ).on( "load", function() {
        $( "p" ).mouseenter(function() {
            alert( "文本被穿过了!" );
        })
      });
    </script>
  </head>
  <body>
    <p>Hello world!</p>
  </body>
</html>
▰▰▰▰▰▰▰▰▰▰▰▰▰▰▰▰事件解绑▰▰▰▰▰▰▰▰▰▰▰▰▰▰▰
通过使用off方法来移除通过on方法绑定的事件
// 移除所有事件
$("button").off();

// 移除特定类型事件
$("input").off("focus");

// 移除委托事件
$("#container").off("click", ".dynamic-item");
4.3 一次性事件
one方法只执行一次后就会自动解绑:
// 单个事件
$("button").one("click", function() {
  alert("仅显示一次");
});

// 多个事件
$("input").one("focus blur", function(e) {
  console.log(e.type);
});
4.4 事件委托
事件委托利用事件冒泡,将子元素的事件处理程序绑定到父元素上,这样可以通过父元素统一管理子元素的事件处理程序。
在父元素上监听子元素事件,格式为父元素.on(事件,子选择器,处理函数)
$( "#list" ).on( "click", "a", function( event ) {
    event.preventDefault();
    console.log( $( this ).text() );
});
事件委托与直接绑定的区别:

4.5 自定义事件
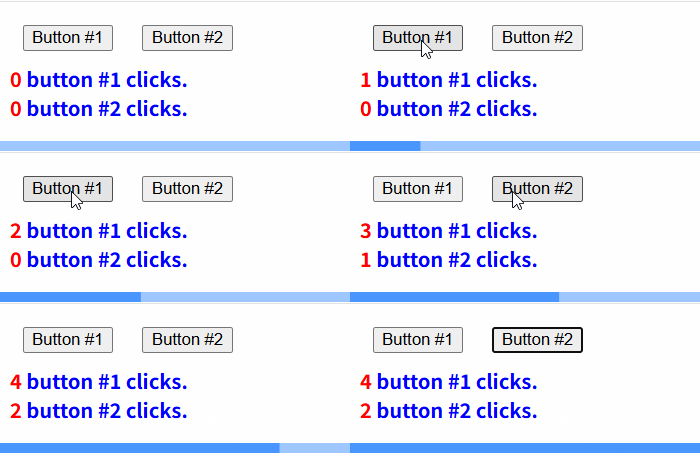
trigger方法可以手动触发元素上的事件,包括自定义事件,语法为trigger(eventType[,extraParameters])或者trigger(event[,extraParameters])
eventType:事件类型
extraParameters:传递给事件处理程序的其他参数
<html lang="en">
<head>
    <meta charset="utf-8">
    <style>
        button {
            margin: 10px;
        }
        div {
            color: blue;
            font-weight: bold;
        }
        span {
            color: red;
        }
    </style>
    <script src="https://apps.bdimg.com/libs/jquery/2.1.4/jquery.min.js"></script>
</head>
<body>

    <button>Button #1</button>
    <button>Button #2</button>
    <div><span>0</span> button #1 clicks.</div>
    <div><span>0</span> button #2 clicks.</div>

    <script>
        $( "button" ).first().on( "click", function() {
            update( $( "span" ).first() );
        } );

        $( "button" ).last().on( "click", function() {
        $( "button" ).first().trigger( "click" );
            update( $( "span" ).last() );
        } );

        function update( j ) {
            var n = parseInt( j.text(), 10 );
            j.text( n + 1 );
        }
    </script>
</body>
</html>
五、效果
5.1 隐藏/显示
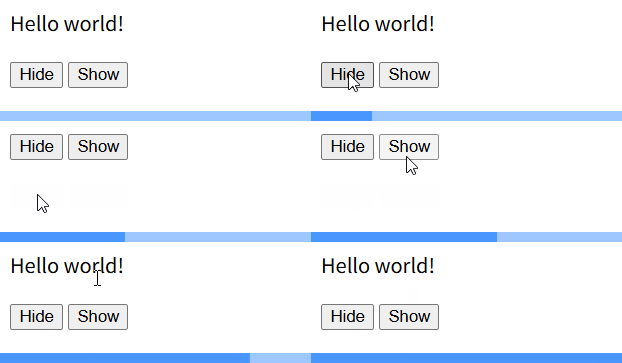
通过hide(speed,callback)方法来隐藏HTML元素,show(speed,callback)方法来显示HTML元素
speed:隐藏/显示的速度,可取slow、fast或者毫秒数
callback:隐藏/显示完成后所执行的函数
<html>
  <head>
    <script src="https://apps.bdimg.com/libs/jquery/2.1.4/jquery.min.js"></script>
    <script>
      $( window ).on( "load", function() {
        $( "button.hide" ).click(function() {
            $( "p" ).hide();
        });
        $( "button.show" ).click(function() {
            $( "p" ).show();
        });
      });
    </script>
  </head>
  <body>
    <p >Hello world!</p>
    <button class="hide">Hide</button>
    <button class="show">Show</button>
  </body>
</html>
使用speed参数来看一下效果:
| speed参数 | 效果 |
|---|---|
speed=1000 | 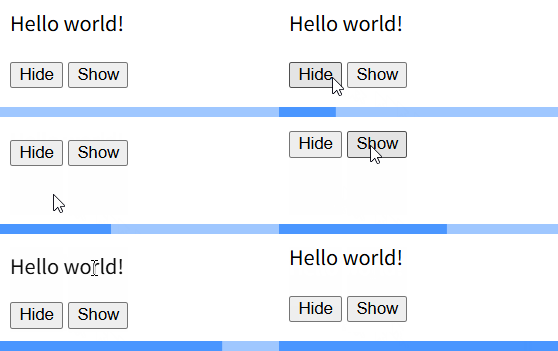 |
speed="fast" | 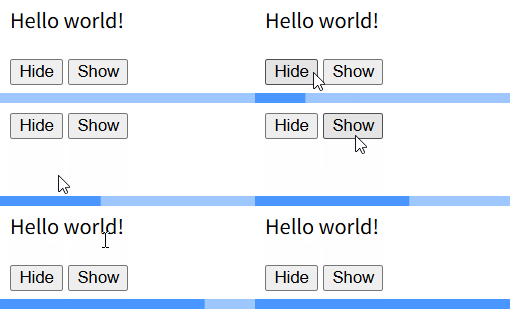 |
speed="slow" | 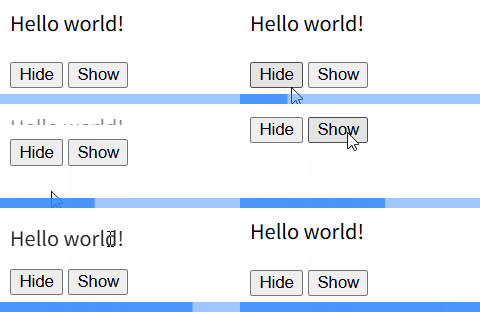 |
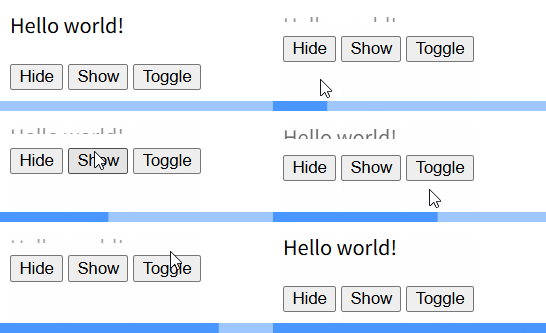
除此之外,也可以使用toggle(speed,callback)方法来切换hide()和show()方法:
<html>
  <head>
    <script src="https://apps.bdimg.com/libs/jquery/2.1.4/jquery.min.js"></script>
    <script>
      $( window ).on( "load", function() {
        $( "button.hide" ).click(function() {
            $( "p" ).hide(speed="slow");
        });
        $( "button.show" ).click(function() {
            $( "p" ).show(speed="slow");
        });
        $( "button.toggle" ).click(function() {
            $( "p" ).toggle(speed="slow");
        })
      });
    </script>
  </head>
  <body>
    <p >Hello world!</p>
    <button class="hide">Hide</button>
    <button class="show">Show</button>
    <button class="toggle">Toggle</button>
  </body>
</html>
5.2 淡入淡出
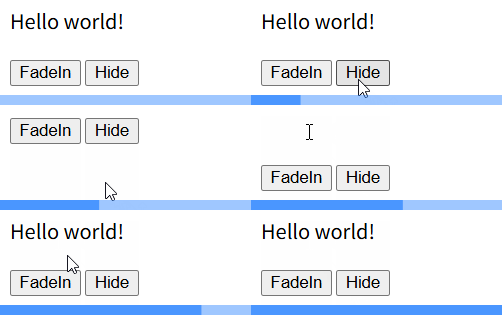
fadeIn(speed,callback)方法来实现淡入已隐藏的元素
<html>
  <head>
    <script src="https://apps.bdimg.com/libs/jquery/2.1.4/jquery.min.js"></script>
    <script>
      $( window ).on( "load", function() {
        $( "button.hide" ).click(function() {
            $( "p" ).hide(speed="slow");
        });
        $( "button.FadeIn" ).click(function() {
            $( "p" ).fadeIn(speed="slow");
        });
      });
    </script>
  </head>
  <body>
    <p >Hello world!</p>
    <button class="FadeIn">FadeIn</button>
    <button class="hide">Hide</button>
  </body>
</html>
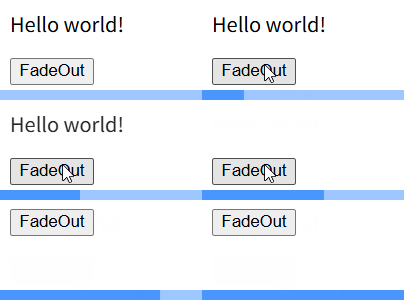
fadeOut(speed,callback)用于淡出可见元素
<html>
  <head>
    <script src="https://apps.bdimg.com/libs/jquery/2.1.4/jquery.min.js"></script>
    <script>
      $( window ).on( "load", function() {

        $( "button.FadeOut" ).click(function() {
            $( "p" ).fadeOut(speed="slow");
        });
      });
    </script>
  </head>
  <body>
    <p >Hello world!</p>
    <button class="FadeOut">FadeOut</button>
  </body>
</html>
fadeToggle(speed,callback)方法可以在fadeIn方法和fadeOut方法切换
<html>
  <head>
    <script src="https://apps.bdimg.com/libs/jquery/2.1.4/jquery.min.js"></script>
    <script>
      $( window ).on( "load", function() {

        $( "button.FadeToggle" ).click(function() {
            $( "p" ).fadeToggle(speed="slow");
        });
      });
    </script>
  </head>
  <body>
    <p >Hello world!</p>
    <button class="FadeToggle">FadeToggle</button>
  </body>
</html>

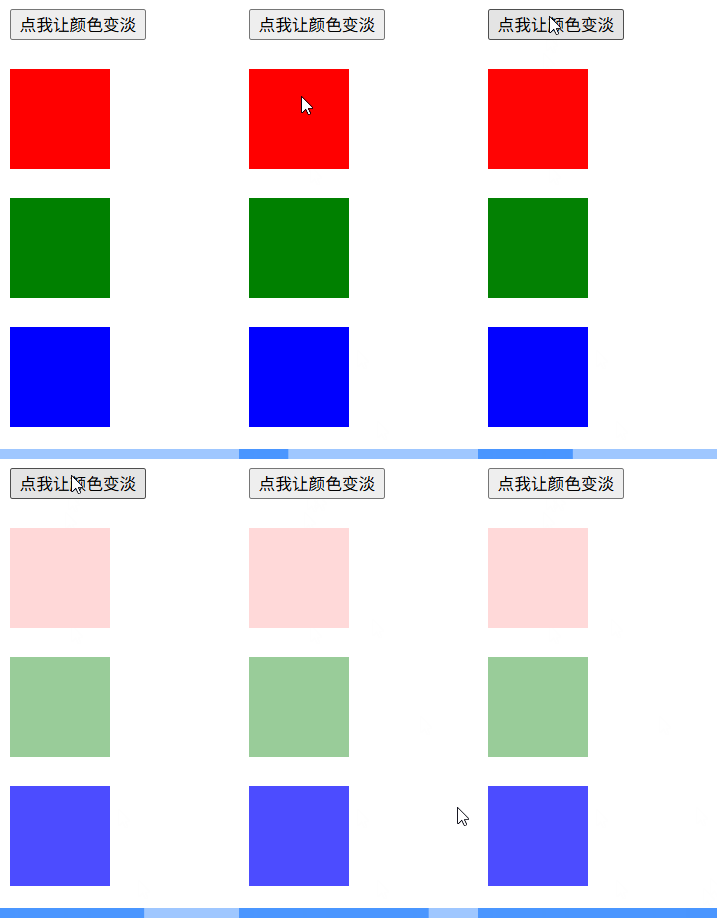
fadeTo(speed,opacity,callback)允许渐变为给定的不透明度
opacity:将淡入淡出效果设置为给定的不透明度,值介于0到1之间
<html>
    <head>
        <meta charset="utf-8">
        <script src="https://apps.bdimg.com/libs/jquery/2.1.4/jquery.min.js"></script>

        <script>
            $(document).ready(function(){
            $("button").click(function(){
                $("#div1").fadeTo("slow",0.15);
                $("#div2").fadeTo("slow",0.4);
                $("#div3").fadeTo("slow",0.7);
            });
            });
        </script>
    </head>

    <body>
        <button>点我让颜色变淡</button>
        <br><br>
        <div id="div1" style="width:80px;height:80px;background-color:red;"></div><br>
        <div id="div2" style="width:80px;height:80px;background-color:green;"></div><br>
        <div id="div3" style="width:80px;height:80px;background-color:blue;"></div>

    </body>
</html>
5.3 滑动
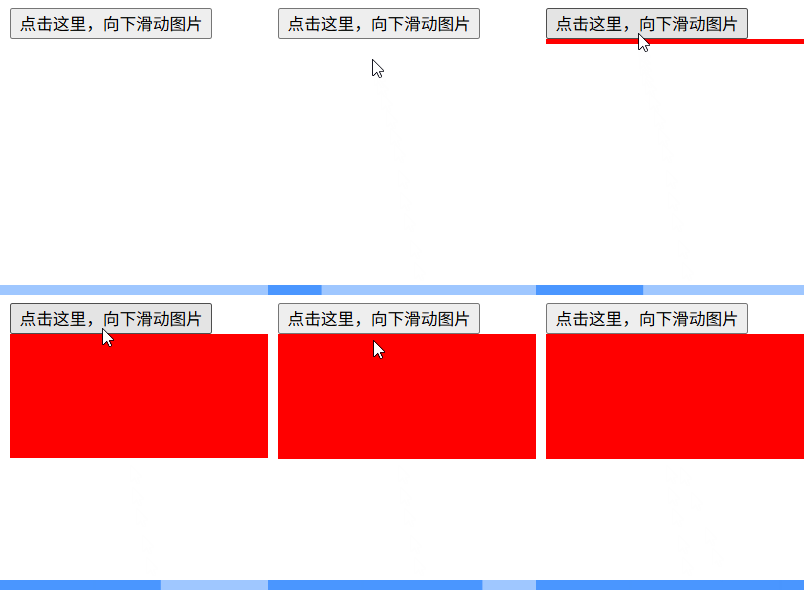
slideDown(speed,callback)用于向下滑动元素
<html>
    <head>
        <meta charset="utf-8">
        <script src="https://apps.bdimg.com/libs/jquery/2.1.4/jquery.min.js"></script>

        <script>
            $(document).ready(function(){
                $(".SlideDown").click(function(){
                    $("#div1").slideDown(1000);
                });
                $("#div1").hide(); // 初始隐藏div1
            });
        </script>
    </head>

    <body>
        <button class ="SlideDown">点击这里,向下滑动图片</button>
        <div id="div1" style="background-color:red;height:100px;width:300px;">

    </body>
</html>
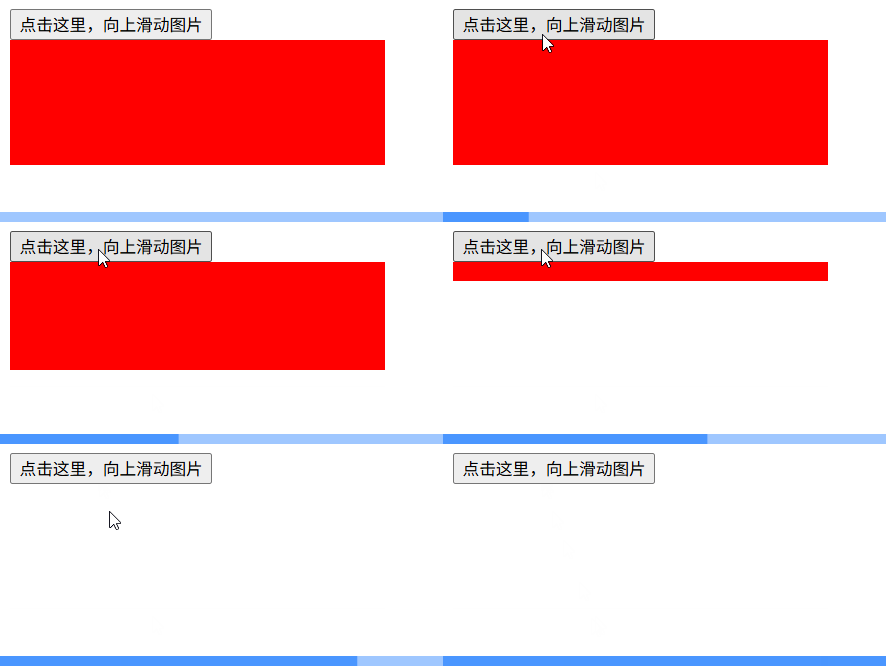
slideUp(speed,callback)向上滑动元素
<html>
    <head>
        <meta charset="utf-8">
        <script src="https://apps.bdimg.com/libs/jquery/2.1.4/jquery.min.js"></script>

        <script>
            $(document).ready(function(){
                $(".SlideUp").click(function(){
                    $("#div1").slideUp(1000);
                });
            });
        </script>
    </head>

    <body>
        <button class ="SlideUp">点击这里,向上滑动图片</button>
        <div id="div1" style="background-color:red;height:100px;width:300px;">

    </body>
</html>
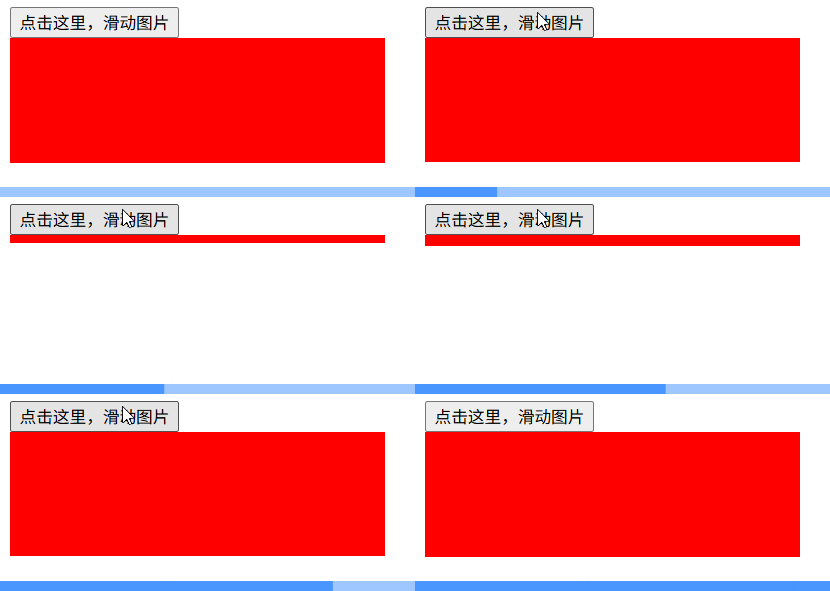
slideToggle(speed,callback)可以在slideDown方法和slideUp方法之间进行切换
<html>
    <head>
        <meta charset="utf-8">
        <script src="https://apps.bdimg.com/libs/jquery/2.1.4/jquery.min.js"></script>

        <script>
            $(document).ready(function(){
                $(".SlideToggle").click(function(){
                    $("#div1").slideToggle(1000);
                });
            });
        </script>
    </head>

    <body>
        <button class ="SlideToggle">点击这里,滑动图片</button>
        <div id="div1" style="background-color:red;height:100px;width:300px;">

    </body>
</html>
5.4 动画
animate({params},speed,callback)用于创建自定义动画
{params}:定义形成动画的CSS属性,属性名使用Camel标记法,例如使用paddingLeft而不是padding-left,同时颜色动画需要从官网下载。
<html>
    <head>
        <meta charset="utf-8">
        <script src="https://apps.bdimg.com/libs/jquery/2.1.4/jquery.min.js"></script>

        <script>
            $(document).ready(function(){
                $(".animate").click(function(){
                    $("#div1").animate({width:'100px'}, 1000);
                });
            });
        </script>
    </head>

    <body>
        <button class ="animate">动画实现</button>
        <div id="div1" style="background-color:red;height:100px;width:300px;">

    </body>
</html>
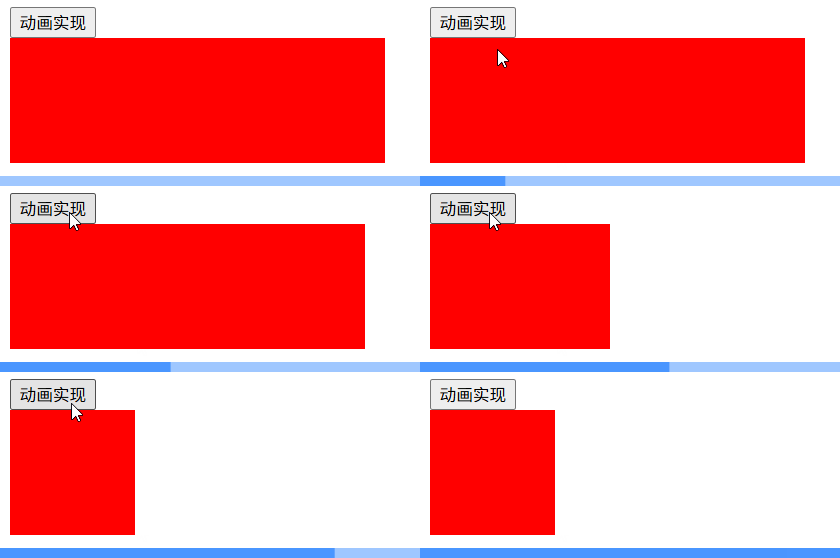
{params}也可以使用相对值(相对于元素的当前值),有+=或者-=
<html>
    <head>
        <meta charset="utf-8">
        <script src="https://apps.bdimg.com/libs/jquery/2.1.4/jquery.min.js"></script>

        <script>
            $(document).ready(function(){
                $(".animate").click(function(){
                    $("#div1").animate({width:'+=100px'}, 1000, function(){
                        // 动画完成时的回调函数
                        $("#div1").animate({width:'300px'}, 1000);
                    });
                });
            });
        </script>
    </head>

    <body>
        <button class ="animate">动画实现</button>
        <div id="div1" style="background-color:red;height:100px;width:300px;">

    </body>
</html>

{params}也可以使用预定义的值,有show、hide、toggle
<html>
    <head>
        <meta charset="utf-8">
        <script src="https://apps.bdimg.com/libs/jquery/2.1.4/jquery.min.js"></script>

        <script>
            $(document).ready(function(){
                $(".animate").click(function(){
                    $("#div1").animate({height:'toggle'}, 1000);
                });
            });
        </script>
    </head>

    <body>
        <button class ="animate">动画实现</button>
        <div id="div1" style="background-color:red;height:100px;width:300px;">

    </body>
</html>
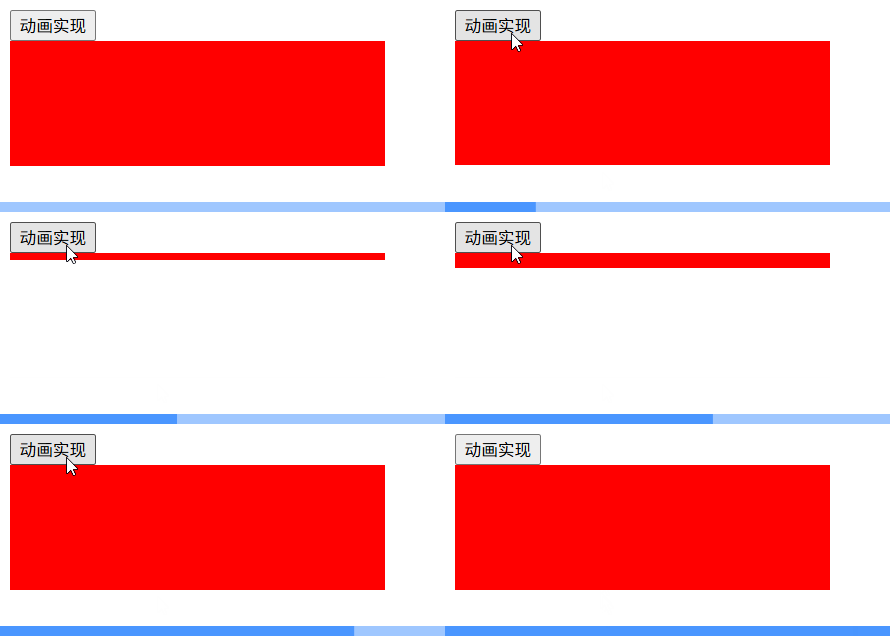
animate方法可以使用队列功能,对同一个元素可以应用多个动画,按顺序执行
<html>
    <head>
        <meta charset="utf-8">
        <script src="https://apps.bdimg.com/libs/jquery/2.1.4/jquery.min.js"></script>

        <script>
            $(document).ready(function(){
                $(".animate").click(function(){
                    $("#div1").animate({height:'toggle'}, 1000);
                    $("#div1").animate({width:'toggle'}, 1000);
                    $("#div1").animate({opacity:'0.4'}, 1000);
                });
            });
        </script>
    </head>

    <body>
        <button class ="animate">动画实现</button>
        <div id="div1" style="background-color:red;height:100px;width:300px;">

    </body>
</html>
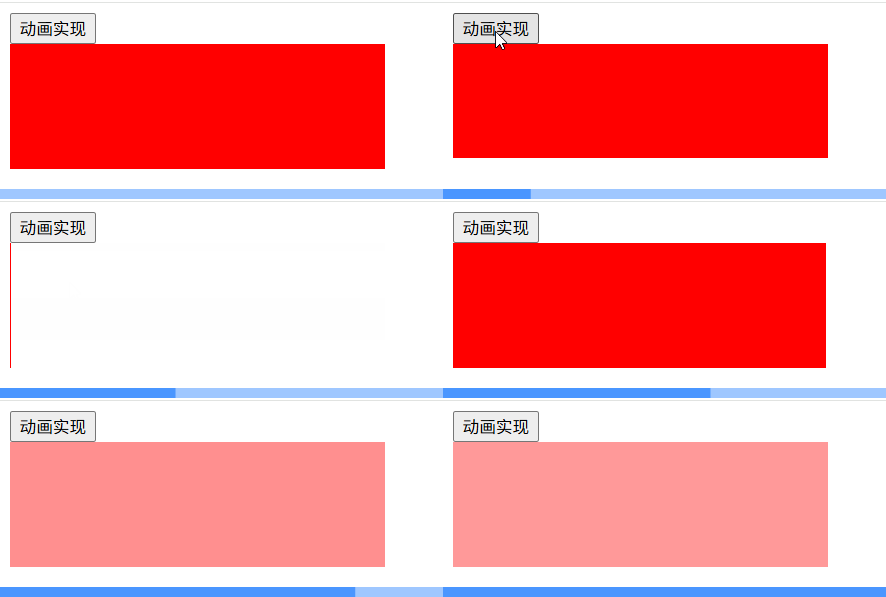
停止动画:stop(stopAll,goToEnd)
stopAll:是否应该清除动画队列,默认为False,仅停止当前活动的动画,接着执行队列中下一个动画。
goToEnd:是否立即完成当前动画,默认为False
| 参数 | 效果 |
|---|---|
stop(true,true) | 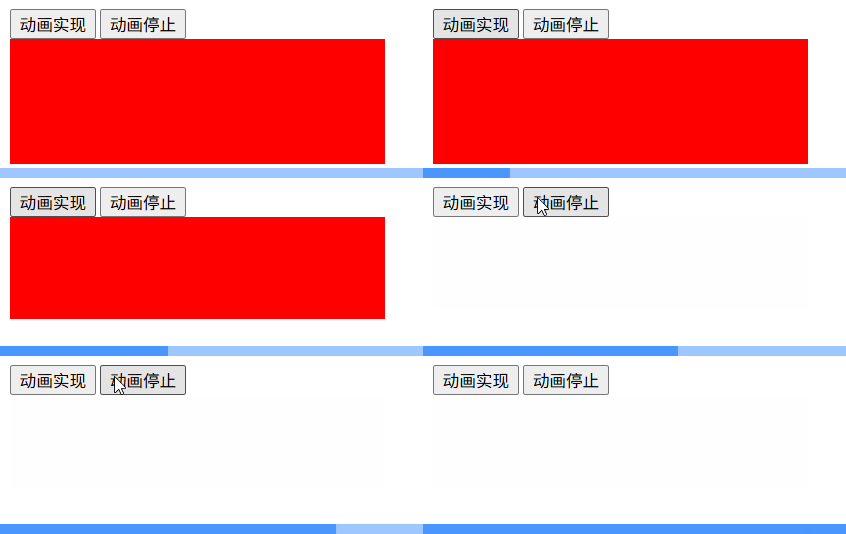 |
stop(true,false) | 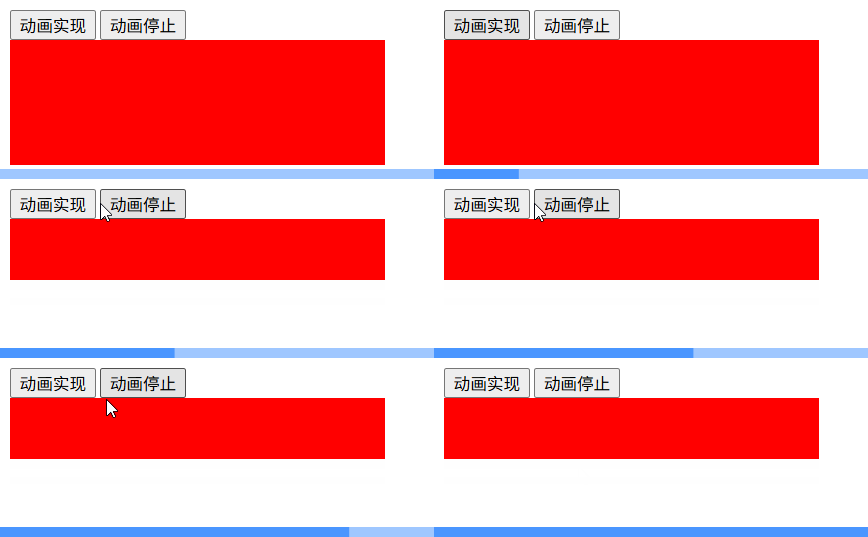 |
stop(false,true) | 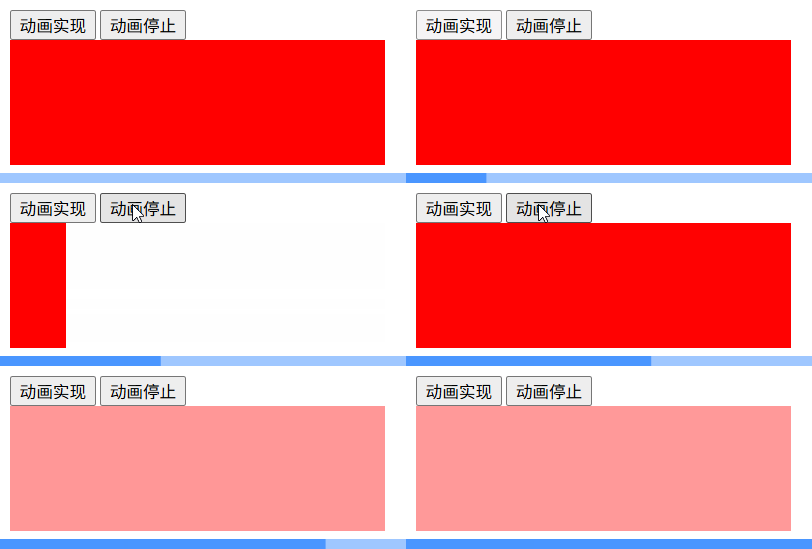 |
stop(false,false) | 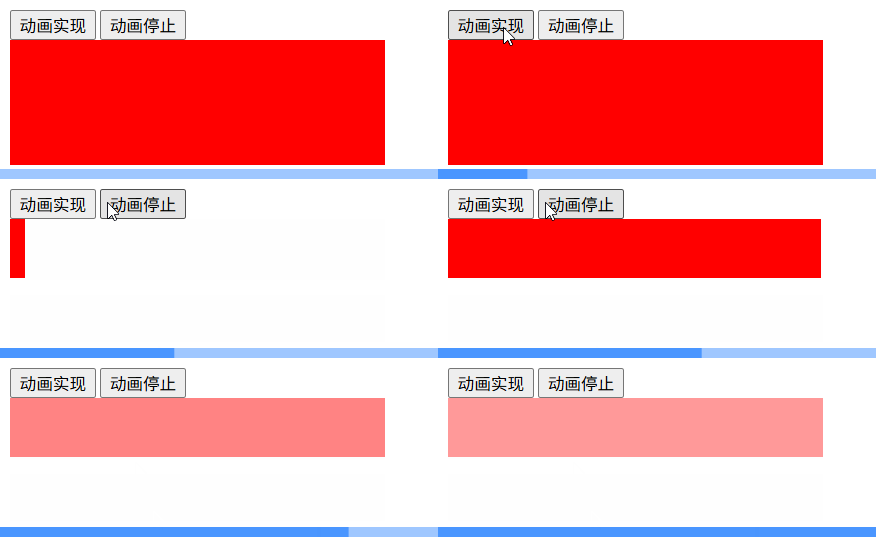 |
六、链
允许在一条语句里对同一个元素运行多个jQuery方法
$("#p1").css("color","red").slideUp(2000).slideDown(2000);
七、HTML
7.1 内容/属性
text([text])方法用来设置或返回所选元素的文本内容
<html>
    <head>
        <meta charset="utf-8">
        <script src="https://apps.bdimg.com/libs/jquery/2.1.4/jquery.min.js"></script>

        <script>
            $(document).ready(function(){
                $(".set").click(function(){
                    $("#div1 p").text("<b>hello world</b>");
                });
                $(".show").click(function(){
                    alert($("#div1 p").text());
                })
            });
        </script>
    </head>

    <body>
        <div id="div1">
            <p>hello</p>
        </div>
        <div id="div2">
            <p>world</p>
        </div>
        <button class="set">set text</button>
        <button class="show">show text</button>

    </body>
</html>

html([htmlString])方法不适用于XML文档,可以设置或返回所选元素的内容,包括HTML标签

val([value])方法主要用于获取和设置表单元素

获取属性: attr()方法,相比于prop方法他可以获取自定义属性
<html>
    <head>
        <meta charset="utf-8">
        <script src="https://apps.bdimg.com/libs/jquery/2.1.4/jquery.min.js"></script>

        <script>
            $(document).ready(function(){
                $(".show").click(function(){
                    alert($("#link1").attr("href"));
                })
                $(".set").click(function(){
                    $("#link1").attr("href","http://www.sina.com.cn");
                    alert($("#link1").attr("href"));
                })
            });
        </script>
    </head>

    <body>
        <div id="div1">
            <a href="http://www.baidu.com" id="link1">hello</a>
        </div>
        <button class="show">show href</button>
        <button class="set">set href</button>

    </body>
</html>

7.2 元素操作
| 方法一览 | 描述 |
|---|---|
append(content[,content]) | 在被选元素的结尾插入内容 |
prepend(content[,content]) | 在被选元素的开头插入内容 |
after(content[,content]) | 在被选元素之后插入内容 |
before(content[,content]) | 在被选元素之前插入内容 |
remove([selector]) | 删除被选元素及其子元素 |
selector | 可以过滤被删除的元素 |
empty | 从被选元素中删除子元素 |
▰▰▰▰▰▰▰▰▰▰▰▰▰▰▰▰增加元素▰▰▰▰▰▰▰▰▰▰▰▰▰▰▰
append、prepend、before、after方法的用法都相似,只不过插入的位置不同

以append方法举例,append方法将指定内容作为每个元素的最后一个子元素插入
<html>
    <head>
        <meta charset="utf-8">
        <script src="https://apps.bdimg.com/libs/jquery/2.1.4/jquery.min.js"></script>

        <script>
            $(document).ready(function(){
                $(".set").click(function(){
                    $(".inner").append("<p>world</p>");
                })
            });
        </script>
    </head>

    <body>
        <h2>Greetings</h2>
        <div class="container">
            <div class="inner">Hello</div>
            <div class="inner">Goodbye</div>
        </div>
        <button class="set">set</button>

    </body>
</html>
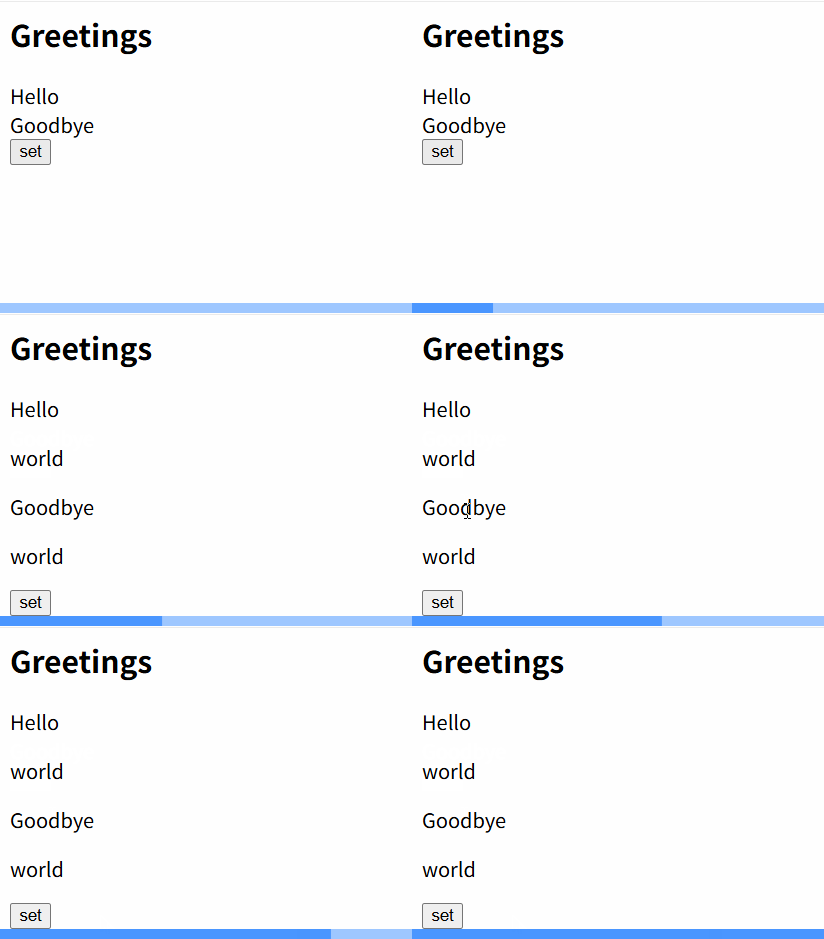
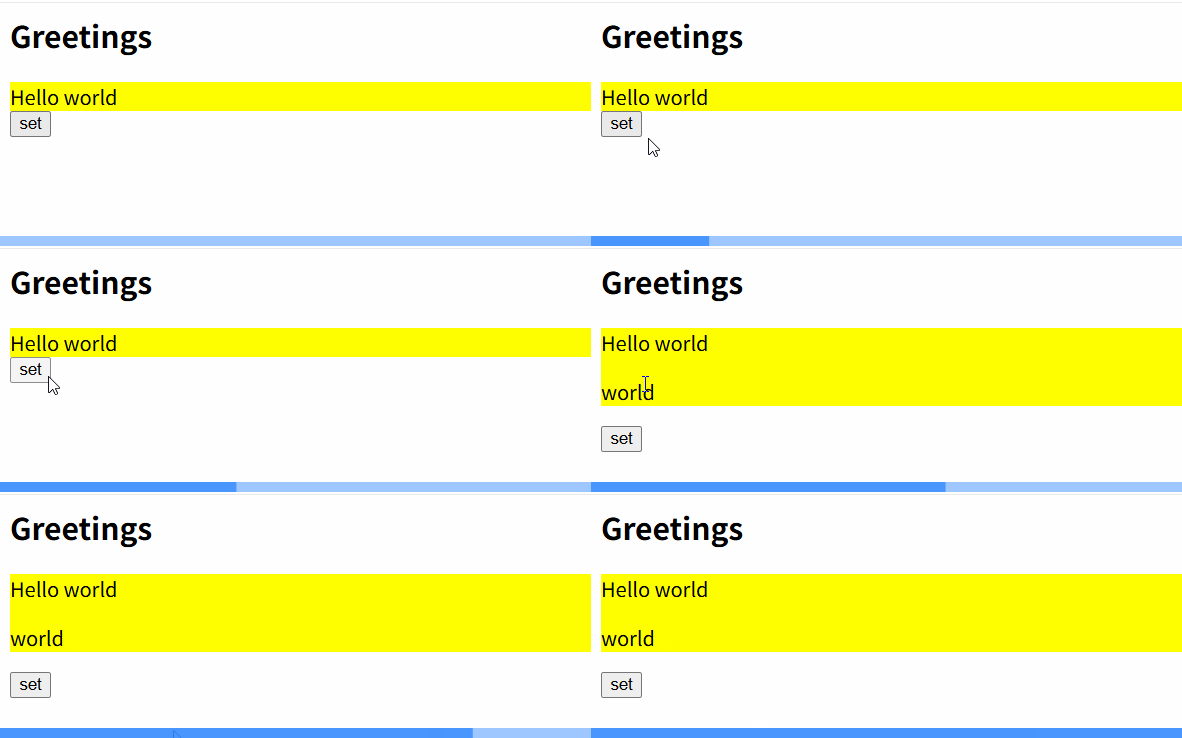
除此之外append方法也会将HTML属性附加到段落上:
<html>
    <head>
        <meta charset="utf-8">
        <style>
            .inner{
                background-color: yellow;
            }
        </style>

        </style>
        <script src="https://apps.bdimg.com/libs/jquery/2.1.4/jquery.min.js"></script>

        <script>
            $(document).ready(function(){
                $(".set").click(function(){
                    $(".inner").append("<p>world</p>");
                })
            });
        </script>
    </head>

    <body>
        <h2>Greetings</h2>
        <div class="container">
            <div class="inner">Hello world</div>
        </div>
        <button class="set">set</button>

    </body>
</html>
▰▰▰▰▰▰▰▰▰▰▰▰▰▰▰▰删除元素▰▰▰▰▰▰▰▰▰▰▰▰▰▰▰
empty方法和remove方法的区别:

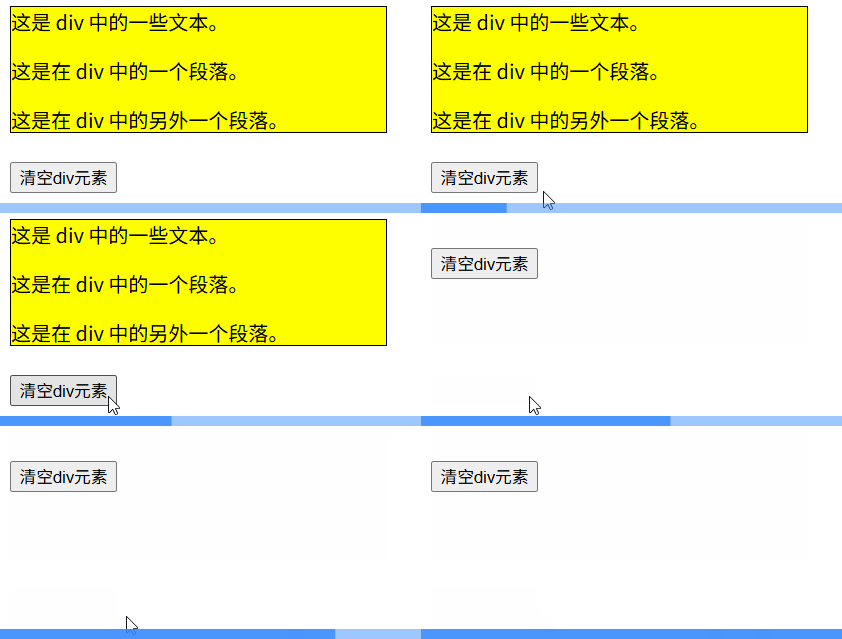
remove方法将删除与元素关联的所有绑定事件和jQuery数据
<html>
    <head>
        <meta charset="utf-8">
        <script src="https://apps.bdimg.com/libs/jquery/2.1.4/jquery.min.js"></script>
        </script>
        <script>
        $(document).ready(function(){
            $("button").click(function(){
                $("#div1").remove();
            });
        });
        </script>
    </head>
    <body>

        <div id="div1" style="height:100px;width:300px;border:1px solid black;background-color:yellow;">

            这是 div 中的一些文本。
            <p>这是在 div 中的一个段落。</p>
            <p>这是在 div 中的另外一个段落。</p>

        </div>
        <br>
        <button>清空div元素</button>

    </body>
</html>
可以将选择器作为可选参数包含在内,效果都是一样的:
<script>
        $(document).ready(function(){
            $("button").click(function(){
                $("div").remove("div#div1");
            });
        });
</script>
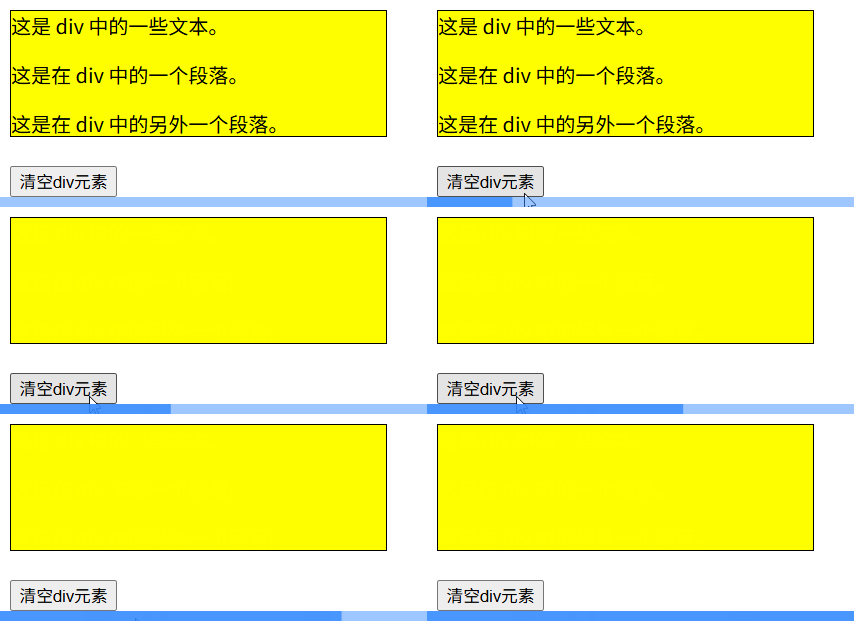
而empty方法会移除目标元素所有子节点,但不会删除目标元素本身和它绑定的数据或事件
<html>
    <head>
        <meta charset="utf-8">
        <script src="https://apps.bdimg.com/libs/jquery/2.1.4/jquery.min.js"></script>
        </script>
        <script>
        $(document).ready(function(){
            $("button").click(function(){
                $("#div1").empty();
            });
        });
        </script>
    </head>
    <body>

        <div id="div1" style="height:100px;width:300px;border:1px solid black;background-color:yellow;">

            这是 div 中的一些文本。
            <p>这是在 div 中的一个段落。</p>
            <p>这是在 div 中的另外一个段落。</p>

        </div>
        <br>
        <button>清空div元素</button>

    </body>
</html>
7.3 类属性
| 方法一览 | 描述 |
|---|---|
addClass(className) | 向被选元素添加一个或多个类 |
removeClass(className) | 从被选元素删除一个或多个类 |
toggleClass(className) | 对被选元素进行添加/删除类的切换操作 |
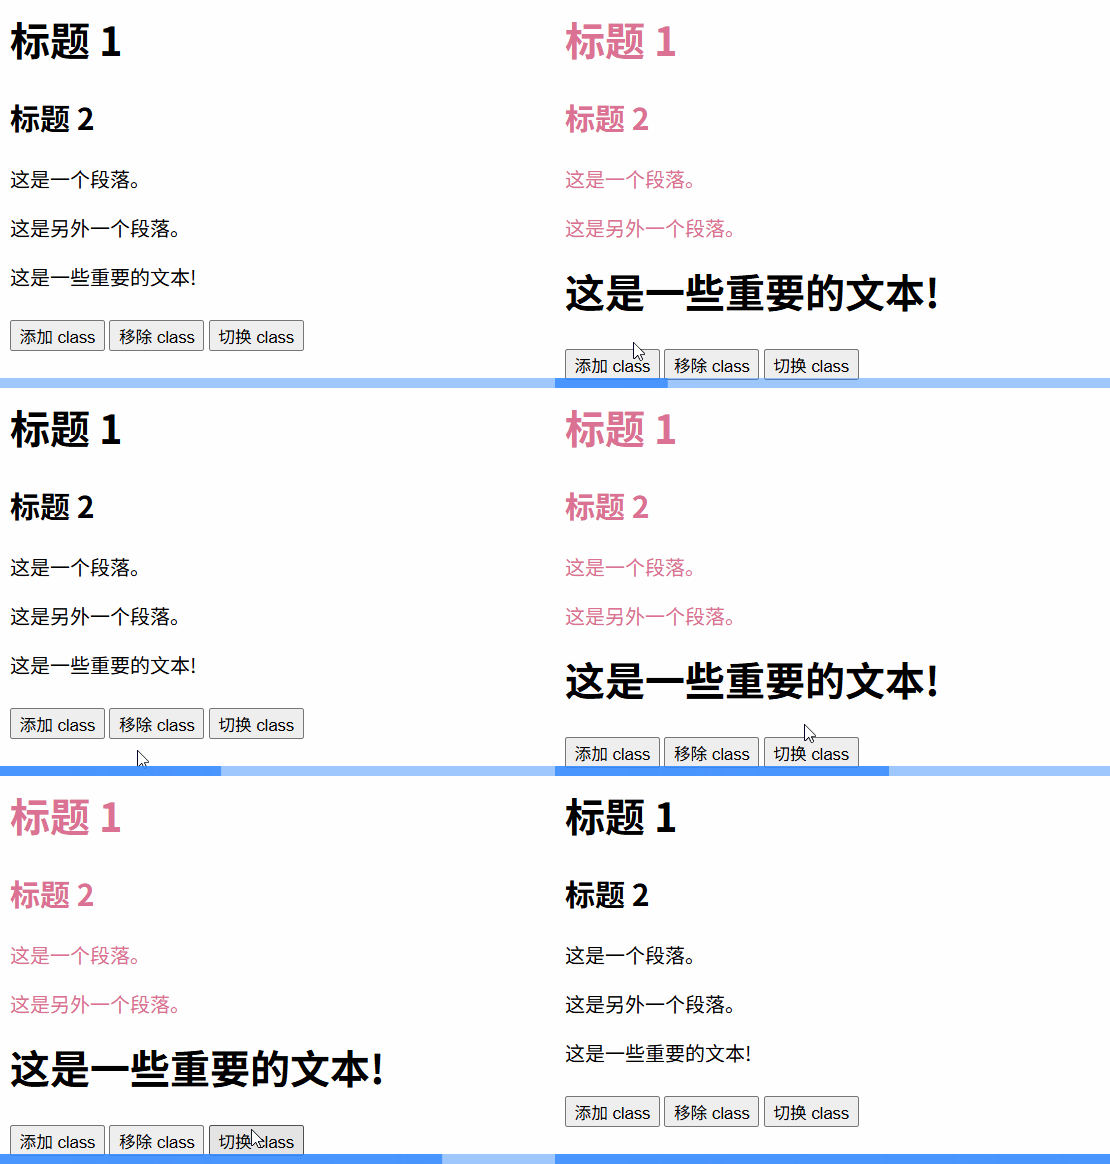
介绍一下addClass、removeClass、toggleClass的使用:
<html>
    <head>
        <meta charset="utf-8">
        <script src="https://apps.bdimg.com/libs/jquery/2.1.4/jquery.min.js"></script>
        </script>
        <script>
        $(document).ready(function(){
            $(".add").click(function(){
                $("h1,h2,p").addClass("b");
                $("div").addClass("a");
            });
            $(".remove").click(function(){
                $("h1,h2,p").removeClass("b");
                $("div").removeClass("a");

            });
            $(".toggle").click(function(){

                $("h1,h2,p").toggleClass("b");
                $("div").toggleClass("a");
            })
        });
        </script>
        <style type="text/css">
        .a
        {
            font-weight:bold;
            font-size:xx-large;
        }
        .b
        {
            color:palevioletred;
        }
        </style>
    </head>
    <body>

        <h1>标题 1</h1>
        <h2>标题 2</h2>
        <p>这是一个段落。</p>
        <p>这是另外一个段落。</p>
        <div>这是一些重要的文本!</div>
        <br>
        <button class="add">添加 class</button>
        <button class="remove">移除 class</button>
        <button class="toggle">切换 class</button>

    </body>
</html>
7.4 样式属性
▰▰▰▰▰▰▰▰▰▰▰▰▰▰▰▰css样式▰▰▰▰▰▰▰▰▰▰▰▰▰▰▰
css方法可以返回或者设置元素的一个或多个样式
<html>
    <head>
        <meta charset="utf-8">
        <script src="https://apps.bdimg.com/libs/jquery/2.1.4/jquery.min.js"></script>
        </script>
        <script>
        $(document).ready(function(){
            $(".set").click(function(){
                $("div").css("color","yellow");
            });
            $(".show").click(function(){
                alert($("div").css("color"));
            })

        });
        </script>
        <style type="text/css">
        .a
        {
            font-weight:bold;
            font-size:xx-large;
            color: blueviolet;
        }
        .b
        {
            color:palevioletred;
        }
        </style>
    </head>
    <body>

        <h1 class="b">标题 1</h1>
        <div class="a">这是一些重要的文本!</div>
        <br>
        <button class="set">设置颜色</button>
        <button class="show">展示颜色</button>

    </body>
</html>

▰▰▰▰▰▰▰▰▰▰▰▰▰▰▰▰尺寸▰▰▰▰▰▰▰▰▰▰▰▰▰▰▰▰▰
jQuery尺寸大致布局:

| 方法一览 | 描述 |
|---|---|
width(width) | 设置或返回元素的宽度,不包括内边距、边框或外边距 |
height(height) | 设置或返回元素的高度,不包括内边距、边框或外边距 |
innerWidth | 返回元素上的宽度,包括内边距 |
innerHeight | 返回元素上的高度,包括内边距 |
outerWidth | 返回元素上的宽度,包括内边距和边框 |
outerHeight | 返回元素上的高度,包括内边距和边框 |
width和height的参数值可以设置为数字、父元素宽度的比例、回调函数。
$("#element").width(200);        // 设置为 200px
$("#element").width("50%");       // 设置为父元素宽度的 50%
$("#element").width(function(index, currentWidth) {
  return currentWidth + 10;       // 动态调整宽度
});
除此之外,还可以获取窗口与文档的尺寸
- 窗口尺寸:
$(window).width()、$(window).height()- 文档尺寸:
$(document).width()、$(document).height()
总结一下:

▰▰▰▰▰▰▰▰▰▰▰▰▰▰▰▰坐标▰▰▰▰▰▰▰▰▰▰▰▰▰▰▰▰▰
offset和position方法的区别:

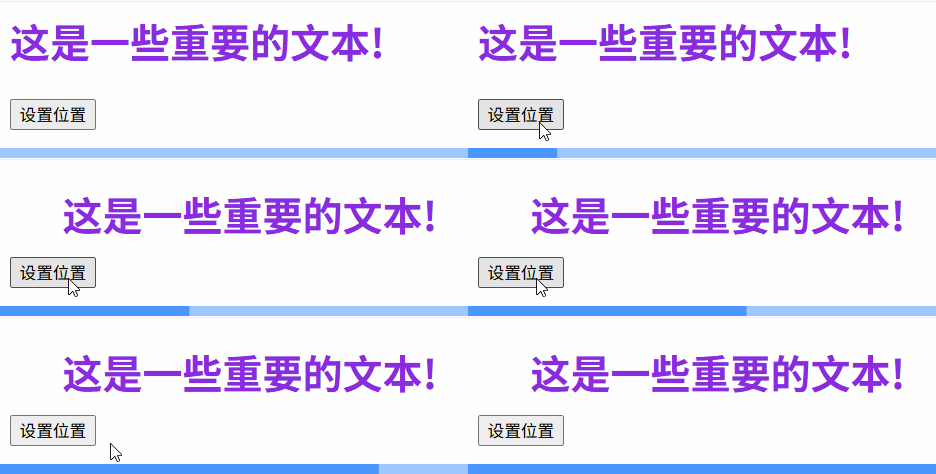
offset获取第一个匹配元素的当前坐标或者设置匹配元素相对于文档的坐标
获取元素位置时,他会返回包含top和left属性的对象
const position = $("#myElement").offset();
console.log("Top:", position.top, "Left:", position.left);
// 输出结果:Top: 200, Left: 300
设置元素位置时,格式为offset({top:value,left:value})
<html>
    <head>
        <meta charset="utf-8">
        <script src="https://apps.bdimg.com/libs/jquery/2.1.4/jquery.min.js"></script>
        </script>
        <script>
        $(document).ready(function(){
            $(".set").click(function(){
                $("div").offset({
                    top: 20,
                    left: 50
                })
});
            });
        </script>
        <style type="text/css">
        .a
        {
            font-weight:bold;
            font-size:xx-large;
            color: blueviolet;
        }
        </style>
    </head>
    <body>
        <div class="a">这是一些重要的文本!</div>
        <br>
        <button class="set">设置位置</button>

    </body>
</html>
7.5 遍历dom
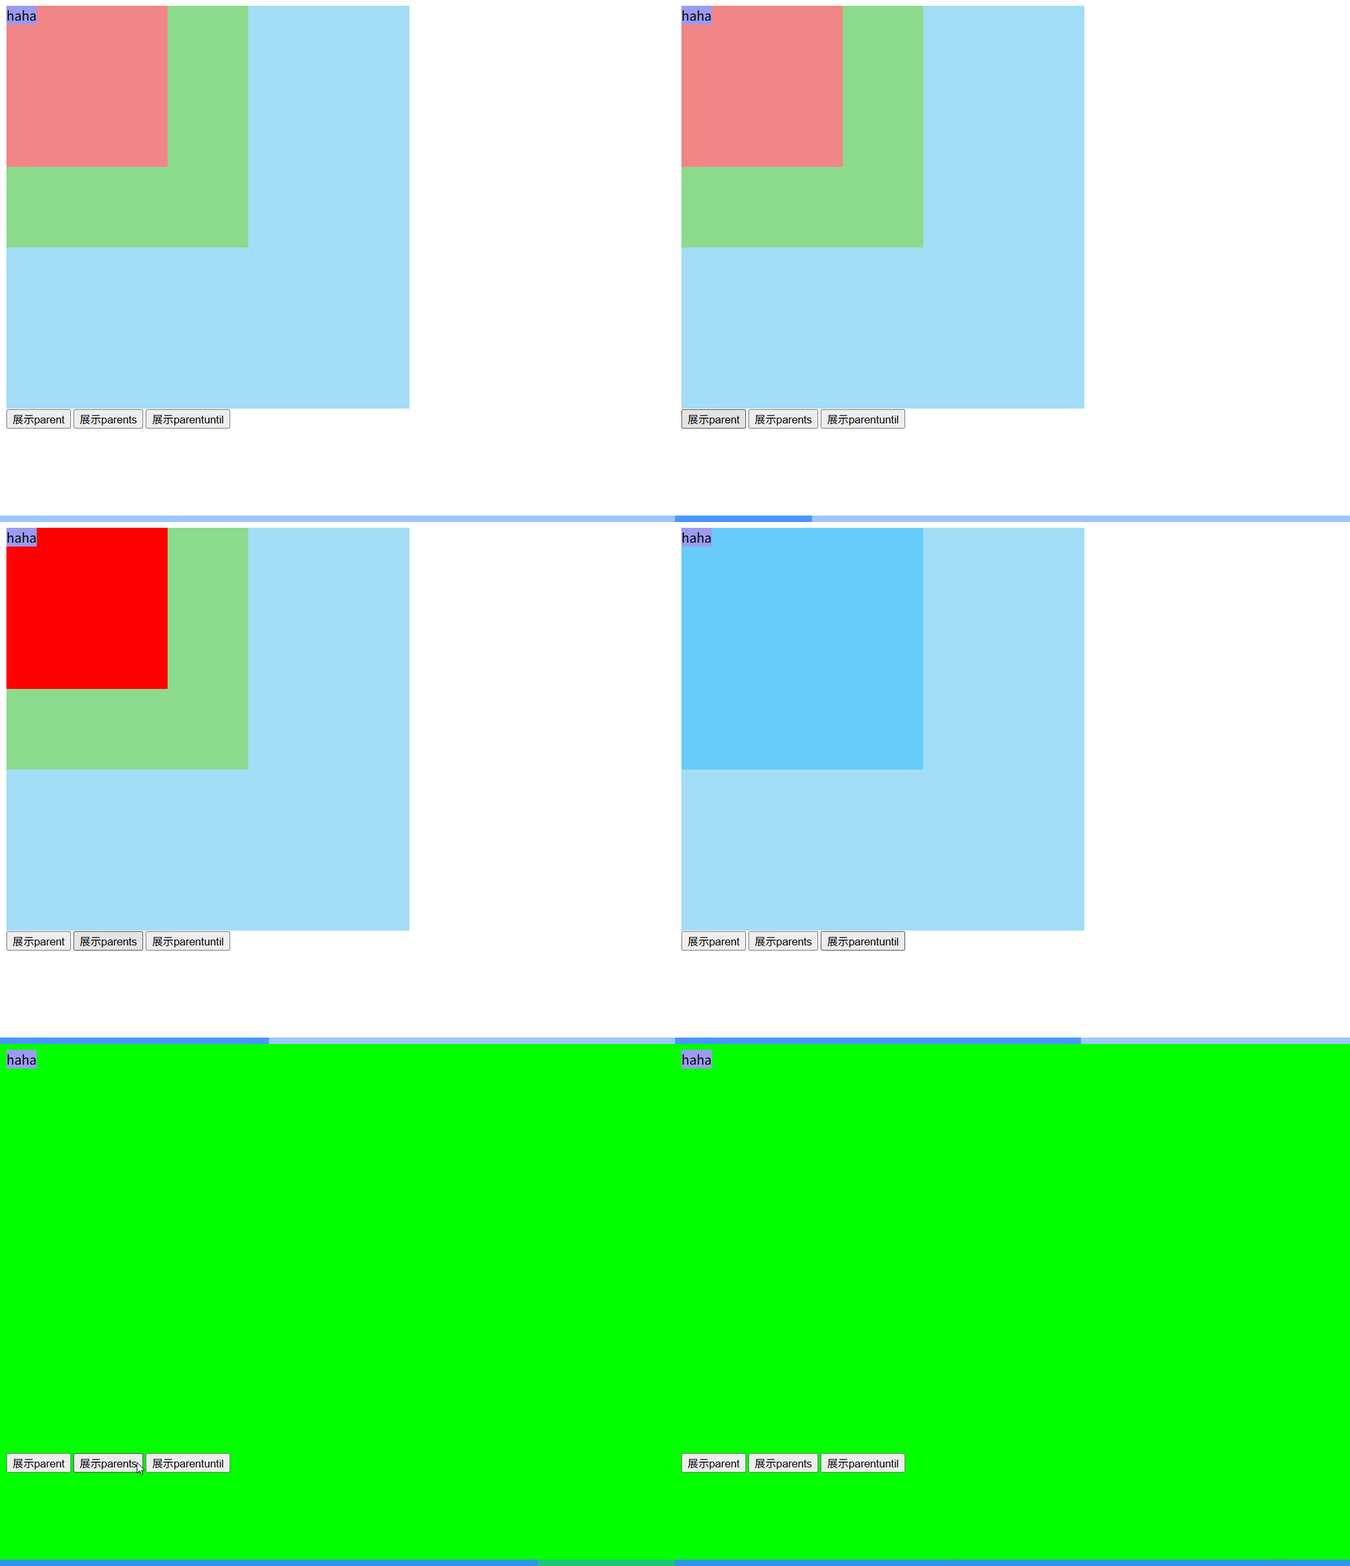
▰▰▰▰▰▰▰▰▰▰▰▰▰▰▰▰遍历祖先▰▰▰▰▰▰▰▰▰▰▰▰▰▰▰▰

<html>
    <head>
        <meta charset="utf-8">
        <script src="https://apps.bdimg.com/libs/jquery/2.1.4/jquery.min.js"></script>
        </script>
        <script>
        $(document).ready(function(){
            $(".show-parent").click(function(){
                $(".child").parent().css("background-color","rgb(255, 0, 0)");
                });
            $(".show-parents").click(function(){
                $(".child").parents().css("background-color","rgb(3, 255, 0)");
                });
            $(".show-parentuntil").click(function(){
                $(".child").parentsUntil(".a").css("background-color","#67cdf8");
                });
            });
        </script>
        <style>
            .a{
                width: 500px;
                height: 500px;
                background-color: rgb(163, 221, 246);
            }
            .parent{
                width: 200px;
                height: 200px;
                background-color: rgb(242, 133, 133);
            }
            .parents{
                width: 300px;
                height: 300px;
                background-color: rgb(140, 218, 140);
            }
            .child{
                width: 100px;
                height: 100px;
                background-color: rgb(156, 156, 241);
            }
        </style>
    </head>
    <body>
        <div class="a">
            <div class ="parents">
                <div class="parent">
                    <span class="child">haha</span>
                    <p></p>
                </div>
            </div>
        </div>
        <button class="show-parent">展示parent</button>
        <button class="show-parents">展示parents</button>
        <button class="show-parentuntil">展示parentuntil</button>

    </body>
</html>
▰▰▰▰▰▰▰▰▰▰▰▰▰▰▰▰遍历后代▰▰▰▰▰▰▰▰▰▰▰▰▰▰▰▰

▰▰▰▰▰▰▰▰▰▰▰▰▰▰▰▰遍历同胞▰▰▰▰▰▰▰▰▰▰▰▰▰▰▰▰

<html>
    <head>
        <meta charset="utf-8">
        <script src="https://apps.bdimg.com/libs/jquery/2.1.4/jquery.min.js"></script>
        </script>
        <script>
        $(document).ready(function(){
            $(".menu-header").click(function(){
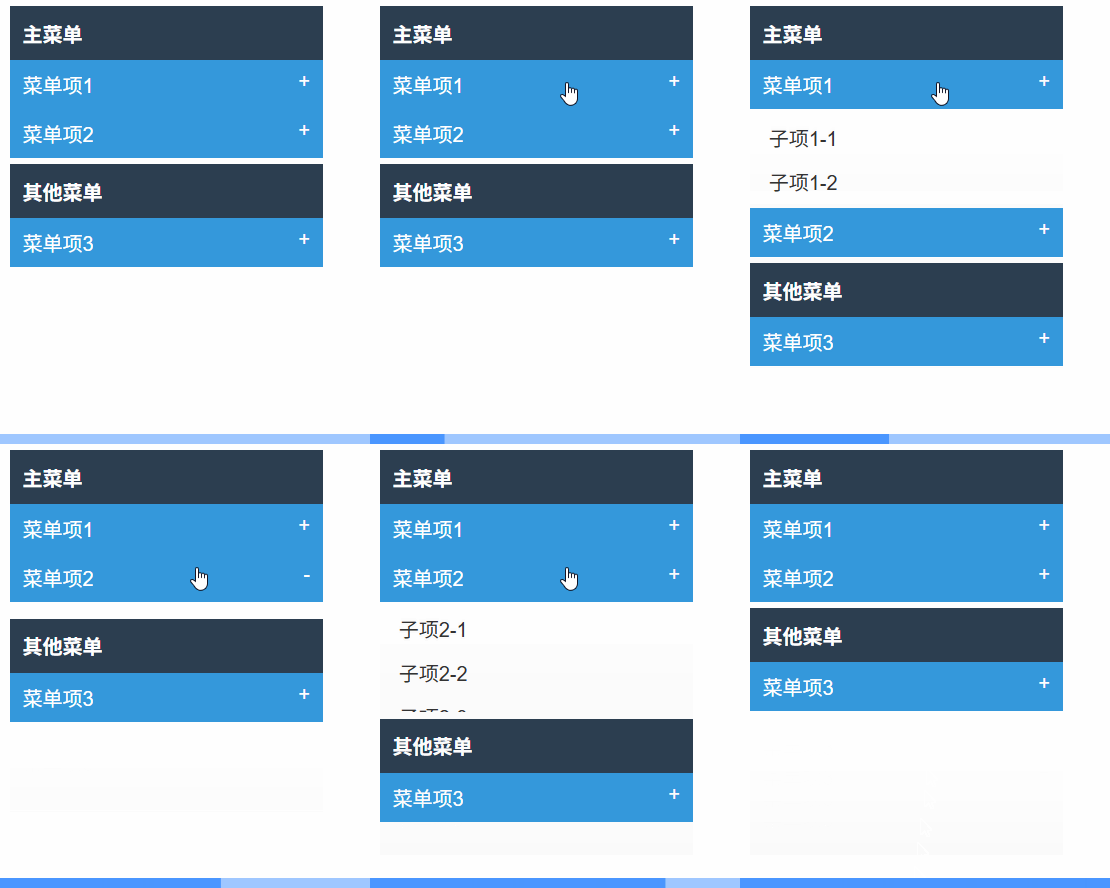
                $(this).next(".menu-content").slideToggle();
                $(this).toggleClass("active");
            });
        });
        </script>
        <style>
           .menu {
                width: 250px;
                font-family: Arial, sans-serif;
            }

            .menu-title {
                padding: 10px;
                background-color: #2c3e50;
                color: white;
                font-weight: bold;
                margin-top: 5px;
            }

            .menu-header {
                padding: 8px 10px;
                background-color: #3498db;
                color: white;
                cursor: pointer;
                position: relative;
            }

            .menu-header:after {
                content: "+";
                position: absolute;
                right: 10px;
            }

            .menu-header.active:after {
                content: "-";
            }

            .menu-content {
                display: none;
                padding: 5px 0;
                background-color: #f9f9f9;
            }

            .sub-item {
                padding: 6px 15px;
                color: #333;
            }

            .sub-item:hover {
                background-color: #e0e0e0;
            }
        </style>
    </head>
    <body>
        <div class="menu">
            <div class="menu-title">主菜单</div>
            <div class="menu-item">
              <div class="menu-header">菜单项1</div>
              <div class="menu-content">
                <div class="sub-item">子项1-1</div>
                <div class="sub-item">子项1-2</div>
              </div>
            </div>
            <div class="menu-item">
              <div class="menu-header">菜单项2</div>
              <div class="menu-content">
                <div class="sub-item">子项2-1</div>
                <div class="sub-item">子项2-2</div>
                <div class="sub-item">子项2-3</div>
              </div>
            </div>
            <div class="menu-title">其他菜单</div>
            <div class="menu-item">
              <div class="menu-header">菜单项3</div>
              <div class="menu-content">
                <div class="sub-item">子项3-1</div>
              </div>
            </div>
          </div>

    </body>
</html>
7.6 过滤元素


 被折叠的 条评论
为什么被折叠?


