参考代码出处:http://blog.csdn.net/yangyu20121224/article/details/9016223
其中有些地方用的不是太明白,自己在Demo中好好好折腾了下,算是弄白了一些没看懂得东西,现在记下来,以便备忘~
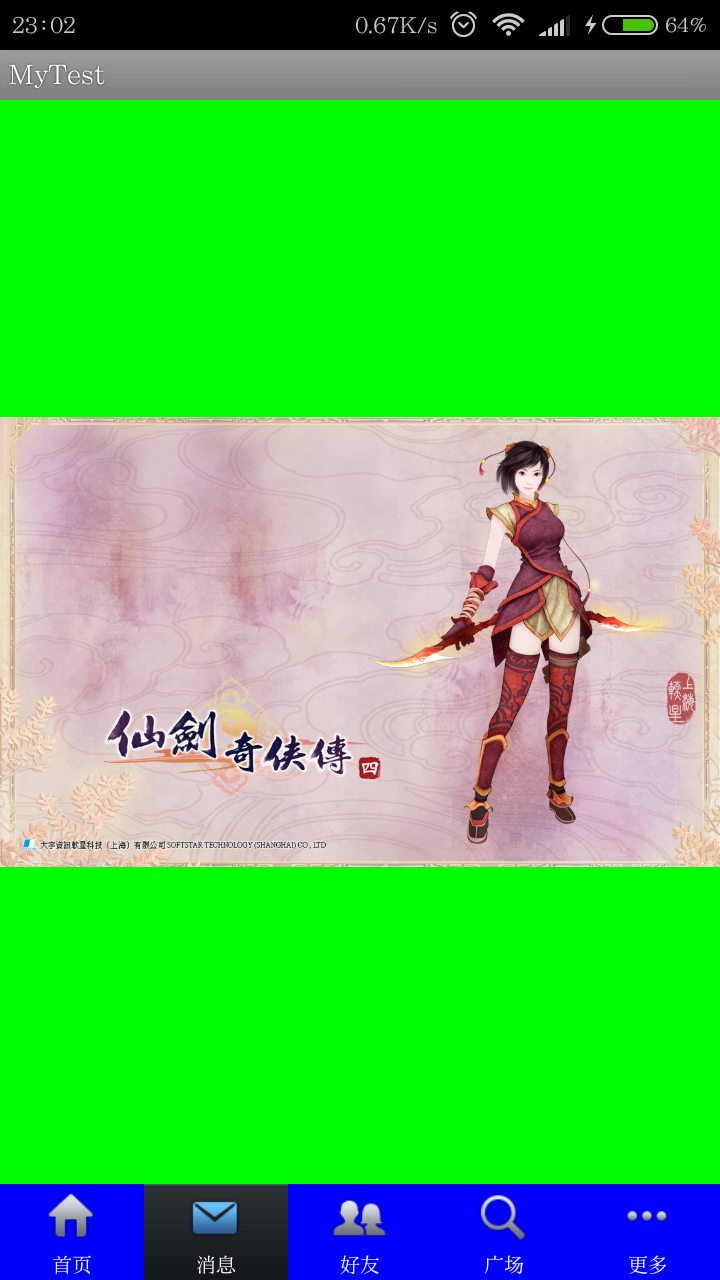
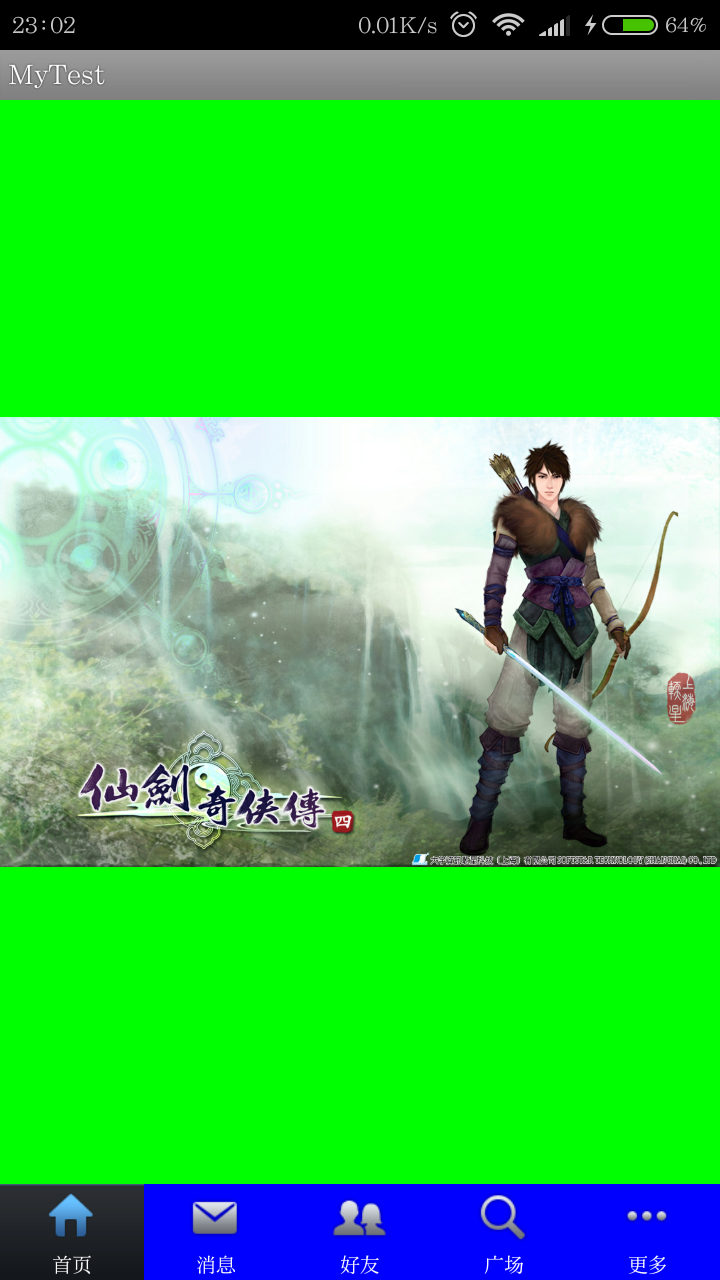
一:改进后的项目效果图:
自己方便查看不同的代码部分对应控制的部分,故在原作的基础上更改了下背景颜色,现效果图如下:
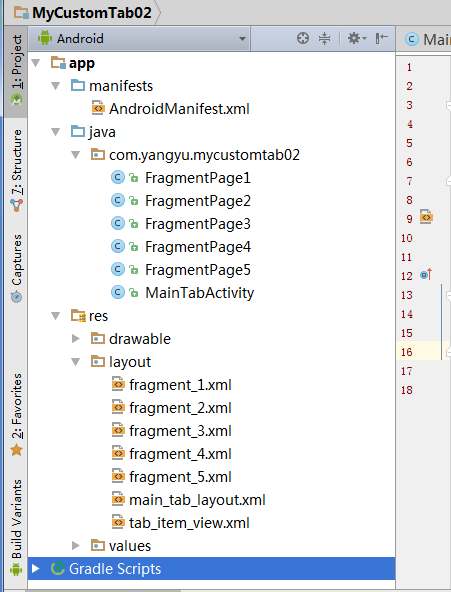
二:文章目录结构:
三:详细代码编写:
1、主tab布局界面,main_tab_layout:
 <?xml version="1.0" encoding="utf-8"?>
<LinearLayout xmlns:android="http://schemas.android.com/apk/res/android"
    android:layout_width="fill_parent"
    android:layout_height="fill_parent"
    android:orientation="vertical" >

    <FrameLayout
        android:id="@+id/realtabcontent"
        android:layout_width="fill_parent"
        android:layout_height="0dip"
        android:background="#00ff00"
        android:layout_weight="1" />

    <android.support.v4.app.FragmentTabHost
        android:id="@android:id/tabhost"
        android:layout_width="fill_parent"
        android:layout_height="wrap_content"
        android:background="#0000ff">
        <!--@drawable/maintab_toolbar_bg-->

        <FrameLayout
            android:id="@android:id/tabcontent"
            android:layout_width="0dp"
            android:layout_height="0dp"
            android:layout_weight="0" />
    </android.support.v4.app.FragmentTabHost>

</LinearLayout>
2、Tab按钮选项布局,tab_item_view.xml:
<?xml version="1.0" encoding="utf-8"?>
<LinearLayout xmlns:android="http://schemas.android.com/apk/res/android"
    android:layout_width="wrap_content"
    android:layout_height="wrap_content"
    android:gravity="center"
    android:orientation="vertical" >

    <ImageView
        android:id="@+id/imageview"
        android:layout_width="wrap_content"
        android:layout_height="wrap_content"
        android:focusable="false"
        android:padding="3dp"
        android:src="@drawable/tab_home_btn">
    </ImageView>

    <TextView
        android:id="@+id/textview"
        android:layout_width="wrap_content"
        android:layout_height="wrap_content"
        android:text="首页"
        android:textSize="10sp"
        android:textColor="#ffffff">
    </TextView>

</LinearLayout>
3、fragment布局界面,这里只列出一个,fragment_1.xml:
<?xml version="1.0" encoding="utf-8"?>
<LinearLayout xmlns:android="http://schemas.android.com/apk/res/android"
    android:layout_width="fill_parent"
    android:layout_height="fill_parent" >

    <ImageView
        android:id="@+id/imageview"
        android:layout_width="fill_parent"
        android:layout_height="fill_parent"
        android:scaleType="fitCenter"
        android:src="@drawable/xianjian01" >
    </ImageView>

</LinearLayout>
4、Tab选项的自定义按钮资源文件,列出其中一个按钮,tab_home_btn:
<?xml version="1.0" encoding="utf-8"?>
<selector xmlns:android="http://schemas.android.com/apk/res/android">

    <item android:drawable="@drawable/icon_home_sel" android:state_selected="true"/>
    <item android:drawable="@drawable/icon_home_nor"/>

</selector>
5、Tab选项按钮背景资源文件,selector_tab_background.xml:
<?xml version="1.0" encoding="utf-8"?>
<selector xmlns:android="http://schemas.android.com/apk/res/android">

    <item android:drawable="@drawable/home_btn_bg" android:state_pressed="true"/>
    <item android:drawable="@drawable/home_btn_bg" android:state_selected="true"/>

</selector>
6、主Activity类,MainTabActivity.Java:
package com.yangyu.mycustomtab02;

import android.os.Bundle;
import android.support.v4.app.FragmentActivity;
import android.support.v4.app.FragmentTabHost;
import android.view.LayoutInflater;
import android.view.View;
import android.widget.ImageView;
import android.widget.TabHost.TabSpec;
import android.widget.TextView;

/**
 * @author yangyu
 *         功能描述:自定义TabHost
 */
public class MainTabActivity extends FragmentActivity {
    //定义FragmentTabHost对象,标签页容器对象
    private FragmentTabHost mTabHost;

    //定义一个布局
    private LayoutInflater layoutInflater;

    //定义数组来存放Fragment界面
    private Class fragmentArray[] = {FragmentPage1.class, FragmentPage2.class, FragmentPage3.class, FragmentPage4.class, FragmentPage5.class};

    //定义数组来存放按钮图片
    private int mImageViewArray[] = {R.drawable.tab_home_btn, R.drawable.tab_message_btn, R.drawable.tab_selfinfo_btn,
            R.drawable.tab_square_btn, R.drawable.tab_more_btn};

    //Tab选项卡的文字
    private String mTextviewArray[] = {"首页", "消息", "好友", "广场", "更多"};

    public void onCreate(Bundle savedInstanceState) {
        super.onCreate(savedInstanceState);
        setContentView(R.layout.main_tab_layout);

        initView();
    }

    /**
     * 初始化组件
     */
    private void initView() {
        //实例化布局对象
        layoutInflater = LayoutInflater.from(this);

        //实例化TabHost对象,得到TabHost,标签页容器
        mTabHost = (FragmentTabHost) findViewById(android.R.id.tabhost);
        //给mtabHos设置父容器。设置标签页对应的内容
        mTabHost.setup(this, getSupportFragmentManager(), R.id.realtabcontent);

        //得到fragment的个数
        int count = fragmentArray.length;

        for (int i = 0; i < count; i++) {
           /**
             * 注意了,重点就这下面两句了,我看着原作者的博客,到头来发现,注释的挺不恰当的,导致在这折腾了半天。
             * 下面我就重新按我的理解进行注释的。
             * */
            //为Tabhost中的分页tabSpec(首页、消息、 好友、 广场、 更多)设置对应的分页按钮对象。
            TabSpec tabSpec = mTabHost.newTabSpec(mTextviewArray[i]).setIndicator(getTabItemView(i));
            //将Tabhost中的分页tabSpec和对应的Fragment界面对应起来
            mTabHost.addTab(tabSpec, fragmentArray[i], null);
            //设置Tabhost的Tab按钮设置背景资源
            //其中:mTabHost.getTabWidget().getChildAt(i)就是:底部的tab按钮对象。
        mTabHost.getTabWidget().getChildAt(i).setBackgroundResource(R.drawable.selector_tab_background);
        }
    }

    /**
     * 给Tab按钮设置图标和文字
     */
    private View getTabItemView(int index) {
        View view = layoutInflater.inflate(R.layout.tab_item_view, null);
        ImageView imageView = (ImageView) view.findViewById(R.id.imageview);
        imageView.setImageResource(mImageViewArray[index]);

        TextView textView = (TextView) view.findViewById(R.id.textview);
        textView.setText(mTextviewArray[index]);

        return view;
    }
}
7、Fragment页面,FragmentPage1.java:
package com.yangyu.mycustomtab02;

import android.os.Bundle;
import android.support.v4.app.Fragment;
import android.view.LayoutInflater;
import android.view.View;
import android.view.ViewGroup;

public class FragmentPage1 extends Fragment{

    @Override
    public View onCreateView(LayoutInflater inflater, ViewGroup container,
            Bundle savedInstanceState) {

        return inflater.inflate(R.layout.fragment_1, null);
    }
}
四:扯扯其他的:
关于FramentActivity在项目测试中发现不能显示标题栏问题(和原作者的能正常显示标题栏的区别:)。

经过反复折腾最后,找到最后的原因在于:所使用对的V4包版本不一致。
在项目中的V4包:
compile ‘com.android.support:support-v4:23.4.0’
这个版本中的FragmentActivity已经将Null ActionBar强制引入了。导致了直接继承FragmentActivity的MainTabActivity不能显示ActionBar。
而在原作者的Demo中使用的V4包为:
compile ‘com.android.support:support-v4:18.0.0’
这个版本中的FragmentActicvity没有强制性的去掉。ActionBar。能正常显示标题栏。
对于在高版本的V4包中MainActivity直接继承FragmentActivity。同时还要能显示标题栏的问题,目前还未解决。查看了下前人的博客。好像是通过非直接继承的方式实现的。(但由于时间问题没有深究。(主要是项目需求改了,不用FragmentTabHost了,呜呜~~~))
Ps:纪念,自己的Android第一篇有自己东西的博客~~~ Oh Year ……


 5240
5240

 被折叠的 条评论
为什么被折叠?


