


一、整合前环境搭建
1、独立式整合
独立式整合指的是三个框架都使用自己的配置文件。
2、创建数据库和表结构
create database crm;
use crm;

/*创建客户表*/
CREATE TABLE `cst_customer` (
  `cust_id` bigint(32) NOT NULL AUTO_INCREMENT COMMENT '客户编号(主键)',
  `cust_name` varchar(32) NOT NULL COMMENT '客户名称(公司名称)',
  `cust_source` varchar(32) DEFAULT NULL COMMENT '客户信息来源',
  `cust_industry` varchar(32) DEFAULT NULL COMMENT '客户所属行业',
  `cust_level` varchar(32) DEFAULT NULL COMMENT '客户级别',
  `cust_address` varchar(128) DEFAULT NULL COMMENT '客户联系地址',
  `cust_phone` varchar(64) DEFAULT NULL COMMENT '客户联系电话',
  PRIMARY KEY (`cust_id`)
) ENGINE=InnoDB AUTO_INCREMENT=1 DEFAULT CHARSET=utf8;
3、编写实体类
/**
 * 客户的实体类(数据模型)
 * @author
 */
public class Customer implements Serializable {

	private Long custId;
	private String custName;
	private String custSource;
	private String custIndustry;
	private String custLevel;
	private String custAddress;
	private String custPhone;
	public Long getCustId() {
		return custId;
	}
	public void setCustId(Long custId) {
		this.custId = custId;
	}
	public String getCustName() {
		return custName;
	}
	public void setCustName(String custName) {
		this.custName = custName;
	}
	public String getCustSource() {
		return custSource;
	}
	public void setCustSource(String custSource) {
		this.custSource = custSource;
	}
	public String getCustIndustry() {
		return custIndustry;
	}
	public void setCustIndustry(String custIndustry) {
		this.custIndustry = custIndustry;
	}
	public String getCustLevel() {
		return custLevel;
	}
	public void setCustLevel(String custLevel) {
		this.custLevel = custLevel;
	}
	public String getCustAddress() {
		return custAddress;
	}
	public void setCustAddress(String custAddress) {
		this.custAddress = custAddress;
	}
	public String getCustPhone() {
		return custPhone;
	}
	public void setCustPhone(String custPhone) {
		this.custPhone = custPhone;
	}
	@Override
	public String toString() {
		return "Customer [custId=" + custId + ", custName=" + custName + ", custSource=" + custSource
				+ ", custIndustry=" + custIndustry + ", custLevel=" + custLevel + ", custAddress=" + custAddress
				+ ", custPhone=" + custPhone + "]";
	}
}
4、编写业务层接口和实现类
package cn.itcast.service;

import java.util.List;

import cn.itcast.domain.Customer;

public interface ICustomerService {

	/**
	 * 查询所有客户
	 *
	 * @return
	 */
	List<Customer> findAllCustomer();

	/**
	 * @param customer
	 */
	void saveCustomer(Customer customer);
}
package cn.itcast.service.impl;
import java.util.List;
import org.springframework.beans.factory.annotation.Autowired;
import cn.itcast.dao.ICustomerDao;
import cn.itcast.domain.Customer;
import cn.itcast.service.ICustomerService;
public class CustomerServiceImpl implements ICustomerService {
private ICustomerDao customerDao;
public void setCustomerDao(ICustomerDao customerDao) {
this.customerDao = customerDao;
}
public List<Customer> findAllCustomer() {
customerDao.findAllCustomer();
return null;
}
public void saveCustomer(Customer customer) {
}
}5、编写dao层接口、实现类
package cn.itcast.dao;

import java.util.List;

import cn.itcast.domain.Customer;

public interface ICustomerDao {

	/**
	 * 查询所有客户
	 *
	 * @return
	 */
	List<Customer> findAllCustomer();

	/**
	 * 保存客户
	 *
	 * @param customer
	 */
	void saveCustomer(Customer customer);
}
package cn.itcast.dao.impl;
import java.util.List;
import cn.itcast.dao.ICustomerDao;
import cn.itcast.domain.Customer;
public class CustomerDaoImpl implements ICustomerDao {
public List<Customer> findAllCustomer() {
System.out.println("查询所有");
return null;
}
@Override
public void saveCustomer(Customer customer) {
System.out.println("保存客户");
}
}二、保证spirng框架在web项目中独立运行
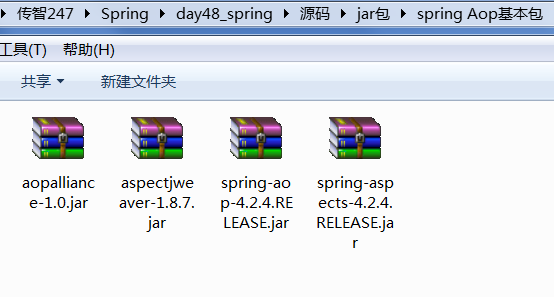
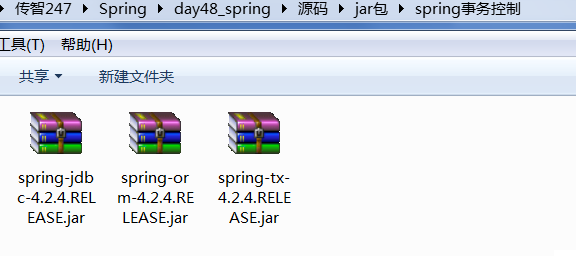
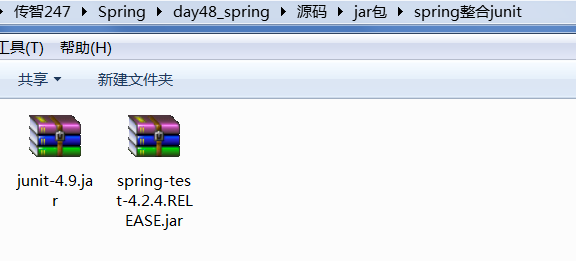
1、导入spring的ioc、aop、事务控制、整合单元测试的基本包

2、创建spring配置文件,导入约束,并配置
<?xml version="1.0" encoding="UTF-8"?>
<beans xmlns="http://www.springframework.org/schema/beans"
	xmlns:xsi="http://www.w3.org/2001/XMLSchema-instance"
	xmlns:aop="http://www.springframework.org/schema/aop"
	xmlns:tx="http://www.springframework.org/schema/tx"
	xsi:schemaLocation="http://www.springframework.org/schema/beans
       					   http://www.springframework.org/schema/beans/spring-beans.xsd
       					   http://www.springframework.org/schema/tx
       					   http://www.springframework.org/schema/tx/spring-tx.xsd
        				   http://www.springframework.org/schema/aop
        				   http://www.springframework.org/schema/aop/spring-aop.xsd">

	<!-- 把资源交给spring管理 -->
	<bean id="customerService" class="cn.itcast.service.impl.CustomerServiceImpl">
		<property name="customerDao" ref="customerDao"></property>
	</bean>

	<bean id="customerDao" class="cn.itcast.dao.impl.CustomerDaoImpl"></bean>

</beans>
3、创建测试类,对spring单独运行进行测试
package cn.itcast.test;

import org.junit.Test;
import org.junit.runner.RunWith;
import org.springframework.beans.factory.annotation.Autowired;
import org.springframework.test.context.ContextConfiguration;
import org.springframework.test.context.junit4.SpringJUnit4ClassRunner;

import cn.itcast.service.ICustomerService;

@RunWith(SpringJUnit4ClassRunner.class)
@ContextConfiguration(locations={"classpath:bean.xml"})
public class SpirngTest {

	@Autowired
	private ICustomerService customerService;
	@Test
	public void testSpirng(){
		customerService.findAllCustomer();
	}

}
三、保证hibernate在web项目中独立运行
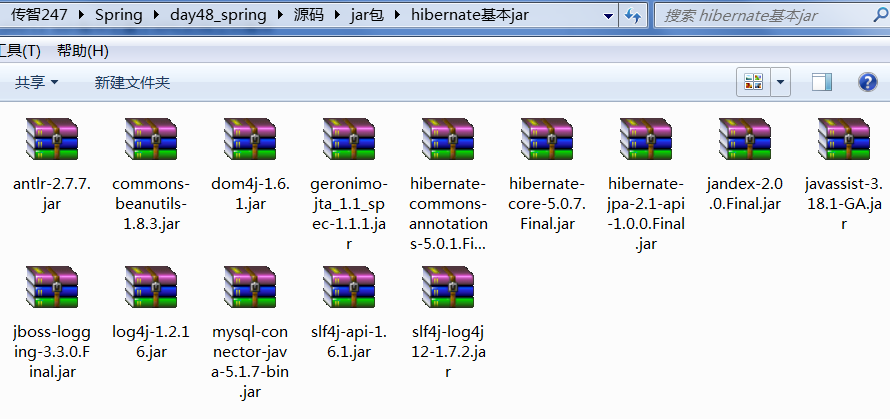
1、导入hibernate必要的jar包
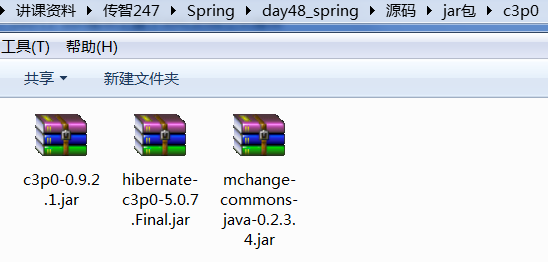
2、导入c3p0连接池所需jar包
3、配置hibernate的主配置文件和映射文件
hibernate主配置文件
<?xml version="1.0" encoding="UTF-8"?>
<!DOCTYPE hibernate-configuration PUBLIC
	"-//Hibernate/Hibernate Configuration DTD 3.0//EN"
	"http://www.hibernate.org/dtd/hibernate-configuration-3.0.dtd">
<hibernate-configuration>
	<session-factory>
		<property name="hibernate.connection.driver_class">com.mysql.jdbc.Driver</property>
		<property name="hibernate.connection.url">jdbc:mysql://localhost:3306/ssh_64</property>
		<property name="hibernate.connection.username">root</property>
		<property name="hibernate.connection.password">admin123</property>
		<!-- 2、hibernate的基本配置 -->
		<!-- 数据库的方言 -->
		<property name="hibernate.dialect">org.hibernate.dialect.MySQLDialect</property>
		<!-- 是否显示SQL语句 -->
		<property name="hibernate.show_sql">true</property>
		<!-- 是否格式化SQL语句 -->
		<property name="hibernate.format_sql">false</property>
		<!-- 选择生成DDL语句的策略
			它只能用于更新表结构,不能用于创建数据库
		-->
		<property name="hibernate.hbm2ddl.auto">update</property>
		<!-- 配置连接池的提供商-->
 		<property name="hibernate.connection.provider_class">org.hibernate.connection.C3P0ConnectionProvider</property>
		<!-- 把session绑定到当前线程上   -->
		<property name="hibernate.current_session_context_class">thread</property>

		<!-- 3、指定映射文件的位置 -->
		<mapping resource="cn/itcast/domain/Customer.hbm.xml"/>
	</session-factory>
</hibernate-configuration>
hibernate映射文件
<?xml version="1.0" encoding="UTF-8"?>
<!DOCTYPE hibernate-mapping PUBLIC
    "-//Hibernate/Hibernate Mapping DTD 3.0//EN"
    "http://www.hibernate.org/dtd/hibernate-mapping-3.0.dtd">
<hibernate-mapping package="cn.itcast.domain">
	<class name="Customer" table="cst_customer">
		<id name="custId" column="cust_id">
			<generator class="native"></generator>
		</id>
		<property name="custName" column="cust_name"></property>
		<property name="custSource" column="cust_source"></property>
		<property name="custIndustry" column="cust_industry"></property>
		<property name="custLevel" column="cust_level"></property>
		<property name="custAddress" column="cust_address"></property>
		<property name="custPhone" column="cust_phone"></property>
	</class>
</hibernate-mapping>
4、编写Hibernate工具类
package cn.itcast.utils;

import org.hibernate.Session;
import org.hibernate.SessionFactory;
import org.hibernate.cfg.Configuration;

/**
 * hibernate的工具类
 * @author wingzhe
 *
 */
public class HibernateUtil {

	private static SessionFactory factory;

	static{
		try {
			Configuration cfg = new Configuration();
			cfg.configure();
			factory = cfg.buildSessionFactory();
		} catch (Exception e) {
			e.printStackTrace();
		}
	}


	public static Session getCurrentSession(){
		return factory.getCurrentSession();
	}
}
5、编写测试类测试hibernate
package cn.itcast.test;

import org.hibernate.Session;
import org.hibernate.Transaction;
import org.junit.Test;

import cn.itcast.domain.Customer;
import cn.itcast.utils.HibernateUtil;

/**
 * hibernate的测试类
 * @author wingzhe
 *
 */
public class HibernateTest {

	@Test
	public void test1(){
		Customer c = new Customer();
		c.setCustName("Test Hibernate");

		Session s = null;
		Transaction tx = null;
		try{
			s = HibernateUtil.getCurrentSession();
			tx = s.beginTransaction();
			s.save(c);
			tx.commit();
		}catch(Exception e){
			tx.rollback();
			e.printStackTrace();
		}
	}
}
四、整合spring和hibernate
1、让spring接管sessionFactory
bean.xml
<?xml version="1.0" encoding="UTF-8"?>
<beans xmlns="http://www.springframework.org/schema/beans"
	xmlns:xsi="http://www.w3.org/2001/XMLSchema-instance"
	xmlns:aop="http://www.springframework.org/schema/aop"
	xmlns:tx="http://www.springframework.org/schema/tx"
	xsi:schemaLocation="http://www.springframework.org/schema/beans
       					   http://www.springframework.org/schema/beans/spring-beans.xsd
       					   http://www.springframework.org/schema/tx
       					   http://www.springframework.org/schema/tx/spring-tx.xsd
        				   http://www.springframework.org/schema/aop
        				   http://www.springframework.org/schema/aop/spring-aop.xsd">

	<!-- 把资源交给spring管理 -->
	<bean id="customerService" class="cn.itcast.service.impl.CustomerServiceImpl">
		<property name="customerDao" ref="customerDao"></property>
	</bean>

	<bean id="customerDao" class="cn.itcast.dao.impl.CustomerDaoImpl">
		<property name="sessionFactory" ref="sessionFactory"></property>
	</bean>

	<!-- 配置一个SessionFactory -->
	<bean id="sessionFactory" class="org.springframework.orm.hibernate5.LocalSessionFactoryBean">
		<!-- 指定hibernate主配置文件的位置,让spring加载用于创建SessionFactory
			如果配置文件在目录中,格式为
			value="classpath:config/hibernate/hibernate.cfg.xml"
		-->
		<property name="configLocation" value="classpath:hibernate.cfg.xml"></property>
	</bean>

</beans>
2、dao层实现类
(1)、第一种写法
package cn.itcast.dao.impl;

import java.util.List;

import org.hibernate.Session;
import org.hibernate.SessionFactory;
import org.hibernate.Transaction;

import cn.itcast.dao.ICustomerDao;
import cn.itcast.domain.Customer;
/**
 * 客户的持久层实现类
 * @author wingzhe
 * 此种方式不可行:原因是事务控制不能放在持久层
 */
public class CustomerDaoImpl implements ICustomerDao {

	private SessionFactory sessionFactory;

	public void setSessionFactory(SessionFactory sessionFactory) {
		this.sessionFactory = sessionFactory;
	}

	@Override
	public void saveCustomer(Customer customer) {
		Session s = null;
		Transaction tx = null;
		try{
			s = sessionFactory.getCurrentSession();
			tx = s.beginTransaction();
			s.save(customer);
			tx.commit();
		}catch(Exception e){
			tx.rollback();
			e.printStackTrace();
		}
	}

	@Override
	public List<Customer> findAllCustomer() {

		return null;
	}

}
(2)、第二种写法 -- 用hibernate模版
package cn.itcast.dao.impl;

import java.util.List;

import org.springframework.orm.hibernate5.HibernateTemplate;

import cn.itcast.dao.ICustomerDao;
import cn.itcast.domain.Customer;
/**
// * 客户的持久层实现类
 * @author wingzhe
 *  此类可以用于基于XML和基于注解的配置。因为在类中有独立的HibernateTemplate定义
 *  但是如果用于基于xml的配置从第17行代码到第21行代码都是重复的
 */
public class CustomerDaoImpl implements ICustomerDao {

	private HibernateTemplate hibernateTemplate;

	public void setHibernateTemplate(HibernateTemplate hibernateTemplate) {
		this.hibernateTemplate = hibernateTemplate;
	}

	@Override
	public void saveCustomer(Customer customer) {
		hibernateTemplate.save(customer);

	}

	@Override
	public List<Customer> findAllCustomer() {
		return (List<Customer>) hibernateTemplate.find("from Customer");
	}

}
(3)、第三种写法 -- 最常用方法
package cn.itcast.dao.impl;

import java.util.List;

import org.springframework.orm.hibernate5.HibernateTemplate;
import org.springframework.orm.hibernate5.support.HibernateDaoSupport;

import cn.itcast.dao.ICustomerDao;
import cn.itcast.domain.Customer;
/**
 * 客户的持久层实现类
 * @author wingzhe
 *
 */
public class CustomerDaoImpl extends HibernateDaoSupport implements ICustomerDao {


	@Override
	public void saveCustomer(Customer customer) {
		getHibernateTemplate().save(customer);
	}

	@Override
	public List<Customer> findAllCustomer() {
		return (List<Customer>) getHibernateTemplate().find("from Customer");
	}

}
3、配置spring的事务
<?xml version="1.0" encoding="UTF-8"?>
<beans xmlns="http://www.springframework.org/schema/beans"
	xmlns:xsi="http://www.w3.org/2001/XMLSchema-instance"
	xmlns:aop="http://www.springframework.org/schema/aop"
	xmlns:tx="http://www.springframework.org/schema/tx"
	xsi:schemaLocation="http://www.springframework.org/schema/beans
       					   http://www.springframework.org/schema/beans/spring-beans.xsd
       					   http://www.springframework.org/schema/tx
       					   http://www.springframework.org/schema/tx/spring-tx.xsd
        				   http://www.springframework.org/schema/aop
        				   http://www.springframework.org/schema/aop/spring-aop.xsd">

	<!-- 把资源交给spring管理 -->
	<bean id="customerService" class="cn.itcast.service.impl.CustomerServiceImpl">
		<property name="customerDao" ref="customerDao"></property>
	</bean>

	<bean id="customerDao" class="cn.itcast.dao.impl.CustomerDaoImpl">
		<property name="sessionFactory" ref="sessionFactory"></property>
	</bean>

	<!-- 配置一个SessionFactory -->
	<bean id="sessionFactory"
		class="org.springframework.orm.hibernate5.LocalSessionFactoryBean">
		<!-- 指定hibernate主配置文件的位置,让spring加载用于创建SessionFactory
		如果配置文件在目录中,格式为 value="classpath:config/hibernate/hibernate.cfg.xml"
		 -->
		<property name="configLocation" value="classpath:hibernate.cfg.xml"></property>
	</bean>

	<!-- 配置事务管理器 -->
	<bean id="transactionManager" class="org.springframework.orm.hibernate5.HibernateTransactionManager">
		<property name="sessionFactory" ref="sessionFactory"></property>
	</bean>

	<!-- 配置事务的通知 -->
	<tx:advice id="txAdvice" transaction-manager="transactionManager">
		<tx:attributes>
			<tx:method name="*" propagation="REQUIRED" read-only="false" />
			<tx:method name="find*" propagation="SUPPORTS" read-only="true" />
		</tx:attributes>
	</tx:advice>

	<!-- 配置aop:建立切入点表达式和事务通知的对应关系 -->
	<aop:config>
		<aop:pointcut expression="execution(* cn.itcast.service.impl.*.*(..))"
			id="pt1" />
		<aop:advisor advice-ref="txAdvice" pointcut-ref="pt1" />
	</aop:config>

</beans>
4、spring整合hibernate的测试类
package cn.itcast.test;

import java.util.List;

import org.junit.Test;
import org.junit.runner.RunWith;
import org.springframework.beans.factory.annotation.Autowired;
import org.springframework.test.context.ContextConfiguration;
import org.springframework.test.context.junit4.SpringJUnit4ClassRunner;

import cn.itcast.domain.Customer;
import cn.itcast.service.ICustomerService;

/**
 * 测试整合spring和hibernate
 * @author zhy
 *
 */
@RunWith(SpringJUnit4ClassRunner.class)
@ContextConfiguration(locations={"classpath:bean.xml"})
public class SpringHibernateTest {

	@Autowired
	private ICustomerService customerService;

	@Test
	public void test1(){
		List list = customerService.findAllCustomer();
		for(Object o : list){
			System.out.println(o);
		}
	}

	@Test
	public void test2(){
		Customer c = new Customer();
		c.setCustName("spring hibernate test 22");
		customerService.saveCustomer(c);
	}
}
运行报错

修改hibernate主配置文件中本地线程中获取session的参数
<!-- 把session绑定到当前线程上
			不与spring整合时参数为thread
			整合之后参数为org.springframework.orm.hibernate5.SpringSessionContext
			注意:整合时此处不配置绑定线程也可以,spring会自动绑定,因此建议不配置
		-->
		<property name="hibernate.current_session_context_class">
			org.springframework.orm.hibernate5.SpringSessionContext
		</property>
五、保证struts2在web项目中独立运行
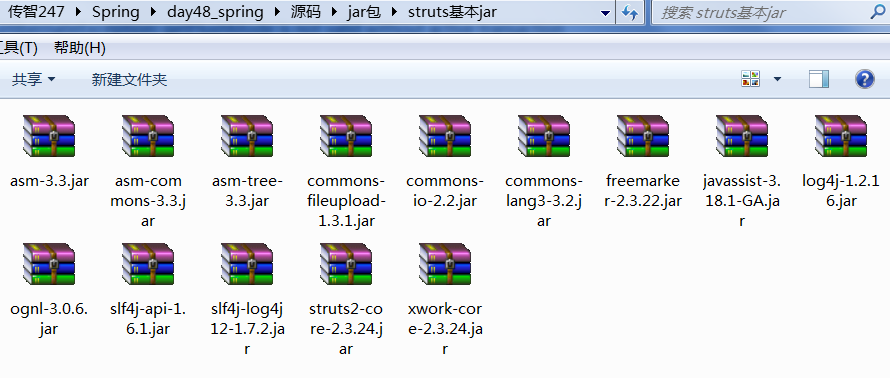
1、导入struts2运行所需的基本jar包
2、配置web.xml中struts2核心控制器
<!-- 配置struts2的核心控制器 ,它之会去类的根路径下加载名称为struts.xml的配置文件
		要想改变位置,需要通过配置过滤器的初始化参数来指定
	-->
	<filter>
		<filter-name>struts2</filter-name>
		<filter-class>org.apache.struts2.dispatcher.ng.filter.StrutsPrepareAndExecuteFilter</filter-class>
		<init-param>
			<!-- 此处的写法是固定的 -->
			<param-name>config</param-name>
			<param-value>struts-default.xml,struts-plugin.xml,config/struts/struts.xml</param-value>
		</init-param>
	</filter>
	<filter-mapping>
		<filter-name>struts2</filter-name>
		<url-pattern>/*</url-pattern>
	</filter-mapping>
3、编写动作类
package cn.itcast.web.action;

import java.util.List;

import com.opensymphony.xwork2.ActionSupport;
import com.opensymphony.xwork2.ModelDriven;

import cn.itcast.domain.Customer;
import cn.itcast.service.ICustomerService;
/**
 * Customer的动作类
 * @author wingzhe
 *
 */
public class CustomerAction extends ActionSupport implements ModelDriven<Customer> {

	private Customer customer = new Customer();

	private ICustomerService customerService;

	public void setCustomerService(ICustomerService customerService) {
		this.customerService = customerService;
	}

	@Override
	public Customer getModel() {
		return customer;
	}

	/**
	 * 查询所有客户
	 * @return
	 */
	private List<Customer> customers;
	public String findAllCustomer(){
		customers = customerService.findAllCustomer();
		return "findAllCustomer";
	}

	/**
	 * 获取添加客户页面
	 * @return
	 */
	public String addUICustomer(){
		return "addUICustomer";
	}


	public List<Customer> getCustomers() {
		return customers;
	}
	public void setCustomers(List<Customer> customers) {
		this.customers = customers;
	}
}
4、配置struts2核心配置文件
<?xml version="1.0" encoding="UTF-8"?>
<!DOCTYPE struts PUBLIC
	"-//Apache Software Foundation//DTD Struts Configuration 2.3//EN"
	"http://struts.apache.org/dtds/struts-2.3.dtd">
<struts>
	<!-- 开启开发者模式 -->
	<constant name="struts.devMode" value="true"></constant>

	<!-- 修改默认拦截的后缀为action -->
	<constant name="struts.action.extension" value="action"></constant>

	<!-- 修改struts2的默认主题 -->
	<constant name="struts.ui.theme" value="simple"></constant>

	<!-- 配置一个公共包 -->
	<package name="myDefault" extends="struts-default" abstract="true">
		<!-- 有公共的配置就写在此处,没有就空着 -->
	</package>

	<!-- 客户的配置 -->
	<package name="customer" extends="myDefault" namespace="/customer">
		<!-- class属性除了写全限定类名之外,还可以写bean的id。这个bean是在spring的配置文件中配置的 在创建action对象时,
			工厂类会使用class属性的值反射创建类对象(Class.forName("customerAction")),
			当能创建成功时,直接创建并使用。 当不能创建成功时,会以class属性的值作为bean的id在spring容器中查找。 -->
		<!-- 获取添加客户页面 -->
		<action name="addUICustomer" class="customerAction" method="addUICustomer">
			<result name="addUICustomer">/jsp/customer/add.jsp</result>
		</action>

		<!-- 查询所有客户 -->
		<action name="findAllCustomer" class="customerAction" method="findAllCustomer">
			<result name="findAllCustomer">/jsp/customer/list.jsp</result>
		</action>
	</package>
</struts>
六、整合struts2和hibernate
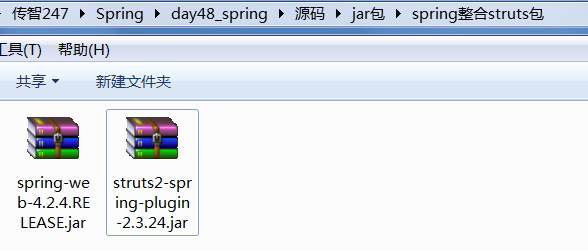
1、导入struts2和spring整合的jar包
2、web.xml中配置spring监听器
<!-- 配置监听器:用于保证spring容器在web工程中只有一个的
		它只能加载在WEB-INF目录中的名称为applicationContext.xml的配置文件,其他位置,其他名称都需要用配置的方式指定
	-->
	<listener>
		<listener-class>org.springframework.web.context.ContextLoaderListener</listener-class>
	</listener>
	<!-- 全局初始化参数 -->
	<context-param>
		<param-name>contextConfigLocation</param-name>
		<param-value>classpath:config/spring/applicationContext.xml</param-value>
	</context-param>
3、把动作类交给spring管理
	<bean id="customerAction" class="cn.itcast.web.action.CustomerAction" scope="prototype">
		<property name="customerService" ref="customerService"></property>
	</bean>
七、优化配置
1、将struts2的配置文件分包管理
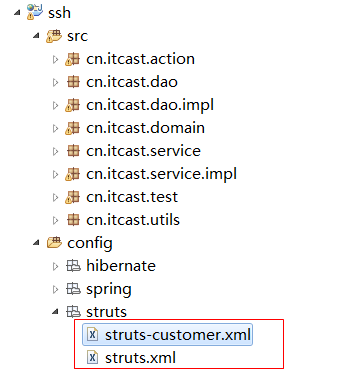
struts.xml中
<?xml version="1.0" encoding="UTF-8"?>
<!DOCTYPE struts PUBLIC
	"-//Apache Software Foundation//DTD Struts Configuration 2.3//EN"
	"http://struts.apache.org/dtds/struts-2.3.dtd">
<struts>
	<!-- 开启开发者模式 -->
	<constant name="struts.devMode" value="true"></constant>

	<!-- 修改默认拦截的后缀为action -->
	<constant name="struts.action.extension" value="action"></constant>

	<!-- 修改struts2的默认主题 -->
	<constant name="struts.ui.theme" value="simple"></constant>

	<!-- 配置一个公共包 -->
	<package name="myDefault" extends="struts-default" abstract="true">
		<!-- 有公共的配置就写在此处,没有就空着 -->
	</package>


	<!-- 引入其他struts2配置文件 -->
	<include file="config/struts/struts-customer.xml"></include>
</struts>
struts-customer.xml
<?xml version="1.0" encoding="UTF-8"?>
<!DOCTYPE struts PUBLIC
	"-//Apache Software Foundation//DTD Struts Configuration 2.3//EN"
	"http://struts.apache.org/dtds/struts-2.3.dtd">
<struts>
	<!-- 客户的配置 -->
	<package name="customer" extends="myDefault" namespace="/customer">
		<!-- class属性除了写全限定类名之外,还可以写bean的id。这个bean是在spring的配置文件中配置的
			在创建action对象时,工厂类会使用class属性的值反射创建类对象(Class.forName("customerAction")),
			当能创建成功时,直接创建并使用。
			当不能创建成功时,会以class属性的值作为bean的id在spring容器中查找。
		-->
		<!-- 获取添加客户页面 -->
		<action name="addUICustomer" class="customerAction" method="addUICustomer">
			<result name="addUICustomer">/jsp/customer/add.jsp</result>
		</action>

		<!-- 查询所有客户 -->
		<action name="findAllCustomer" class="customerAction" method="findAllCustomer">
			<result name="findAllCustomer">/jsp/customer/list.jsp</result>
		</action>
	</package>
</struts>
2、将spring的配置文件分包管理

applicationContext.xml
<?xml version="1.0" encoding="UTF-8"?>
<beans xmlns="http://www.springframework.org/schema/beans"
       xmlns:xsi="http://www.w3.org/2001/XMLSchema-instance"
       xmlns:aop="http://www.springframework.org/schema/aop"
       xmlns:tx="http://www.springframework.org/schema/tx"
       xsi:schemaLocation="http://www.springframework.org/schema/beans
       					   http://www.springframework.org/schema/beans/spring-beans.xsd
       					   http://www.springframework.org/schema/tx
       					   http://www.springframework.org/schema/tx/spring-tx.xsd
        				   http://www.springframework.org/schema/aop
        				   http://www.springframework.org/schema/aop/spring-aop.xsd">
	<!-- 引入其他spring配置文件 -->
	<import resource="applicationContext-customer.xml"/>
	<import resource="applicationContext-jdbc.xml"/>
	<import resource="applicationContext-tx.xml"/>
</beans>
applicationContext-customer.xml
<?xml version="1.0" encoding="UTF-8"?>
<beans xmlns="http://www.springframework.org/schema/beans"
       xmlns:xsi="http://www.w3.org/2001/XMLSchema-instance"
       xmlns:aop="http://www.springframework.org/schema/aop"
       xmlns:tx="http://www.springframework.org/schema/tx"
       xsi:schemaLocation="http://www.springframework.org/schema/beans
       					   http://www.springframework.org/schema/beans/spring-beans.xsd
       					   http://www.springframework.org/schema/tx
       					   http://www.springframework.org/schema/tx/spring-tx.xsd
        				   http://www.springframework.org/schema/aop
        				   http://www.springframework.org/schema/aop/spring-aop.xsd">
	<!-- 把资源交给spring来管理 -->
	<bean id="customerDao" class="cn.itcast.dao.impl.CustomerDaoImpl">
		<property name="sessionFactory" ref="sessionFactory"></property>
	</bean>

	<bean id="customerService" class="cn.itcast.service.impl.CustomerServiceImpl">
		<property name="customerDao" ref="customerDao"></property>
	</bean>

	<bean id="customerAction" class="cn.itcast.web.action.CustomerAction" scope="prototype">
		<property name="customerService" ref="customerService"></property>
	</bean>
</beans>
applicationContext-jdbc.xml
<?xml version="1.0" encoding="UTF-8"?>
<beans xmlns="http://www.springframework.org/schema/beans"
xmlns:xsi="http://www.w3.org/2001/XMLSchema-instance"
xmlns:aop="http://www.springframework.org/schema/aop"
xmlns:tx="http://www.springframework.org/schema/tx"
xsi:schemaLocation="http://www.springframework.org/schema/beans
http://www.springframework.org/schema/beans/spring-beans.xsd
http://www.springframework.org/schema/tx
http://www.springframework.org/schema/tx/spring-tx.xsd
http://www.springframework.org/schema/aop
http://www.springframework.org/schema/aop/spring-aop.xsd">
<!-- 配置一个SessionFactory -->
<bean id="sessionFactory" class="org.springframework.orm.hibernate5.LocalSessionFactoryBean">
<!-- 指定hibernate主配置文件的位置,让spring加载用于创建SessionFactory -->
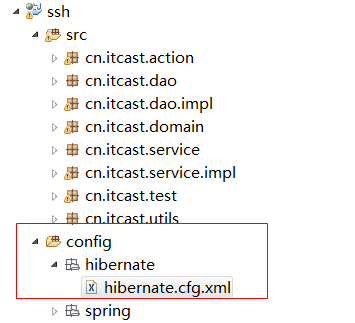
<property name="configLocation" value="classpath:config/hibernate/hibernate.cfg.xml"></property>
</bean>
</beans>applicationContext-tx.xml
<?xml version="1.0" encoding="UTF-8"?>
<beans xmlns="http://www.springframework.org/schema/beans"
       xmlns:xsi="http://www.w3.org/2001/XMLSchema-instance"
       xmlns:aop="http://www.springframework.org/schema/aop"
       xmlns:tx="http://www.springframework.org/schema/tx"
       xsi:schemaLocation="http://www.springframework.org/schema/beans
       					   http://www.springframework.org/schema/beans/spring-beans.xsd
       					   http://www.springframework.org/schema/tx
       					   http://www.springframework.org/schema/tx/spring-tx.xsd
        				   http://www.springframework.org/schema/aop
        				   http://www.springframework.org/schema/aop/spring-aop.xsd">
	<!-- 配置事务管理器 -->
	<bean id="transactionManager" class="org.springframework.orm.hibernate5.HibernateTransactionManager">
		<property name="sessionFactory" ref="sessionFactory"></property>
	</bean>

	<!-- 配置事务的通知 -->
	<tx:advice id="txAdvice" transaction-manager="transactionManager">
		<tx:attributes>
			<tx:method name="*" propagation="REQUIRED" read-only="false"/>
			<tx:method name="find*" propagation="SUPPORTS" read-only="true"/>
		</tx:attributes>
	</tx:advice>

	<!-- 配置aop:建立切入点表达式和事务通知的对应关系 -->
	<aop:config>
		<aop:pointcut expression="execution(* cn.itcast.service.impl.*.*(..))" id="pt1"/>
		<aop:advisor advice-ref="txAdvice" pointcut-ref="pt1"/>
	</aop:config>
</beans>
3、将hibernate配置文件分包管理


 1万+
1万+

 被折叠的 条评论
为什么被折叠?
被折叠的 条评论
为什么被折叠?
 到【灌水乐园】发言


