


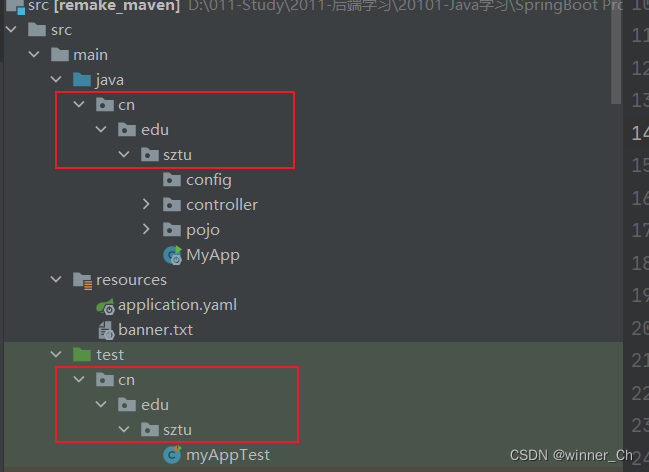
Spring注入属性值的三种方式
Spring注入属性值的三种方式:使用@Value注解直接注入字符串、 使用@Value+@PropertySource设置、加载外部配置文件注入属性值
1.使用@Value注解直接注入字符串
缺点:
- 没有配合spel+配置文件进行读取的话,只能注入基本数据类型,引用数据类型的话就必须结合配置文件和spel表达式使用
- 硬编码,适合全局通用配置
示例代码:
注意:标注了@Component的类才会被Spring所识别,才会被注册为@Bean类,才能被Spring容器所管理
Book类
@Component
public class Book {
    @Value("三国")
    private String bookName;

    @Value("23.00")
    private Double price;

    @Value("罗贯中")
    private String author;

    @Override
    public String toString() {
        return "Book{" +
                "bookName='" + bookName + '\'' +
                ", price=" + price +
                ", author='" + author + '\'' +
                '}';
    }
}
上面所有的属性都是基本数据类型,所以注入成功
基本数据类型的属性:bookName、price、author
测试类
@RunWith(SpringRunner.class)
@SpringBootTest
public class myAppTest {
//    注意:测试类包名要保持一致
    @Autowired
    Book book;

    @Test
    public void run(){
        System.out.println(book);
    }
}
注意:测试类的包名要和基本项目目录保持一致
运行结果:

2.使用@Value+@PropertySource设置
对于需要使用引用数据类型的需求,例如为属性注入日期值,则需要使用spel表达式+xx.properties配置文件
步骤
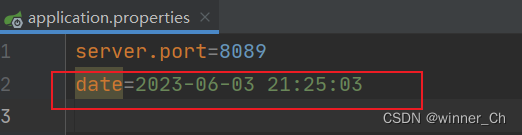
第一步: 在resource目录下新建application.properties文件,默认Spring会加载application开头的文件,当然也可以通过注解的方式手动指定需要的配置文件

server.port=8085
date=2023-06-03 21:08:20
第二步: 在Book类的引用数据类型上,例如Date上添加@Value注解,并使用spel表达式获取配置文件的值
package cn.edu.sztu.pojo;

import org.springframework.beans.factory.annotation.Value;
import org.springframework.format.annotation.DateTimeFormat;
import org.springframework.stereotype.Component;

import javax.annotation.PostConstruct;
import java.text.ParseException;
import java.text.SimpleDateFormat;
import java.util.Date;

@Component
public class Book {
    @Value("三国")
    private String bookName;
    @Value("23.00")
    private Double price;

    @Value("罗贯中")
    private String author;


//这里
    @DateTimeFormat(pattern = "yyyy-MM-dd HH:mm:ss")
    @Value("${date}") //SPEL表达式
    private Date publish_date;

    @Override
    public String toString() {
        return "Book{" +
                "bookName='" + bookName + '\'' +
                ", price=" + price +
                ",publish_date="+publish_date+
                ", author='" + author + '\'' +
                '}';
    }
}
注意:对于日期的处理,需要使用SpringBoot的注解@DateTimeFormat进行格式化,否则会出现类型转换异常
默认SpringBoot会去加载application.properties文件
运行后的结果如下:

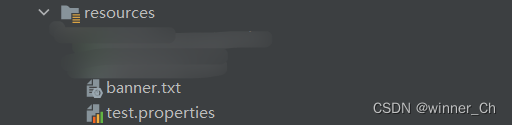
若要指定外部配置文件,可以通过@PropertySource注解进行配置
- 通过
@PropertySource(value={"classpath:test.properties"})注解指定外部配置文件
并编写相关配置

date=2023-06-03 21:12:30
server.port=8086
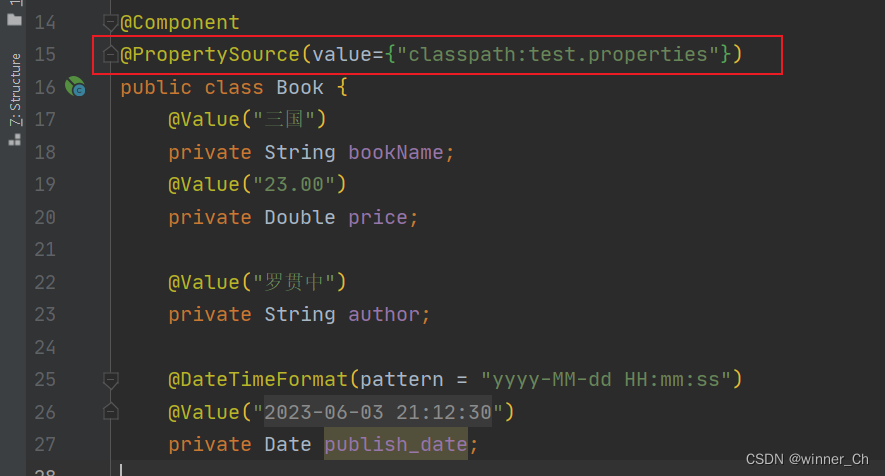
在需要注入的的类上加上注解@PropertySource(value={"classpath:test.properties"})并指定配置文件的位置
@Component
@PropertySource(value={"classpath:test.properties"})
public class Book {
    @Value("三国")
    private String bookName;
    @Value("23.00")
    private Double price;

    @Value("罗贯中")
    private String author;

    @DateTimeFormat(pattern = "yyyy-MM-dd HH:mm:ss")
    @Value("${date}")
    private Date publish_date;

    @Override
    public String toString() {
        return "Book{" +
                "bookName='" + bookName + '\'' +
                ", price=" + price +
                ",publish_date="+publish_date+
                ", author='" + author + '\'' +
                '}';
    }
}
运行后的结果如下所示:

日期类型注入成功
注意:如果存在多个配置文件,会优先加载application.properties
例如:加载顺序如下

测试验证一下

待注入的类上标注的注解还是test.properties
运行之,可以发现加载的确实是application.properties配置文件

3. 加载外部配置文件并注入属性值
我们在Book类制定了加载test.properties文件,由于spring boot加载配置文件的顺序问题,我们给出以下的解决方案
- 通过传入外部参数指定需要加载的配置文件
spring.config.name=xx:指定配置文件所在目录名spring.config.location=classpath:xx.yaml/properties指定配置文件名
举个例子:
java -jar myapp.jar --spring.config.name=myconfig --spring.config.location=classpath:/myconfig/
上面配置的信息如下:
--spring.config.name在运行jar包的时候指定配置文件的目录为myconfigspring.config.location=classpath:/myconfig/:在运行jar包的时候指定加载myconfig目录下的所有文件
对于上面举的Book类的例子,我们可以不需要打成jar包后指定配置文件,可以在IDEA工具传入外部参数
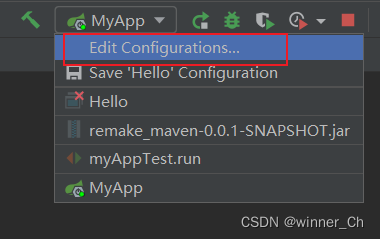
第一步: 点击启动类图标,并且点击Edit Configurations
第二步 点击Environment->program argument
输入:–spring.config.location=classpath:xxx.properties(你需要加载的自定义的配置文件名)
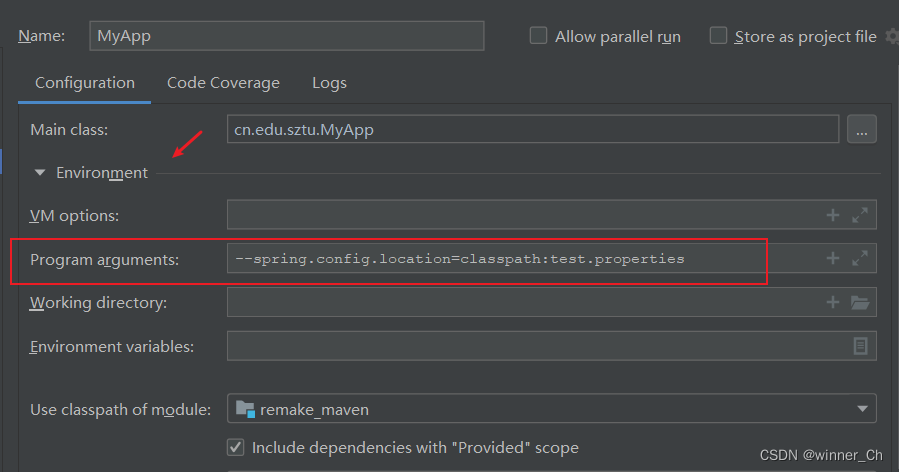
重新启动项目

切换外部配置文件成功!
4. 通过加载yaml配置文件进行属性值的注入【推荐】
- 使用
@ConfigurationProperties注解+yaml配置文件的方式进行配置文件的加载 - 其中
@ConfigurationProperties注解需要传入一个前缀参数prefix,prefix前缀定义了哪些外部属性将绑定到类的字段上,也就是配置文件中的前缀后面的字段应和类一一对应
注意点1:使用@ConfigurationProperties注解进行配置的对象必须要有:
- 公共的getter方法
- 公共的setter方法
才能由Spring进行自动赋值
注意点2: 必须给类加上@Component注解,标识为组件类,组件类由Spring进行管理
示例代码:
//必须加上@Component注解才能被Spring识别到
@Component
@PropertySource({"classpath:application.yaml"})
@ConfigurationProperties(prefix = "student")
public class Student {

    private String name;
    private Integer age;
    private String gender;
    private Double score;

    @Override
    public String toString() {
        return "Student{" +
                "name='" + name + '\'' +
                ", age=" + age +
                ", gender='" + gender + '\'' +
                ", score=" + score +
                '}';
    }

    public String getName() {
        return name;
    }

    public void setName(String name) {
        this.name = name;
    }

    public Integer getAge() {
        return age;
    }

    public void setAge(Integer age) {
        this.age = age;
    }

    public String getGender() {
        return gender;
    }

    public void setGender(String gender) {
        this.gender = gender;
    }

    public Double getScore() {
        return score;
    }

    public void setScore(Double score) {
        this.score = score;
    }
}
使用Controller类进行测试
@RestController
public class DemoController {
    @Autowired
    Student student;
    @RequestMapping("/demo")
    public String sayHello(){
        System.out.println(student);
        return "demo!!";
    }
}
yaml配置文件
server:
  port: 8083

date: "2023-06-03 21:25:03"

student:
  name: '张三'
  age: 23
  gender: '男'
  score: 99.0
运行测试:


 3655
3655


 被折叠的 条评论
为什么被折叠?
被折叠的 条评论
为什么被折叠?
 到【灌水乐园】发言


