


在今天的博客中,我们将探讨如何使用Python和wxPython创建一个强大而实用的桌面应用程序。这个应用程序可以遍历指定文件夹中的所有EXE文件,并提供运行这些文件和自动截图的功能。无论你是系统管理员、软件测试人员,还是仅仅对自动化工具感兴趣的开发者,这个项目都会给你带来启发。
C:\pythoncode\new\runfolderexeandsnapshot.py
功能概述
我们的应用程序具有以下主要功能:
- 选择文件夹并遍历其中的所有EXE文件(包括子文件夹)
- 在列表框中显示找到的EXE文件
- 双击列表项运行对应的EXE文件
- 一键运行所有找到的EXE文件
- 自动为每个运行的程序截图
- 将截图以原EXE文件名保存在指定位置
技术栈
为了实现这些功能,我们使用了以下Python库:
- wxPython: 用于创建图形用户界面
- os: 用于文件系统操作
- subprocess: 用于运行外部程序
- pyautogui: 用于屏幕截图
- PIL (Python Imaging Library): 用于图像处理
全部代码
import wx
import os
import subprocess
import pyautogui
from PIL import Image

class MainFrame(wx.Frame):
    def __init__(self):
        super().__init__(parent=None, title='EXE Runner and Screenshot Tool')
        panel = wx.Panel(self)

        self.list_box = wx.ListBox(panel, pos=(5, 35), size=(350, 300), style=wx.LB_SINGLE)
        self.list_box.Bind(wx.EVT_LISTBOX_DCLICK, self.on_dclick)

        select_btn = wx.Button(panel, label='选择文件夹', pos=(5, 5), size=(100, 25))
        select_btn.Bind(wx.EVT_BUTTON, self.on_select)

        run_all_btn = wx.Button(panel, label='运行全部', pos=(110, 5), size=(100, 25))
        run_all_btn.Bind(wx.EVT_BUTTON, self.on_run_all)

        self.SetSize((360, 375))
        self.Centre()

    def on_select(self, event):
        dlg = wx.DirDialog(self, "选择一个文件夹", style=wx.DD_DEFAULT_STYLE)
        if dlg.ShowModal() == wx.ID_OK:
            self.folder_path = dlg.GetPath()
            self.exe_files = self.get_exe_files(self.folder_path)
            self.list_box.Set(self.exe_files)
        dlg.Destroy()

    def get_exe_files(self, folder):
        exe_files = []
        for root, dirs, files in os.walk(folder):
            for file in files:
                if file.endswith('.exe'):
                    exe_files.append(os.path.join(root, file))
        return exe_files

    def on_dclick(self, event):
        index = event.GetSelection()
        self.run_exe(self.exe_files[index])

    def on_run_all(self, event):
        for exe in self.exe_files:
            self.run_exe(exe)

    def run_exe(self, exe_path):
        try:
            subprocess.Popen(exe_path)
            wx.Sleep(2)  # 等待程序启动
            self.take_screenshot(exe_path)
        except Exception as e:
            wx.MessageBox(f"运行 {exe_path} 时出错: {str(e)}", "错误", wx.OK | wx.ICON_ERROR)

    def take_screenshot(self, exe_path):
        screenshot = pyautogui.screenshot()
        exe_name = os.path.splitext(os.path.basename(exe_path))[0]
        screenshot_folder = os.path.join(os.path.dirname(exe_path), "screenshot")
        if not os.path.exists(screenshot_folder):
            os.makedirs(screenshot_folder)
        screenshot_path = os.path.join(screenshot_folder, f"{exe_name}.png")
        screenshot.save(screenshot_path)

if __name__ == '__main__':
    app = wx.App()
    frame = MainFrame()
    frame.Show()
    app.MainLoop()
代码解析
让我们深入了解代码的关键部分:
1. 用户界面
我们使用wxPython创建了一个简洁的用户界面,包含一个列表框和两个按钮:
class MainFrame(wx.Frame):
    def __init__(self):
        super().__init__(parent=None, title='EXE Runner and Screenshot Tool')
        panel = wx.Panel(self)

        self.list_box = wx.ListBox(panel, pos=(5, 35), size=(350, 300), style=wx.LB_SINGLE)
        self.list_box.Bind(wx.EVT_LISTBOX_DCLICK, self.on_dclick)

        select_btn = wx.Button(panel, label='选择文件夹', pos=(5, 5), size=(100, 25))
        select_btn.Bind(wx.EVT_BUTTON, self.on_select)

        run_all_btn = wx.Button(panel, label='运行全部', pos=(110, 5), size=(100, 25))
        run_all_btn.Bind(wx.EVT_BUTTON, self.on_run_all)
2. 文件遍历
我们使用os.walk()来递归遍历文件夹及其子文件夹,查找所有的EXE文件:
def get_exe_files(self, folder):
    exe_files = []
    for root, dirs, files in os.walk(folder):
        for file in files:
            if file.endswith('.exe'):
                exe_files.append(os.path.join(root, file))
    return exe_files
3. 运行EXE文件
我们使用subprocess.Popen()来运行EXE文件:
def run_exe(self, exe_path):
    try:
        subprocess.Popen(exe_path)
        wx.Sleep(2)  # 等待程序启动
        self.take_screenshot(exe_path)
    except Exception as e:
        wx.MessageBox(f"运行 {exe_path} 时出错: {str(e)}", "错误", wx.OK | wx.ICON_ERROR)
4. 屏幕截图
我们使用pyautogui来捕获屏幕截图,并使用PIL来保存图像:
def take_screenshot(self, exe_path):
    screenshot = pyautogui.screenshot()
    exe_name = os.path.splitext(os.path.basename(exe_path))[0]
    screenshot_folder = os.path.join(os.path.dirname(exe_path), "screenshot")
    if not os.path.exists(screenshot_folder):
        os.makedirs(screenshot_folder)
    screenshot_path = os.path.join(screenshot_folder, f"{exe_name}.png")
    screenshot.save(screenshot_path)
潜在应用场景
这个工具可以在多种场景下发挥作用:
- 软件测试: 自动运行多个程序并捕获截图,可以大大提高测试效率。
- 系统管理: 快速查看和运行系统中的可执行文件,对系统管理员很有帮助。
- 软件开发: 在开发过程中快速测试和记录多个可执行文件的运行状态。
- 教育: 作为一个教学工具,展示如何使用Python创建实用的桌面应用程序。
改进空间
虽然这个工具已经相当实用,但仍有一些可以改进的地方:
- 添加进度条,显示当前正在运行的程序和截图进度。
- 实现更灵活的截图时间控制,因为不同程序可能需要不同的启动时间。
- 添加选项来自动关闭运行的程序。
- 实现更robust的错误处理和日志记录机制。
- 添加对非EXE文件的支持,如批处理文件或其他可执行文件。
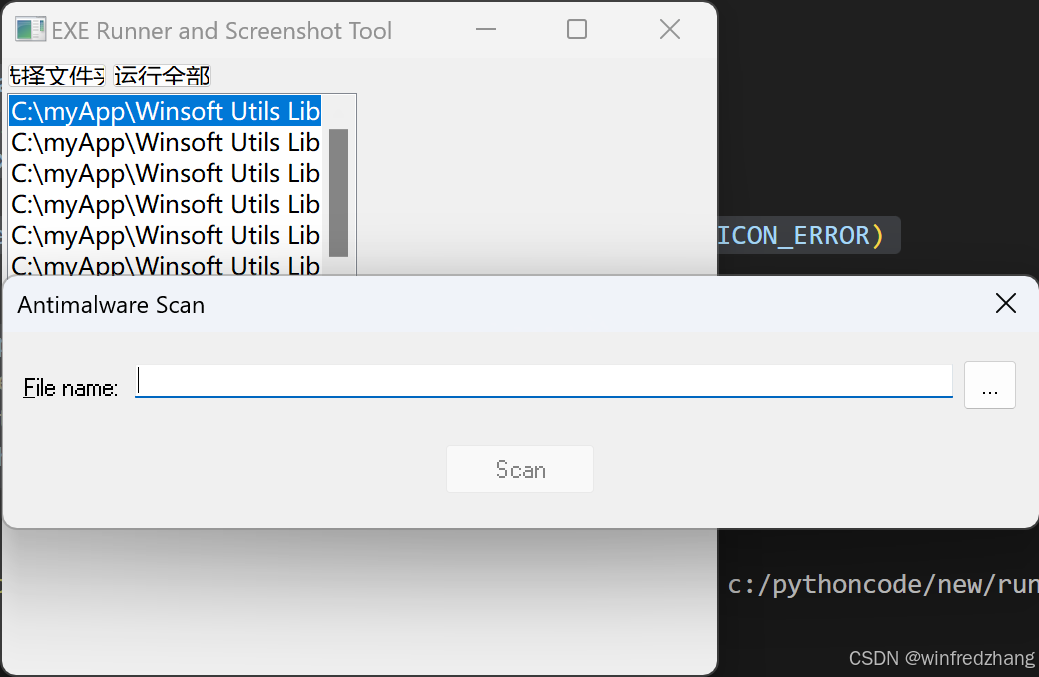
运行结果


 3万+
3万+

 被折叠的 条评论
为什么被折叠?
被折叠的 条评论
为什么被折叠?
 到【灌水乐园】发言


