


Tryton ERP 简介
Tryton ERP (Tryton - Modularity, scalability & security for your business)基于Python语言开发,客户端访问支持web和桌面两种方式,目前最新版本为6.8(2023-05月发布)。因相关的安装资料较少,官网提供了在线的demo(Tryton),以及docker镜像,本文主要把windows环境下的本地安装过程要点进行了总结,供大家参考。
环境准备
安装msys2
根据tryton产品介绍,其桌面程序是基于GTK,因此安装环境选择了msys2。msys2的安装网上有很多资料,这里不再赘述。msys2安装完成后,通过pacman安装python及nodejs,并检查python版本是否为3.7以上(最新版的msys2默认安装的python为3.11)
安装C、C++编译环境,用于python模块安装,具体安装过程自行百度,参考命令如下:
# 注意选择子环境,msys,mingw64,ucrt64, clang64, mwin32, 一般选择mingw64即可
pacman -S mingw-w64-x86_64-toolchain
目录规划
本地安装位置根据本地磁盘情况进行规划,建议采用如下的目录结构,便于今后环境的更新处理:
tryton
--trytond-last --server后端环境目录
--tryton-last --desktop端环境目录
--tryton-sao-last --server前端环境目录
数据库环境
Tryton使用的为postgresql数据库,可以在msys2环境中安装也可以自行安装windows版本或使用其他来源的数据服务,这里也不再赘述。数据库中创建用于tryton系统的数据库。
前端代码部署
下载tryton-sao程序包(https://downloads.tryton.org/6.8/tryton-sao-last.tgz)并解压到tryton-sao-last 目录
环境检查
python -V

node -v

psql --version

gcc -v
安装步骤
创建python虚拟环境
分别trytond-last和tryton-last 两个目录下创建python虚拟环境
python -m venv ./venvserver后端安装
# 启动虚拟环境
source venv/bin/activate

# 设置C编译环境,这一步根据本地msys2环境情况处理,如果是新安装的msys,执行python包安装是可能遇到C编译问题因此对编译环境进行设置
export SETUPTOOLS_USE_DISTUTILS=stdlib

# 安装python预编译包,有些python包,不能通过源码编译安装,msys2提供了另外的安装方式,可根据下面安装trytond时遇到的错误逐一处理

pacman -S mingw-w64-x86_64-python-lxml

# 更新虚拟环境,这一步在通过上述方式安装的python库后需要将安装的库更新到虚拟环境中,以上两个步骤可能需要根据安装过程中出现的异常反复处理
python -m venv --system-site-packages --upgrade ./venv

# 安装trytond
pip install trytond
安装完成后,可以通过下面的命令验证是否成功
trytond-admin --version

trytond --version
server前端安装
进入前端目录(tryton-sao-last ),执行前端node安装(可参考前端目录中的README.md)
npm install --legacy-peer-deps编制server启动配置文件
详细配置文件可参考官方文档(Configuration file for Tryton — trytond latest documentation),示例配置文件如下
# /etc/tryton/trytond.conf - Configuration file for Tryton Server (trytond)
#
# This file contains the most common settings for trytond (Defaults
# are commented).
# For more information read
# /usr/share/doc/trytond-<version>/

[database]
# Database related settings

# The URI to connect to the SQL database (following RFC-3986)
# uri = database://username:password@host:port/
# (Internal default: sqlite:// (i.e. a local SQLite database))
#
# PostgreSQL via Unix domain sockets
# (e.g. PostgreSQL database running on the same machine (localhost))
#uri = postgresql://tryton:tryton@/
#
#Default setting for a local postgres database
#uri = postgresql:///

#
# PostgreSQL via TCP/IP
# (e.g. connecting to a PostgreSQL database running on a remote machine or
# by means of md5 authentication. Needs PostgreSQL to be configured to accept
# those connections (pg_hba.conf).)
uri = postgresql://tryton:tryton@localhost:5432/

# The path to the directory where the Tryton Server stores files.
# The server must have write permissions to this directory.
# (Internal default: /var/lib/trytond)
path = /home/tryton/data

# Shall available databases be listed in the client?
#list = True

# The number of retries of the Tryton Server when there are errors
# in a request to the database
#retry = 5

# The primary language, that is used to store entries in translatable
# fields into the database.
language = en
# language = de_AT

[ssl]
# SSL settings
# Activation of SSL for all available protocols.
# Uncomment the following settings for key and certificate
# to enable SSL.

# The path to the private key
#privatekey = /etc/ssl/private/ssl-cert-snakeoil.key

# The path to the certificate
#certificate = /etc/ssl/certs/ssl-cert-snakeoil.pem

[jsonrpc]
# Settings for the JSON-RPC network interface

# The IP/host and port number of the interface
# (Internal default: localhost:8000)
#
# Listen on all interfaces (IPv4)

listen = 0.0.0.0:8000

#
# Listen on all interfaces (IPv4 and IPv6)
#listen = [::]:8000

# The hostname for this interface
#hostname =

# The root path to retrieve data for GET requests
#data = jsondata

[xmlrpc]
# Settings for the XML-RPC network interface

# The IP/host and port number of the interface
#listen = localhost:8069

[webdav]
# Settings for the WebDAV network interface

# The IP/host and port number of the interface
#listen = localhost:8080
listen = 0.0.0.0:8080

[session]
# Session settings

# The time (in seconds) until an inactive session expires
timeout = 3600

# The server administration password used by the client for
# the execution of database management tasks. It is encrypted
# using using the Unix crypt(3) routine. A password can be
# generated using the following command line (on one line):
# $ python -c 'import getpass,crypt,random,string; \
# print crypt.crypt(getpass.getpass(), \
# "".join(random.sample(string.ascii_letters + string.digits, 8)))'
# Example password with 'admin'
super_pwd = jkUbZGvFNeugk


[email]
# Mail settings

# The URI to connect to the SMTP server.
# Available protocols are:
# - smtp: simple SMTP
# - smtp+tls: SMTP with STARTTLS
# - smtps: SMTP with SSL
#uri = smtp://localhost:25
uri = smtp://localhost:25

# The From address used by the Tryton Server to send emails.
from = tryton@<your-domain.tld>

[report]
# Report settings

# Unoconv parameters for connection to the unoconv service.
#unoconv = pipe,name=trytond;urp;StarOffice.ComponentContext

# Module settings
#
# Some modules are reading configuration parameters from this
# configuration file. These settings only apply when those modules
# are installed.
#
#[ldap_authentication]
# The URI to connect to the LDAP server.
#uri = ldap://host:port/dn?attributes?scope?filter?extensions
# A basic default URL could look like
#uri = ldap://localhost:389/

[web]
# Path for the web-frontend
# root = /usr/lib/node-modules/tryton-sao
listen = 0.0.0.0:8000
# root = /usr/share/sao
root = /home/tryton/tryton-sao-last
需要根据实际环境情况修改database和web两个属性组,database:uri,database:path,web:root。Windows中的目录格式为:/盘符/目录1/目录2/...,如:/d/msys2/home/tryton,表示系统D盘下msys2目录以下的路径
初始化数据库
# -c 指定配置文件位置,-d posygresql中tryton数据库名字
trytond-admin -c /home/tryton/trytond.conf  -d  tryton --all
初始过程会提示输入管理员(admin)邮箱和密码,密码默认有复杂性要求,长度为8位以上。管理员密码可以通过下面命令进行更新:
trytond-admin -c /home/tryton/trytond.conf -d tryton -p 服务端启动和验证
启动服务
进入server端目录,并确认python虚拟环境已经生效,运行以下命令启动tryton服务:
# 注意替换-c参数值,指向本地正确的配置文件位置
trytond -c /home/tryton/trytond.conf -d  tryton
验证服务
浏览器中访问http://127.0.0.1:8000/,出现登陆界面即表示服务启动成功,输入用户名admin以及初始化数据库时设置的密码即可访问系统了。
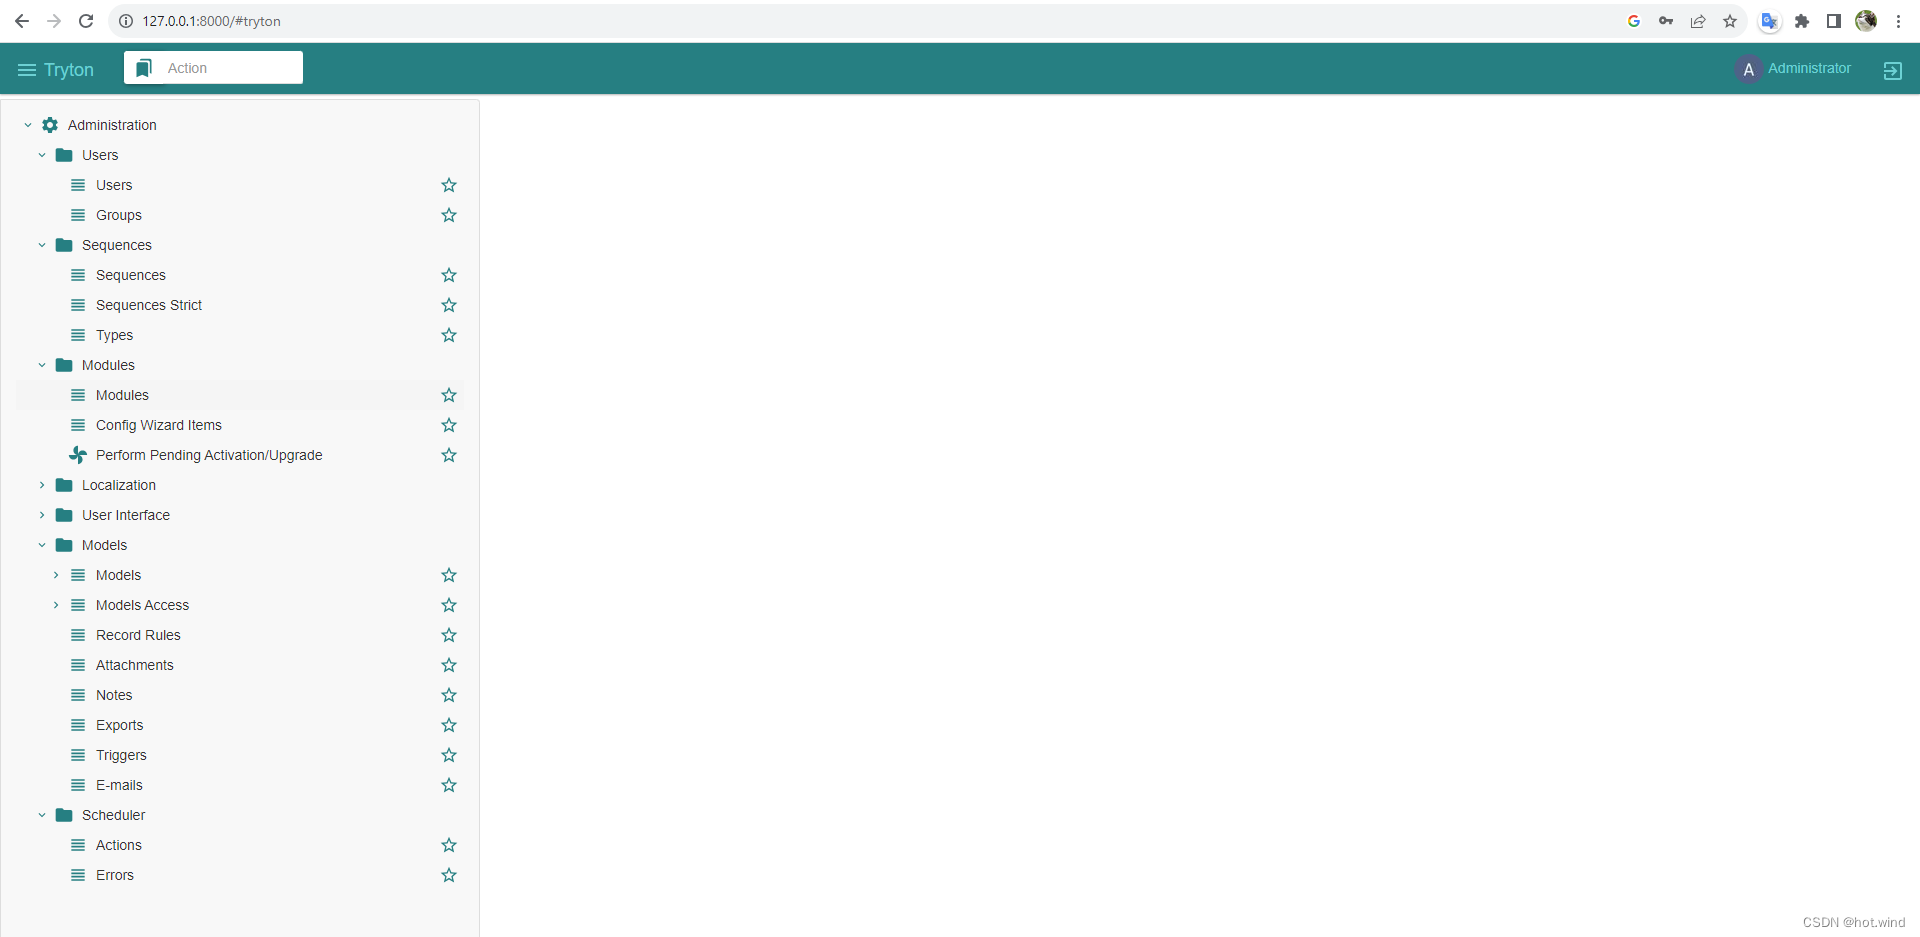
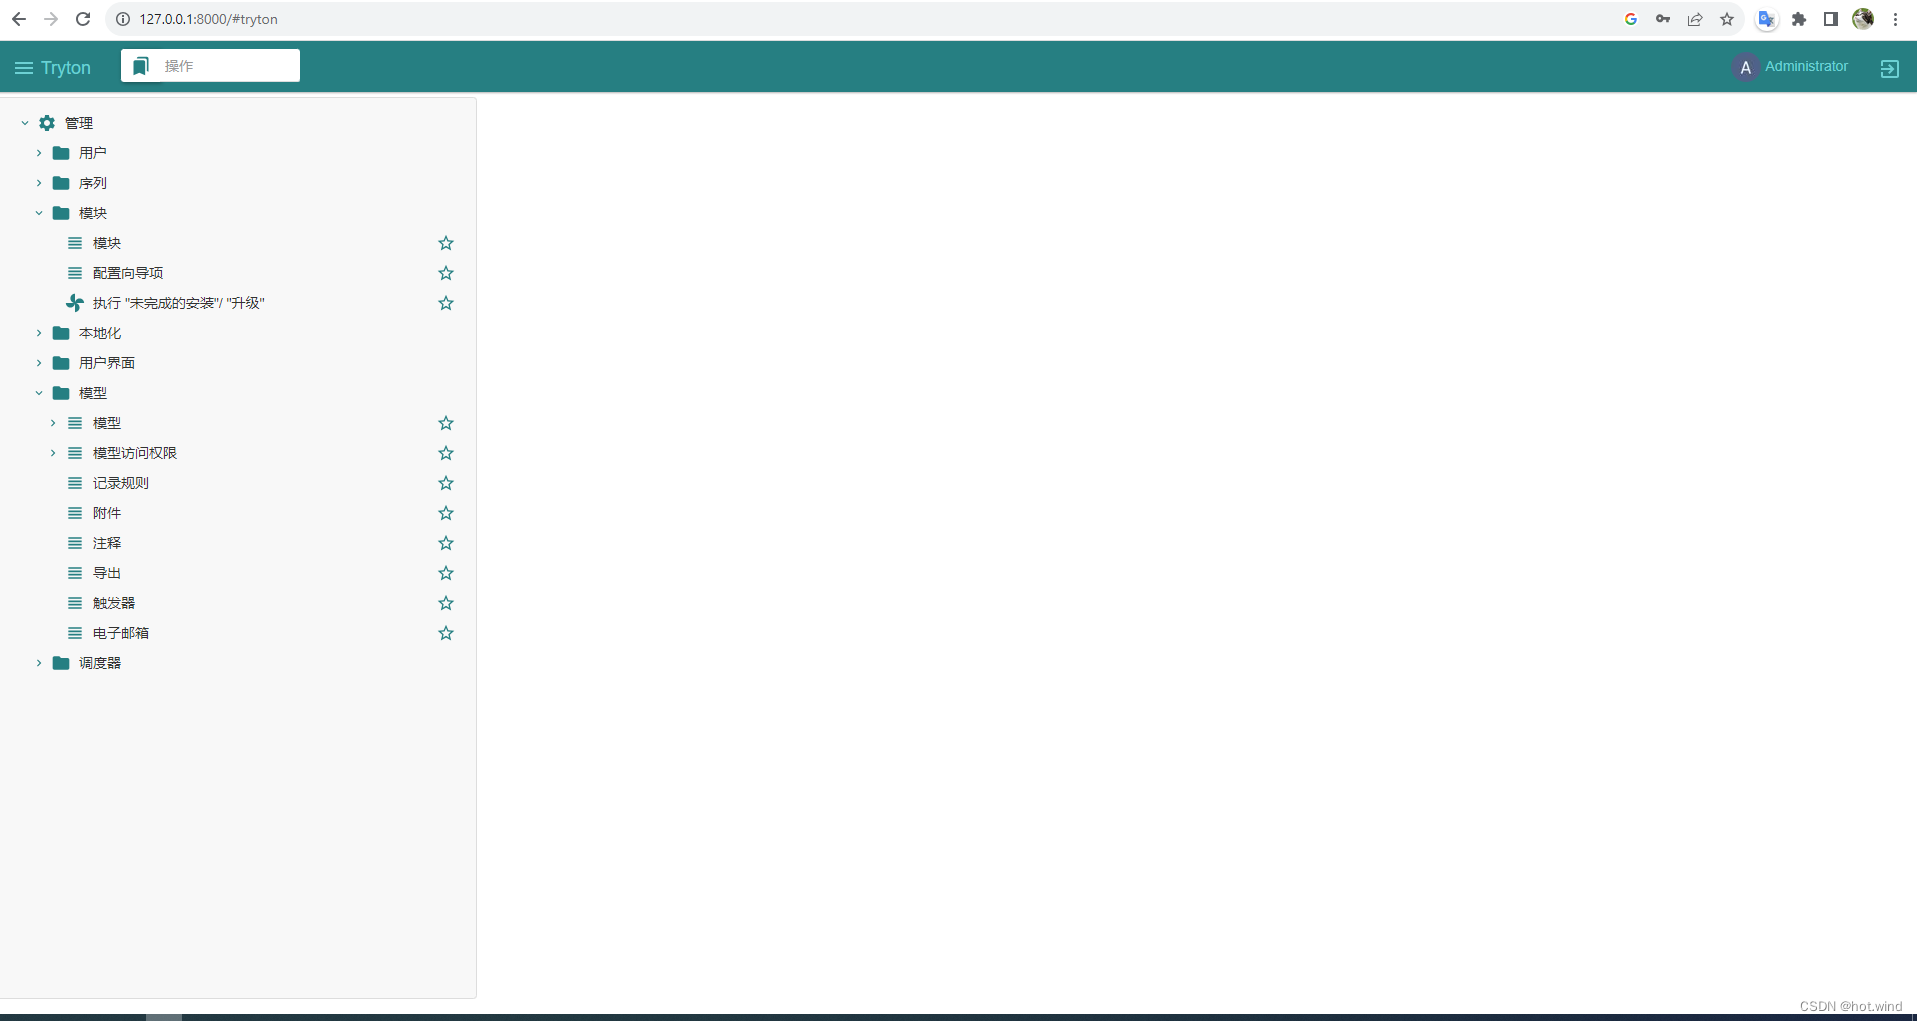
基本模块的汉化还算完整,通过设置用户偏好可以进行不同语言界面的切换。
 后记
后记
如果不是使用msys2环境也可以进行server端的安装,只是在执行trytond以及trytond-admin时,需要通过python命令启动,如:
python .\venv\Scripts\trytond -c d:\tryton\trytond-last\trytond.conf -d tryton
另外,需要安装微软的vc编译环境,具体参考WindowsCompilers - Python Wiki
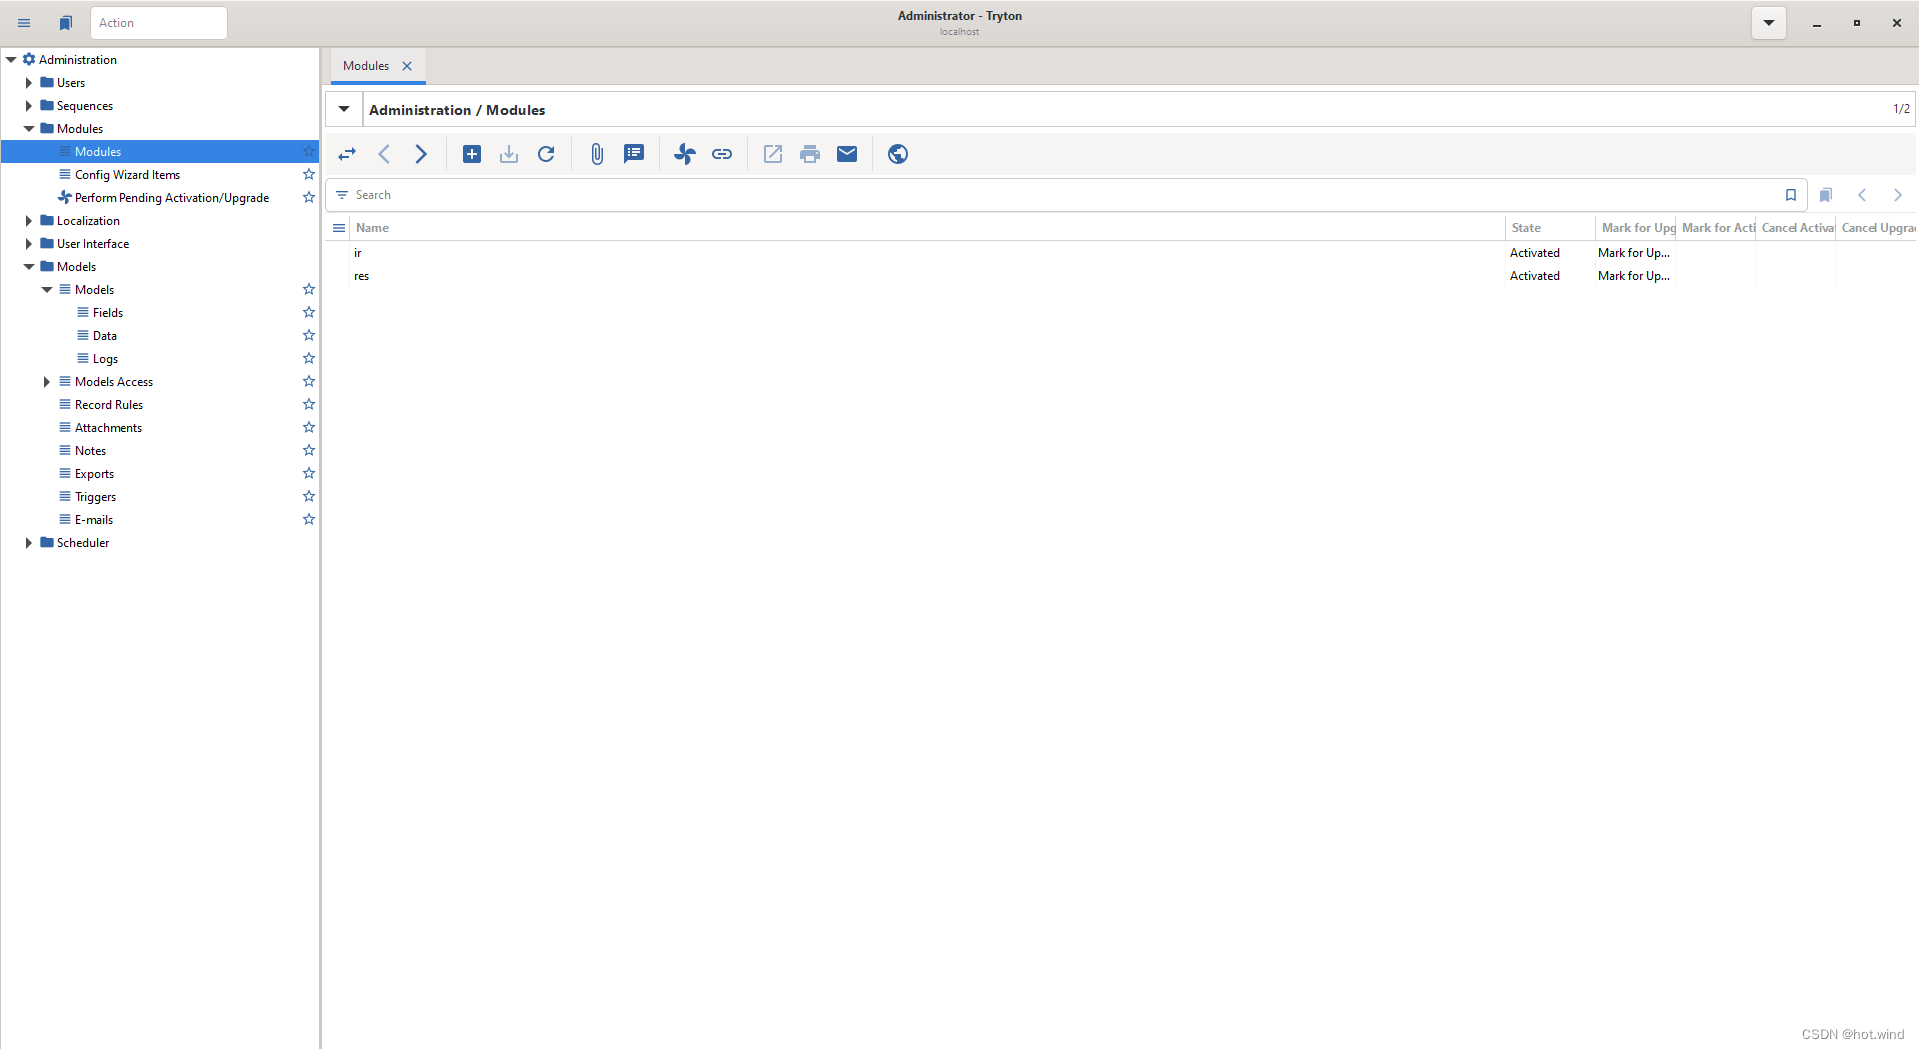
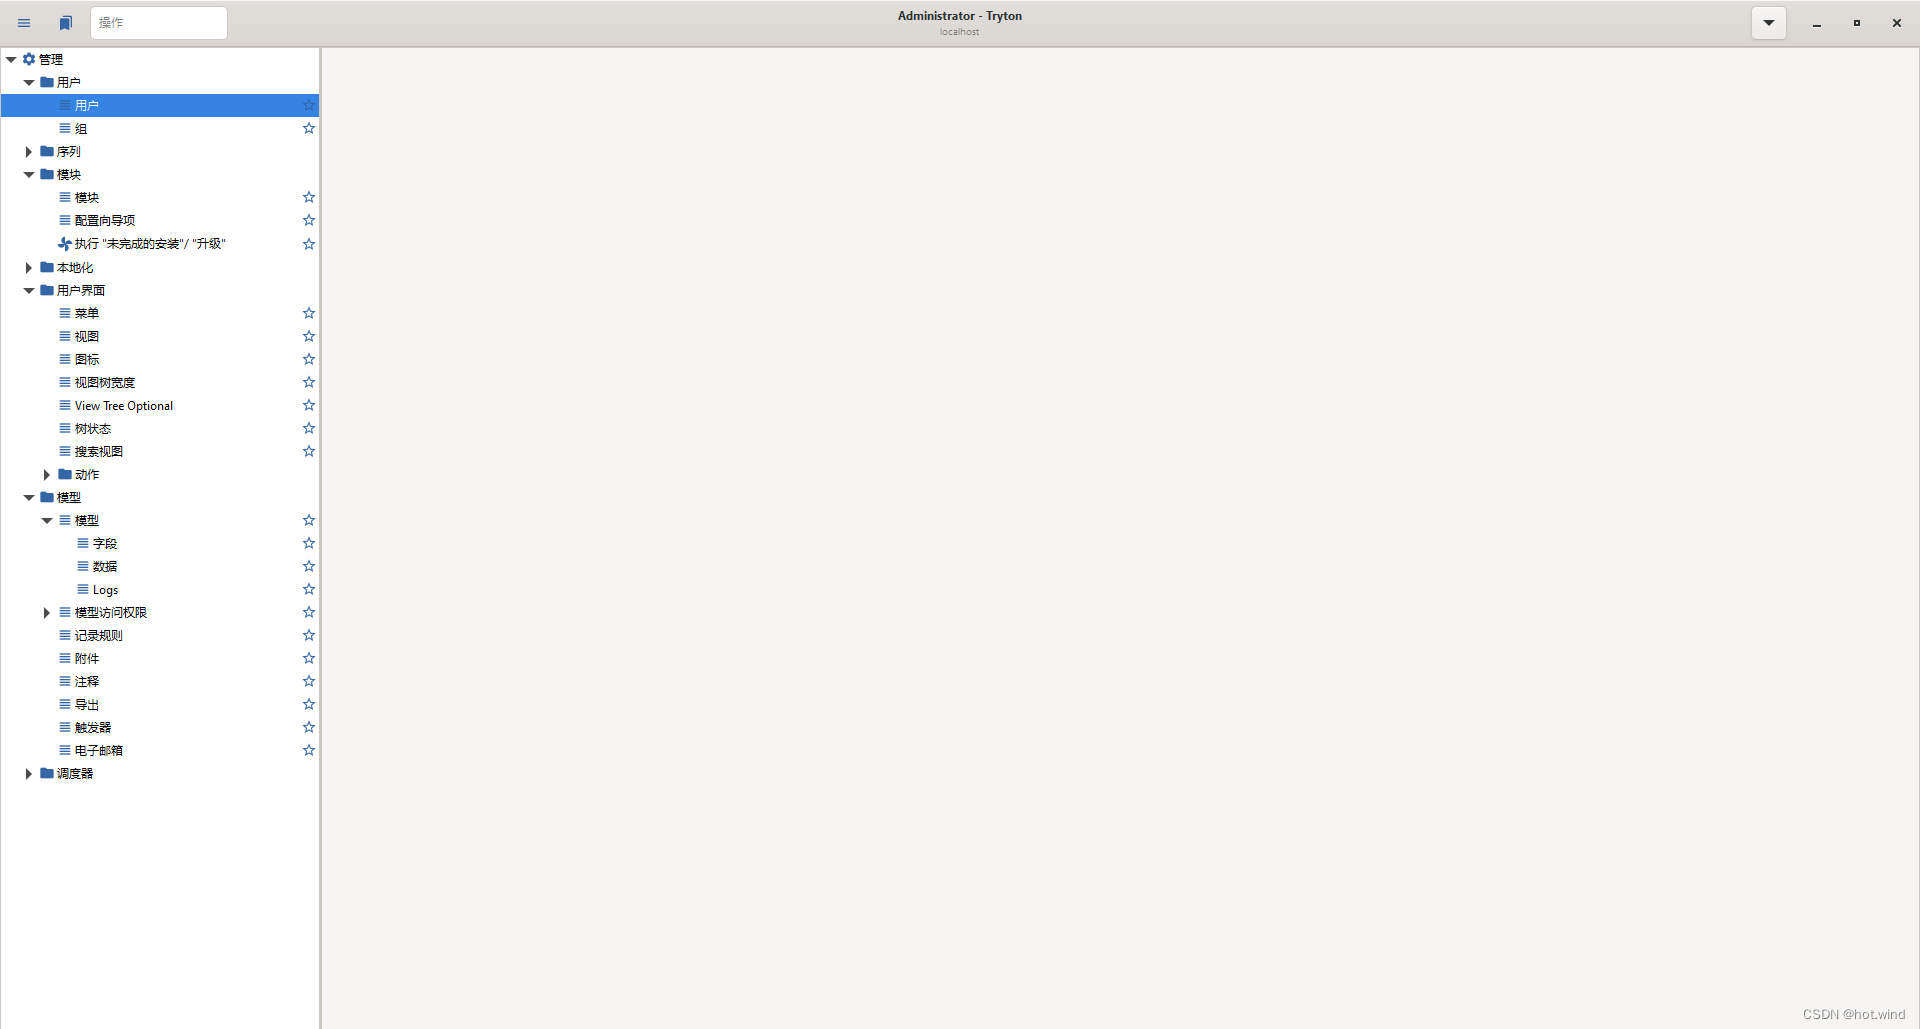
desktop端的安装以及modules的安装将在下一篇中发布,敬请期待。desktop端预览如下:


 1093
1093

 被折叠的 条评论
为什么被折叠?
被折叠的 条评论
为什么被折叠?
 到【灌水乐园】发言


