


在Vue中处理文件上传是一件容易的任务!
在本文中,我们将讨论如何使用VueJs处理文件上传。我们将创建一个图像上传器,允许用户通过拖放或选择文件对话框上传单个或多个图像文件。
然后,我们将上传所选图像并相应地显示它们。我们还将学习过滤上传文件类型,例如,我们只允许图像,不允许像PDF这样的文件类型。
源代码:https://github.com/chybie/file-upload-vue演示:https : //vue-file-upload-1126b.firebaseapp.com/
#文件上传UI&API
文件上传由两部分组成:UI(前端)和API(后端)。我们将使用VueJ来处理UI部分。我们需要一个后端应用程序来接受上传的文件。您可以按照后端教程或下载并运行这些服务器端应用程序之一来处理您的后端的文件上传:
使用Hapi.js上传文件:https : //scotch.io/bar-talk/handling-file-uploads-with-hapi-js,或使用Express + Multer进行文件上传:https : //scotch.io/tutorials/express-file-uploads-with-multer或切换到您选择的任何云解决方案(Amazon S3,Google Drive等)。
在本文中,我们将使用文件上传与Hapi.js作为后端。我们还将学习在前端启用假上载的技巧。
#设置项目与Vue-Cli
我们将使用vue-cli来支架Vue.js项目。我们将使用该webpack-simple项目模板。
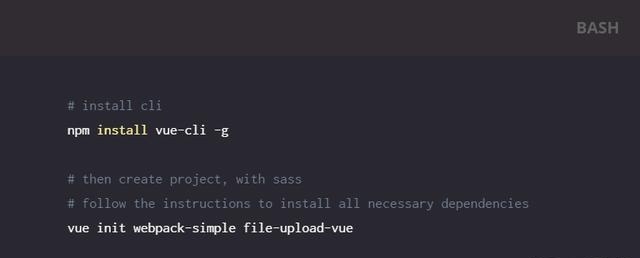
我们继续创建我们的组件
#文件上传组件
我们将编写我们的代码 App.vue。删除文件中的所有自动生成的代码。
html:
Upload imagesaccept=”image/*”>Drag your file(s) here to begin or click to browseUploading {{ fileCount }} files…
笔记:-
我们的App.vue组件由3部分组成:模板(HTML),脚本(Javascript)和样式(SASS)。我们的模板有一个上传表单。表单属性enctype=”multipart/form-data”很重要。要启用文件上传,必须设置此属性。了解更多关于ENCTYPE 这里。我们有一个文件输入来接受文件上传。该属性multiple表示允许多个文件上传。删除它单文件上传。我们将处理文件输入change事件。每当文件输入更改(有人删除或选择文件)时,我们将触发该filesChange功能并传入控制名称和所选文件$event.target.files,然后上传到服务器。我们将文件输入限制为仅使用该属性接受图像accept=”image/*”。文件输入将在上传时被禁用,所以用户只能在上传完成后再次删除/选择文件。我们捕获fileCount文件更改的时间。我们使用fileCount变量显示上传的文件数Uploading {{ fileCount }} files…。
#样式我们的文件上传组件
现在,这是有趣的部分。目前,我们的组件看起来像这样:
我们需要将其转换成如下所示:

让我们来吧:
….dropbox {outline: 2px dashed grey; /* the dash box */outline-offset: -10px;background: lightcyan;color: dimgray;padding: 10px 10px;min-height: 200px; /* minimum height */position: relative;cursor: pointer;.input-file {opacity: 0; /* invisible but it’s there! */width: 100%;height: 200px;position: absolute;cursor: pointer;.dropbox:hover {background: lightblue; /* when mouse over to the drop zone, change color */.dropbox p {font-size: 1.2em;text-align: center;padding: 50px 0;
只有几行css,我们的组件现在看起来更漂亮。
笔记:
我们通过应用opacity: 0样式使文件输入不可见。这不会隐藏文件输入,它只是使其不可见。然后,我们为文件输入父元素(dropboxcss类)设置样式。我们让它看起来像一个drop文件区环绕着破折号。然后,我们将dropbox中的文本对齐到中心。
#文件上传组件代码
javascript:
…import { upload } from ‘./file-upload.service’;const STATUS_INITIAL = 0, STATUS_SAVING = 1, STATUS_SUCCESS = 2, STATUS_FAILED = 3;export default {name: ‘app’,data() {return {uploadedFiles: [],uploadError: null,currentStatus: null,uploadFieldName: ‘photos’},computed: {isInitial() {return this.currentStatus === STATUS_INITIAL;},isSaving() {return this.currentStatus === STATUS_SAVING;},isSuccess() {return this.currentStatus === STATUS_SUCCESS;},isFailed() {return this.currentStatus === STATUS_FAILED;},methods: {reset() {// reset form to initial statethis.currentStatus = STATUS_INITIAL;this.uploadedFiles = [];this.uploadError = null;},save(formData) {// upload data to the serverthis.currentStatus = STATUS_SAVING;upload(formData).then(x => {this.uploadedFiles = [].concat(x);this.currentStatus = STATUS_SUCCESS;}).catch(err => {this.uploadError = err.response;this.currentStatus = STATUS_FAILED;});},filesChange(fieldName, fileList) {// handle file changesconst formData = new FormData();if (!fileList.length) return;// append the files to FormDataArray.from(Array(fileList.length).keys()).map(x => {formData.append(fieldName, fileList[x], fileList[x].name);});// save itthis.save(formData);},mounted() {this.reset();},
我们的组件将有几个状态:STATUS_INITIAL,STATUS_SAVING,STATUS_SUCCESS,STATUS_FAILED,变量名称本身很有表现力。稍后,我们将调用Hapi.js文件上传 API来上传图片,API接受一个字段调用photos。这是我们的文件输入字段名称。我们用filesChange函数处理文件更改。FileList是HTML的files属性返回的对象!了解更多[here]((https://developer.mozilla.org/en/docs/Web/API/FileList)。然后FormData,我们创建一个新的,并附加我们所有的photos文件。FormData界面提供了一种方便地构建一组代表表单字段及其值的键/值对。了解更多这里。该save函数将调用我们的文件上传服务(挂起,我们将在下一步创建服务!)。我们也根据结果设置状态。mount()是vue组件生命周期钩。在这一点上,我们将组件状态设置为初始状态。
#文件上传服务
安装轴系
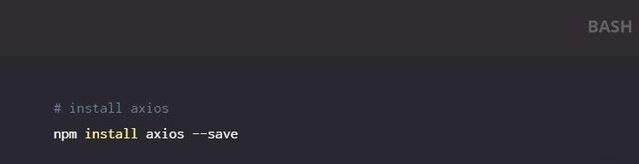
服务
// file-upload.service.jsimport * as axios from ‘axios’;const BASE_URL = ‘http://localhost:3001’;function upload(formData) {const url = `{BASE_URL}/photos/upload`;return axios.post(url, formData)// get data.then(x => x.data)// add url field.then(x => x.map(img => Object.assign({},img, { url: `{BASE_URL}/images/${img.id}` })));export { upload }
没有什么,代码本身很有表现力。我们上传文件,等待结果,相应地映射。
您可以使用npm run dev命令来运行应用程序。尝试上传几张图片,它的工作!(记得启动你的后端服务器)
#显示成功和失败的结果
我们可以成功上传文件。但是,UI中没有任何指示。让我们更新我们的HTML模板。
…form…Uploaded {{ uploadedFiles.length }} file(s) successfully.Upload againUploaded failed.Try again{{ uploadError }}
上传成功时显示上传的图像。上传失败时显示错误信息。
#假上载在前端
如果你懒得启动后端应用程序(Hapi,Express等)来处理文件上传。这是一个假服务来替换文件上传服务。
// file-upload.fake.service.jsfunction upload(formData) {const photos = formData.getAll(‘photos’);const promises = photos.map((x) => getImage(x).then(img => ({id: img,originalName: x.name,fileName: x.name,url: img})));return Promise.all(promises);function getImage(file) {return new Promise((resolve, reject) => {const fReader = new FileReader();const img = document.createElement(‘img’);fReader.onload = () => {img.src = fReader.result;resolve(getBase64Image(img));fReader.readAsDataURL(file);})function getBase64Image(img) {const canvas = document.createElement(‘canvas’);canvas.width = img.width;canvas.height = img.height;const ctx = canvas.getContext(‘2d’);ctx.drawImage(img, 0, 0);const dataURL = canvas.toDataURL(‘image/png’);return dataURL;export { upload }
来到这个Stackoverflow文章中的这个解决方案。很有用 我的在线演示正在使用此服务。
基本上,代码做的是读取源代码,将其绘制在画布中,并将其作为数据URL保存为canvas toDataURL函数。在这里了解更多关于画布。
现在,您可以使用假的交换实时服务。
…// swap as you needimport { upload } from ‘./file-upload.fake.service’; // fake service// import { upload } from ‘./file-upload.service’; // real service…
完成了!停止您的后端API,刷新您的浏览器,您应该看到我们的应用程序仍然工作,代替虚假的服务。
延迟你的承诺
有时,您可能希望延迟承诺,以查看状态的变化。在我们的情况下,文件上传可能会太快。我们为此写一个帮助函数。
// utils.js// utils to delay promisefunction wait(ms) {return (x) => {return new Promise(resolve => setTimeout(() => resolve(x), ms));};export { wait }
然后,您可以在组件中使用它
…import { wait } from ‘./utils’;…save(formData) {….upload(formData).then(wait(1500)) // DEV ONLY: wait for 1.5s.then(x => {this.uploadedFiles = [].concat(x);this.currentStatus = STATUS_SUCCESS;})…},
#摘要
而已。这是如何处理文件上传,而不使用Vue中的任何第三方库和插件。这不是很难吗?
快乐编码!
UI(前端)
API(后端)教程和Sourcode
——————-喜欢您就高抬贵手关注一下!


 1万+
1万+


 被折叠的 条评论
为什么被折叠?
被折叠的 条评论
为什么被折叠?
 到【灌水乐园】发言


