


在DuiLib中有时需要在窗口中绘制图形或图像,如画相关的曲线或OpenCV处理图像的Mat数据,此时DuiLib就没有直接的函数可对界面进行操作,本文描述了一种基于Win窗口的折中方法。
1、定义CWndUI类,使其能够加入到DuiLib中
class CWndUI: public CControlUI
{
public:
    CWndUI(): m_hWnd(NULL){}

    virtual void SetVisible(bool bVisible = true)
    {
        __super::SetVisible(bVisible);
        ::ShowWindow(m_hWnd, bVisible);
    }

    virtual void SetInternVisible(bool bVisible = true)
    {
        __super::SetInternVisible(bVisible);
        ::ShowWindow(m_hWnd, bVisible);
    }

    virtual void SetPos(RECT rc)
    {
        __super::SetPos(rc);
        ::SetWindowPos(m_hWnd, NULL, rc.left, rc.top, rc.right - rc.left, rc.bottom - rc.top, SWP_NOZORDER | SWP_NOACTIVATE);
    }

    BOOL Attach(HWND hWndNew)
    {
        if (! ::IsWindow(hWndNew))
        {
            return FALSE;
        }

        m_hWnd = hWndNew;
        return TRUE;
    }

    HWND Detach()
    {
        HWND hWnd = m_hWnd;
        m_hWnd = NULL;
        return hWnd;
    }

    HWND GetHWND()
    {
        return m_hWnd;
    }

protected:
    HWND m_hWnd;
};
2 、定义并注册窗口和窗口处理函数
ATOM MyRegisterWnd(TCHAR *szClsName, WNDPROC WndProc)
{WNDCLASSEX wcex;
	wcex.cbSize = sizeof(WNDCLASSEX);
	wcex.style = CS_HREDRAW | CS_VREDRAW | CS_DBLCLKS;
	wcex.lpfnWndProc = WndProc;
	wcex.cbClsExtra = 0;
	wcex.cbWndExtra = 0;
	wcex.hInstance = GetModuleHandle(NULL);
	wcex.hIcon = NULL;// LoadIcon(hInstance, MAKEINTRESOURCE(IDI_TEST));
	wcex.hCursor = NULL;//LoadCursor(NULL, IDC_ARROW);
	wcex.hbrBackground = GetStockBrush(LTGRAY_BRUSH); //(HBRUSH)(COLOR_WINDOW + 1);
	wcex.lpszMenuName = NULL;// MAKEINTRESOURCE(IDC_TEST);
	wcex.lpszClassName = szClsName;
	wcex.hIconSm = NULL;// LoadIcon(wcex.hInstance, MAKEINTRESOURCE(IDI_SMALL));
	return RegisterClassEx(&wcex);
}
窗口处理函数为:
LRESULT CALLBACK CallbackImageCalibration(HWND hWnd, UINT message, WPARAM wParam, LPARAM lParam)
{
	//  int wmId, wmEvent;
	PAINTSTRUCT ps;
	HDC hdc; HBRUSH hRedBrush;
	static int      cxClient, cyClient;
	RECT        rect;
	HBRUSH hbrush;
	switch (message)
	{
	case WM_SIZE:
		cxClient = LOWORD(lParam);
		cyClient = HIWORD(lParam);
		::PostMessage(hWnd, WM_PAINT, NULL, NULL);
		return 0;
	case WM_ERASEBKGND:
		hdc = GetDC(hWnd);//要十分注意局部变量的使用,假如在这里没有获取dc,那么就会擦除失败。
		hbrush = CreateSolidBrush(RGB(0, 0, 0));//新建画刷
		GetClientRect(hWnd, &rect);
		FillRect(hdc, &rect, hbrush);
		ReleaseDC(hWnd, hdc);
		return TRUE;
	case WM_PAINT:
		hdc = BeginPaint(hWnd, &ps);
		m_fc.DrawriginImage(hWnd);// m_fc为鱼眼图像校正的类
		EndPaint(hWnd, &ps);
		break;
	default:
		return DefWindowProc(hWnd, message, wParam, lParam);
	}
	return 0;
}
在主程序中注册窗口
TCHAR szClsName[256] = _T("#32775");
MyRegisterWnd( szClsName, CallbackImageCalibration);3、定义DuiLib界面XML文件中的要素并创建
<HorizontalLayout name="ctnClient1" bkcolor="#FF0E0E0E"> <!-- 由于Layout控件都是Container的子类,所以Layout控件可以直接代替Container -->
	<Wnd1 name="wndImageCalibration"  visible="false"/>
</HorizontalLayout>
创建名称为Wnd1的窗口
CControlUI* CFIPFrameWnd::CreateControl(LPCTSTR pstrClassName)
{
	if (_tcsicmp(pstrClassName, _T("Wnd1")) == 0)
	{
		CWndUI *pUI = new CWndUI;
		m_hwndImageCalibration = CreateWindow(_T("#32775"), _T("WndImageCalibration"), WS_VISIBLE | WS_CHILD, 0, 0, 0, 0, m_PaintManager.GetPaintWindow(), (HMENU)0, NULL, NULL);
		pUI->Attach(m_hwndImageCalibration);
		pUI->SetVisible(true);
		::ShowWindow(m_hwndImageCalibration, true);
		::UpdateWindow(m_hwndImageCalibration);
		return pUI;
	}
	Return pUI;
}
4、重新绘制窗口
这里展示的是一段鱼眼图像校正的函数。CControlUI *pbtnWnd = m_PaintManager.FindControl(_T("wndImageCalibration"));
pbtnWnd->SetVisible(true);
//按照DuiLib的模式获取控件的实体类
CListUI* pListUI = static_cast<CListUI*>(m_PaintManager.FindControl(_T("imageCalibrationlist")));
int nSel = pListUI->GetCurSel();//获得左边的
m_fc.fix_data = NULL;// m_fc为鱼眼图像校正的类
if (nSel >= 0)
{
string_t filename = m_imageCalibrationList.at(nSel);
Mat mat = imread(filename);
CComboBoxUI* pComboboxUI = static_cast<CComboBoxUI*>(m_PaintManager.FindControl(_T("calibrationMethodlist")));
int nMethod = pComboboxUI->GetCurSel();//获得校正方法,经度、双精度、经纬、柱面等
m_fc.Init(mat.cols, mat.rows, CalibrationType(nMethod));
m_fc.org_mat = mat.clone();
float time = m_fc.Calibration();//开始校正鱼眼图像
CLabelUI *pLabelUI = static_cast<CLabelUI*>(m_PaintManager.FindControl(_T("ImageCalibrationInfo")));
CDuiString strTmp;
strTmp.Format(_T("图像校正时间:%f秒"), time);
pLabelUI->SetText(strTmp);
RECT r;
::GetWindowRect(m_hwndImageCalibration, &r);
::InvalidateRect(m_hwndImageCalibration,&r,true);//重新绘制
}
其中重绘的函数是在鱼眼校正的类中, m_fc. DrawriginImage 函数
void FisheyeCalibration::DrawriginImage(HWND hwnd)
{
	if (fix_mat.data)
	{
		WinShowMatImage(fix_mat, hwnd);
	}

}
void FisheyeCalibration::WinShowMatImage(const cv::Mat& img, HWND hwnd)
{
	if (!::IsWindow(hwnd)) return;
	HDC hdc = ::GetWindowDC(hwnd);
	RECT rect;
	GetWindowRect(hwnd, &rect);
	RECT destRect;
	destRect.left = 0; destRect.top = 0;
	destRect.right = rect.right - rect.left;
	destRect.bottom = rect.bottom - rect.top;
	//判断长和宽
	if ( img.cols<(rect.right - rect.left) &&  img.rows<(rect.bottom - rect.top))
	{
		int tmp1 = ((rect.right - rect.left) - img.cols) / 2;
		int tmp2 = ((rect.bottom - rect.top) - img.rows) / 2;
		destRect.left = tmp1; destRect.right = tmp1 + img.cols;
		destRect.top = tmp2; destRect.bottom = tmp2 + img.rows;
	}
	else
	{
		if (rect.bottom == rect.top) return;
		float ratio1 = (float)(rect.right - rect.left) / (float)(rect.bottom - rect.top);
		float ratio2 = (float)img.cols / (float)img.rows;
		if (ratio1 > ratio2)
		{
			int w = ratio2*(rect.bottom - rect.top);
			int h = rect.bottom - rect.top;// ratio2*img.rows;

			destRect.left = (rect.right - rect.left - w) / 2; destRect.right = (rect.right - rect.left - w) / 2 + w;
			destRect.top = 0; destRect.bottom = h;
		}
		else
		{
			int w = rect.right - rect.left;// ratio1*img.cols;
			int h = (rect.right - rect.left) / ratio2;// ratio1*img.rows;
			destRect.left = 0; destRect.right = w;
			destRect.top = (rect.bottom - rect.top - h) / 2; destRect.bottom = (rect.bottom - rect.top - h) / 2 + h;
		}
	}
	CvMat _img = img;
	const CvArr* arr = &_img;
	CvMat stub;
	CvMat* image = cvGetMat(arr, &stub);
	// 构造BITMAPINFO头
	SIZE size = { image->width, image->height };
	int channels = 3;
	BITMAPINFO binfo;
	memset(&binfo, 0, sizeof(binfo));
	BITMAPINFOHEADER& bmih = binfo.bmiHeader;
	bmih.biSize = sizeof(BITMAPINFOHEADER);
	bmih.biWidth = size.cx;
	bmih.biHeight = abs(size.cy);
	bmih.biPlanes = 1;
	bmih.biBitCount = (unsigned short)(channels * 8);
	bmih.biCompression = BI_RGB;

	void* dst_ptr = 0;
	HBITMAP hb = CreateDIBSection(hdc, &binfo, DIB_RGB_COLORS, &dst_ptr, 0, 0);
	HDC windowdc = ::CreateCompatibleDC(hdc);
	SelectObject(windowdc, hb);
	CvMat dst;
	cvInitMatHeader(&dst, size.cy, size.cx, CV_8UC3, dst_ptr, (size.cx*channels + 3)&-4);

	int origin = ((IplImage*)arr)->origin;
	cvConvertImage(image, &dst, 1/*origin == 0 ? CV_CVTIMG_FLIP : 0*/);
	// 显示
	SetStretchBltMode(hdc, COLORONCOLOR);
	StretchBlt(hdc, destRect.left+1, destRect.top+1, destRect.right - destRect.left, destRect.bottom - destRect.top, windowdc, 0, 0, size.cx, size.cy, SRCCOPY);
}
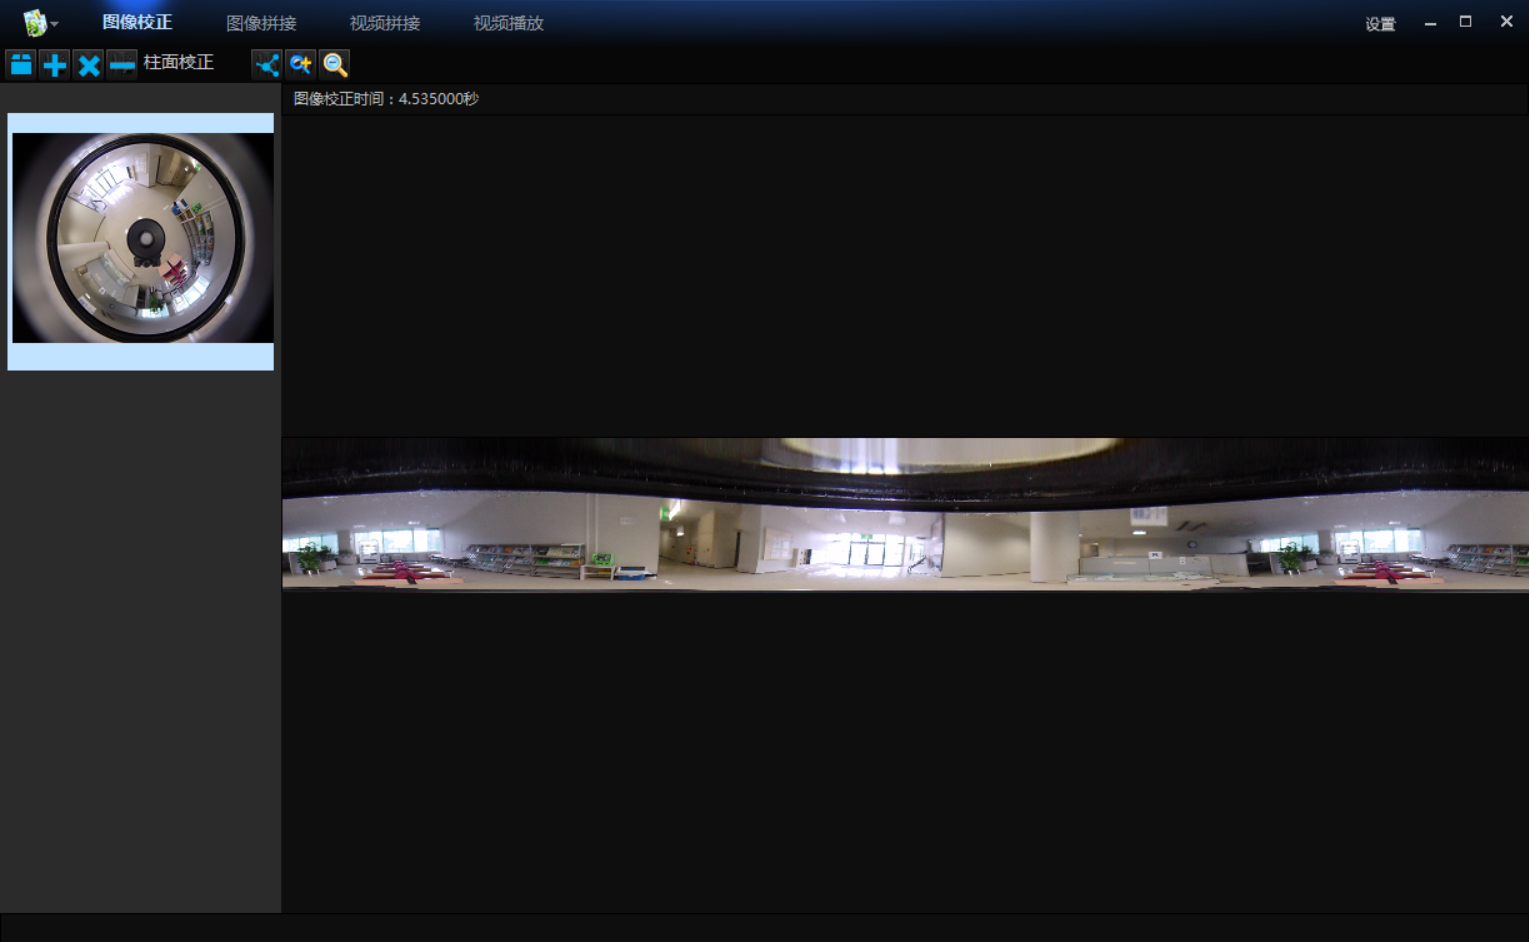
5、显示效果
柱面校正的效果
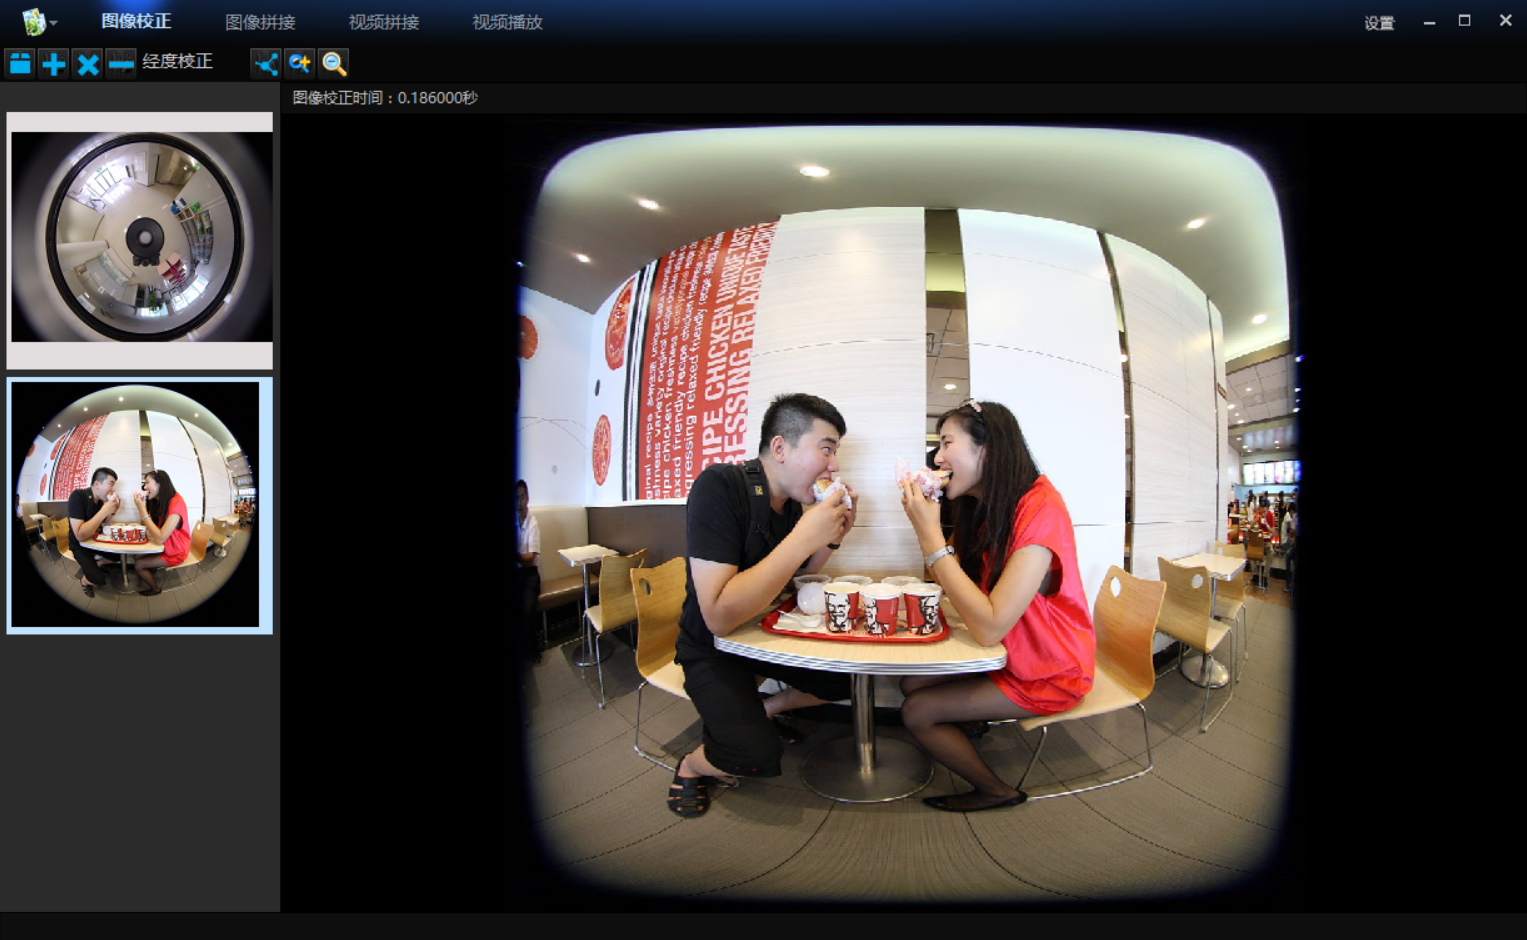
鱼眼图像经度校正的结果
鱼眼图像经纬校正的结果
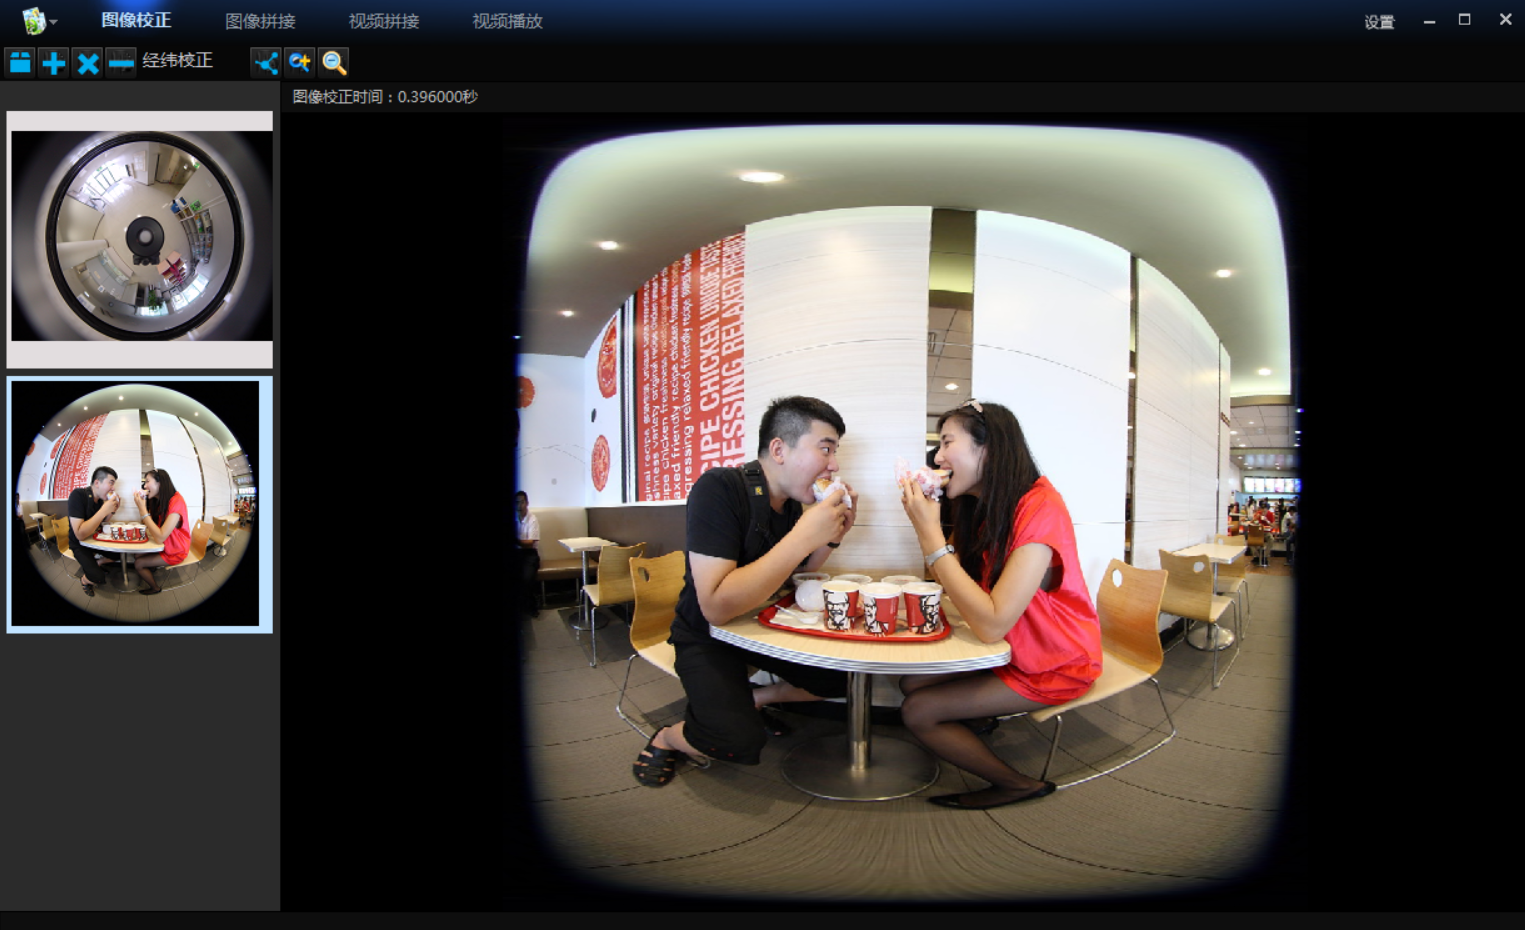
可以看出,实现在DuiLib界面中绘制用户数据的需求。


 277
277

 被折叠的 条评论
为什么被折叠?
被折叠的 条评论
为什么被折叠?
 到【灌水乐园】发言


