


以前都是用php或者java作为后台uniapp作为前端。
但是后台代码改动就会动服务器而unicloud云服务可以算是把前后端打包到一起了。
新建项目时勾选启用unicloud就行。
1.新建函数及对象
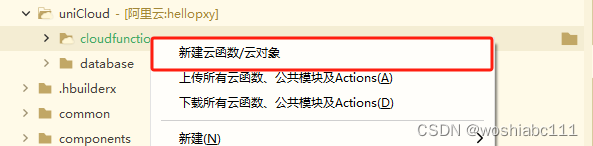
创建函数就是一个js文件

代码中可操作数据库
'use strict';
const db = uniCloud.database()
exports.main = async (event, context) => {
	const collection = db.collection('unicloud-test')//获取数据库的表
	const res = await collection.add(event)//添加数据
	return res
};
调用也十分简单
methods: {
			add() {
				uni.showLoading({
					title: '处理中...'
				})
				uniCloud.callFunction({
					name: 'add',//此处的add就是创建函数的名称
					data: {
						product: 'uniCloud',
						create_time: Date.now()
					}
				}).then((res) => {
					uni.hideLoading()
					uni.showModal({
						content: `成功添加一条数据,文档id为:${res.result.id}`,
						showCancel: false
					})
					console.log(res)
				}).catch((err) => {
					uni.hideLoading()
					uni.showModal({
						content: `添加数据失败,错误信息为:${err.message}`,
						showCancel: false
					})
					console.error(err)
				})
			},
		}
创建对象也是同理,对象时多个函数的整合。

代码中包含了简单的增删改查
const db = uniCloud.database();
const testCollection = db.collection('unicloud-test')
module.exports = {
	async add({product, create_time }) {
		let res = await testCollection.add({product, create_time })
		return res
	},
	async remove() {
		let docList = await testCollection.limit(1).get()
		if (!docList.data || docList.data.length === 0) {
			return {
				status: -1,
				msg: '集合unicloud-test内没有数据'
			}
		}
		let res = await testCollection.doc(docList.data[0]._id).remove()
		if (res.deleted === 1) {
			return {
				status: 0,
				msg: '成功删除unicloud-test内第一条数据'
			}
		} else {
			return {
				status: -2,
				msg: '删除数据失败'
			}
		}
	},
	async update({product,create_time}) {
		const docList = await testCollection.limit(1).get();
		if (!docList.data || docList.data.length === 0) {
			return {
				status: -1,
				msg: '集合unicloud-test内没有数据'
			}
		}
		const res = await testCollection.doc(docList.data[0]._id).update({product,create_time});
		if (res.updated === 1) {
			let result = Object.assign({}, {
				_id: docList.data[0]._id
			}, {product,create_time})
			return {
				status: 0,
				msg: `集合第一条数据由${JSON.stringify(docList.data[0])}修改为${JSON.stringify(result)}`
			}
		} else {
			return {
				status: -1,
				msg: `集合unicloud-test内没有数据`
			}
		}
	},
	async get() {
		let res = await testCollection.limit(10).get()
		return res
	},
	async useCommon() {
		const {
			secret,
			getVersion
		} = require('hello-common')
		let version = getVersion()
		console.log("secret: " + secret);
		console.log("version: " + version);
		return {
			secret,
			version
		}
	}
}
调用需要指定到对象名称
	let canUse = true,cloudObjectDemo;
	if (uniCloud.importObject) {
		cloudObjectDemo = uniCloud.importObject('cloud-object-demo');//引入的对象名称
	} else {
		canUse = false
	}
	export default {
		data() {
			return {
				canUse
			}
		},
		methods: {
			add() {
				uni.showLoading({
					title: '处理中...'
				})
				//调用对象内的方法
				cloudObjectDemo.add({
					product: 'uniCloud',
					create_time: Date.now()
				}).then((res) => {
					console.log(res)
					uni.hideLoading()
					uni.showModal({
						content: `成功添加一条数据,文档id为:${res.id}`,
						showCancel: false
					})
				}).catch((err) => {
					console.error(err)
					uni.hideLoading()
					uni.showModal({
						content: `添加数据失败,错误信息为:${err.message}`,
						showCancel: false
					})
				})
			},
		}
	}
unicloud多表联查询
const db = uniCloud.database()

// 假设 order 集合中有字段 book_id 与 book 集合的 _id 字段对应
let res = await db.collection('order')
                  .aggregate()
                  .lookup({
                    from: 'book',//要联查哪个表
                    localField: 'book_id', // 本表字段
                    foreignField: '_id', // 关联表字段
                    as: 'bookInfo' // 结果映射到的新字段名
                  })
                  .end()

console.log(res.data)
其他条件查询以及排序筛选可参考
uniCloud - 传统方式操作云数据库


 392
392


 被折叠的 条评论
为什么被折叠?
被折叠的 条评论
为什么被折叠?
 到【灌水乐园】发言


