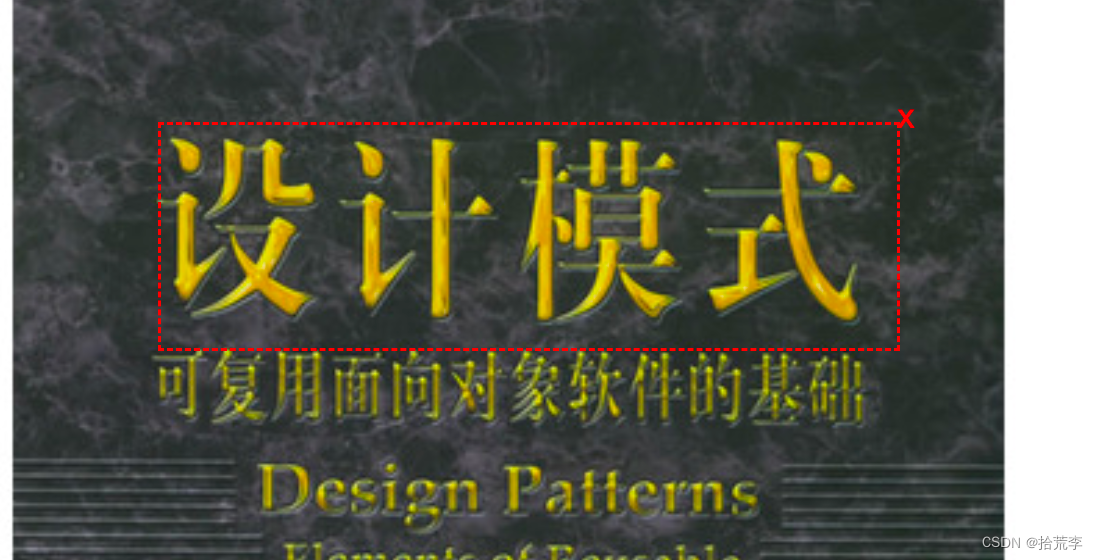
实现的思路大概就是,先将dom转化为canvas画布,再对canvas进行裁切,然后通过canvas api生成图片,这里用到了一个库
html2canvas
效果如图:

首先实现框选效果:
const mousedownEvent = (e) => {
	moveX = 0;
	moveY = 0;
	const [startX, startY] = [e.clientX, e.clientY];
	x = startX - viewer.getBoundingClientRect().left;
	y = startY - viewer.getBoundingClientRect().top;
	const divDom = document.createElement("div");
	divDom.id = 'screenshot';
	divDom.width = '1px';
	divDom.height = '1px';
	divDom.style.position = "absolute";
	divDom.style.top = y + "px";
	divDom.style.left = x + "px";
	const closeIcon = document.createElement("span");
	closeIcon.className = 'outline-close-icon';
	closeIcon.textContent = 'x';
	divDom.appendChild(closeIcon);

	closeIcon.addEventListener('click', () => {
		divDom.remove();
	});
	// document.body.appendChild(divDom)
	viewer.appendChild(divDom);
	const moveEvent = (e) => {
		moveX = e.clientX - startX;
		moveY = e.clientY - startY;
		if (moveX > 0) {
			divDom.style.width = moveX + 'px';
		} else {
			divDom.style.width = -moveX + 'px';
			divDom.style.left = e.clientX - viewer.getBoundingClientRect().left + 'px';
		}
		if (moveY > 0) {
			divDom.style.height = moveY + 'px';
		} else {
			divDom.style.height = -moveY + 'px';
			divDom.style.top = e.clientY - viewer.getBoundingClientRect().top + 'px';
		}
	};
	window.addEventListener("mousemove", moveEvent);
	window.addEventListener("mouseup", () => {
		window.removeEventListener("mousemove", moveEvent);
		window.removeEventListener("mousedown", mousedownEvent);
		document.querySelector("body").style.cursor = "default";
	});
};
window.addEventListener("mousedown", mousedownEvent);
全码:
const viewer = document.getElementById('viewer');

document.getElementById('screen-button').addEventListener('click', (e) => {

	document.querySelector("body").style.cursor = "crosshair";
	let moveX;
	let moveY;
	let x;
	let y;
	const mousedownEvent = (e) => {
		moveX = 0;
		moveY = 0;
		const [startX, startY] = [e.clientX, e.clientY];
		x = startX - viewer.getBoundingClientRect().left;
		y = startY - viewer.getBoundingClientRect().top;
		const divDom = document.createElement("div");
		divDom.id = 'screenshot';
		divDom.width = '1px';
		divDom.height = '1px';
		divDom.style.position = "absolute";
		divDom.style.top = y + "px";
		divDom.style.left = x + "px";
		const closeIcon = document.createElement("span");
		closeIcon.className = 'outline-close-icon';
		closeIcon.textContent = 'x';
		divDom.appendChild(closeIcon);

		closeIcon.addEventListener('click', () => {
			divDom.remove();
		});
		// document.body.appendChild(divDom)
		viewer.appendChild(divDom);
		const moveEvent = (e) => {
			moveX = e.clientX - startX;
			moveY = e.clientY - startY;
			if (moveX > 0) {
				divDom.style.width = moveX + 'px';
			} else {
				divDom.style.width = -moveX + 'px';
				divDom.style.left = e.clientX - viewer.getBoundingClientRect().left + 'px';
			}
			if (moveY > 0) {
				divDom.style.height = moveY + 'px';
			} else {
				divDom.style.height = -moveY + 'px';
				divDom.style.top = e.clientY - viewer.getBoundingClientRect().top + 'px';
			}
		};
		window.addEventListener("mousemove", moveEvent);
		window.addEventListener("mouseup", () => {

			window.removeEventListener("mousemove", moveEvent);
			window.removeEventListener("mousedown", mousedownEvent);
			document.querySelector("body").style.cursor = "default";

			if (!moveX) {
				return;
			}

			// 把body转成canvas
			html2canvas(viewer, {
				scale: 1,
				// allowTaint: true,
				useCORS: true  //跨域使用
			}).then(canvas2 => {
				let capture_x, capture_y;
				let width = moveX;
				let height = moveY;
				if (width > 0) {
					//从左往右画
					capture_x = startX - canvas.getBoundingClientRect().left + 1;
				} else {
					//从右往左画
					capture_x = x + width + 1;
				}
				if (height > 0) {
					//从上往下画
					capture_y = y + 1;
				} else {
					//从下往上画
					capture_y = y + height + 1;
				}
				printClip(canvas2, capture_x, capture_y, Math.abs(width), Math.abs(height));

				moveX = 0;

			});
		});
	};
	window.addEventListener("mousedown", mousedownEvent);
});

/**
 * 打印截取区域
 * @param canvas 截取的canvas
 * @param capture_x 截取的起点x
 * @param capture_y 截取的起点y
 * @param capture_width 截取的起点宽
 * @param capture_height 截取的起点高
 */
async function printClip(canvas2, capture_x, capture_y, capture_width, capture_height) {
	// 创建一个用于截取的canvas
	const clipCanvas = document.createElement('canvas');
	clipCanvas.width = capture_width;
	clipCanvas.height = capture_height;
	// 截取
	clipCanvas.getContext('2d').drawImage(canvas2, capture_x, capture_y, capture_width, capture_height, 0, 0, capture_width, capture_height);
	const clipImgBase64 = clipCanvas.toDataURL();
	// console.log('clipImgBase64->', clipImgBase64);
	// console.log('clipImgBase64->', clipImgBase64.replace(/^data:image\/\w+;base64,/, ""));
	const obj = {
		// file: new File([this.blob],'main.audio',{ type: 'audio/mp3' })
		file: new File([base64ToBlob(clipImgBase64.replace(/^data:image\/\w+;base64,/, ""), 'image/png')], 'test.png', { type: 'image/png' })
	};
	// 生成图片
	// var clipImg = new Image()
	// clipImg.src = clipImgBase64
	downloadIamge(clipImgBase64)
}

/**
 * 下载保存图片
 * @param imgUrl 图片地址
 */
function downloadIamge(imgUrl) {
	// 生成一个a元素
	const a = document.createElement('a');
	// 创建一个单击事件
	const event = new MouseEvent('click');
	// 生成文件名称
	const timestamp = new Date().getTime();
	const name = imgUrl.substring(22, 30) + timestamp + '.png';
	a.download = name;
	// 将生成的URL设置为a.href属性
	a.href = imgUrl;
	// 触发a的单击事件 开始下载
	a.dispatchEvent(event);
}

// 将Base64编码转换为Blob对象
function base64ToBlob(base64, type) {
	const byteCharacters = atob(base64);
	const byteArrays = [];

	for (let offset = 0; offset < byteCharacters.length; offset += 512) {
		let slice = byteCharacters.slice(offset, offset + 512);

		let byteNumbers = new Array(slice.length);
		for (let i = 0; i < slice.length; i++) {
			byteNumbers[i] = slice.charCodeAt(i);
		}

		let byteArray = new Uint8Array(byteNumbers);
		byteArrays.push(byteArray);
	}

	let blob = new Blob(byteArrays, { type: type });
	return blob;
}
坑:
- 如果生成图片样式有问题 html就用内联样式
- 当截图片的时候如果不识别 就将图片url转化为base64
- 当遇到超长截图的时候会失败,下面我详细讲下
我们截图的原理是将页面都绘制到了canvas上,但是这里canvas在不同浏览器中高度都是有限制的,而且不同浏览器 限制不一样,这样导致长篇幅的pdf页面绘制不了canvas,解决方式给一个最大高度限制,并且从可视区域开始截图,这样不管pdf预览页面再长 都可以去做框选截图了。
const viewer = document.getElementById('viewer');
		document.getElementById('screen-button').addEventListener('click', (e) => {

			document.querySelector("body").style.cursor = "crosshair";
			let moveX;
			let moveY;
			let x;
			let y;
			const mousedownEvent = (e) => {
				moveX = 0;
				moveY = 0;
				const [startX, startY] = [e.clientX, e.clientY];
				x = startX - viewer.getBoundingClientRect().left;
				y = startY - 64;
				const divDom = document.createElement("div");
				divDom.id = 'screenshot';
				divDom.width = '1px';
				divDom.height = '1px';
				divDom.style.position = "absolute";
				divDom.style.top = y + "px";
				divDom.style.left = x + "px";
				const closeIcon = document.createElement("span");
				closeIcon.className = 'outline-close-icon';
				closeIcon.textContent = 'x';
				divDom.appendChild(closeIcon);

				closeIcon.addEventListener('click', () => {
					divDom.remove();
				});
				// document.body.appendChild(divDom)
				viewer.appendChild(divDom);
				const moveEvent = (e) => {
					moveX = e.clientX - startX;
					moveY = e.clientY - startY;
					if (moveX > 0) {
						divDom.style.width = moveX + 'px';
					} else {
						divDom.style.width = -moveX + 'px';
						divDom.style.left = e.clientX - viewer.getBoundingClientRect().left + 'px';
					}
					if (moveY > 0) {
						divDom.style.height = moveY + 'px';
					} else {
						divDom.style.height = -moveY + 'px';
						divDom.style.top = e.clientY - viewer.getBoundingClientRect().top + 'px';
					}
				};
				window.addEventListener("mousemove", moveEvent);
				window.addEventListener("mouseup", () => {

					window.removeEventListener("mousemove", moveEvent);
					window.removeEventListener("mousedown", mousedownEvent);
					document.querySelector("body").style.cursor = "default";

					if (!moveX) {
						return;
					}
					// 把body转成canvas
					html2canvas(viewer, {
						scale: 1,
						height: (viewer.offsetHeight > 60000 ? 60000 : viewer.offsetHeight),
						width: viewer.scrollWidth,
						x: 0,
						y: document.getElementById('viewerContainer').scrollTop, // 用网页滚动的高度定位y轴顶点
						// dpi: 300,
						// allowTaint: true,
						useCORS: true,  //跨域使用
					}).then(canvas2 => {
						// document.body.append(canvas2);

						let capture_x, capture_y;
						let width = moveX;
						let height = moveY;
						if (width > 0) {
							//从左往右画
							capture_x = x + 1;
						} else {
							//从右往左画
							capture_x = x + width + 1;
						}
						if (height > 0) {
							//从上往下画
							capture_y = y + 1;
						} else {
							//从下往上画
							capture_y = y + height + 1;
						}
						printClip(canvas2, capture_x, capture_y, Math.abs(width), Math.abs(height));

						moveX = 0;
					});
				});
			};
			window.addEventListener("mousedown", mousedownEvent);
		});


 3817
3817


 被折叠的 条评论
为什么被折叠?


