


这周末参加了UPYUN的移动沙龙,就提到了React Native,今天就写一篇教程。
首先要配置环境,如果没有就执行下面的工作。
1.安装Homebrew打开终端
ruby -e "$(curl -fsSL https://raw.githubusercontent.com/Homebrew/install/master/install)"
2.安装node
brew install node
3.安装
brew install watchman
4.安装
brew install flow
5.执行
npm install -g react-native-cli
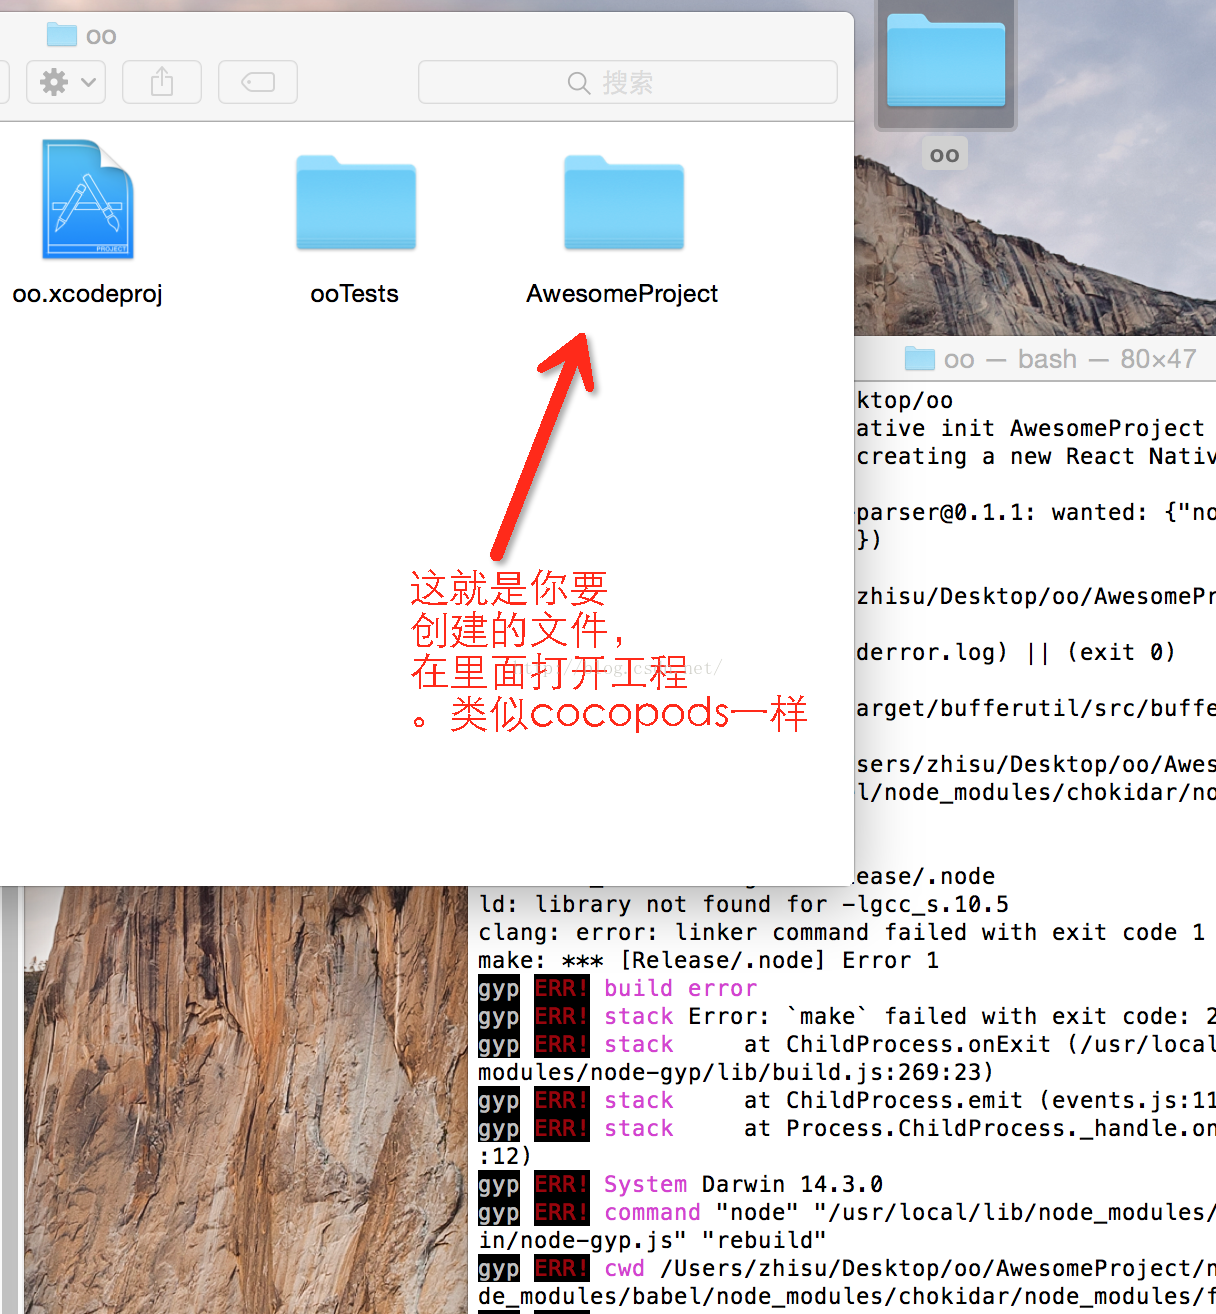
6.现在cd到你工程所处的文件位置--AwesomeProject这个就是你要创建的一个文件
react-native init AwesomeProject

现在运行下模拟器
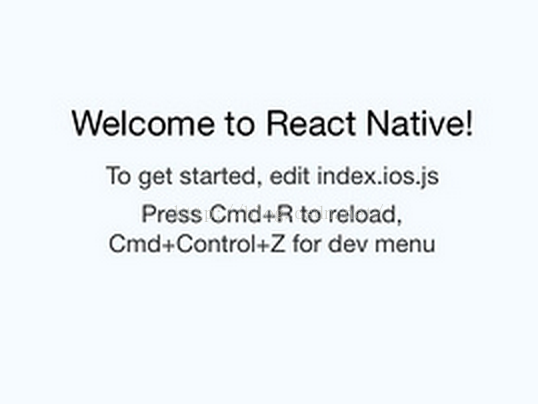
ok完成。
现在打开js文件编写代码了。
/**
 * Sample React Native App
 * https://github.com/facebook/react-native
 react-native init FaceMash
 */
'use strict';//用于开启Strict Mode,让js在这种模式下更好的工作

var React = require('react-native');//将react-native模块加载进来,并将它赋值给变量react。//require:这个概念可以等同于 Swift 中的“链接库”或者“导入库”。

//声明一些属性
var {
  AppRegistry,
  StyleSheet,
  Text,
  View,
     TextInput,//输入框
    Image,//图片


} = React;

var FaceMash = React.createClass({
                                 getInitialState(){
                                 return{
                                 selectedTab:'faceMash'


                                 }
                                 },

  render: function() {
    return (
//      <View style={styles.container}>
//        <Text style={styles.welcome}>
//          第一次用啊。。。。
//        </Text>
//    </View>


            //文本输入框
//        <View>
//            <TextInput
//            style = {{height:40,backgroundColor:'gray',borgerWidth:1}}
//            onChangeText={(text)=>this.setState({input:text})}
//            />
//        </View>

            //设置图片
//            <View>
//            <Image  source={require('image!my_login_qq')}/>
//
//            </View>
//

            //设置view
            <View style={{backgroundColor:'#527FE4',padding:100}}>
            <Text style={{fontSize:11}}>

            BLue backgroundColor
            </Text>

            </View>


    );
  }
});


//定义了一些样式  比如颜色啊,位置啊
var styles = StyleSheet.create({
  container: {
    flex: 1,
    justifyContent: 'center',
    alignItems: 'center',
    backgroundColor: '#F5FCFF',
  },
  welcome: {
    fontSize: 20,
    textAlign: 'center',
    margin: 10,
  },
  instructions: {
    textAlign: 'center',
    color: '#333333',
    marginBottom: 5,
  },
});

//AppRegistry 定义了App的入口,并提供了根组件。
AppRegistry.registerComponent('FaceMash', () => FaceMash);
以上是一些小demo,你可以尝试下。
对了如果你要真机运行那么需要把localhost换成你电脑的ip地址,然后运行就可以了。

ok


 2248
2248

 被折叠的 条评论
为什么被折叠?
被折叠的 条评论
为什么被折叠?
 到【灌水乐园】发言


