


准备工作
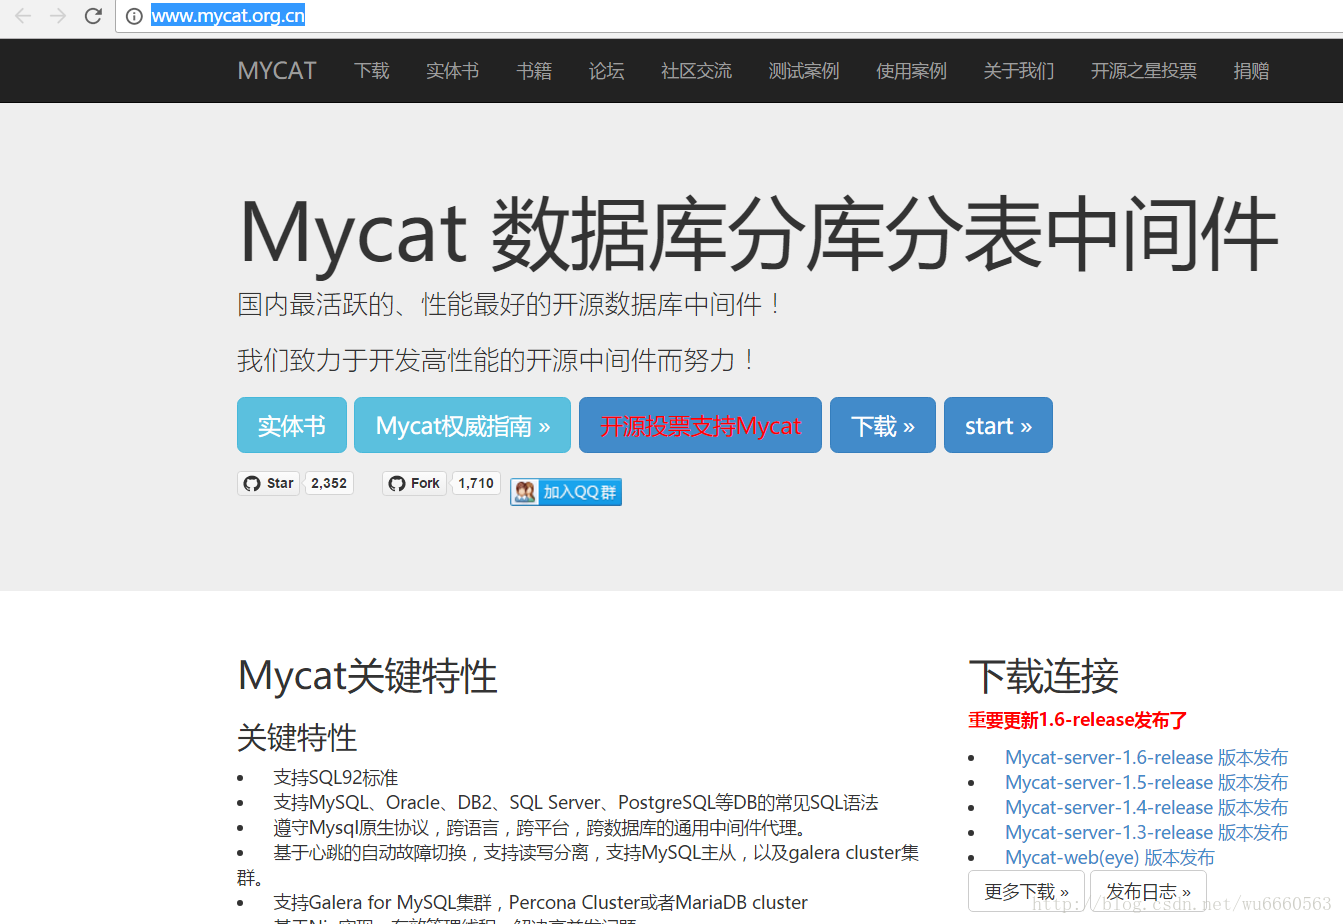
从官网http://www.mycat.org.cn/下载mycat包
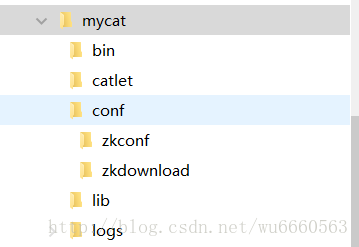
下载以后的文件目录结构如下:
快速入门
配置mycat/conf的server.xml
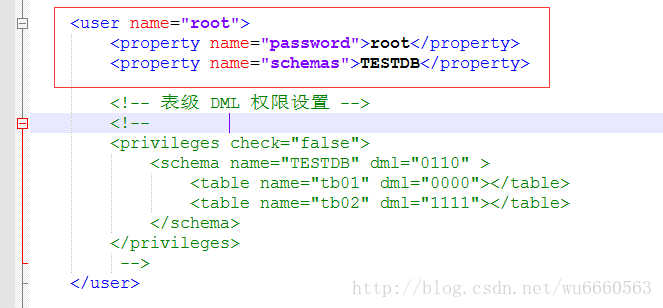
    <user name="root">
        <property name="password">root</property>
        <property name="schemas">TESTDB</property>

        <!-- 表级 DML 权限设置 -->
        <!--
        <privileges check="false">
            <schema name="TESTDB" dml="0110" >
                <table name="tb01" dml="0000"></table>
                <table name="tb02" dml="1111"></table>
            </schema>
        </privileges>
         -->
    </user>
说明:name=root,password=root,schemas=TESTDB表示mycat逻辑库的用户名是root,密码是root,数据库名是TESTDB
配置conf/schema.xml
<schema name="TESTDB" checkSQLschema="false" sqlMaxLimit="100">
        <!-- auto sharding by id (long) -->
        <table name="travelrecord" dataNode="dn1,dn2,dn3" rule="auto-sharding-long" />

        <!-- global table is auto cloned to all defined data nodes ,so can join
            with any table whose sharding node is in the same data node -->
        <table name="company" primaryKey="ID" type="global" dataNode="dn1,dn2,dn3" />
        <table name="goods" primaryKey="ID" type="global" dataNode="dn1,dn2" />
        <!-- random sharding using mod sharind rule -->
        <table name="hotnews" primaryKey="ID" autoIncrement="true" dataNode="dn1,dn2,dn3"
               rule="mod-long" />
        <!-- <table name="dual" primaryKey="ID" dataNode="dnx,dnoracle2" type="global"
            needAddLimit="false"/> <table name="worker" primaryKey="ID" dataNode="jdbc_dn1,jdbc_dn2,jdbc_dn3"
            rule="mod-long" /> -->
        <table name="employee" primaryKey="ID" dataNode="dn1,dn2"
               rule="sharding-by-intfile" />
        <table name="customer" primaryKey="ID" dataNode="dn1,dn2"
               rule="sharding-by-intfile">
            <childTable name="orders" primaryKey="ID" joinKey="customer_id"
                        parentKey="id">
                <childTable name="order_items" joinKey="order_id"
                            parentKey="id" />
            </childTable>
            <childTable name="customer_addr" primaryKey="ID" joinKey="customer_id"
                        parentKey="id" />
        </table>
        <!-- <table name="oc_call" primaryKey="ID" dataNode="dn1$0-743" rule="latest-month-calldate"
            /> -->
    </schema>
这一段代码表示逻辑库名称是TESTDB,里面有travelrecord、company、goods、hotnews、employee、customer等逻辑表
dataNode=”dn1,dn2,dn3”表示位于物理库的dn1,dn2,dn3库
下面的
<dataNode name="dn1" dataHost="localhost1" database="db1" />
<dataNode name="dn2" dataHost="localhost1" database="db2" />
<dataNode name="dn3" dataHost="localhost1" database="db3" />
表示有三个物理库,物理库的名称为db1,db2,db3
dataHost表示配置物理数据库的链接信息,改成你自己的配置即可
<writeHost host="hostM1" url="localhost:3306" user="root"
                   password="root">
保存配置
使用客户端工具连接物理库创建相对应的数据库:
create database db1;
create database db2;
create database db3;
启动mycat
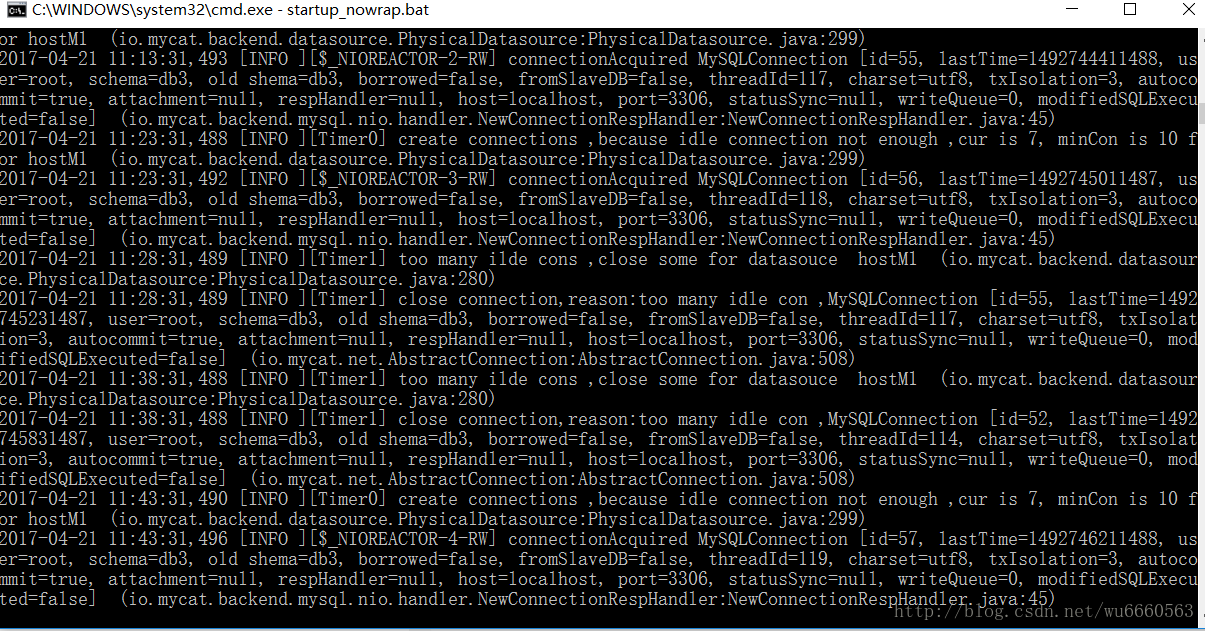
进入bin目录,双击startup_nowrap.bat,出现一个窗口
客户端工具逻辑库
使用sqlyog或者navicat工具连接逻辑库,
IP: localhost
port: 8066
user: root
password: root
链接以后的效果如下:
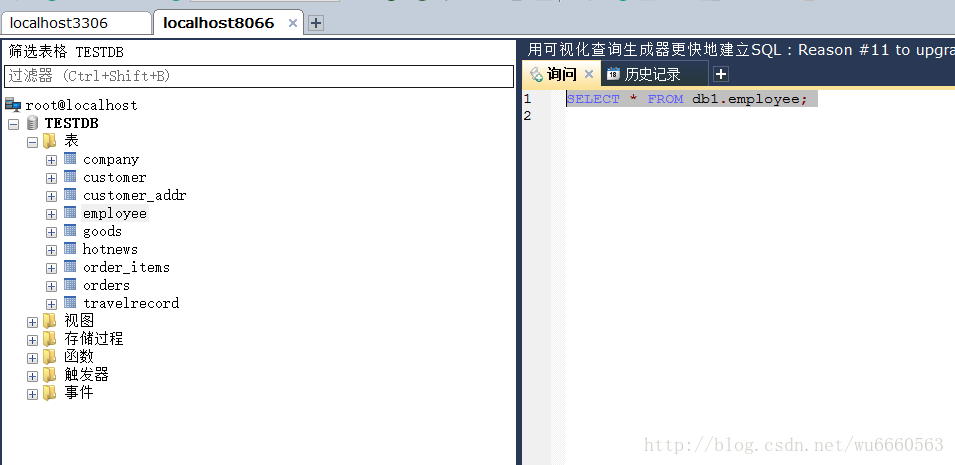
这个时候会有你在schema.xml里面配置的表。查询,报错!
报错是正常的,因为我们物理库并没有表
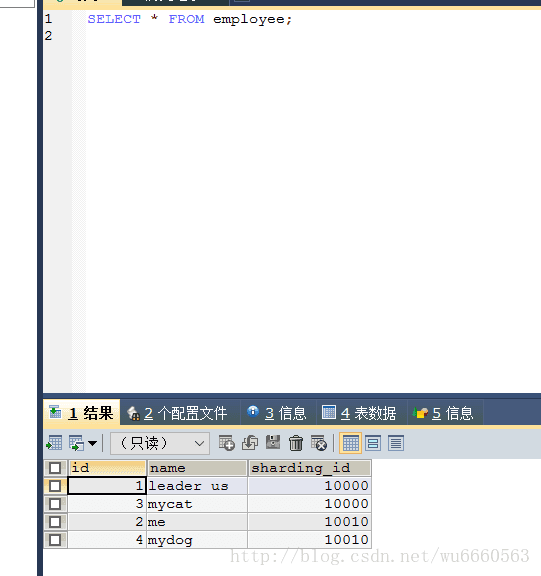
在mycat的8066连接中,执行一下SQL
create table employee (id int not null primary key,name varchar(100),sharding_id int not null);
insert into employee(id,name,sharding_id) values(1,'leader us',10000);
insert into employee(id,name,sharding_id) values(2, 'me',10010);
insert into employee(id,name,sharding_id) values(3, 'mycat',10000);
insert into employee(id,name,sharding_id) values(4, 'mydog',10010);
再去查询select * from employee
发现有数据了
再去localhost3306物理库里面可以看到
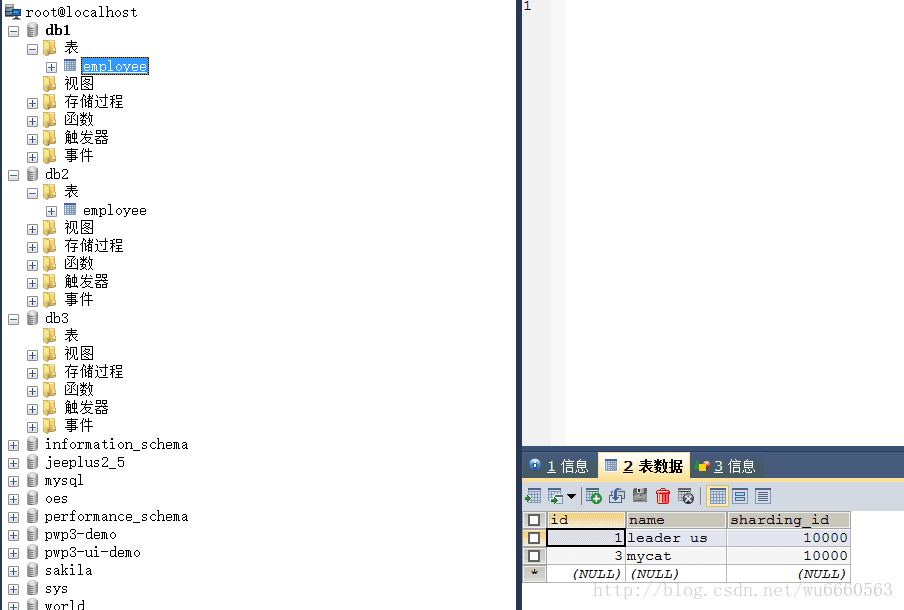
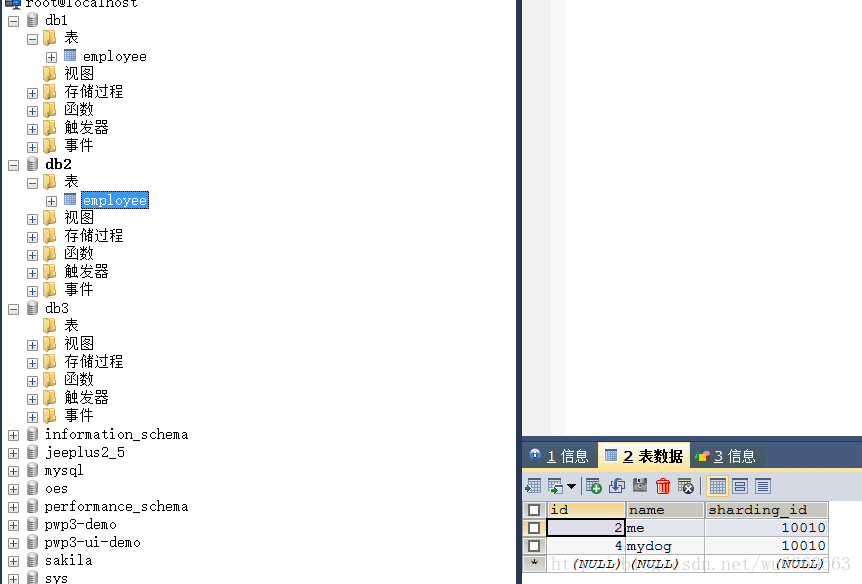
物理库里面数据是分布在db1和db2里面的,逻辑库里面查询到的数据则合并在一起,即可达到分库的架构
分表架构同样也可以通过mycat配置实现
Mycat暂时遇到的bug
1、使用客户端工具查询不到数据,控制台报错find no route,提示找不到路由
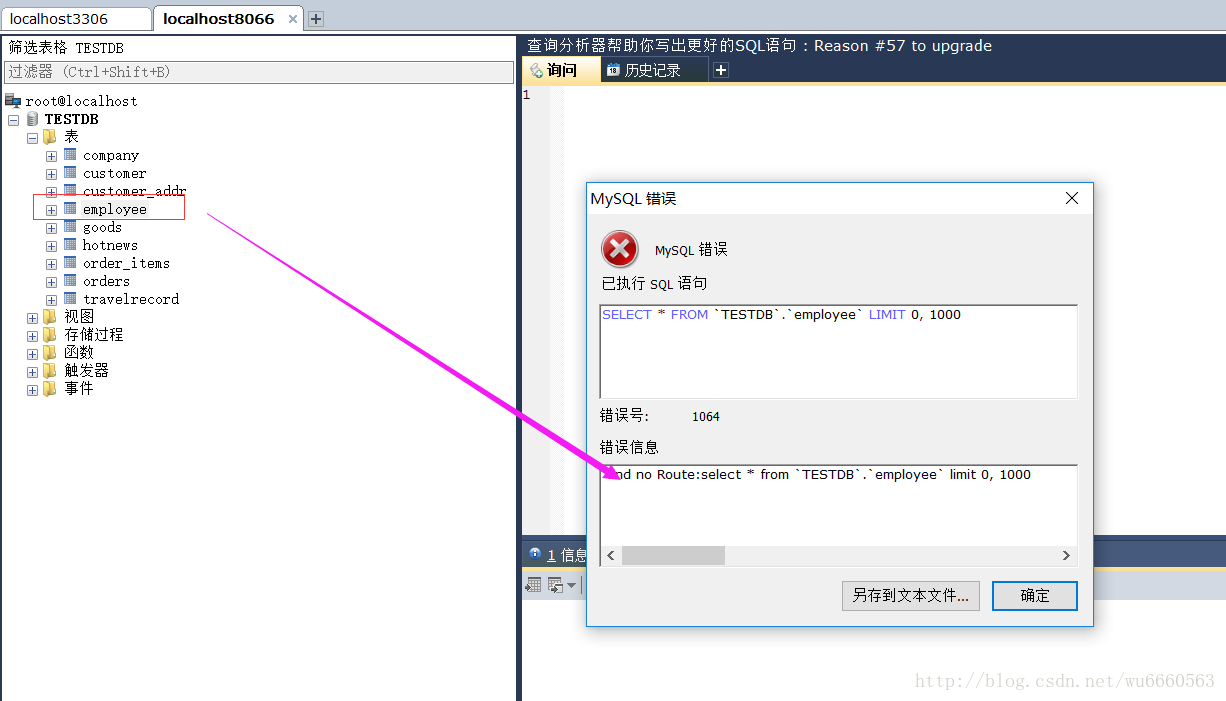

解决办法:使用命令行查询
DOS下面:
mysql -uroot -proot -P8066
use TESTDB;
select * from employee;


 2781
2781

 被折叠的 条评论
为什么被折叠?
被折叠的 条评论
为什么被折叠?
 到【灌水乐园】发言


