


环境
OS:Ubuntu18.
MySQL: 5.7
1.安装MySQL
在Ubuntu中,默认情况下,只有最新版本的MySQL包含在APT软件包存储库中,要安装它,只需更新服务器上的包索引并安装默认包apt-get,安装过程中选择Y,继续执行
sudo apt-get update
sudo apt-get install mysql-server
2.配置MySQL
2.1 初始化配置
sudo mysql_secure_installation
#1
VALIDATE PASSWORD PLUGIN can be used to test passwords...
Press y|Y for Yes, any other key for No: N (我的选项)

#2
Please set the password for root here...
New password: (输入密码)
Re-enter new password: (重复输入)

#3
By default, a MySQL installation has an anonymous user,
allowing anyone to log into MySQL without having to have
a user account created for them...
Remove anonymous users? (Press y|Y for Yes, any other key for No) : N (我的选项)

#4
Normally, root should only be allowed to connect from
'localhost'. This ensures that someone cannot guess at
the root password from the network...
Disallow root login remotely? (Press y|Y for Yes, any other key for No) : Y (我的选项)

#5
By default, MySQL comes with a database named 'test' that
anyone can access...
Remove test database and access to it? (Press y|Y for Yes, any other key for No) : N (我的选项)

#6
Reloading the privilege tables will ensure that all changes
made so far will take effect immediately.
Reload privilege tables now? (Press y|Y for Yes, any other key for No) : Y (我的选项)
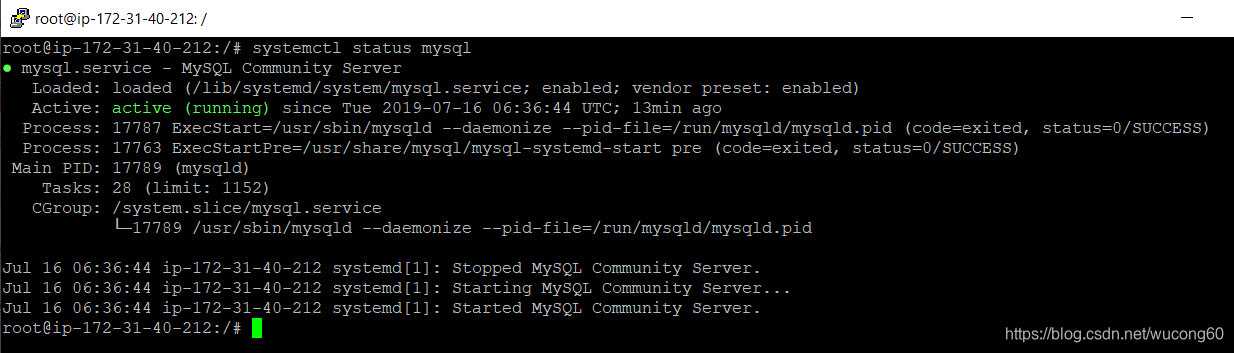
2.2 检查mysql服务状态
systemctl status mysql.service
显示如下结果说明mysql服务是正常的:
3.配置远程访问
在Ubuntu下MySQL缺省是只允许本地访问的,使用navicat是连接不上的。
如果你要其他机器也能够访问的话,需要进行配置;
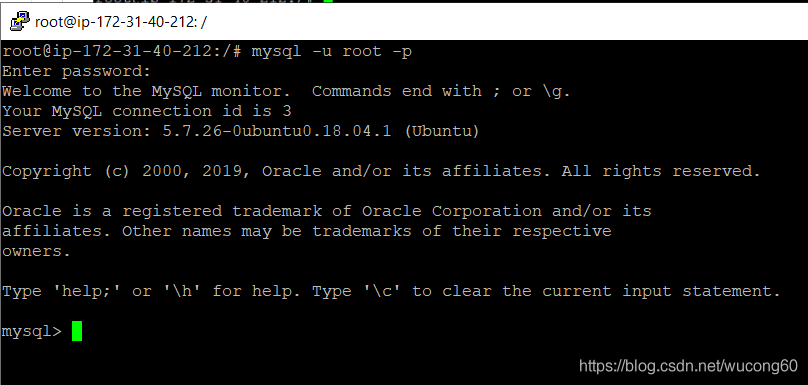
3.1 根用户进入
sudo mysql -uroot -p
3.2 给root用户授权可以远程访问
- 其中
root@localhost,localhost就是本地访问,配置成%就是所有主机都可连接; - 第二个
'123456'为你给新增权限用户设置的密码,%代表所有主机,也可以是具体的ip; - *.* 是表示所有数据库
#查找所有的用户
mysql> SELECT User,Host FROM mysql.user;
+------------------+-----------+
| User             | Host      |
+------------------+-----------+
| root             | localhost |
| debian-sys-maint | localhost |
| mysql.session    | localhost |
| mysql.sys        | localhost |
+------------------+-----------+
4 rows in set (0.00 sec)

#删除root账号
mysql> DROP USER 'root'@'localhost';
Query OK, 0 rows affected (0,00 sec)

#重新创建root:
mysql> CREATE USER 'root'@'%' IDENTIFIED BY '123456';
Query OK, 0 rows affected (0,00 sec)

#授权
mysql> GRANT ALL PRIVILEGES ON *.* TO 'root'@'%' WITH GRANT OPTION;
Query OK, 0 rows affected (0,00 sec)

mysql> FLUSH PRIVILEGES;
Query OK, 0 rows affected (0,01 sec)
当然你也可以不用以上,删除root账号,再重新创建root账号进行授权,可以只需要如下一行命令就搞定了。
GRANT ALL PRIVILEGES ON *.* TO 'root'@'%' IDENTIFIED BY "123456";
3.3 修改mysqld.cnf, 将bind-address = 127.0.0.1 注释掉
cd /etc/mysql/mysql.conf.d

cat mysqld.cnf


#
# The MySQL database server configuration file.
#
# You can copy this to one of:
# - "/etc/mysql/my.cnf" to set global options,
# - "~/.my.cnf" to set user-specific options.
#
# One can use all long options that the program supports.
# Run program with --help to get a list of available options and with
# --print-defaults to see which it would actually understand and use.
#
# For explanations see
# http://dev.mysql.com/doc/mysql/en/server-system-variables.html

# This will be passed to all mysql clients
# It has been reported that passwords should be enclosed with ticks/quotes
# escpecially if they contain "#" chars...
# Remember to edit /etc/mysql/debian.cnf when changing the socket location.

# Here is entries for some specific programs
# The following values assume you have at least 32M ram

[mysqld_safe]
socket          = /var/run/mysqld/mysqld.sock
nice            = 0

[mysqld]
#
# * Basic Settings
#
user            = mysql
pid-file        = /var/run/mysqld/mysqld.pid
socket          = /var/run/mysqld/mysqld.sock
port            = 3306
basedir         = /usr
datadir         = /var/lib/mysql
tmpdir          = /tmp
lc-messages-dir = /usr/share/mysql
skip-external-locking
#
# Instead of skip-networking the default is now to listen only on
# localhost which is more compatible and is not less secure.
bind-address           = 127.0.0.1
#
# * Fine Tuning
#
key_buffer_size         = 16M
max_allowed_packet      = 16M
thread_stack            = 192K
thread_cache_size       = 8
# This replaces the startup script and checks MyISAM tables if needed
# the first time they are touched
myisam-recover-options  = BACKUP
#max_connections        = 100
#table_open_cache       = 64
#thread_concurrency     = 10
#
# * Query Cache Configuration
#
query_cache_limit       = 1M
query_cache_size        = 16M
#
# * Logging and Replication
#
# Both location gets rotated by the cronjob.
# Be aware that this log type is a performance killer.
# As of 5.1 you can enable the log at runtime!
#general_log_file        = /var/log/mysql/mysql.log
#general_log             = 1
#
# Error log - should be very few entries.
#
log_error = /var/log/mysql/error.log
#
# Here you can see queries with especially long duration
#slow_query_log         = 1
#slow_query_log_file    = /var/log/mysql/mysql-slow.log
#long_query_time = 2
#log-queries-not-using-indexes
#
# The following can be used as easy to replay backup logs or for replication.
# note: if you are setting up a replication slave, see README.Debian about
#       other settings you may need to change.
#server-id              = 1
#log_bin                        = /var/log/mysql/mysql-bin.log
expire_logs_days        = 10
max_binlog_size   = 100M
#binlog_do_db           = include_database_name
#binlog_ignore_db       = include_database_name
#
# * InnoDB
#
# InnoDB is enabled by default with a 10MB datafile in /var/lib/mysql/.
# Read the manual for more InnoDB related options. There are many!
#
# * Security Features
#
# Read the manual, too, if you want chroot!
# chroot = /var/lib/mysql/
#
# For generating SSL certificates I recommend the OpenSSL GUI "tinyca".
#
# ssl-ca=/etc/mysql/cacert.pem
# ssl-cert=/etc/mysql/server-cert.pem
# ssl-key=/etc/mysql/server-key.pem
3.4 重启mysql 服务
service mysql restart

#或者

systemctl restart mysql
3.5 使用navicat 远程连接

4. 关于重置密码
SET PASSWORD FOR root@'localhost' = PASSWORD('password');

#或者

UPDATE mysql.user SET Password=PASSWORD('newpwd') WHERE User='root';

#或者

USE mysql

UPDATE user SET Password = PASSWORD('newpwd')

WHERE Host = 'localhost' AND User = 'root';host为%时允许远程登录,也允许任何地方登录
USE mysql

UPDATE user SET Password = PASSWORD('newpwd')

WHERE Host = '%' AND User = 'root';
5. 参考
https://askubuntu.com/questions/766334/cant-login-as-mysql-user-root-from-normal-user-account-in-ubuntu-16-04
https://help.ubuntu.com/community/MysqlPasswordReset


 433
433


 被折叠的 条评论
为什么被折叠?
被折叠的 条评论
为什么被折叠?
 到【灌水乐园】发言


