


1. 简介
我们在公司里,一般都有后端与前端那么接口的交互就成了问题从前又使用word文档的不过那太落后了都是手写最重要还是我们手写,现在我们有接口文档不用那么麻烦了他能根据加的注解就能生成相应的格式以及解释,且有接口测试。
2. 使用配置
2.1 依赖
        <!--引入swagger2依赖-->
        <dependency>
            <groupId>com.spring4all</groupId>
            <artifactId>swagger-spring-boot-starter</artifactId>
            <version>1.9.1.RELEASE</version>
        </dependency>
        <!--图形化依赖-->
        <dependency>
            <groupId>com.github.xiaoymin</groupId>
            <artifactId>swagger-bootstrap-ui</artifactId>
            <version>1.9.6</version>
        </dependency>
2.2 开启注解
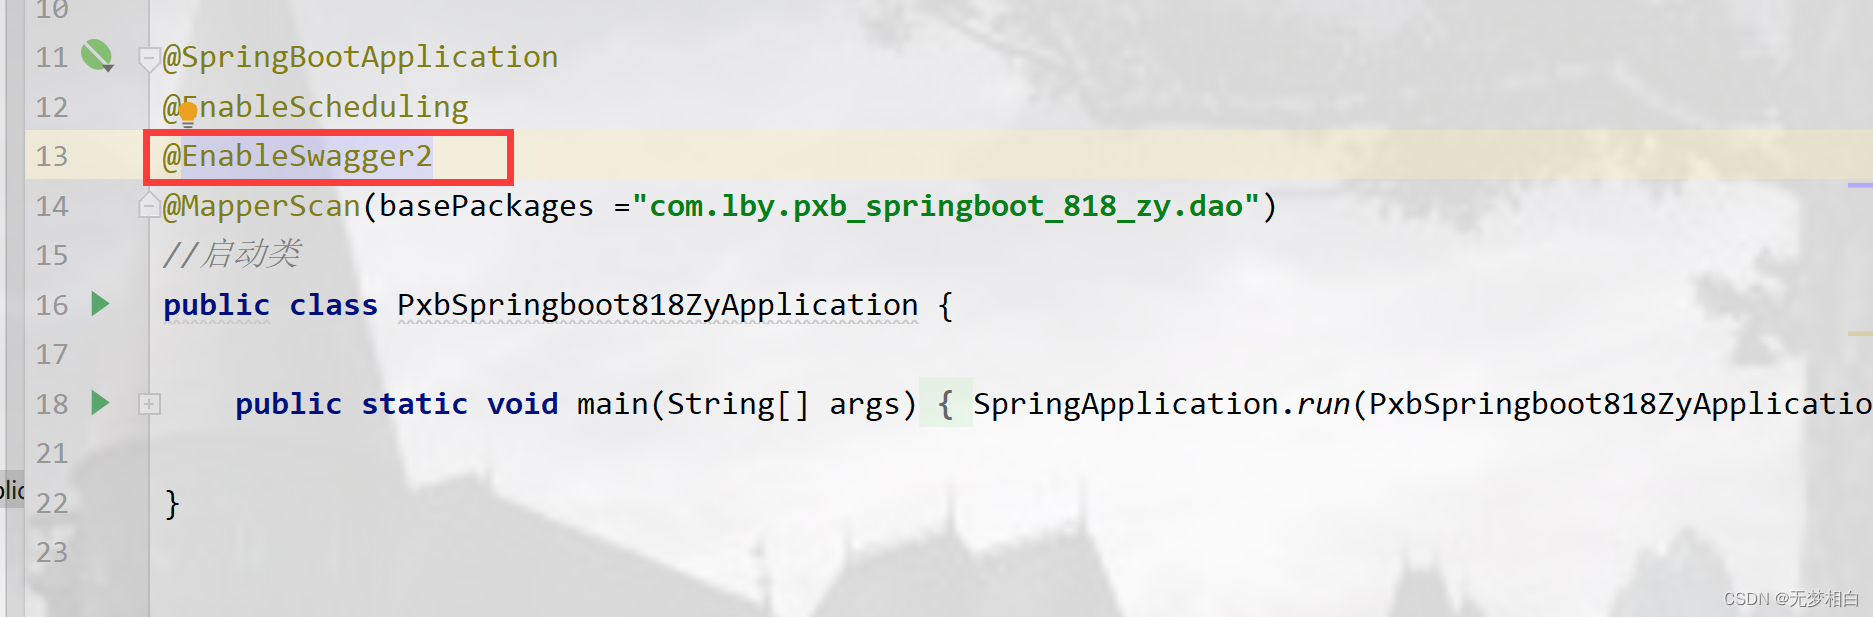
在Springboot的启动类上开启@EnableSwagger2注解
2.3 文档配置
在springboot自定义配置类中配置文档的摘要信息等等,不配置也有默认的。
@Configuration
public class MyConfig {
    @Bean
    public Docket swagger2Config(){
            //摘要配置  文档类型   swagger2                                                                         扫描接口路径
return new Docket(DocumentationType.SWAGGER_2).apiInfo(getInfo()).select().apis(RequestHandlerSelectors.basePackage("com.lby.pxb_springboot_818_zy.controller")).build() ;
    }

    private ApiInfo getInfo(){                      //作者           联系地址                    作者邮箱
         Contact DEFAULT_CONTACT = new Contact("创始人", "http://www.baidu.com", "2000@qq.com");
                                    //文档名称      项目简介     版本                  服务的地址
         ApiInfo info = new ApiInfo("第一组", "员工管理系统API", "v1.0", "http://www.jd.com",

                 DEFAULT_CONTACT, "Apache 2.0", "http://www.baidu.com", new ArrayList<VendorExtension>());
         return info;

         }
}
3. 使用注解
3.1 @Api
使用方式加在Controller上面用 @Api( tags = "名称") 就可以在接口文档为Conroller定义名称
@Api( tags = "我的控制类")
@RestController
@RequestMapping("My")
public class MyController {

}
3.2 @ApiOperation
为方法定义名称使用方法在方法上加入:@ApiOperation("名称")
    @ApiOperation("插入方法")
    @PostMapping
 public Result insert(@RequestBody Account account){
        Result insert = accountService.insert(account);
        System.out.println(account);
        return insert;
    }
3.3 @ApiImplicitParam
为方法的参数加上名称以及方法跟类型等等
使用方法在 @ApiImplicitParams下对应每一个参数使用:
@ApiImplicitParams(value = {
        @ApiImplicitParam(value = "解释", name = "参数名", required = 是否必须, dataType = 参数类型)
})
或者可以由于是实体类你需要看到他的属性那就名称不用对应
    @PostMapping
    @ApiOperation("插入方法")
    @ApiImplicitParams(value = {
            @ApiImplicitParam(value = "负责添加账户", name = "账户实体类", required = true, dataType = "Account")

    })
    public Result insert(@RequestBody Account account){
        Result insert = accountService.insert(account);
        System.out.println(account);
        return insert;
    }
3.4 @ApiModel
为实体类定义名称,使用方法加在实体类上:@ApiModel(“名称”)
@ApiModel("账户实体类")
public class Account {
}
3.5 @ApiModelProperty
为实体类的属性定义名称,使用方法加在实体类属性上:@ApiModelProperty("名称")
@ApiModel("账户实体类")
public class Account {
    @ApiModelProperty("用户编号")
    private Integer aid;
}
4. 效果
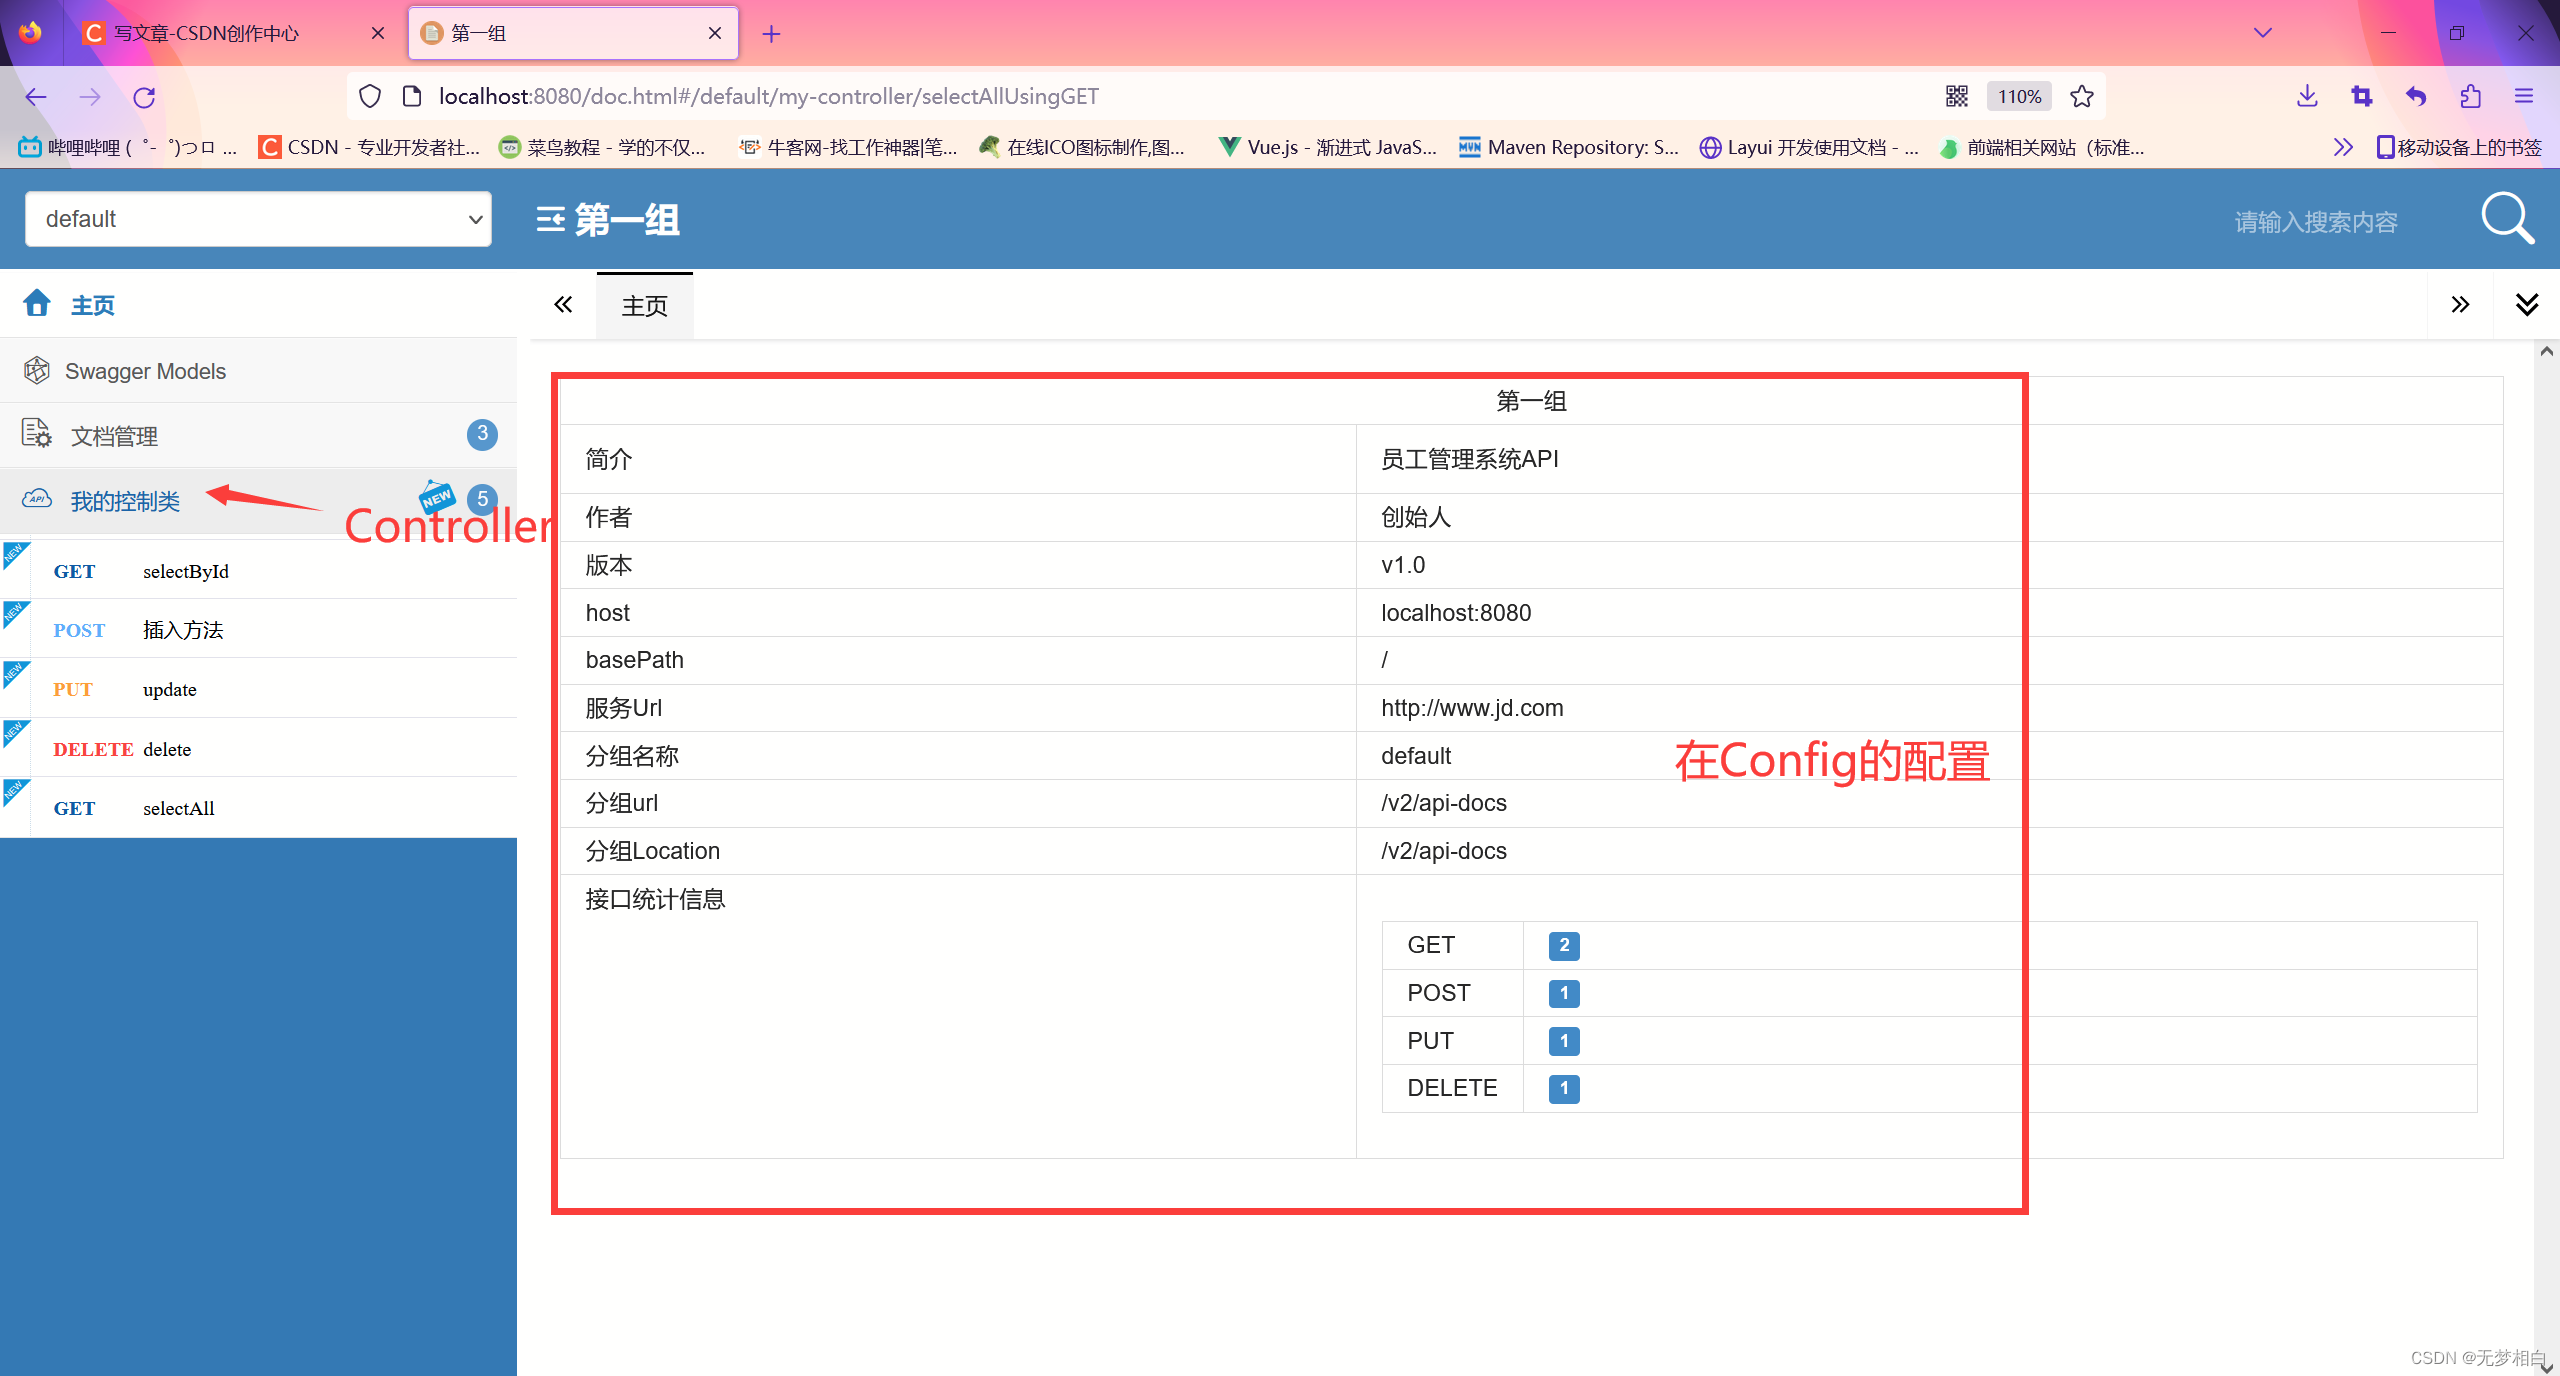
在浏览器里输入http://localhost:8080/doc.html
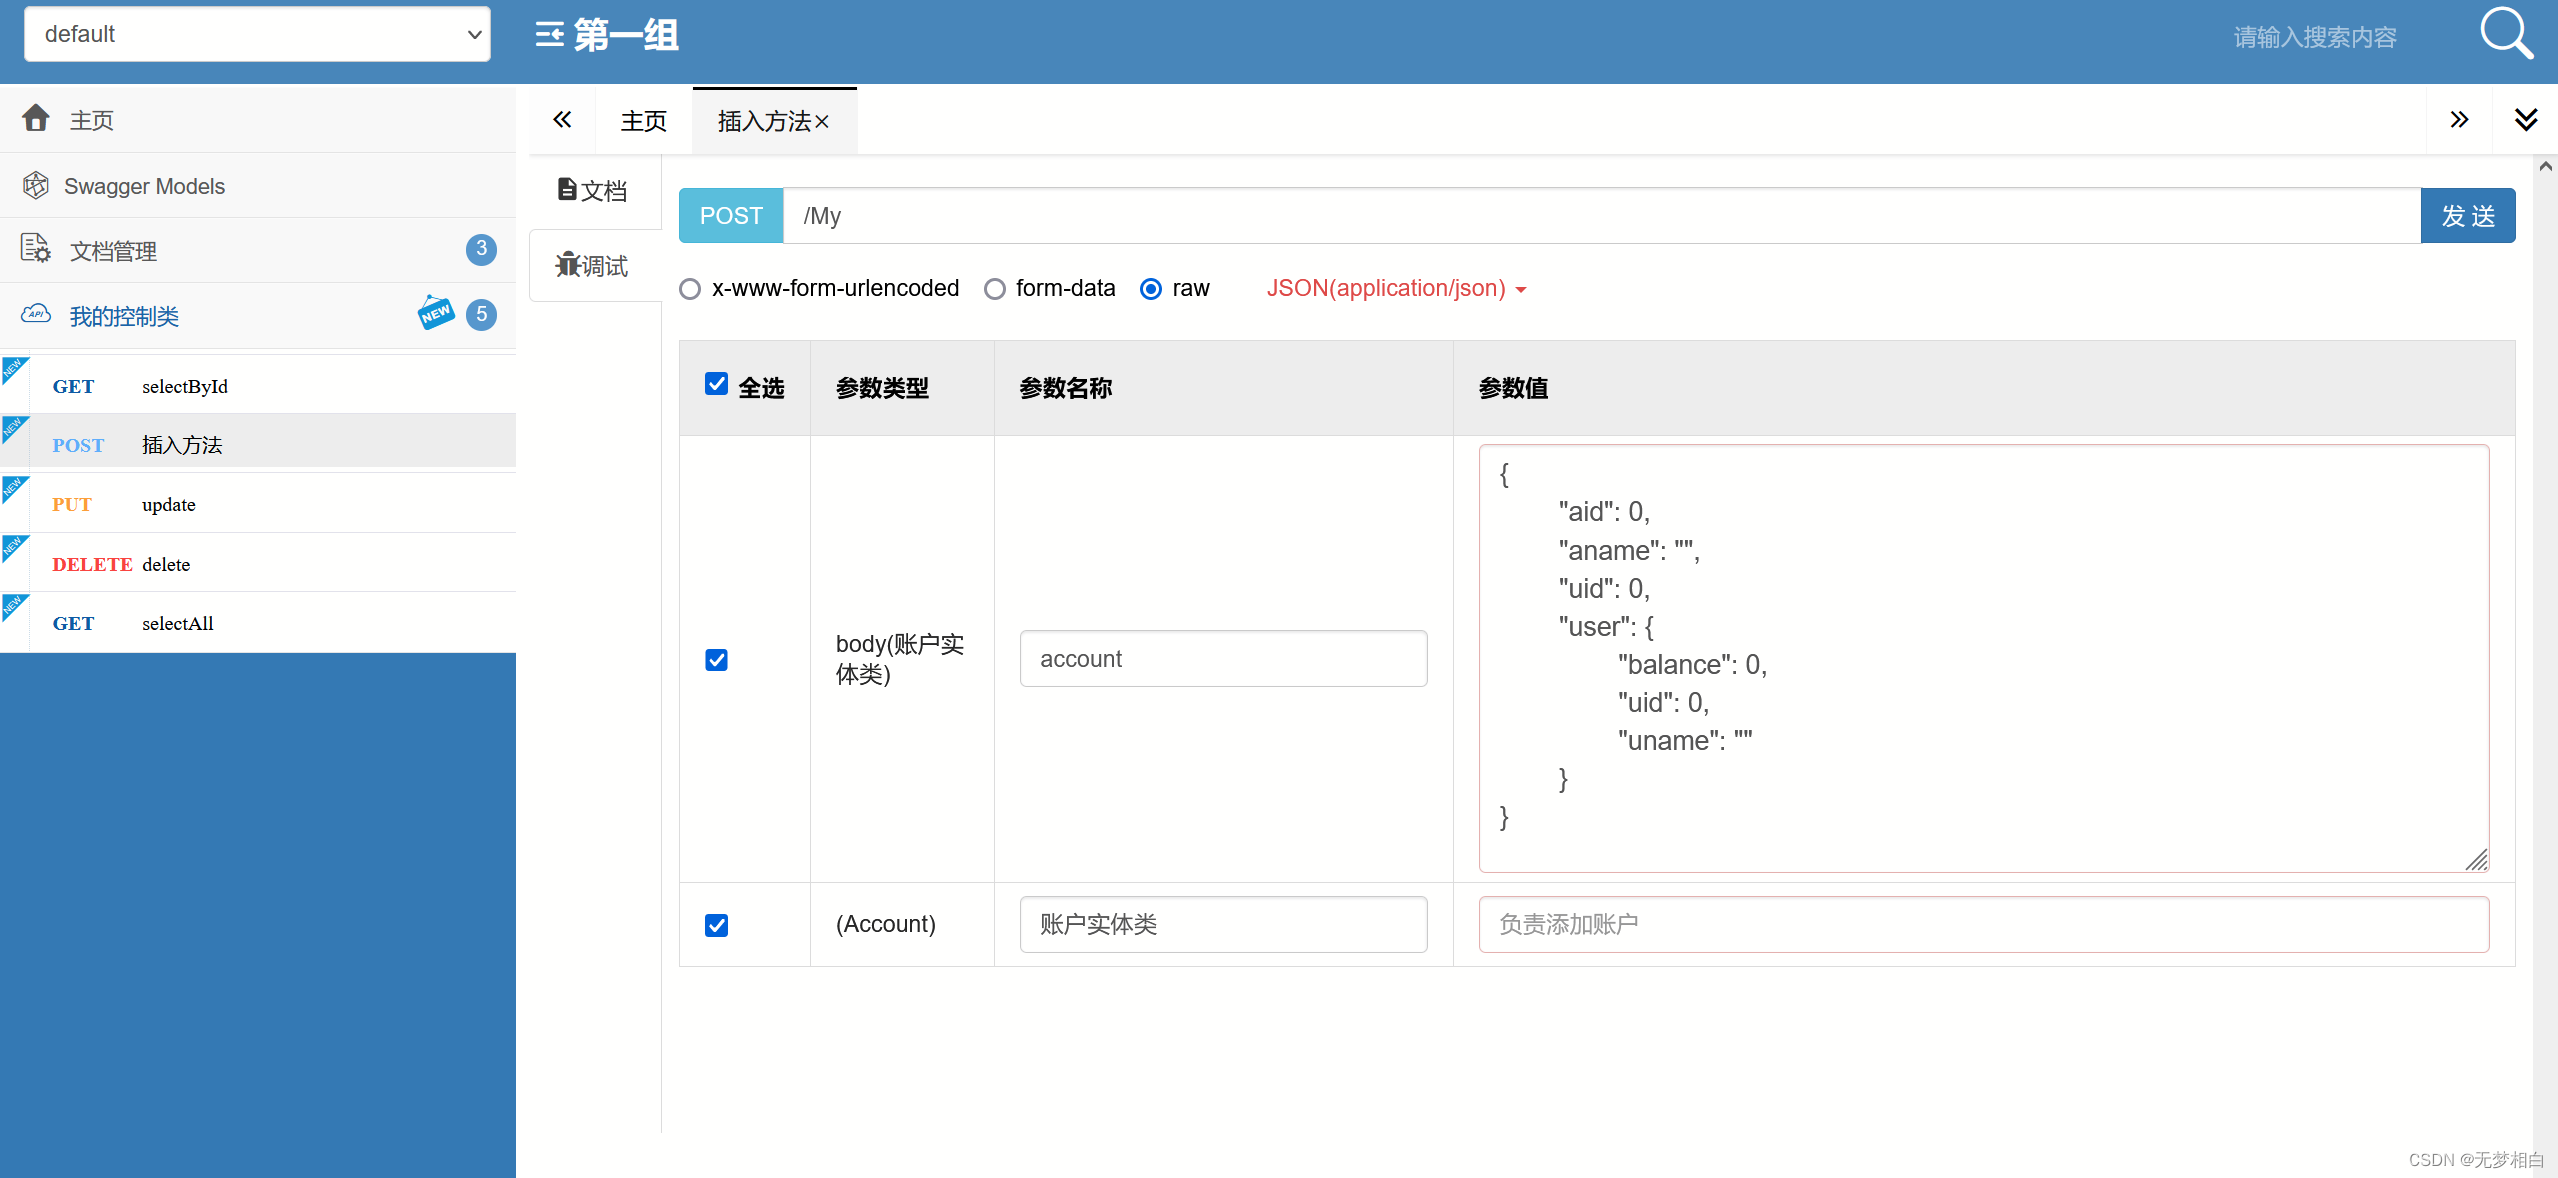
插入方法效果

还可以进行调试


 315
315


 被折叠的 条评论
为什么被折叠?
被折叠的 条评论
为什么被折叠?
 到【灌水乐园】发言


