


CIFS介绍
CIFS使程序可以访问远程Internet计算机上的文件并要求此计算机提供服务。CIFS 使用客户/服务器模式。客户程序请求远在服务器上的服务器程序为它提供服务。服务器获得请求并返回响应。CIFS是公共的或开放的 SMB协议版本,并由Microsoft使用。SMB协议在局域网上用于服务器文件访问和打印的协议。像SMB协议一样,CIFS在高层运行,而不像 TCP/IP协议那样运行在底层。CIFS可以看做是应用程序协议如 文件传输协议和 超文本传输协议的一个实现。samba介绍
服务端口:通常使用 TCP/445 进行所有连接。还使用 UDP137、UDP138和TCP/139进行向后兼容
安装环境
配置网络与yum源
desktop虚拟机:hostnamectl set-hostname client.example.com
server虚拟机:hostnamectl set-hostname server.example.com
[root@server ~]# yum search samba #查找samba安装包
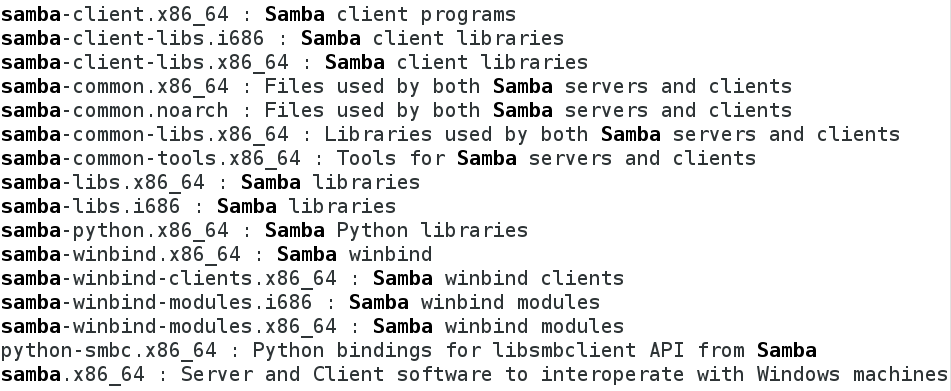
[root@server ~]# yum install samba samba-client samba-common -y #安装samba相关软件
samba-client --客户端应用程序
samba-common --samba的支持文件
[root@server ~]# systemctl start smb #开启samba服务
[root@server ~]# systemctl enable smb #开机自启
ln -s '/usr/lib/systemd/system/smb.service' '/etc/systemd/system/multi-user.target.wants/smb.service'
[root@server ~]# systemctl stop firewalld #关闭火墙
[root@server ~]# systemctl disable firewalld #永久关闭火墙
rm '/etc/systemd/system/basic.target.wants/firewalld.service'
rm '/etc/systemd/system/dbus-org.fedoraproject.FirewallD1.service'
[root@server ~]# netstat -antlupe |grep smb #查看samba端口(445,139)

客户端:
[root@client ~]# yum install samba-client -y #安装客户端samba软件
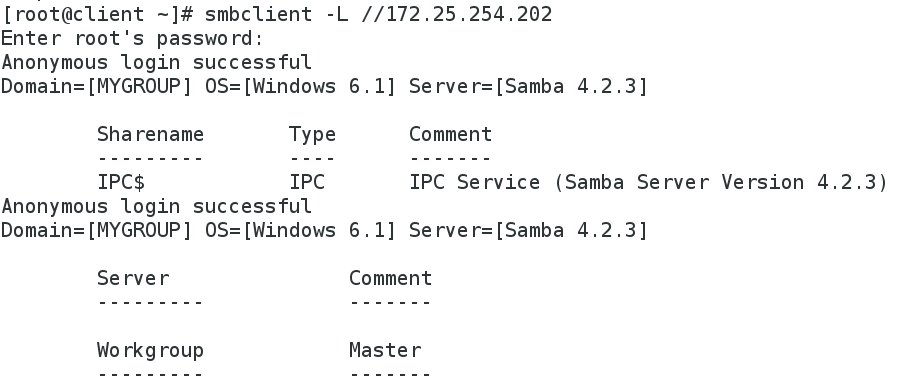
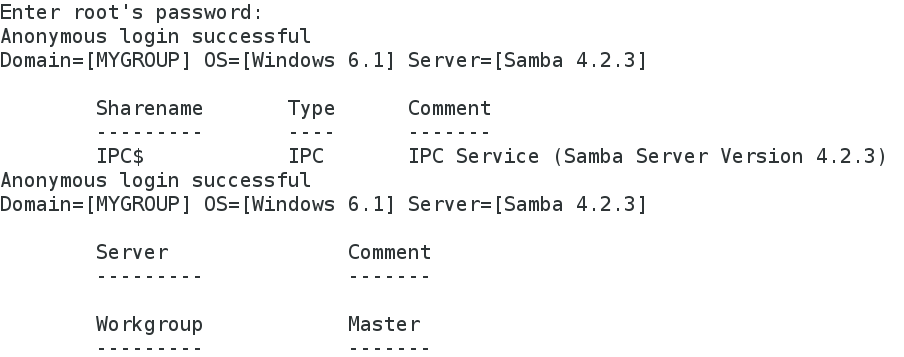
[root@client ~]# smbclient -L //172.25.254.202 #匿名登陆(没有设置密码,直接登陆)
添加smb用户
服务端:
[root@server ~]# smbpasswd -a student #添加samba用户,用户必须存在
New SMB password:
Retype new SMB password:
Added user student.
[root@server ~]# smbpasswd -a westos #不存在的用户添加samba用户将失败
New SMB password:
Retype new SMB password:
Failed to add entry for user westos.
[root@server ~]# useradd westos
[root@server ~]# smbpasswd -a westos
New SMB password:
Retype new SMB password:
Added user westos.
[root@server ~]# pdbedit -L #查看samba用户信息

[root@server ~]# pdbedit -x student #删除用户
[root@server ~]# pdbedit -L
westos:1001:
[root@server ~]# smbpasswd -a student
New SMB password:
Retype new SMB password:
Added user student.
[root@server ~]# pdbedit -L
student:1000:Student User
westos:1001:
客户端:
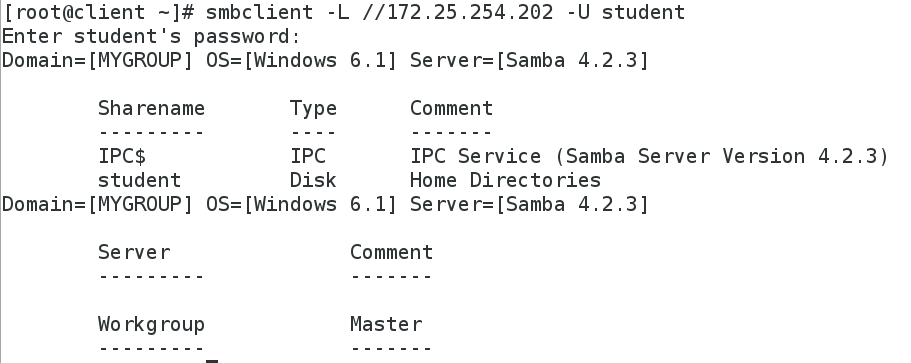
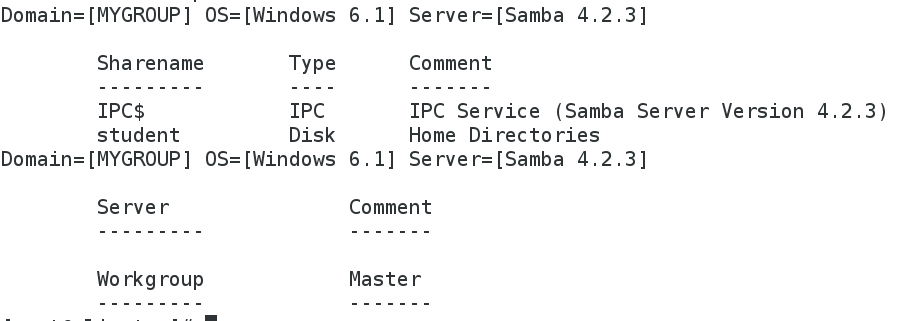
[root@client ~]# smbclient -L //172.25.254.202 -U student #L:显示
[root@client ~]# smbclient //172.25.254.202/student -U student #以student的用户身份登陆, /student:共享student用户的信息
Enter student's password:
Domain=[MYGROUP] OS=[Unix] Server=[Samba 4.1.1]
smb: \> ls
NT_STATUS_ACCESS_DENIED listing \* #DENIED,禁止访问根目录,服务端SELinux服务没开
smb: \> quit
[root@client ~]# smbclient //172.25.254.202/student -U student
Enter student's password:
session setup failed: NT_STATUS_LOGON_FAILURE #遇到这种报错表示密码输入错误
服务端:
[root@server ~]# getsebool -a | grep samba #查看samba服务状态

samba_enable_home_dirs --> off #访问家目录功能关闭
[root@server ~]# setsebool -P samba_enable_home_dirs on #永久开启服务
客户端:
[root@client ~]# smbclient //172.25.254.202/student -U student

smb 上传文件
[root@client ~]# smbclient //172.25.254.202/student -U student
Enter student's password:Domain=[MYGROUP] OS=[Unix] Server=[Samba 4.1.1]
smb: \> !ls
anaconda-ks.cfg Documents Music Public Videos
Desktop Downloads Pictures Templates
smb: \> quit
[root@client ~]# pwd
/root
[root@client ~]# ls
anaconda-ks.cfg Documents Music Public Videos
Desktop Downloads Pictures Templates
[root@client ~]# cd /etc
[root@client etc]# smbclient //172.25.254.202/student -U student
Enter student's password:
Domain=[MYGROUP] OS=[Unix] Server=[Samba 4.1.1]
smb: \> !ls #!ls表示显示当前目录信息
smb: \> put passwd
putting file passwd as \passwd (979.0 kb/s) (average 979.0 kb/s)
服务端:
[root@server ~]# cd /home/student
[root@server student]# ls
passwd
客户端:
smb: \> put /bin/ls #直接通过路径不能上传文件,必须进入到文件所在目录
smb: \> quit
[root@client etc]# cd /bin
[root@client bin]# smbclient //172.25.254.202/student -U student
Enter student's password:
Domain=[MYGROUP] OS=[Unix] Server=[Samba 4.1.1]
smb: \> put ls #进入到文件文件目录后可以上传
putting file ls as \ls (57426.9 kb/s) (average 57429.7 kb/s)
smb: \> quit
smb 挂载
[root@client bin]# smbclient //172.25.254.202/student -U student
Enter student's password:
Domain=[MYGROUP] OS=[Unix] Server=[Samba 4.1.1]
smb: \> touch file #不能建立文件
touch: command not found
smb: \> quit
[root@client bin]# smbclient -L //172.25.254.202/ -U student
Enter student's password:
disk #硬盘,可挂载
临时挂载
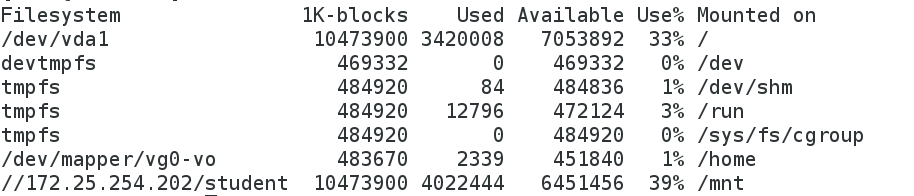
[root@client bin]# mount //172.25.254.202/student /mnt/ -o username=student,password=123
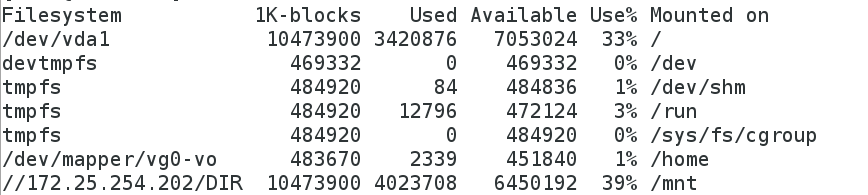
[root@client bin]# df
[root@client bin]# cd /mnt
[root@client mnt]# ls
ls passwd
[root@client mnt]# touch file{1..10}
服务端:
[root@server student]# ls

客户端:
[root@client mnt]# rm -fr *
[root@client mnt]# ls服务端:
[root@server student]# ls
永久挂载
方法一:[root@client mnt]# cd
[root@client ~]# vim /etc/fstab
//172.25.254.202/student /mnt/ cifs defaults,username=student,password=123 0 0
重启后,先挂载再启动系统;如果挂载失败,系统将无法启动不建议使用

[root@client ~]# mount -a
[root@client ~]# df
[root@client ~]# vim /etc/fstab #删除挂载内容
方法二:
mount //172.25.254.202/student /mnt -o username=student,password=lee
在所有服务启动后,初始化的时候开始执行,不会影响系统

[root@client ~]# reboot
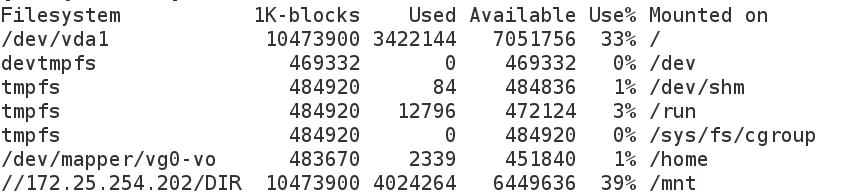
[root@client ~]# df
smb 客户端使用
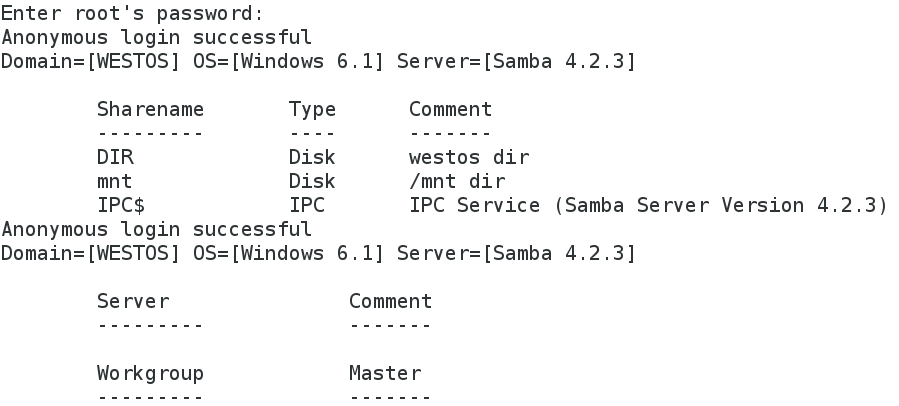
[root@client ~]# smbclient -L //172.25.254.202
1、修改组名称Domain
[root@server student]# rpm -qc samba-common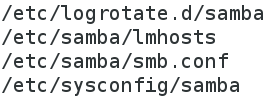
[root@server student]# vim /etc/samba/smb.conf #smb服务主配置文件
89 workgroup = WESTOS

测试:
[root@client ~]# smbclient -L //172.25.254.202
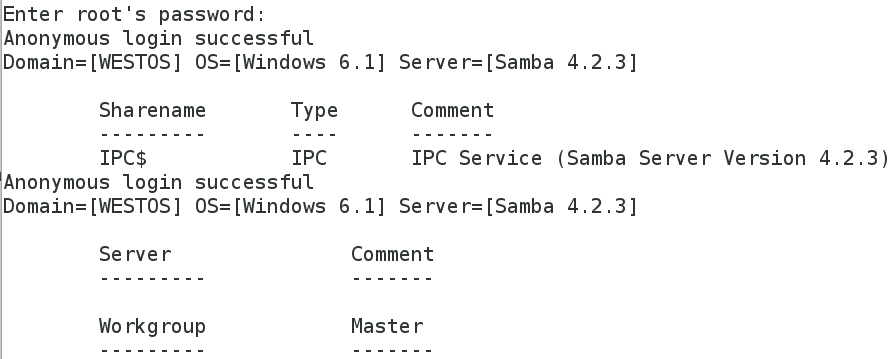
Domain=[WESTOS]
2、设置用户权限
白名单
[root@server student]# vim /etc/samba/smb.conf

[root@client ~]# smbclient -L //172.25.254.202

黑名单
[root@server student]# vim /etc/samba/smb.conf
98 hosts deny = 172.25.254.102
[root@foundation2 ~]# smbclient -L //172.25.254.202

smb 共享目录
smb共享目录的selinux安全上下文: samba_share_t
共享系统目录时要打开:
samba_export_all _ro 和 samba_export_all_rw
文件 /etc/samba/smb.conf 中有修改smb的selinux安全上下文等相关配置的策略
1.自己创建的目录
服务端:
把刚才写的黑白名单注释掉
[root@server student]# mkdir /westos #建立/westos目录
[root@server student]# vim /etc/samba/smb.conf
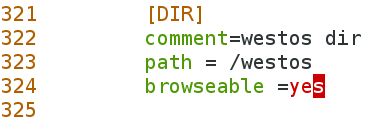
321 [DIR] #可以看到的共享目录名称
322 comment=westos dir #说明
323 path = /westos #共享位置

在smb主配置文件40-42行可以看到修改自己创建的目录安全上下文修改方式

[root@server student]# semanage fcontext -a -t samba_share_t '/westos(/.*)? #修改安全上下文'
[root@server student]# restorecon -RvvF /westos #刷新

客户端测试:
[root@client ~]# smbclient //172.25.254.202/DIR #登录成功,但匿名用户不能访问

[root@client ~]# smbclient //172.25.254.202/DIR -U student

可以看到目录下的内容,共享自己创建的目录成功!
2.系统目录
服务端:
325 [mnt]
326 comment =/mnt dir
327 path = /mnt

客户端测试:
[root@client ~]# smbclient -L //172.25.254.202
服务端:
[root@server ~]# touch /mnt/file{1..5}
[root@server ~]# ls /mnt
file1 file2 file3 file4 file5
客户端测试:
[root@client ~]# smbclient //172.25.254.202/mnt -U student

服务端:
客户端测试:

可以看到新建文件
[root@server ~]# setenforce 1 #设置为强制模式
不能修改安全上下文,因为/mnt为系统目录,修改安全上下文后,其他服务使用该目录时会受到影响
[root@server ~]# vim /etc/samba/smb.conf #查看主配置文件

[root@server ~]# setsebool -P samba_export_all_ro on #打开后可以共享所有级别目录,比安全上下文级别高
客户端测试:

可以服务端看到系统目录/mnt下的文件,共享成功!
smb 权限管理
1、是否允许浏览:browseable = yes|no
[root@server ~]# vim /etc/samba/smb.conf
324 browseable =no #是否显示目录信息

客户端测试:

[root@server ~]# vim /etc/samba/smb.conf
324 browseable =yes #显示目录信息
[root@client ~]# smbclient -L //172.25.254.202
2、是否可写:writable = yes|no
服务端:[root@server ~]# vim /etc/samba/smb.conf
325 writable=yes

[root@server ~]# chmod 777 /westos/
客户端:
以student的身份挂载:
[root@client ~]# mount //172.25.254.202/DIR /mnt -o username=student,password=123[root@client ~]# touch /mnt/file
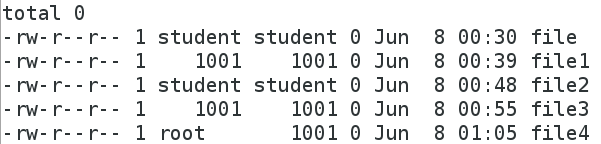
[root@client ~]# ll /mnt
total 0
-rw-r--r-- 1 student student 0 Jun 2 02:51 file
[root@client ~]# umount /mnt
以westos的身份挂载:
[root@client ~]# touch /mnt/file1
[root@client ~]# ll /mnt
total 0
-rw-r--r-- 1 student student 0 Jun 2 02:55 file
-rw-r--r-- 1 1001 1001 0 Jun 2 02:59 file1
以student身份挂载后建立的文件所有人和所有组均为student
以westos身份挂载后建立的文件所有人和所有组均为1001
id: westos: no such user
因为客户端没有westos用户
[root@server ~]# id westos
uid=1001(westos) gid=1001(westos) groups=1001(westos)服务端westos用户uid=1001,gid=1001
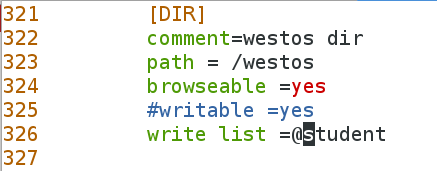
3、允许用户列表:write list = student
服务端:
[root@server ~]# vim /etc/samba/smb.conf
325 #writable=yes
326 write list = student

[root@server ~]# systemctl restart smb.service
客户端测试:
[root@client ~]# umount /mnt
[root@client ~]# mount //172.25.254.202/DIR /mnt -o username=westos,password=123
[root@client ~]# touch /mnt/file2
touch: cannot touch ‘/mnt/file2’: Permission denied #不可写,没有权限
[root@client ~]# umount /mnt
[root@client ~]# mount //172.25.254.202/DIR /mnt -o username=student,password=123
[root@client ~]# touch /mnt/file2
4、允许组列表(+或@表示组):write list = @student
326 write list = @student
客户端测试:
[root@client ~]# touch /mnt/file3
touch: cannot touch ‘/mnt/file3’: Permission denied
[root@client ~]# umount /mnt
在客户端把westos用户所有组设置为student
[root@server ~]# usermod -G student westos[root@server ~]# id westos

在客户端测试:
[root@client ~]# mount //172.25.254.202/DIR /mnt -o username=westos,password=123
[root@client ~]# touch /mnt/file3
[root@client ~]# umount /mnt
所有组为student的westos用户挂载后可以写入,操作成功!
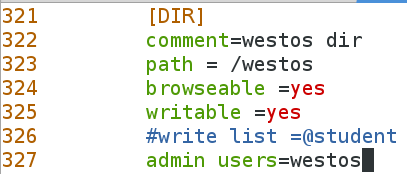
5、指定超级用户:admin users = westos(在可写情况下才可以执行动作)
[root@server ~]# vim /etc/samba/smb.conf
326 #write list = @student
327 admin users = westos
[root@client ~]# mount //172.25.254.202/DIR /mnt -o username=westos,password=123
[root@client ~]# touch /mnt/file4
[root@client ~]# ll /mnt
[root@client ~]# df
smb 多用户挂载
客户端测试:
[root@client ~]# useradd test
[root@client ~]# su - test[test@client ~]$ ls /mnt #任意用户都可以看到/mnt的内容,不安全
file file1 file2 file3 file4
[root@client ~]# umount /mnt
服务端:
[root@client ~]# yum install cifs-utils -y
[root@client ~]# man mount.cifs #查看挂载规则,根据挂载规则编写文件
credentials=filename
username=value
password=value
domain=value
The default in mainline kernel versions prior to v3.8 was sec=ntlm.
In v3.8, the default was changed to sec=ntlmssp.
multiuser
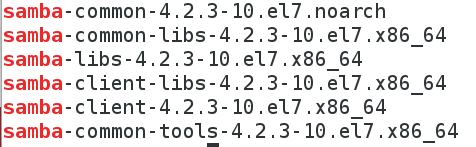
[root@client ~]# rpm -qa |grep samba #版本4.2,在3.8以上,sec=ntlmssp
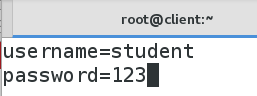
[root@client ~]# vim /root/smbpass
username=student
password=123
[root@client ~]# mount -o credentials=/root/smbpass,sec=ntlmssp,multiuser //172.25.254.202/DIR /mnt
#挂载,credentials=/root/smbpass:文件指定的用户名、密码sec=nelmssp:认证方式
[root@client mnt]# ls
file file1 file2 file3 file4
[root@client mnt]# su - testLast login: Sat Jun 2 03:37:38 EDT 2018 on pts/0
[test@client ~]$ cd /mnt
[test@client mnt]$ ls
ls: reading directory .: Permission denied
切换到普通用户后不能查看/mnt下的文件,必须指定用户挂载通过smb认证才可以查看
[root@client ~]# cifscreds --help

[test@client ~]$ cifscreds add -u westos 172.25.254.202 #写入错的密码
Password:[test@client ~]$ ls /mnt
ls: cannot access /mnt: Permission denied
[test@client ~]$ cifscreds add -u westos 172.25.254.202 #第二次登陆会直接报错
You already have stashed credentials for 172.25.254.200 (172.25.254.200)
If you want to update them use:
cifscreds update
[test@client ~]$ cifscreds clearall #清理缓存
[test@client ~]$ cifscreds add -u westos 172.25.254.202
Password:
[test@client ~]$ ls /mnt
file file1 file2 file3 file4
可以看到/mnt下的内容
smb 匿名用户访问
linux 的匿名用户 Anonymouswindows 的匿名用户 guest
服务端:
328 guest ok =yes #允许匿名用户登录
125 map to guest =bad user #将匿名用户影射为guest用户


客户端测试:
[root@client ~]# smbclient //172.25.254.202/DIR

[root@client ~]# mount //172.25.254.202/DIR /mnt -o username=guest,password=""
[root@client ~]# df
[root@client ~]# umount /mnt


 2508
2508

 被折叠的 条评论
为什么被折叠?
被折叠的 条评论
为什么被折叠?
 到【灌水乐园】发言


