


目录
自定义导航栏介绍:
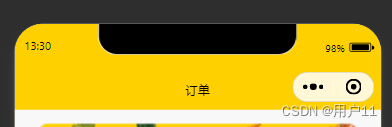
一般用于图片等的填充或者其他特殊需求,如果使用纯色填充顶部栏可以直接使用navigationBarBackgroundColor完成
page.json文件:
"navigationBarBackgroundColor": "#FED000"效果:
自定义导航栏的使用
step1:取消默认的原生导航栏
page.json文件page的style中添加代码
"navigationStyle":"custom"step2:在页面中添加占位元素
占位高度包括:
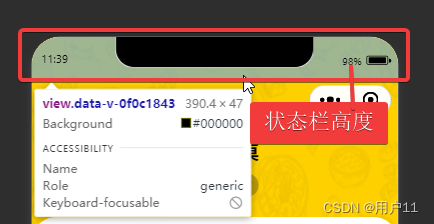

        <!-- 状态栏高度 -->
        <view :style="{ height: `${statusBarHeight}px` }"></view>
        <!-- 自定义导航栏高度 并 居中 -->
        <view :style="{
          height: `${barHeight}px`,
          'line-height': `${barHeight}px`,
          'text-align': 'center',
        }">
            <text>评价</text>
        </view>
onLoad() {
// 状态栏高度
this.statusBarHeight = uni.getSystemInfoSync().statusBarHeight;
// 胶囊数据
const { top, height } = wx.getMenuButtonBoundingClientRect();
// 自定义导航栏高度 = 胶囊高度 + 胶囊的padding*2, 如果获取不到设置为38
this.barHeight = height ? height + (top - this.statusBarHeight) * 2 : 38;
},


 2154
2154


 被折叠的 条评论
为什么被折叠?
被折叠的 条评论
为什么被折叠?
 到【灌水乐园】发言


