


安装文档说明
http://lucene.apache.org/solr/guide/7_7/installing-solr.html
下载安装包
http://www.apache.org/dyn/closer.lua/lucene/solr/8.1.0/solr-8.1.0.tgz
wget http://mirrors.tuna.tsinghua.edu.cn/apache/lucene/solr/8.1.0/solr-8.1.0.tgz
解压安装包
tar -zxvf solr-8.1.0.tgz
目录 说明
Directory Layout
After installing Solr, you’ll see the following directories and files within them:

bin/

This directory includes several important scripts that will make using Solr easier.

solr and solr.cmd

This is Solr’s Control Script, also known as bin/solr (*nix) / bin/solr.cmd (Windows). This script is the preferred tool to start and stop Solr. You can also create collections or cores, configure authentication, and work with configuration files when running in SolrCloud mode.

post

The PostTool, which provides a simple command line interface for POSTing content to Solr.

solr.in.sh and solr.in.cmd

These are property files for *nix and Windows systems, respectively. System-level properties for Java, Jetty, and Solr are configured here. Many of these settings can be overridden when using bin/solr / bin/solr.cmd, but this allows you to set all the properties in one place.

install_solr_services.sh

This script is used on *nix systems to install Solr as a service. It is described in more detail in the section Taking Solr to Production.

contrib/

Solr’s contrib directory includes add-on plugins for specialized features of Solr.

dist/

The dist directory contains the main Solr .jar files.

docs/

The docs directory includes a link to online Javadocs for Solr.

example/

The example directory includes several types of examples that demonstrate various Solr capabilities. See the section Solr Examples below for more details on what is in this directory.

licenses/

The licenses directory includes all of the licenses for 3rd party libraries used by Solr.

server/

This directory is where the heart of the Solr application resides. A README in this directory provides a detailed overview, but here are some highlights:

Solr’s Admin UI (server/solr-webapp)
Jetty libraries (server/lib)
Log files (server/logs) and log configurations (server/resources). See the section Configuring Loggingfor more details on how to customize Solr’s default logging.
Sample configsets (server/solr/configsets)
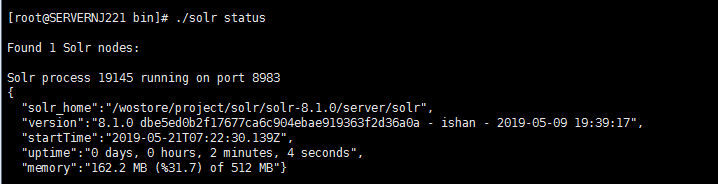
启动

./solr status
[root@SERVERNJ221 bin]# ./solr start -h

ERROR: Hostname is required when using the -h option!


Usage: solr start [-f] [-c] [-h hostname] [-p port] [-d directory] [-z zkHost] [-m memory] [-e example] [-s solr.solr.home] [-t solr.data.home] [-a "additional-options"] [-V]

  -f            Start Solr in foreground; default starts Solr in the background
                  and sends stdout / stderr to solr-PORT-console.log

  -c or -cloud  Start Solr in SolrCloud mode; if -z not supplied and ZK_HOST not defined in
                  solr.in.sh, an embedded ZooKeeper instance is started on Solr port+1000,
                  such as 9983 if Solr is bound to 8983

  -h <host>     Specify the hostname for this Solr instance

  -p <port>     Specify the port to start the Solr HTTP listener on; default is 8983
                  The specified port (SOLR_PORT) will also be used to determine the stop port
                  STOP_PORT=($SOLR_PORT-1000) and JMX RMI listen port RMI_PORT=($SOLR_PORT+10000).
                  For instance, if you set -p 8985, then the STOP_PORT=7985 and RMI_PORT=18985

  -d <dir>      Specify the Solr server directory; defaults to server

  -z <zkHost>   Zookeeper connection string; only used when running in SolrCloud mode using -c
                   If neither ZK_HOST is defined in solr.in.sh nor the -z parameter is specified,
                   an embedded ZooKeeper instance will be launched.

  -m <memory>   Sets the min (-Xms) and max (-Xmx) heap size for the JVM, such as: -m 4g
                  results in: -Xms4g -Xmx4g; by default, this script sets the heap size to 512m

  -s <dir>      Sets the solr.solr.home system property; Solr will create core directories under
                  this directory. This allows you to run multiple Solr instances on the same host
                  while reusing the same server directory set using the -d parameter. If set, the
                  specified directory should contain a solr.xml file, unless solr.xml exists in Zookeeper.
                  This parameter is ignored when running examples (-e), as the solr.solr.home depends
                  on which example is run. The default value is server/solr. If passed relative dir,
                  validation with current dir will be done, before trying default server/<dir>

  -t <dir>      Sets the solr.data.home system property, where Solr will store index data in <instance_dir>/data subdirectories.
                  If not set, Solr uses solr.solr.home for config and data.

  -e <example>  Name of the example to run; available examples:
      cloud:         SolrCloud example
      techproducts:  Comprehensive example illustrating many of Solr's core capabilities
      dih:           Data Import Handler
      schemaless:    Schema-less example

  -a            Additional parameters to pass to the JVM when starting Solr, such as to setup
                  Java debug options. For example, to enable a Java debugger to attach to the Solr JVM
                  you could pass: -a "-agentlib:jdwp=transport=dt_socket,server=y,suspend=n,address=18983"
                  In most cases, you should wrap the additional parameters in double quotes.

  -j            Additional parameters to pass to Jetty when starting Solr.
                  For example, to add configuration folder that jetty should read
                  you could pass: -j "--include-jetty-dir=/etc/jetty/custom/server/"
                  In most cases, you should wrap the additional parameters in double quotes.

  -noprompt     Don't prompt for input; accept all defaults when running examples that accept user input

  -v and -q     Verbose (-v) or quiet (-q) logging. Sets default log level to DEBUG or WARN instead of INFO

  -V/-verbose   Verbose messages from this script
./solr start -e cloud -force
[root@SERVERNJ221 bin]# ./solr stop -all
[root@SERVERNJ221 bin]# ./solr start -e cloud -force

Welcome to the SolrCloud example!

This interactive session will help you launch a SolrCloud cluster on your local workstation.
To begin, how many Solr nodes would you like to run in your local cluster? (specify 1-4 nodes) [2]:
2
Ok, let's start up 2 Solr nodes for your example SolrCloud cluster.
Please enter the port for node1 [8983]:

Please enter the port for node2 [7574]:

Solr home directory /wostore/project/solr/solr-8.1.0/example/cloud/node1/solr already exists.
/wostore/project/solr/solr-8.1.0/example/cloud/node2 already exists.

Starting up Solr on port 8983 using command:
"/wostore/project/solr/solr-8.1.0/bin/solr" start -cloud -p 8983 -s "/wostore/project/solr/solr-8.1.0/example/cloud/node1/solr" -force

Warning: Available entropy is low. As a result, use of the UUIDField, SSL, or any other features that require
RNG might not work properly. To check for the amount of available entropy, use 'cat /proc/sys/kernel/random/entropy_avail'.

NOTE: Please install lsof as this script needs it to determine if Solr is listening on port 8983.

Started Solr server on port 8983 (pid=20407). Happy searching!


Starting up Solr on port 7574 using command:
"/wostore/project/solr/solr-8.1.0/bin/solr" start -cloud -p 7574 -s "/wostore/project/solr/solr-8.1.0/example/cloud/node2/solr" -z localhost:9983 -force

Warning: Available entropy is low. As a result, use of the UUIDField, SSL, or any other features that require
RNG might not work properly. To check for the amount of available entropy, use 'cat /proc/sys/kernel/random/entropy_avail'.

NOTE: Please install lsof as this script needs it to determine if Solr is listening on port 7574.

Started Solr server on port 7574 (pid=20565). Happy searching!
./solr status


 841
841


 被折叠的 条评论
为什么被折叠?
被折叠的 条评论
为什么被折叠?
 到【灌水乐园】发言


