


一. 多表连接一般分为内连接和外连接,今天重点讲解外连接。外连接又包括左外连接和右外连接,我这个项目用的是左外连接,所以就拿左外连接举例吧。
左连接:left join 或 left outer join
(1).左连接顾名思义,就是从左边表开始查询,但是如果左边表的某行在右表中没有匹配,那么相关联的结果集中右表的列表的将是空值(null)。
(2). sql语句
String sql="select a.*,b.type_name,c.vendor_name,d.office_name from t_m3s_device  a" +
        " left join t_m3s_device_type b on a.type_id=b.type_id left join t_m3s_vendor c" +
        " on a.manufacturer=c.vendor_id left join t_m3s_office d on a.office_id=d.office_id" +
        " where a.device_id=?";
注释:我这里加的where条件,是因为一会我只需查询单条记录即可,并不是所有查询,所以加了where条件,如果是查询全部的话,即可去掉。
2.右连接:right join 或 right outer join
二.更改访问url
1.首先是更改struts的配置
<struts>
    <package name="deviceWeb" extends="common">
        <action name="app" class="deviceWebAction" method="deviceWebList">
            <result>device.jsp</result>
        </action>
    </package>

</struts>
2.其次是更改shiro配置,让其成为“游客”身份,也就是不用登陆,任何人都可以访问
<property name="filterChainDefinitions">
            <value>
                /app = anon
                /${adminPath}/login.action = authc
                /${adminPath}/logout.action = logout
            </value>
        </property>
注释:具体细节就不往上发表了,anon代表的就是“游客”身份
3.由于需求是查询单条记录,规定的访问路径是
<s:iterator value="deviceList" var="item">
            <form action="${ctx}/app?sid=<s:property value="device_id" />" method="post">
                <table id="contentTable" class="table table-bordered">
                    <tr>
                        <td>设备编号:<s:property value="device_id" /></td>
                    </tr>
                    <tr>
                        <td>设备类型:<s:property value="type_name" /></td>
                    </tr>
                    .
                    .
                    .
                    .
                </table>
            </form>
        </s:iterator>
注释:由于后台返回是一个list集合,所以就用了struts的iterator标签
4.所以后台就需要获得前台的sid,并且给它赋值,否则sid就会是空值
    private List<DeviceWeb> deviceList;
    private String sid;     //前台sid

    public String deviceWebList(){

        try{
            this.setActionErrors(actionErrors);
            DeviceWeb d=new DeviceWeb();
            sid=request.getParameter("sid");
            d.setDevice_id(sid);                //将前台sid赋值
            this.deviceList=this.deviceWebService.deviceWebList(d);

        }catch(Exception e){
            this.addActionError("查询设备失败");
            e.printStackTrace();
        }

        return SUCCESS;
    }
    public List<DeviceWeb> getDeviceList() {
        return deviceList;
    }
    public void setDeviceList(List<DeviceWeb> deviceList) {
        this.deviceList = deviceList;
    }
    public String getSid() {
        return sid;
    }
    public void setSid(String sid) {
        this.sid = sid;
    }
注释:切记不要忘记给sid赋值,我就是忘记了赋值,所以一开始是空值;还有就是不要忘记给sid和deviceList写set,get方法,这也是很容易忘掉的
5.看一下效果,界面是这样滴
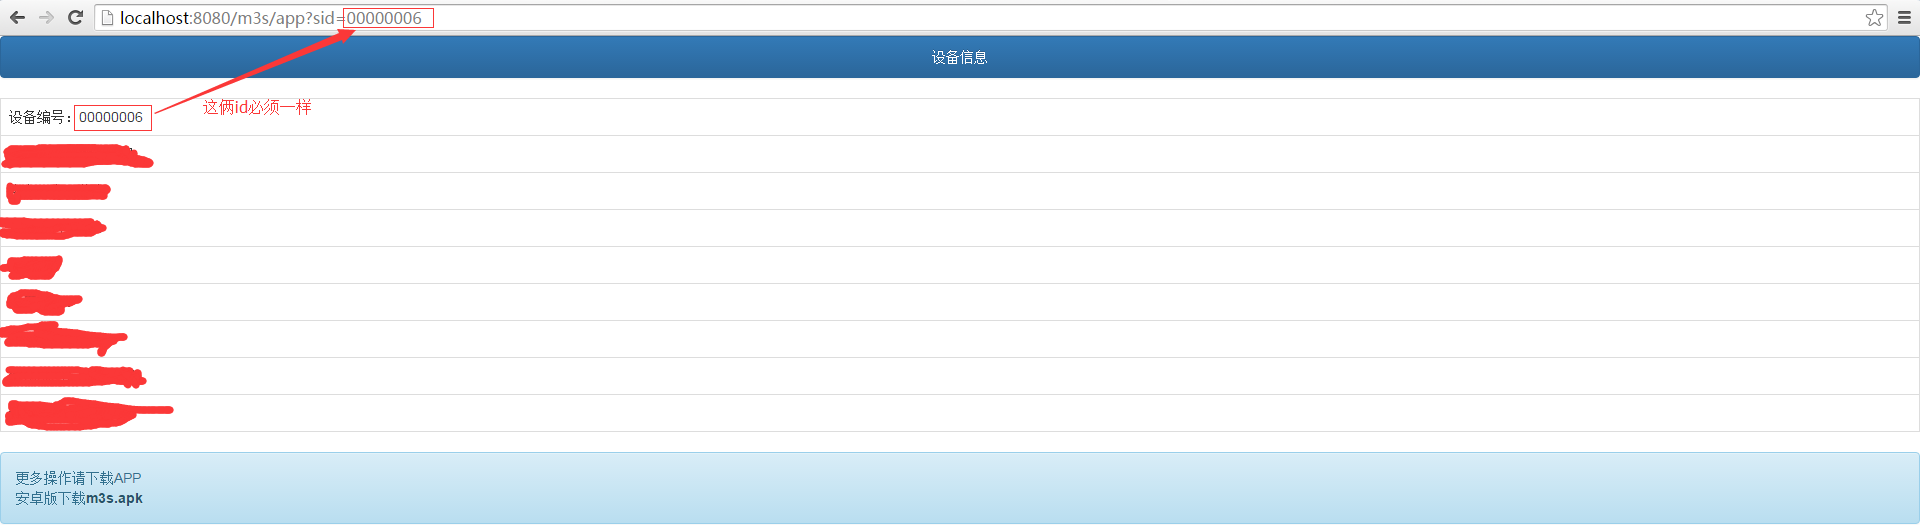
注释:我前台是用bootstrap3写的,所以pc端和app端都支持,兼容效果也不错
有什么不足之处,欢迎大家给我留言,谢谢大家。


 2万+
2万+


 被折叠的 条评论
为什么被折叠?
被折叠的 条评论
为什么被折叠?
 到【灌水乐园】发言


