


Android 进阶16:IntentService 使用及源码解析
版权声明:转载前请留言获得作者许可,转载后标明作者 张拭心 与 原文链接。大家都是成年人,创作不易,感谢您的支持!
- It’s time to start living the life you’ve only imagined.
读完本文你将了解:
在前面两篇文章 源码解读 Android 消息机制( Message MessageQueue Handler Looper) 和 HandlerThread 使用场景及源码解析 中我们了解了 Android 中执行异步任务的两种方式。
本篇文章介绍另外一种:IntentService。
IntentService 简介
public abstract class IntentService extends Service {...}
- 1

- 1
IntentService 是一个抽象类,继承了 Service 。
由于是一个 Service,IntentService 的优先级比较高,在后台不会轻易被系统杀死;它可以接收 Intent 请求,然后在子线程中按顺序执行。
官方文档关于它的介绍:
IntentService 使用工作线程逐一处理所有启动请求。如果你不需要在 Service 中执行并发任务,IntentService 是最好的选择。
IntentService 源码分析
IntentService 源码很短:
public abstract class IntentService extends Service {
    private volatile Looper mServiceLooper;
    private volatile ServiceHandler mServiceHandler;
    private String mName;
    private boolean mRedelivery;

    //内部创建的 Handler
    private final class ServiceHandler extends Handler {
        public ServiceHandler(Looper looper) {
            super(looper);
        }

        @Override
        public void handleMessage(Message msg) {
            //调用这个方法处理数据
            onHandleIntent((Intent)msg.obj);
            //处理完就自尽了
            stopSelf(msg.arg1);
        }
    }

    //子类需要重写的构造函数,参数是服务的名称
    public IntentService(String name) {
        super();
        mName = name;
    }

    //设置当前服务被意外关闭后是否重新
    //如果设置为 true,onStartCommand() 方法将返回 Service.START_REDELIVER_INTENT,这样当
    //当前进程在 onHandleIntent() 方法返回前销毁时,会重启进程,重新使用之前的 Intent 启动这个服务
    //(如果有多个 Intent,只会使用最后的一个)
    //如果设置为 false,onStartCommand() 方法返回 Service.START_NOT_STICKY,当进程销毁后也不重启服务
    public void setIntentRedelivery(boolean enabled) {
        mRedelivery = enabled;
    }

    @Override
    public void onCreate() {
        super.onCreate();
        //创建时启动一个 HandlerThread
        HandlerThread thread = new HandlerThread("IntentService[" + mName + "]");
        thread.start();

        //拿到 HandlerThread 中的 Looper,然后创建一个子线程中的 Handler
        mServiceLooper = thread.getLooper();
        mServiceHandler = new ServiceHandler(mServiceLooper);
    }

    @Override
    public void onStart(@Nullable Intent intent, int startId) {
        //将 intent 和 startId 以消息的形式发送到 Handler
        Message msg = mServiceHandler.obtainMessage();
        msg.arg1 = startId;
        msg.obj = intent;
        mServiceHandler.sendMessage(msg);
    }

    /**
     * You should not override this method for your IntentService. Instead,
     * override {@link #onHandleIntent}, which the system calls when the IntentService
     * receives a start request.
     * @see android.app.Service#onStartCommand
     */
    @Override
    public int onStartCommand(@Nullable Intent intent, int flags, int startId) {
        onStart(intent, startId);
        return mRedelivery ? START_REDELIVER_INTENT : START_NOT_STICKY;
    }

    @Override
    public void onDestroy() {
        mServiceLooper.quit();    //值得学习的,在销毁时退出 Looper
    }

    @Override
    @Nullable
    public IBinder onBind(Intent intent) {
        return null;
    }

    @WorkerThread
    protected abstract void onHandleIntent(@Nullable Intent intent);
}
- 1
- 2
- 3
- 4
- 5
- 6
- 7
- 8
- 9
- 10
- 11
- 12
- 13
- 14
- 15
- 16
- 17
- 18
- 19
- 20
- 21
- 22
- 23
- 24
- 25
- 26
- 27
- 28
- 29
- 30
- 31
- 32
- 33
- 34
- 35
- 36
- 37
- 38
- 39
- 40
- 41
- 42
- 43
- 44
- 45
- 46
- 47
- 48
- 49
- 50
- 51
- 52
- 53
- 54
- 55
- 56
- 57
- 58
- 59
- 60
- 61
- 62
- 63
- 64
- 65
- 66
- 67
- 68
- 69
- 70
- 71
- 72
- 73
- 74
- 75
- 76
- 77
- 78
- 79
- 80
- 81
- 82
- 83
从上述代码可以看到,IntentService 做了以下工作:
- 创建了一个
HandlerThread默认的工作线程 - 使用
HandlerThread的Looper创建了一个Handler,这个Handler执行在子线程 - 在
onStartCommand()中调用onStart(),然后在onStart()中将 intent 和 startId 以消息的形式发送到 Handler - 在
Handler中将消息队列中的Intent按顺序传递给onHandleIntent()方法 - 在处理完所有启动请求后自动停止服务,不需要我们调用
stopSelf()
public void handleMessage(Message msg) {
    onHandleIntent((Intent)msg.obj);
    stopSelf(msg.arg1);
}
- 1
- 2
- 3
- 4
- 1
- 2
- 3
- 4
有同学可能有疑问,在 handleMessage 方法中不是调用了一次 onHandleIntent() 后就调用 stopSelf() 了吗,这不是只能执行一个任务么?
仔细看下可以发现,这个 stopSelf() 方法传递了一个 id,这个 id 是启动服务时 IActivityManager 分配的 id,当我们调用 stopSelf(id) 方法结束服务时,IActivityManager 会对比当前 id 是否为最新启动该服务的 id,如果是就关闭服务。
public final void stopSelf(int startId) {
    if (mActivityManager == null) {
        return;
    }
    try {
        mActivityManager.stopServiceToken(
                new ComponentName(this, mClassName), mToken, startId);
    } catch (RemoteException ex) {
    }
}
- 1
- 2
- 3
- 4
- 5
- 6
- 7
- 8
- 9
- 10
- 1
- 2
- 3
- 4
- 5
- 6
- 7
- 8
- 9
- 10
因此只有当最后一次启动 IntentService 的任务执行完毕才会关闭这个服务。
此外还要注意的是,IntentService 中除了
onHandleIntent方法其他都是运行在主线程的。
IntentService 的使用
通过前面的源码分析,我们可以看到,最终每个任务的处理都会调用 onHandleIntent(),因此使用 IntentService 也很简单,只需实现 onHandleIntent() 方法,在这里执行对应的后台工作即可。
举个例子:
我们写一个使用 IntentService 实现在子线程下载多张 美女图片 的效果。
创建 IntentService 的子类
/**
 * Description:
 * <br> 使用 IntentService 实现下载
 * <p>
 * <br> Created by shixinzhang on 17/6/8.
 * <p>
 * <br> Email: shixinzhang2016@gmail.com
 * <p>
 * <a  href="https://about.me/shixinzhang">About me</a>
 */

public class DownloadService extends IntentService {
    private static final String TAG = "DownloadService";
    public static final String DOWNLOAD_URL = "down_load_url";
    public static final int WHAT_DOWNLOAD_FINISHED = 1;
    public static final int WHAT_DOWNLOAD_STARTED = 2;

    public DownloadService() {
        super(TAG);
    }

    private static Handler mUIHandler;

    public static void setUIHandler(final Handler UIHandler) {
        mUIHandler = UIHandler;
    }

    /**
     * 这个方法运行在子线程
     *
     * @param intent
     */
    @Override
    protected void onHandleIntent(final Intent intent) {
        String url = intent.getStringExtra(DOWNLOAD_URL);
        if (!TextUtils.isEmpty(url)) {
            sendMessageToMainThread(WHAT_DOWNLOAD_STARTED, "\n " + DateUtils.getCurrentTime() + " 开始下载任务:\n" + url);
            try {
                Bitmap bitmap = downloadUrlToBitmap(url);
                SystemClock.sleep(1000);    //延迟一秒发送消息
                sendMessageToMainThread(WHAT_DOWNLOAD_FINISHED, bitmap);
            } catch (Exception e) {
                e.printStackTrace();
            }
        }
    }

    /**
     * 发送消息到主线程
     *
     * @param id
     * @param o
     */
    private void sendMessageToMainThread(final int id, final Object o) {
        if (mUIHandler != null) {
            mUIHandler.sendMessage(mUIHandler.obtainMessage(id, o));
        }
    }

    /**
     * 下载图片
     *
     * @param url
     * @return
     * @throws Exception
     */
    private Bitmap downloadUrlToBitmap(String url) throws Exception {
        HttpURLConnection urlConnection = (HttpURLConnection) new URL(url).openConnection();
        BufferedInputStream in = new BufferedInputStream(urlConnection.getInputStream(), 8 * 1024);
        Bitmap bitmap = BitmapFactory.decodeStream(in);
        urlConnection.disconnect();
        in.close();
        return bitmap;
    }
}
- 1
- 2
- 3
- 4
- 5
- 6
- 7
- 8
- 9
- 10
- 11
- 12
- 13
- 14
- 15
- 16
- 17
- 18
- 19
- 20
- 21
- 22
- 23
- 24
- 25
- 26
- 27
- 28
- 29
- 30
- 31
- 32
- 33
- 34
- 35
- 36
- 37
- 38
- 39
- 40
- 41
- 42
- 43
- 44
- 45
- 46
- 47
- 48
- 49
- 50
- 51
- 52
- 53
- 54
- 55
- 56
- 57
- 58
- 59
- 60
- 61
- 62
- 63
- 64
- 65
- 66
- 67
- 68
- 69
- 70
- 71
- 72
- 73
- 74
- 75
在上面的代码中,我们做了以下几件事:
- 在
onHandleIntent()中接收任务,开始下载,同时将状态返回给主线程 - 下载完成后将得到的 Bitmap 通过 Handler 发送到主线程
为了界面上有明显效果,设置了一定延时。
IntentService 也是 Service,别忘了在 AndroidManifest 中注册!
布局界面
<LinearLayout xmlns:android="http://schemas.android.com/apk/res/android"
              android:layout_width="match_parent"
              android:layout_height="match_parent"
              android:gravity="center_horizontal"
              android:orientation="vertical"
              android:padding="8dp">

    <ImageView
        android:id="@+id/iv_display"
        android:layout_width="match_parent"
        android:layout_height="0dp"
        android:layout_weight="1"/>

    <TextView
        android:id="@+id/tv_status"
        android:layout_width="match_parent"
        android:layout_height="250dp"
        android:padding="8dp"
        android:text="状态信息:"/>

    <Button
        android:id="@+id/btn_download"
        android:layout_width="wrap_content"
        android:layout_height="wrap_content"
        android:text="开始下载"/>
</LinearLayout>
- 1
- 2
- 3
- 4
- 5
- 6
- 7
- 8
- 9
- 10
- 11
- 12
- 13
- 14
- 15
- 16
- 17
- 18
- 19
- 20
- 21
- 22
- 23
- 24
- 25
- 26
- 1
- 2
- 3
- 4
- 5
- 6
- 7
- 8
- 9
- 10
- 11
- 12
- 13
- 14
- 15
- 16
- 17
- 18
- 19
- 20
- 21
- 22
- 23
- 24
- 25
- 26
界面上有一个开始下载按钮,一个显示下载状态的 TextView,一个展示图片的 ImageView.
调用方代码
/**
 * Description:
 * <br> IntentService 实例
 * <p>
 * <br> Created by shixinzhang on 17/6/9.
 * <p>
 * <br> Email: shixinzhang2016@gmail.com
 * <p>
 * <a  href="https://about.me/shixinzhang">About me</a>
 */

public class IntentServiceActivity extends AppCompatActivity implements Handler.Callback {

    @BindView(R.id.iv_display)
    ImageView mIvDisplay;
    @BindView(R.id.btn_download)
    Button mBtnDownload;
    @BindView(R.id.tv_status)
    TextView mTvStatus;

    private List<String> urlList = Arrays.asList("https://ws1.sinaimg.cn/large/610dc034ly1fgepc1lpvfj20u011i0wv.jpg",
            "https://ws1.sinaimg.cn/large/d23c7564ly1fg6qckyqxkj20u00zmaf1.jpg",
            "https://ws1.sinaimg.cn/large/610dc034ly1fgchgnfn7dj20u00uvgnj.jpg");    //美女图片地址
    int mFinishCount;   //完成的任务个数

    @Override
    protected void onCreate(@Nullable final Bundle savedInstanceState) {
        super.onCreate(savedInstanceState);
        setContentView(R.layout.activity_intent_service);
        ButterKnife.bind(this);
        DownloadService.setUIHandler(new Handler(this));
    }

    @OnClick(R.id.btn_download)
    public void downloadImage() {
        Intent intent = new Intent(this, DownloadService.class);

        for (String url : urlList) {
            intent.putExtra(DownloadService.DOWNLOAD_URL, url);
            startService(intent);
        }
        mBtnDownload.setEnabled(false);
    }


    @Override
    public boolean handleMessage(final Message msg) {
        if (msg != null) {
            switch (msg.what) {
                case DownloadService.WHAT_DOWNLOAD_FINISHED:
                    mIvDisplay.setImageBitmap((Bitmap) msg.obj);
                    mBtnDownload.setText("完成 " + (++mFinishCount) + "个任务");
                    break;
                case DownloadService.WHAT_DOWNLOAD_STARTED:
                    mTvStatus.setText(mTvStatus.getText() + (String) msg.obj);
                    break;
            }
        }
        return true;
    }
}
- 1
- 2
- 3
- 4
- 5
- 6
- 7
- 8
- 9
- 10
- 11
- 12
- 13
- 14
- 15
- 16
- 17
- 18
- 19
- 20
- 21
- 22
- 23
- 24
- 25
- 26
- 27
- 28
- 29
- 30
- 31
- 32
- 33
- 34
- 35
- 36
- 37
- 38
- 39
- 40
- 41
- 42
- 43
- 44
- 45
- 46
- 47
- 48
- 49
- 50
- 51
- 52
- 53
- 54
- 55
- 56
- 57
- 58
- 59
- 60
- 61
- 1
- 2
- 3
- 4
- 5
- 6
- 7
- 8
- 9
- 10
- 11
- 12
- 13
- 14
- 15
- 16
- 17
- 18
- 19
- 20
- 21
- 22
- 23
- 24
- 25
- 26
- 27
- 28
- 29
- 30
- 31
- 32
- 33
- 34
- 35
- 36
- 37
- 38
- 39
- 40
- 41
- 42
- 43
- 44
- 45
- 46
- 47
- 48
- 49
- 50
- 51
- 52
- 53
- 54
- 55
- 56
- 57
- 58
- 59
- 60
- 61
Activity 中做了以下几件事:
- 设置 UI 线程的 Handler 给 IntentService
- 使用
startService(intent)启动 IntentService 执行图片下载任务 - 在 Handler 的
handleMessage中根据消息类型进行相应处理
可以看到,调用方的代码和上一篇使用 HandlerThread 的方法很相似。
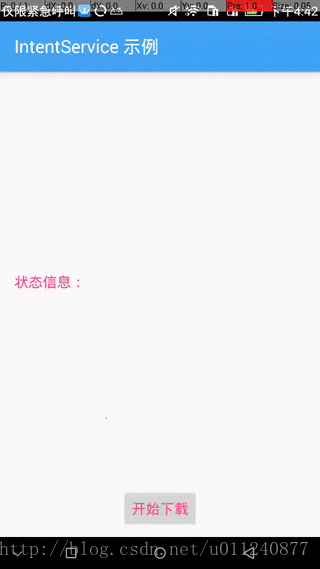
运行效果
总结
本篇文章介绍了 IntentService 的使用和源码。
在第一次启动 IntentService 后,IntentService 仍然可以接受新的请求,接受到的新的请求被放入了工作队列中,等待被串行执行。
使用 IntentService 显著简化了启动服务的实现,如果您决定还重写其他回调方法(如 onCreate()、onStartCommand() 或 onDestroy()),请确保调用超类实现,以便 IntentService 能够妥善处理工作线程的生命周期。
由于大多数启动服务都不必同时处理多个请求(实际上,这种多线程情况可能很危险),因此使用 IntentService 类实现服务也许是最好的选择。
一句话总结 IntentService:
- 优先级比较高的、用于串行执行异步任务、会自尽的 Service。
代码地址
Thanks
《android 开发艺术探索》
https://developer.android.com/guide/components/services.html#ExtendingIntentService
http://rainbow702.iteye.com/blog/1143286
http://blog.csdn.net/javazejian/article/details/52426425


 2955
2955


 被折叠的 条评论
为什么被折叠?
被折叠的 条评论
为什么被折叠?
 到【灌水乐园】发言


