


zabbix监控配置流程详解
- 1.添加主机/主机组
- 2.添加监控项
手动添加
模板添加 - 3添加触发器trigger
- 4.定义媒介(告警通知的方式)
- 5.配置动作 (告知、处理)
- 6手动触发并验证
环境
| Linux系统版本 | zabbix版本 | 服务类型 | 安装功能 | IP地址 |
| centos-8 | zabbix-6.4 | 客户端(被监控) | agent | 192.168.179.136 |
关闭防火墙和selinux、创建zabbix用户
关闭防火墙
[root@host1 ~]# systemctl disable --now firewalld.service
Removed /etc/systemd/system/multi-user.target.wants/firewalld.service.
Removed /etc/systemd/system/dbus-org.fedoraproject.FirewallD1.service.关闭selinux
[root@host1 ~]# setenforce 0
[root@host1 ~]# vim /etc/selinux/config
[root@host1 ~]# cat /etc/selinux/config# This file controls the state of SELinux on the system.
# SELINUX= can take one of these three values:
# enforcing - SELinux security policy is enforced.
# permissive - SELinux prints warnings instead of enforcing.
# disabled - No SELinux policy is loaded.
SELINUX=disabled
# SELINUXTYPE= can take one of these three values:
# targeted - Targeted processes are protected,
# minimum - Modification of targeted policy. Only selected processes are protected.
# mls - Multi Level Security protection.
SELINUXTYPE=targeted创建zabbix用户
[root@host1 ~]# useradd -r -M -s /sbin/nologin zabbix
[root@host1 ~]# id zabbix
uid=994(zabbix) gid=991(zabbix) groups=991(zabbix)
安装依赖包且安装zabbix包
[root@host1 ~]# yum -y install vim wget make gcc gcc-c++ pcre-devel --allowerasing
[root@host1 ~]# wget https://cdn.zabbix.com/zabbix/sources/stable/6.4/zabbix-6.4.6.tar.gz
[root@host1 ~]# tar -xf zabbix-6.4.6.tar.gz
[root@host1 ~]# ls
anaconda-ks.cfg zabbix-6.4.6 zabbix-6.4.6.tar.gz
源码编译安装zabbix客户端
[root@host1 ~]# cd zabbix-6.4.6
[root@host1 zabbix-6.4.6]# ./configure --enable-agent.....
IPv6 support: no
cmocka support: noyaml support: no
***********************************************************
* Now run 'make install' *
* *
* Thank you for using Zabbix! *
* <http://www.zabbix.com> *
***********************************************************[root@host1 zabbix-6.4.6]# make install
配置客户端
[root@host1 ~]# cd /usr/local/etc/
[root@host1 etc]# ls
zabbix_agentd.conf zabbix_agentd.conf.d
[root@host1 etc]# vim zabbix_agentd.confServer=192.168.139.135
ServerActive=192168.139.135
Hostname=host1(全局唯一)
设置开机自启
配置服务的配置文件
[root@host1 ~]# vim /usr/lib/systemd/system/zabbix_agentd.service
[Unit]
Description=zabbix agentd daemon
After=network.targe[Service]
Type=forking
ExecStart=/usr/local/sbin/zabbix_agentd
ExecStop=pkill zabbix_agentd
ExecReload=/bin/kill -HUP \$MAINPID[Install]
WantedBy=multi-user.target
设置开机自启[root@host1 ~]# systemctl daemon-reload
[root@host1 ~]# systemctl start zabbix_agentd.service
[root@host1 ~]# systemctl enable zabbix_agentd.service
Created symlink /etc/systemd/system/multi-user.target.wants/zabbix_agentd.service → /usr/lib/systemd/system/zabbix_agentd.service.
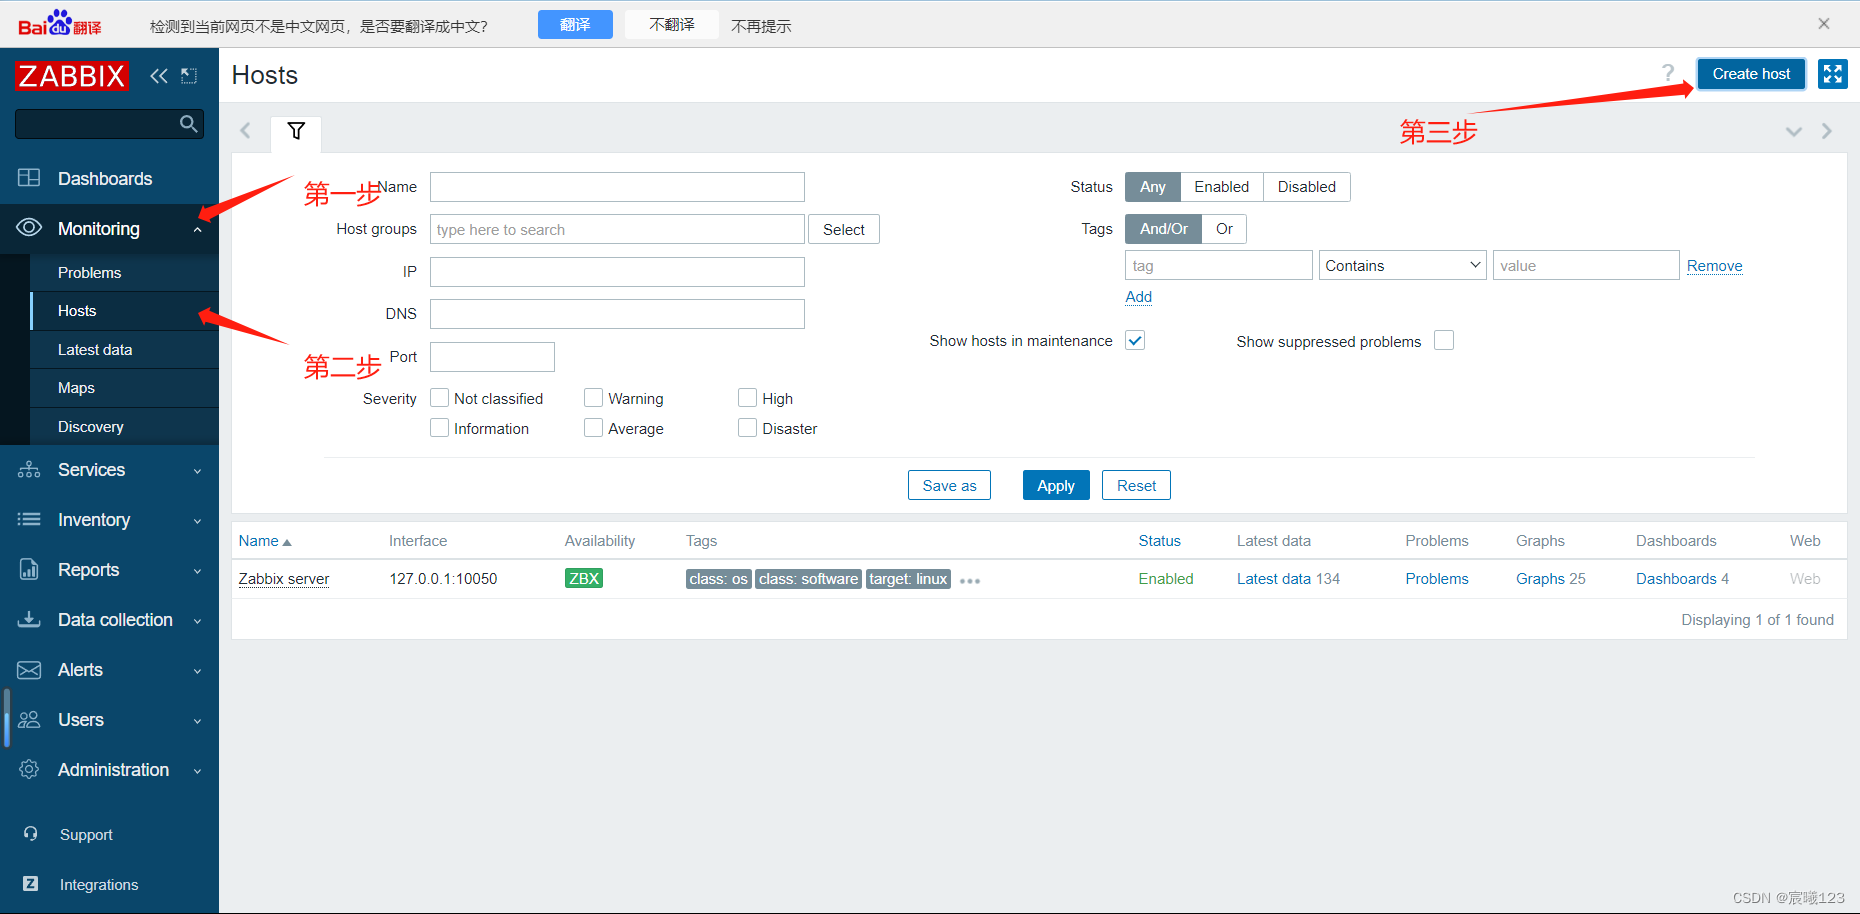
添加要监控主机
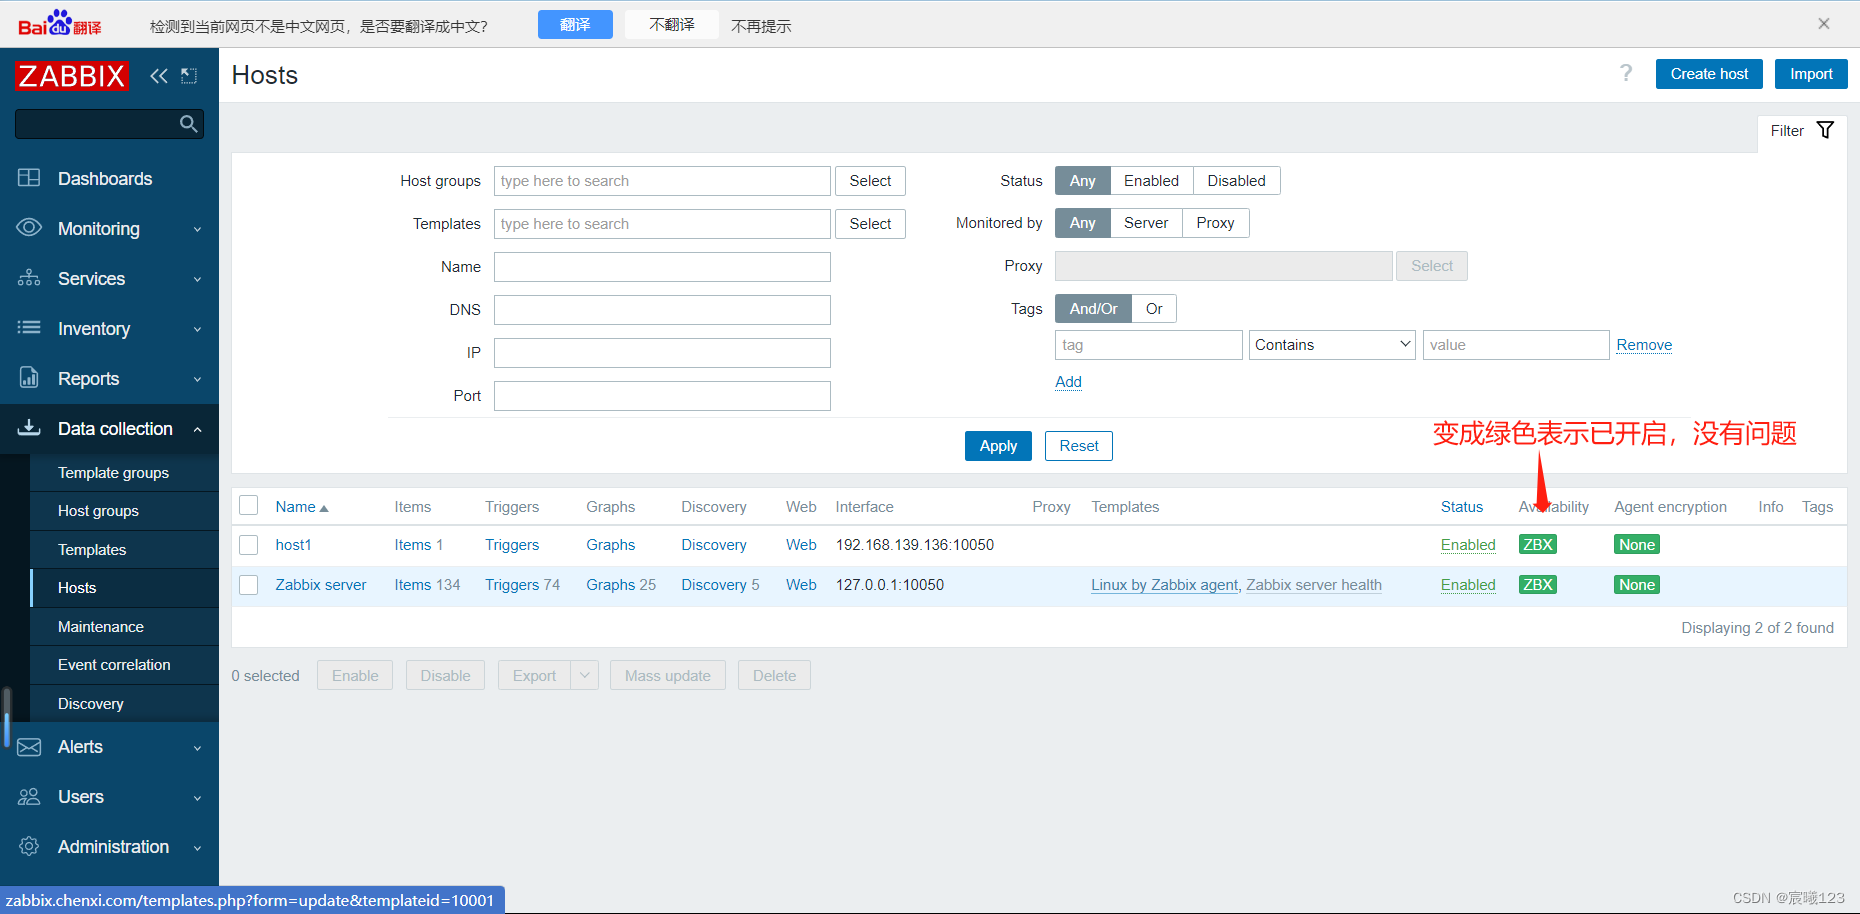
添加主机
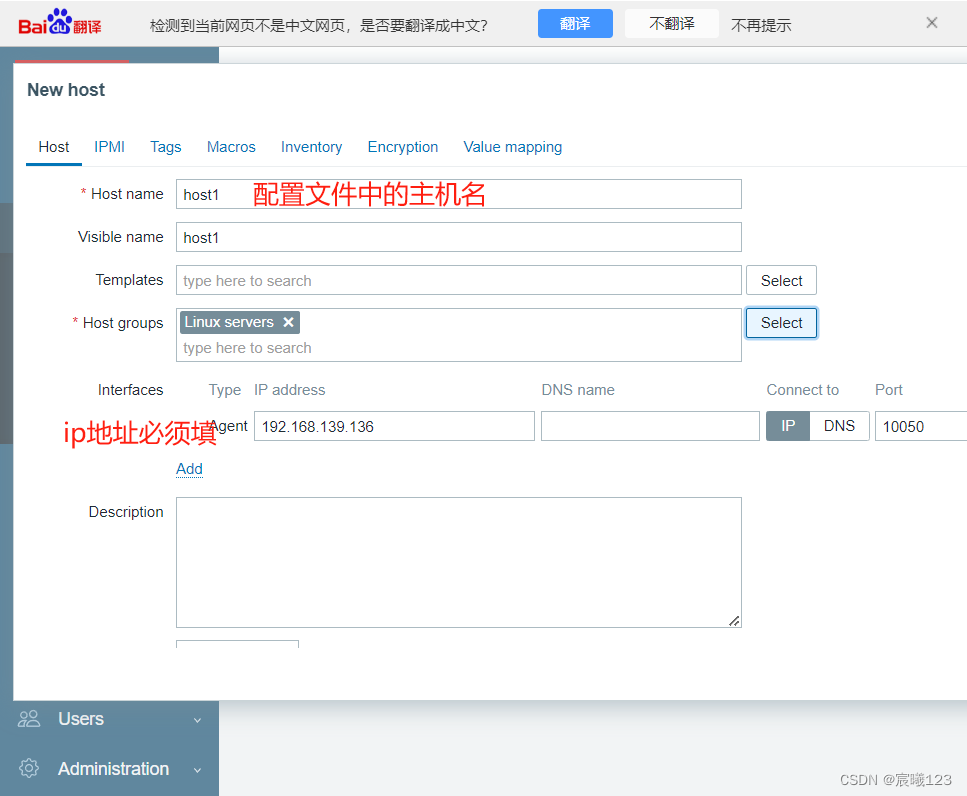
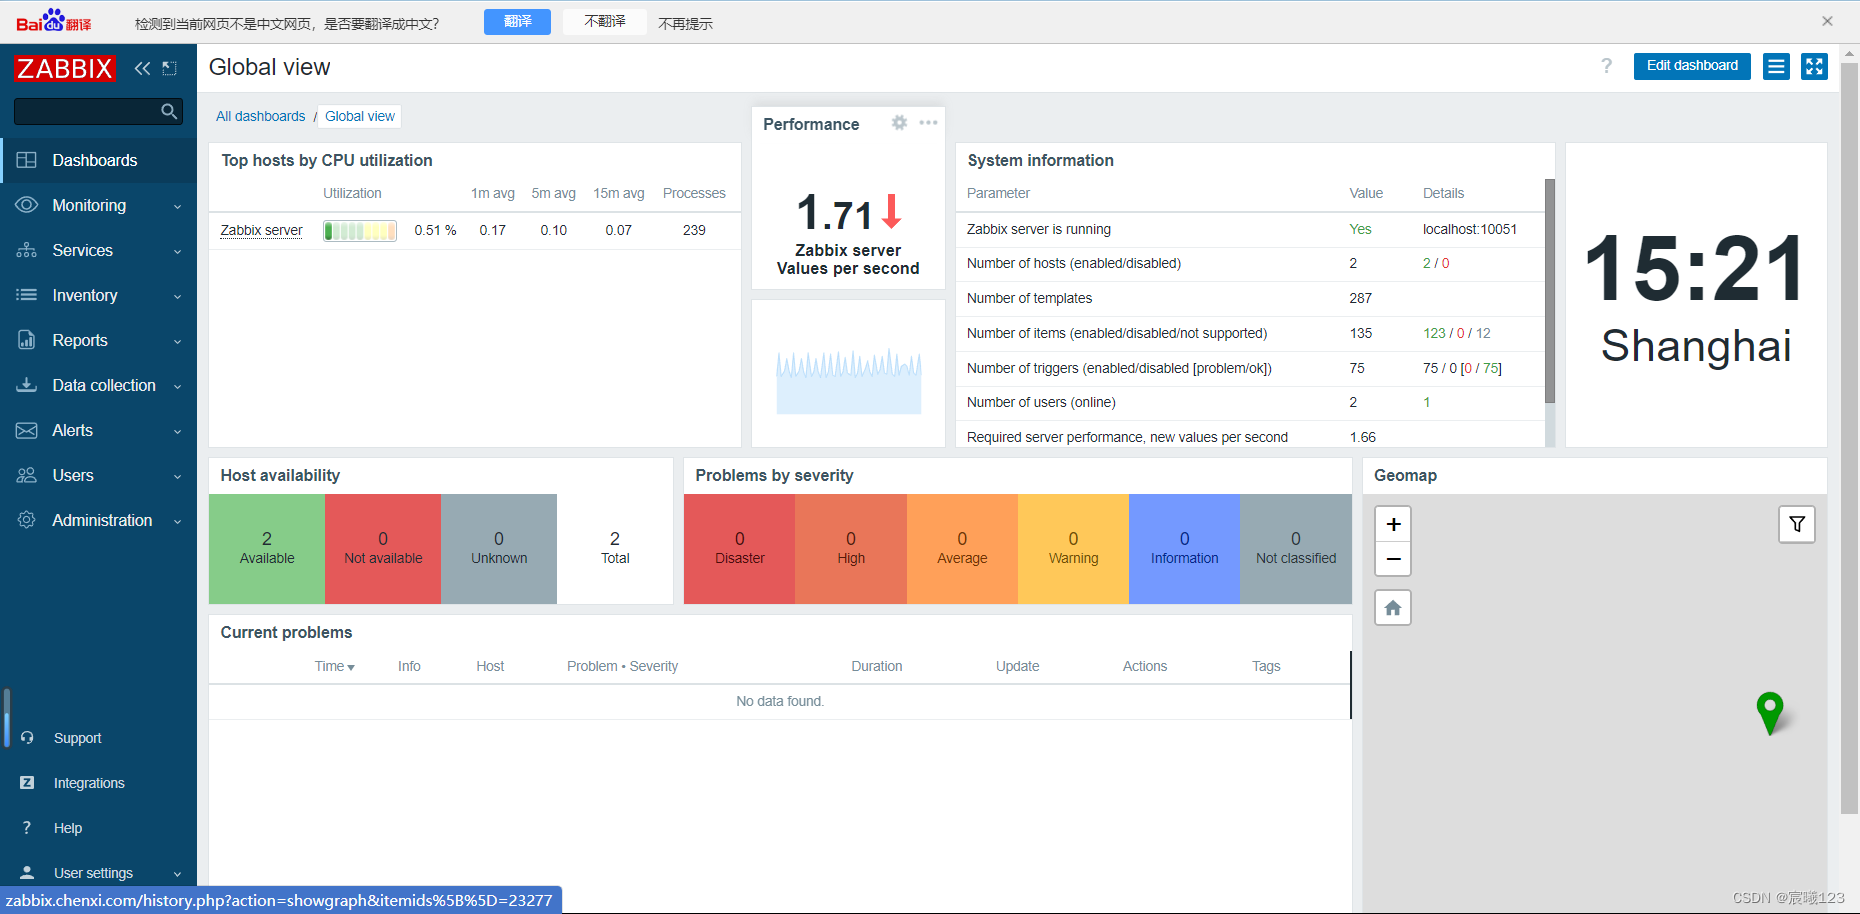
然后点击添加,然后显示的是此页面
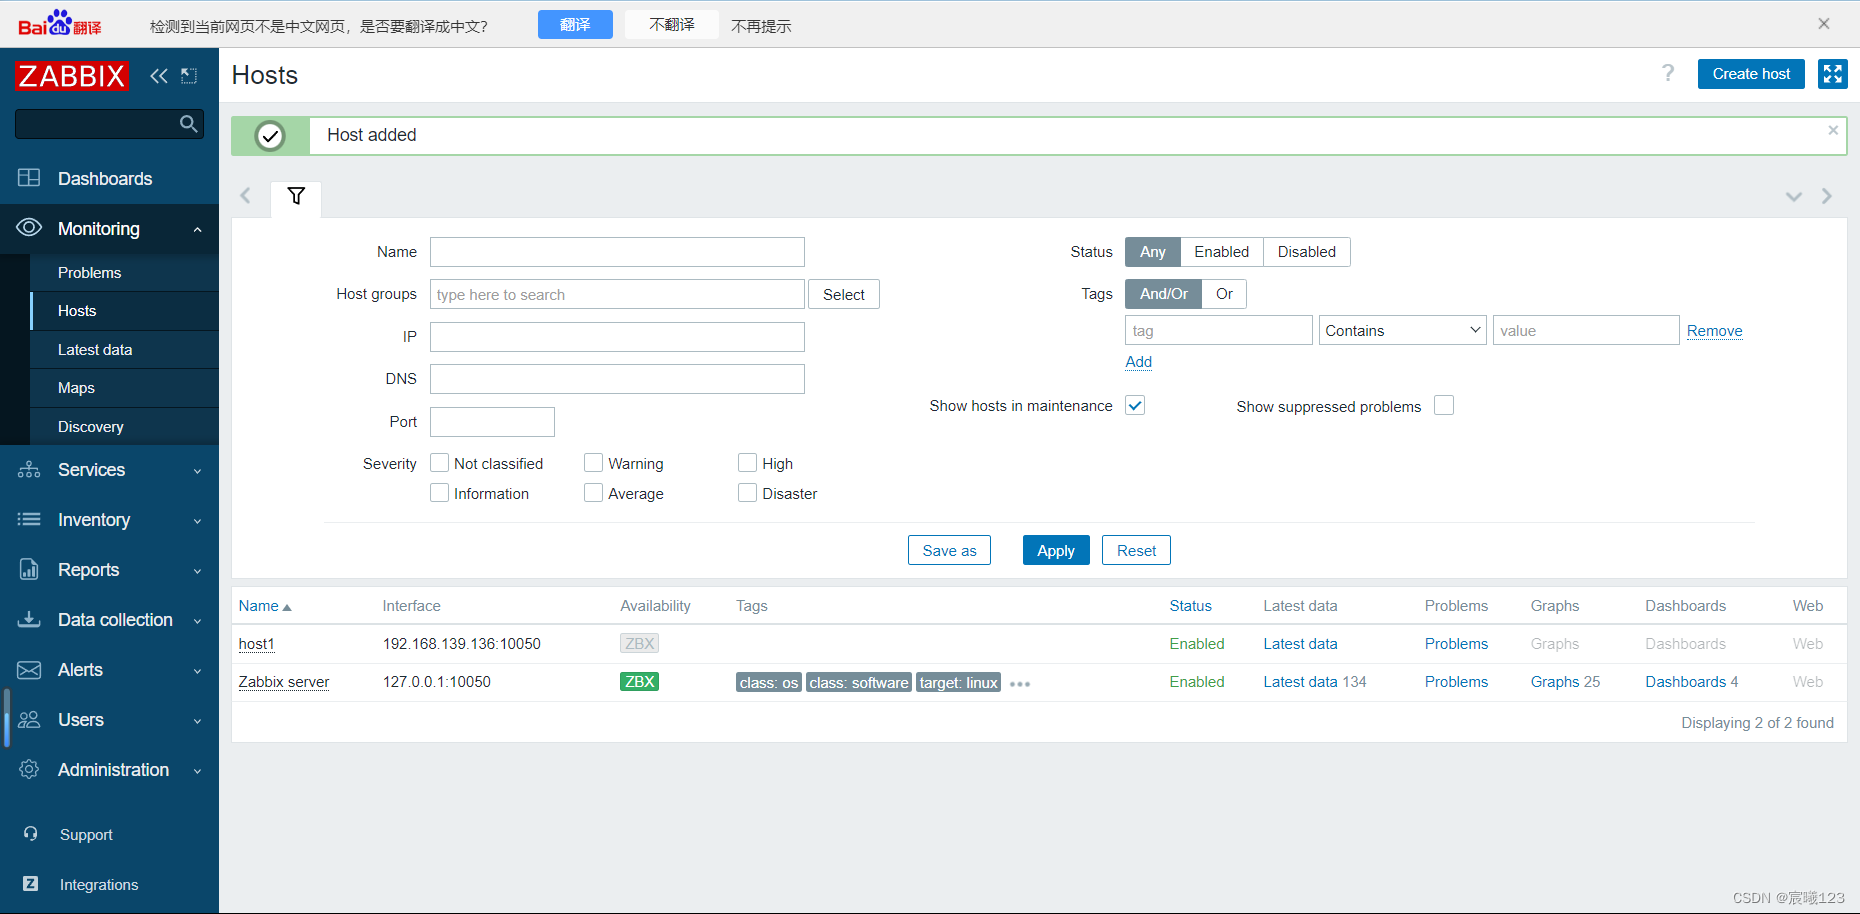
ZBX是灰色的是因为没有监控项
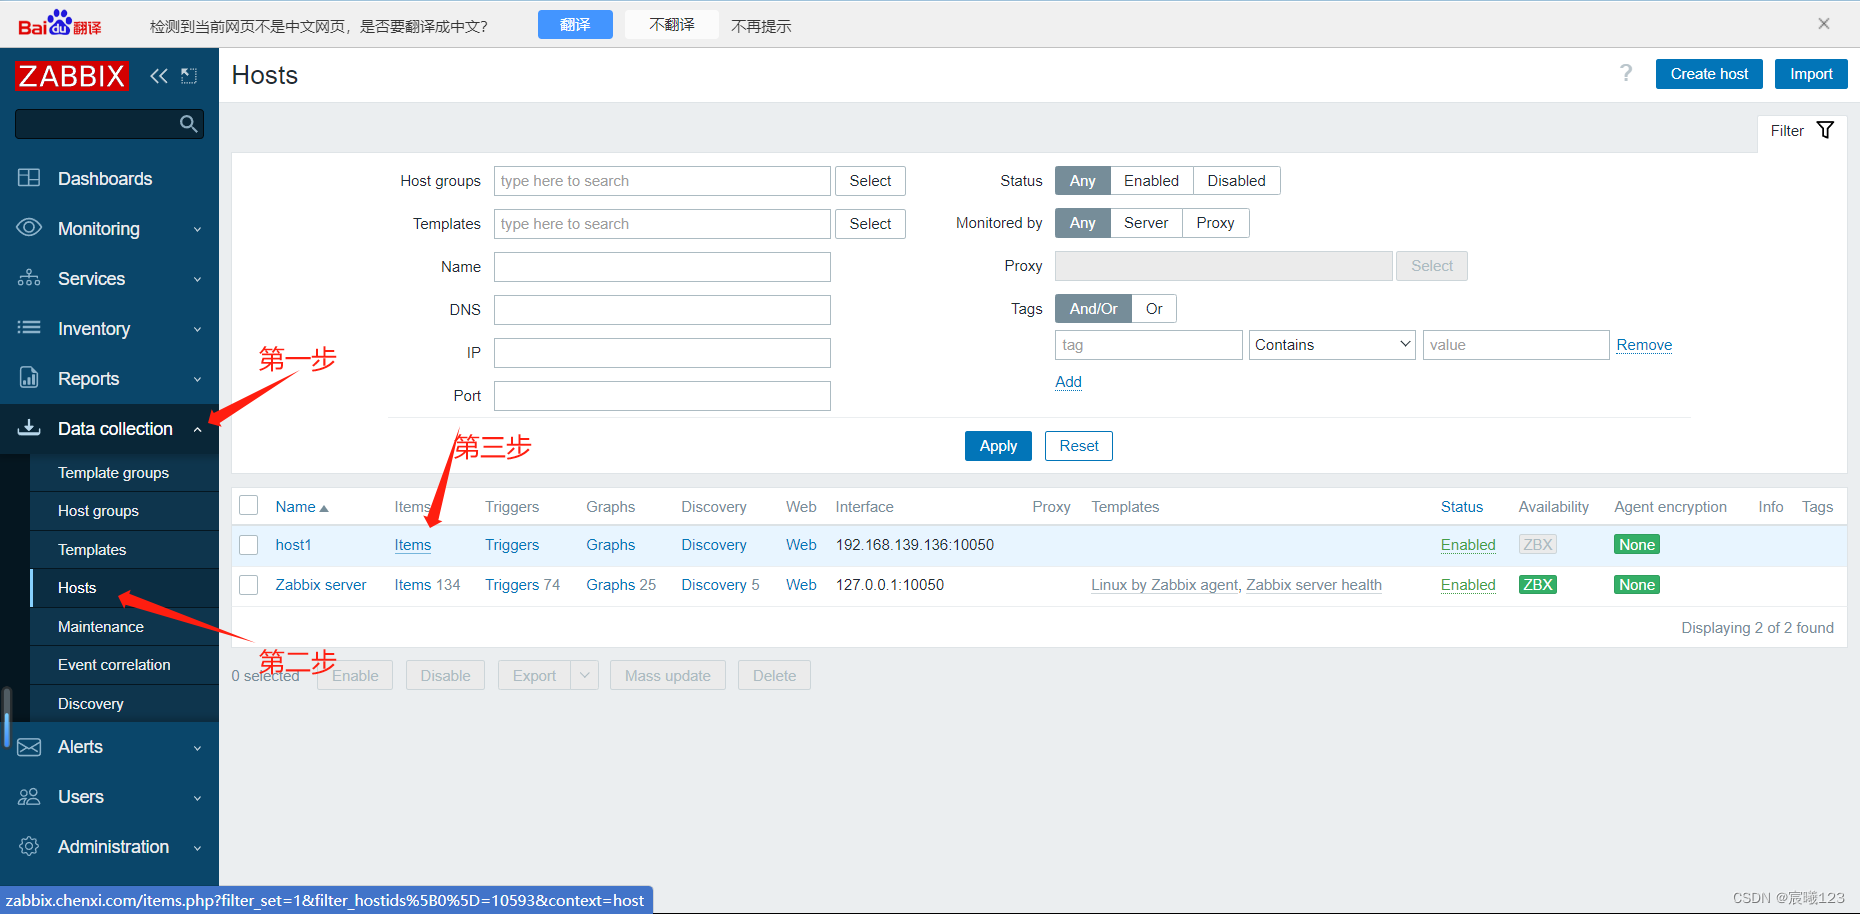
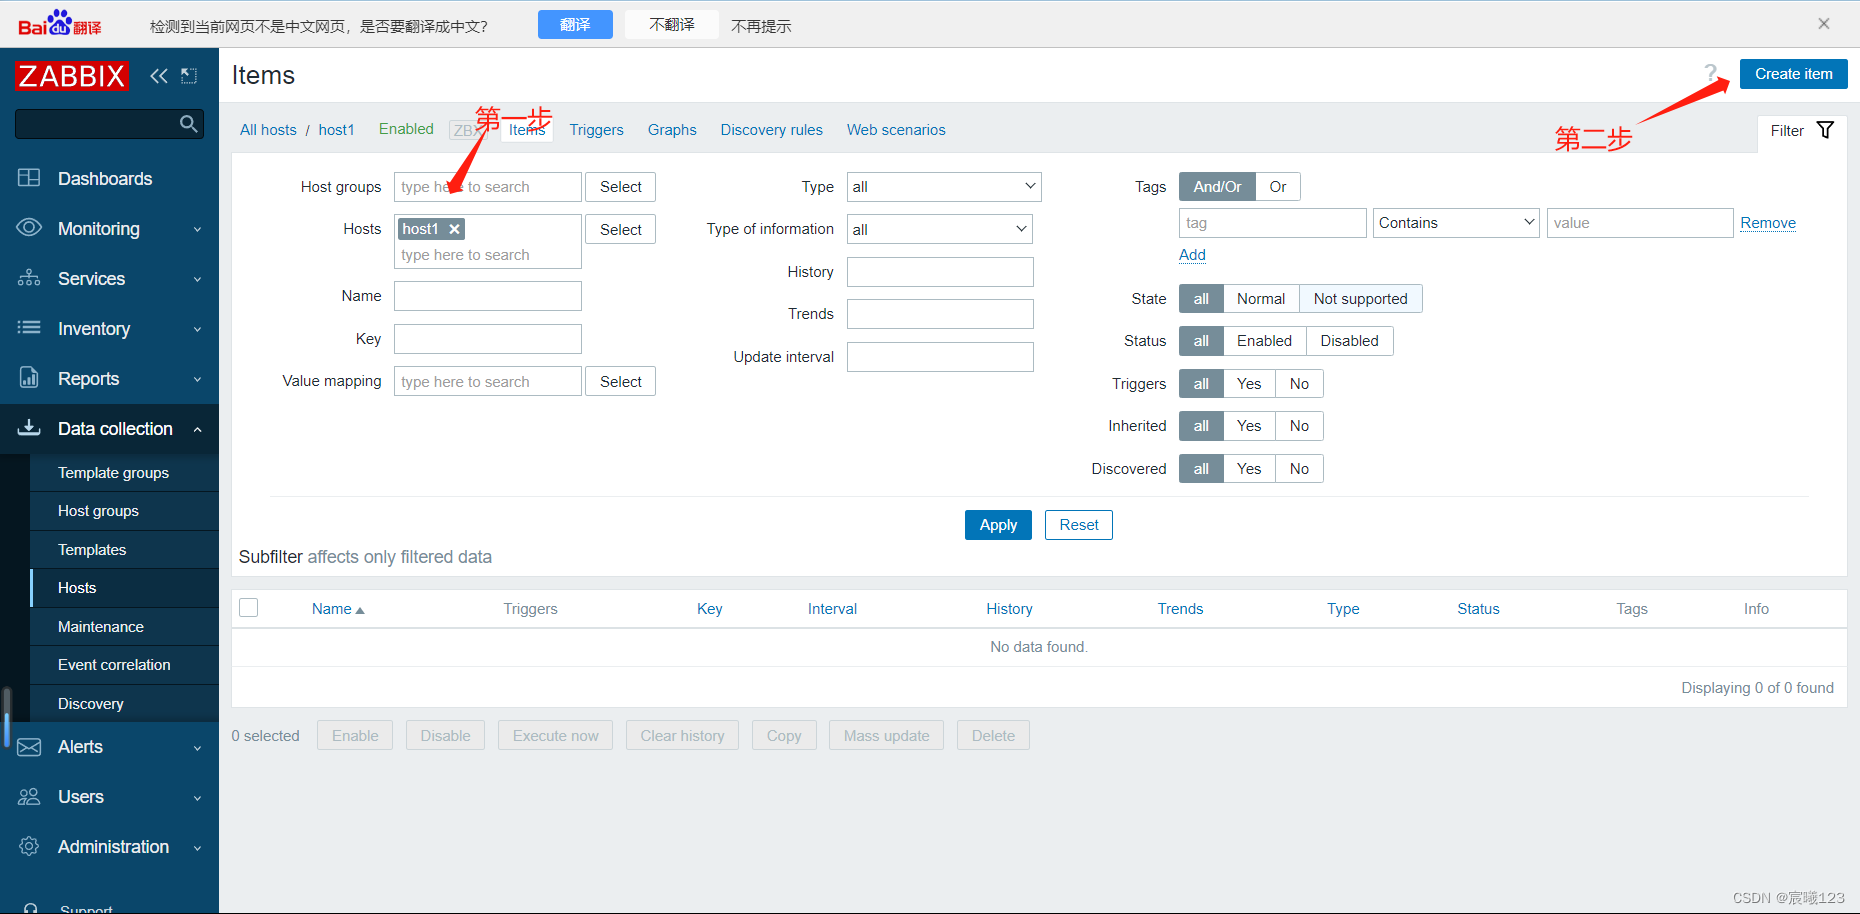
添加完成后则需要去创建监控项
然后在被监控主机创建一个文件,然后监控这个文件
[root@zabbix ~]# echo "host" >> /tmp/123
[root@zabbix ~]# cat /tmp/123
host
在主页给这台主机手动配置一个监控项,通过对比这个文件的sum值,判断文件是否发生改变
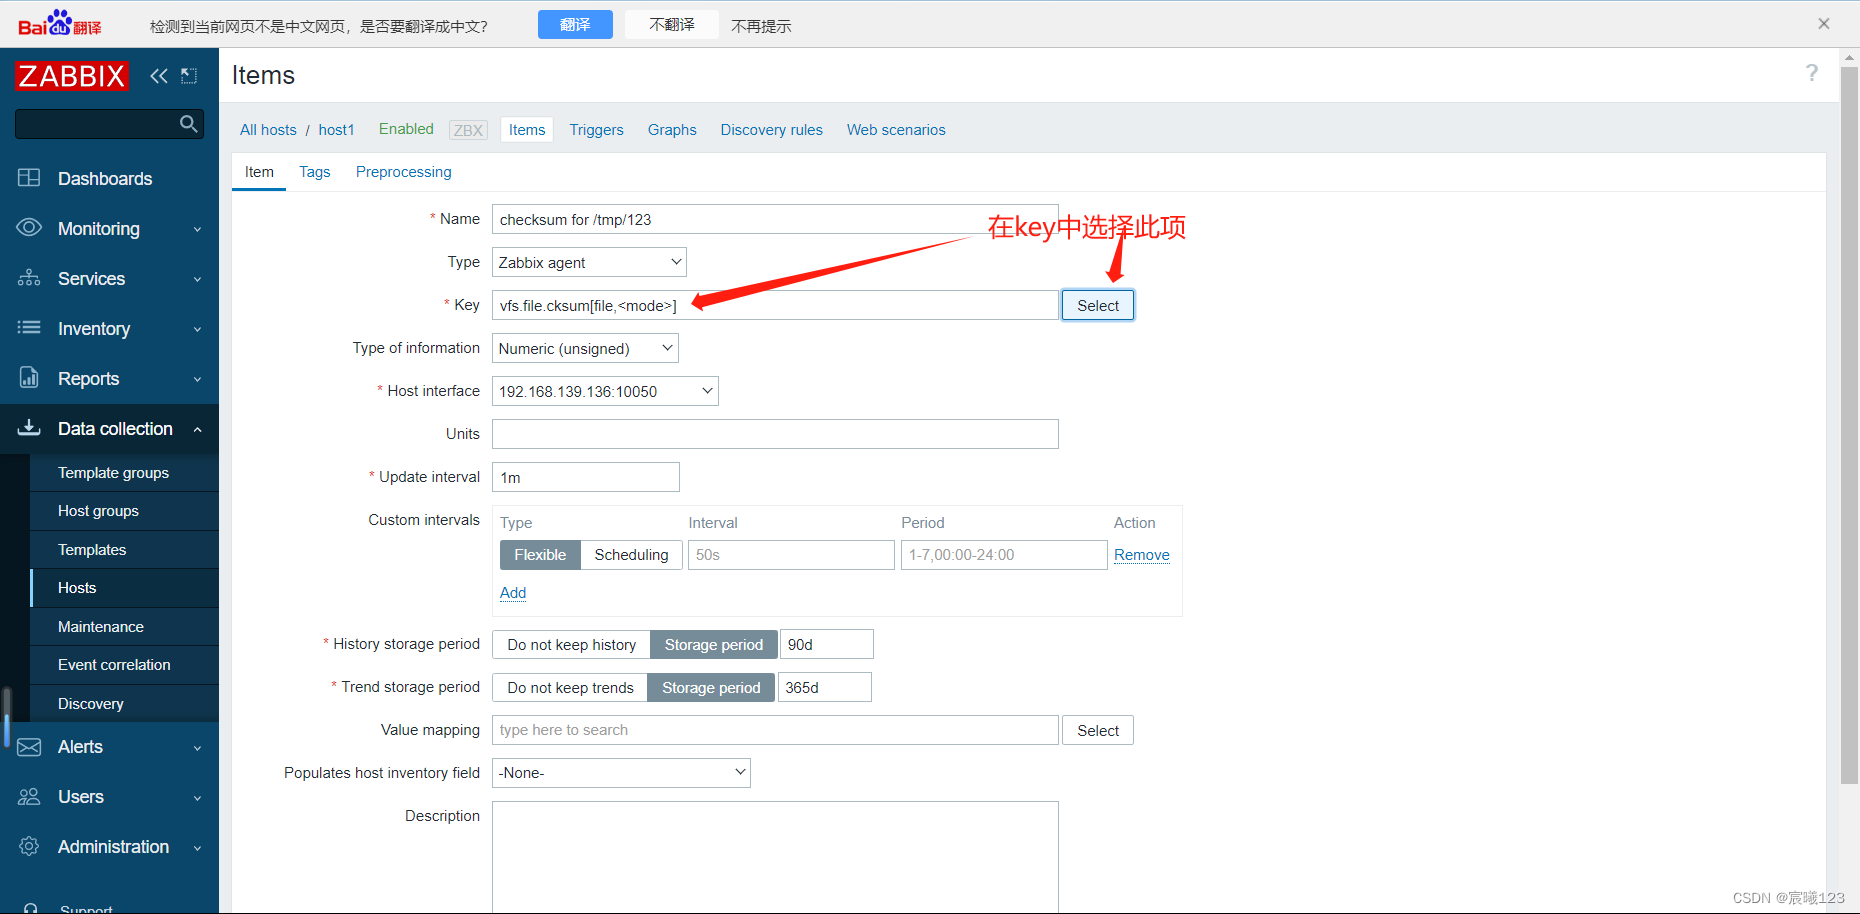
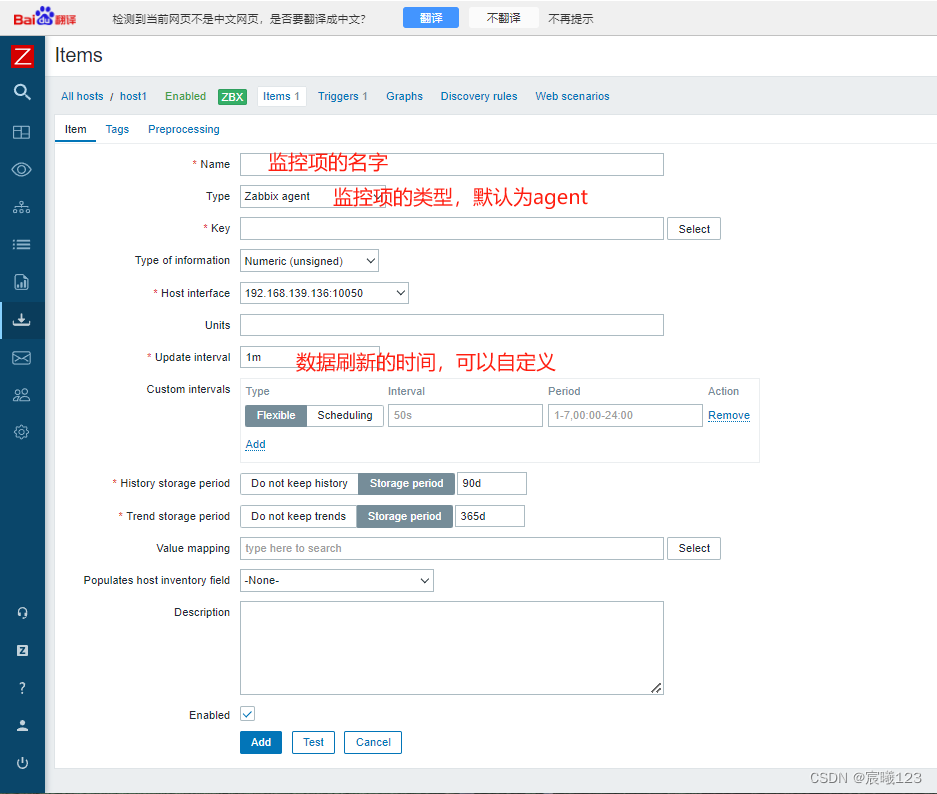
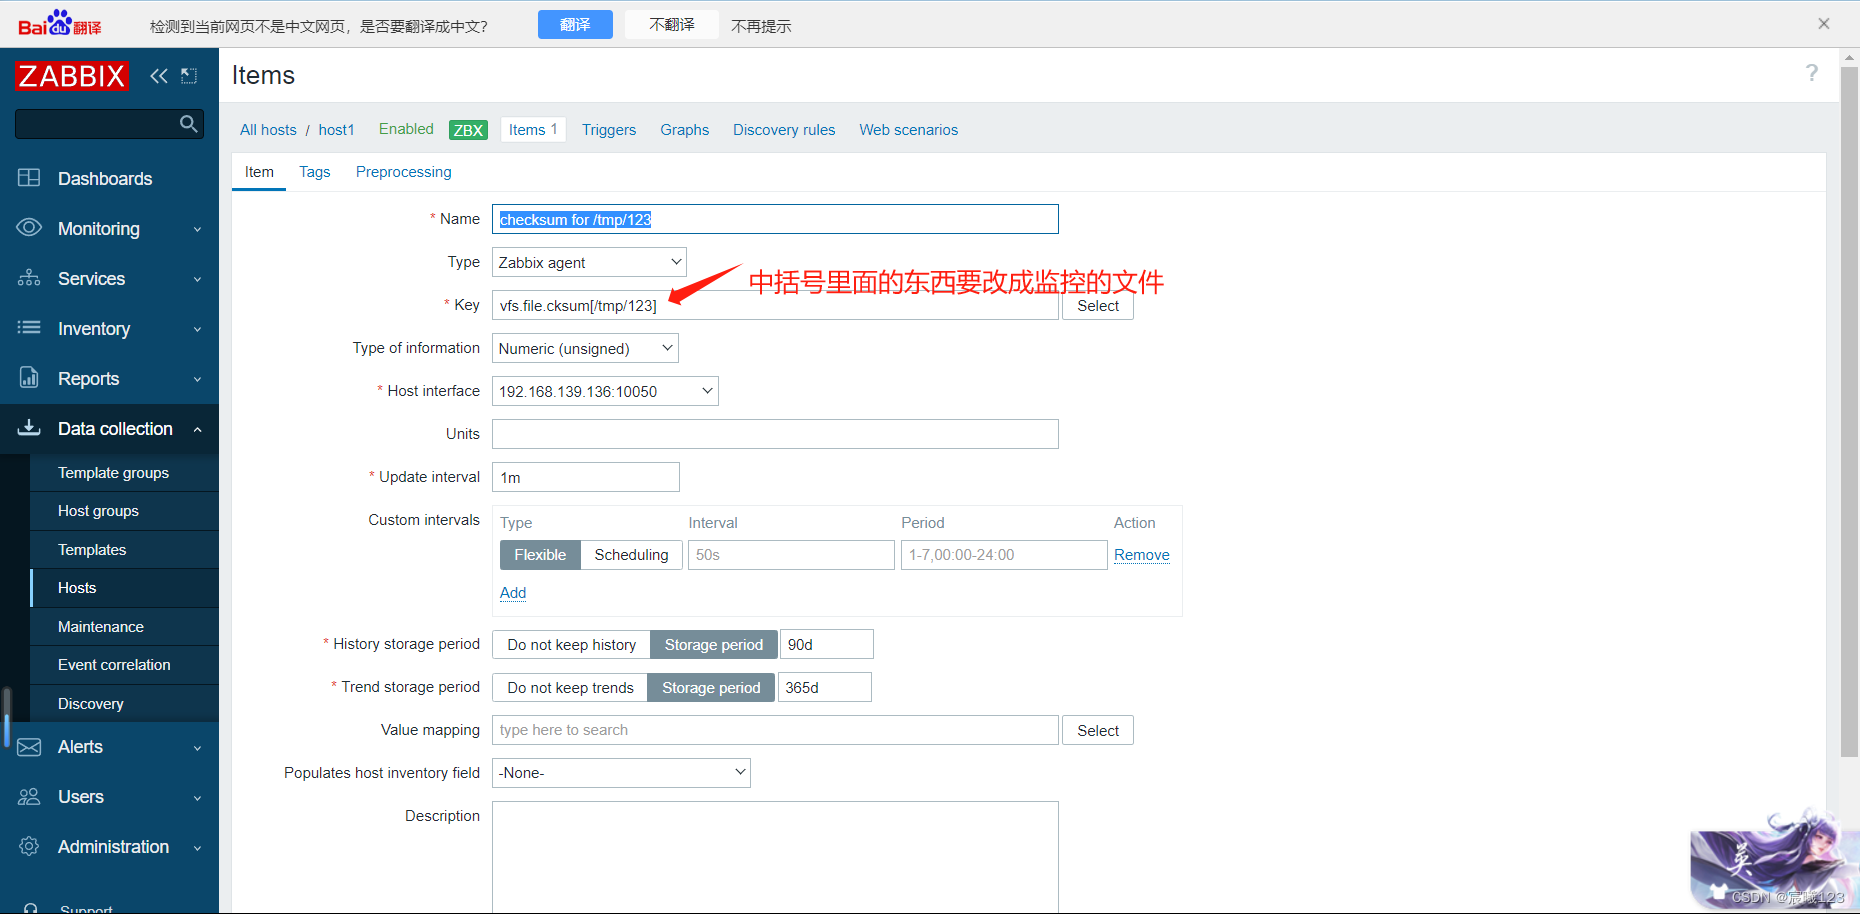
然后选择添加
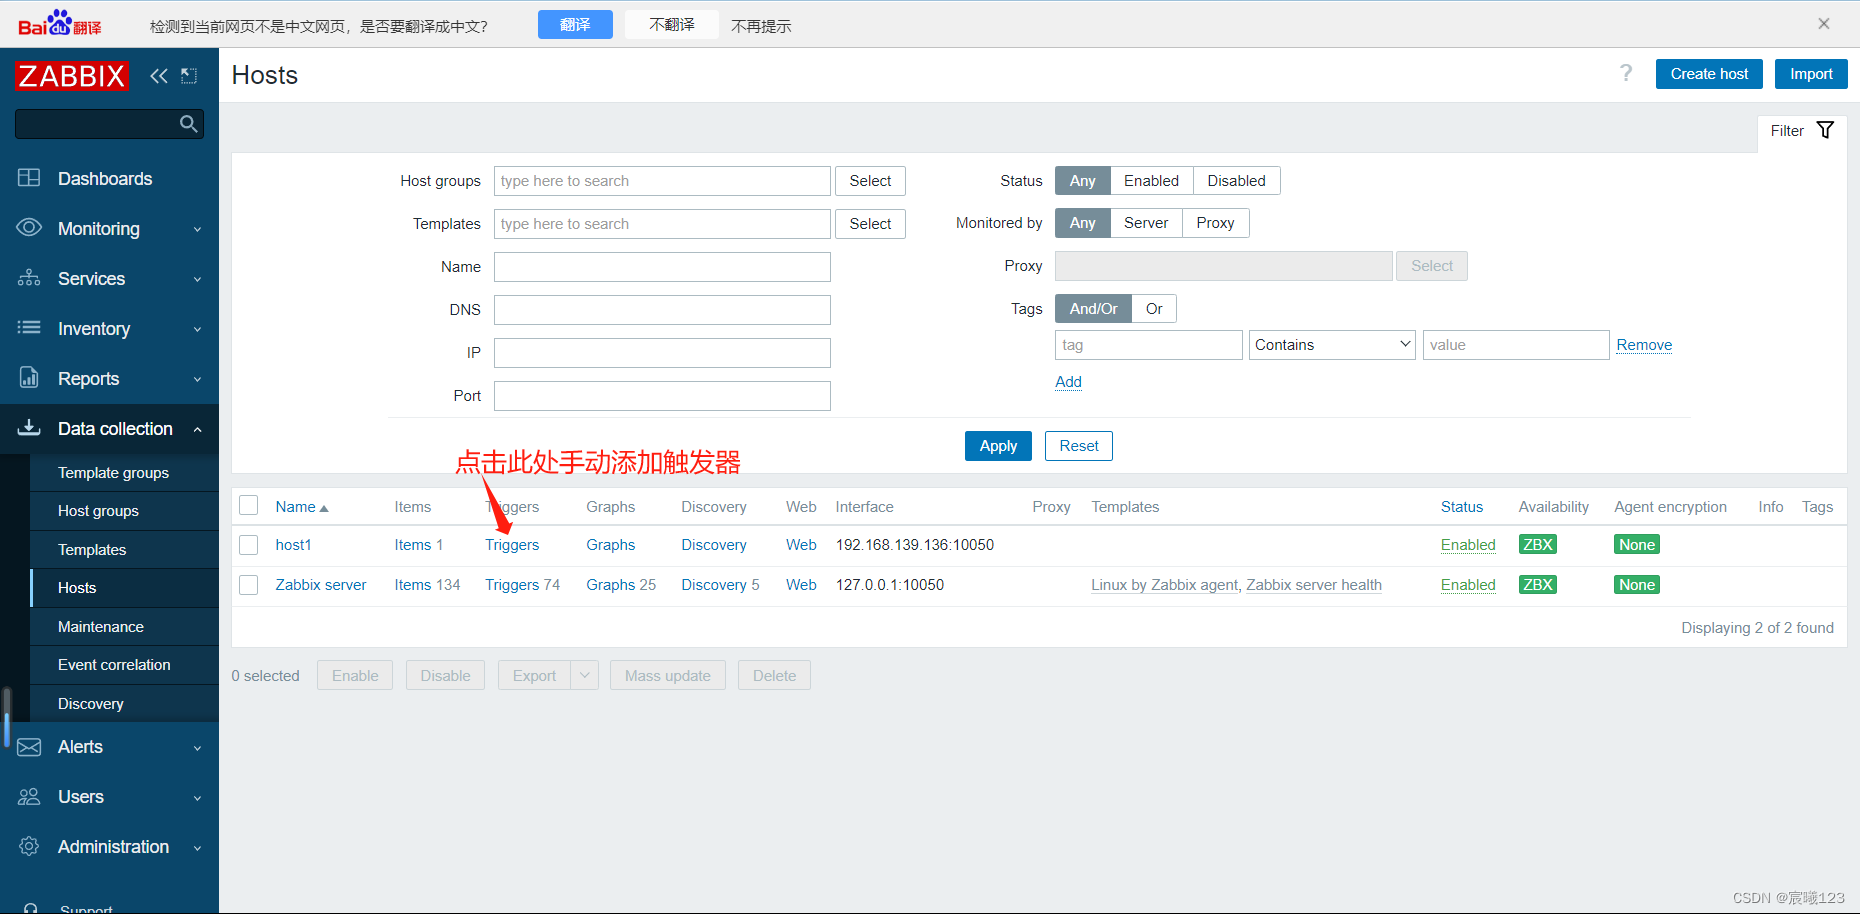
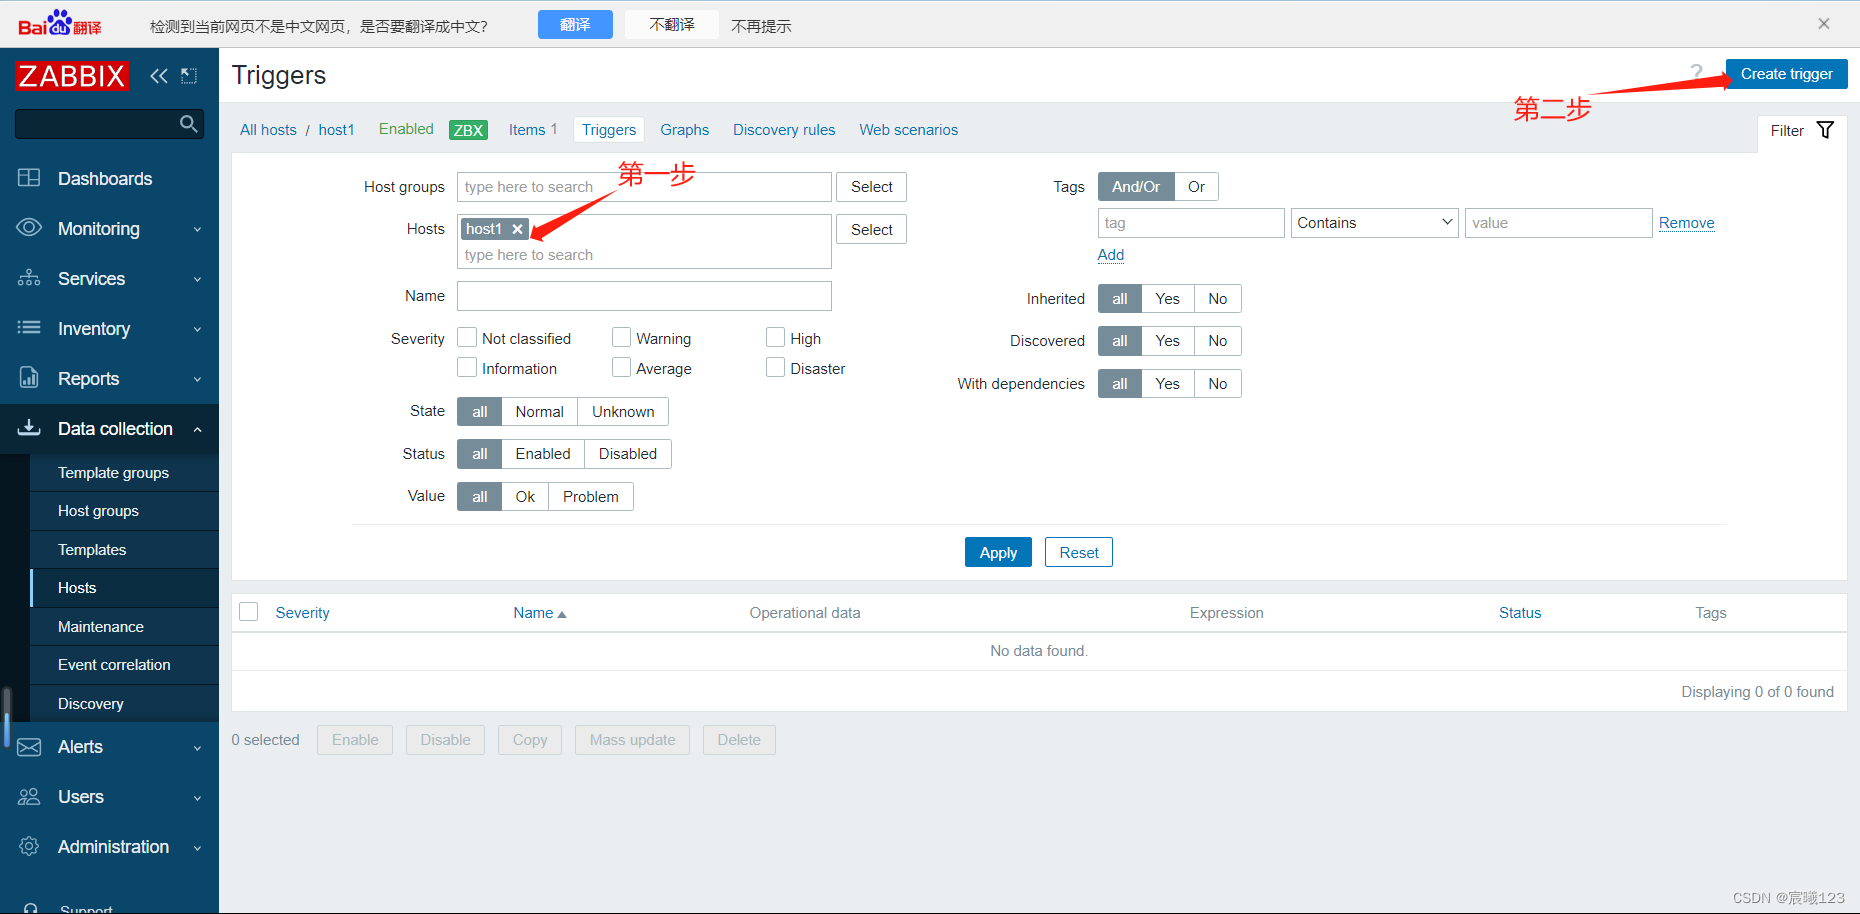
手动添加触发器

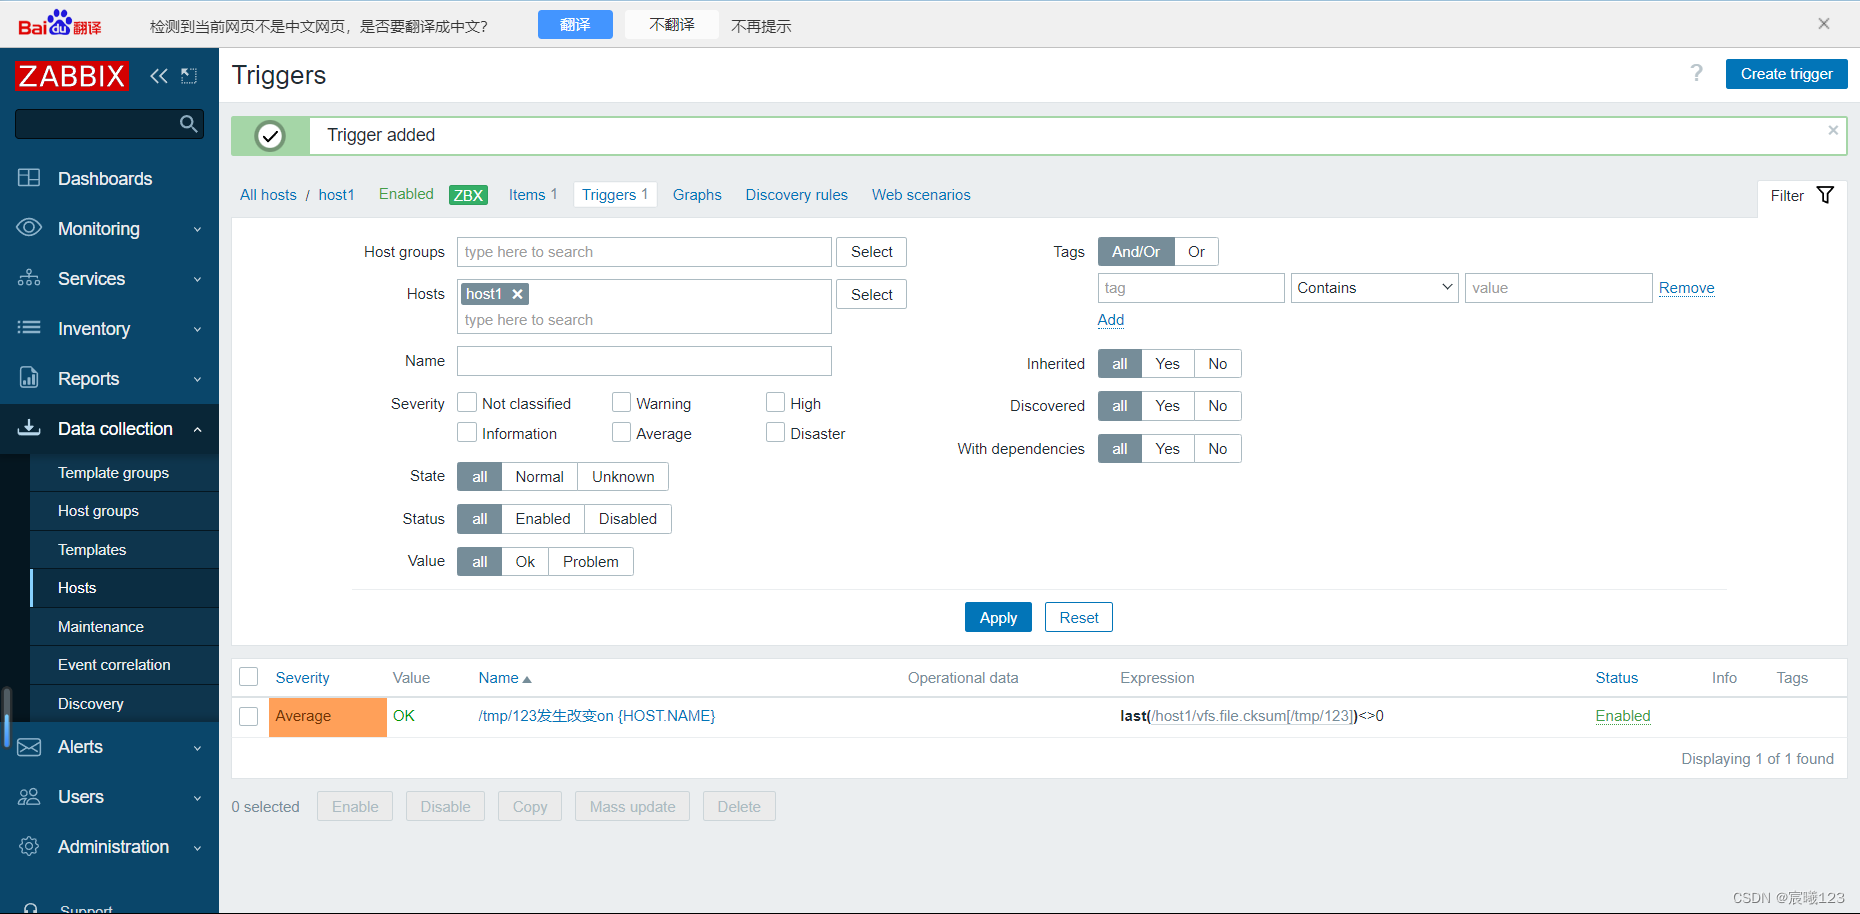
添加完成
手动触发监控项,看是否成功
手动触发前的主页
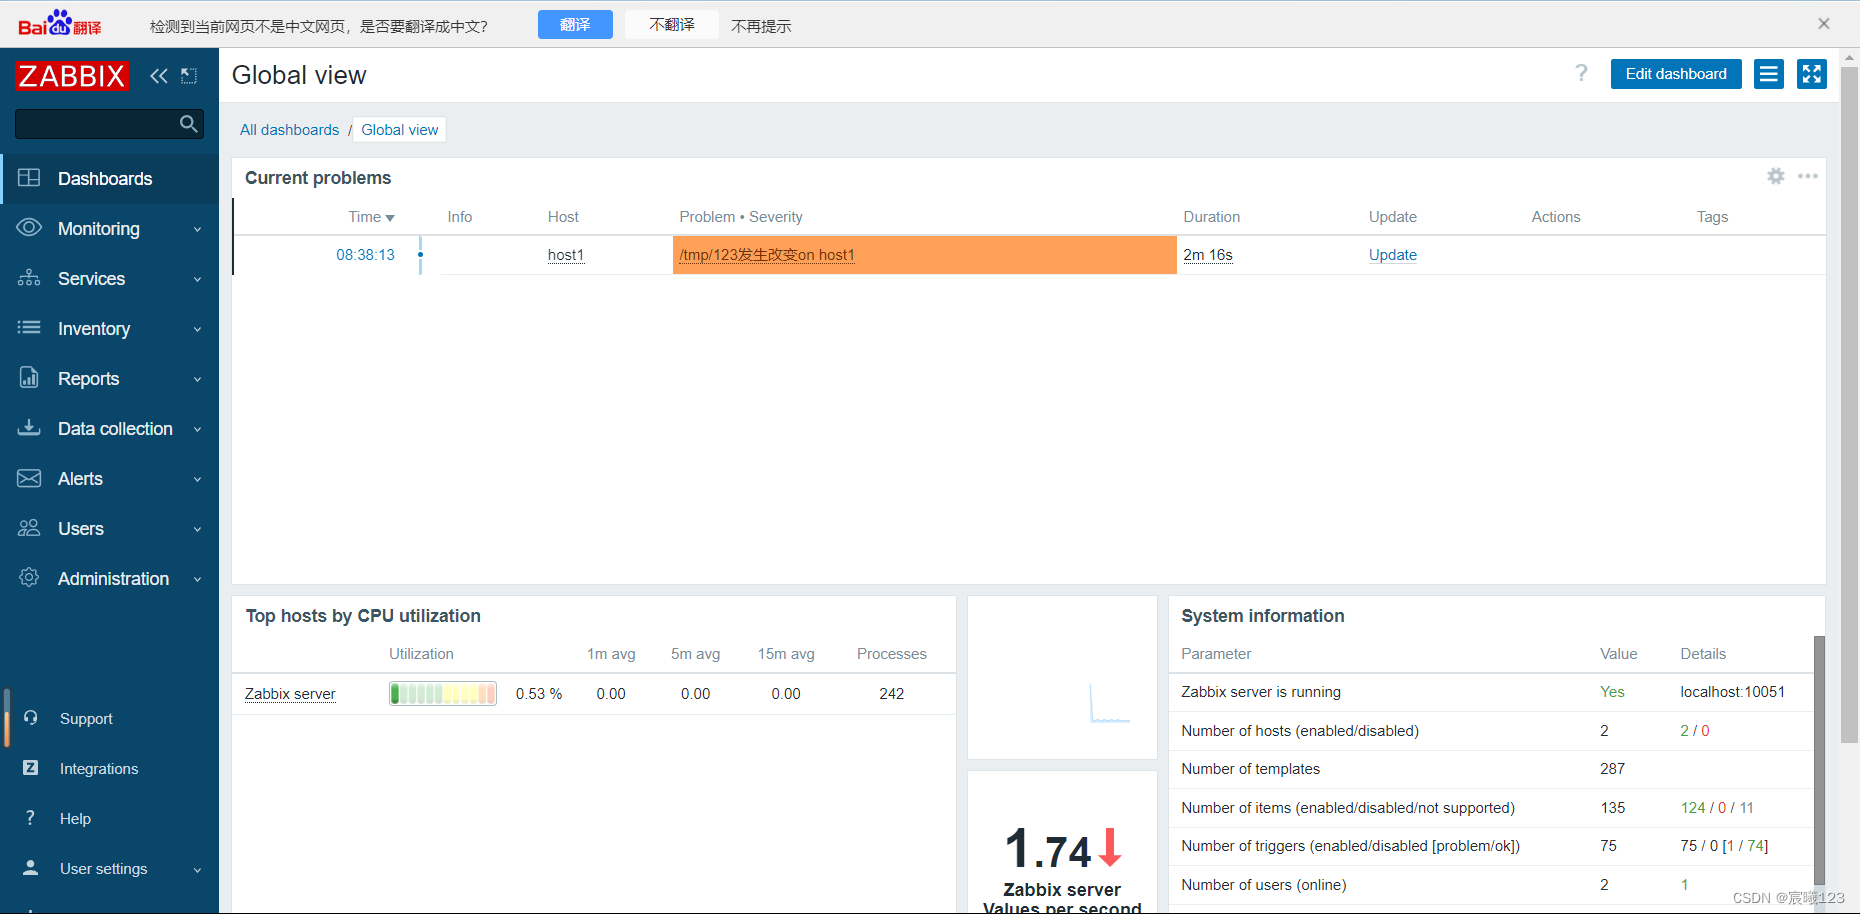
在被监控的主机的文件上添加内容
[root@host1 ~]# echo "xixi" >> /tmp/123
出现报警信息
第三方邮箱报警
首先开启邮箱的smtp服务
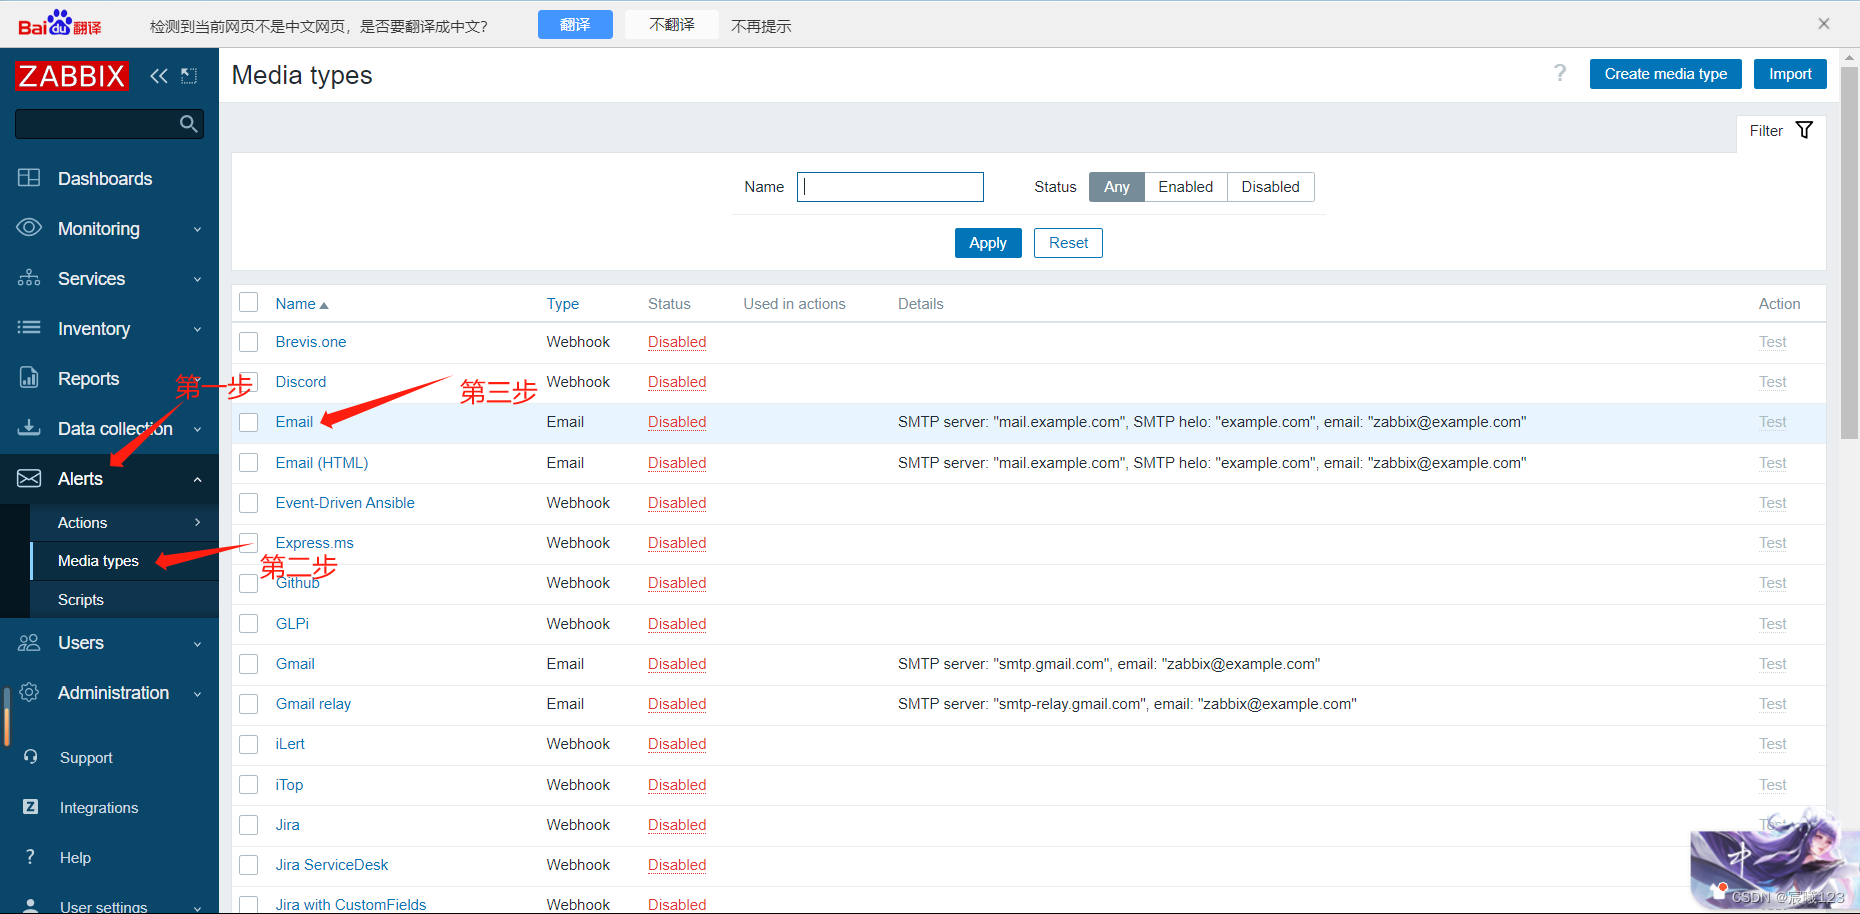
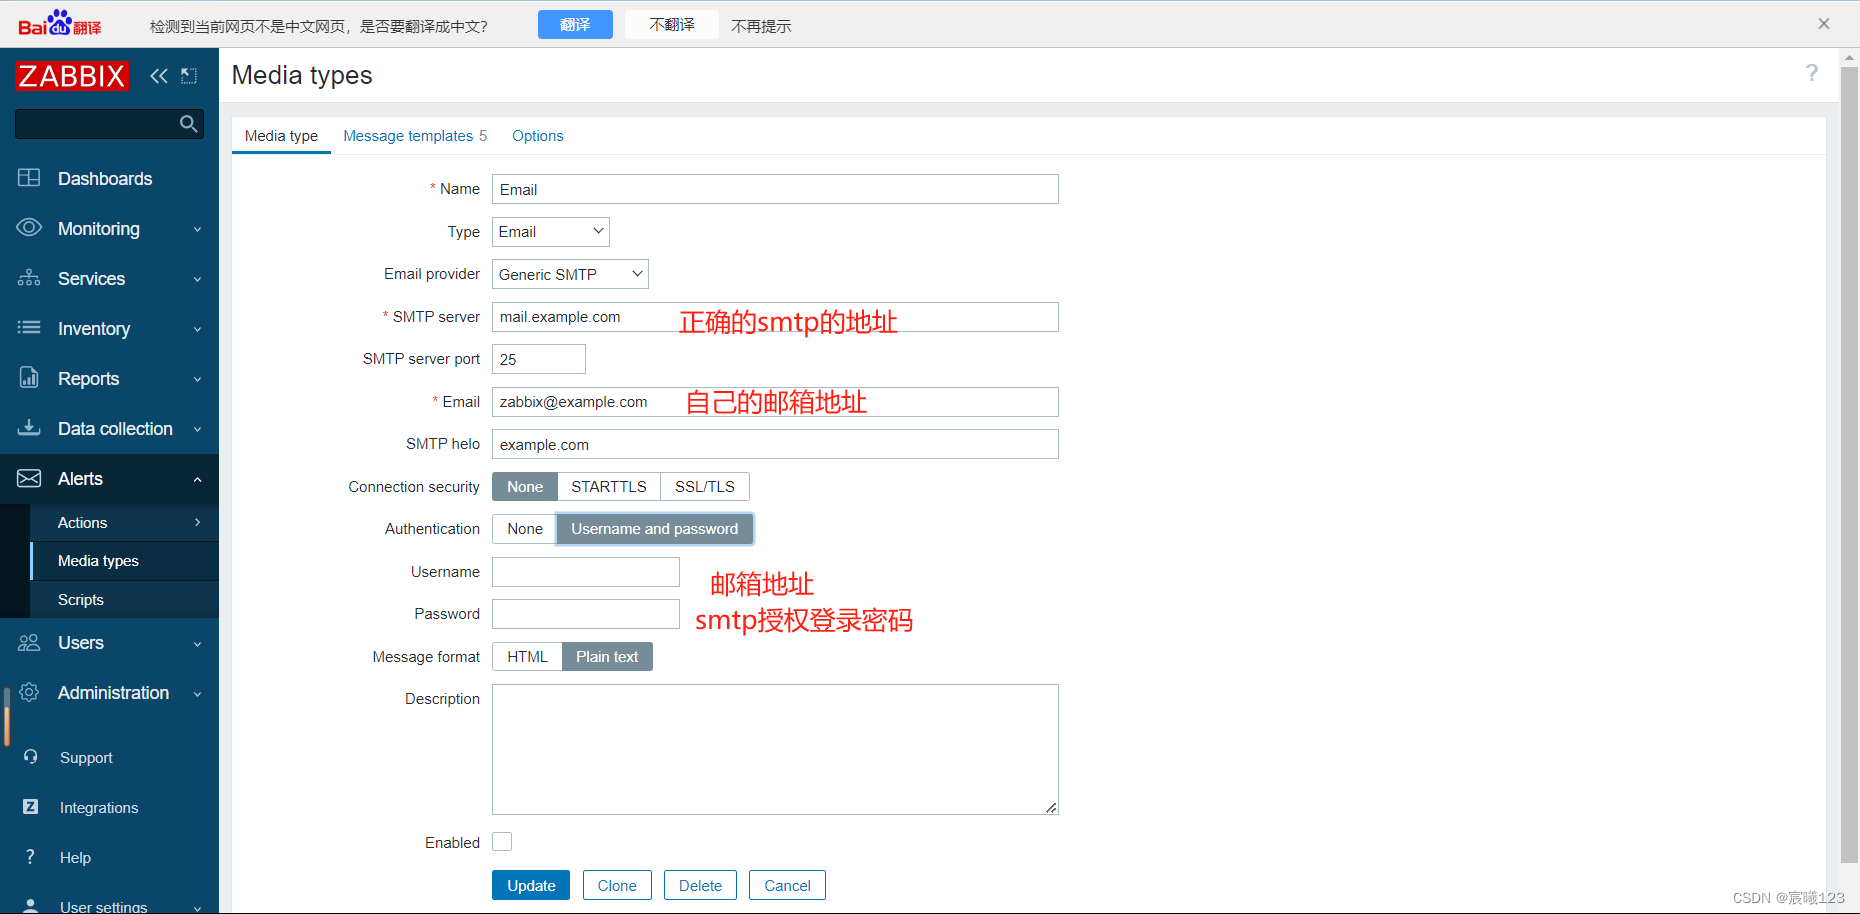
然后按邮箱报警步骤添加邮箱报警


 2万+
2万+


 被折叠的 条评论
为什么被折叠?
被折叠的 条评论
为什么被折叠?
 到【灌水乐园】发言


