


大厂技术  高级前端  Node进阶点击上方 程序员成长指北,关注公众号
回复1,加入高级Node交流群
北京房子买不起,但是几行代码看房自由还是能做到的,今天就分享一期教程,使用 Three.js 帮你实现“看房自由”。
作者:知心宝贝
https://blog.csdn.net/qq_53673551/article/details/127513554
一、前言
基于WebGL的三维引擎,目前是国内资料最多、使用最广泛的三维引擎,可以制作一些3D可视化项目。
目前随着元宇宙概念的爆火,THREE技术已经深入到了物联网、VR、游戏、数据可视化等多个平台,今天我们主要基于THREE实现一个三维的VR看房小项目。
二、基础知识
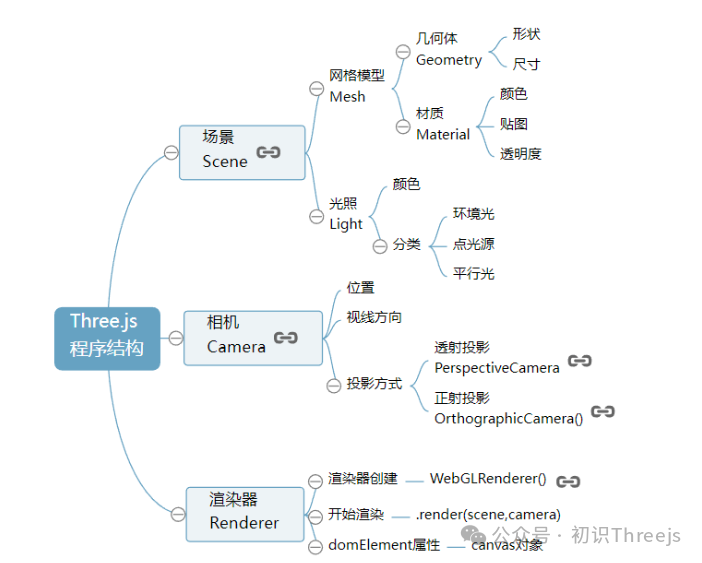
Three.js一般分为三个部分:场景、相机、渲染器,这三个主要的分支就构成了THREE.JS的主要功能区,这三大部分还有许多细小的分支,这些留到我们后续抽出一些章节专门讲解一下。

工作流程:场景——相机——渲染器
从实际生活中拍照角度立方体网格模型和光照组成了一个虚拟的三维场景,相机对象就像你生活中使用的相机一样可以拍照,只不过一个是拍摄真实的景物,一个是拍摄虚拟的景物。拍摄一个物体的时候相机的位置和角度需要设置,虚拟的相机还需要设置投影方式,当你创建好一个三维场景,相机也设置好,就差一个动作“咔”,通过渲染器就可以执行拍照动作。
三、场景
场景主要由网络模型与光照组成,网络模型分为几何体与材质。
3.1 网络模型
几何体就像我们小时候学我们就知道点线面体四种概念,点动成线,线动成面,面动成体,而材质就像是是几何体上面的涂鸦,有不同的颜色、图案…
例子如下:
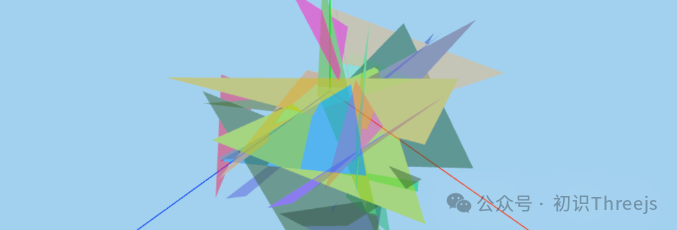
//打造酷炫三角形
for (let i = 0; i < 50; i++) {
    const geometry = new THREE.BufferGeometry();
    const arr = new Float32Array(9);
    for (let j = 0; j < 9; j++) {
        arr[j] = Math.random() * 5;
    }
    geometry.setAttribute('position', new THREE.BufferAttribute(arr, 3));
    let randomColor = new THREE.Color(Math.random(), Math.random(), Math.random());
    const material = new THREE.MeshBasicMaterial({
        color: randomColor,
        transparent: true,
        opacity:0.5,
    });
    const mesh = new THREE.Mesh(geometry, material);
    scene.add(mesh);
}
const geometry = new THREE.BoxGeometry(100, 100, 100);
const material = new THREE.MeshStandardMaterial({ color: 0x0000ff });
const cube = new THREE.Mesh(geometry, material);
scene.add(cube);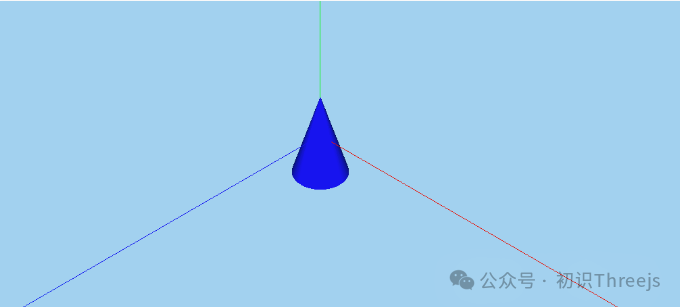
const geometry = new THREE.ConeGeometry(5, 15, 32);//底面半径 高 侧边三角分段
const material = new THREE.MeshStandardMaterial({ color: 0x0000ff });
const clone = new THREE.Mesh(geometry, material);
scene.add(clone);
3.2 光照
3.2.1 环境光
光照对three.js的物体全表面进行光照测试,有可能会发生光照融合。
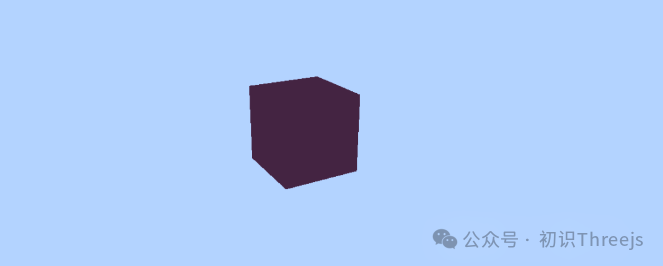
//环境光
const ambient = new THREE.AmbientLight(0x404040);
scene.add(ambient);
3.2.2 平行光
向特定方向发射的光,太阳光也视作平行的一种,和上面比较,物体变亮了。
//平行光  颜色 强度
const directionalLight = new THREE.DirectionalLight(0xffffff, 1);
directionalLight.position.set(100, 100, 100);//光源位置
directionalLight.target = cube;//光源目标 默认 0 0 0
scene.add(directionalLight);
3.2.3 点光源
由中间向四周发射光、强度比平行光小。
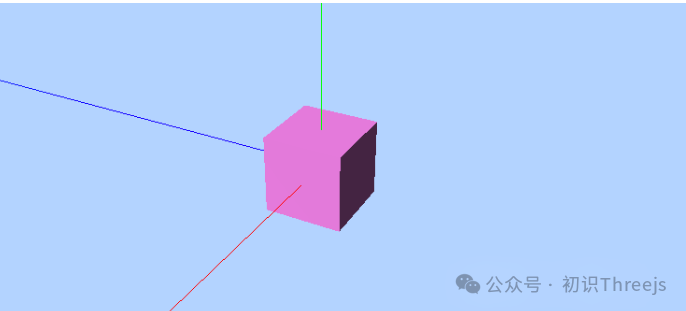
// 颜色 强度 距离 衰退量(默认1)
const pointLight = new THREE.PointLight(0xff0000, 1, 100, 1);
pointLight.position.set(50, 50, 50);
scene.add(pointLight);
3.2.4 聚光灯
家里面的节能灯泡,强度较好。
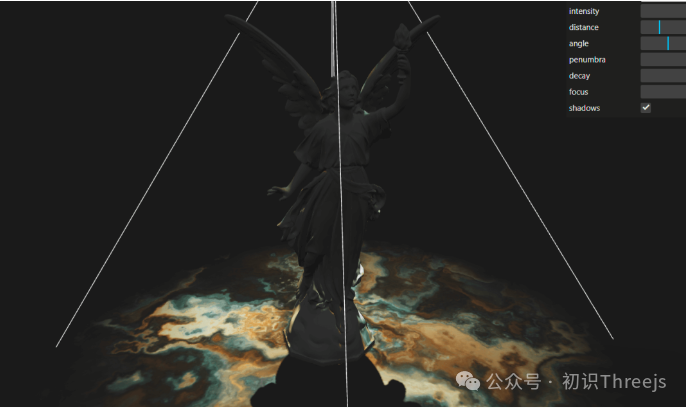
//聚光灯
const spotLigth = new THREE.PointLight(0xffffff);
spotLigth.position.set(50, 50, 50);
spotLigth.target = cube;
spotLigth.angle = Math.PI / 6;
scene.add(spotLigth);
3.2.5 半球光
概念:光源直接放置于场景之上,光照颜色从天空光线颜色渐变到地面光线颜色
//半球光
const light = new THREE.HemisphereLight(0xffffbb, 0x080820, 1);//天空 场景
scene.add(light);
四、相机
4.1 正交相机
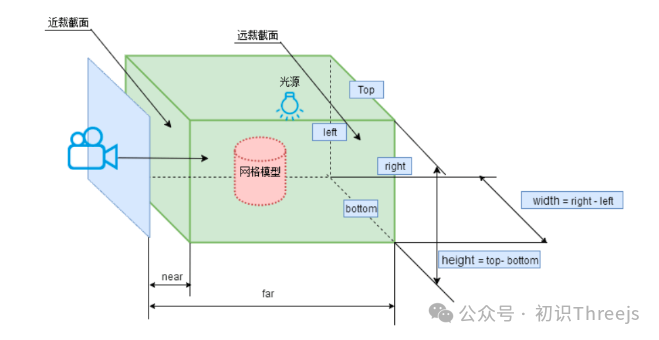
| 参数(属性) | 含义 |
|---|---|
| left | 渲染空间的左边界 |
| right | 渲染空间的右边界 |
| top | 渲染空间的上边界 |
| bottom | 渲染空间的下边界 |
| near | near属性表示的是从距离相机多远的位置开始渲染,一般情况会设置一个很小的值。默认值0.1。 |
| far | far属性表示的是距离相机多远的位置截止渲染,如果设置的值偏小小,会有部分场景看不到。默认值1000。 |
let width = window.innerWidth;
let height = window.innerHeight;
const camera = new THREE.OrthographicCamera(width / - 2, width / 2, height / 2, height / - 2, 1, 1000);
scene.add(camera);
camera.position.set(100, 200, 100);
4.2 透视相机
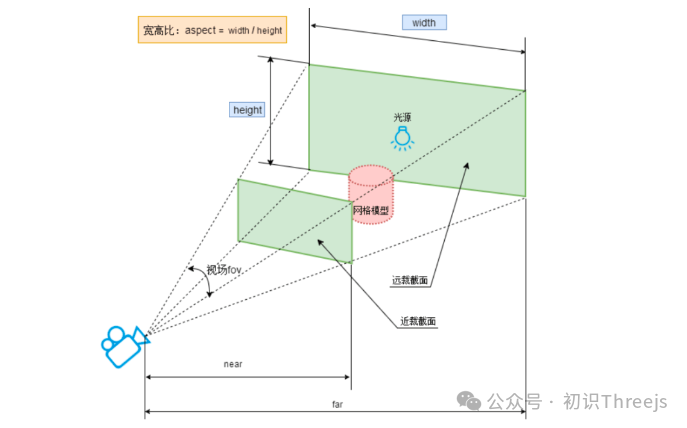
| 参数 | 含义 | 默认值 |
|---|---|---|
| fov | fov表示视场,所谓视场就是能够看到的角度范围,人的眼睛大约能够看到180度的视场,视角大小设置要根据具体应用,一般游戏会设置60~90度 | 45 |
| aspect | aspect表示渲染窗口的长宽比,如果一个网页上只有一个全屏的canvas画布且画布上只有一个窗口,那么aspect的值就是网页窗口客户区的宽高比 | window.innerWidth/window.innerHeight |
| near | near属性表示的是从距离相机多远的位置开始渲染,一般情况会设置一个很小的值。 | 0.1 |
| far | far属性表示的是距离相机多远的位置截止渲染,如果设置的值偏小,会有部分场景看不到 | 1000 |
let width = window.innerWidth;
let height = window.innerHeight;
const camera = new THREE.PerspectiveCamera(45, width / height, 1, 1000);
camera.position.set(150, 100, 300);
camera.lookAt(scene.position);
五、渲染器
从WEBGL的角度来看,three就是对它的进一步封装,想要进一步了解渲染器这方面的知识点还需要了解一下WEBGL,这里我们就不做过多介绍了。
贴图纹理
6.1 基础介绍
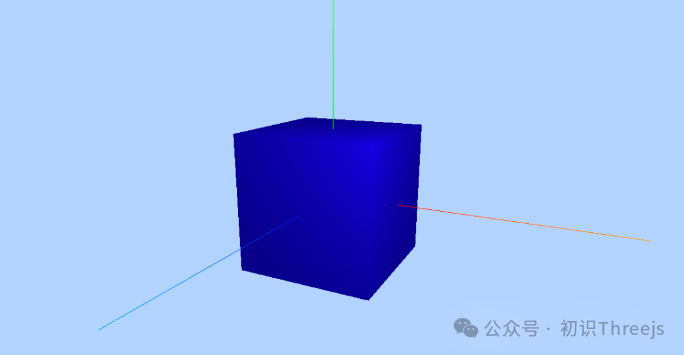
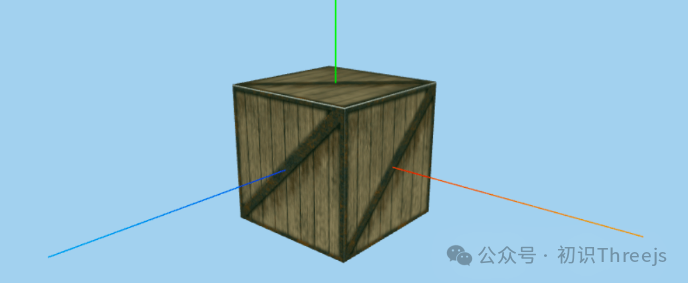
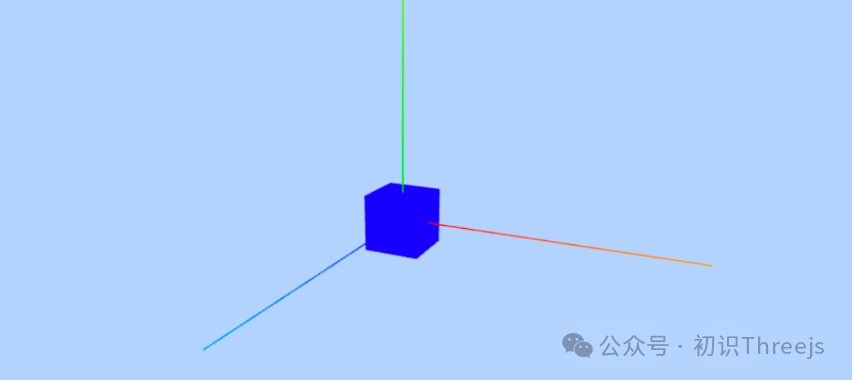
这部分对于我们是否能够给别人呈现一个真实的渲染场景来说,很重要,比如下面一个普普通通的正方体,我们只要一加上贴图,立马不一样了。
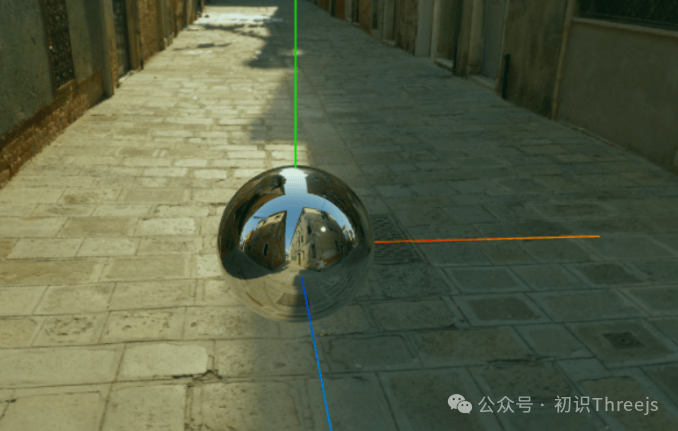
6.2 环境贴图
目前有许许多多的贴图,比如基础、透明、环境、法线、金属、粗糙、置换等等,今天我们呢主要讲解一下环境和一点HDR处理
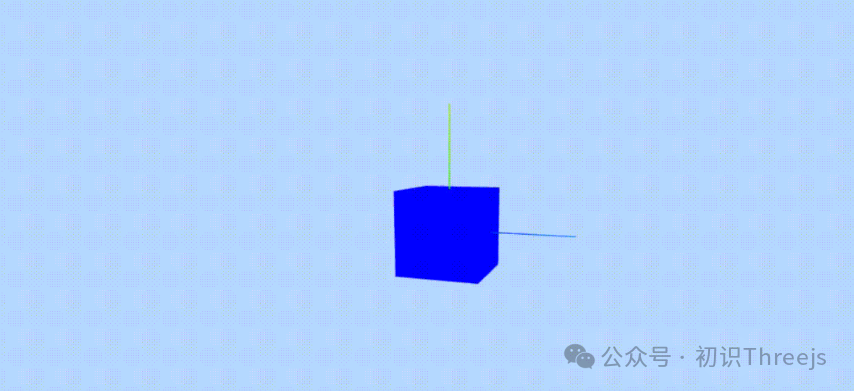
在THREE的世界里面,坐标轴x、y、z的位置关系图如下所示:
红、绿、蓝分别代表x、z、y,我们的贴图就是在px nx py ny pz nz这六个方向防止一张图片,其中p就代表坐标轴的正方向。
CubeTextureLoader:加载CubeTexture的一个类。内部使用ImageLoader来加载文件。
//场景贴图
const sphereTexture = new THREE.CubeTextureLoader().setPath('./textures/course/environmentMaps/0/');
const envTexture= sphereTexture.load([
'px.jpg',
'nx.jpg',
'py.jpg',
'ny.jpg',
'pz.jpg',
'nz.jpg'
]);
//场景添加背景
scene.background = envTexture;
//场景的物体添加环境贴图(无默认情况使用)
scene.environment = envTexture;
const sphereGeometry = new THREE.SphereGeometry(5, 30, 30);
const sphereMaterial = new THREE.MeshStandardMaterial({
roughness: 0,//设置粗糙程度
metalness: 1,//金属度
envMap:envTexture,
});
const sphere = new THREE.Mesh(sphereGeometry, sphereMaterial);
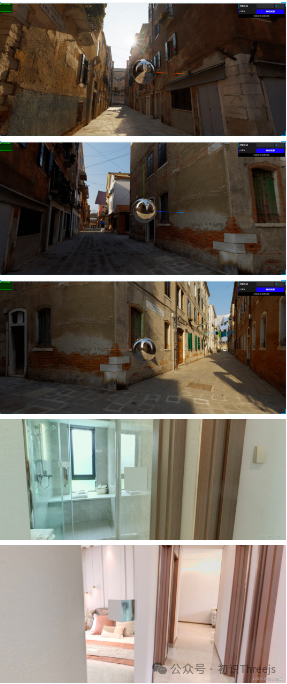
scene.add(sphere);gif图片有点大上传不了,我就截了几张图。
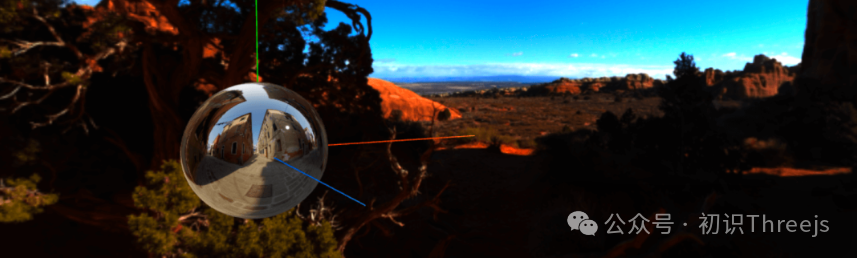
6.3 HDR处理
高动态范围图像,相比普通的图像,能够提供更多的动态范围和图像细节,一般被运用于电视显示产品以及图片视频拍摄制作当中。
import { RGBELoader } from 'three/examples/jsm/loaders/RGBELoader;
const rgbeLoader = new RGBELoader().setPath('./textures/course/hdr/');
//异步加载
rgbeLoader.loadAsync('002.hdr').then((texture) => {

    //设置加载方式 等距圆柱投影的环境贴图
    texture.mapping = THREE.EquirectangularReflectionMapping;
    scene.background = texture;
 })
七、拓展
7.1 坐标系
坐标轴能够更好的反馈物体的位置信息,红、绿、蓝分别代表x、z、y。
const axesHelper = new THREE.AxesHelper(20);//里面的数字代表坐标抽长度
scene.add(axesHelper);
7.2 控制器
通过鼠标控制物体和相机的移动、旋转、缩放。
导包
import { OrbitControls } from 'three/examples/jsm/controls/OrbitControls'应用
const controls = new OrbitControls(camera, renderer.domElement)自旋转
controls.autoRotate = true必须在render函数调用update实时更新才奏效。
7.3 自适应
根据屏幕大小自适应场景。
//自适应屏幕
window.addEventListener('resize', () => {
    camera.aspect = window.innerWidth / window.innerHeight
    camera.updateProjectionMatrix()
    renderer.setSize(window.innerWidth, window.innerHeight)
    renderer.setPixelRatio(window.devicePixelRatio)
})
设置相机的宽高比、重新更新渲染相机、渲染器的渲染大小、设备的像素比
7.4 全屏响应
双击进入全屏,再次双击/ESC退出全屏。
window.addEventListener('dblclick', () => {
    let isFullScreen = document.fullscreenElement
    if (!isFullScreen) {
        renderer.domElement.requestFullscreen()
    }
    else {
        document.exitFullscreen()
    }
})
7.5 信息面板
通过操作面板完成界面的移动物体的相关应用。
链接:https://www.npmjs.com/package/dat.gui
//安装npm
npm install --save dat.gui
//如果出现...标记错误,安装到开发依赖就可以了
npm i --save-dev @types/dat.gui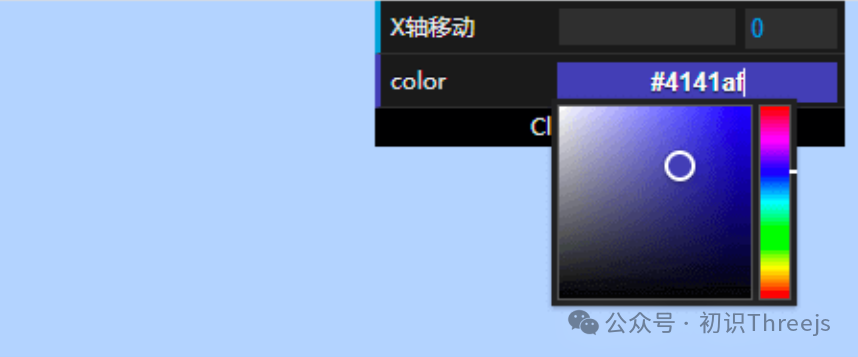
//界面操作
const gui = new dat.GUI();

//操作物体位置
gui
    .add(cube.position, 'x')
    .min(0)
    .max(10)
    .step(0.1)
    .name('X轴移动')
    .onChange((value) => {
        console.log('修改的值为' + value);
    })
    .onFinishChange((value) => {
        console.log('完全停止' + value);
    });
//操作物体颜色
const colors = {
    color: '#0000ff',
};
gui
    .addColor(colors, 'color')
    .onChange((value) => {
        //修改物体颜色
        cube.material.color.set(value);
    });
7.6 频率检测
检测帧率。
导包
import Stats from 'three/addons/libs/stats.module.js';应用
const stats = new Stats();
document.body.appendChild(stats.dom);
自变化
stats.update()必须在render函数调用update实时更新才奏效。
7.7 导航网格
底部二维平面的网格化,帮助我们更好的创建场景。
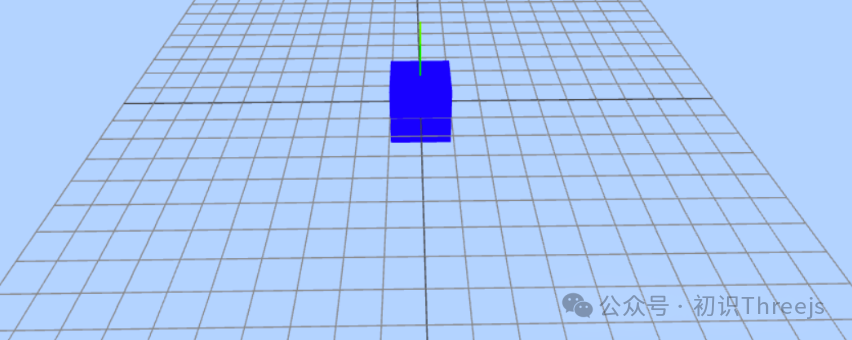
const gridHelper = new THREE.GridHelper(10, 20)//网格大小、细分次数
scene.add(gridHelper)
八、源码
//导入包
import * as THREE from 'three';
import { OrbitControls } from 'three/examples/jsm/controls/OrbitControls';
import * as dat from 'dat.gui';
import Stats from 'three/addons/libs/stats.module.js';


let scene,camera,renderer

//场景
scene = new THREE.Scene();

//坐标抽
const axesHelper = new THREE.AxesHelper(20);
scene.add(axesHelper);

//场景贴图
const sphereTexture = new THREE.CubeTextureLoader().setPath('./textures/course/environmentMaps/0/');
const envTexture= sphereTexture.load([
    'px.jpg',
    'nx.jpg',
    'py.jpg',
    'ny.jpg',
    'pz.jpg',
    'nz.jpg'
]);
//场景添加背景
scene.background = envTexture;
//场景的物体添加环境贴图(无默认情况使用)
scene.environment = envTexture;

const sphereGeometry = new THREE.SphereGeometry(5, 30, 30);
const sphereMaterial = new THREE.MeshStandardMaterial({
    roughness: 0,//设置粗糙程度
    metalness: 1,//金属度
    envMap:envTexture,

});
const sphere = new THREE.Mesh(sphereGeometry, sphereMaterial);
scene.add(sphere);


//光照
const ambient = new THREE.AmbientLight(0xffffff);
scene.add(ambient);

const directionalLight = new THREE.DirectionalLight(0xffffff, 0.05);
directionalLight.position.set(10,10,10);
directionalLight.lookAt(scene.position);
scene.add( directionalLight );


//相机
camera = new THREE.PerspectiveCamera(
    60,
    window.innerWidth / window.innerHeight,
    1,
    2000,
);
camera.position.set(10,10,20);
camera.lookAt(scene.position);
scene.add(camera);


//渲染器
renderer = new THREE.WebGLRenderer({
    //防止锯齿
    antialias: true,
});
renderer.setSize(window.innerWidth, window.innerHeight);
// renderer.setClearColor(0xb9d3ff, 1);
document.body.appendChild(renderer.domElement);

//鼠标控制器
const controls = new OrbitControls(camera, renderer.domElement);
//阻尼 必须在 render函数调用  controls.update();
controls.dampingFactor = true;
controls.autoRotate=true

const stats=new Stats()
document.body.appendChild(stats.dom);
function render () {

    renderer.render(scene, camera);
    requestAnimationFrame(render);
    controls.update();//调用
    stats.update()
}
render();


//全屏操作
window.addEventListener('dblclick', () => {
    //查询是否全屏
    let isFullScene = document.fullscreenElement;
    console.log(isFullScene);
    if (!isFullScene) {
        renderer.domElement.requestFullscreen();
    }
    else {
        document.exitFullscreen();
    }
})

//自适应
window.addEventListener('resize', () => {
    //宽高比
    camera.aspect = window.innerWidth / window.innerHeight;
    camera.updateProjectionMatrix();
    renderer.setSize(window.innerWidth, window.innerHeight);
    renderer.setPixelRatio(window.devicePixelRatio);//设置像素比

})

//界面操作
const gui = new dat.GUI();

//操作物体位置
gui
    .add(sphere.position, 'x')
    .min(0)
    .max(10)
    .step(0.1)
    .name('X轴移动')
    .onChange((value) => {
        console.log('修改的值为' + value);
    })
    .onFinishChange((value) => {
        console.log('完全停止' + value);
    });
//操作物体颜色
const colors = {
    color: '#0000ff',
};
gui
    .addColor(colors, 'color')
    .onChange((value) => {
        //修改物体颜色
        sphere.material.color.set(value);
    });
Node 社群
我组建了一个氛围特别好的 Node.js 社群,里面有很多 Node.js小伙伴,如果你对Node.js学习感兴趣的话(后续有计划也可以),我们可以一起进行Node.js相关的交流、学习、共建。下方加 考拉 好友回复「Node」即可。
“分享、点赞、在看” 支持一波👍


 1万+
1万+

 被折叠的 条评论
为什么被折叠?
被折叠的 条评论
为什么被折叠?
 到【灌水乐园】发言


