


MotionLayout是ConstraintLayout 2.0库中的一个新类,可帮助Android开发人员在其应用程序中管理动画和小部件动画。
在Google I / O 2018上发布的关于ConstraintLayout和Android Studio设计工具的新功能的下半部分(29分钟)对图书馆的功能进行了很好的概述。
视频地址
在本系列文章中,我们将介绍如何将库添加到应用程序中,并开始尝试MotionLayout的概念和功能。
本部分我将介绍MotionLayout的基础知识:
- 为何选择MotionLayout?
- 将ConstraintLayout 2.0和MotionLayout添加到项目中
- 使用MotionLayout
- ConstraintSets
- MotionScene
- 示例01:引用现有布局的基本动作
- OnSwipe处理程序
- 示例02:使用自包含MotionScene文件的基本运动
- MotionLayout属性
- 结论
该库是早期版本(alpha 2),可能会在最终稳定版本发布之前发生变化。特别是在alpha发布周期中,API /命名的变化更可能是对用户反馈的反应。请在ConstraintLayout组件下报告问题跟踪器上的任何错误或功能请求。
为何选择MotionLayout?
Android框架已经提供了几种在应用程序中添加动画的方法:
- 动画矢量Drawable
- 属性动画框架
- LayoutTransition动画
- 使用TransitionManager进行布局转换
- CoordinatorLayout
本节将介绍MotionLayout与现有解决方案的不同之处。
正如其名称提示的那样,MotionLayout首先是一个布局,让您定位元素。它实际上是ConstraintLayout的子类,并以其丰富的布局功能为基础。
创建MotionLayout是为了弥补布局转换和复杂运动处理之间的差距。 您可以将其视为属性动画框架,TransitionManager和CoordinatorLayout之间的混合。
属性动画框架,使用TransitionManager的布局转换和CoordinatorLayout之间的混合
它允许您描述两个布局之间的过渡(如TransitionManager),但也可以为任何属性设置动画(不仅仅是布局属性)。此外,它固有地支持可搜索的转换,例如CoordinatorLayout(转换可以纯粹通过触摸驱动并立即转换到它的任何点)。它支持触摸处理和关键帧,允许开发人员根据自己的需要轻松定制过渡。
MotionLayout是完全声明的
除了这个范围,另一个关键区别是MotionLayout是完全声明的 - 你可以在XML中完全描述一个复杂的转换 - 没有代码是期望的(如果你需要通过代码表达运动,现有的属性动画框架已经提供了一个很好的方法正在做)
MotionLayout工具
我们相信这种对声明性运动规范的关注将简化创建此类动画,并开辟在Android Studio中提供出色图形工具的方式。
虽然我们正在积极研究这个工具,但还没有。一旦库达到稳定/ beta,它就可能可用。
最后,作为ConstraintLayout 2.0的一部分,它作为支持库提供,向后兼容API级别14(ICS):这意味着它支持99.8%的当前Android设备.
限制
MotionLayout仅为其直接子节点提供其功能 - 与TransitionManager相反,后者可以使用嵌套布局层次结构以及活动过渡。
什么时候使用它
我们为MotionLayout设想的场景是您需要移动,调整大小或动画实际的UI元素 - 按钮,标题栏等 - 用户需要与之交互的元素。
在动画用户将与之交互的UI元素时使用MotionLayout
重要的是要认识到动作是为了达到目的 - 它不应该仅仅是你的应用中的无偿特殊效果; 它应该用于帮助用户了解您的应用程序正在做什么。该材料设计原则的网站是一个伟大的介绍这些概念。
有一类动画只需要处理播放预定义内容,用户不会 - 或者不需要 - 直接与内容交互。视频,GIF或有限的动画矢量绘图或lottie文件通常属于此类别。MotionLayout没有专门尝试处理这类动画(但你当然可以将它们包含在MotionLayout中)。
将MotionLayout添加到项目中
只需将ConstraintLayout 2.0添加到Gradle文件即可完成此操作:
implementation 'androidx.constraintlayout:constraintlayout:2.0.0-beta2'
使用MotionLayout
MotionLayout是ConstraintLayout的子类 - 因此,您可以将其视为普通布局。要将现有的ConstraintLayout转换为MotionLayout,就像从以下位置替换类名一样简单:
<androidx.constraintlayout.motion.widget.MotionLayout../>
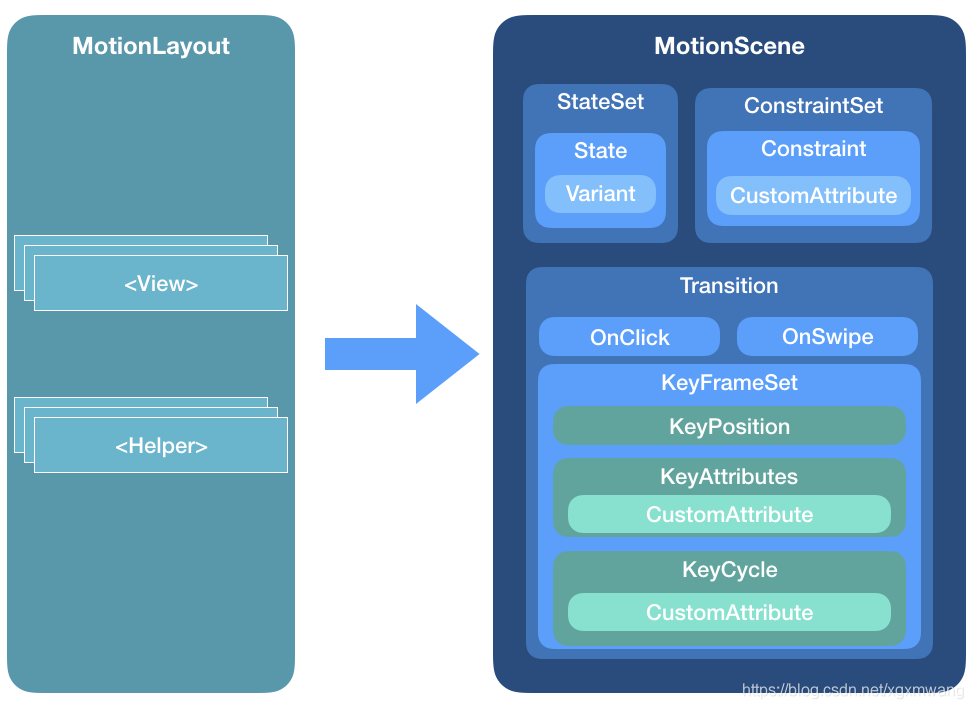
在XML层次ConstraintLayout和MotionLayout之间的主要区别是什么MotionLayout会做实际的描述并不一定是包含在布局文件。
相反,MotionLayout通常将所有这些信息保存在MotionScene它引用的单独XML文件(a )中,并且此信息将优先于布局文件中的信息。
这样,布局文件只能包含视图及其属性 - 而不是它们的定位或移动。
ConstraintSets
ConstraintSets与ConstraintLayout一起使用视频示例
ConstraintSet的一般思想是它们封装了布局的所有定位规则; 当您可以使用多个ConstraintSet时,您可以随时决定将哪些规则应用于您的布局,而无需重新创建视图 - 只有它们的位置/尺寸会发生变化。
结合TransitionManager,这提供了一种使用ConstraintLayout创建动画的相对简单的方法,如上面的视频所示。
MotionLayout基本上建立在这个想法上,并进一步扩展了这个概念。
MotionScene
如上所述,与通常的布局相反,MotionLayout所做的规范保存在一个单独的XML文件MotionScene中,该文件存储在您的res/xml目录中。
MotionScene文件可以包含指定动画所需的全部内容:
- 使用ConstraintSets
- ConstraintSets之间的过渡
- 关键帧,触摸处理等
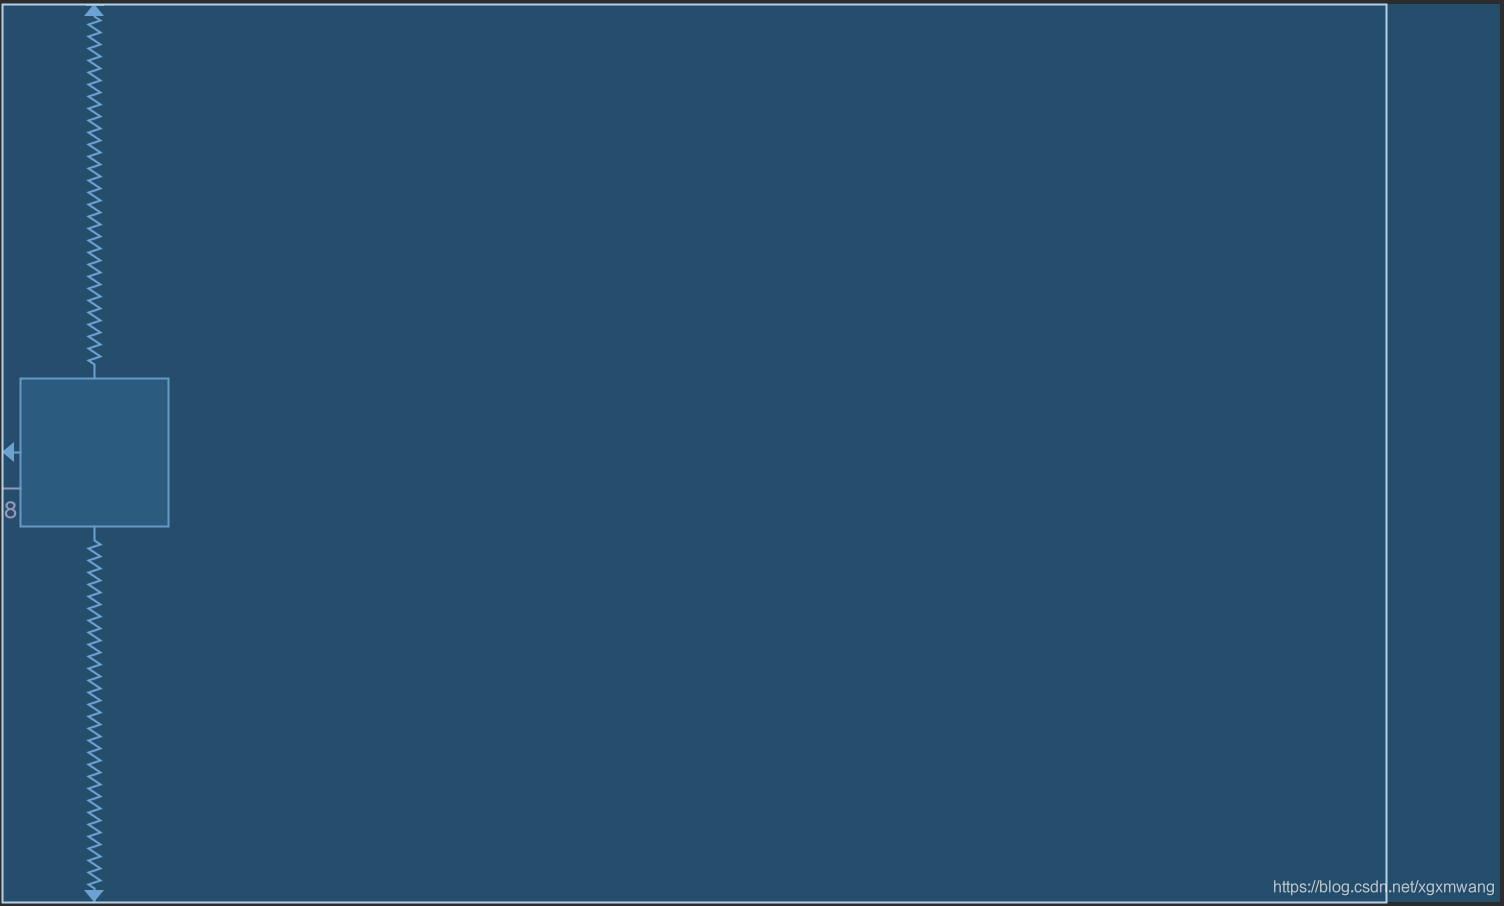
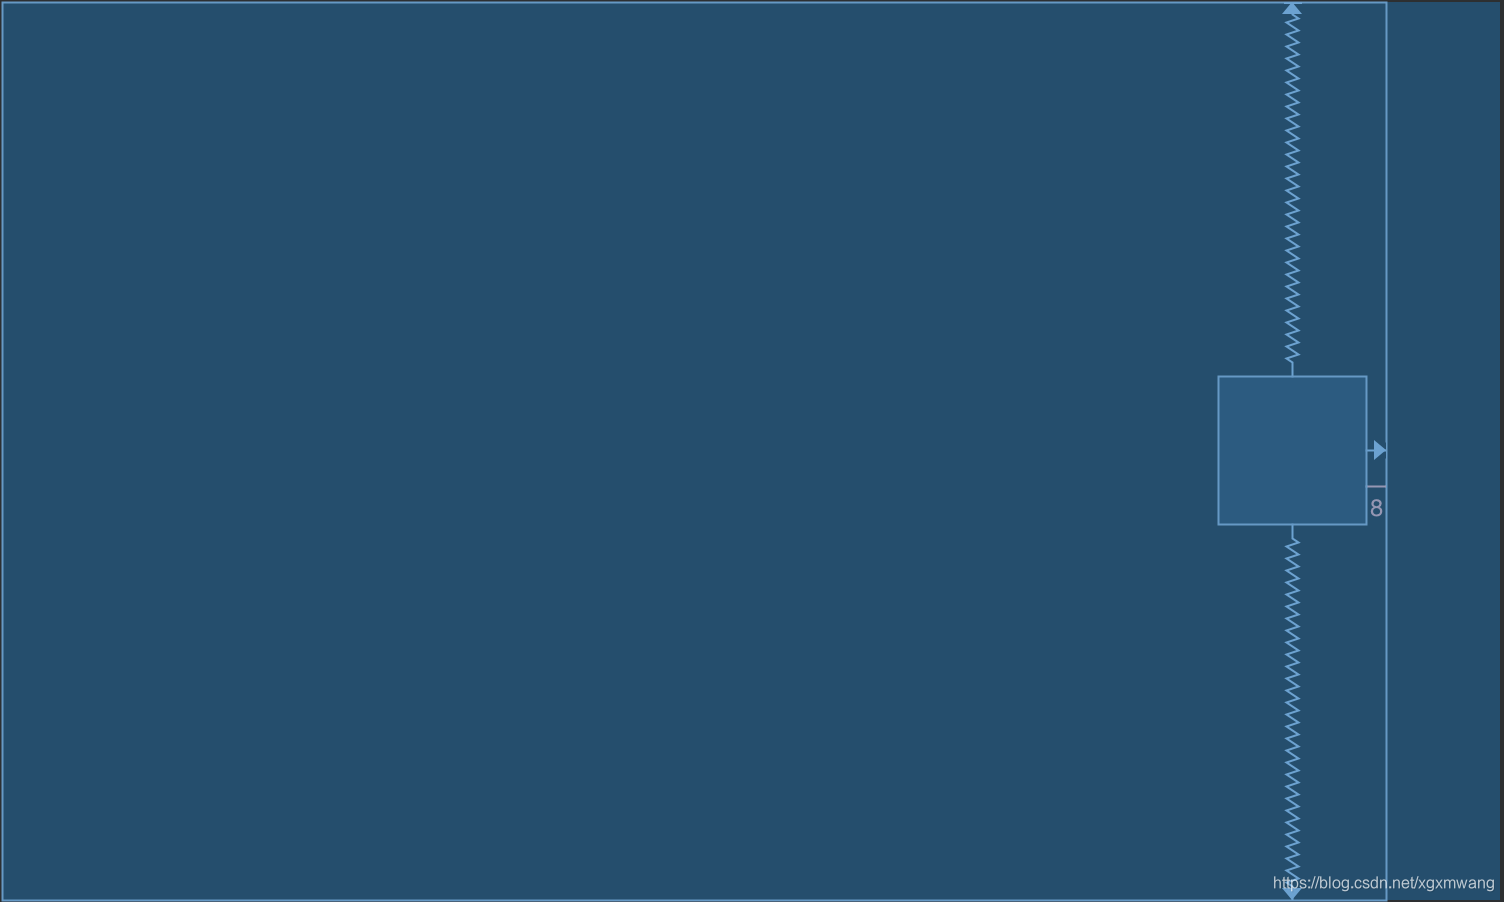
例如,让我们尝试将一个简单的视图从屏幕的一端移动到另一端,您可以用手指拖动:
示例01:引用现有布局
使用ConstraintLayout,您将创建两个ConstraintSet - 一个用于第一个位置(窗口左侧的窗口小部件),第二个用于第二个位置(窗口右侧的窗口小部件)。
开始布局:
<?xml version="1.0" encoding="utf-8"?>
<android.support.constraint.ConstraintLayout xmlns:android="http://schemas.android.com/apk/res/android"
    xmlns:tools="http://schemas.android.com/tools"
    xmlns:app="http://schemas.android.com/apk/res-auto"
    android:layout_width="match_parent"
    android:layout_height="match_parent">

    <View
        android:id="@+id/button"
        android:background="@color/colorAccent"
        android:layout_width="64dp"
        android:layout_height="64dp"
        android:layout_marginStart="8dp"
        android:text="Button"
        app:layout_constraintBottom_toBottomOf="parent"
        app:layout_constraintStart_toStartOf="parent"
        app:layout_constraintTop_toTopOf="parent" />

</android.support.constraint.ConstraintLayout>
motion_01_cl_start.xml
结束布局:
<?xml version="1.0" encoding="utf-8"?>
<android.support.constraint.ConstraintLayout xmlns:android="http://schemas.android.com/apk/res/android"
    xmlns:tools="http://schemas.android.com/tools"
    xmlns:app="http://schemas.android.com/apk/res-auto"
    android:layout_width="match_parent"
    android:layout_height="match_parent">

    <View
        android:id="@+id/button"
        android:background="@color/colorAccent"
        android:layout_width="64dp"
        android:layout_height="64dp"
        android:layout_marginEnd="8dp"
        android:text="Button"
        app:layout_constraintBottom_toBottomOf="parent"
        app:layout_constraintEnd_toEndOf="parent"
        app:layout_constraintTop_toTopOf="parent" />

</android.support.constraint.ConstraintLayout>
motion_01_cl_end.xml
使用ConstraintLayout,您可以从这两个布局中初始化两个ConstraintSets,然后应用它们(如果使用TransitionManager,则将动画转换)。这种方法的一个问题是,一旦过渡开始,它就是不可中断的。您也无法告诉系统转到转换中的特定点 - 这意味着您无法通过用户输入来驱动转换。
MotionLayout解决了所有这些问题。以下是如何创建相同的内容,甚至重用这些现有布局来初始化这两种状态。首先,我们将为我们的小部件创建一个MotionLayout文件:
<?xml version="1.0" encoding="utf-8"?>
<android.support.constraint.motion.MotionLayout xmlns:android="http://schemas.android.com/apk/res/android"
    xmlns:app="http://schemas.android.com/apk/res-auto"
    xmlns:tools="http://schemas.android.com/tools"
    android:id="@+id/motionLayout"
    android:layout_width="match_parent"
    android:layout_height="match_parent"
    app:layoutDescription="@xml/scene_01"
    tools:showPaths="true">

    <View
        android:id="@+id/button"
        android:layout_width="64dp"
        android:layout_height="64dp"
        android:background="@color/colorAccent"
        android:text="Button" />

</android.support.constraint.motion.MotionLayout>
motion_01_basic.xml
请注意,布局文件引用了MotionScene文件 - scene_01
这里是:
<?xml version="1.0" encoding="utf-8"?>
<MotionScene
    xmlns:motion="http://schemas.android.com/apk/res-auto">

    <Transition
        motion:constraintSetStart="@layout/motion_01_cl_start"
        motion:constraintSetEnd="@layout/motion_01_cl_end"
        motion:duration="1000">
        <OnSwipe
            motion:touchAnchorId="@+id/button"
            motion:touchAnchorSide="right"
            motion:dragDirection="dragRight" />
    </Transition>

</MotionScene>
scene_01.xml
scene_01通过指示开始和结束ConstraintSet(motion_01_cl_start&motion_01_cl_end,显示为上面的片段)来指定默认转换。另请注意,我们OnSwipe为该转换指定了处理程序。
就是这样!您将得到的结果是上面显示的动画。
OnSwipe处理程序
回顾一下这个scene_01.xml文件,我们指定了一个OnSwipe包含在Transition定义中的处理程序。此处理程序的作用是让您通过匹配手指的运动来驱动过渡。
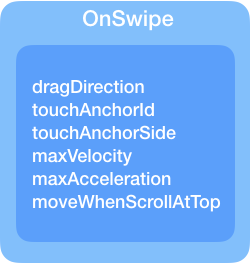
您需要设置一些参数:
- touchAnchorId:我们应该跟踪的对象(这里@+id/button)
- touchAnchorSide:应跟踪手指的对象的一侧(right / left / top / bottom)
- dragDirection:我们正在跟踪的运动方向(dragRight / dragLeft / dragUp / dragDown将定义如何设置进度值,从0到1)
例02:独立的MotionScene
第一个示例让您了解如何快速设置MotionLayout,最终重用您可能已经拥有的布局(如果您当前正在使用ConstraintSets来执行基本动画)。
MotionLayout还支持直接在位于res/xml目录中的MotionScene文件中描述ConstraintSets 。这带来了几个好处:
- 一个文件来维护各种ConstraintSet
- 添加功能,处理其他可视属性和自定义属性
- 面向未来:Android Studio中即将推出的MotionEditor可能只支持自包含的MotionScene文件。
插值属性
MotionScene文件中ConstraintSets元素中指定的属性覆盖的内容多于通常的布局属性。超出位置和界限,MotionLayout将自动插入以下属性:
- alpha
- visibility
- elevation
- rotation,rotation[X/ /Y]
- translation[X/ Y/Z]
- scaleX/Y
让我们用自包含的MotionScene文件重新创建第一个示例。MotionLayout文件与示例01中的相同,仅引用scene_02.xml:
<?xml version="1.0" encoding="utf-8"?>
<android.support.constraint.motion.MotionLayout
    xmlns:android="http://schemas.android.com/apk/res/android"
    xmlns:tools="http://schemas.android.com/tools"
    xmlns:app="http://schemas.android.com/apk/res-auto"
    android:id="@+id/motionLayout"
    app:layoutDescription="@xml/scene_02"
    android:layout_width="match_parent"
    android:layout_height="match_parent">

    <View
        android:id="@+id/button"
        android:background="@color/colorAccent"
        android:layout_width="64dp"
        android:layout_height="64dp"
        android:text="Button" />

</android.support.constraint.motion.MotionLayout>
motion_02.xml
MotionScene是不同的地方; 该Transition定义是一样的,但是我们把的定义start和end ConstraintSets直接在文件中。与普通布局文件的主要区别在于我们没有指定此处使用的窗口小部件的类型 - 而是将约束作为Constraint元素的属性。
<?xml version="1.0" encoding="utf-8"?>
<MotionScene xmlns:android="http://schemas.android.com/apk/res/android"
    xmlns:motion="http://schemas.android.com/apk/res-auto">

    <Transition
        motion:constraintSetStart="@+id/start"
        motion:constraintSetEnd="@+id/end"
        motion:duration="1000">
        <OnSwipe
            motion:touchAnchorId="@+id/button"
            motion:touchAnchorSide="right"
            motion:dragDirection="dragRight" />
    </Transition>

    <ConstraintSet android:id="@+id/start">
        <Constraint
            android:id="@+id/button"
            android:layout_width="64dp"
            android:layout_height="64dp"
            android:layout_marginStart="8dp"
            motion:layout_constraintBottom_toBottomOf="parent"
            motion:layout_constraintStart_toStartOf="parent"
            motion:layout_constraintTop_toTopOf="parent" />
    </ConstraintSet>

    <ConstraintSet android:id="@+id/end">
        <Constraint
            android:id="@+id/button"
            android:layout_width="64dp"
            android:layout_height="64dp"
            android:layout_marginEnd="8dp"
            motion:layout_constraintBottom_toBottomOf="parent"
            motion:layout_constraintEnd_toEndOf="parent"
            motion:layout_constraintTop_toTopOf="parent" />
    </ConstraintSet>

</MotionScene>
scene_02.xml
约束集
要记住的一件重要事情是ConstraintSet如何工作 - 它们将替换受影响的小部件的所有现有约束。
因此,您需要让每个Constraint元素包含要应用于窗口小部件的所有约束。基本上,这不是应用delta,它是清除所有并仅应用您指定的约束。
另一方面,假设您有一个包含十几个小部件的布局,但只有一个是您正在制作动画的小部件 - MotionScene中的ConstraintSet只需要包含该小部件的约束。
MotionLayout属性用于开发
MotionLayout本身有一些您可能希望在开发过程中指定的属性:
- app:layoutDescription=”reference” 必须指向MotionScene XML文件,如前所述
- app:applyMotionScene=”boolean” 让你申请或不申请MotionScene [default = true]
- app:showPaths=”boolean” 是否显示运动路径[default = false]。记得在生产版本中关闭!
- app:progress=”float” 让您指定从0到1的转换进度
- app:currentState=”reference” 让你强制一个特定的ConstraintSet


 1万+
1万+


 被折叠的 条评论
为什么被折叠?
被折叠的 条评论
为什么被折叠?
 到【灌水乐园】发言


