


第一部分:
学习kernel需要了解编译的一些过程,为了详细理解GCC编译过程的原理,动手做了个sy,记录如下,有需要的童鞋可以参考。
| 1.环境:(均可,二次环境并非是WSL版本) |
| root@LAPTOP-X280:~# uname -r 5.15.146.1-microsoft-standard-WSL2 root@LAPTOP-X280:~# lsb_release -a No LSB modules are available. Distributor ID: Ubuntu Description: Ubuntu 22.04.3 LTS Release: 22.04 Codename: jammy root@LAPTOP-X280:~# gcc -v Command 'gcc' not found, but can be installed with: apt install gcc root@LAPTOP-X280:~# |
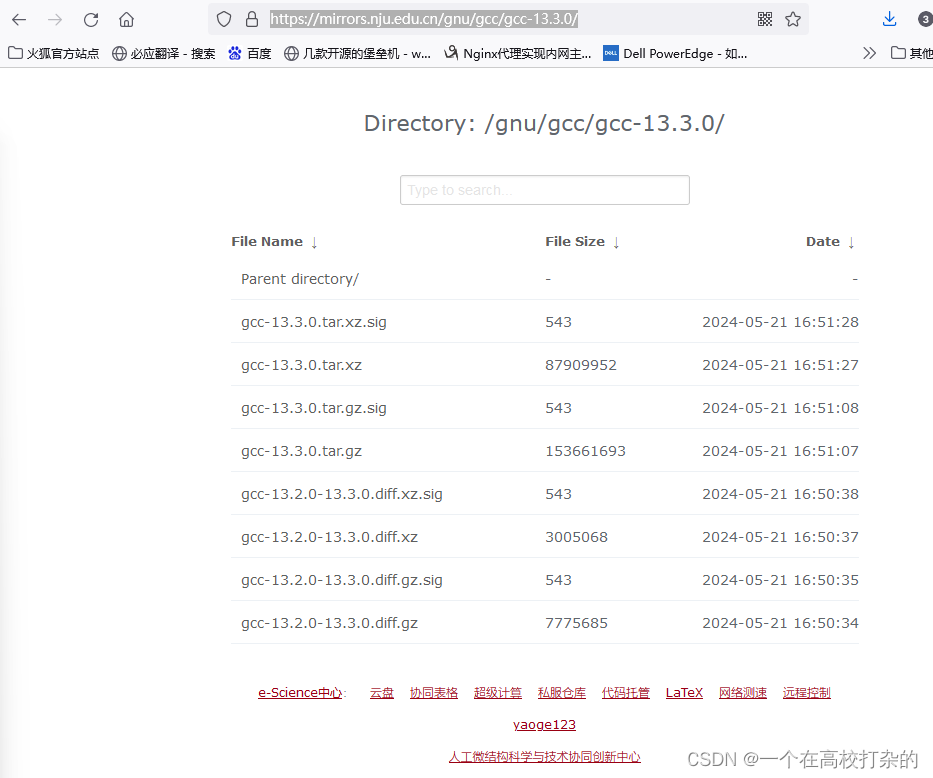
| 从亚洲镜像站点下载:https://www.gnu.org/prep/ftp.html#asia 下载最新的版本:
| |
The installation procedure itself is broken into five steps. | |
| 0.解压缩文件 | |
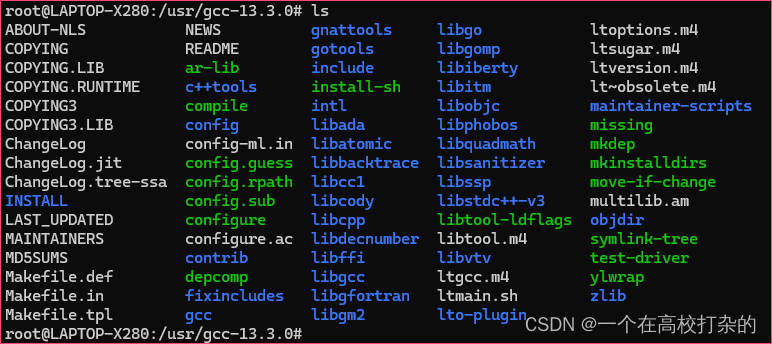
| xz -cd gcc.13.0.tar.xz | tar xvf -
mkdir objdir
| |
| apt install build-essential //必须安装的基础编译,不如C和C++ //解决configure: error: no acceptable C compiler found in $PATH等问题 //实际上这个是安装了gcc,g++,make等工具的编译器了。 apt install libgmp-dev libmpfr-dev libmpc-dev libisl-dev //必须安装,按这里的先后顺序 | |
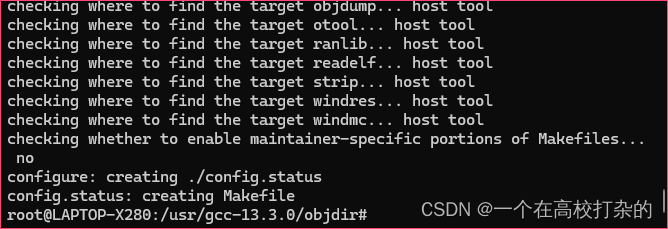
| root@LAPTOP-X280:/usr/gcc-13.3.0/objdir# ../configure
root@LAPTOP-X280:/usr/gcc-13.3.0/objdir# ../configure --disable-multilib
| |
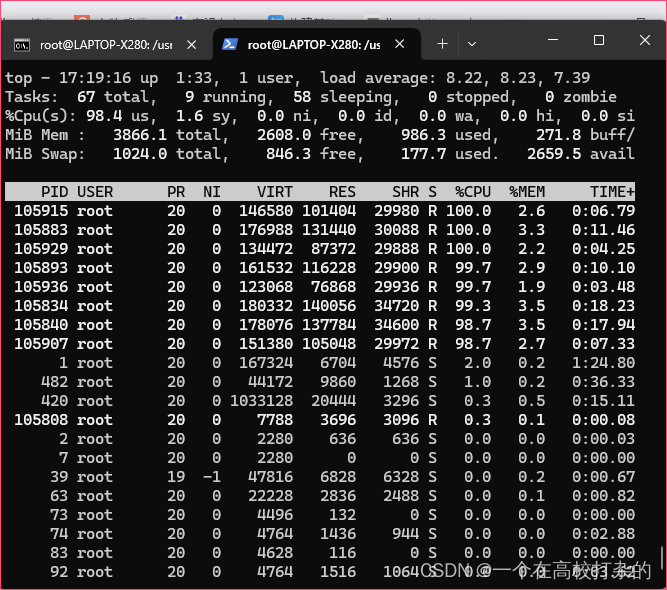
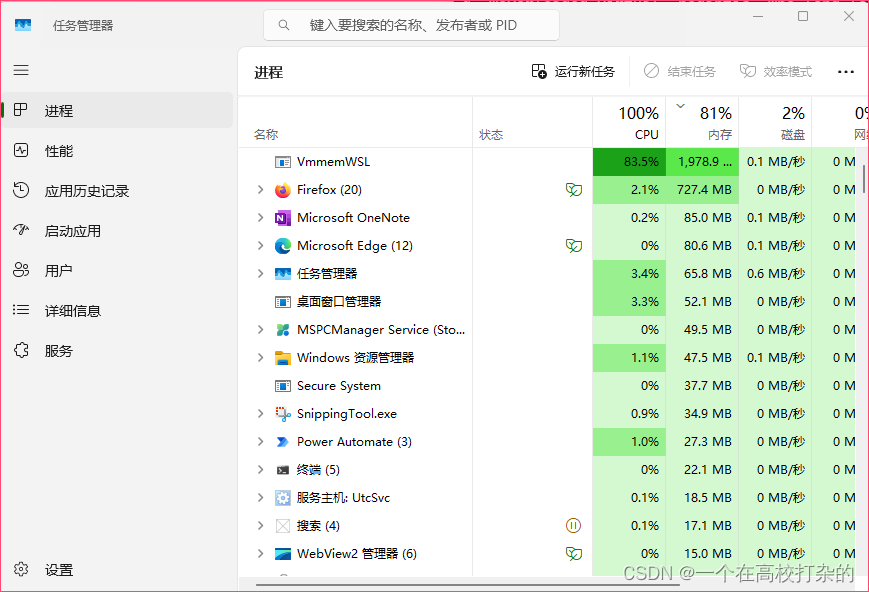
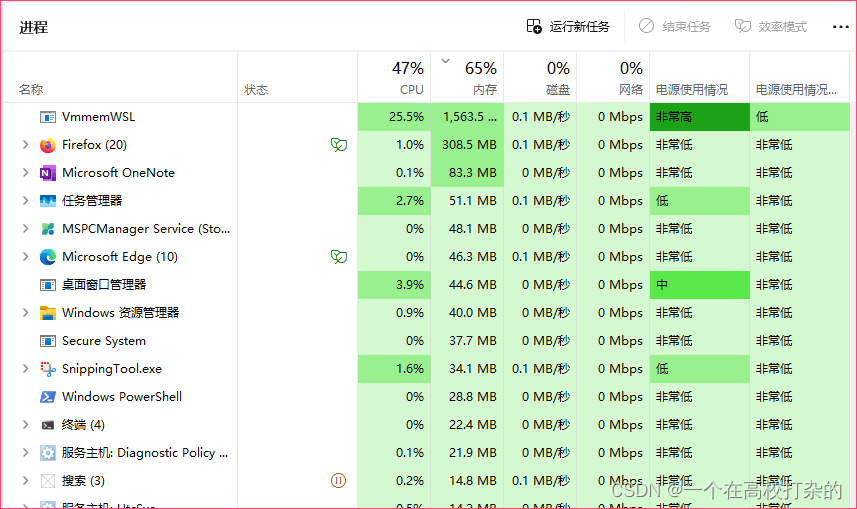
| 4.Building Building a native compiler nproc make -j$(nproc) 这个过程需要时间,而且top查看,开销很大,CPU基本都是耗尽。 若出现cpu等fetal error,可能就不需要使用-j的选项了,默认使用make即可 以下是WSL的资源使用:
Win11 的资源使用:
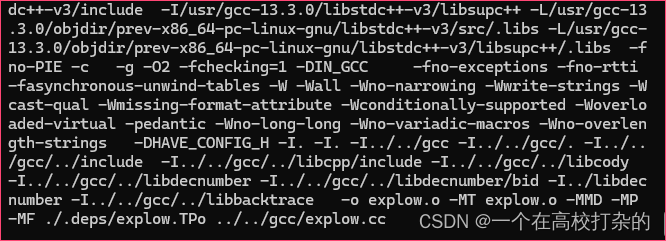
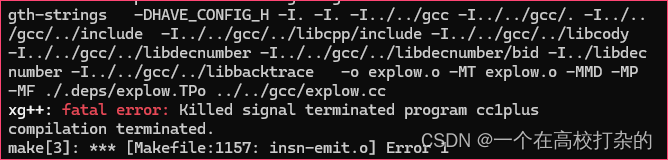
卡住在:…/gcc /explow.cc
后面出现fatal error
Ctrl+c终止进程,改为make -j6 记得6<nproc(8),资源也是很吃紧如下图:
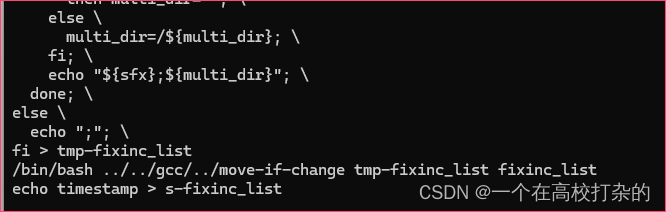
还是卡住了: /bin/bash ../../gcc/../move-if-change tmp-fixinc_list fixinc_list echo timestamp > s-fixinc_list
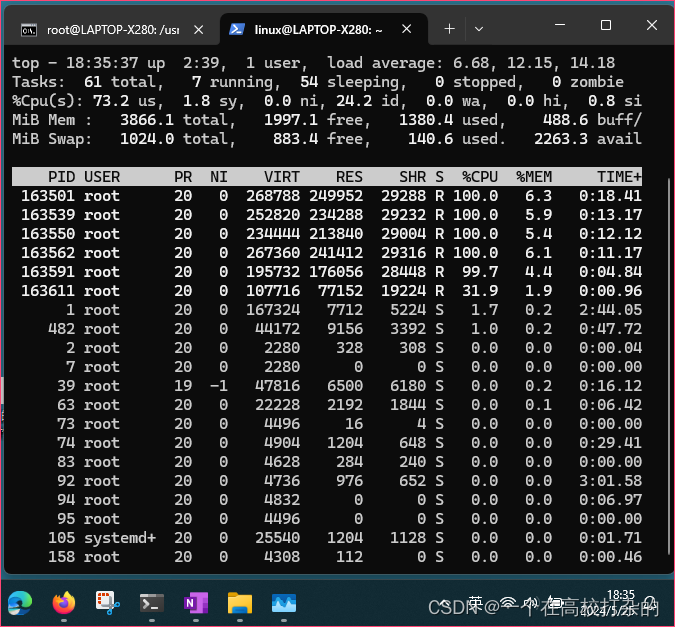
…. 最后尝试make把 先make distclean, do ‘make distclean’ to delete all files that might be invalid. 再../configure --disable-multilib Make //19:10开始执行命令,完成时间:20:03终止 这时候的资源:
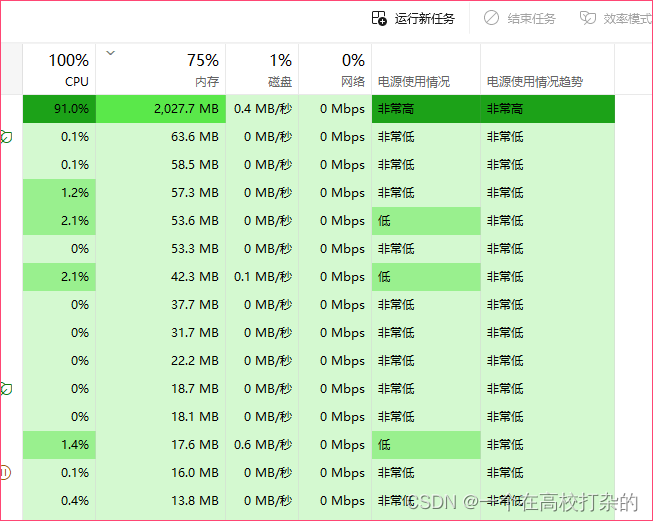
执行make -j8 开始执行时间:20:04,完成时间:21:10,出现fatal error 这时候的资源情况瞬间上升:
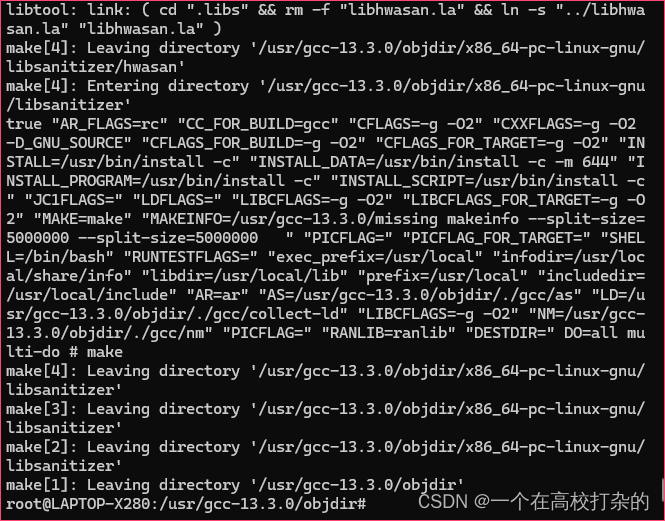
第二次改成make -j6,时间从21:21-21:46 这次OK了。
| |
| ps:(这里是第二次编译的,遇到磁盘空间不够的情况) 磁盘空间不够的化使用命令:make -j4 bootstrap-lean
| |
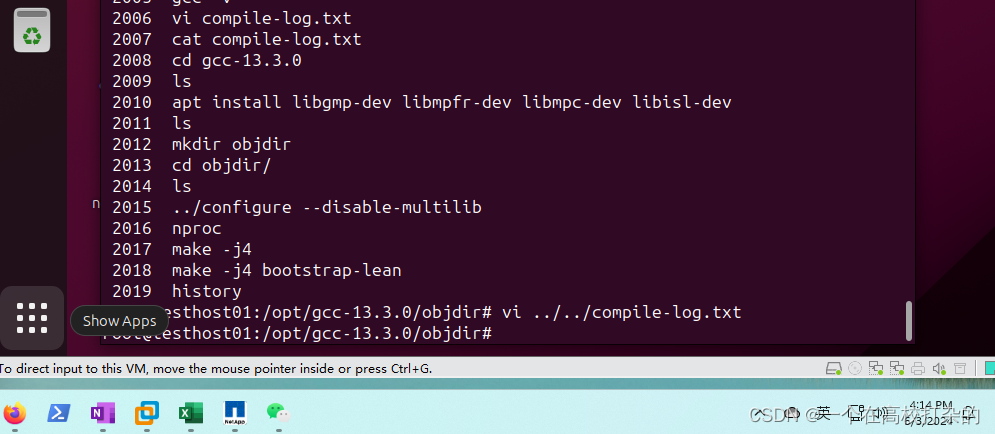
| 5.Testing (optional) The latest development sources are available via anonymous Git. Use the following command to clone a copy of the source tree: $ git clone git://git.sv.gnu.org/dejagnu.git
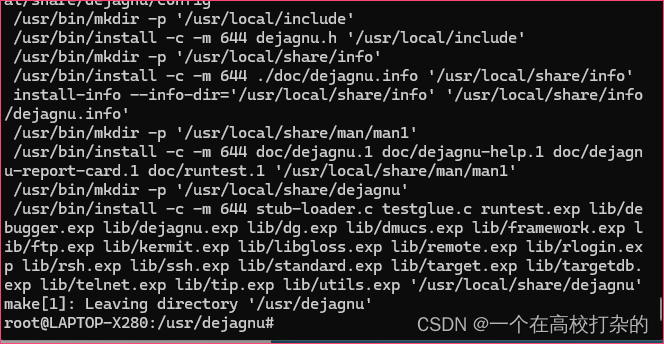
cd dejagnu ./configure make …出错解决: apt install texinfo make make install
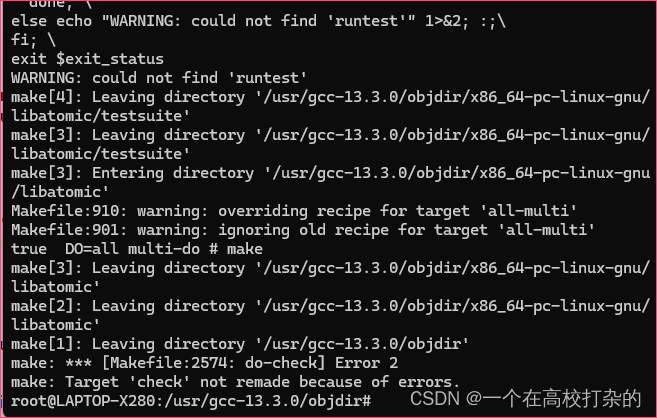
cd objdir; root@LAPTOP-X280:/usr/gcc-13.3.0/objdir# make -k check
| |
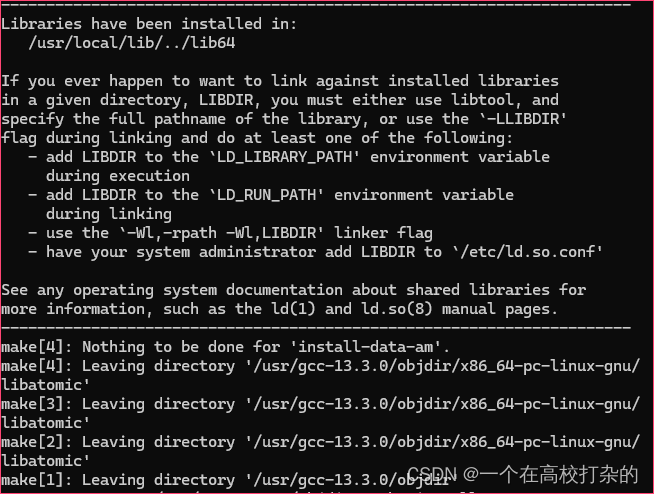
| make install
root@LAPTOP-X280:/usr/gcc-13.3.0/objdir# whereis gcc gcc: /usr/lib/gcc /usr/local/bin/gcc /usr/local/lib/gcc /usr/share/gcc root@LAPTOP-X280:/usr/gcc-13.3.0/objdir# /usr/local/bin/g cc -v Using built-in specs. COLLECT_GCC=/usr/local/bin/gcc COLLECT_LTO_WRAPPER=/usr/local/libexec/gcc/x86_64-pc-linux-gnu/13.3.0/lto-wrapper Target: x86_64-pc-linux-gnu Configured with: ../configure --disable-multilib Thread model: posix Supported LTO compression algorithms: zlib gcc version 13.3.0 (GCC) root@LAPTOP-X280:/usr/gcc-13.3.0/objdir# | |
第二部分:使用gcc编译c程序 | |
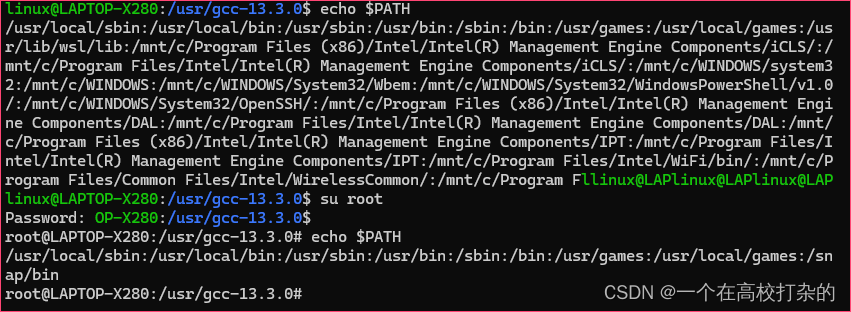
| 1.先设置环境变量 查看:
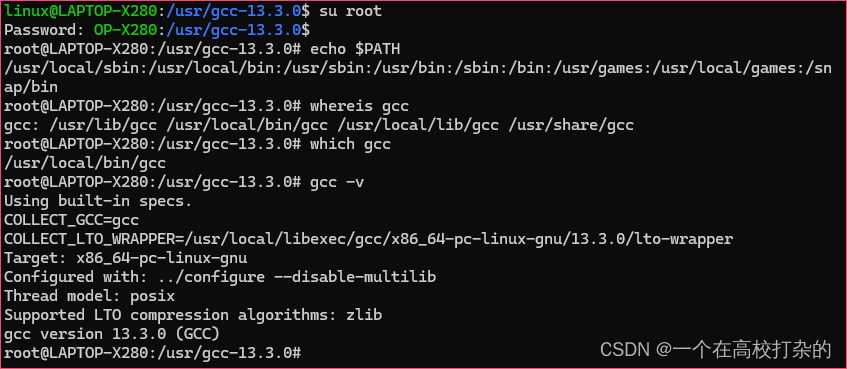
因为在root环境下编译的源代码,所以切换root下查看:
这里就可以直接使用gcc -v了,所以不需要设置环境变量。 关于环境变量的设置,查看/etc/profile或需要用到: export HOME等命令, 如export PATH= 'echo $PATH':/root/linux … | |
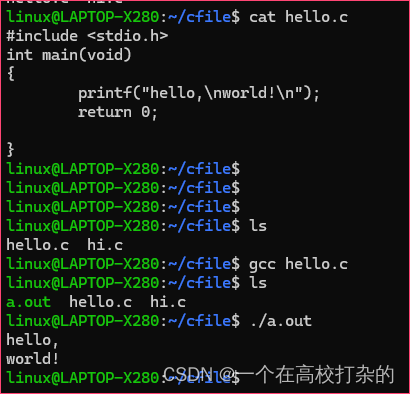
| 2.编译单个文件
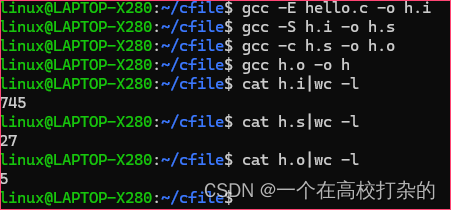
linux@LAPTOP-X280:~/cfile$ cat hello.c #include <stdio.h> int main(void) { printf("hello,\nworld!\n"); return 0; } 缺省一步编译 linux@LAPTOP-X280:~/cfile$ gcc hello.c //直接执行编译,会生产a.out的文件 linux@LAPTOP-X280:~/cfile$ ls a.out hello.c hi.c linux@LAPTOP-X280:~/cfile$ ./a.out //执行a.out 二进制可执行文件 hello, world! linux@LAPTOP-X280:~/cfile$ file a.out a.out: ELF 64-bit LSB executable, x86-64, version 1 (SYSV), dynamically linked, interpreter /lib64/ld-linux-x86-64.so.2, for GNU/Linux 3.2.0, not stripped 指定一步编译: inux@LAPTOP-X280:~/cfile$ gcc hello.c -o myhello linux@LAPTOP-X280:~/cfile$ file myhello myhello: ELF 64-bit LSB executable, x86-64, version 1 (SYSV), dynamically linked, interpreter /lib64/ld-linux-x86-64.so.2, for GNU/Linux 3.2.0, not stripped linux@LAPTOP-X280:~/cfile$ ./myhello hello, world! 分步编译: 预处理:gcc -E hello.c -o hello.i //-E(大写)只进行预处理 编 译: gcc -S hello.i -o hello.s //-S(大写)只进行预处理和编译 汇 编: gcc -c hello.s -o hello.o //-c 只进行预处理、编译和汇编 链 接: gcc hello.o -o file //指定生成的输出文件名为file linux@LAPTOP-X280:~/cfile$ gcc -E hello.c -o h.i linux@LAPTOP-X280:~/cfile$ cat h.i |wc -l 745 linux@LAPTOP-X280:~/cfile$ cat h.i … linux@LAPTOP-X280:~/cfile$ gcc -S h.i -o h.s linux@LAPTOP-X280:~/cfile$ cat h.o |wc -l 27 linux@LAPTOP-X280:~/cfile$ cat h.o … linux@LAPTOP-X280:~/cfile$ file h h: ELF 64-bit LSB executable, x86-64, version 1 (SYSV), dynamically linked, interpreter /lib64/ld-linux-x86-64.so.2, for GNU/Linux 3.2.0, not stripped linux@LAPTOP-X280:~/cfile$ ./h hello, world!
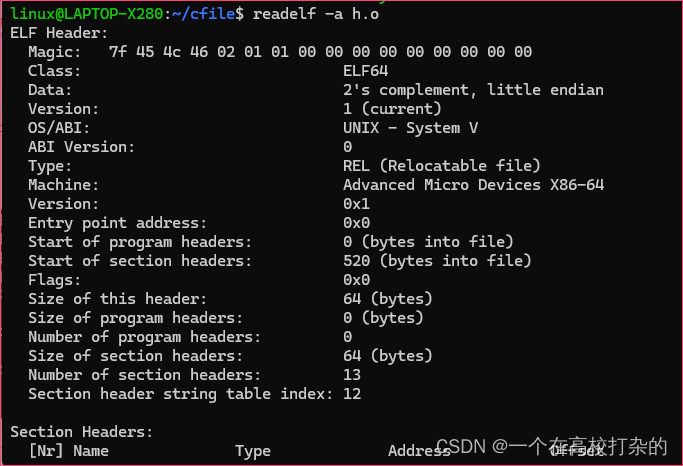
使用readelf -a h.o查看.o文件
| |
| 3.编译多个文件 | |
| 4.自动编译文件 |


 462
462

 被折叠的 条评论
为什么被折叠?
被折叠的 条评论
为什么被折叠?
 到【灌水乐园】发言


