


一、目录结构
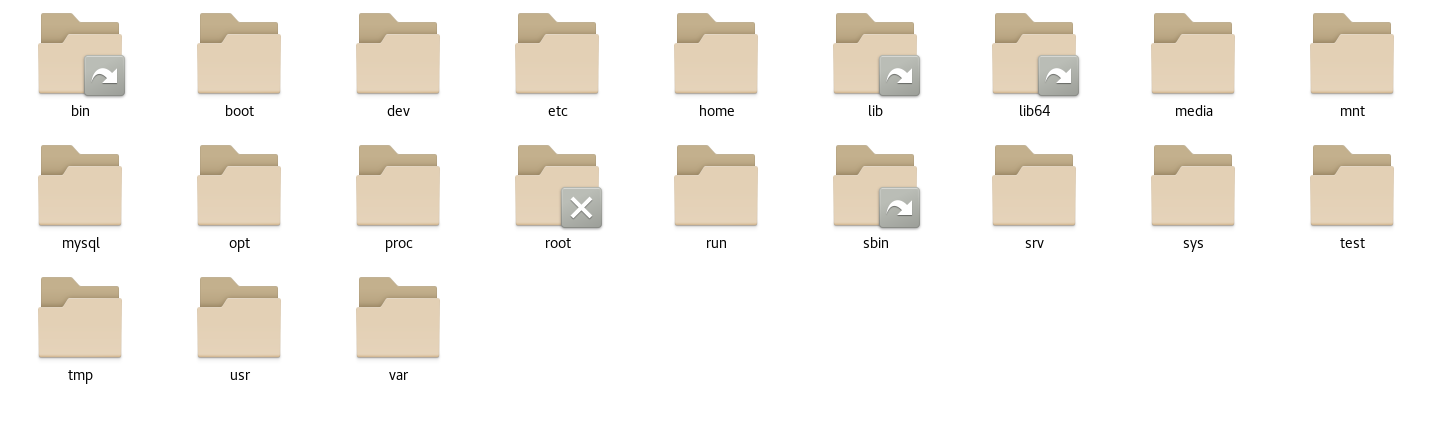
1.1 目录详解
1、bin 目录:里面存储的是脚本命令,如 cd、ls 等命令都会在里面存储。
2、sbin 目录:里面存储的是高级的命令脚本,启动或停止一些服务的命令脚本
3、boot 目录:linux 内核相关的一些配置,不要动它。
4、dev 目录:所有的设备都会在里面有一个文件夹,比如说 cpu、磁盘、网络等。也不要动它
5、etc 目录:环境变量目录,里面存储大量的设置,通过命令行修改 etc 目录下的一些文件来达到修改配置的目的。
6、home 目录:家目录,当点击桌面的文件夹时就会进入到家目录,根据用户的不同家目录也是不一样的。
7、lib 和 lib64 目录:存储的是依赖,即 linux 运行需要的一些东西。
8、media 目录:存储的是和设备有关的,比如音响、鼠标、键盘之类的。
9、mnt 目录:存储的是和设备有关的,单指磁盘挂载
10、opt 目录:装软件用的,软件都装在这个里面。
11、proc 目录:系统所使用的东西,内存映射,不要动
12、run 目录:在 linux 系统上提供对外服务时,它会在里面产生一个对应的文件
13、srv 目录:在 linux 系统上提供对外服务时,运行之后会产生一个额外的文件
14、sys 目录:也是存储系统文件的目录
15、tmp 目录:存储临时文件的目录,定期会自动删除
16、usr 目录:存储的是用户环境的设置,根据不同的用户设置不同的环境
17、var 目录:存储额外产生日志的文件
1.2 总结
经常使用到的是 opt 和 home 目录,当安装使用软件之后,就会在 run、srv、tmp、usr、var 这几个目录下产生文件。
如果我自定义了一些命令,那么就需要把它放到 bin、sbin 里面。
如果你加了一些设备,就会在 media 和 mnt 里面用的到。
如果修改了一些设置会在 etc 目录下用得到,剩下的 boot、dev、lib、lib64、sys 和 proc 这几个目录是不要去动的目录。
二、目录管理
2.1 列出目录 ls
# ls 命令
# -a 参数,查看全部的文件,包括隐藏的文件
# -l 参数,列出所有的文件,包括文件的属性和权限,不显示隐藏文件
[root@localhost /]# ls
bin  boot  dev  etc  home  lib  lib64  media  mnt  opt  proc  root  run  sbin  srv  sys  tmp  usr  var
[root@localhost /]# ls -a
.  ..  bin  boot  dev  etc  home  lib  lib64  media  mnt  opt  proc  root  run  sbin  srv  sys  tmp  usr  var
[root@localhost /]# ls -l
total 24
lrwxrwxrwx.   1 root root    7 Aug 17 01:18 bin -> usr/bin
dr-xr-xr-x.   5 root root 4096 Aug 17 01:35 boot
drwxr-xr-x.  19 root root 3280 Aug 21 20:17 dev
drwxr-xr-x. 144 root root 8192 Aug 31 23:30 etc
drwxr-xr-x.   3 root root   20 Aug 17 01:34 home
lrwxrwxrwx.   1 root root    7 Aug 17 01:18 lib -> usr/lib
lrwxrwxrwx.   1 root root    9 Aug 17 01:18 lib64 -> usr/lib64
drwxr-xr-x.   2 root root    6 Apr 10  2018 media
drwxr-xr-x.   2 root root    6 Apr 10  2018 mnt
drwxr-xr-x.   4 root root   61 Aug 17 01:45 opt
dr-xr-xr-x. 242 root root    0 Aug 21 20:16 proc
dr-xr-x---.   4 root root  287 Aug 30 19:40 root
drwxr-xr-x.  43 root root 1320 Aug 31 23:40 run
lrwxrwxrwx.   1 root root    8 Aug 17 01:18 sbin -> usr/sbin
drwxr-xr-x.   2 root root    6 Apr 10  2018 srv
dr-xr-xr-x.  13 root root    0 Aug 21 20:16 sys
drwxrwxrwt.  25 root root 4096 Aug 31 18:27 tmp
drwxr-xr-x.  13 root root  155 Aug 17 01:18 usr
drwxr-xr-x.  21 root root 4096 Aug 17 01:35 var
2.2 创建目录 mkdir
# mkdir
# -p 创建多级目录
[root@localhost home]# mkdir test1
[root@localhost home]# mkdir -p test2/test3/test4
2.3 删除目录 rmdir
# rmdir
# -p 删除多级目录
[root@localhost home]# rmdir test1
[root@localhost home]# rmdir -p test2/test3/test4
2.4 复制文件或目录 cp
# cp 文件名 文件路径
[root@localhost home]# ls
tansun  test1  test1.txt
[root@localhost home]# cp test1.txt test1
[root@localhost home]# cd test1
[root@localhost test1]# ls
test1.txt
2.5 移除文件或目录 rm
# rm
# -f 忽略不存在的文件,强制删除
# -r 递归删除目录
# -i 互动,删除时询问是否删除
[root@localhost test1]# rm -rf test1
[root@localhost test1]# rm -f test1.txt
2.6 移动文件或目录(重命名) mv
# mv
# -f 强制
# -u 只替换已经更新过的文件
[root@localhost home]# ls
tansun  test1  test1.txt
[root@localhost home]# mv test1.txt test2.txt
[root@localhost home]# ls
tansun  test1  test2.txt
三、文件内容
3.1 从第一行开始看 cat
# 由第一行开始显示文件内容,用来读取文章
[root@localhost etc]# cat networks
default 0.0.0.0
loopback 127.0.0.0
link-local 169.254.0.0
3.2 从最后一行开始看 tac
# 从最后一行开始读取文件,它是 cat 的倒写
[root@localhost etc]# tac networks
link-local 169.254.0.0
loopback 127.0.0.0
default 0.0.0.0
3.3 显示行号 nl
# 显示内容的时候顺便显示行号
[root@localhost etc]# nl networks
     1	default 0.0.0.0
     2	loopback 127.0.0.0
     3	link-local 169.254.0.0
3.4 一页一页的看 more
# 一页一页的显示文件内容
# 点击空格表示翻页
# enter 代表向下看一行
# :f 显示行号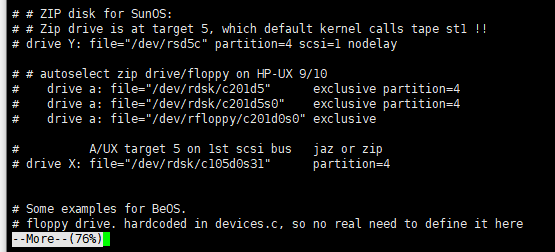
3.5 前后翻页 less
# less 和 more 比较相似,空格翻页,
# 上下键代表翻动页面
# 输入 q 命令退出
# 查找字符串  /查找的字符  表示向下查询,输入 n 表示继续向下寻找下一个
# 查找字符串  ?查找的字符  表示向上查询,输入 N 表示继续向上寻找下一个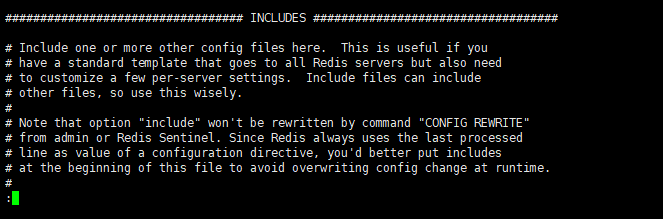
3.6 只查看前几行 head
# 只看头几行,通过 -n 来控制查看的行数
[root@localhost myredis]# head -10 redis80.conf
# Redis configuration file example.
#
# Note that in order to read the configuration file, Redis must be
# started with the file path as first argument:
#
# ./redis-server /path/to/redis.conf

# Note on units: when memory size is needed, it is possible to specify
# it in the usual form of 1k 5GB 4M and so forth:
#
3.7 只查看后几行 tail
# 只看后几行,通过 -n 来控制查看的行数
[root@localhost myredis]# tail -10 redis80.conf
# ignore-warnings ARM64-COW-BUG

# Generated by CONFIG REWRITE
latency-tracking-info-percentiles 50 99 99.9
user default on nopass sanitize-payload ~* &* +@all

replicaof 127.0.0.1 6381
save 3600 1
save 300 100
save 60 10000
四、创建文件
4.1 创建文件 touch
[root@localhost home]# ls
tansun  test1  test2.txt
[root@localhost home]# touch test3
[root@localhost home]# ls
tansun  test1  test2.txt  test3
4.2 创建文件 vim
[root@localhost home]# ls
tansun  test1
[root@localhost home]# vim test2.txt
[root@localhost home]# ls
tansun  test1  test2.txt
4.3 创建并写入文件内容 echo
# 语法:exho "文件内容" >> 文件名
[root@localhost home]# ls
tansun  test1
[root@localhost home]# echo "i love you" >> test2.txt
[root@localhost home]# ls
tansun  test1  test2.txt
五、账号管理
5.1 添加用户 useradd
# useradd -选项 用户名
# -m 自动创建这个用户的主目录为 /home/xhf
# -G 给用户分配组
[root@localhost home]# useradd -m xhf
[root@localhost home]# ls
tansun  test1  test2.txt  xhf
添加用户成功后,会在 /etc/passwd 文件里面留下用户存储相关文件的记录,如下所示:

5.2 删除用户 userdel
# userdel -r 删除用户的时候将他的目录也一并删掉
[root@localhost home]# ls
tansun  test1  test2.txt  xhf
[root@localhost home]# userdel -r xhf
[root@localhost home]# ls
tansun  test1  test2.txt
5.3 修改用户 usermod
# 修改 xhf 的目录到指定文件夹下
[root@localhost home]# usermod -d /home/222 xhf
5.4 切换用户 su
# 第一种情况:root 用户切换到普通用户
# root:表示当前用户
# localhost:表示主机名
# home:表示当前目录
# 只有root用户 后面才使用 # ,普通用户使用 $
# 语法为 su 用户名
[root@localhost home]# useradd -m xhf
[root@localhost home]# su xhf
[xhf@localhost home]$


# 第二种情况,普通用户切换到 root 用户
# 命令为 su
[xhf@localhost home]$ su
Password:
[root@localhost home]#
5.5 设置密码 passwd
# 一般我们通过 root 创建用户的时候是需要配置密码的
# 假设是超级用户给其他用户设置密码语法为:
# passwd 用户名
[root@localhost /]# passwd xhf
Changing password for user xhf.
New password:
Retype new password:
passwd: all authentication tokens updated successfully.
[root@localhost /]# su xhf
[xhf@localhost /]$


# 如果是普通用户,只需要 passwd 命令即可
[xhf@localhost /]$ passwd
Changing password for user xhf.
Changing password for xhf.
(current) UNIX password:
New password:
Retype new password:
5.6 锁定账户
# 锁定账户有两种方式
# 第一种方式:加 -l 参数,锁定之后这个账户就不能登录了
[root@localhost /]# passwd -l xhf
Locking password for user xhf.
passwd: Success

# 第二种方式:加 -d 参数,没有密码也不是不能登录的
[root@localhost /]# passwd -d xhf
Removing password for user xhf.
passwd: Success
六、用户组管理
6.1 创建用户组 groupadd
# 创建完用户组后可以得到一个组的 id ,这个 id 是可以指定的,若不指定则自增 +1
# -g 520 指定组的 id
#
[root@localhost etc]# groupadd xhfgroup
[root@localhost etc]# cat /etc/group
6.2 删除用户组 groupdel
[root@localhost etc]# groupdel xhfgroup 6.3 修改用户组 groupmod
# 有两个参数 -g 和 -n
# -g 表示修改id
# -n 表示修改当前组的名字
[root@localhost etc]# groupmod -g 520 -n xhfgroup2 xhfgroup
[root@localhost etc]# cat /etc/group
七、磁盘管理
7.1 列出使用量 df
# 列出文件系统整体的磁盘使用量
[root@localhost /]# df
Filesystem     1K-blocks    Used Available Use% Mounted on
devtmpfs         1777648       0   1777648   0% /dev
tmpfs            1793428       0   1793428   0% /dev/shm
tmpfs            1793428   29172   1764256   2% /run
tmpfs            1793428       0   1793428   0% /sys/fs/cgroup
/dev/sda3       18555904 5598740  12957164  31% /
/dev/sda1         303780  166924    136856  55% /boot
tmpfs             358688      40    358648   1% /run/user/1000
tmpfs             358688       0    358688   0% /run/user/0

# -h 表示以兆为单位查看磁盘使用量
[root@localhost /]# df -h
Filesystem      Size  Used Avail Use% Mounted on
devtmpfs        1.7G     0  1.7G   0% /dev
tmpfs           1.8G     0  1.8G   0% /dev/shm
tmpfs           1.8G   29M  1.7G   2% /run
tmpfs           1.8G     0  1.8G   0% /sys/fs/cgroup
/dev/sda3        18G  5.4G   13G  31% /
/dev/sda1       297M  164M  134M  55% /boot
tmpfs           351M   40K  351M   1% /run/user/1000
tmpfs           351M     0  351M   0% /run/user/0
7.2 检查使用量 du
# 检查磁盘空间使用量
[root@localhost home]# du
4	./tansun/.cache/abrt
la/extensions
0	./tansun3/.mozilla/plugins
0	./tansun3/.mozilla
12	./tansun3
0	./xhf2/.mozilla/extensions
0	./xhf2/.mozilla/plugins
0	./xhf2/.mozilla
4	./xhf2/.cache/abrt
4	./xhf2/.cache
0	./xhf2/.config/abrt
0	./xhf2/.config
16	./xhf2
4012	.

# -a 表示也查看隐藏的磁盘空间,也可以看见子文件夹
[root@localhost home]# du -a
4	./xhf2/.bashrc
4	./xhf2/.cache/abrt/lastnotification
4	./xhf2/.cache/abrt
4	./xhf2/.cache
0	./xhf2/.config/abrt
0	./xhf2/.config
16	./xhf2
4012	.

# 查看整个系统的容量,即检查根目录下每个目录所占容量
[root@localhost home]# du -sm /*
0	/bin
148	/boot
0	/dev
43	/etc
4	/home
0	/lib
0	/lib64
0	/media
0	/mnt
242	/opt
du: cannot access ‘/proc/86363/task/86363/fd/3’: No such file or directory
du: cannot access ‘/proc/86363/task/86363/fdinfo/3’: No such file or directory
du: cannot access ‘/proc/86363/fd/3’: No such file or directory
du: cannot access ‘/proc/86363/fdinfo/3’: No such file or directory
0	/proc
1	/root
du: cannot access ‘/run/user/1000/gvfs’: Permission denied
29	/run
0	/sbin
0	/srv
0	/sys
2	/tmp
3961	/usr
1111	/var
7.3 挂载 mount
# 将外部设备 xhf 这个 u 盘挂载到 mnt 目录下
[root@localhost home]# mount /dev/xhf /mnt/xhf
7.4 卸载 umount
# -f 强制删除
[root@localhost home]# umount -f 挂载位置
八、进程管理
8.1 查看进程信息 ps
# 语法:ps -xx
# -a 显示当前终端运行的所有的进程信息
# -u 以用户的信息显示进程
# -x 显示后台运行进程的参数
# | 在linux 中这个叫管道符,grep 查找文件中符合条件的字符串
[root@localhost home]# ps -aux|grep mysql

# 查看父进程的信息
ps -ef|grep mysql

# 也可以使用 pstree 命令
# -p 显示父 id
# -u 显示用户组
pstree -pu
8.2 结束进程 kill
kill -9 进程id8.3 不挂断启动 nohup
# nohup 意思是不挂断运行命令,当账户退出或终端关闭时,程序仍然运行
# 当用 nohup 命令执行作业时,缺省情况下该作业的所有输出被重定向到 nohup.out的文件中 ,除非另外指定了输出文件。
# 这种方法会把日志文件输入到你指定的文件中,没有则会自动创建。
[root@localhost bin]# nohup  java -jar XX.jar >temp.text &
九、防火墙管理
9.1 查看防火墙状态
[root@localhost home]# systemctl status firewalld9.2 开启防火墙
[root@localhost home]# systemctl start firewalld9.3 关闭防火墙
[root@localhost home]# systemctl stop firewalld.service9.4 重启防火墙
[root@localhost home]# firewall-cmd --reload
success
9.5 查看防火墙开放端口
[root@localhost home]# firewall-cmd --list-ports9.6 防火墙开放指定端口
# 需要重启防火墙才可以生效
# --zone 作用域,都可以访问
# --add-port=3306/tcp 添加端口
# --permanent 永久生效,没有此参数重启后失效
[root@localhost home]# firewall-cmd --zone=public --permanent --add-port=3306/tcp
success
[root@localhost home]# firewall-cmd --list-ports

[root@localhost home]# firewall-cmd --reload
success
[root@localhost home]# firewall-cmd --list-ports
3306/tcp
9.7 查看指定端口是否开放
[root@localhost home]# firewall-cmd --zone=public --query-port=80/tcp
no
9.8 删除端口
[root@localhost home]# firewall-cmd --zone=public --remove-port=3306/tcp --permanent
success
十、Mysql 常用命令
10.1 开启 mysql 服务
[root@localhost bin]# service mysql start10.2 关闭 mysql 服务
[root@localhost bin]# service mysql stop10.3 启动 mysql 数据库
# 记得回车后输入前面的随机密码
[root@localhost bin]# mysql -u root -p
10.4 设置远程连接
create user 'root'@'%' identified by '数据库密码';
grant all on *.* to 'root'@'%';
flush privileges;
10.5 设置 mysql 开机自启
[root@localhost bin]# cp /usr/local/mysql/support-files/mysql.server /etc/init.d/mysql


 354
354


 被折叠的 条评论
为什么被折叠?
被折叠的 条评论
为什么被折叠?
 到【灌水乐园】发言


