


一、服务端编码
1.1 添加 maven 依赖
   <!-- cxf实现webservice相关依赖-->
   <dependency>
        <groupId>org.apache.cxf</groupId>
        <artifactId>cxf-rt-frontend-jaxws</artifactId>
        <version>3.2.4</version>
    </dependency>
    <dependency>
       <groupId>org.apache.cxf</groupId>
        <artifactId>cxf-rt-transports-http</artifactId>
       <version>3.2.4</version>
   </dependency>
   <!--alibaba fastjson-->
   <dependency>
        <groupId>com.alibaba</groupId>
        <artifactId>fastjson</artifactId>
        <version>1.2.4</version>
   </dependency>
1.2 编写服务类
编写 model 类,如下
public class Teacher {
	private String name;
	private Integer age;
	private String sex;
	private Date birthday;

	// getter、setter

	public Teacher(String name, Integer age, String sex, Date birthday) {
		super();
		this.name = name;
		this.age = age;
		this.sex = sex;
		this.birthday = birthday;
	}
}
编写需要发布的接口和实现类,如下:
// @WebService:主要用于对接口、类进行注解,表示要发布的Web服务。
@WebService
public interface TeacherService {

    // @WebMethod:表示要发布的方法
	@WebMethod
	String getTeacherName(@WebParam(name="teacherId") String teacherId);

    // @WebParam:表示要发布方法的参数,默认的参数名称是args0、args1等,如果有这个注解,teacherId替代args0。
	@WebMethod
	String getUser(String teacherId);
}
// targetNamespace 为接口包所在的路径
// endpointInterface 为需要发布的接口路径
@WebService(targetNamespace="http://service.webService.com/",endpointInterface="com.webService.service.TeacherService")
public class TeacherServiceImpl implements TeacherService{
@Override
public String getTeacherName(String teacherId) {
return "我拿到了请求的teacherId"+teacherId;
}
@Override
public String getUser(String teacherId) {
System.out.println("此次请求的teacherId为"+teacherId);
Teacher t = new Teacher("王老师",40,"男",new Date());
return JSON.toJSONString(t);
}
}编写发布接口的代码如下:
@Configuration
public class PublishWebService {
// 如果这个地方的名字是 dispatcherServlet 则其他的请求也会被 webservice 拦截,访问不了
@Bean
public ServletRegistrationBean disServlet() {
return new ServletRegistrationBean(new CXFServlet(), "/test/*");
}
@Bean(name = Bus.DEFAULT_BUS_ID)
public SpringBus springBus() {
return new SpringBus();
}
@Bean
public TeacherService teacherService() {
return new TeacherServiceImpl();
}
@Bean
public Endpoint endpoint() {
EndpointImpl endpoint = new EndpointImpl(springBus(), teacherService());
endpoint.publish("/user");
return endpoint;
}
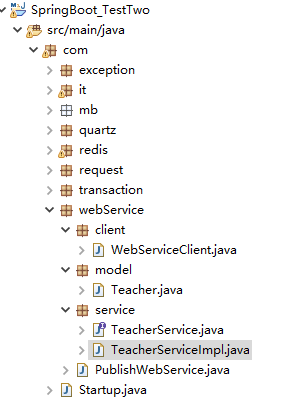
}项目文件结构如下:

1.3 启动测试
启动项目,在浏览器输入: http://localhost:8080/test/user?wsdl 返回结果如下,证明发布成功了。

二、客户端测试
2.1 客户端编码
测试服务的 client 代码如下:
public class WebServiceClient {

	public static void main(String[] args) throws Exception {

		JaxWsDynamicClientFactory dcf =JaxWsDynamicClientFactory.newInstance();
		org.apache.cxf.endpoint.Client client =dcf.createClient("http://localhost:8080/test/user?wsdl");

		// getUser 为接口中定义的方法名称  张三为传递的参数   返回一个 Object 数组
		Object[] objects=client.invoke("getTeacherName","411001");

		// 输出调用结果
		System.out.println("*****"+objects[0].toString());
	}
}
返回结果如下:


 3743
3743


 被折叠的 条评论
为什么被折叠?
被折叠的 条评论
为什么被折叠?
 到【灌水乐园】发言


