


欢迎关注作者,更多数据库相关安装配置,troubleshooting,调优,备份恢复等资源
墨天伦:潇湘秦的个人主页 - 墨天轮
CSDN:潇湘秦-CSDN博客
公众号:潇湘秦
---------------------------------------------------------------------------------------------
ORACLE OEM13.5安装配置详细文档
包含详细的安装配置,常见的错误和解决办法,已经OEM添加集群和主机等可能遇到的问题和解决办法
一、数据库基础环境安装
版本:Oracle Database 19c Enterprise Edition Release 19.3.0.0.0 - 64bit Production
Non-CDB
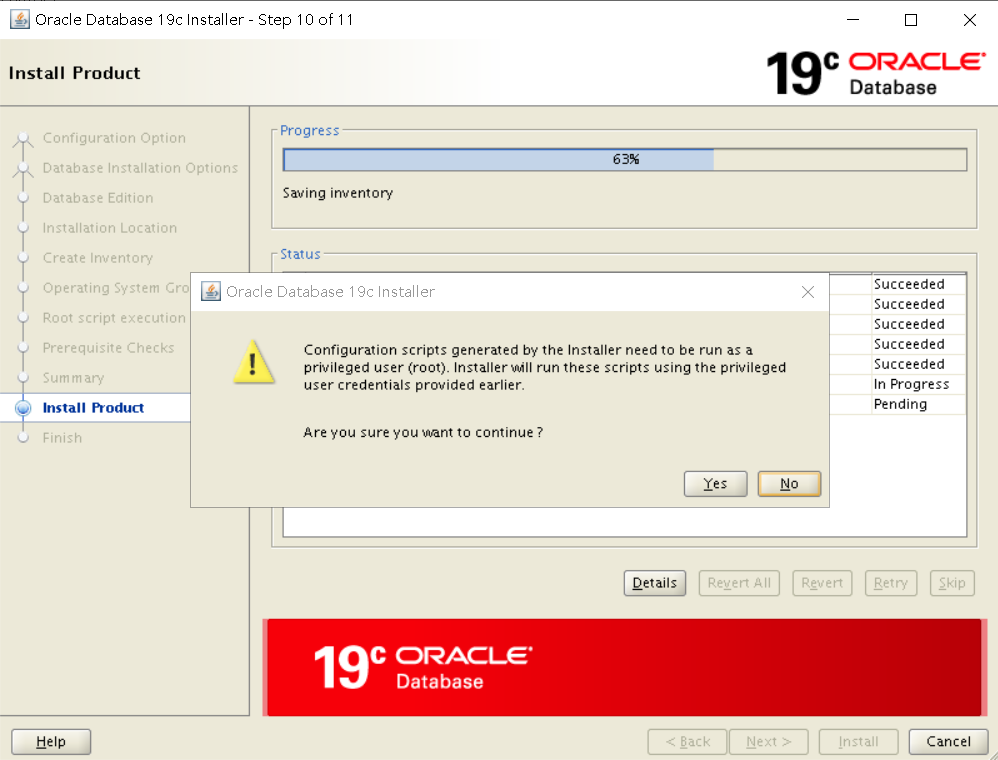
二、数据库软件安装

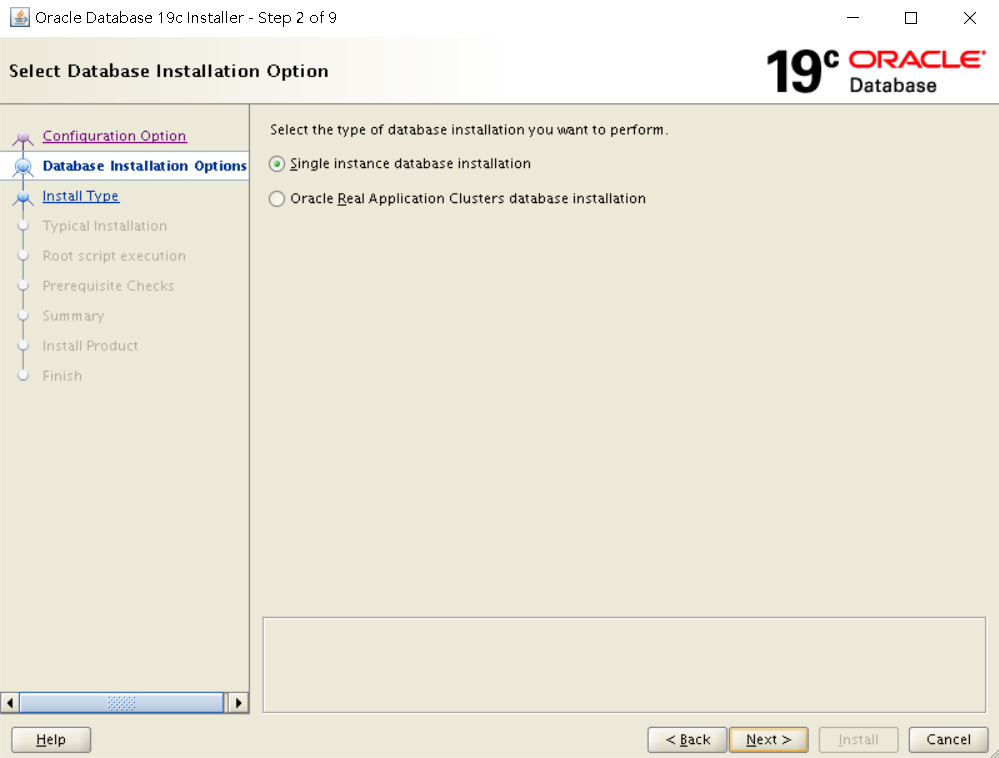


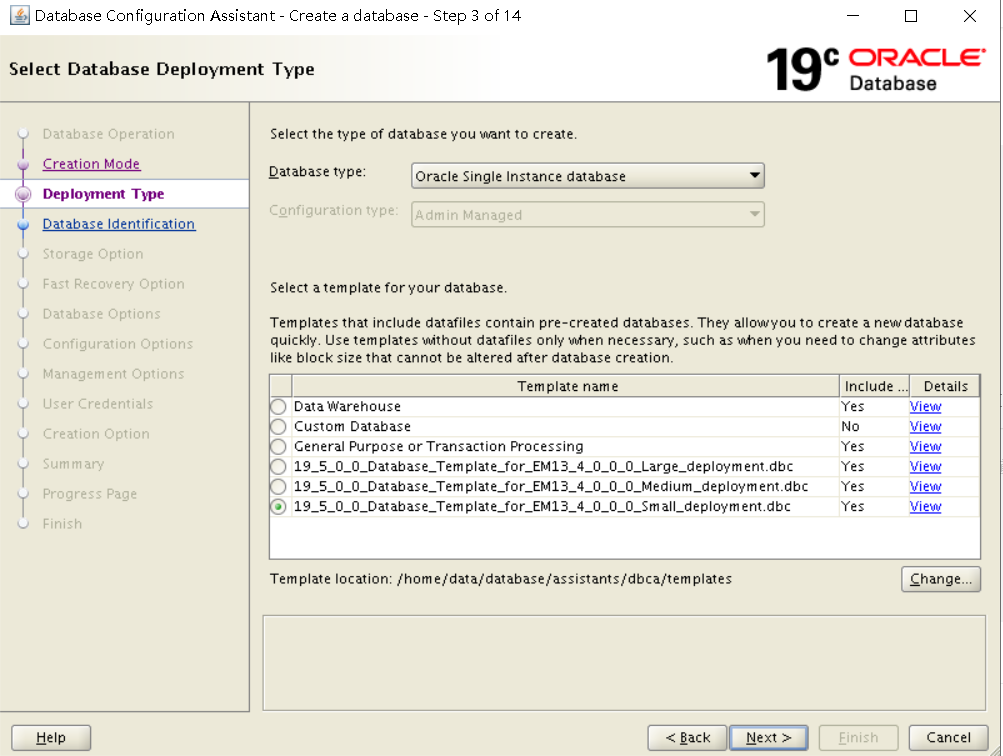
三、dbca建库
模板建库:
13.5不需要使用模板建库


vi /etc/pam.d/login

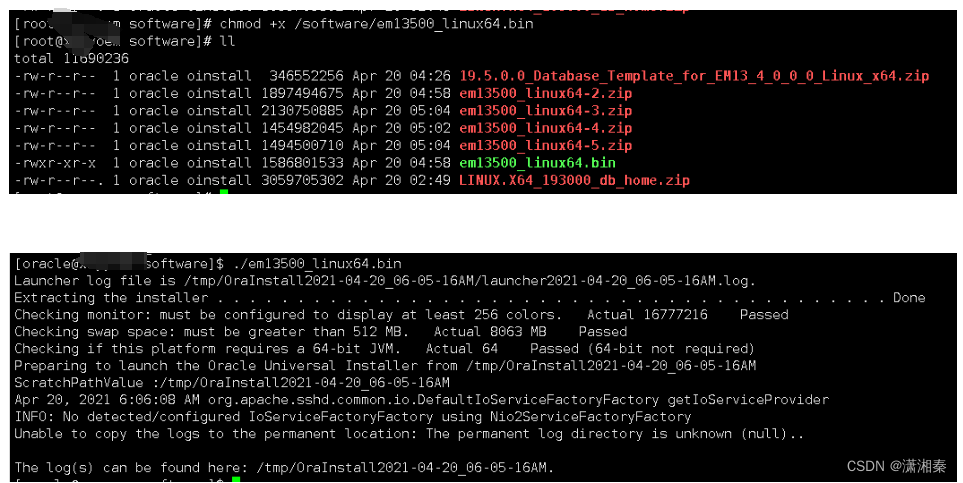
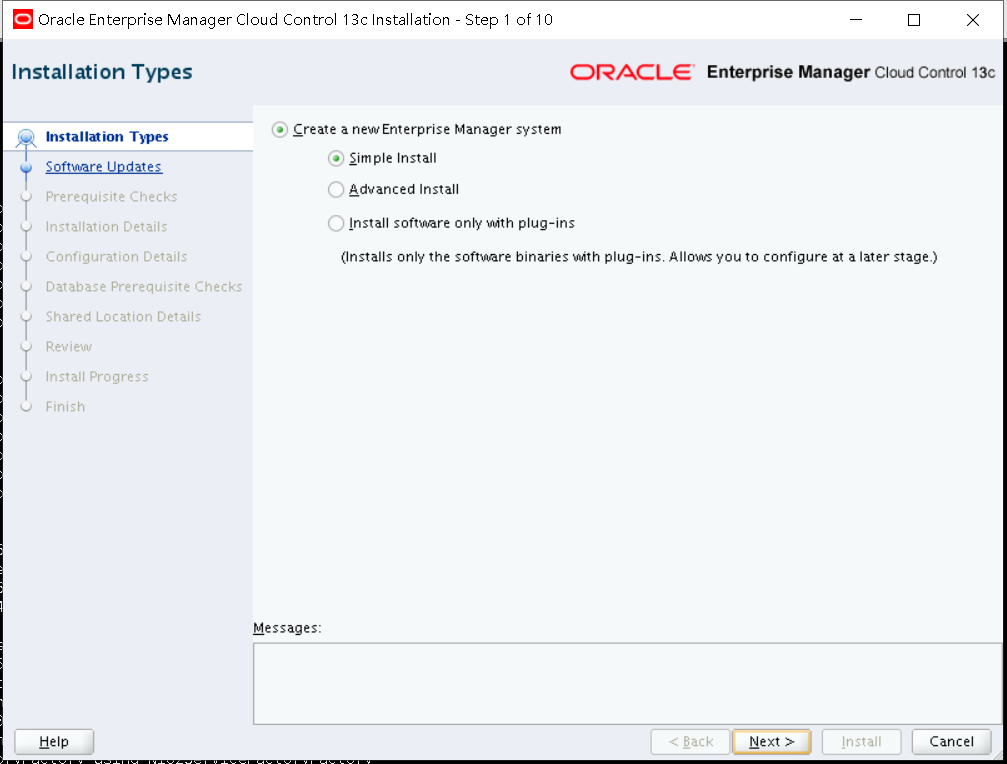
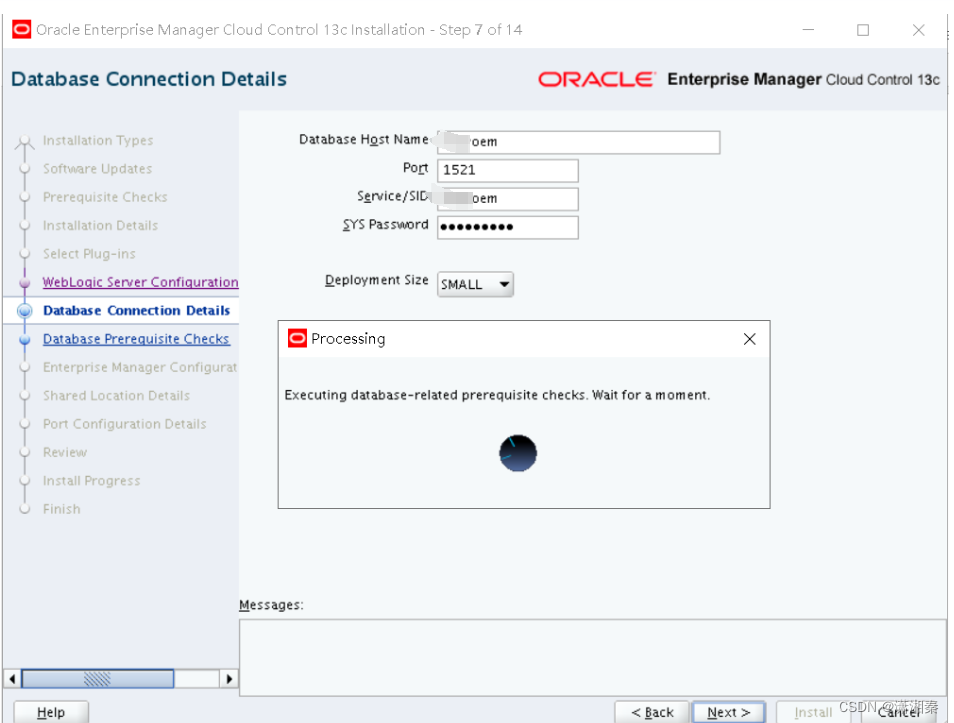
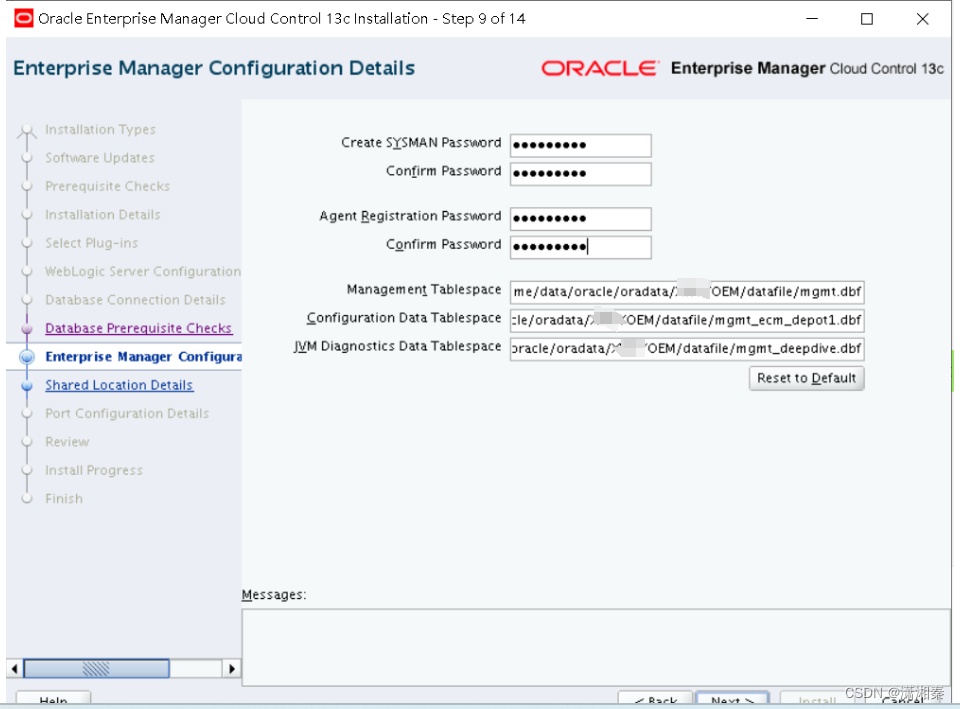
四、oem安装
EMCC13.5安装包 可以如下方式下载

附:环境变量、listener信息


修改系统参数


 创建安装目录
mkdir –r /data/oracle/middleware
mkdir –r /data/oracle/middlewareagent


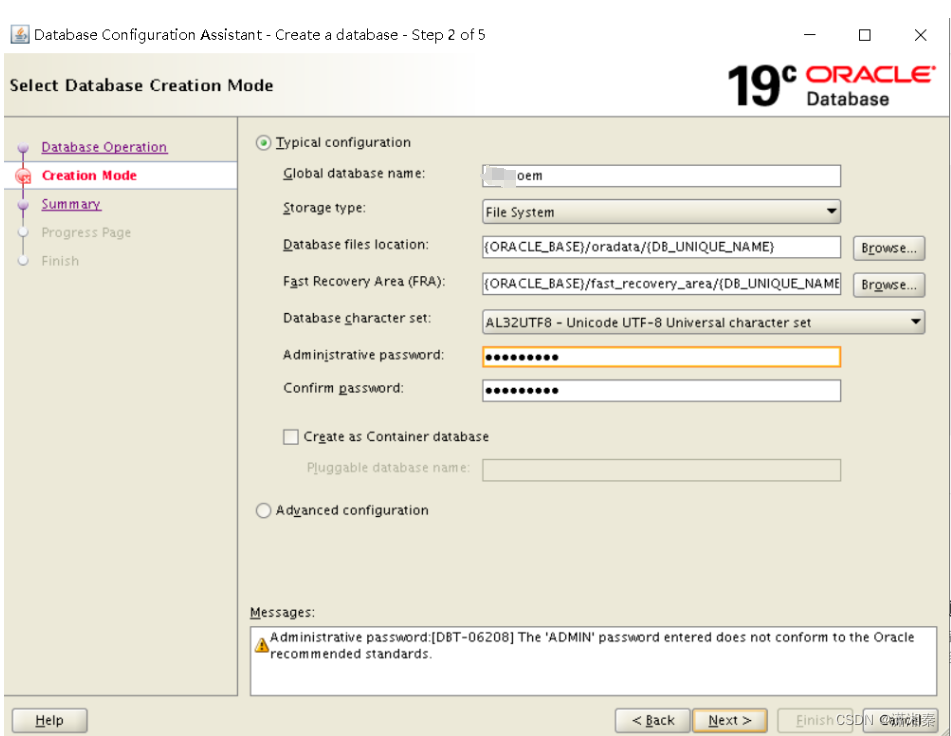
五.dbca建库
19C可以选择标准模板建库
部分系统参数需要修改
alter system set parallel_min_servers=0;

alter system set session_cached_cursors=400 scope=spfile;

alter system set log_buffer=8M scope=spfile;

alter system set open_cursors=600 scope=spfile;

alter system set processes=800 scope=spfile;

alter system set shared_pool_size=1G scope=spfile;

alter system set session_cached_cursors=400 scope=spfile;

redo log 设置300M

alter database add logfile group 4 ('/data/OEMDB/redo04.log') size 400M;

alter database add logfile group 5 ('/data/OEMDB/redo05.log') size 400M;

alter database add logfile group 6 ('/data/OEMDB/redo06.log') size 400M;

alter database drop logfile group 1;

alter database drop logfile group 2;

alter database drop logfile group 3;

restart db

shutdown immediate

startup
alter system set "_allow_insert_with_update_check"=true scope=both;


This information is also available at:

/home/data/oracle/middleware/install/setupinfo.txt

See the following for information pertaining to your Enterprise Manager installation:

Use the following URL to access:

1. Enterprise Manager Cloud Control URL: https://xxxxoem:7803/em

2. Admin Server URL: https://xxxxoem:7102/console

The following details need to be provided while installing an additional OMS:

1. Admin Server Host Name: xxxxoem

2. Admin Server Port: 7102

You can find the details on ports used by this deployment at : /home/data/oracle/middleware/install/portlist.ini

Oem 安装介质路径:/software

Oem oms路径:/home/data/oracle/middleware

Oem agent路径:/home/data/oracle/middlewareagent
his information is also available at:

/data/oracle/middleware/install/setupinfo.txt

See the following for information pertaining to your Enterprise Manager installation:

Use the following URL to access:

1. Enterprise Manager Cloud Control URL: https://SZSPLORCOEM01:7803/em

2. Admin Server URL: https://SZSPLORCOEM01:7102/console

The following details need to be provided while installing an additional OMS:

1. Admin Server Host Name: SZSPLORCOEM01

2. Admin Server Port: 7102

You can find the details on ports used by this deployment at : /data/oracle/middleware/install/portlist.ini

NOTE:

An encryption key has been generated to encrypt sensitive data in the Management Repository. If this key is lost, all encrypted data in the Repository becomes unusable.

A backup of the OMS configuration is available in /data/oracle/gc_inst/em/EMGC_OMS1/sysman/backup on host SZSPLORCOEM01. See Cloud Control Administrators Guide for details on how to back up and recover an OMS.

NOTE: This backup is valid only for the initial OMS configuration. For example, it will not reflect plug-ins installed later, topology changes like the addition of a load balancer, or changes to other properties made using emctl or emcli. Backups should be created on a regular basis to ensure they capture the current OMS configuration. Use the following command to backup the OMS configuration:

/data/oracle/middleware/bin/emctl exportconfig oms -dir <backup dir>
如果添加主机ssh不是默认22端口 需要修改如下文件
[oracle@szsplorcoem01 resources]$ pwd

/data/oracle/middleware/oui/prov/resources

[oracle@szsplorcoem01 resources]$

vi /data/oracle/middleware/oui/prov/resources/Paths.properties

[oracle@xxxxxxdb01 ~]$ /u01/app/oracle/agent/agent_inst/bin/emctl config agent addinternaltargets

Oracle Enterprise Manager Cloud Control 13c Release 5

Copyright (c) 1996, 2021 Oracle Corporation. All rights reserved.

[oracle@csicn20db01 ~]$ /u01/app/oracle/agent/agent_inst/bin/emctl start agent

Oracle Enterprise Manager Cloud Control 13c Release 5

Copyright (c) 1996, 2021 Oracle Corporation. All rights reserved.

Starting agent ...... started.

[oracle@xxxxxxdb01 ~]$
六.新加被监控集群
- 手动配置安装代理
- 确保OEM主机和db主机host都配置OK

- 主机选择主机名,和平台 11g目前只支持linux x86-64

- 配置安装目录 --确保安装目录不存在,系统会自动创建

- 配置oracle用户名和密码

- 配置root 用户和密码

- 开始部署

- 初始化部署 可能会需要一些时间


cd /u01/app/oracle/agent/ADATMP_2023-05-30_15-23-43-PM;
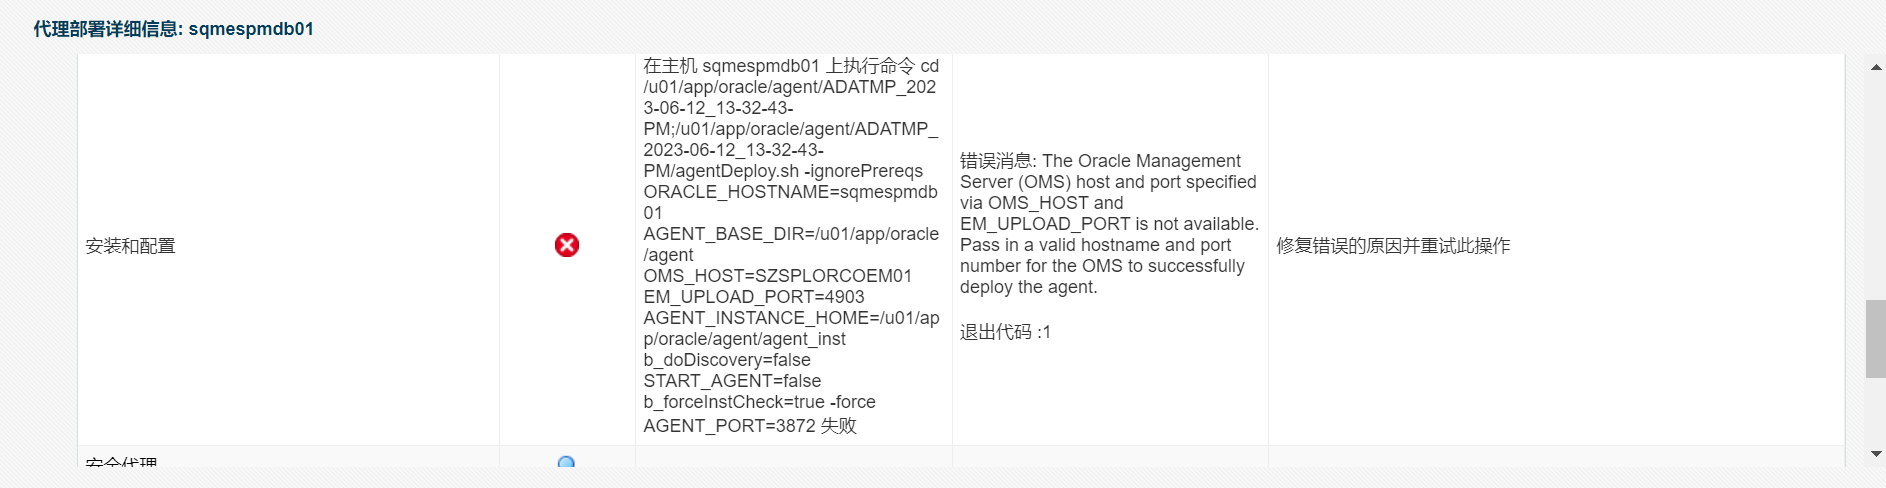
/u01/app/oracle/agent/ADATMP_2023-05-30_15-23-43-PM/agentDeploy.sh -ignorePrereqs ORACLE_HOSTNAME=jxrac01 AGENT_BASE_DIR=/u01/app/oracle/agent OMS_HOST=SZSPLORCOEM01 EM_UPLOAD_PORT=4903 AGENT_INSTANCE_HOME=/u01/app/oracle/agent/agent_inst b_doDiscovery=false START_AGENT=false b_forceInstCheck=true -force AGENT_PORT=3872报错处理:
如果遇到如下问题 请排查
- db端和oms端的hosts文件均配置好主机IP应对关系
- wget https://SZSPLORCOEM01:4903/empbs/upload --no-check-certificate
异常

正常 此命令能够正常执行是是否能推送成功agent的前提

报错图片

添加RAC集群
- 首先按上面的步骤将agent在主机上安装好
- 自动发现主机上的目标

点到新加主机,然后点立即搜索


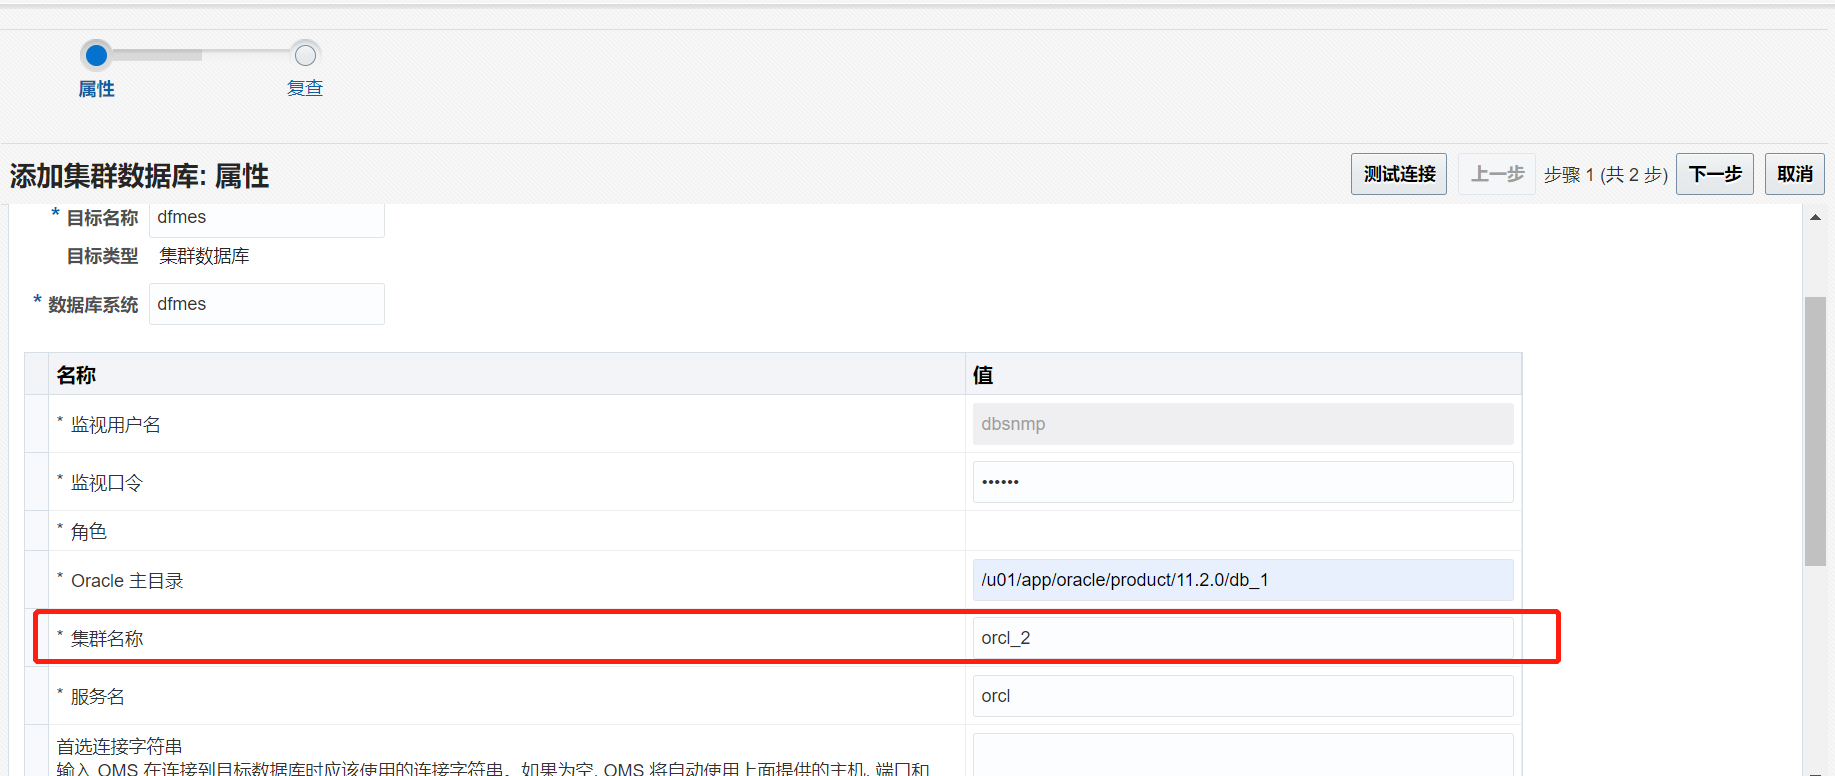
- 添加集群数据库


依次添加两个实例 测试连接,下一步完成

异常处理 dbname重复问题
如果dbname重复可能无法加入会报错
以下目标已经存在于基于属性的资料档案库中:- jxmes : rac_database
解决办法如下
- 首先搜索主机上的目标,找到主机上的集群数据库的名字


如果已经集群的dbname重复了,则发现的集群数据库可能会是如下图
orcl_1 或者是大写的ORCL等等 只要名字不通就可以添加成功


 2075
2075


 被折叠的 条评论
为什么被折叠?
被折叠的 条评论
为什么被折叠?
 到【灌水乐园】发言


