


一、下载categraf
GitHub - flashcatcloud/categraf: one-stop telemetry collector for nightingale
go环境自己搭建
用mtail采集日志参考:
二、新建inputs/mtail文件

mtail文件内容如下:本例只返回:999,小伙伴可以重写gatherOnce方法,返回自己想要的内容
package mtail
import (
	"sync"
	"sync/atomic"
	"flashcat.cloud/categraf/config"
	"flashcat.cloud/categraf/inputs"
	"flashcat.cloud/categraf/types"
	"github.com/toolkits/pkg/container/list"
)

const inputName = "mtail"
type Mtail struct {
	config.Interval
	counter   uint64
	waitgrp   sync.WaitGroup
	Instances []*Instance `toml:"instances"`
}

func init() {
	inputs.Add(inputName, func() inputs.Input {
		return &Mtail{}
	})
}

func (r *Mtail) Prefix() string {
	return inputName
}

func (r *Mtail) Init() error {
	if len(r.Instances) == 0 {
		return types.ErrInstancesEmpty
	}

	for i := 0; i < len(r.Instances); i++ {
		if err := r.Instances[i].Init(); err != nil {
			return err
		}
	}

	return nil
}

func (r *Mtail) Drop() {}

func (r *Mtail) Gather(slist *list.SafeList) {
	atomic.AddUint64(&r.counter, 1)

	for i := range r.Instances {
		ins := r.Instances[i]

		r.waitgrp.Add(1)
		go func(slist *list.SafeList, ins *Instance) {
			defer r.waitgrp.Done()

			if ins.IntervalTimes > 0 {
				counter := atomic.LoadUint64(&r.counter)
				if counter%uint64(ins.IntervalTimes) != 0 {
					return
				}
			}

			ins.gatherOnce(ins.TargetUrl, slist)
		}(slist, ins)
	}

	r.waitgrp.Wait()
}

type Instance struct {
	Labels        map[string]string `toml:"labels"`
	IntervalTimes int64             `toml:"interval_times"`
	TargetUrl     string            `toml:"target_url"`
}

func (ins *Instance) Init() error {
	return nil
}

func (ins *Instance) gatherOnce(TargetUrl string, slist *list.SafeList) {
	fields := map[string]interface{}{
		"send_error": "999",
	}
	inputs.PushSamples(slist, fields)
}
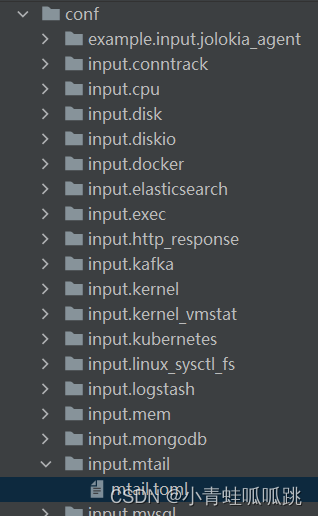
三、新建conf/input.mtail/mtail.toml文件
mtail.toml文件自己定义内容
[[instances]]
labels = "hlw"
interval_times = 1
target_url = "http://192.168.1.44:3903/metrics"
四、注册
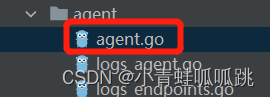
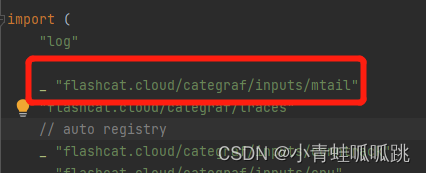
在agent/agent.go注册
五、打包测试
# export GO111MODULE=on
# export GOPROXY=https://goproxy.cn
go build
如果打包成linux下运行的程序
$Env:GOARCH="amd64";$Env:GOOS="linux"
go build
PS D:\workspace_go\categraf> .\categraf --test --inputs mtail
2022/08/13 09:38:09 main.go:110: I! runner.binarydir: D:\workspace_go\categraf
2022/08/13 09:38:09 main.go:111: I! runner.hostname: LAPTOP-4O62U4N3
2022/08/13 09:38:09 main.go:112: I! runner.fd_limits: N/A
2022/08/13 09:38:09 main.go:113: I! runner.vm_limits: N/A
2022/08/13 09:38:09 config.go:33: I! tracing disabled
2022/08/13 09:38:09 agent.go:62: I! agent starting
2022/08/13 09:38:09 metrics_agent.go:64: I! input: mtail started
2022/08/13 09:38:09 agent.go:67: I! agent started
23291
2022/08/13 09:38:38 main.go:90: I! received signal: interrupt
2022/08/13 09:38:38 agent.go:71: I! agent stopping
2022/08/13 09:38:38 agent.go:76: I! agent stopped
2022/08/13 09:38:38 main.go:105: I! exited
PS D:\workspace_go\categraf> go build
PS D:\workspace_go\categraf> .\categraf.exe --test --inputs mtail
2022/08/13 09:39:38 main.go:110: I! runner.binarydir: D:\workspace_go\categraf
2022/08/13 09:39:38 main.go:111: I! runner.hostname: LAPTOP-4O62U4N3
2022/08/13 09:39:38 main.go:112: I! runner.fd_limits: N/A
2022/08/13 09:39:38 main.go:113: I! runner.vm_limits: N/A
2022/08/13 09:39:38 config.go:33: I! tracing disabled
2022/08/13 09:39:38 agent.go:62: I! agent starting
2022/08/13 09:39:38 metrics_agent.go:64: I! input: mtail started
2022/08/13 09:39:38 agent.go:67: I! agent started
09:39:53 mtail_send_error agent_hostname=LAPTOP-4O62U4N3 999
09:40:08 mtail_send_error agent_hostname=LAPTOP-4O62U4N3 999
09:40:23 mtail_send_error agent_hostname=LAPTOP-4O62U4N3 999
2022/08/13 09:40:25 main.go:90: I! received signal: interrupt
2022/08/13 09:40:25 agent.go:71: I! agent stopping
2022/08/13 09:40:25 agent.go:76: I! agent stopped
2022/08/13 09:40:25 main.go:105: I! exited
六、部署
1、选择在linux上生成docker镜像
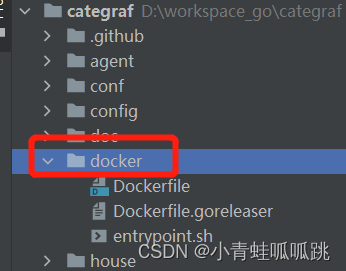
2、 将categraf和conf文件赋值到docker文件夹中
[root@localhost docker]# ll
-rwxrwxrwx  1 root root 131276085 Aug 12 17:50 categraf
drwxrwxrwx 39 root root      4096 Aug 12 17:21 conf
-rwxrwxrwx  1 root root       247 Aug 12 17:17 Dockerfile
-rwxrwxrwx  1 root root       279 Aug 12 17:17 Dockerfile.goreleaser
-rwxrwxrwx  1 root root       277 Aug 12 17:40 entrypoint.sh

#打包镜像
[root@localhost docker]# docker build -t categraf:v1 .
Sending build context to Docker daemon  131.4MB
Step 1/7 : FROM ubuntu:22.10
 ---> 15a38249db7a
Step 2/7 : RUN echo 'hosts: files dns' >> /etc/nsswitch.conf
 ---> Using cache
 ---> 6b369085d262
Step 3/7 : RUN set -ex &&     mkdir -p /usr/bin /etc/categraf
 ---> Using cache
 ---> 76630541bbf9
Step 4/7 : COPY categraf  /usr/bin/categraf
 ---> Using cache
 ---> 7ac37851e65f
Step 5/7 : COPY conf /etc/categraf/conf
 ---> Using cache
 ---> 326db080659e
Step 6/7 : COPY entrypoint.sh /entrypoint.sh
 ---> Using cache
 ---> 3f66ddcb98a8
Step 7/7 : CMD ["/entrypoint.sh"]
 ---> Using cache
 ---> 6549372b42a3
Successfully built 6549372b42a3
Successfully tagged categraf:v1

[root@localhost docker]# docker images
REPOSITORY                              TAG       IMAGE ID       CREATED         SIZE
categraf                                v1        6549372b42a3   16 hours ago    202MB
3、修改夜莺docker-compose.yaml
categraf:
  #image: "flashcatcloud/categraf:latest"
  image: "categraf:v1"
注意:将自己写的toml文件,赋值到 nightingale-main\docker\categraf
因为categraf容器的conf映射到这里。

4、重新启动categraf容器
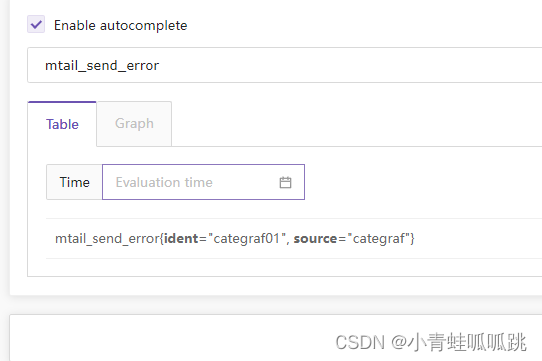
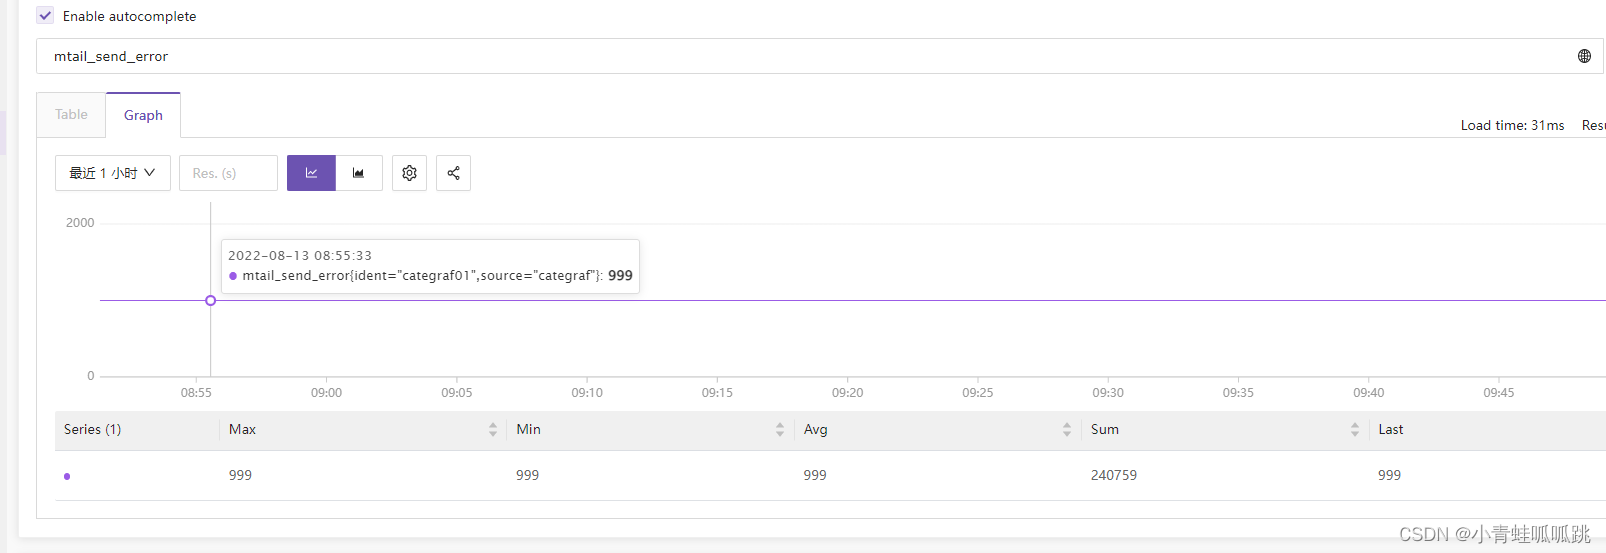
七、夜莺查看
1、在即时查询
输入 mtail_send_error
2、快捷试图
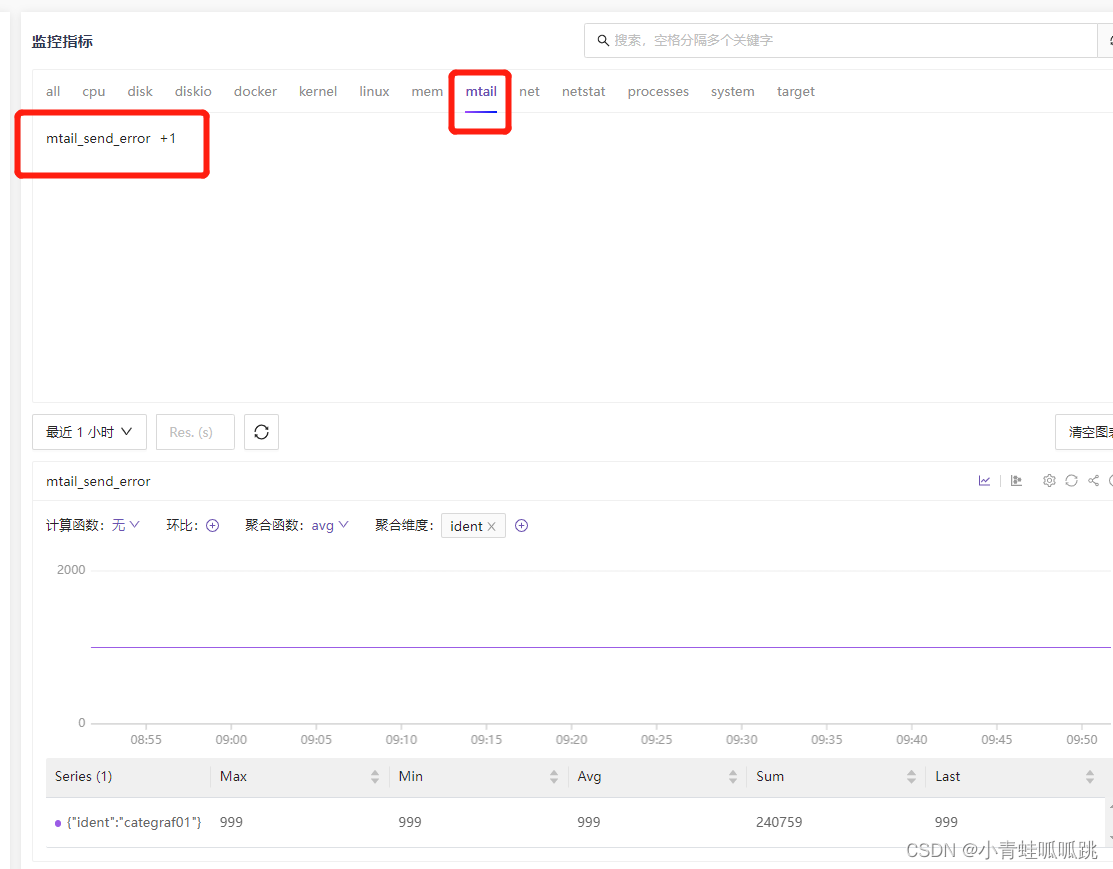
剩余的操作可自行定制告警了


 1429
1429


 被折叠的 条评论
为什么被折叠?
被折叠的 条评论
为什么被折叠?
 到【灌水乐园】发言


